Wuben X1 Pro Torch Review

Wuben X1 Pro#
- Specifications
- Introduction
- Torch in use
- Build quality
- LED, bezel, lens and reflector
- Size and comparison
- User interface
- Batteries and charging
- Performance
- Thermal Images
- Beamshots
- Conclusion
- Price
- Product page
Specifications#
| Brand/model | Wuben X1 Pro |
|---|---|
| LED | 6500K 70 CRI 1* CREE XHP50.3 HI, 4* CREE XHP50.3 HD |
| Maximum lumens | 12,300 lm |
| Maximum beam intensity | 42,025 cd |
| Maximum throw | 410 m |
| Battery | 2*21700 |
| Onboard charging | Yes (USB-C) |
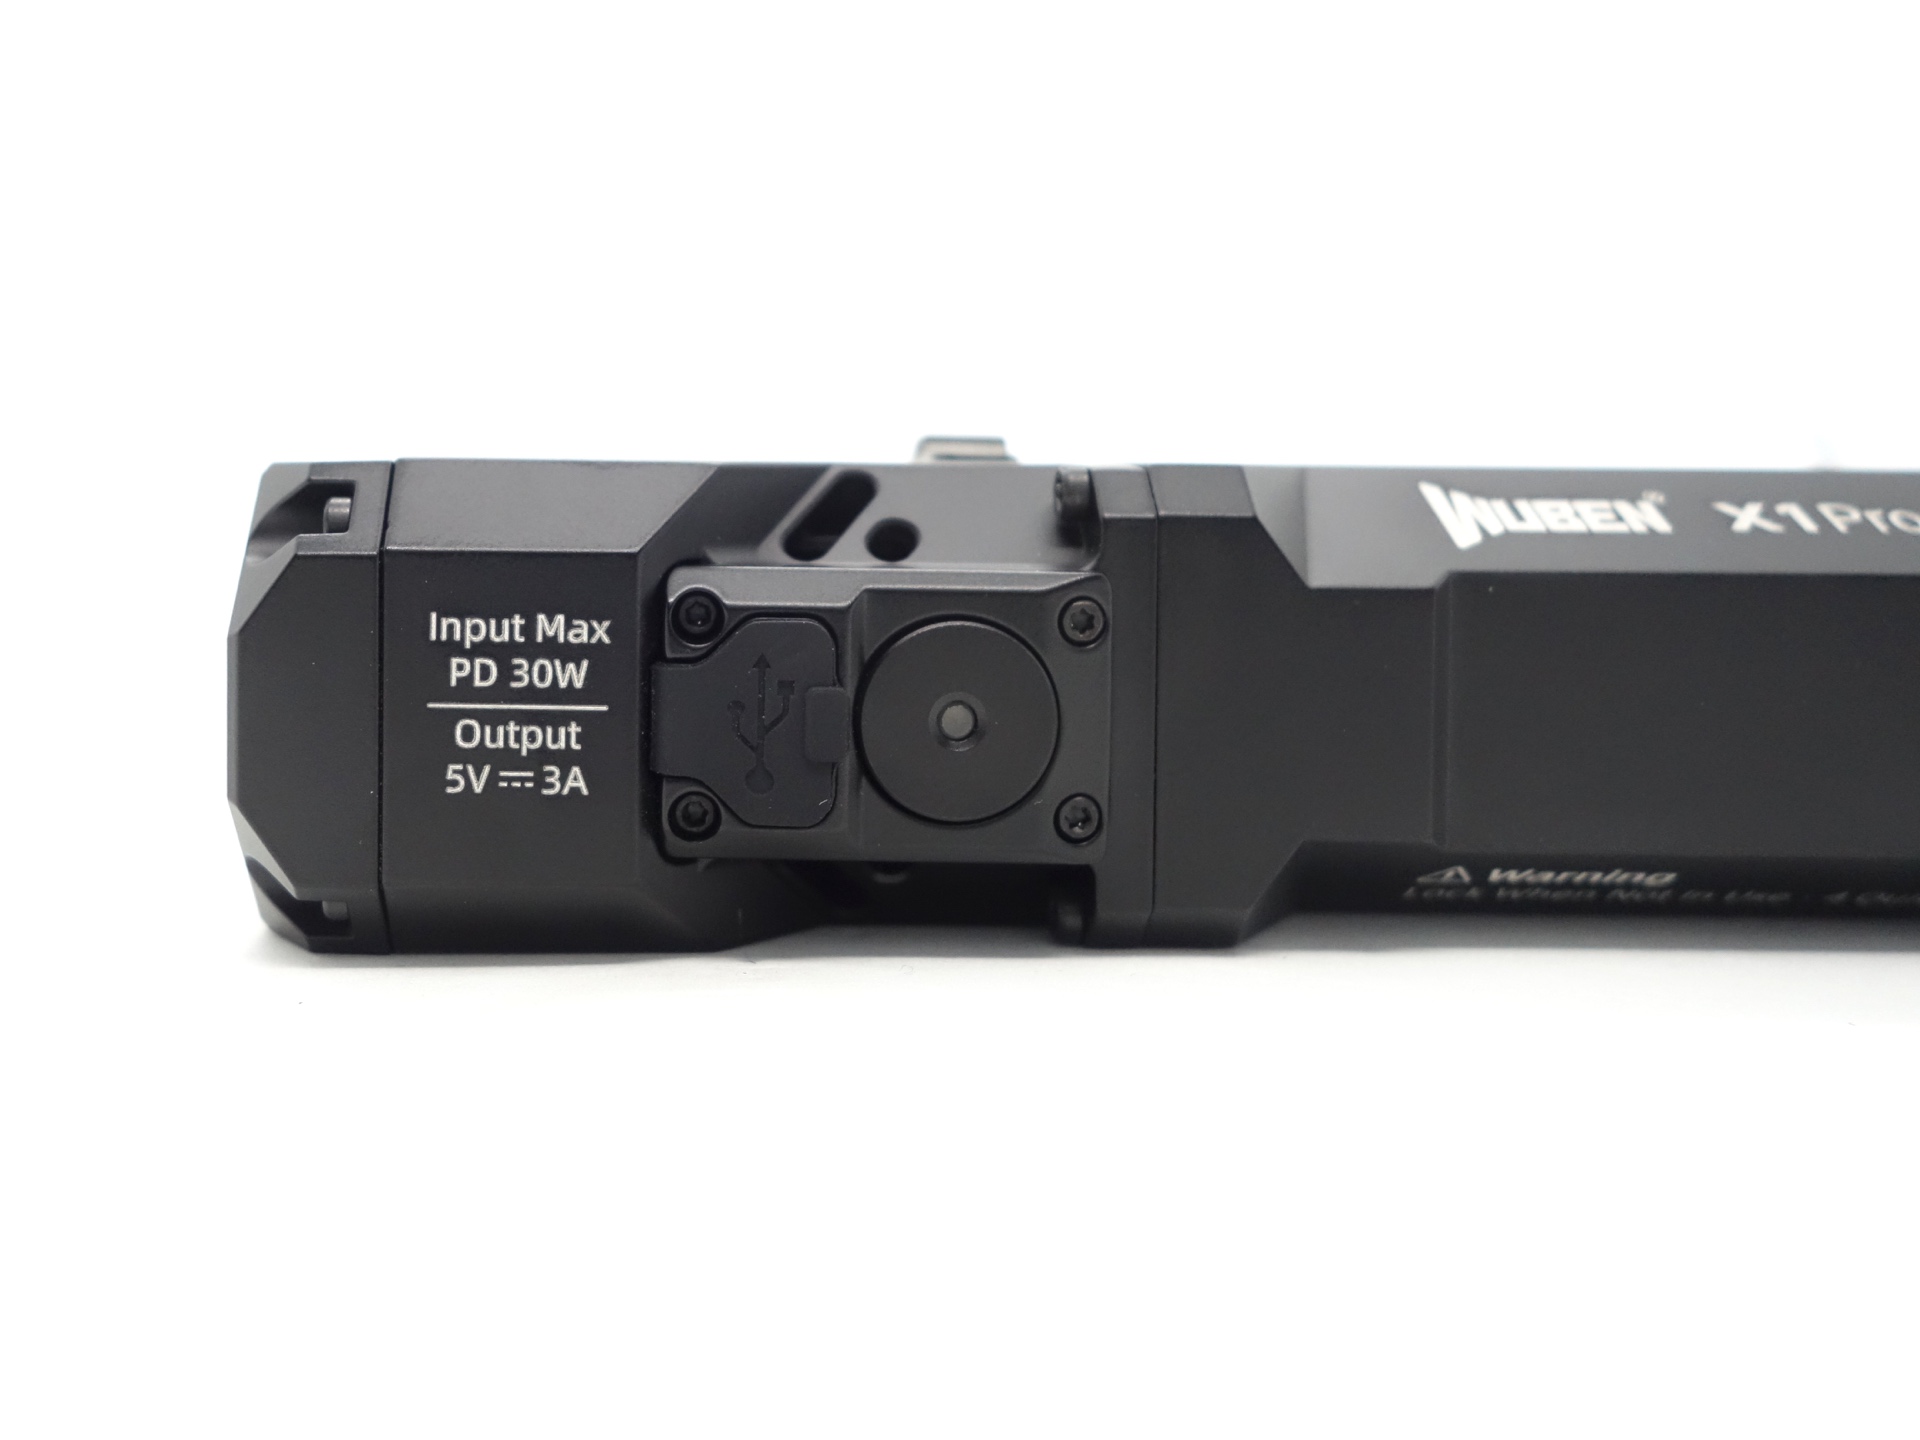
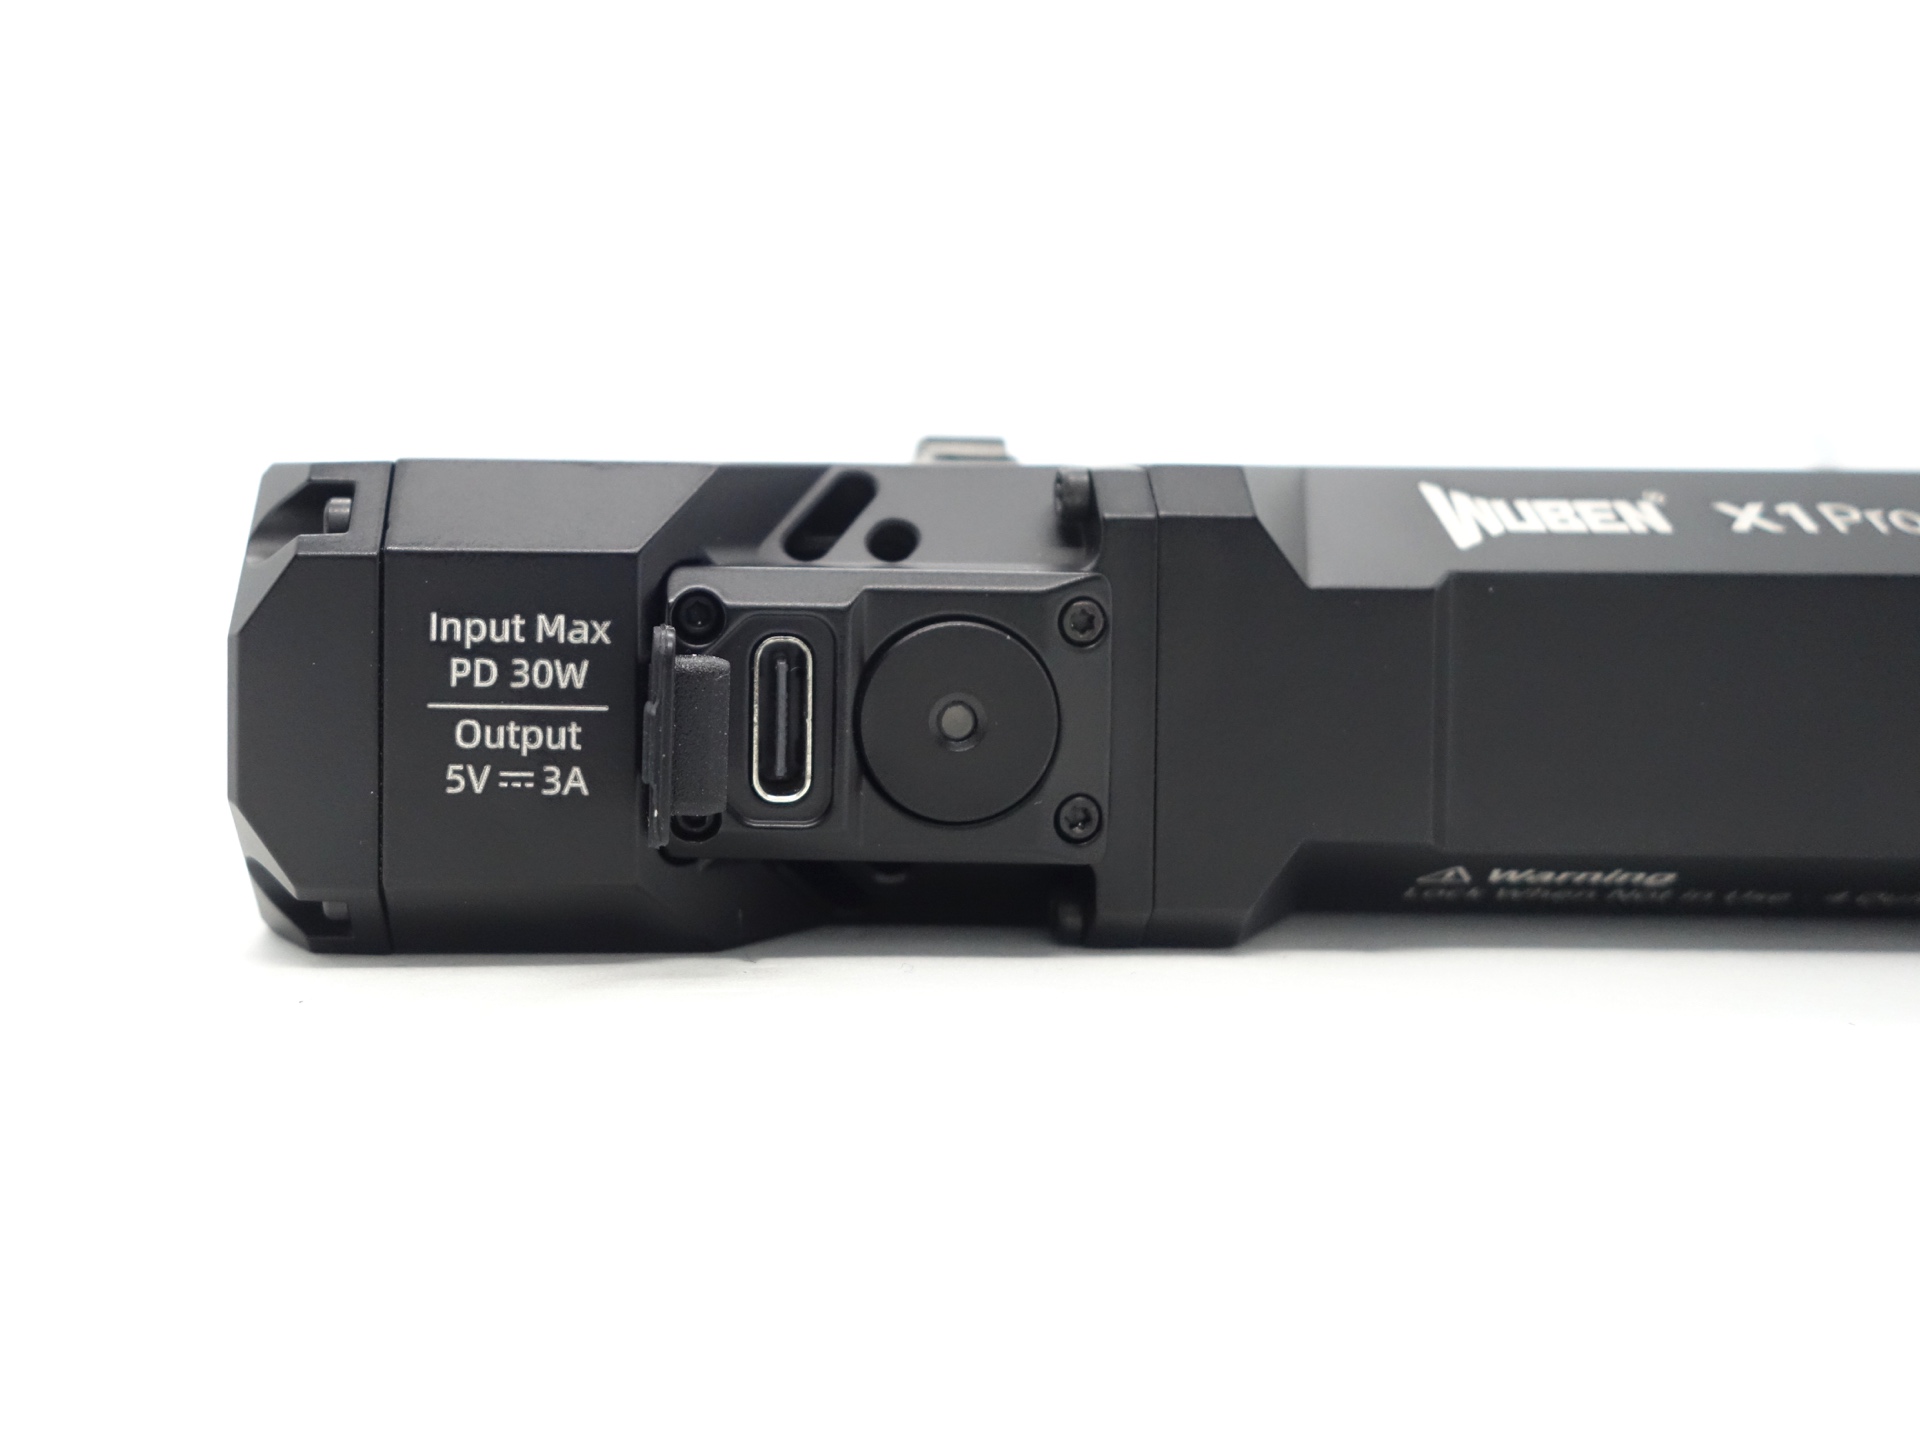
| Powerbank | Yes (USB-C 5V/3A) |
| Material | Aluminium |
| Modes | 5 |
| Blinkies | Strobe, SOS |
| Reflector | Smooth |
| Waterproof | IP65 |
| Review date | April 2026 |
Introduction#
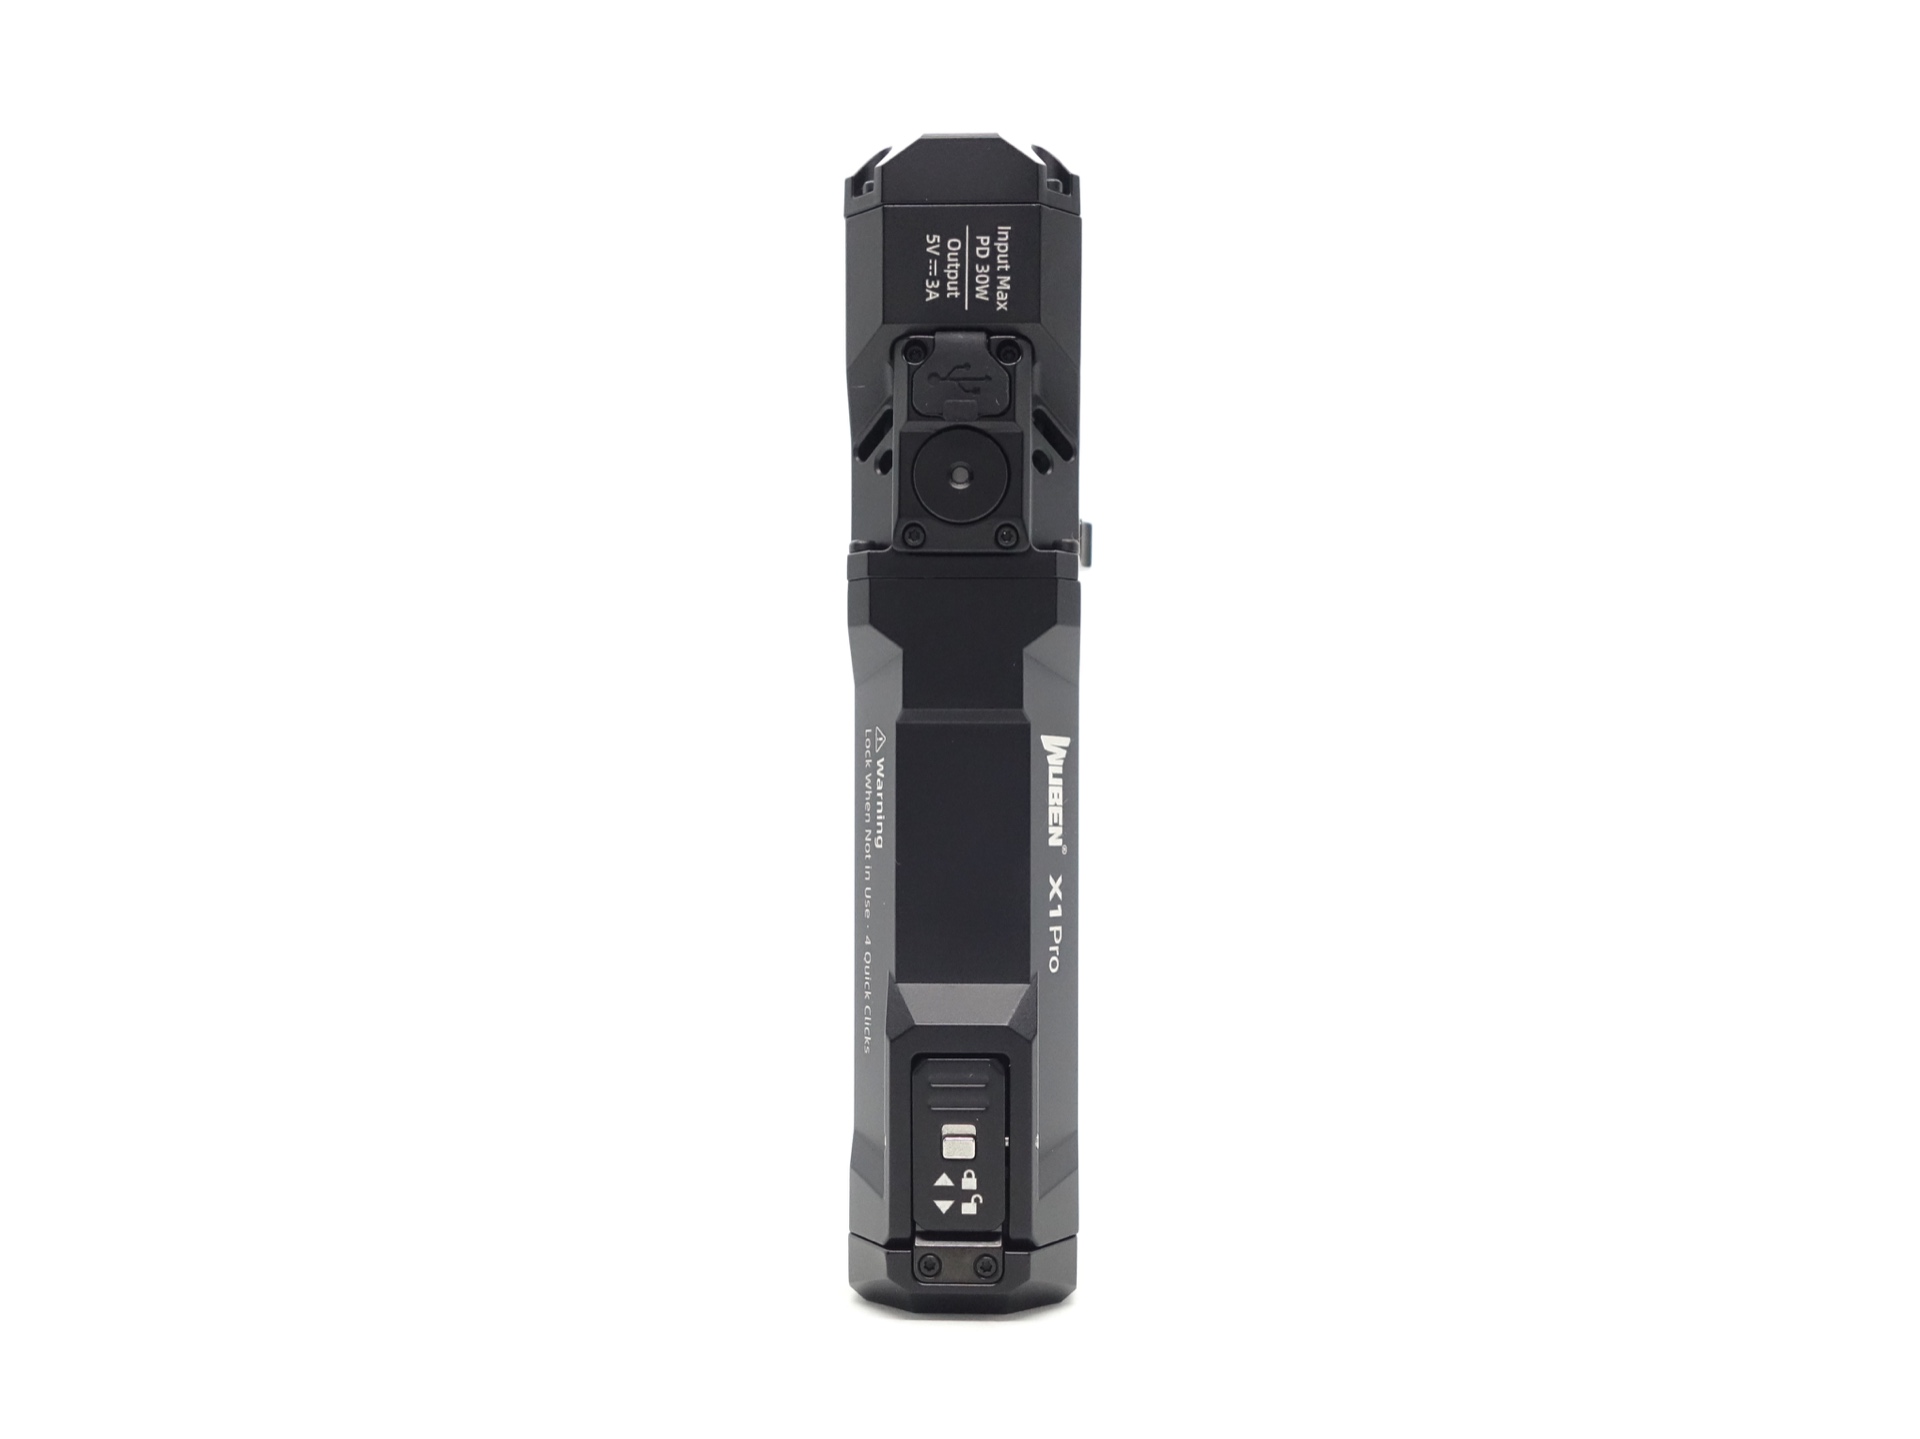
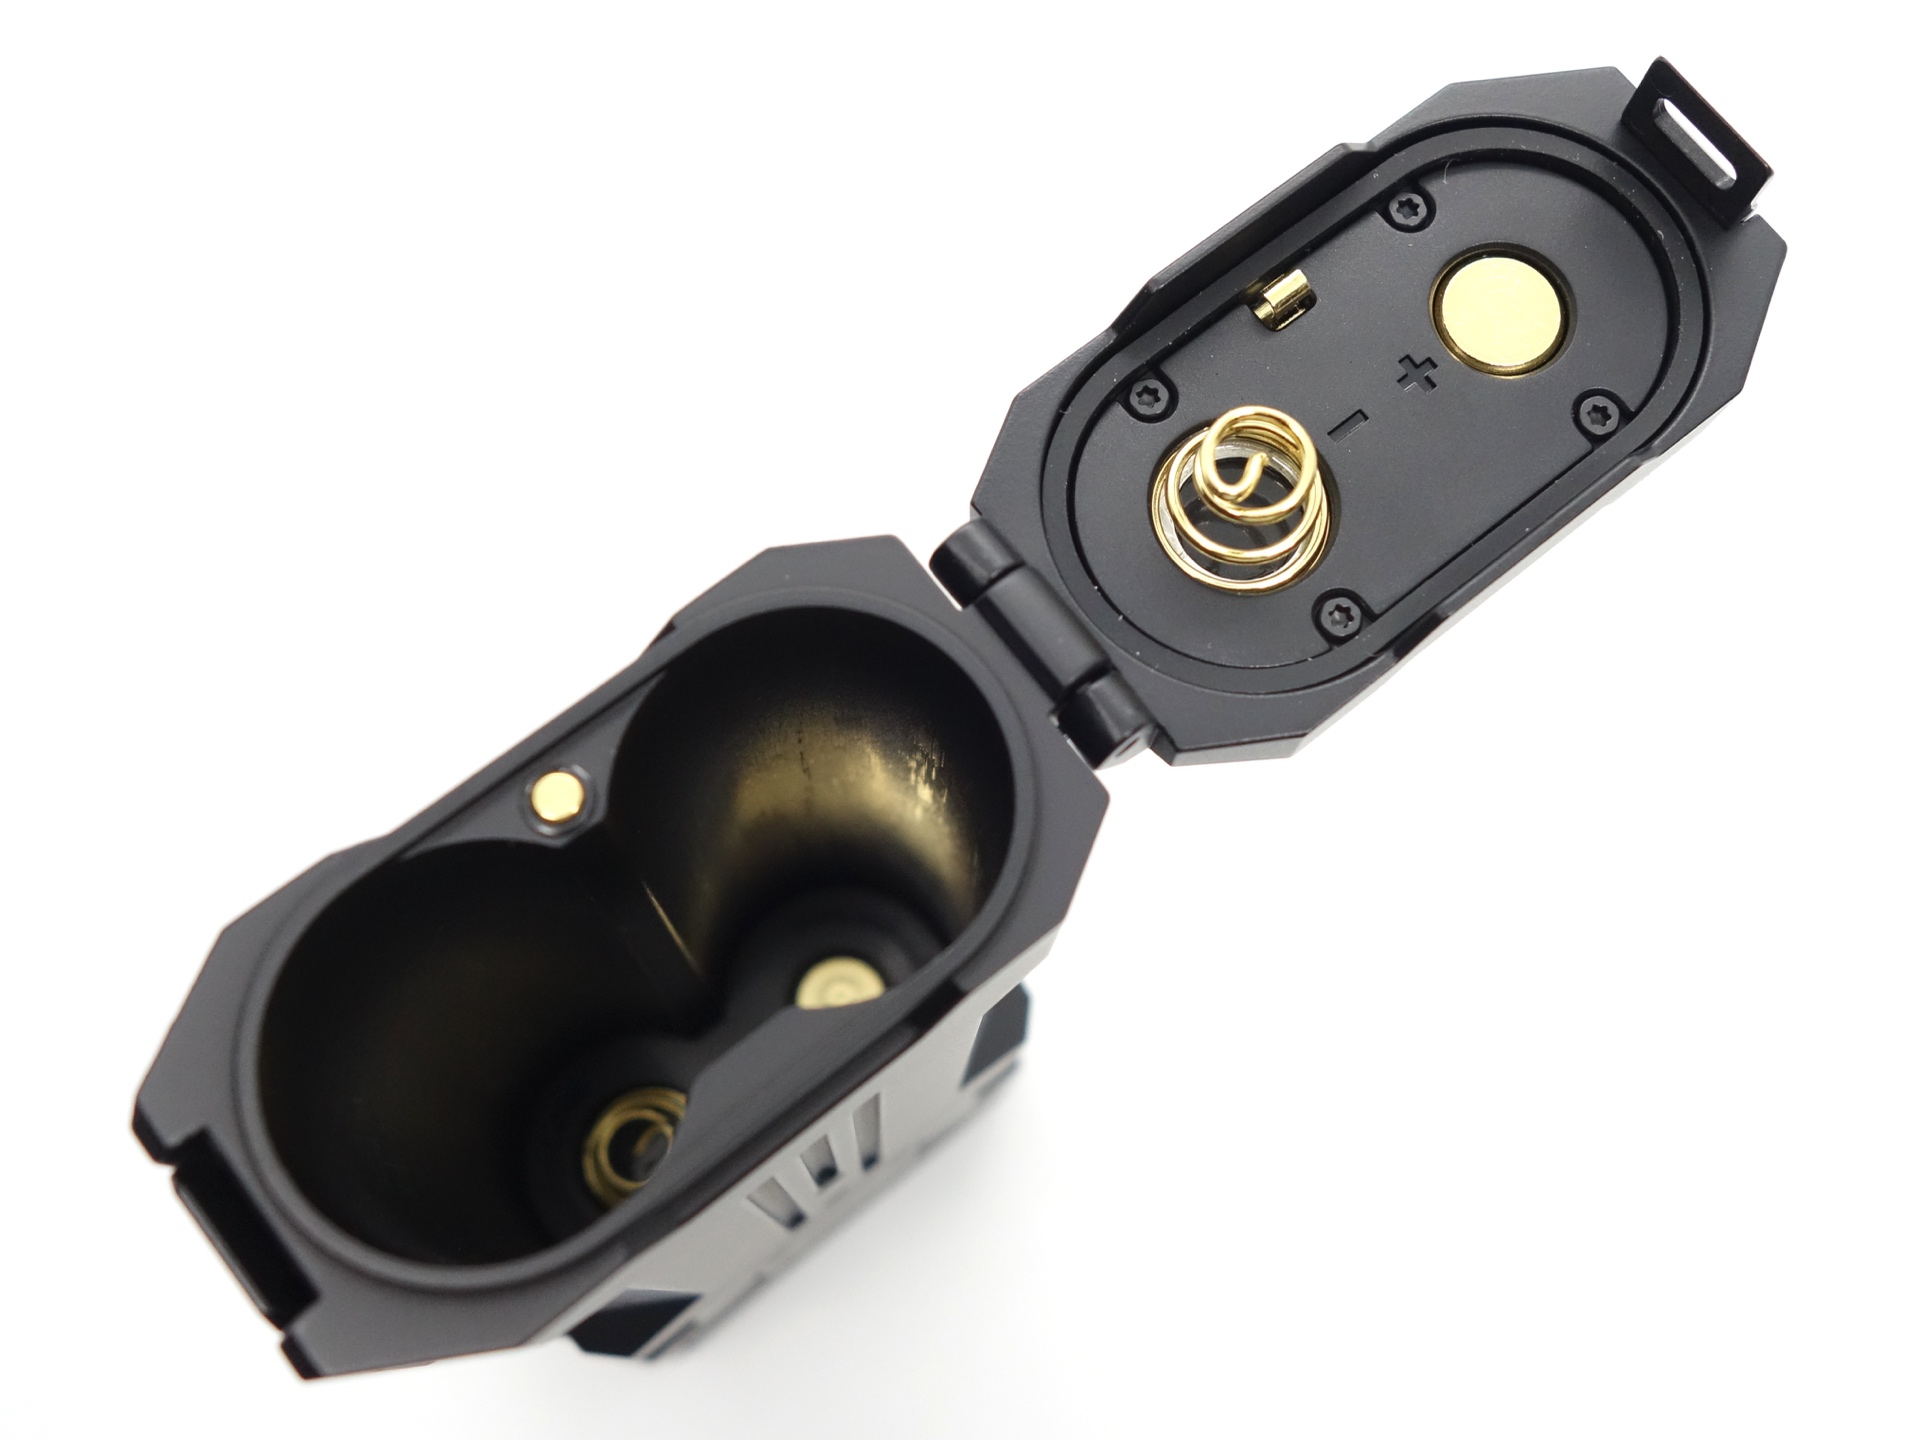
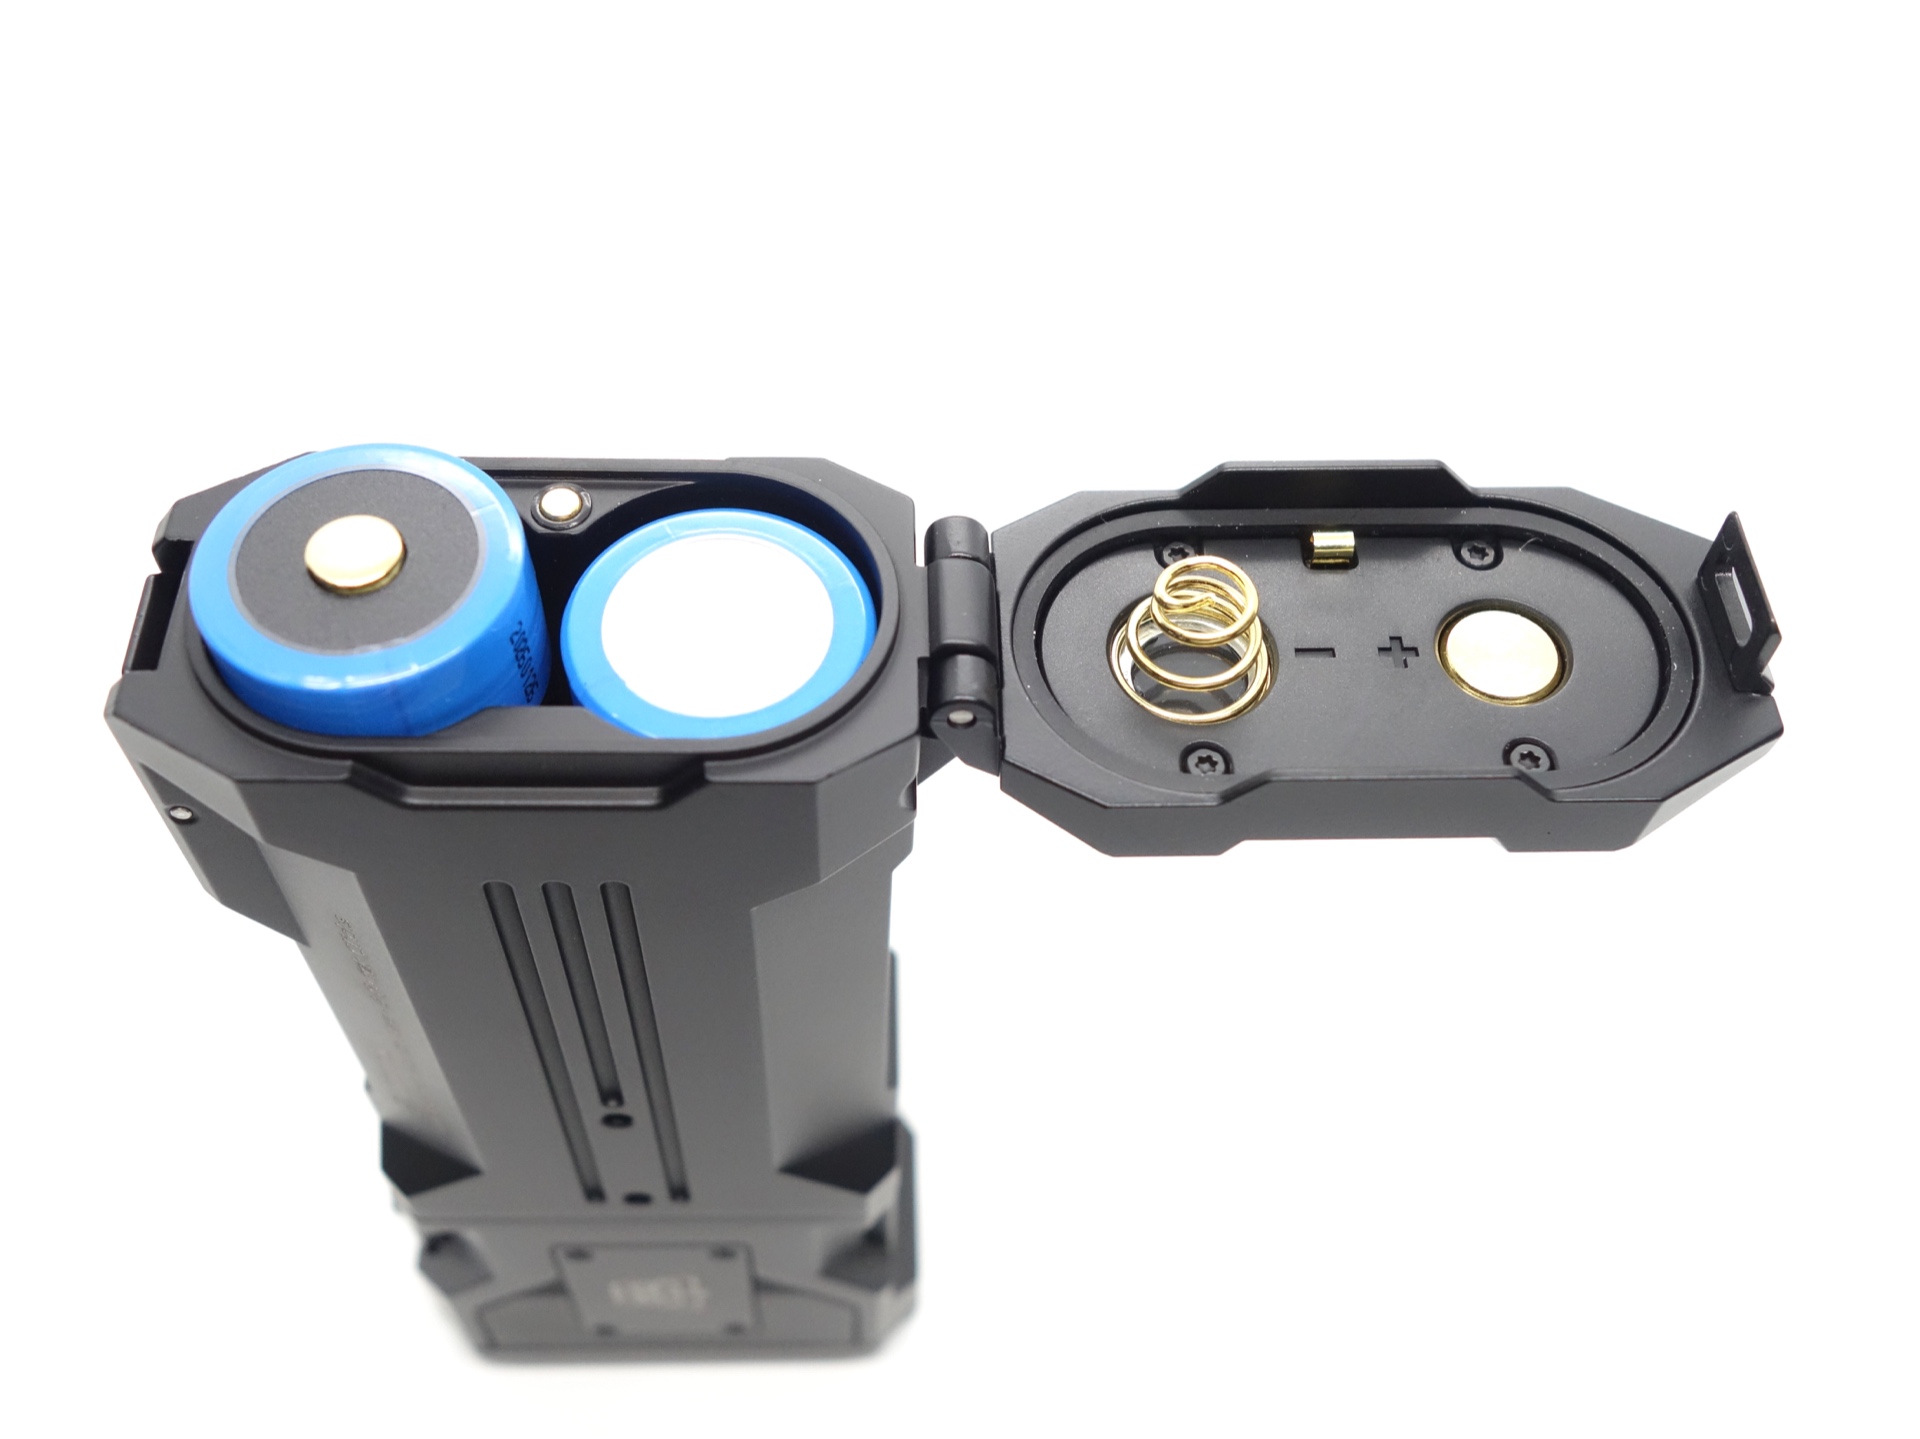
The Wuben X1 Pro is a fan-cooled torch powered by two 21700 cells. It has a Floodlight and a Spotlight. The battery compartment has a quick release lock. The USB-C port can be used as a power bank.
Is this better than the Wuben X1?
Wuben kindly provided this torch for review. I have not been paid for this review nor have I held back my opinions of this torch.
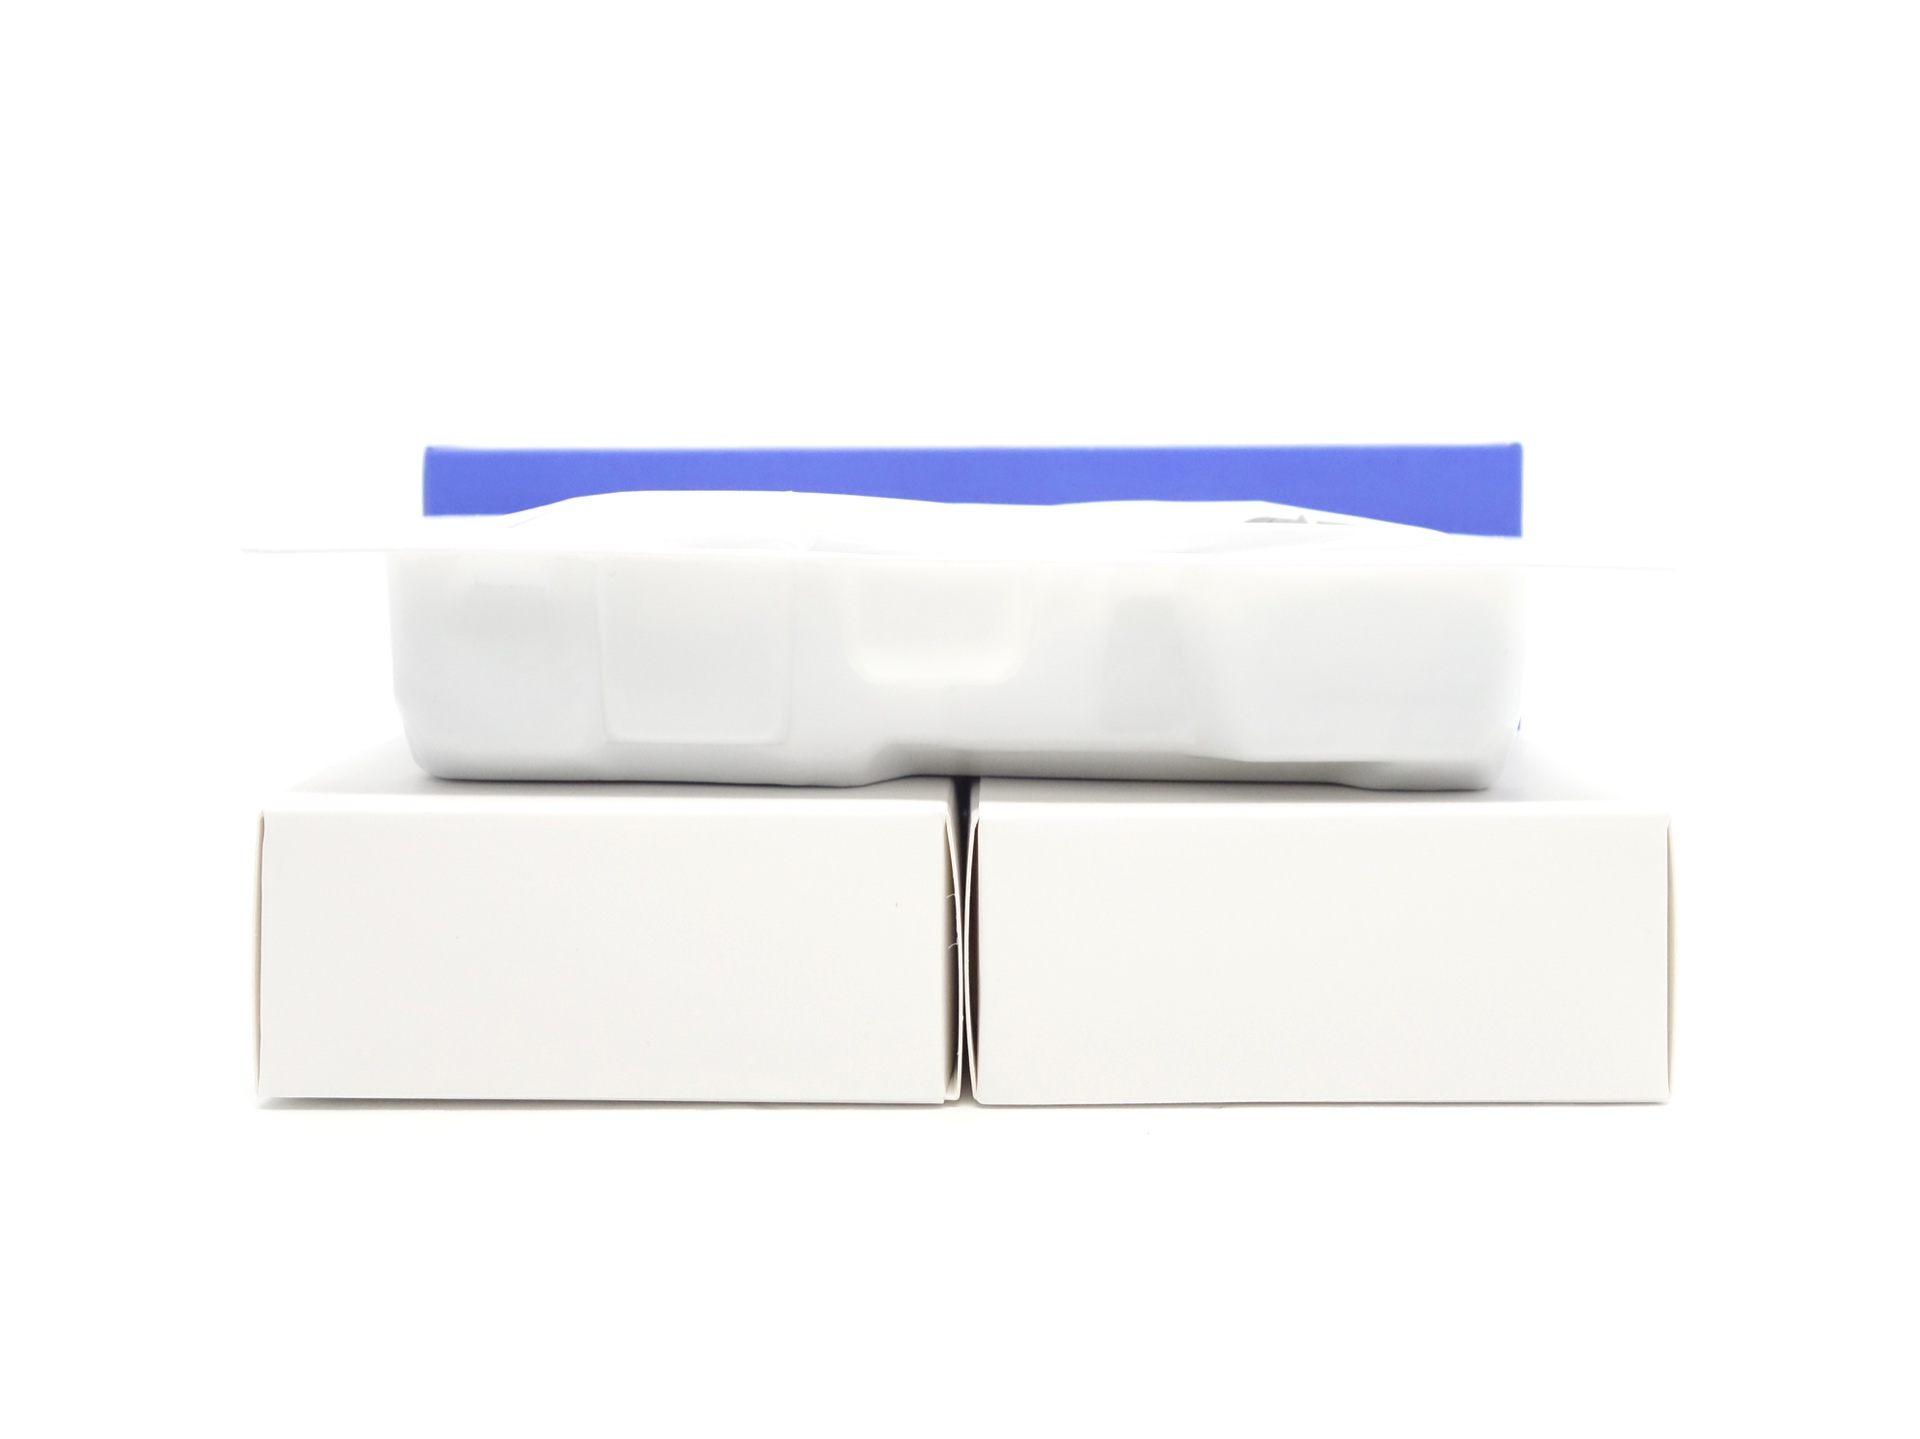
Packaging#
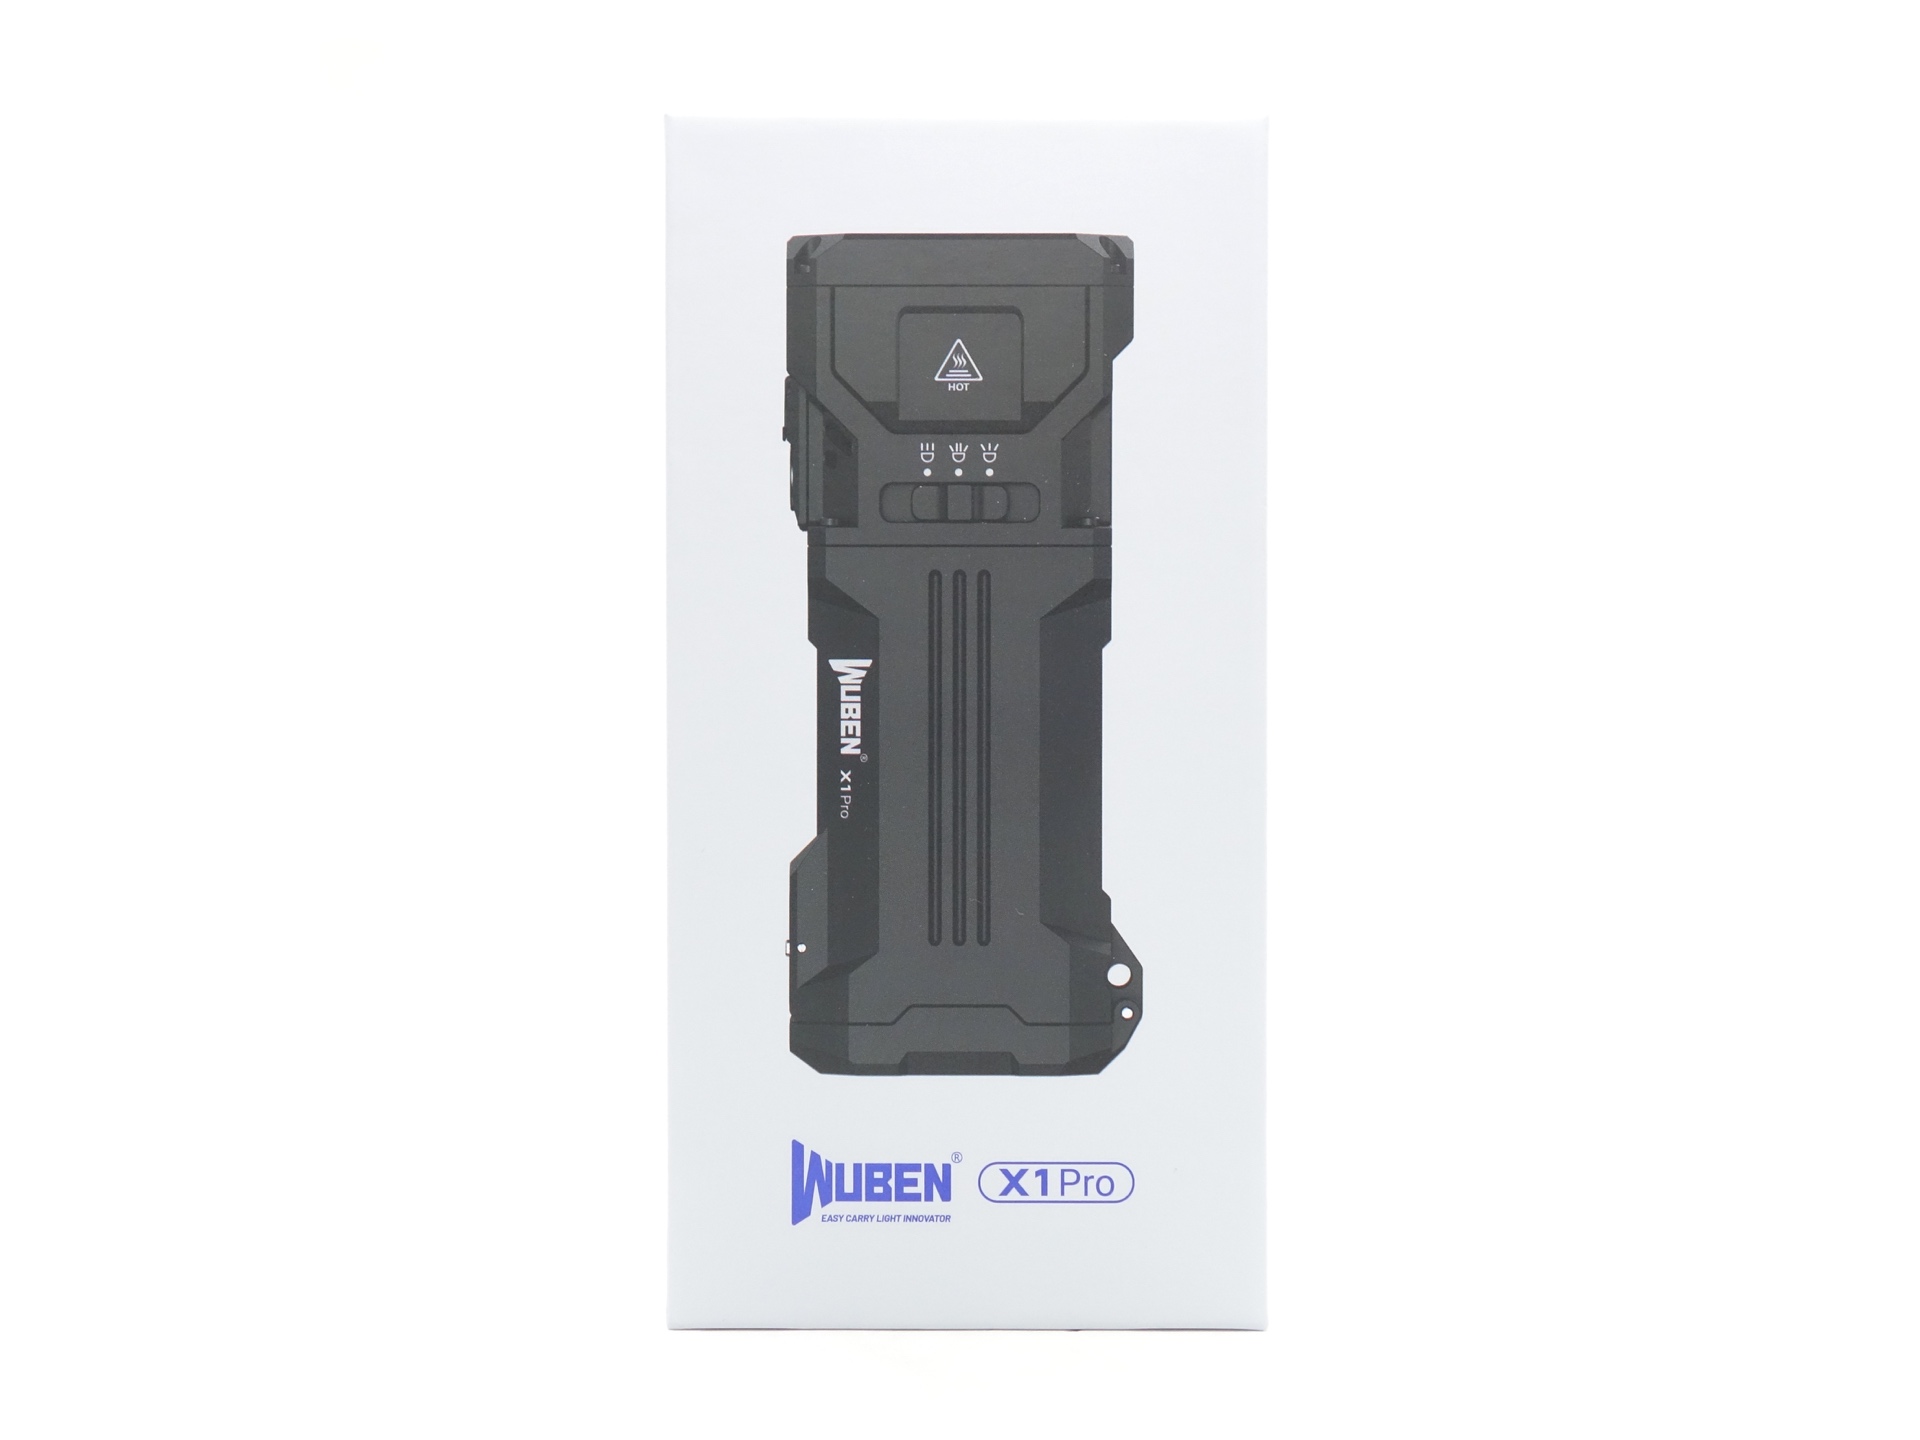
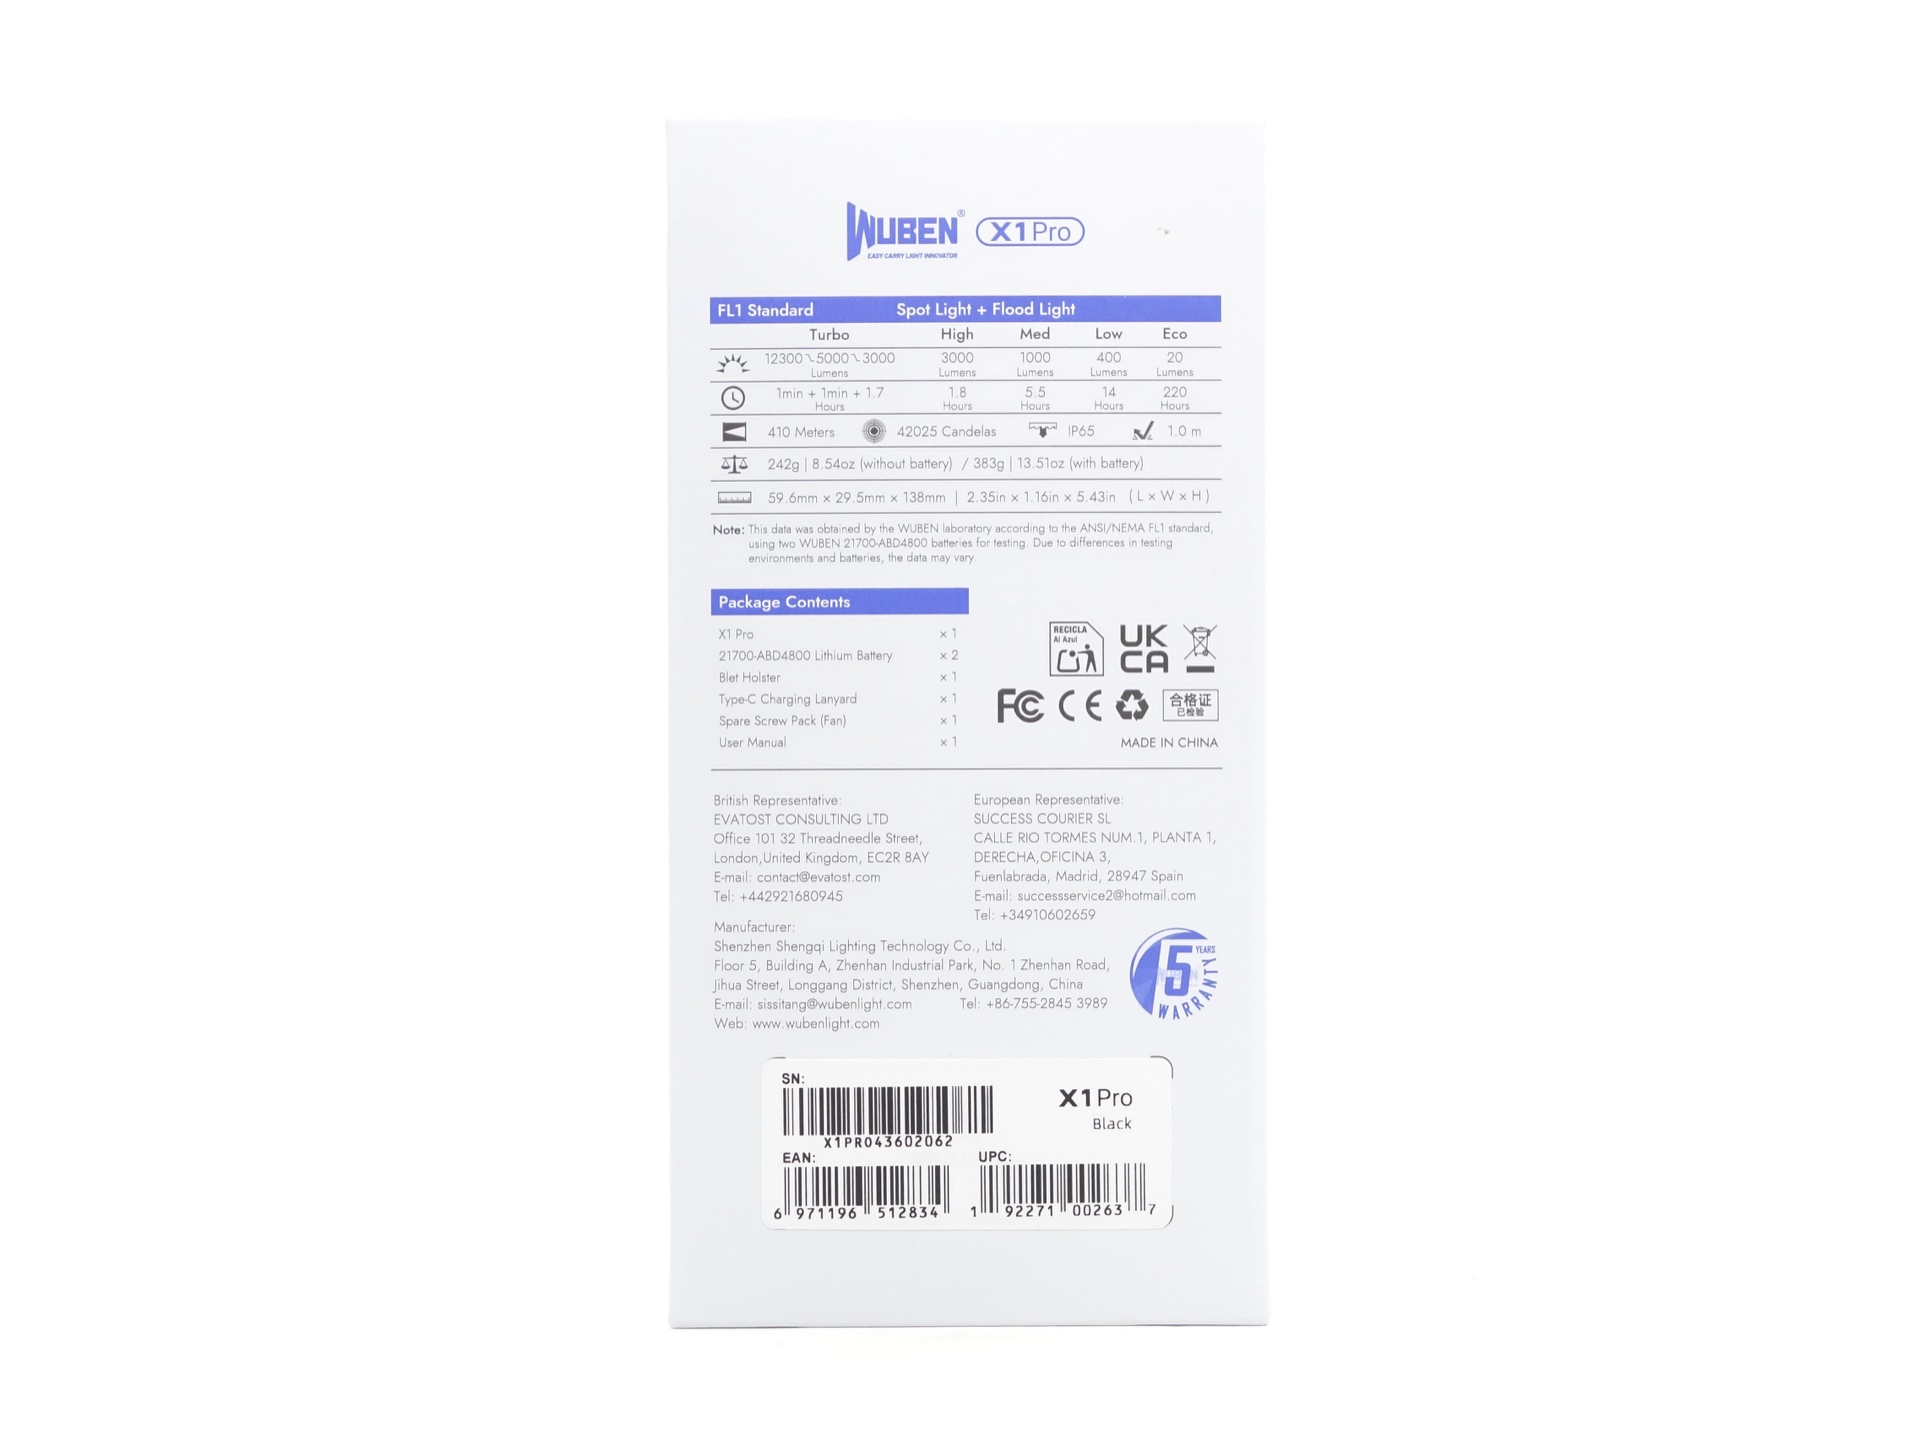
The Wuben X1 Pro comes in an off-white and blue Wuben-branded box with an image of the torch on the front and specifications on the back.
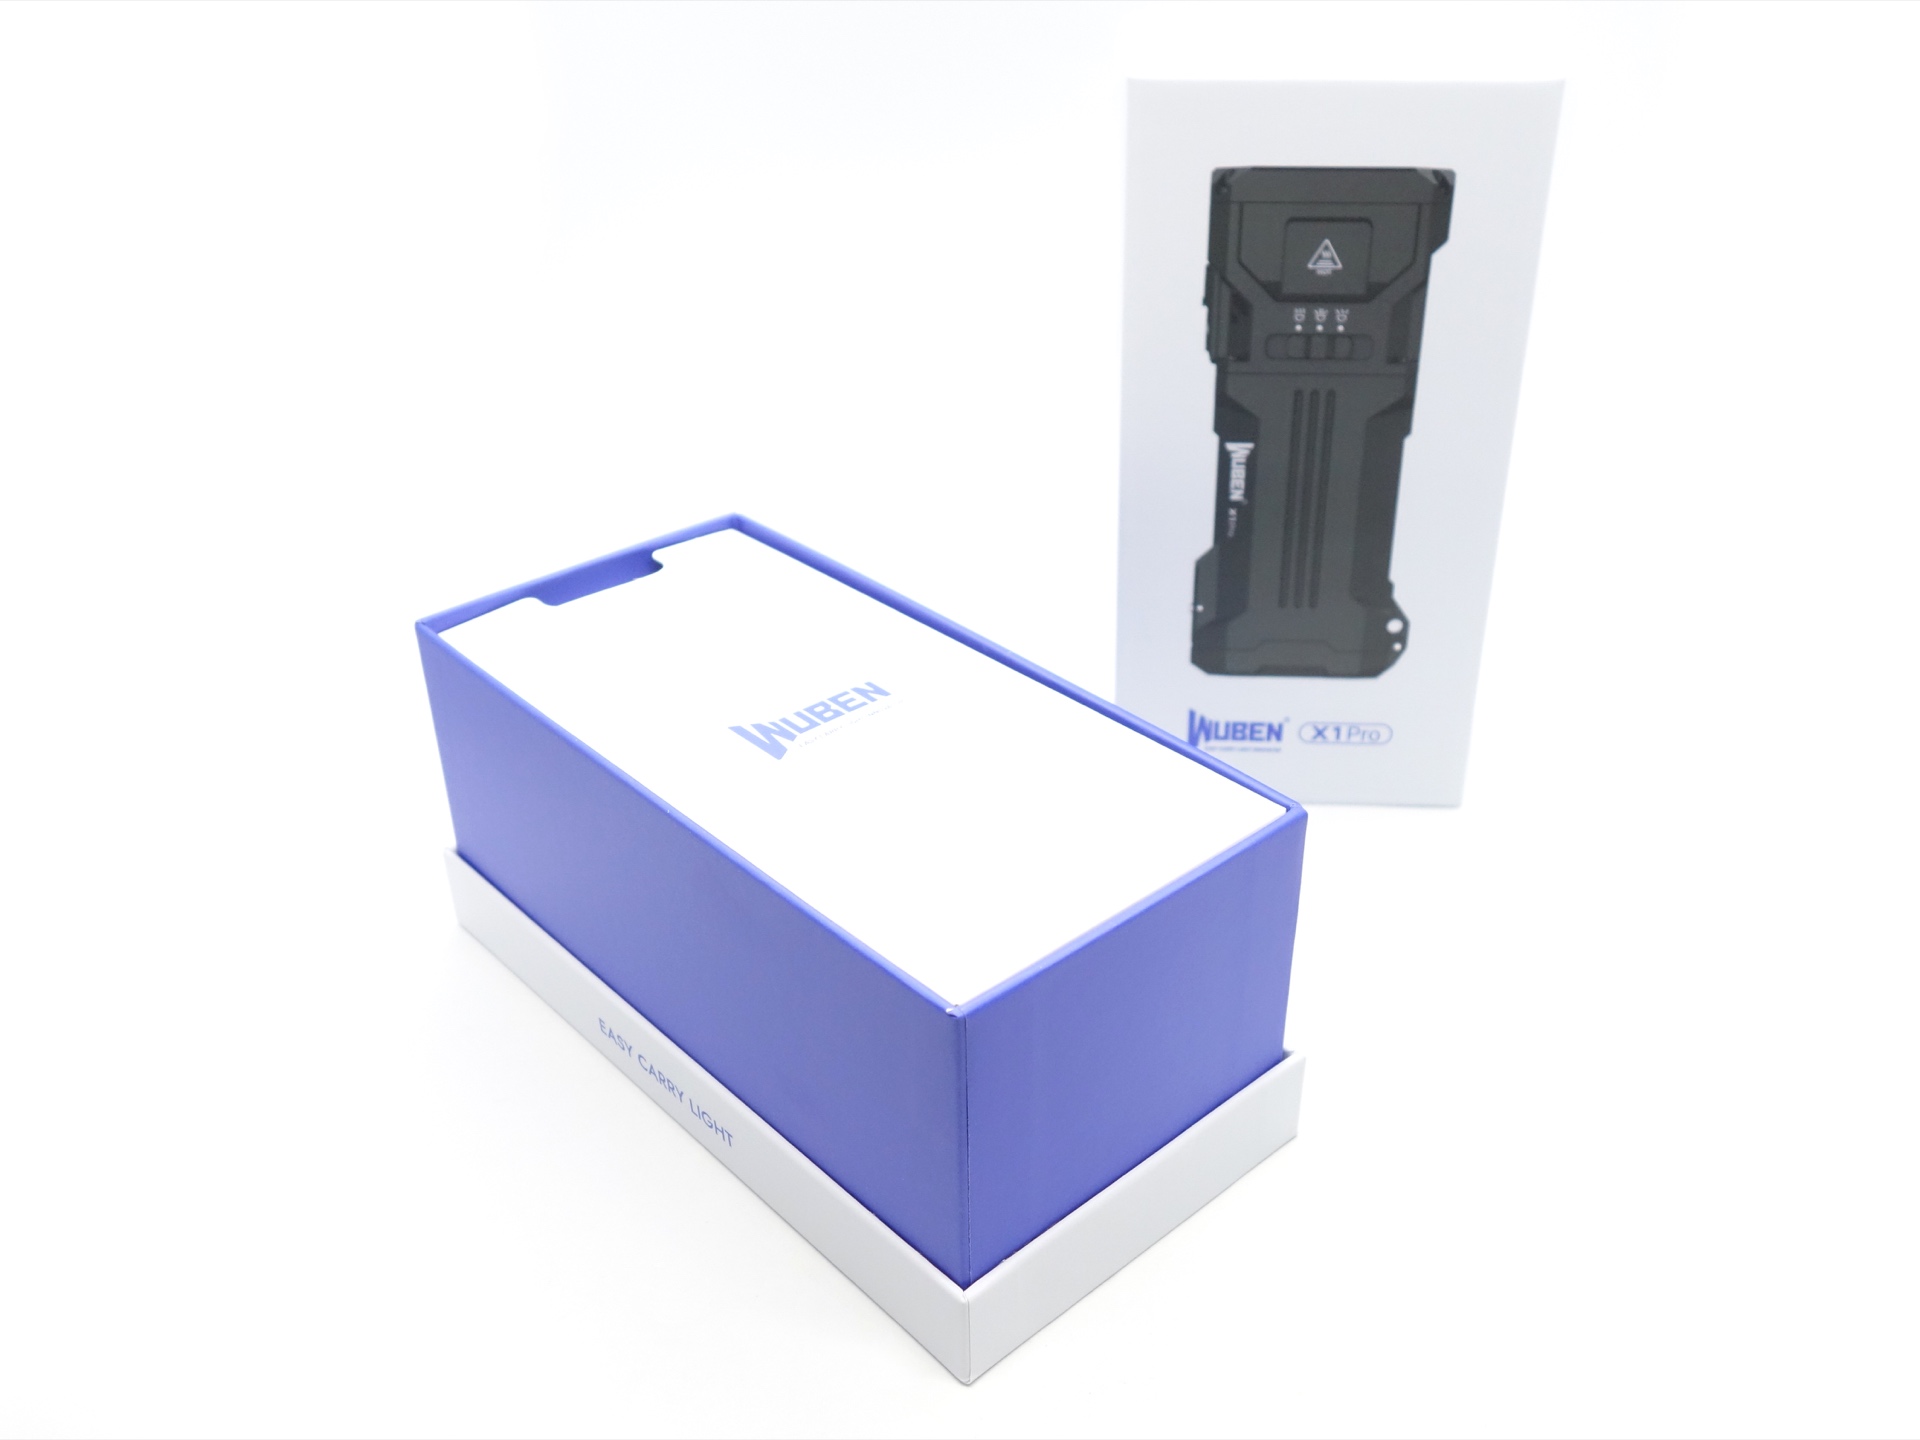
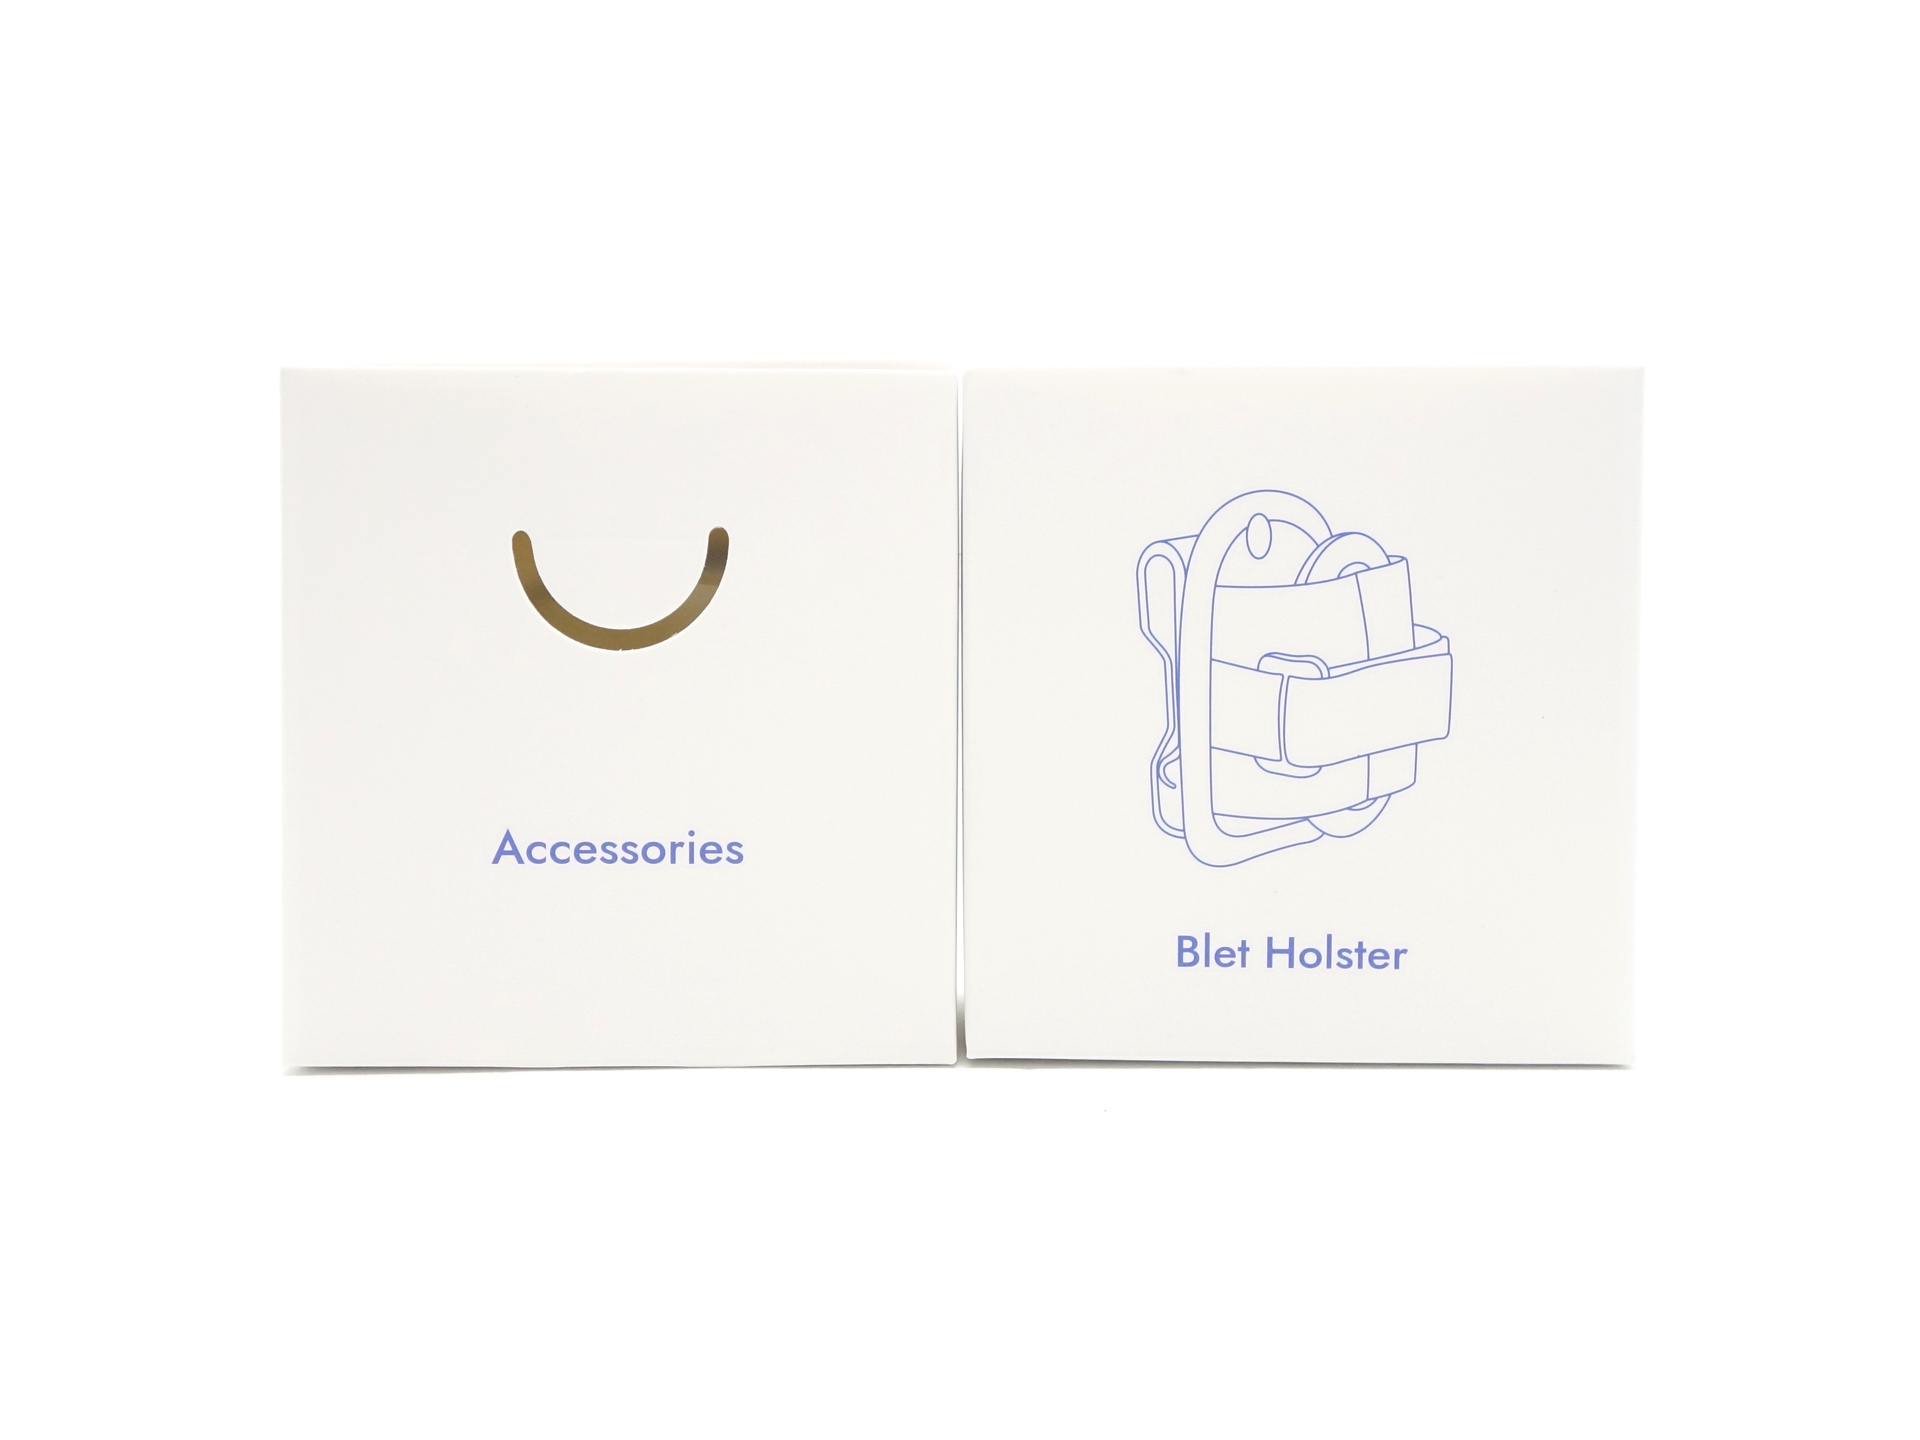
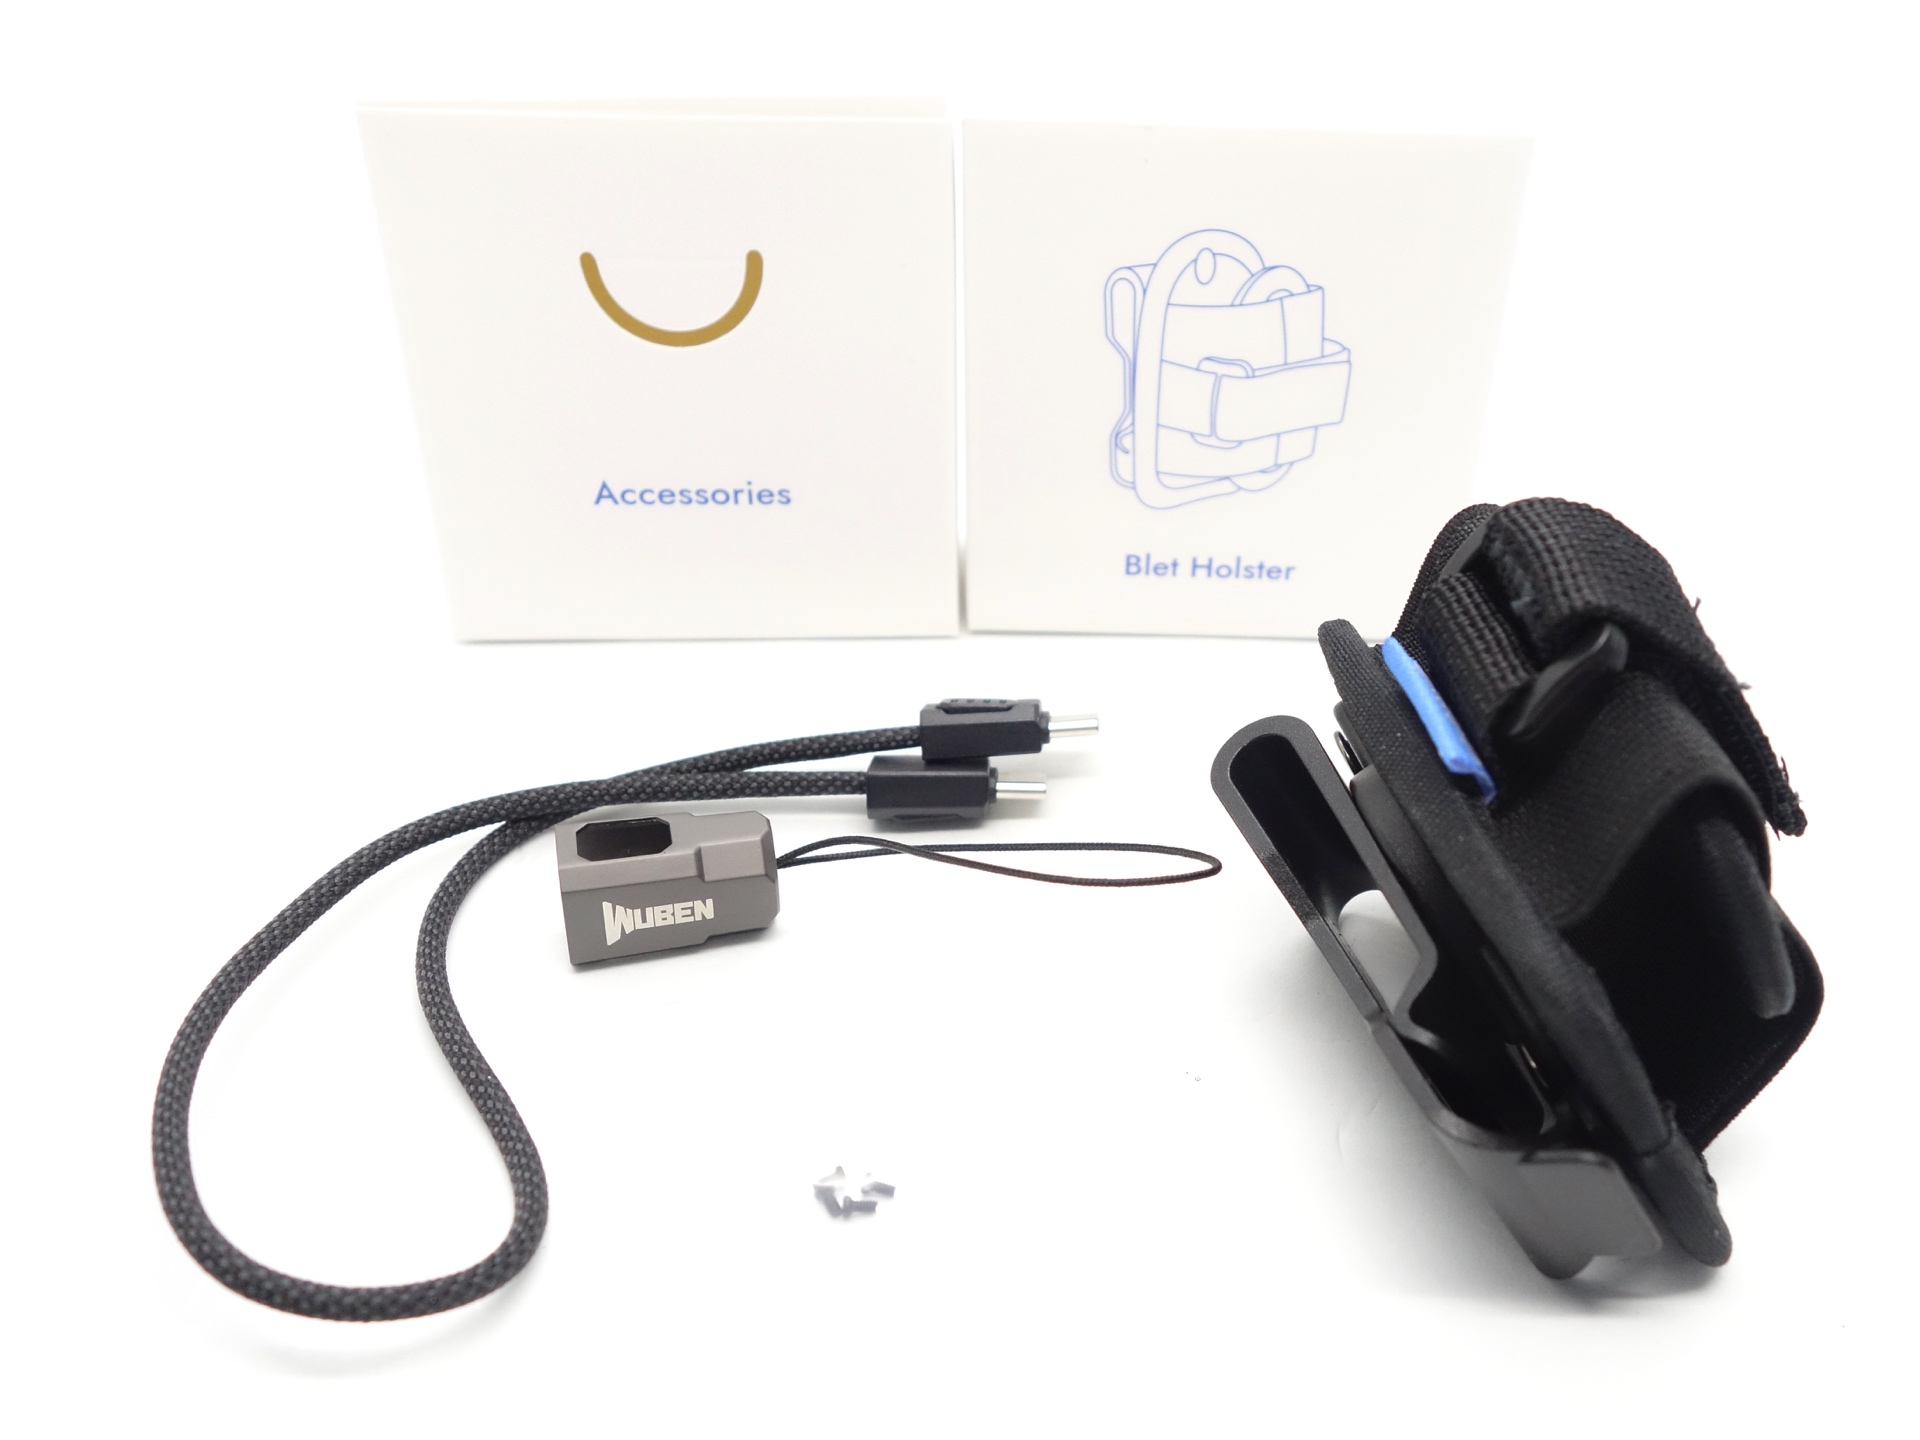
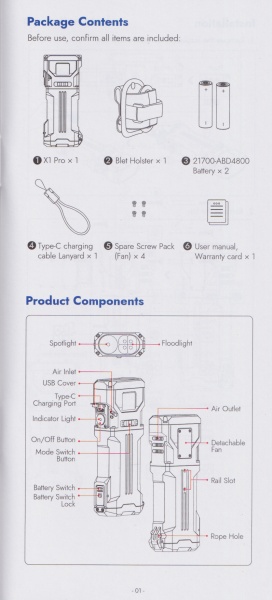
The following was included in the box:
- Wuben X1 Pro.
- 2* Wuben ABD4800 21700 3.6V Li-ion 4800mAh cells.
- USB-C to USB-C cable (lanyard).
- Holster.
- Spare screws for the fan.
- User manual.
1/4 inch thread extender (optional):
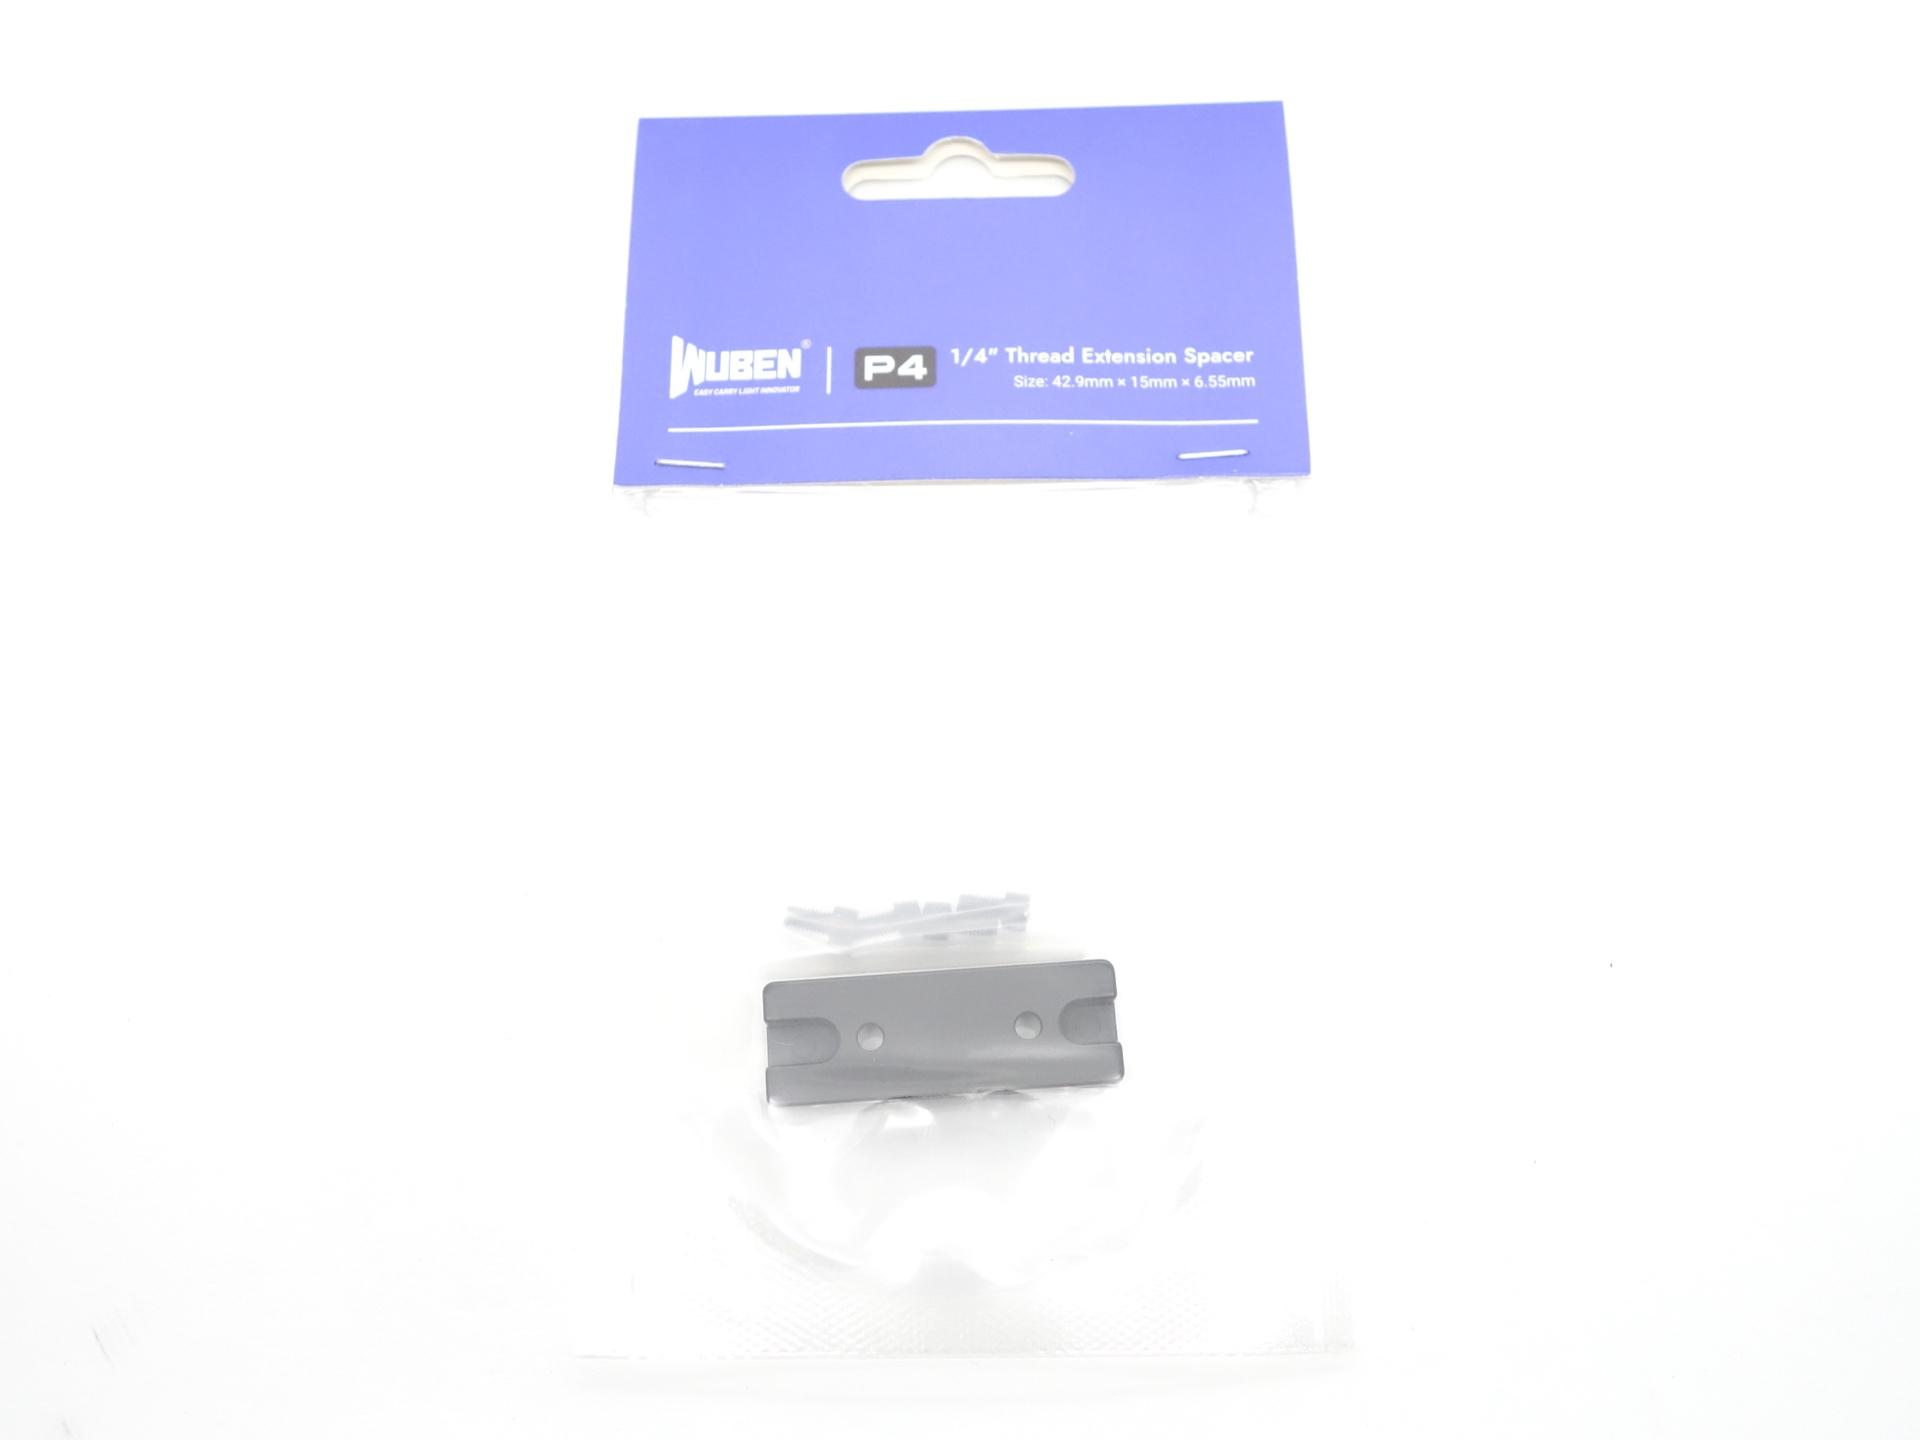
The 1/4 inch thread is great for mounting the torch to a tripod!
There is also an optional AT2XP bike mount.
User manual#


Torch in use#
The Wuben X1 Pro feels comfortable in my hand.
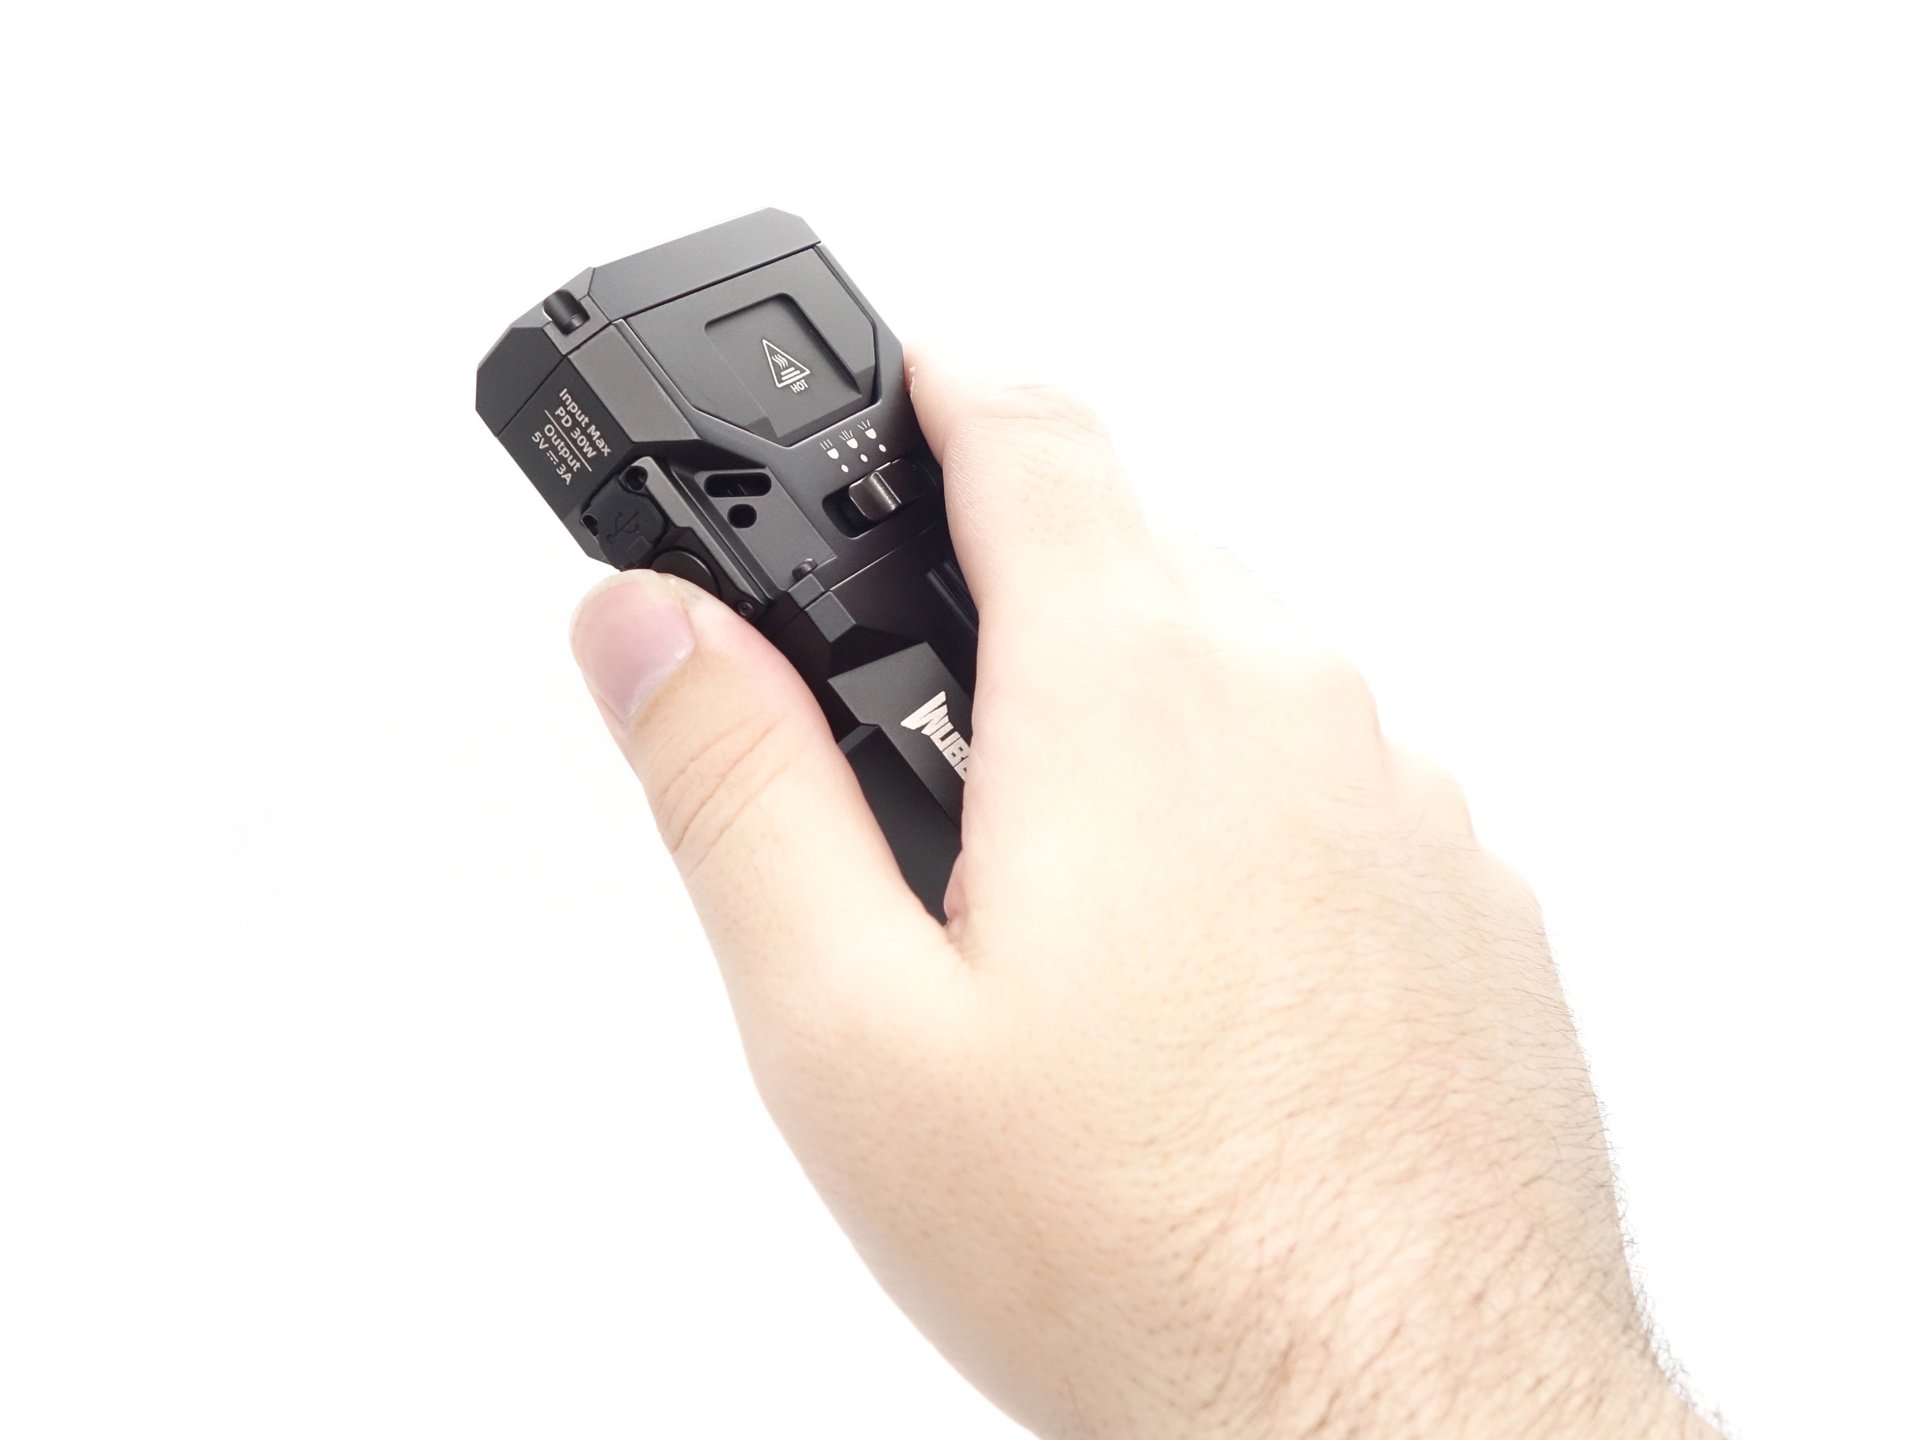
I really like the user inteface! The switch to select Spotlight, Both or Floodlight is fun to use.
It reminds me of the Acebeam M2.
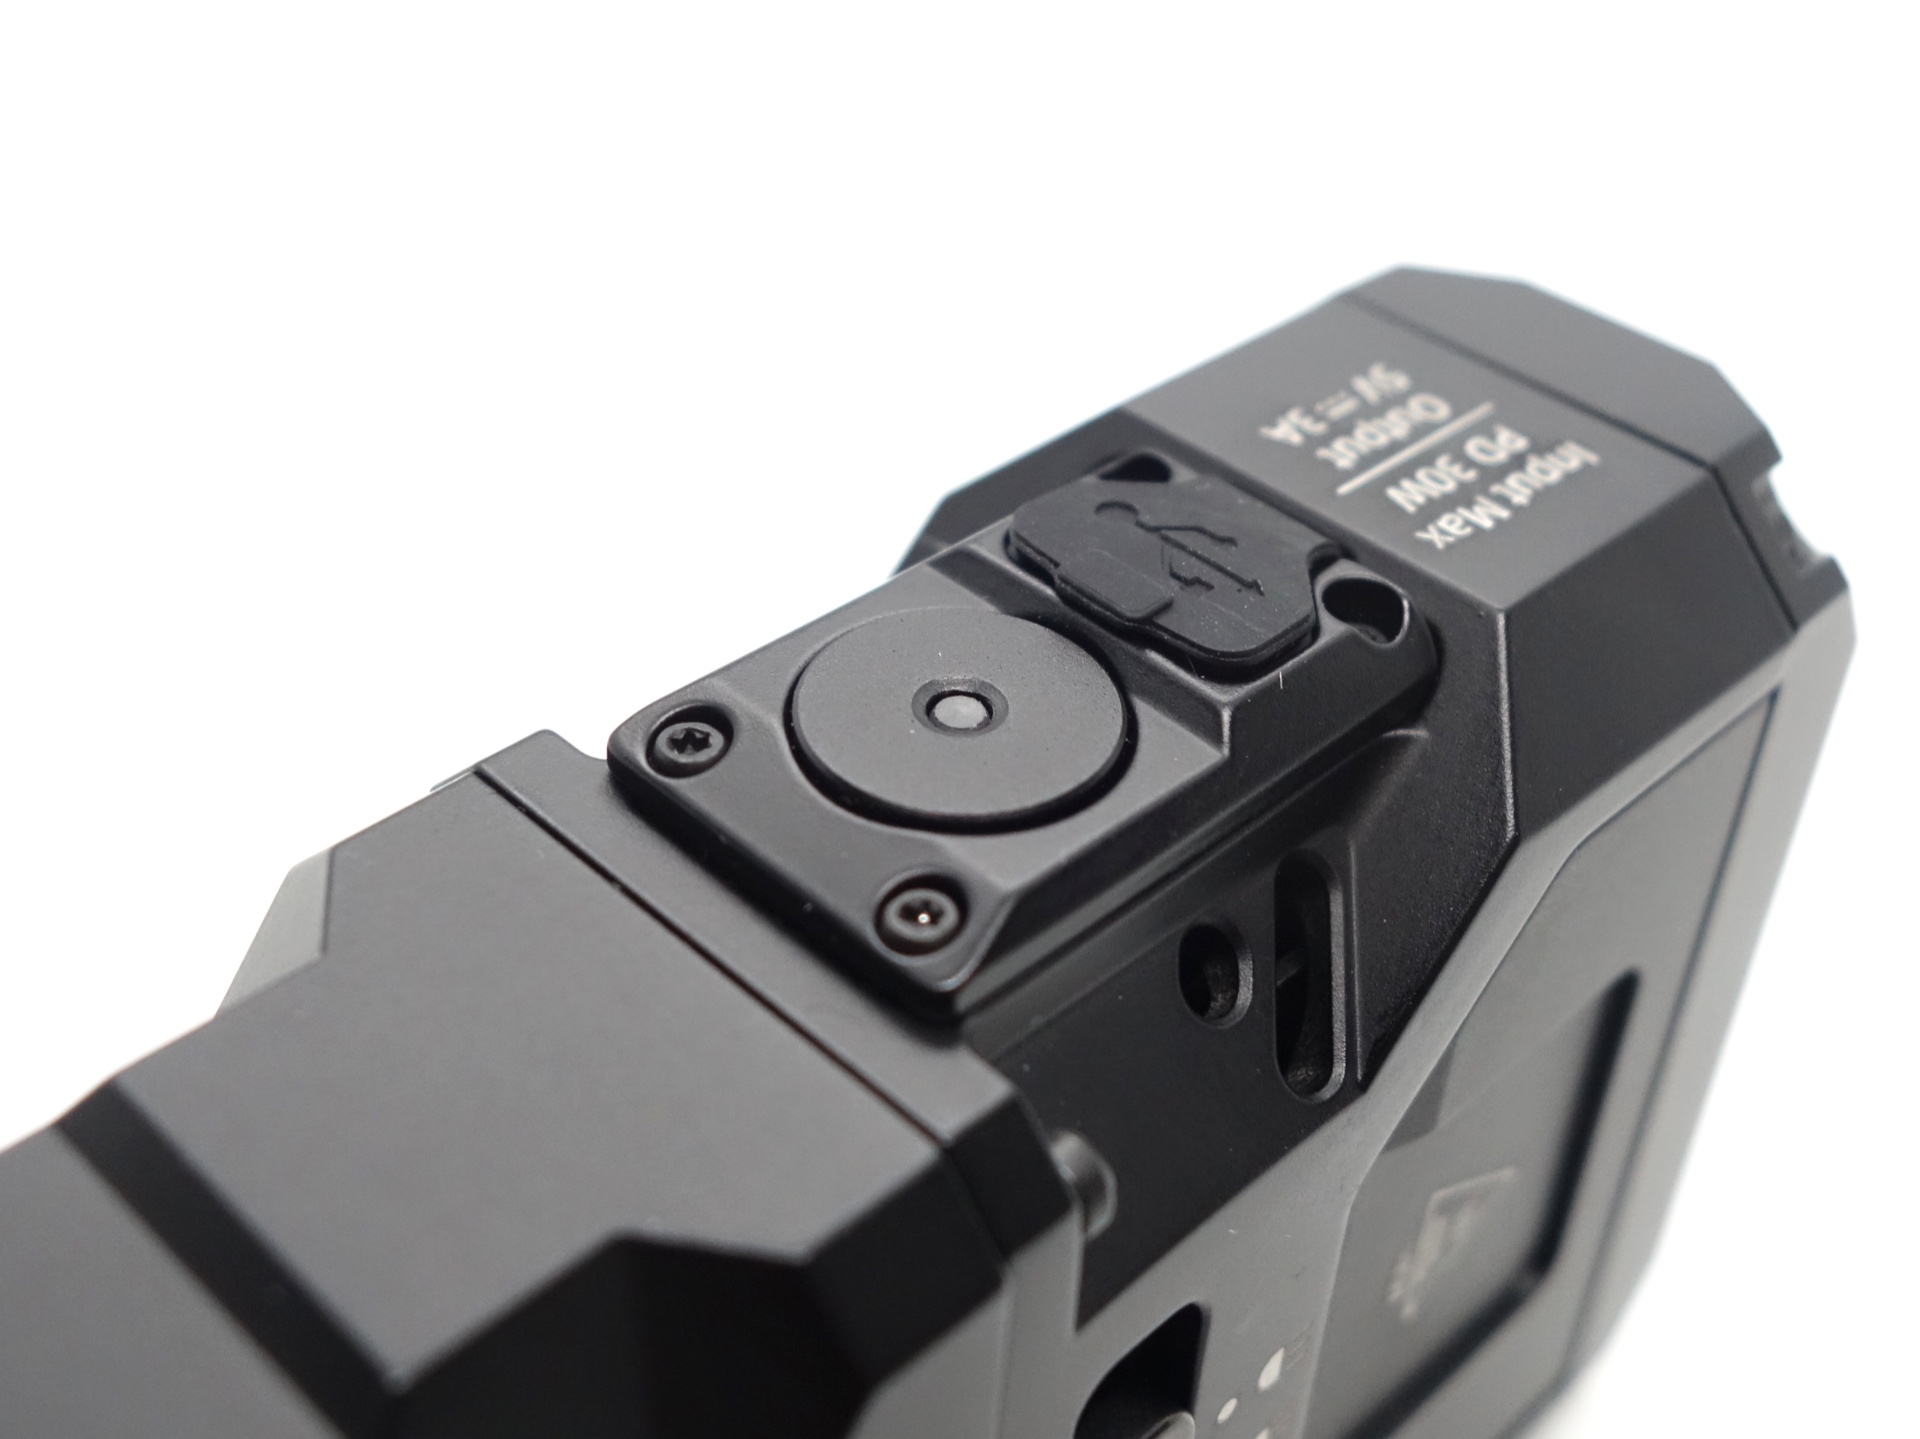
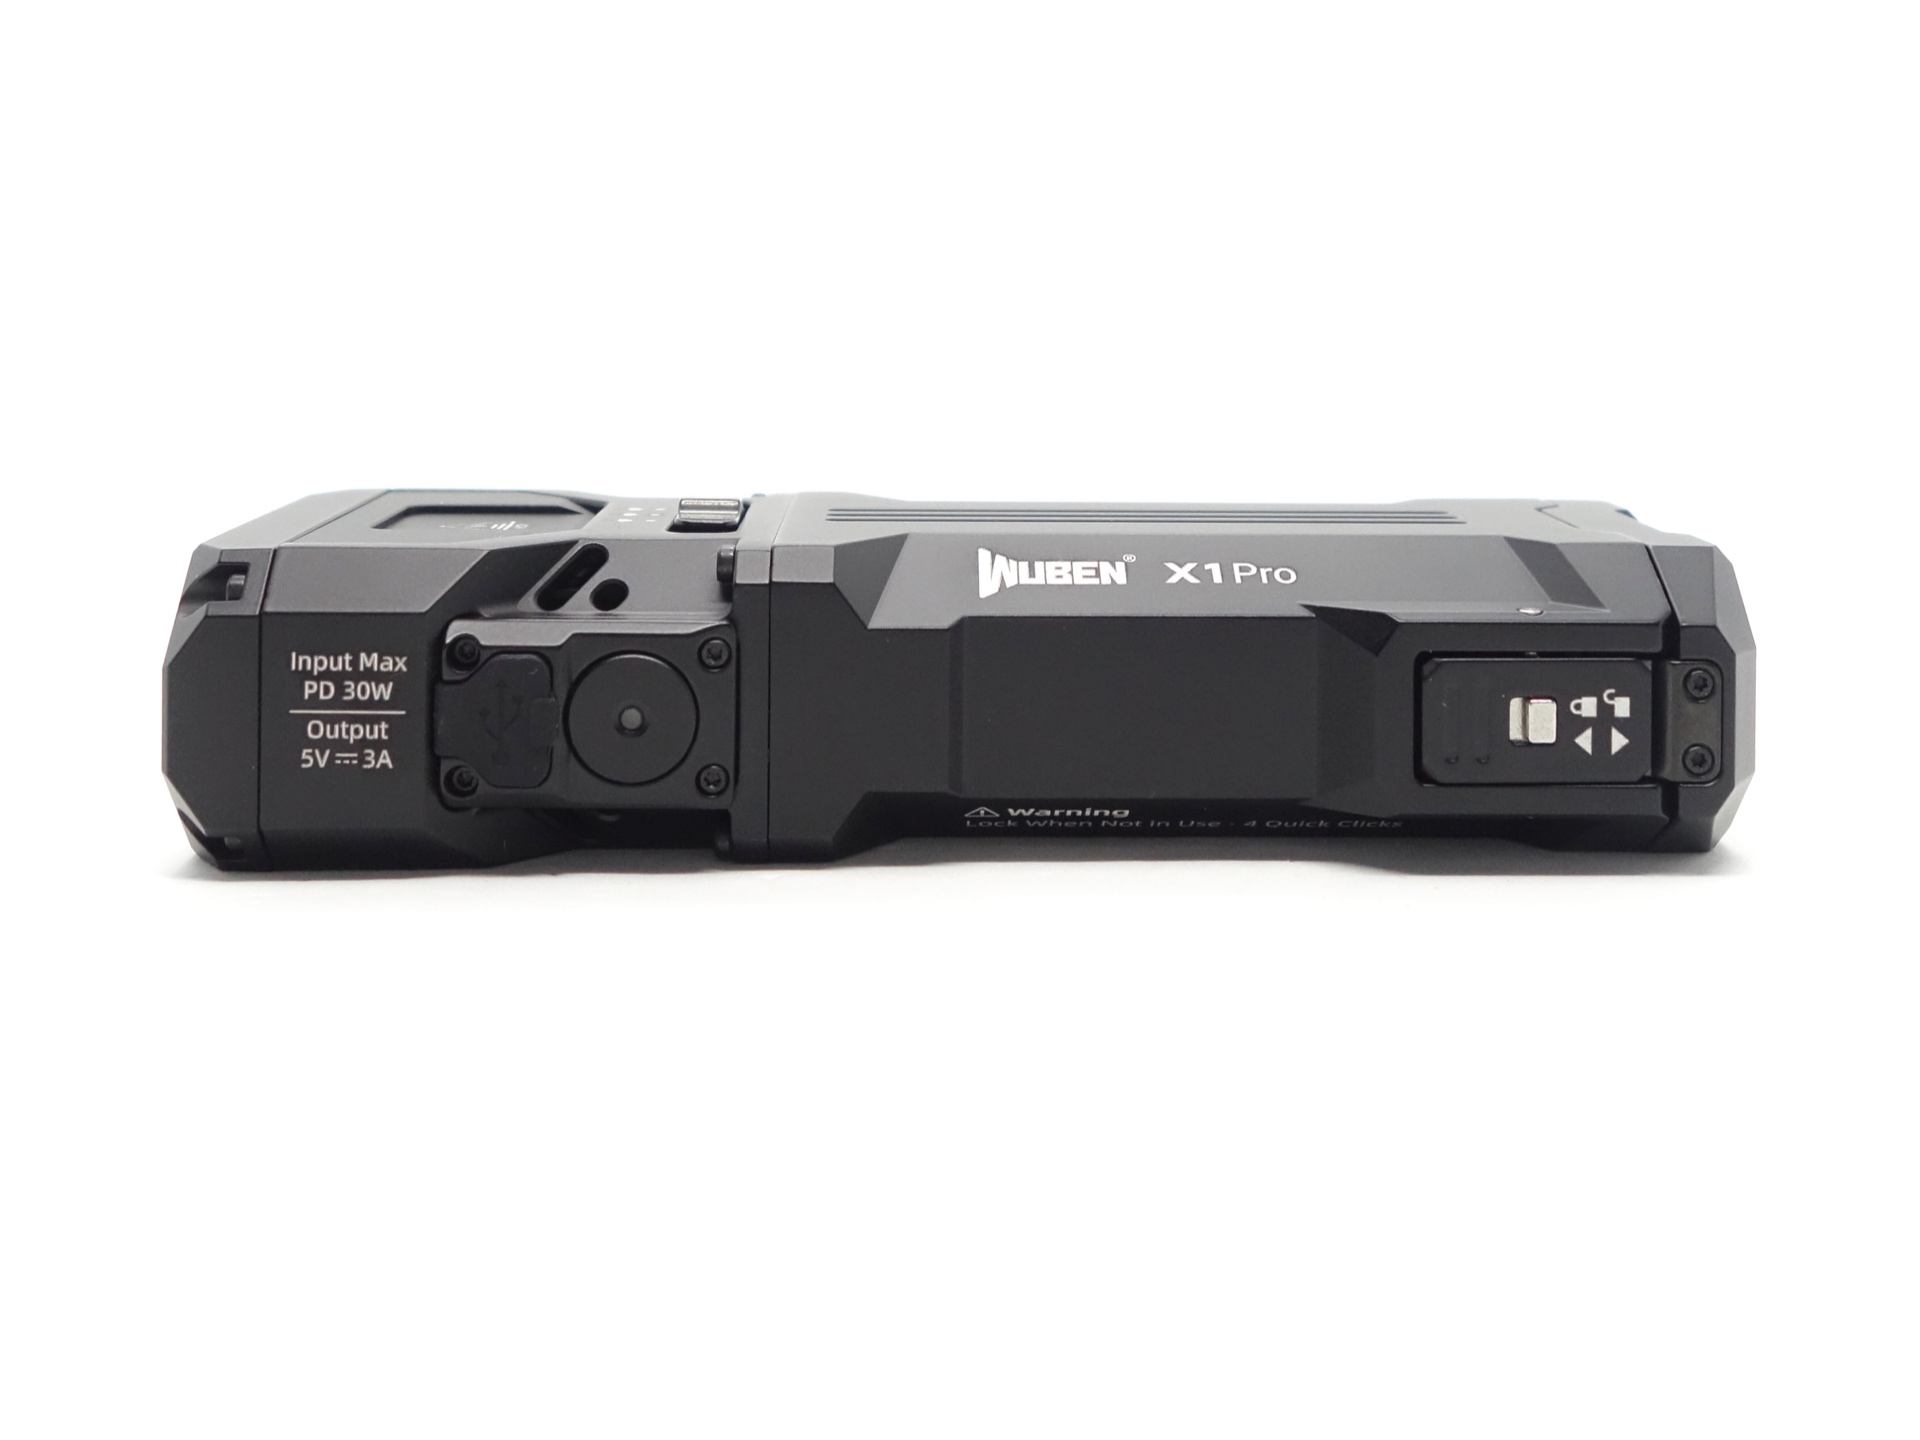
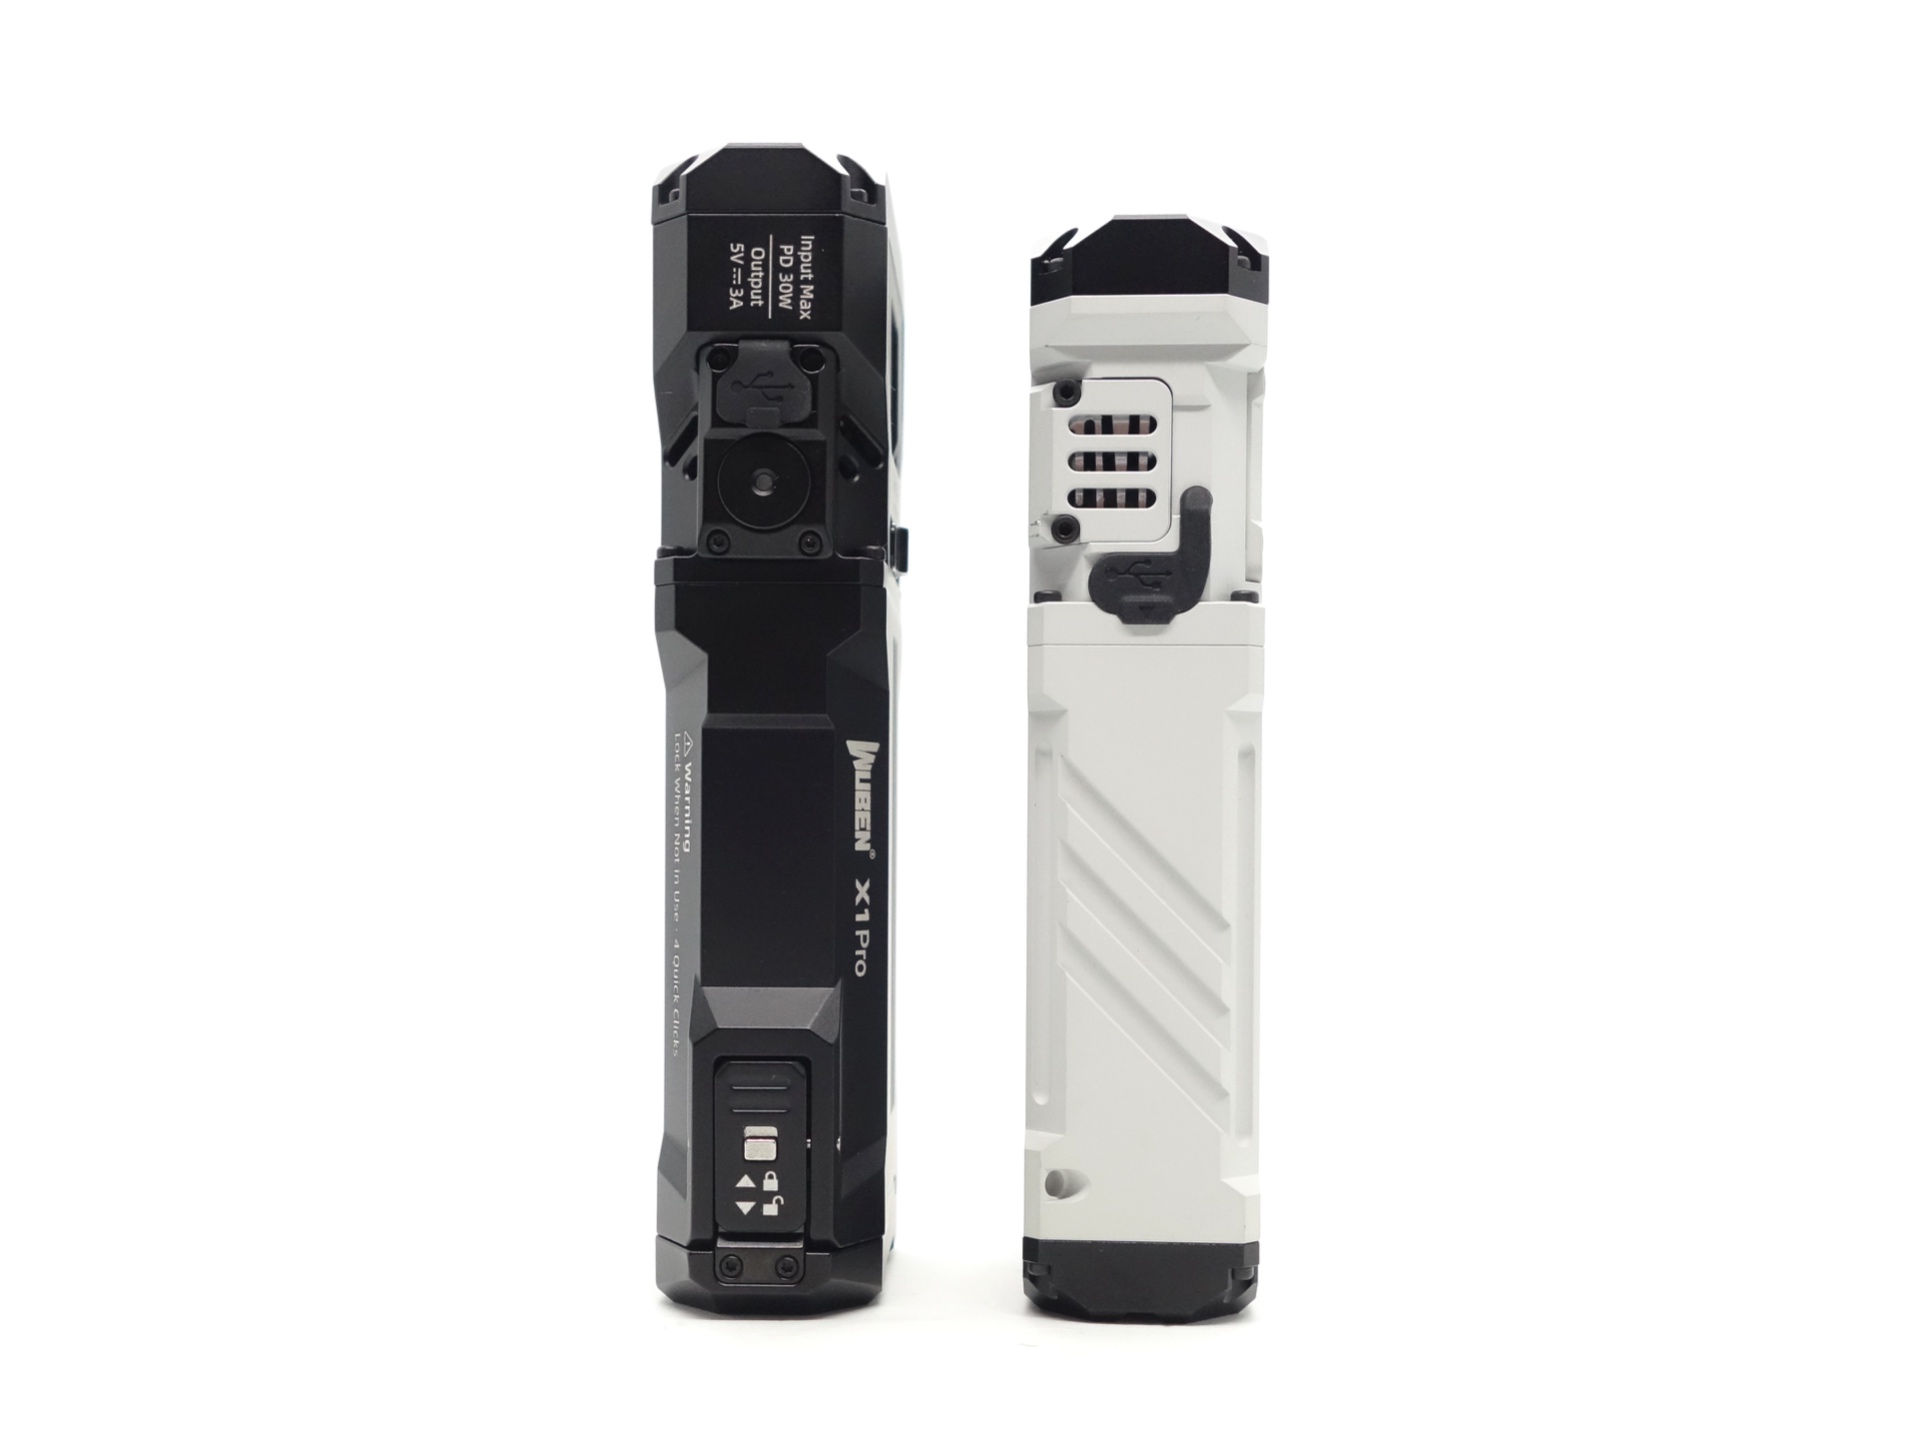
The USB-C port can be used for charging the torch or as a power bank.
The holster is much smaller compared to the one included with the Wuben X1.
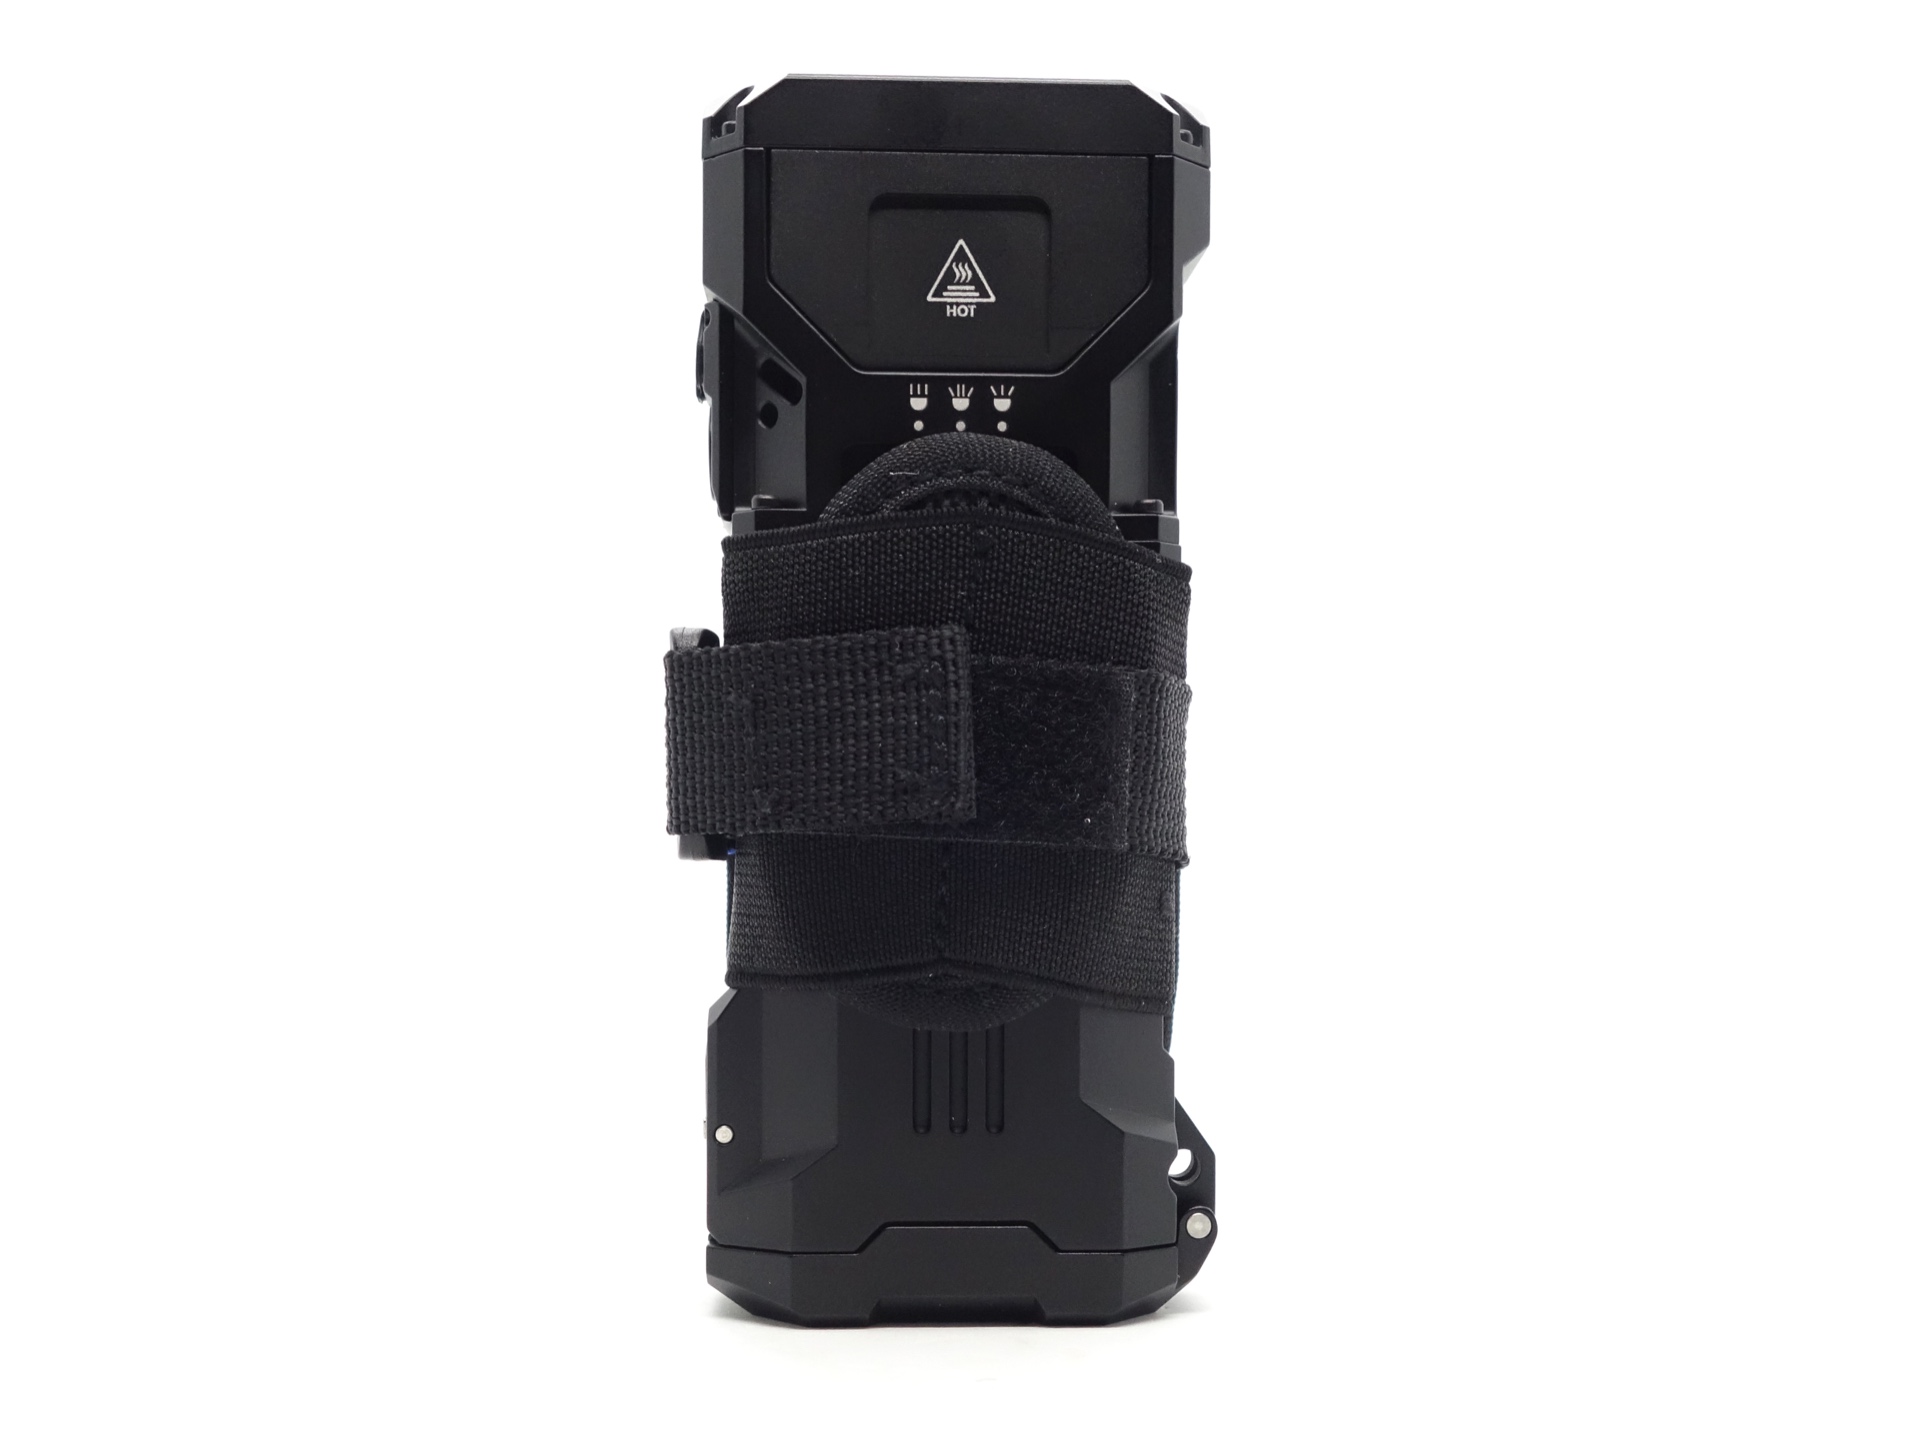
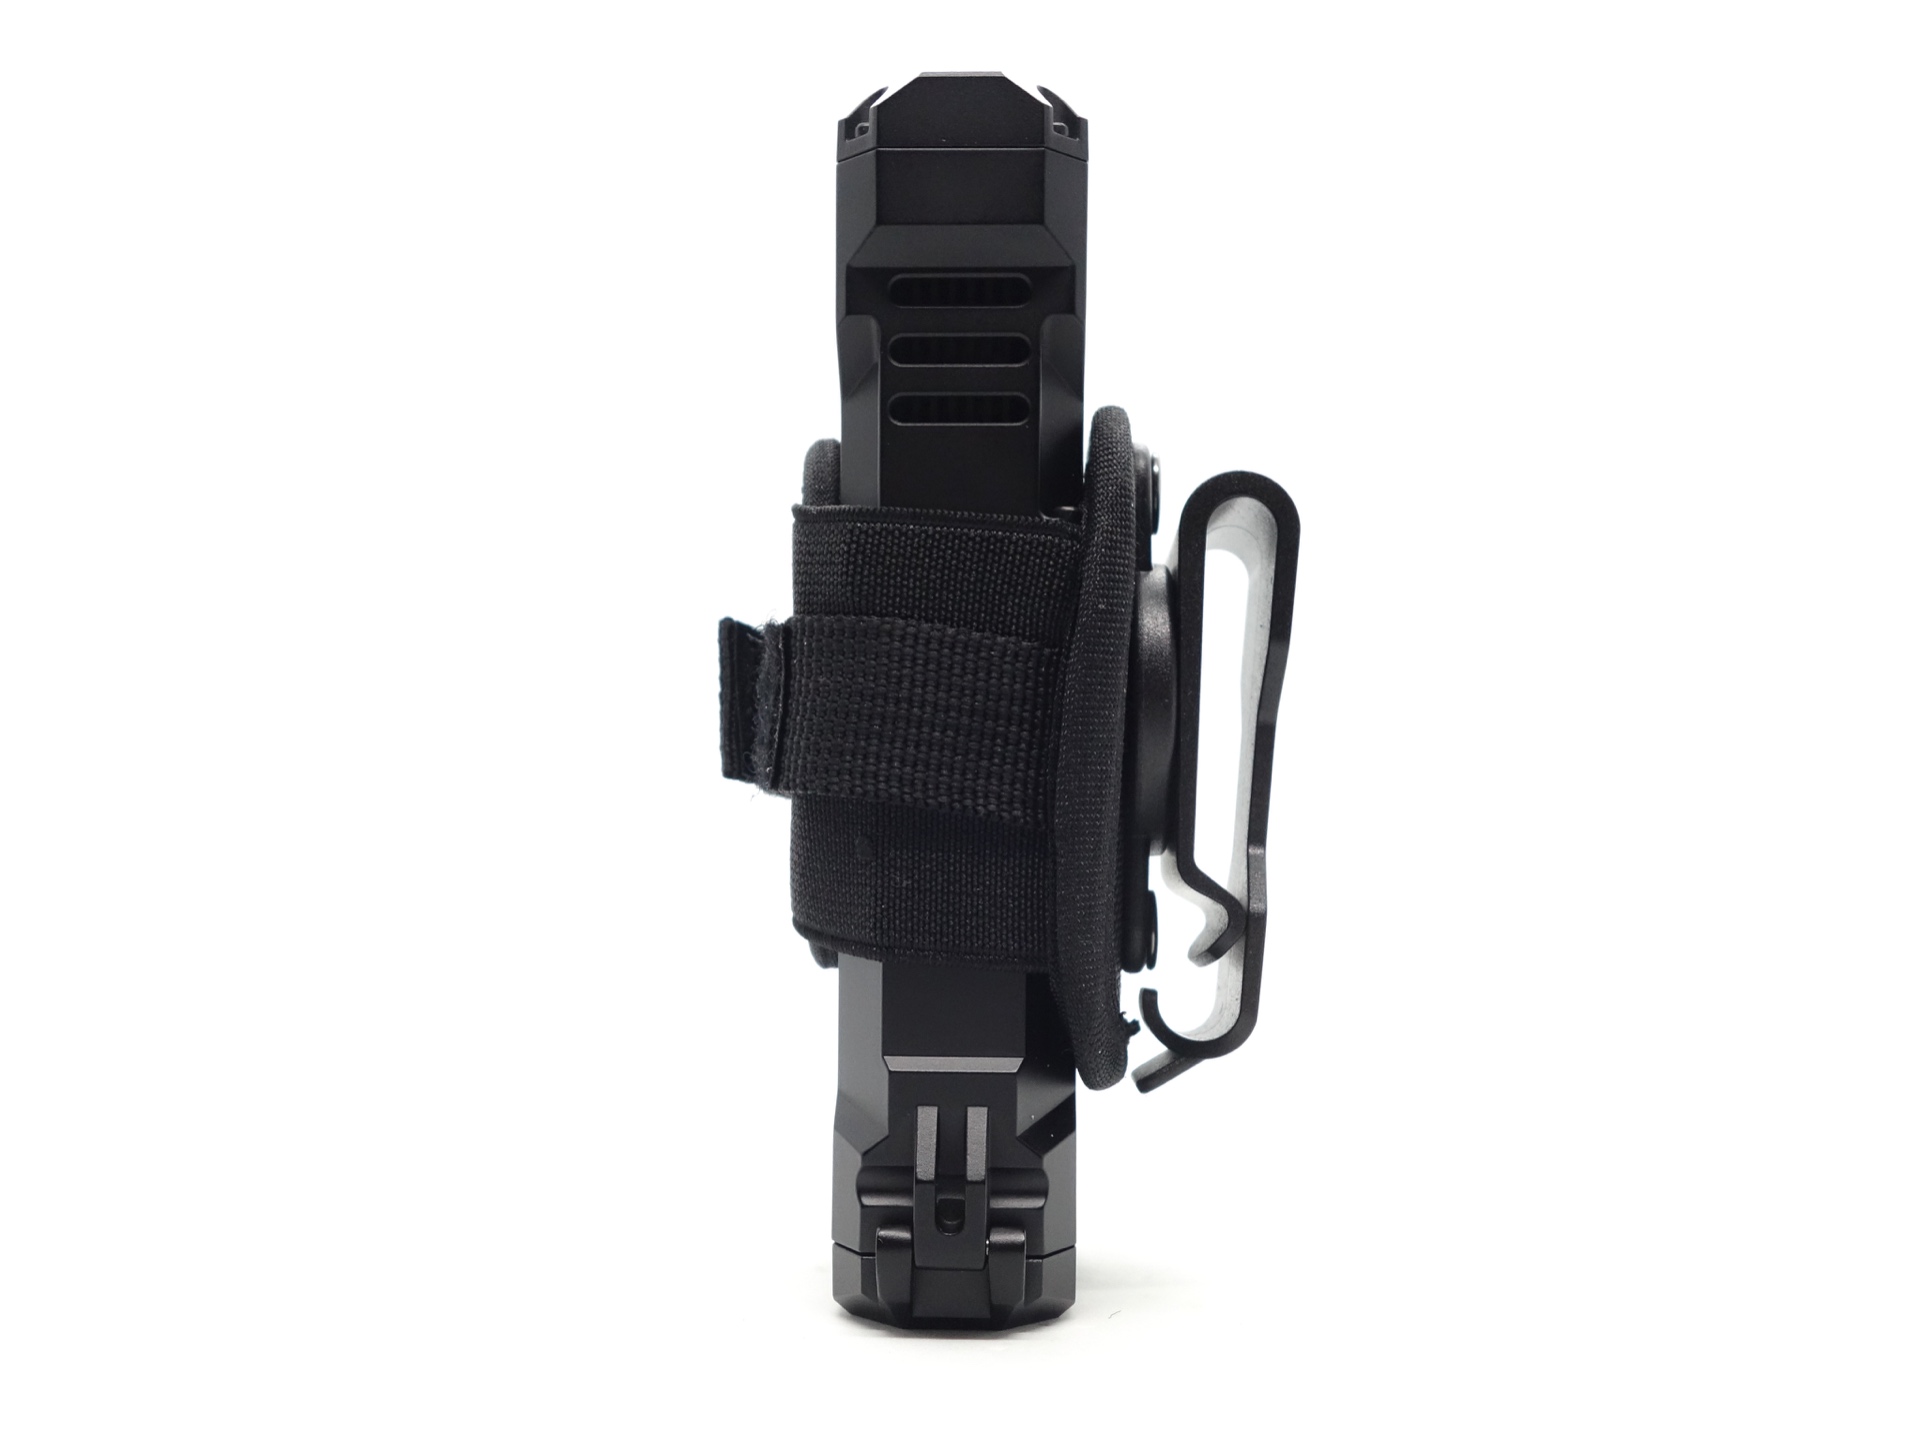
That said, the belt clip can be rotated!
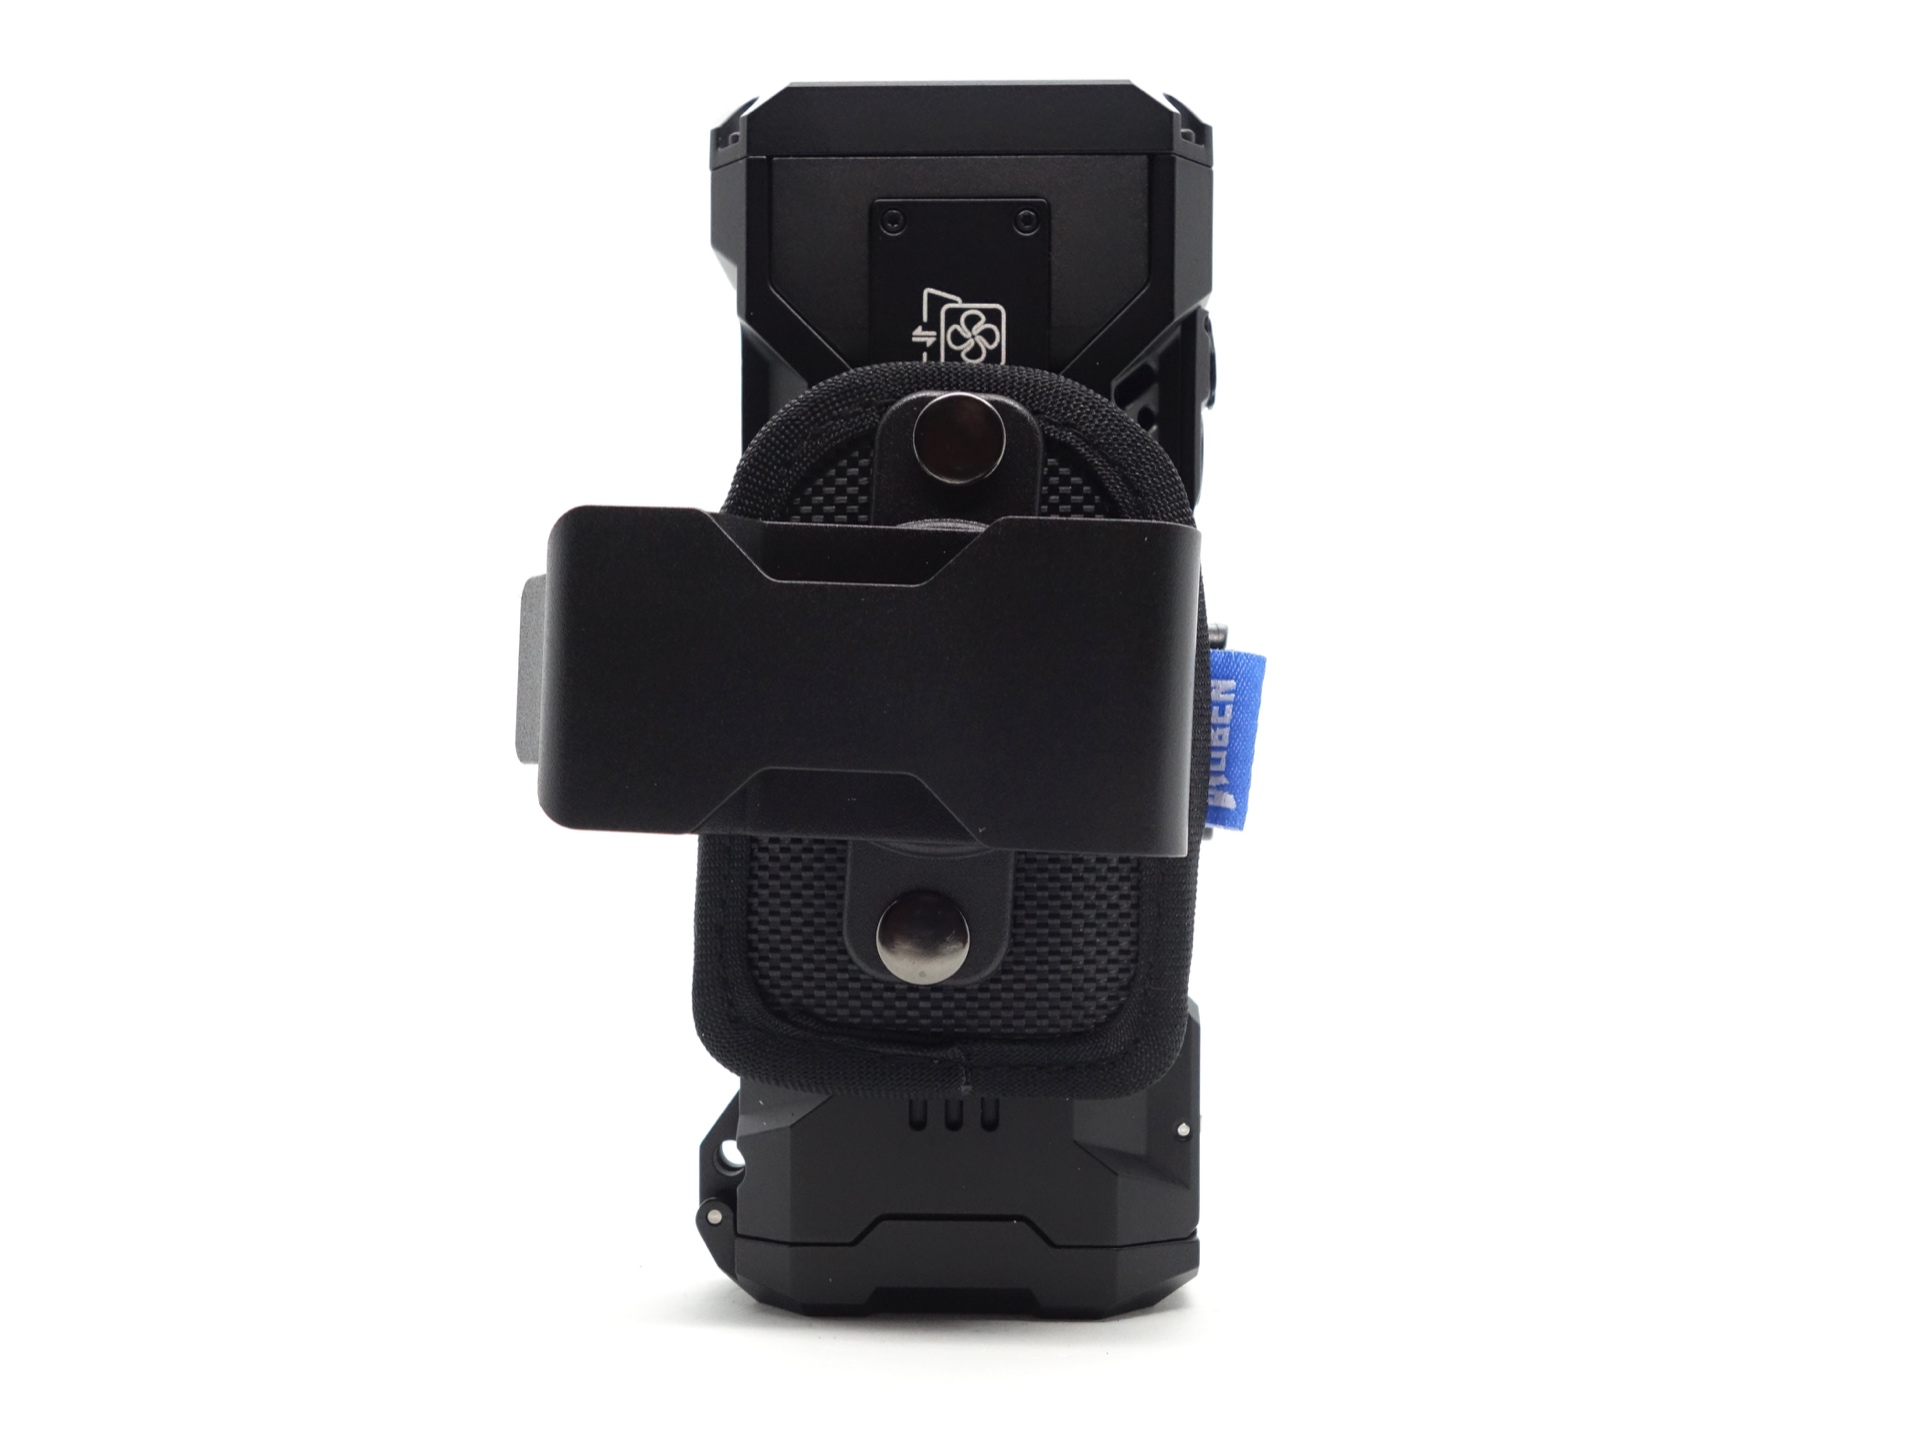
There is a massive lanyard hole near the hinge.
Build quality#
This Wuben X1 Pro is made of alumimium and it has a matte black anodised finish. There is also a white version.
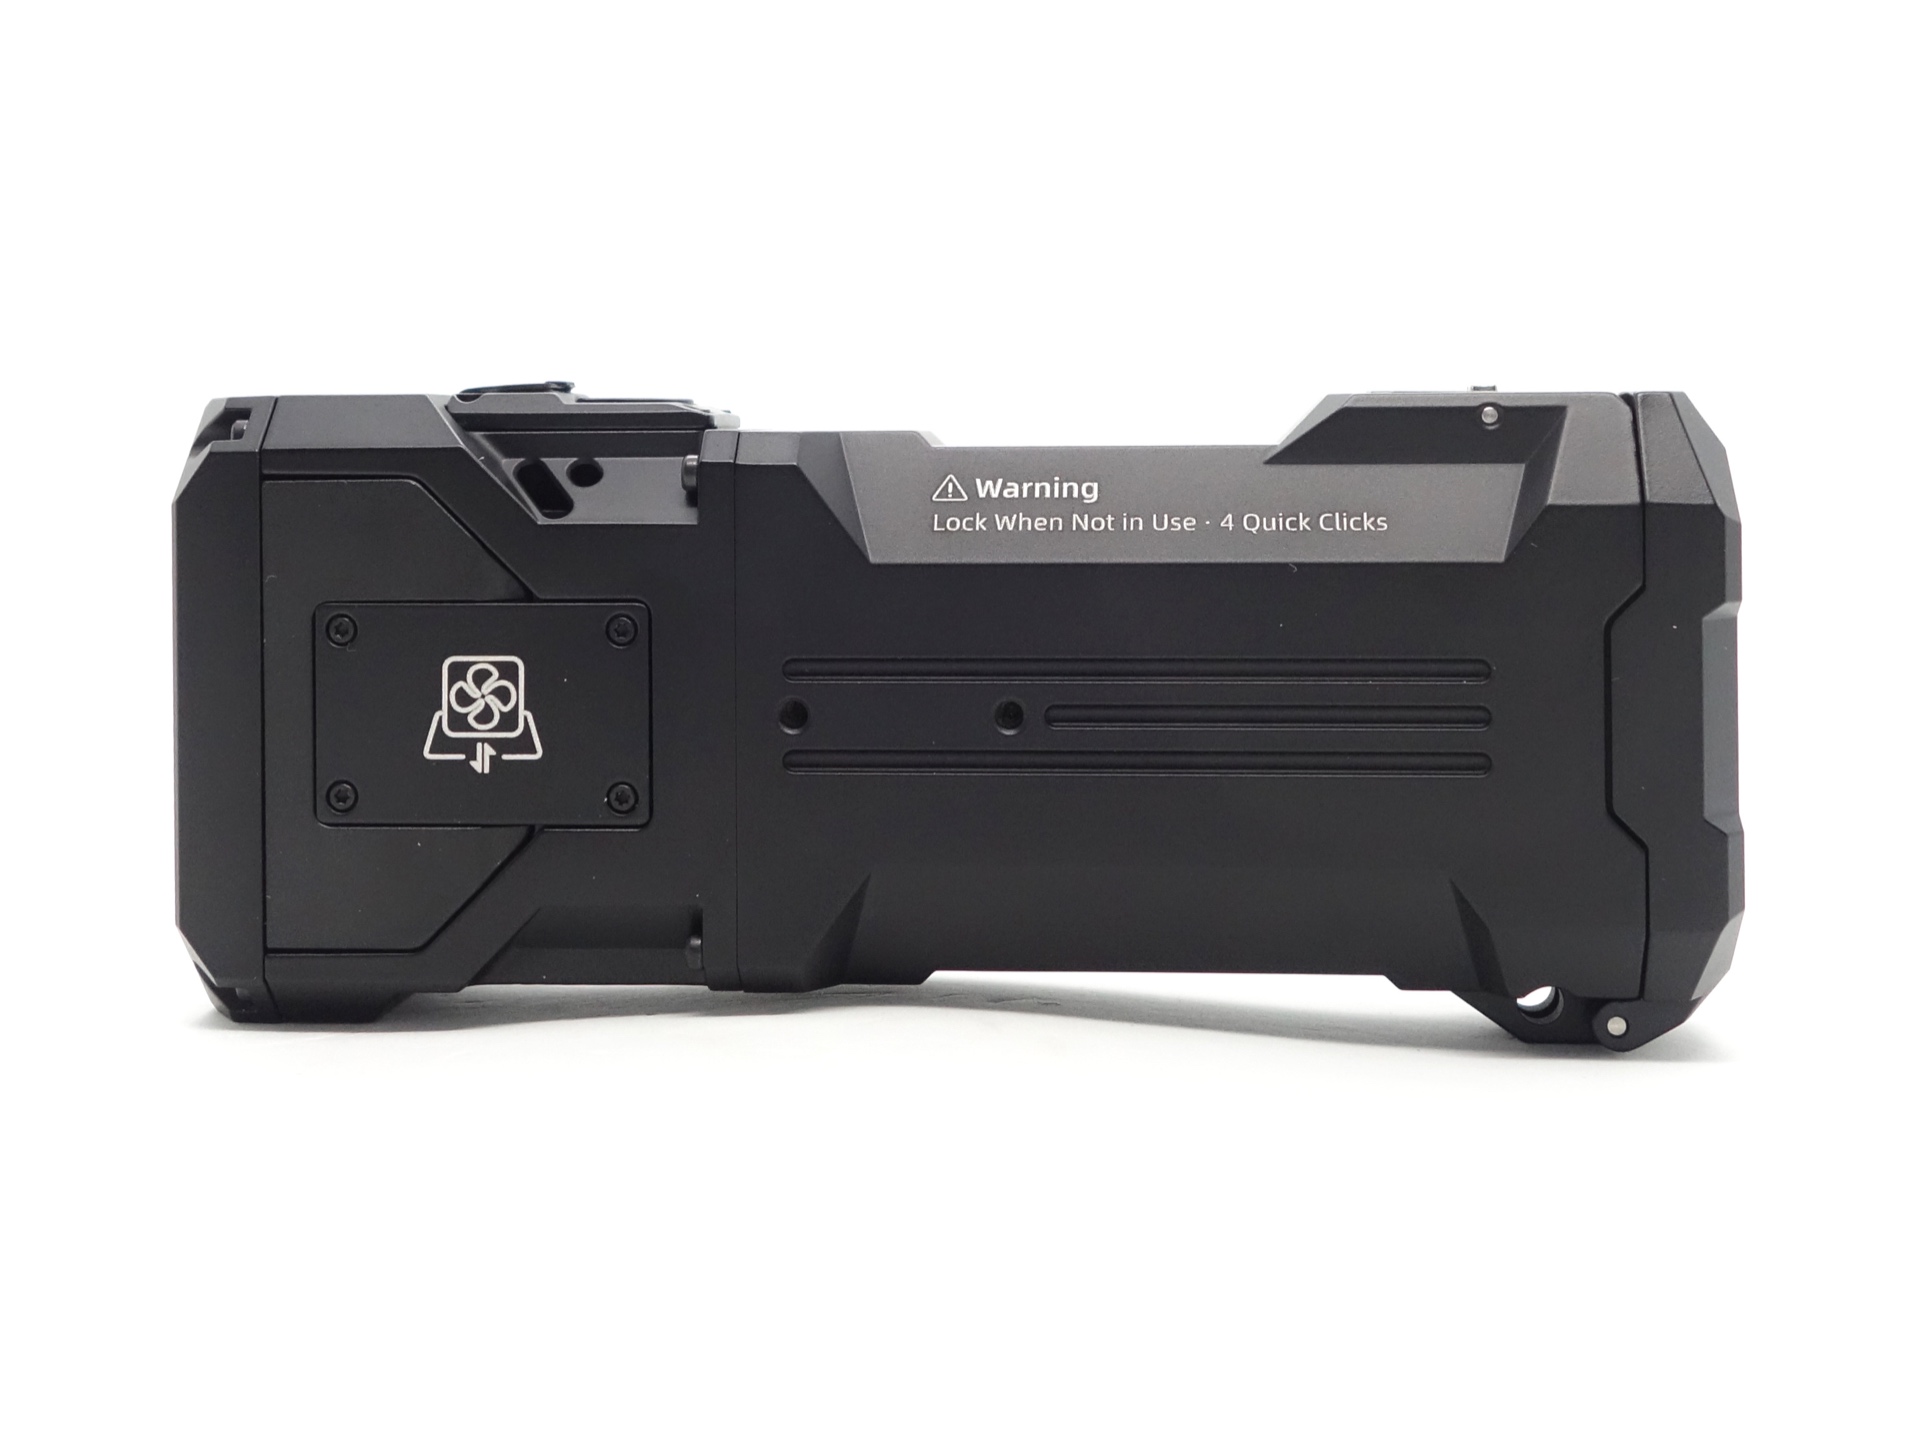
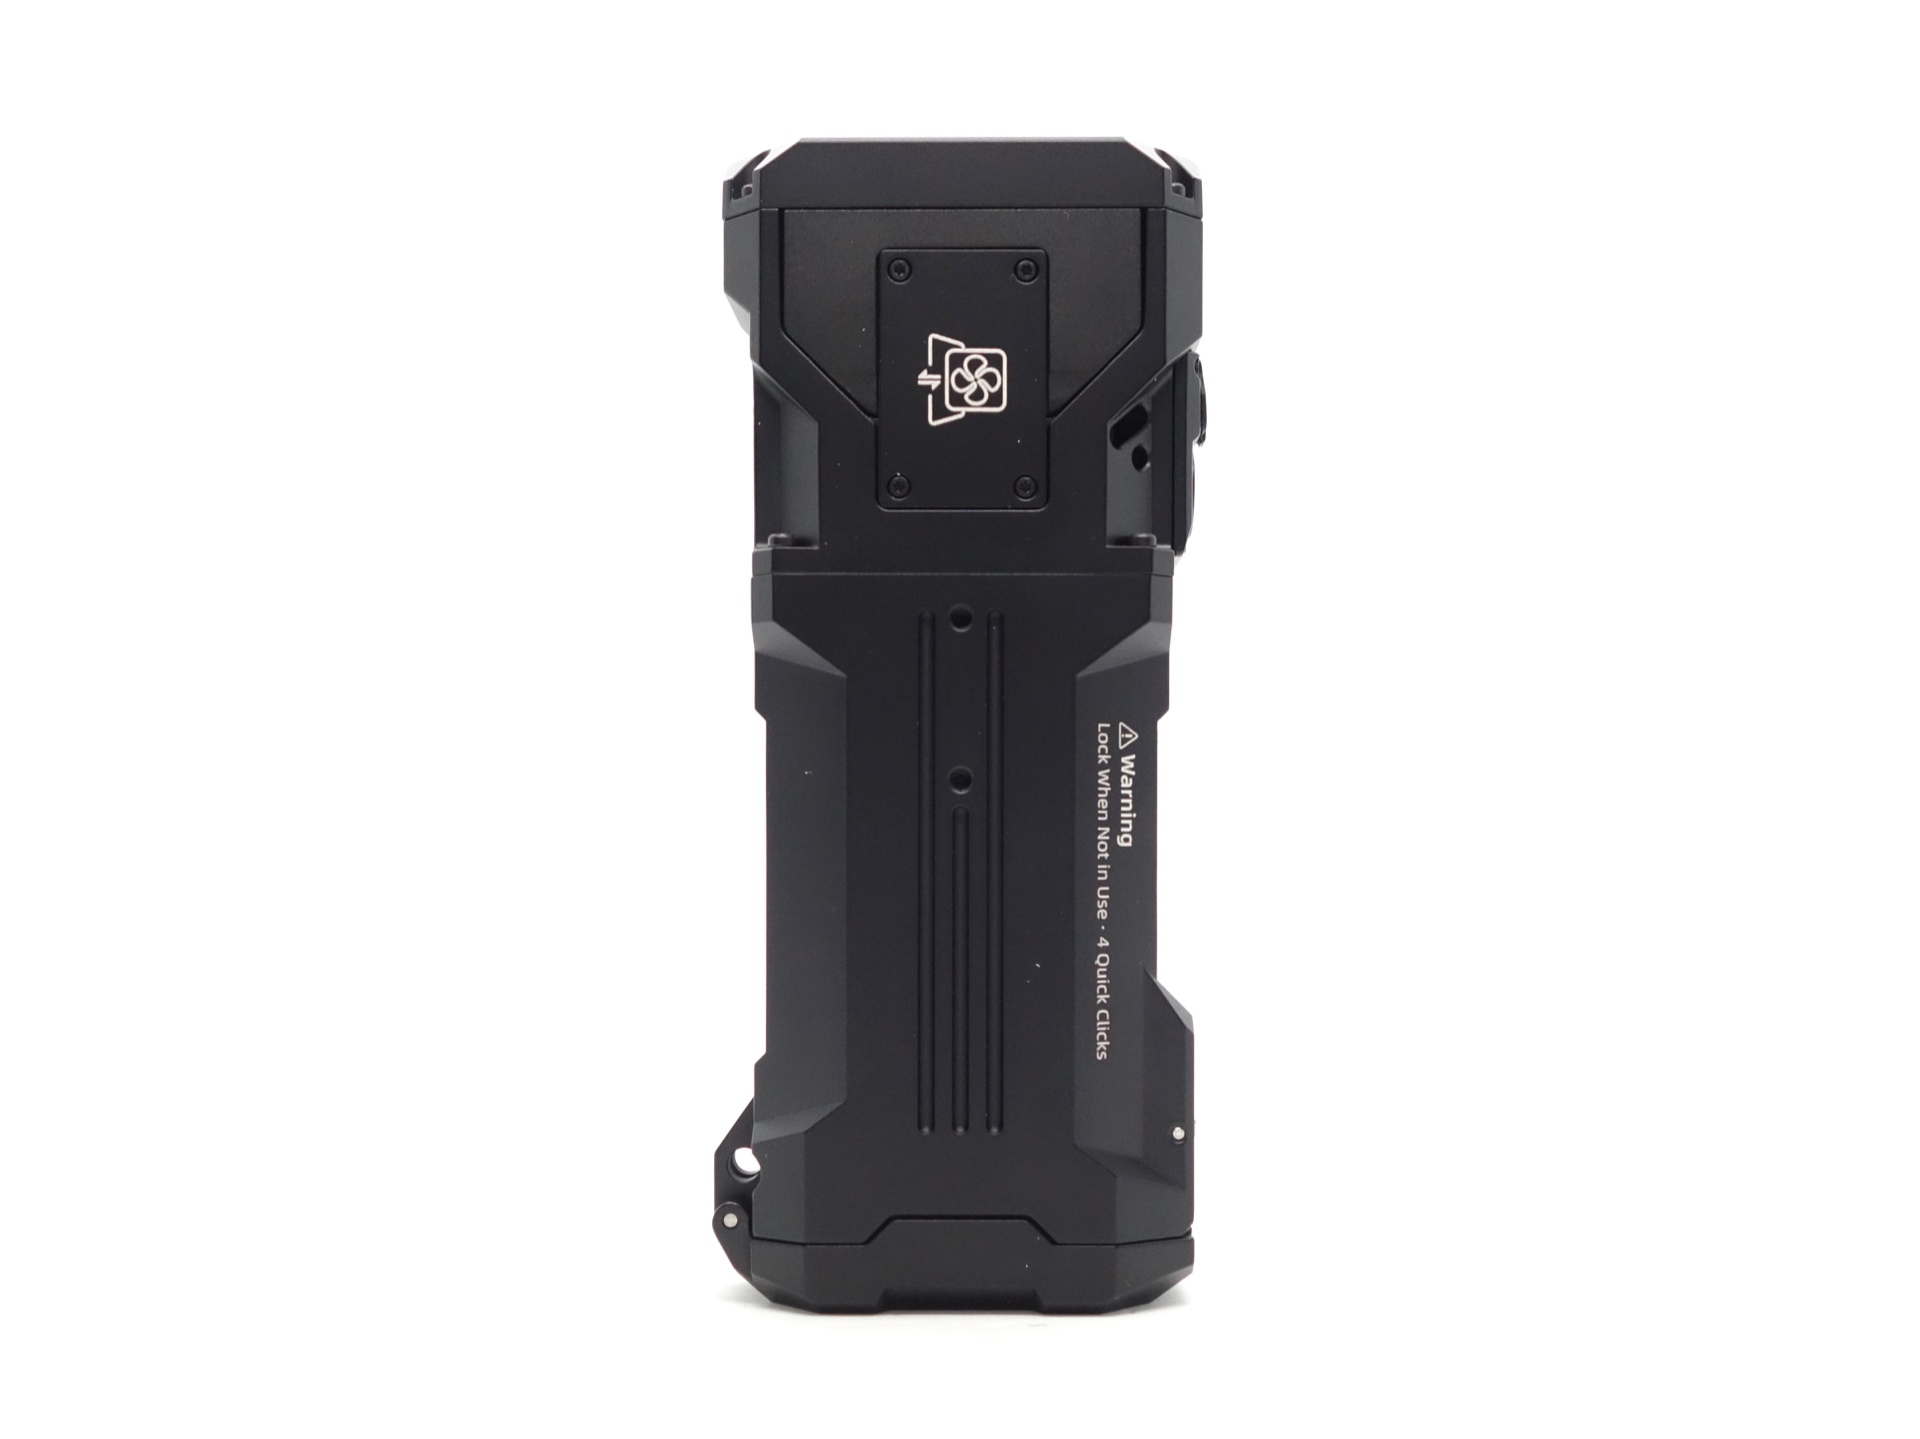
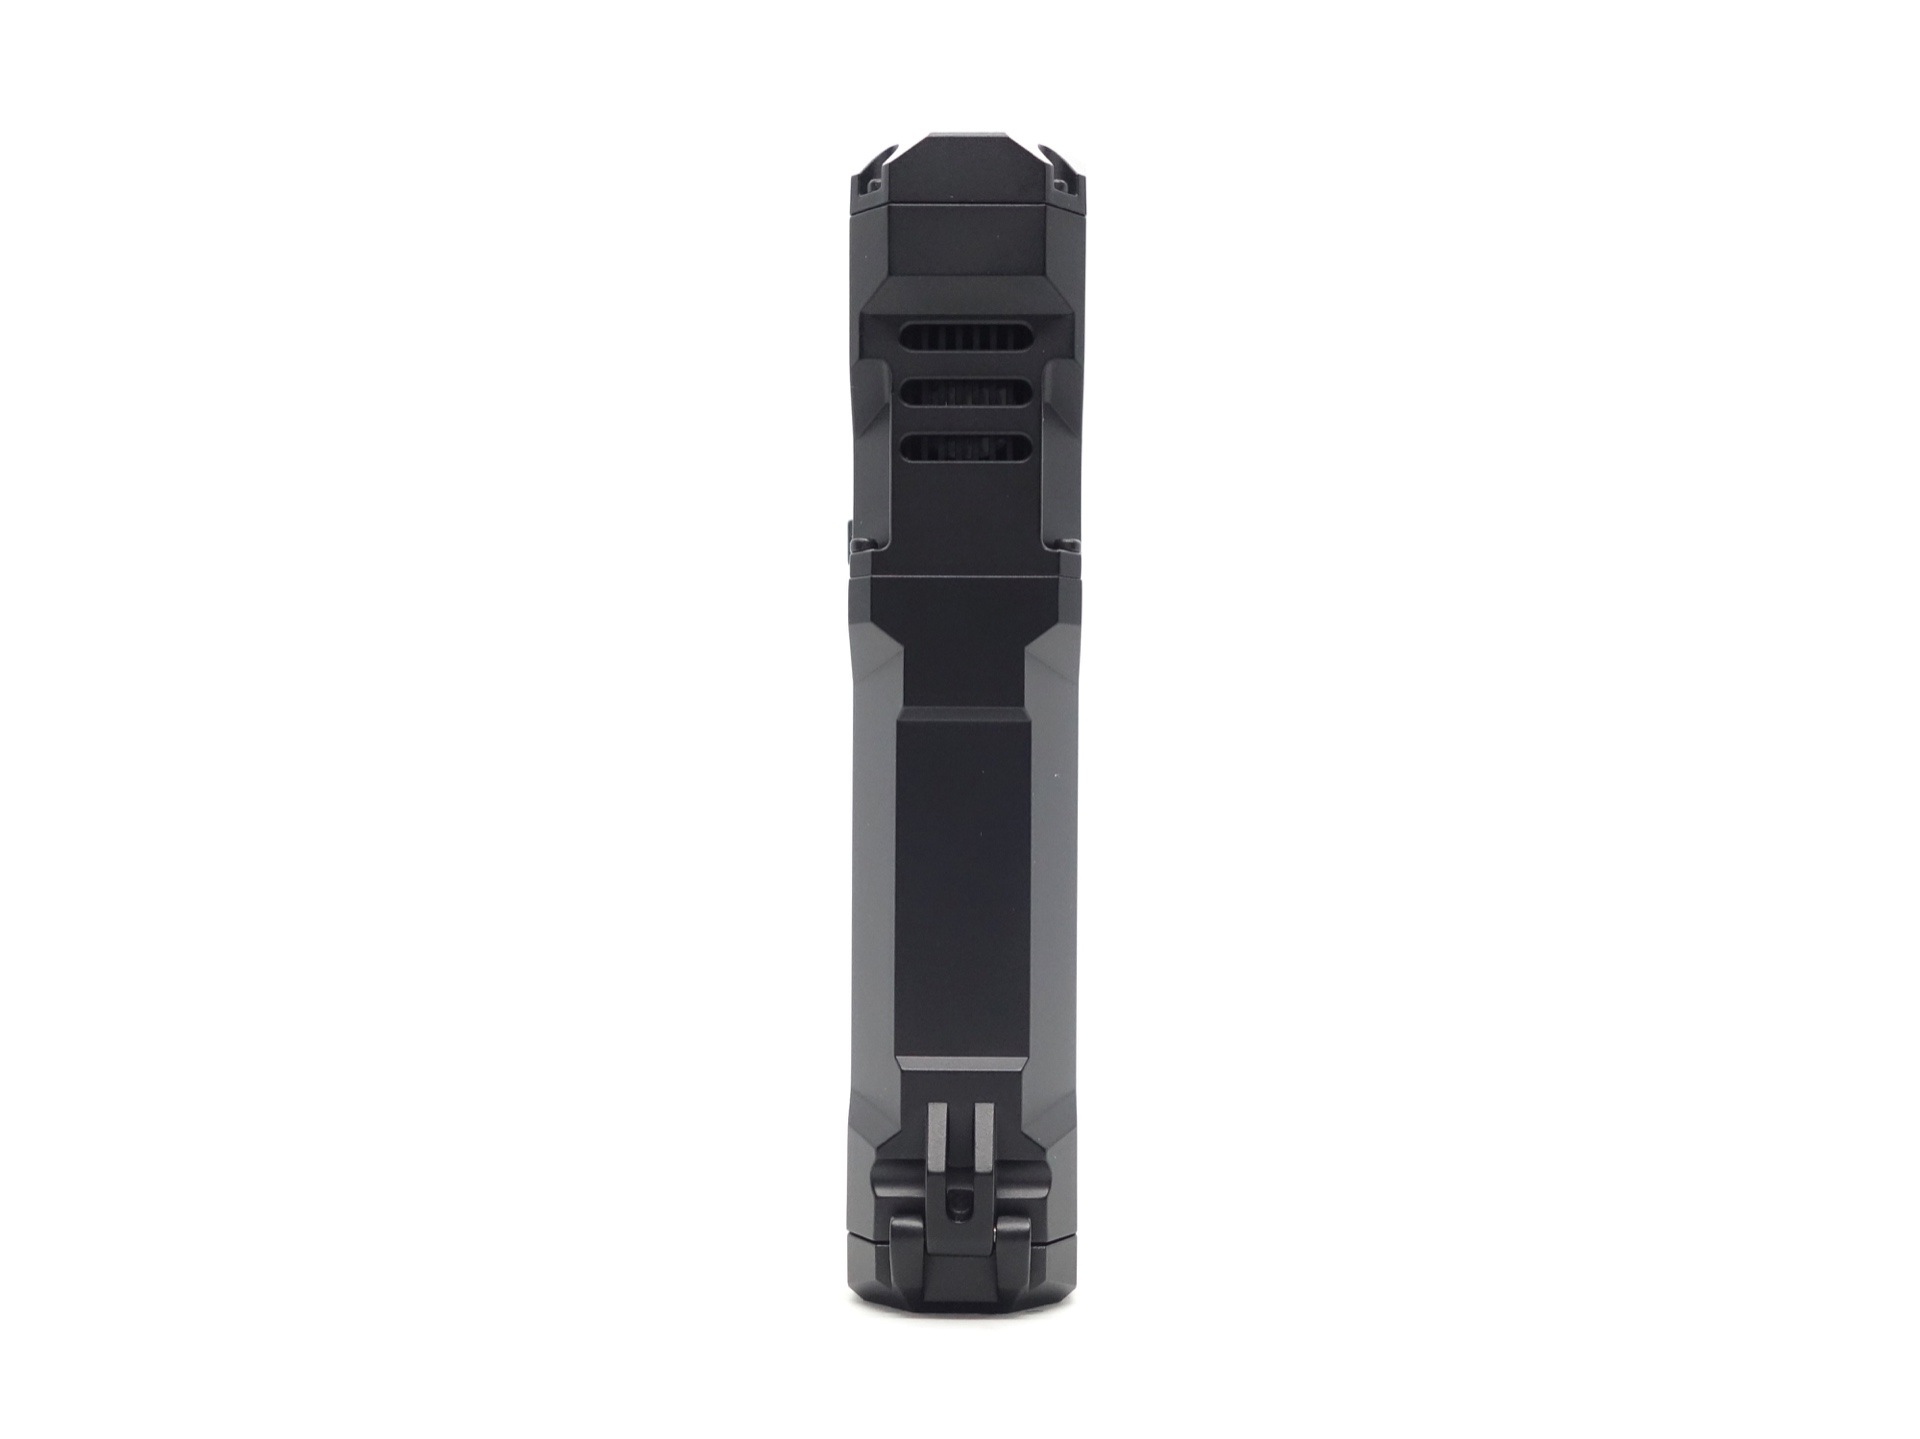
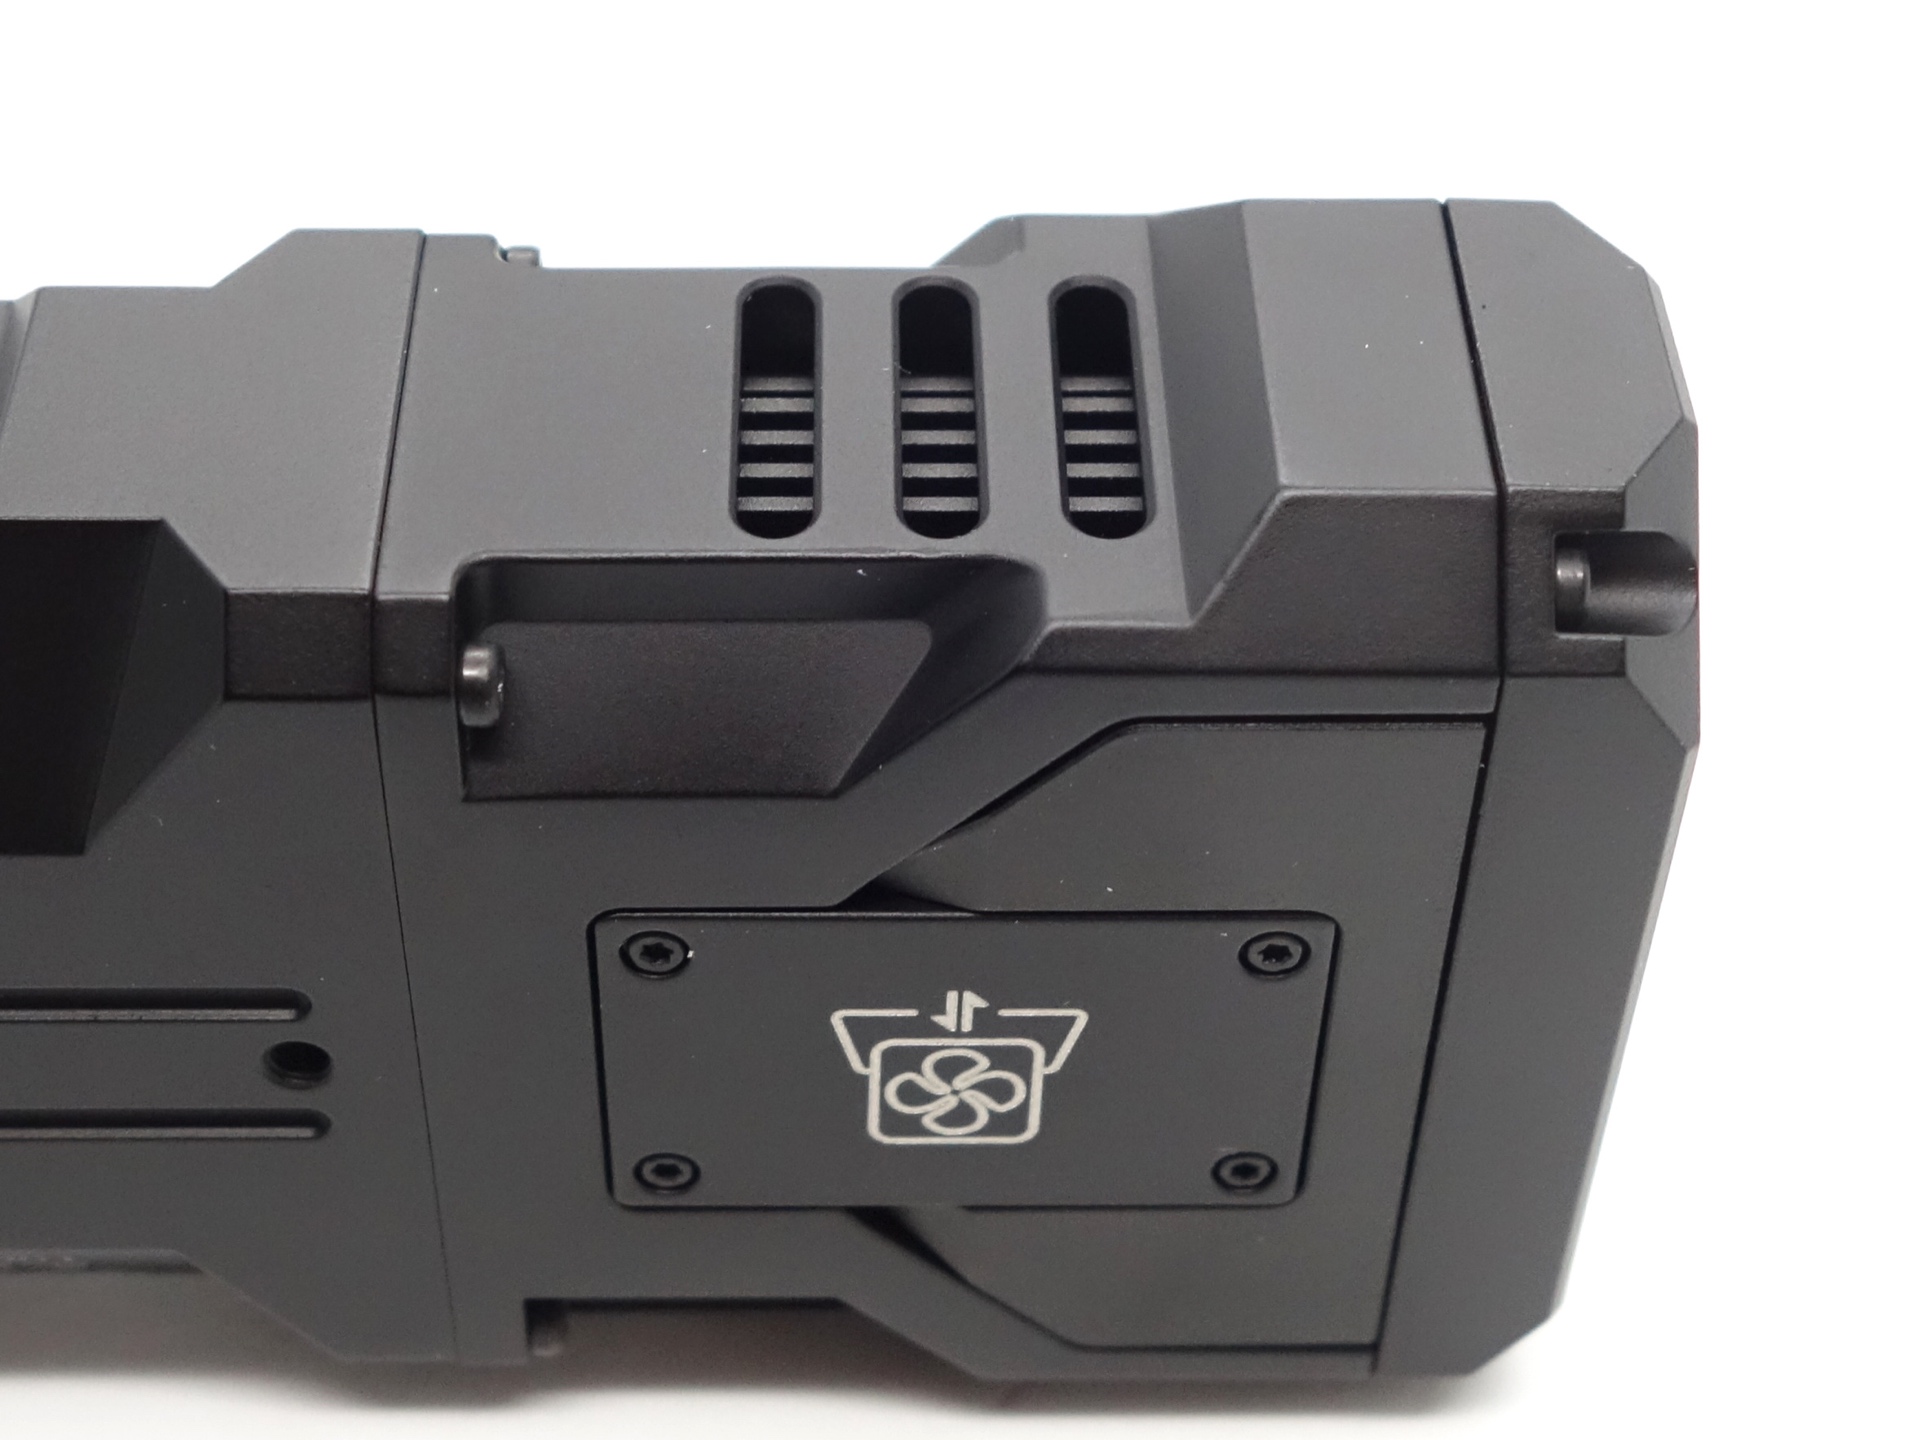
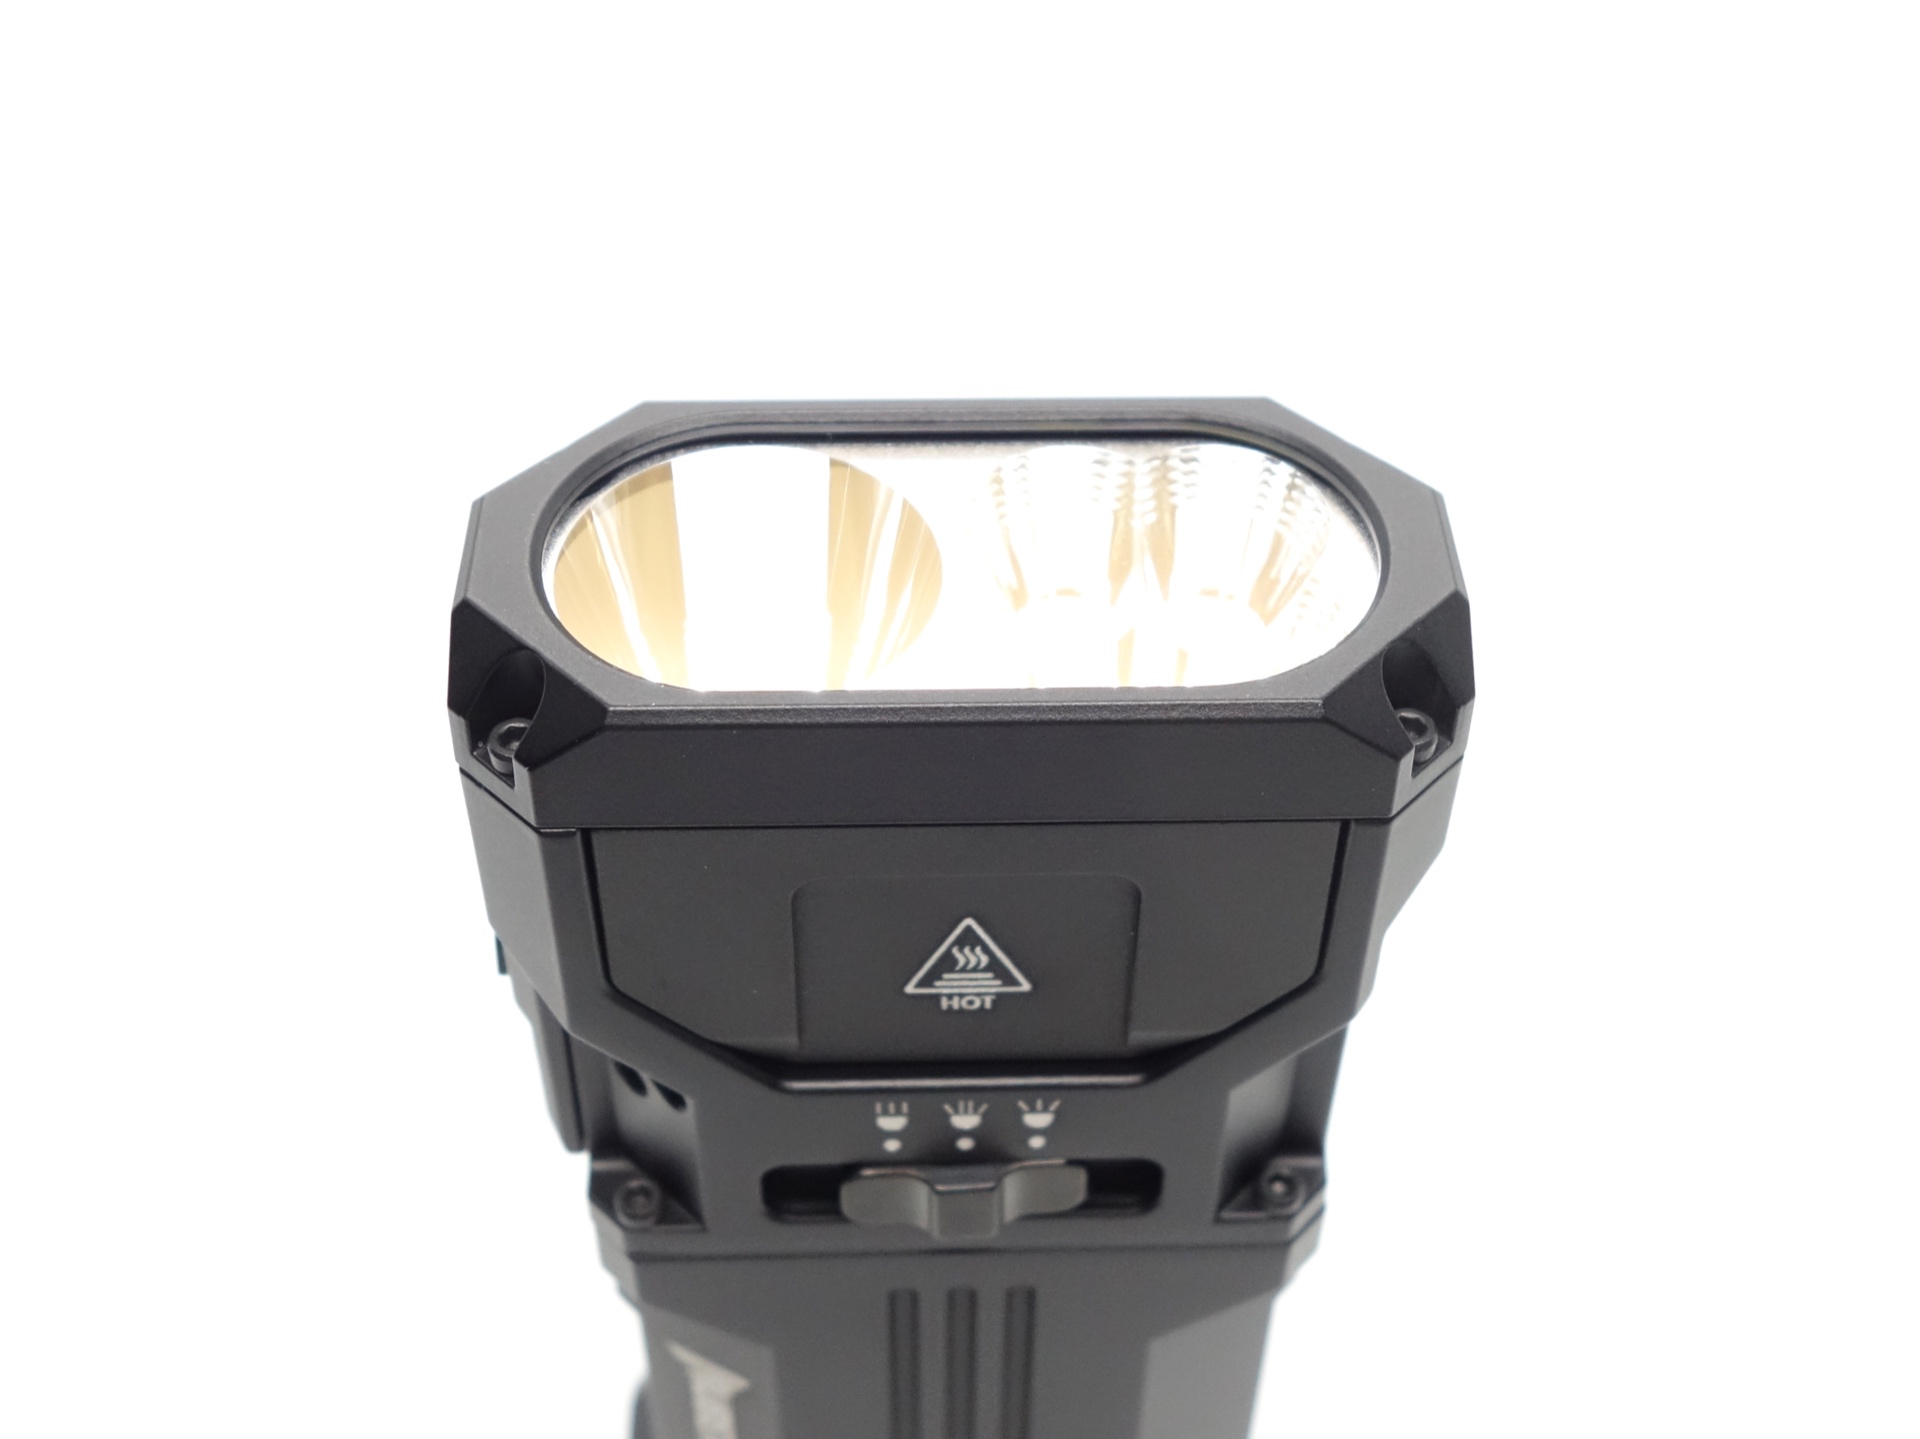
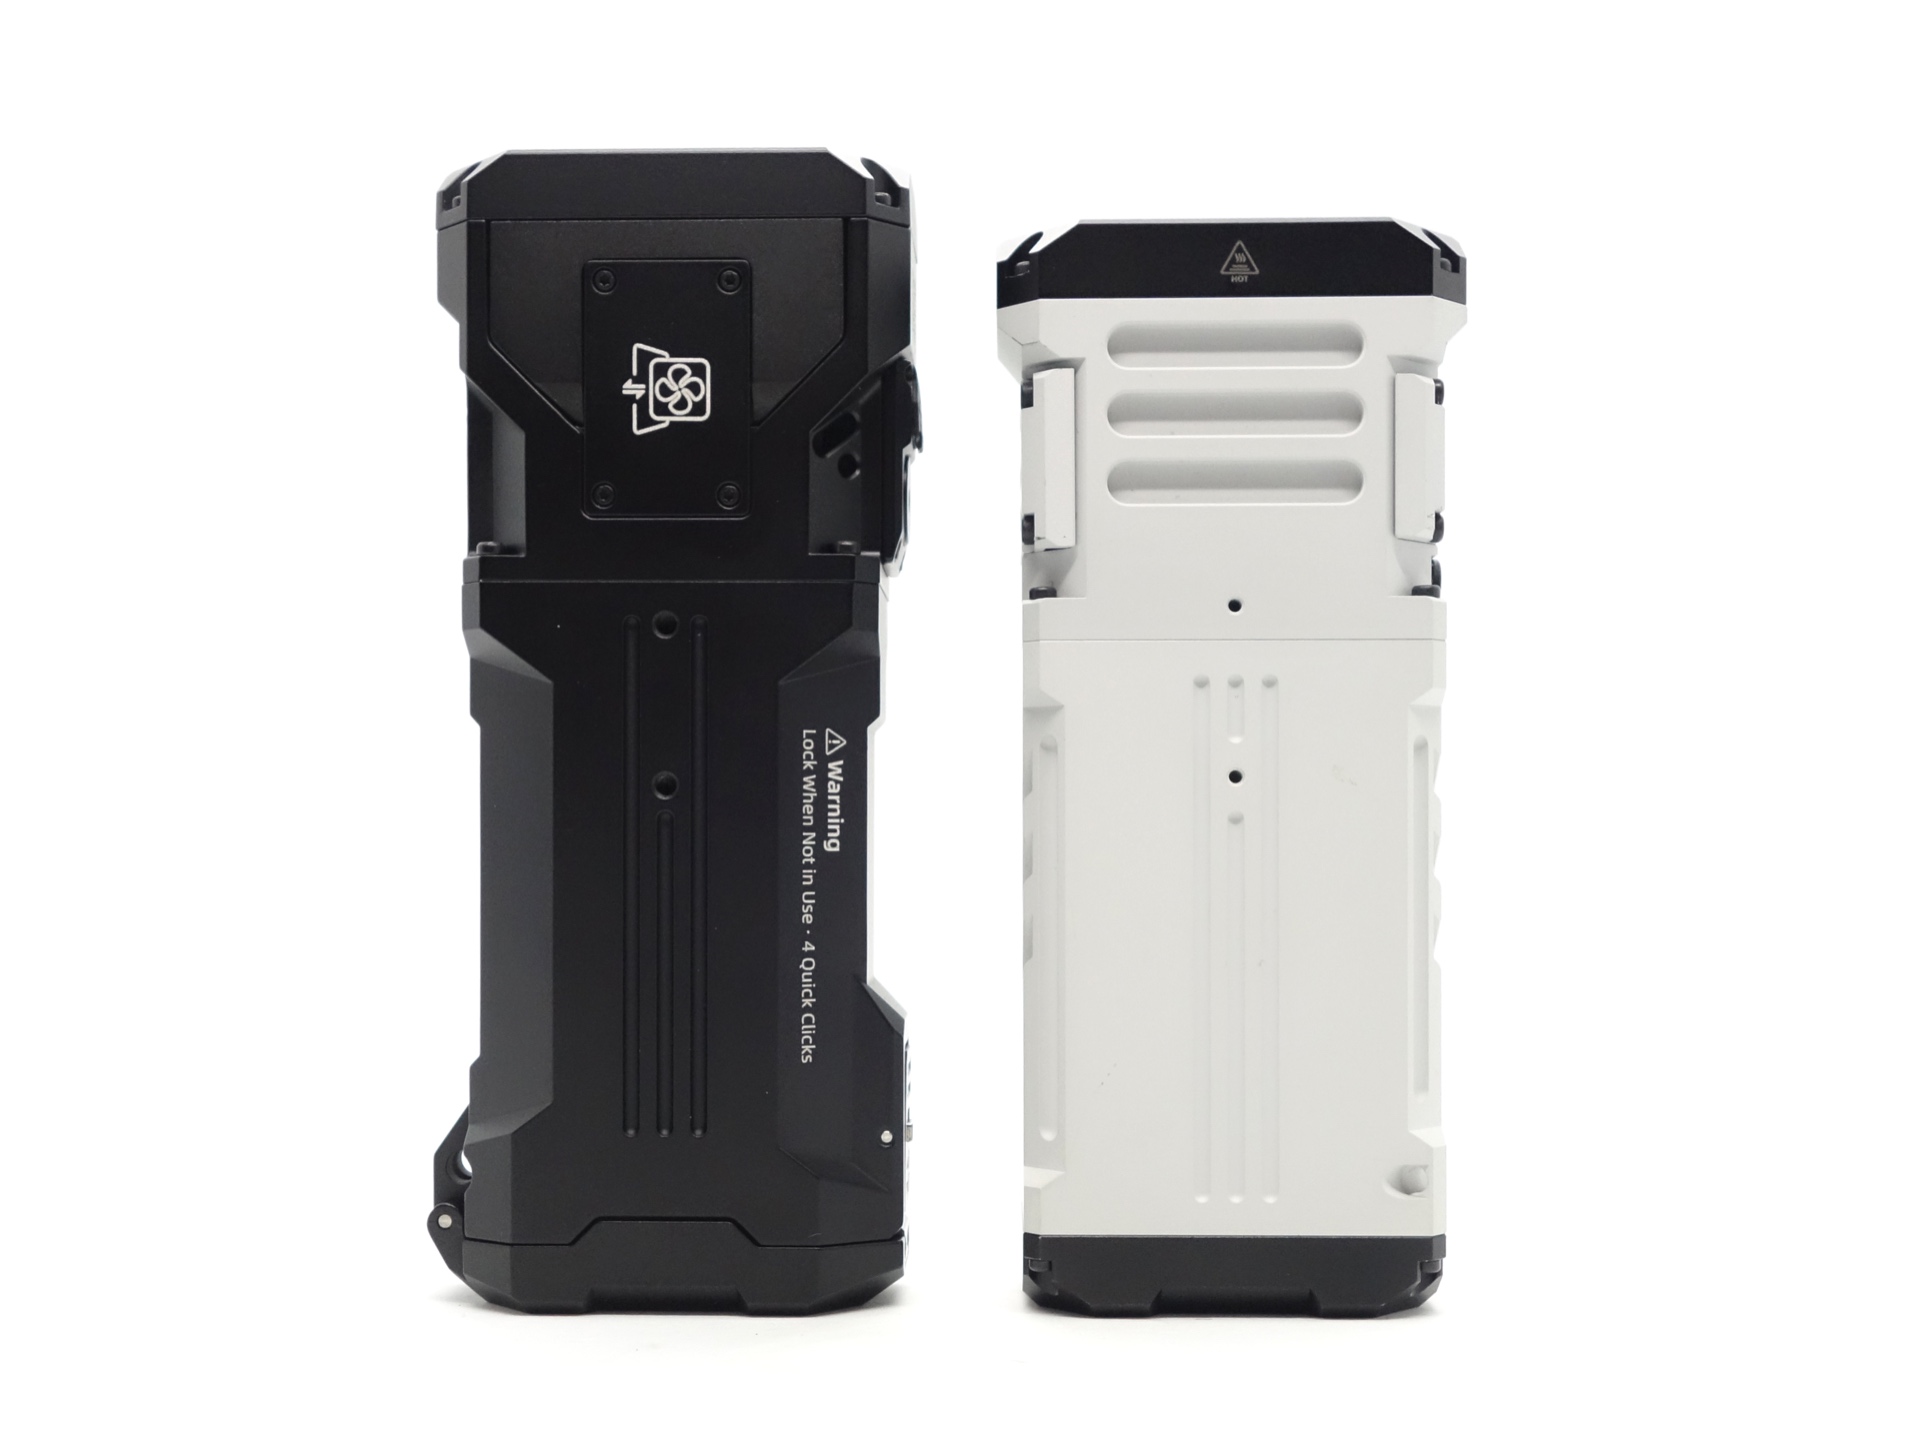
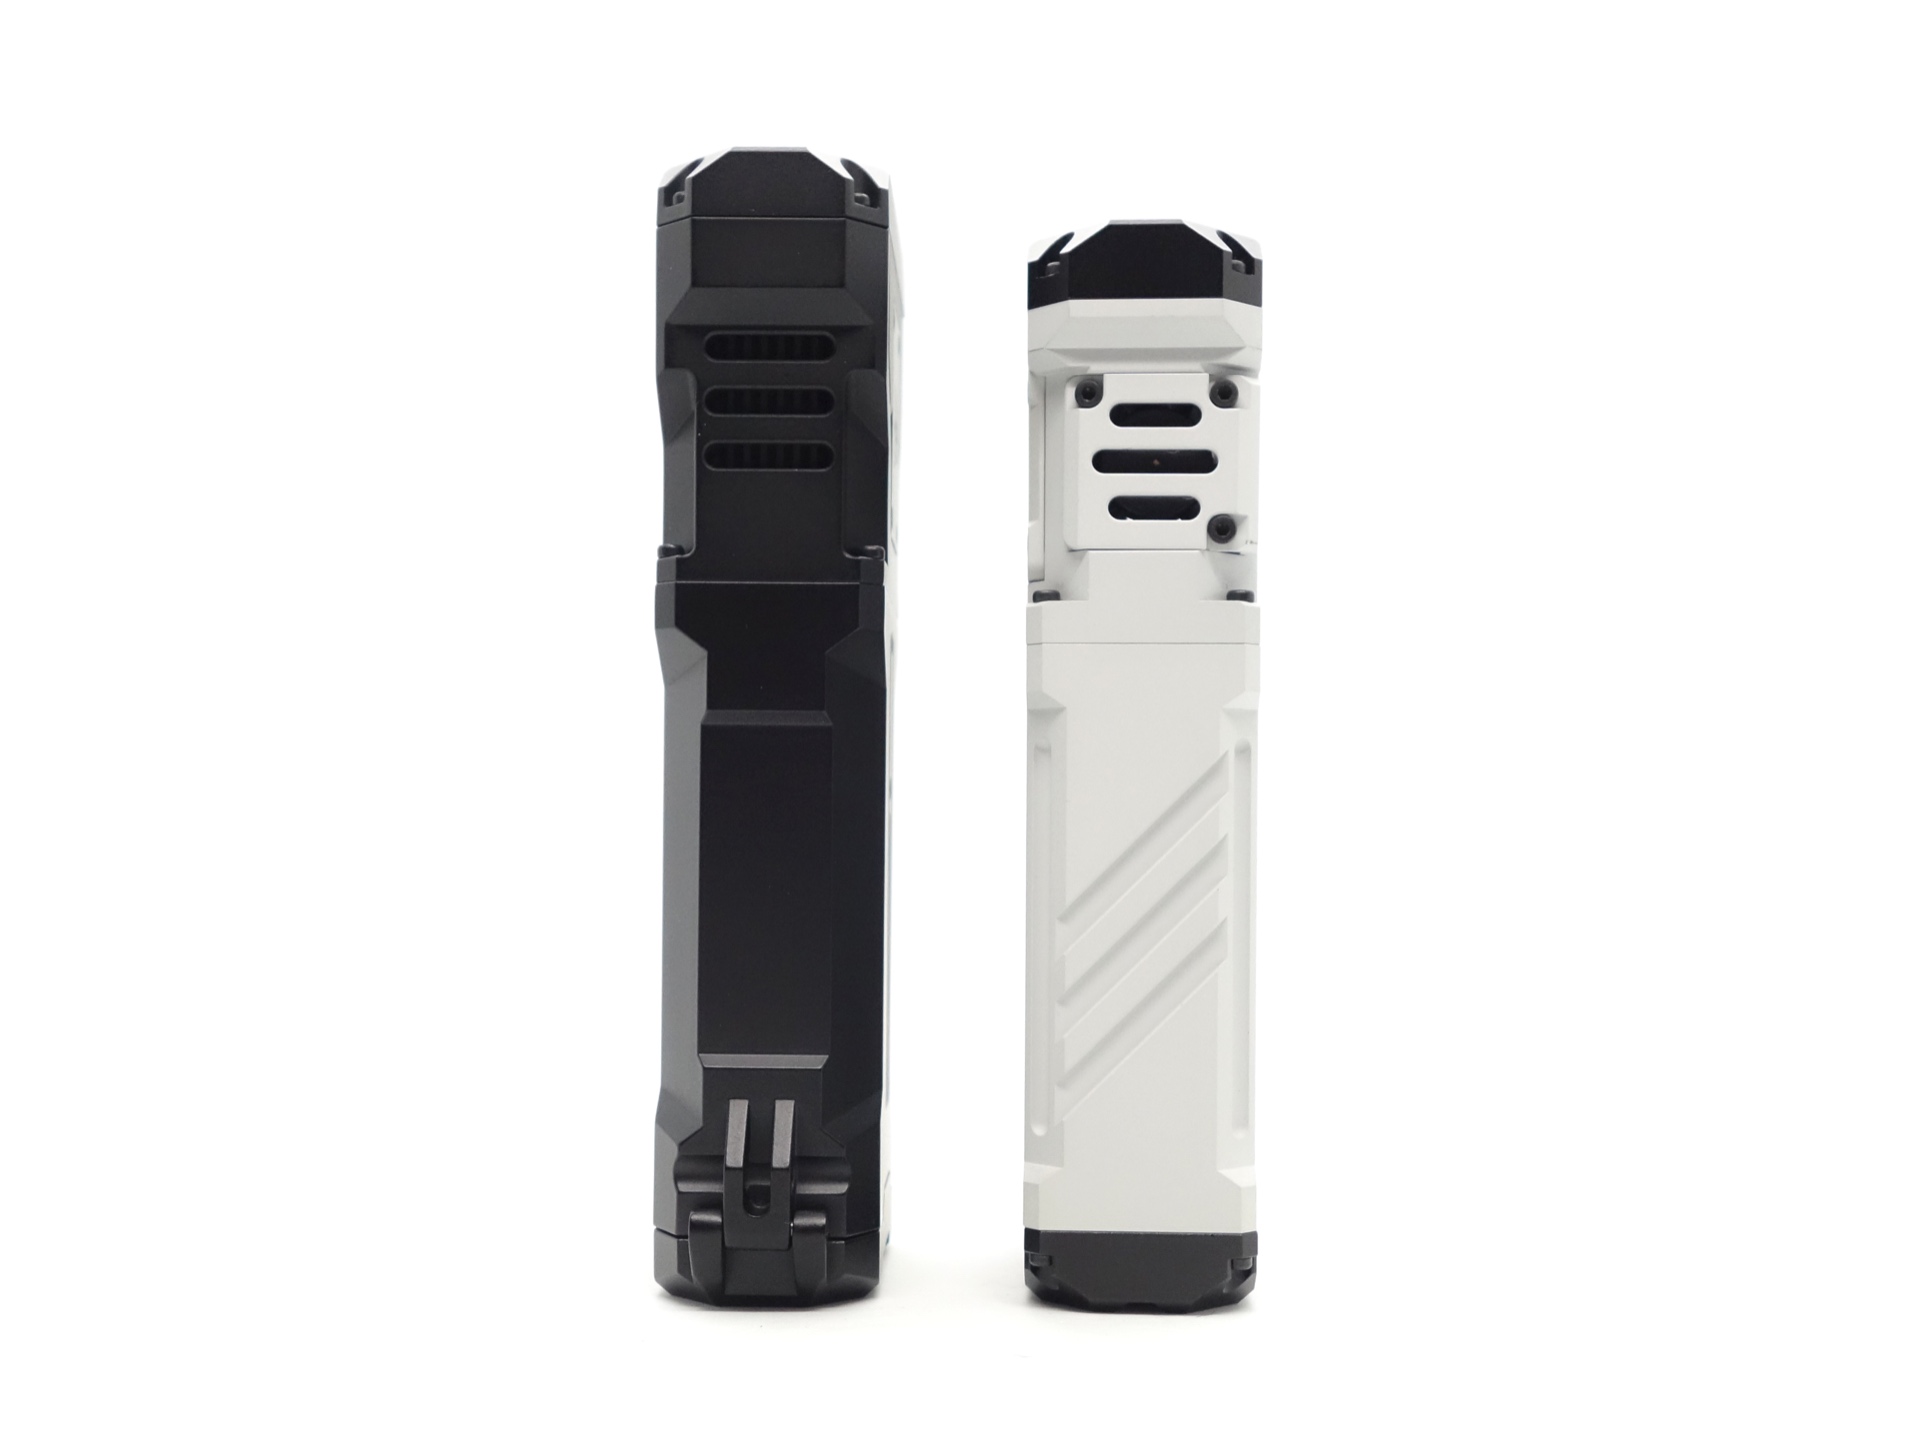
The torch can be actively cooled with a fan while sucking in air from the heatsink near the button and then by pushing air out near the heatsink on the other side.
The fan automatically turns on when the torch gets hot but it can be turned on manually too.
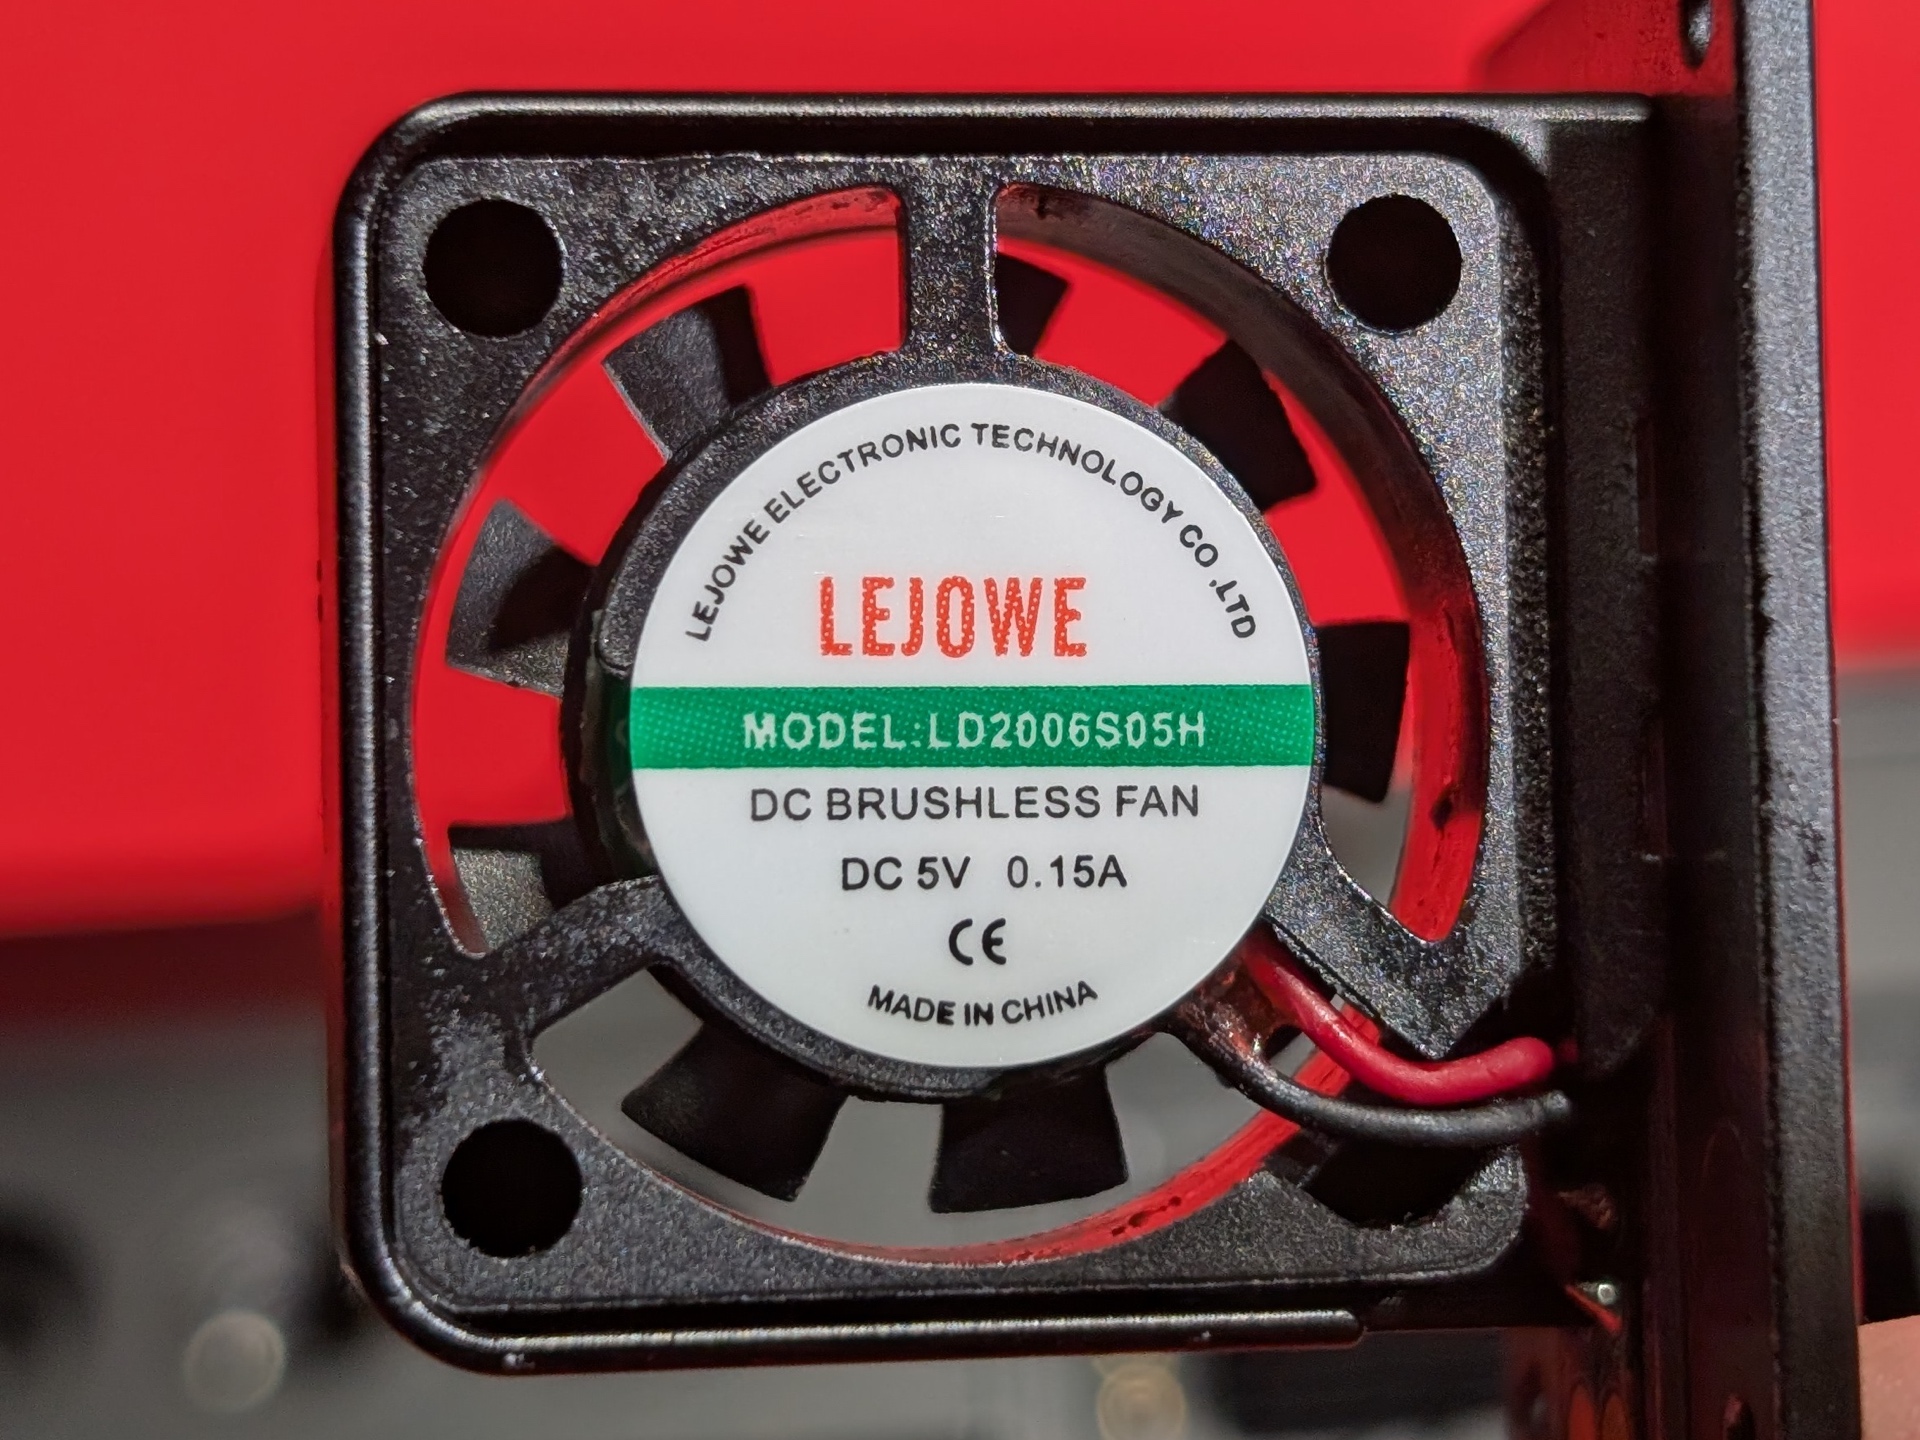
The fan can be removed by unscrewing four TX 5 screws.
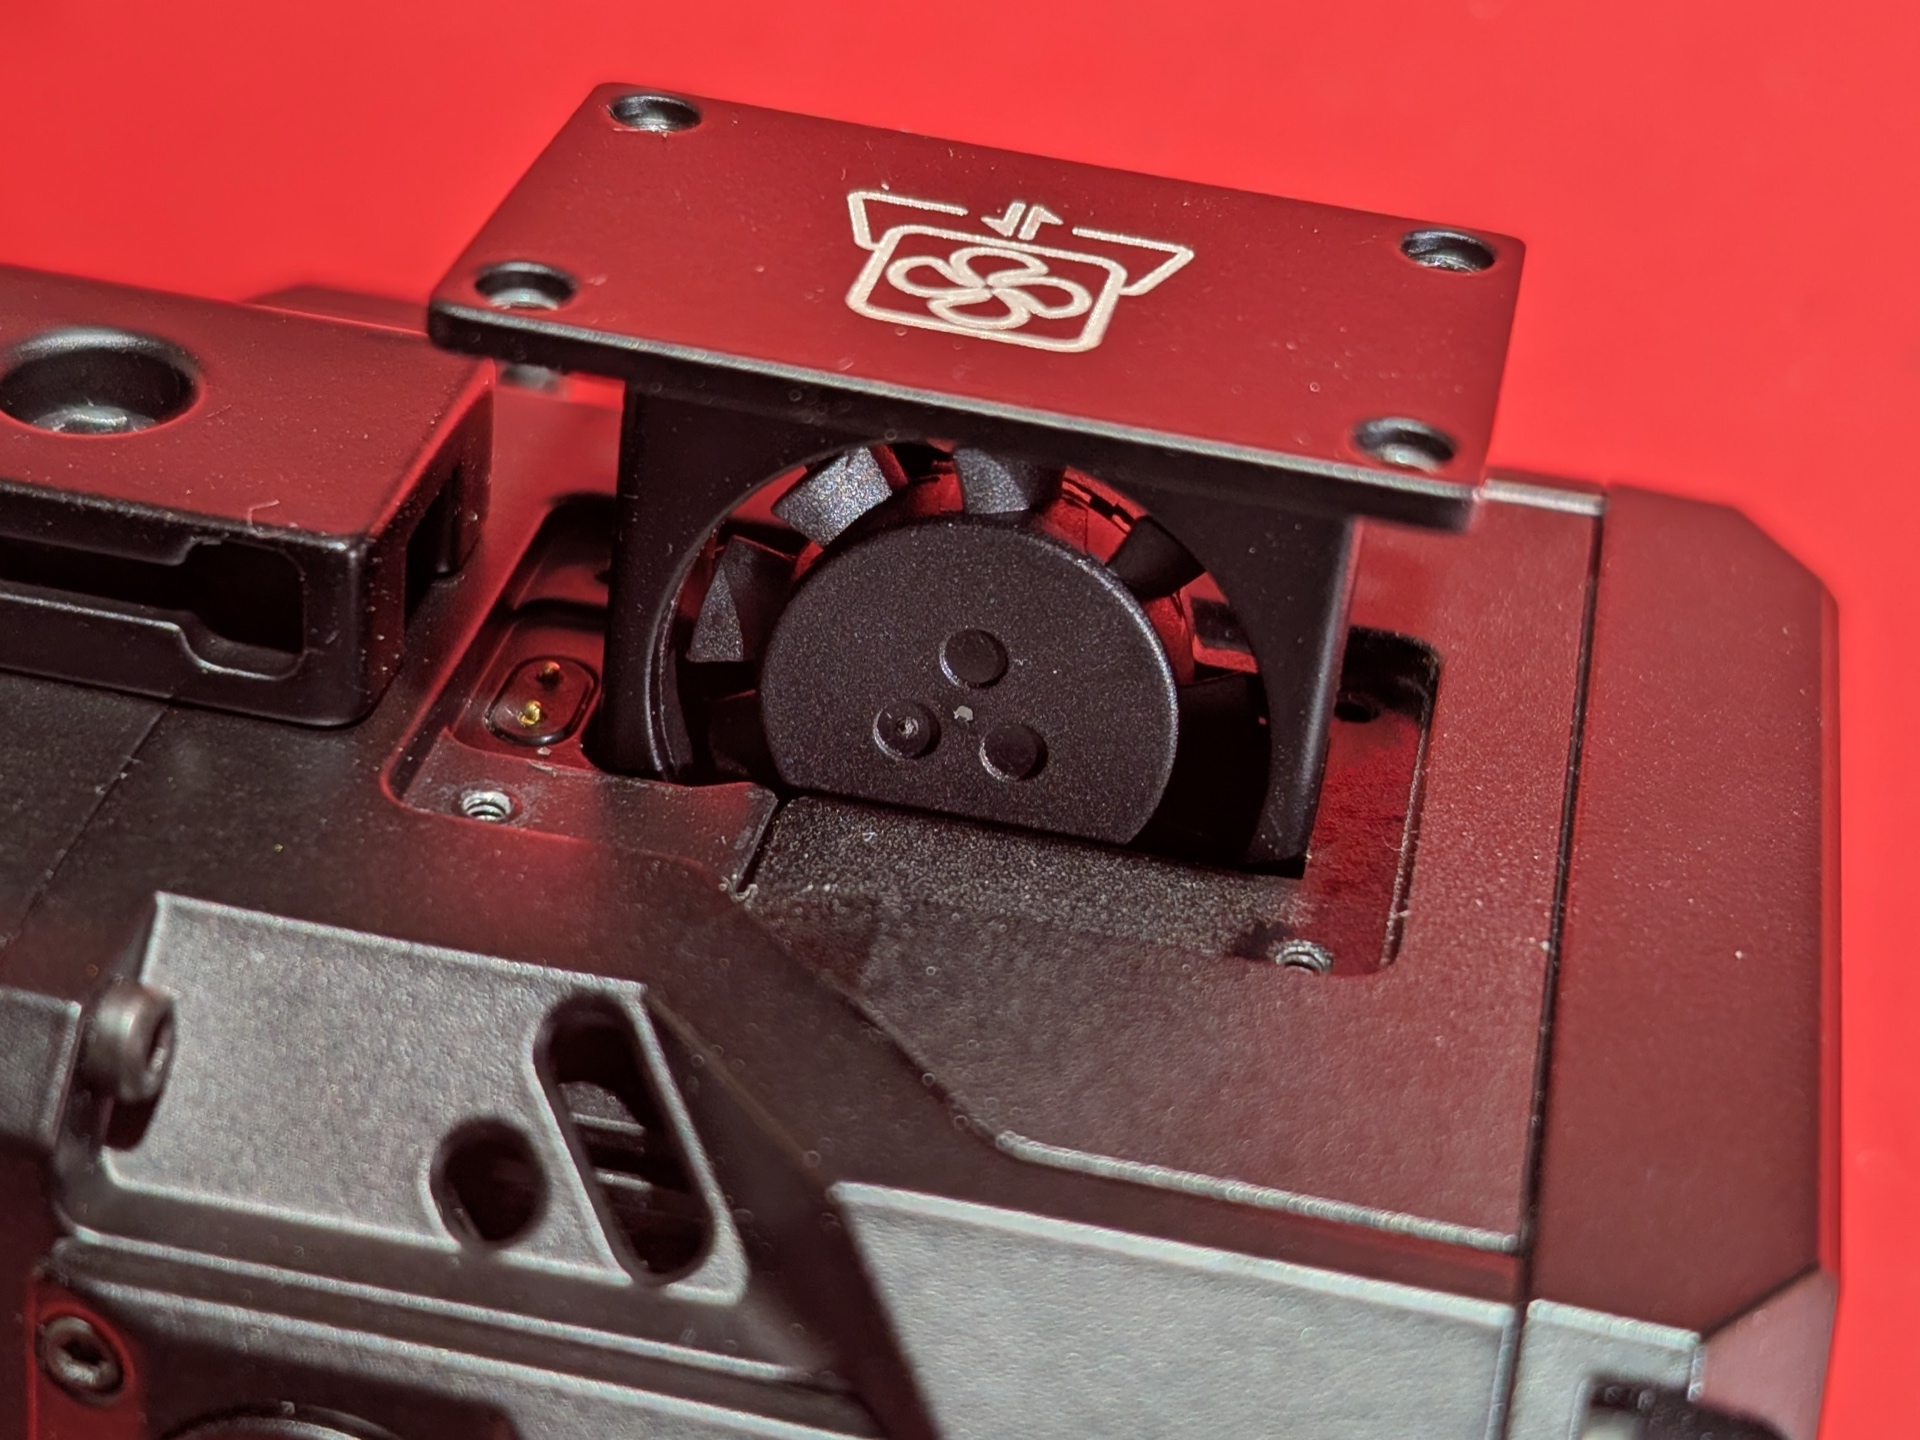
The fan is a LEJOWE LD2006S05H DC Brushless Fan DC 5V 0.15A.
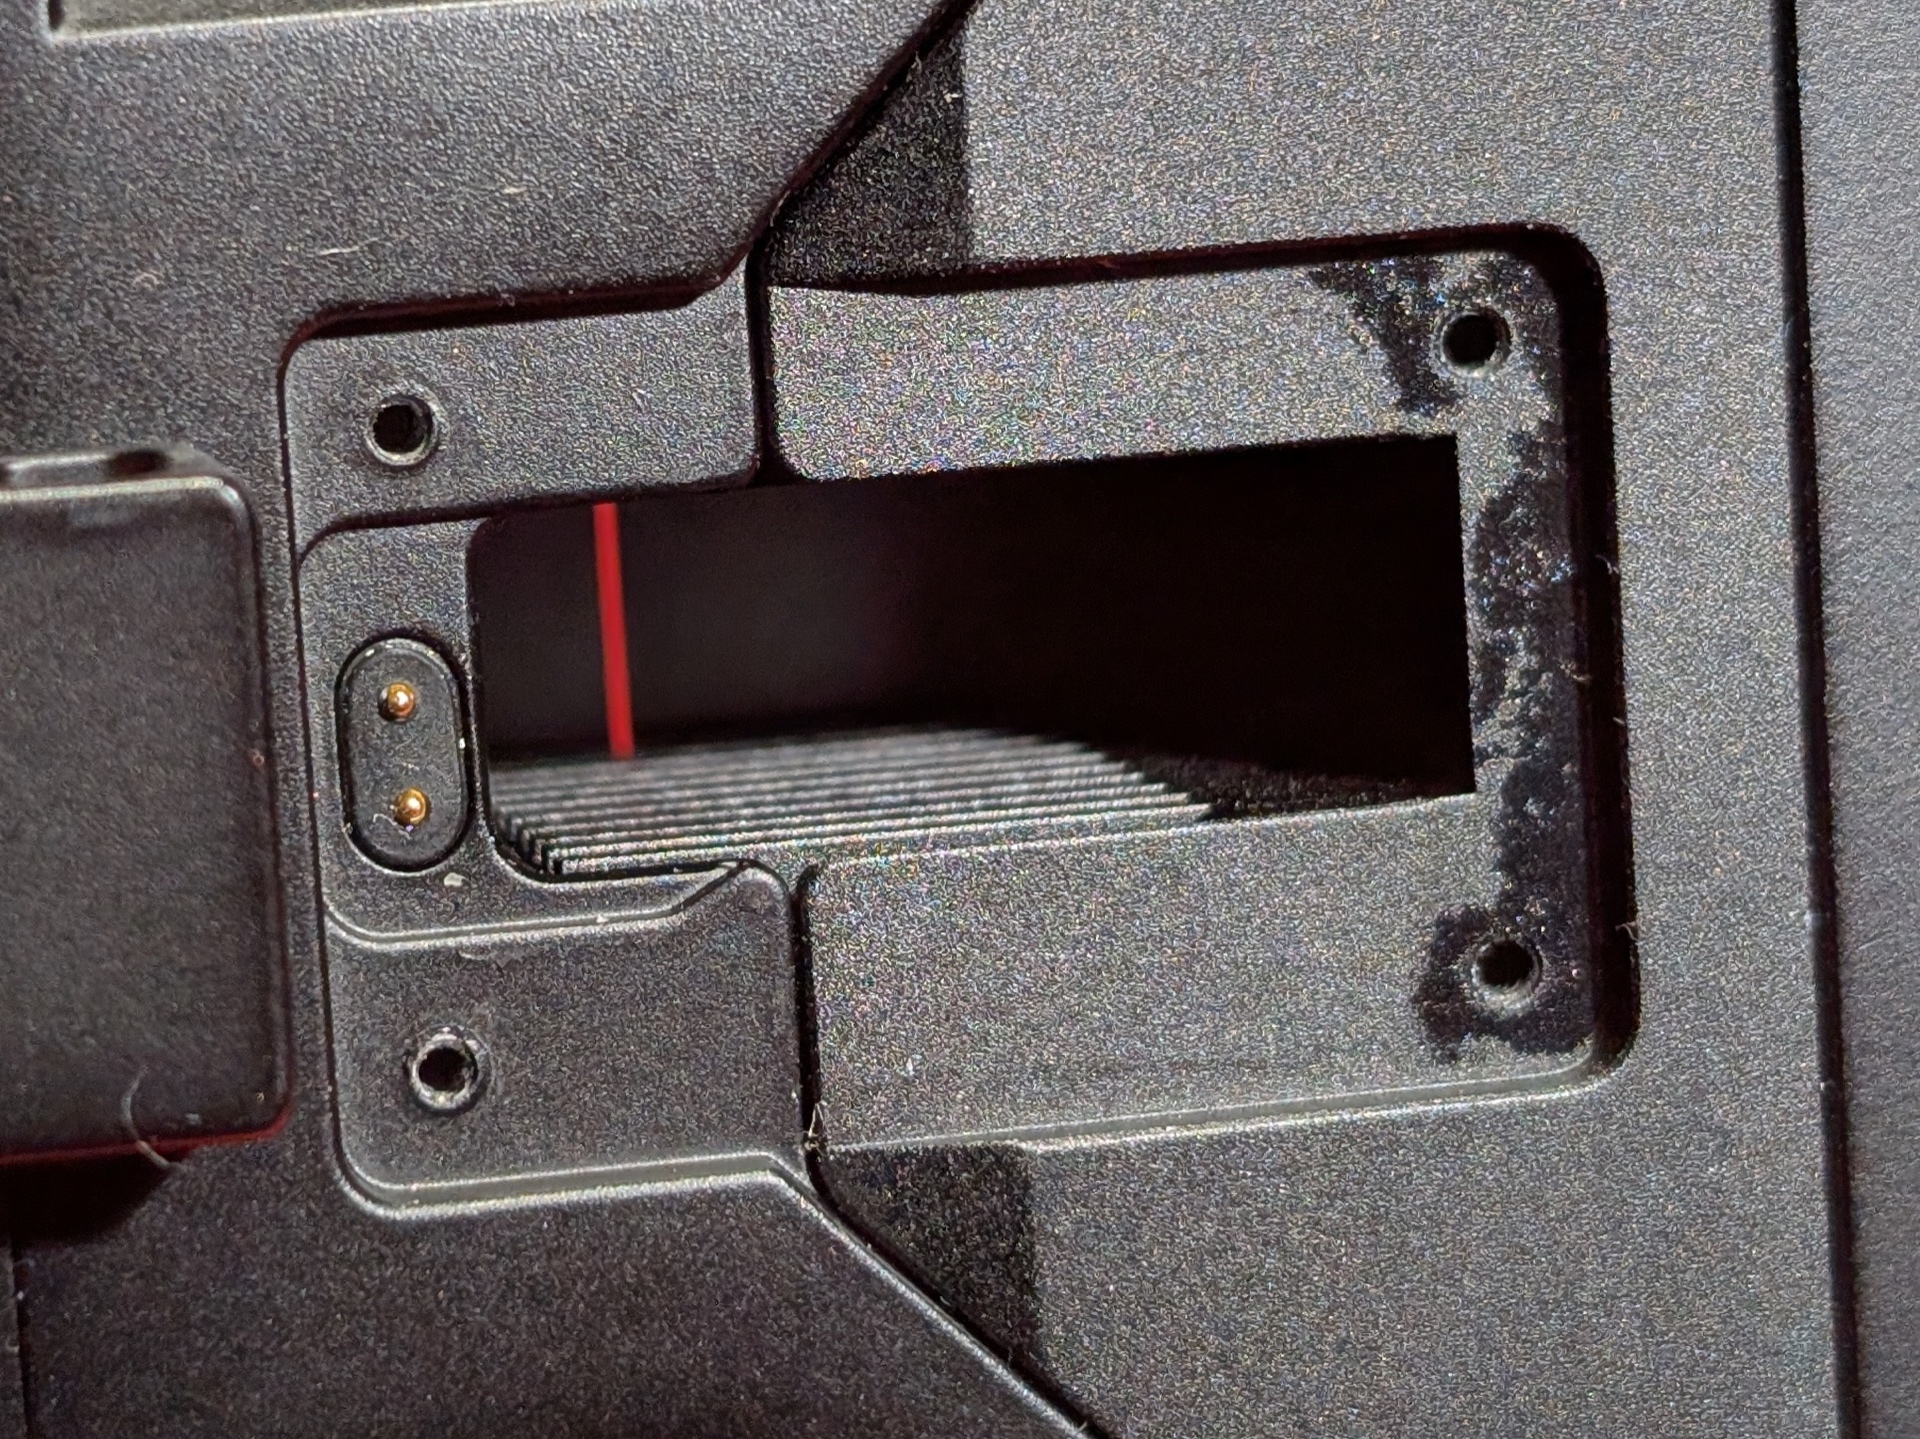
The springs and pads look like they form a solid connection.
There is physical reverse polarity protection but the driver does not have reverse polarity protection. I accidentally damaged the balancing circuit of the driver by putting 8.4V through the wrong way between the small notch on the tube and one of the terminals near the head.
That little notch is used to balance the cells. When it does not balance, one cell might start to discharge while the other charges. Luckily, the individual cells have low voltage protection and over voltage protection built-in.
The charging port cover feels like it might snap off.
The quick release lock is easy to use.
Drop test#
I performed a drop test and the torch surived!
I dropped the torch onto concrete from a height of one metre multiple times.
The silver sliding switch in the locking mechanism moved to the unlocked position each time the torch hit the ground. This could be a design flaw. That said, the battery compartment did not spring open.
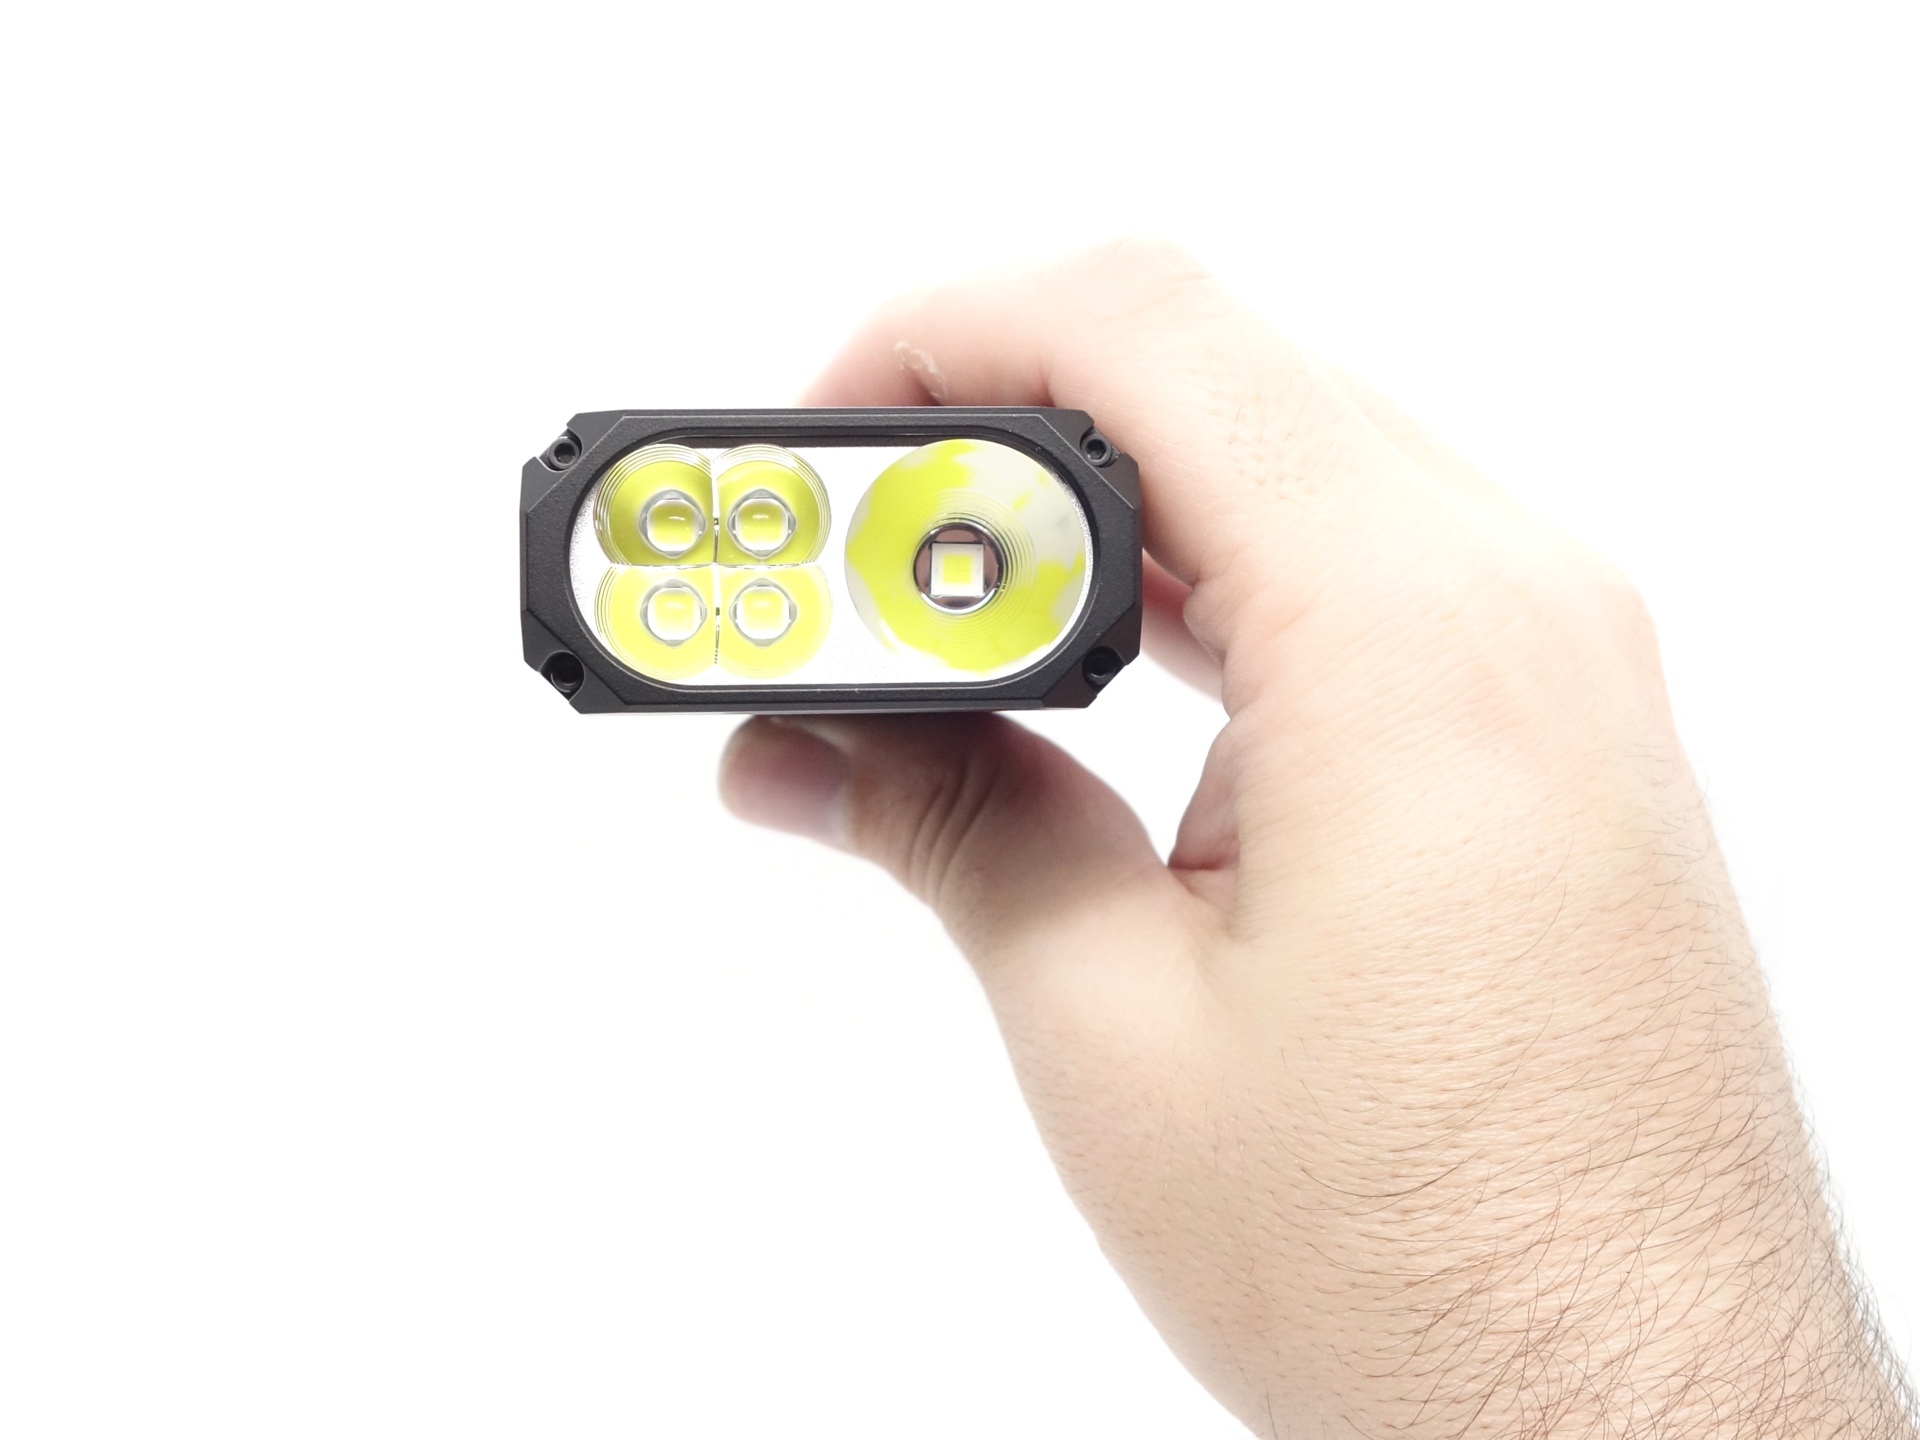
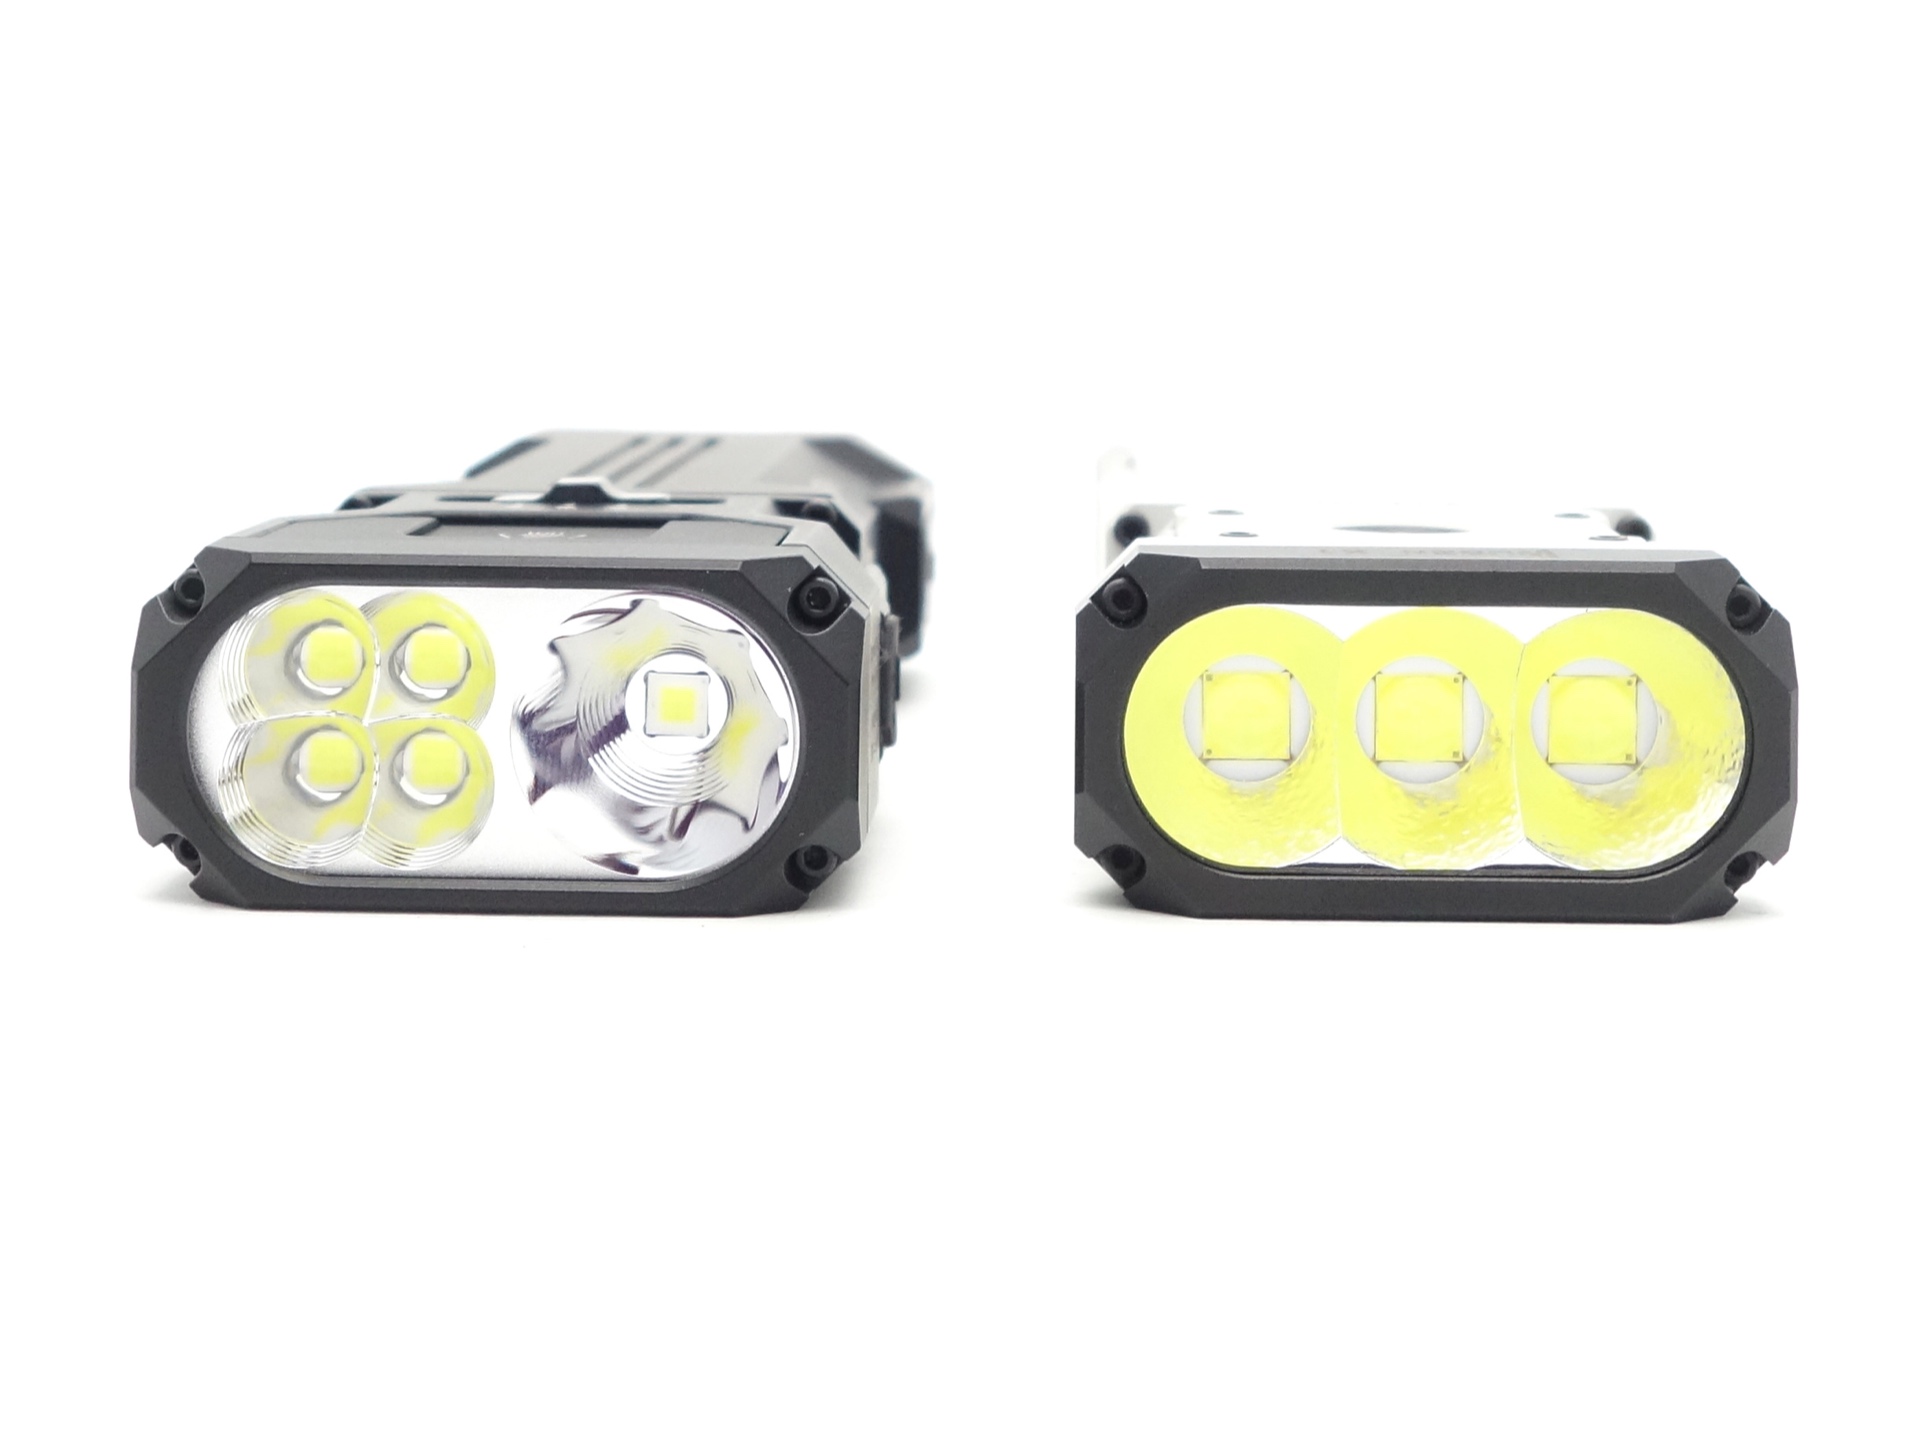
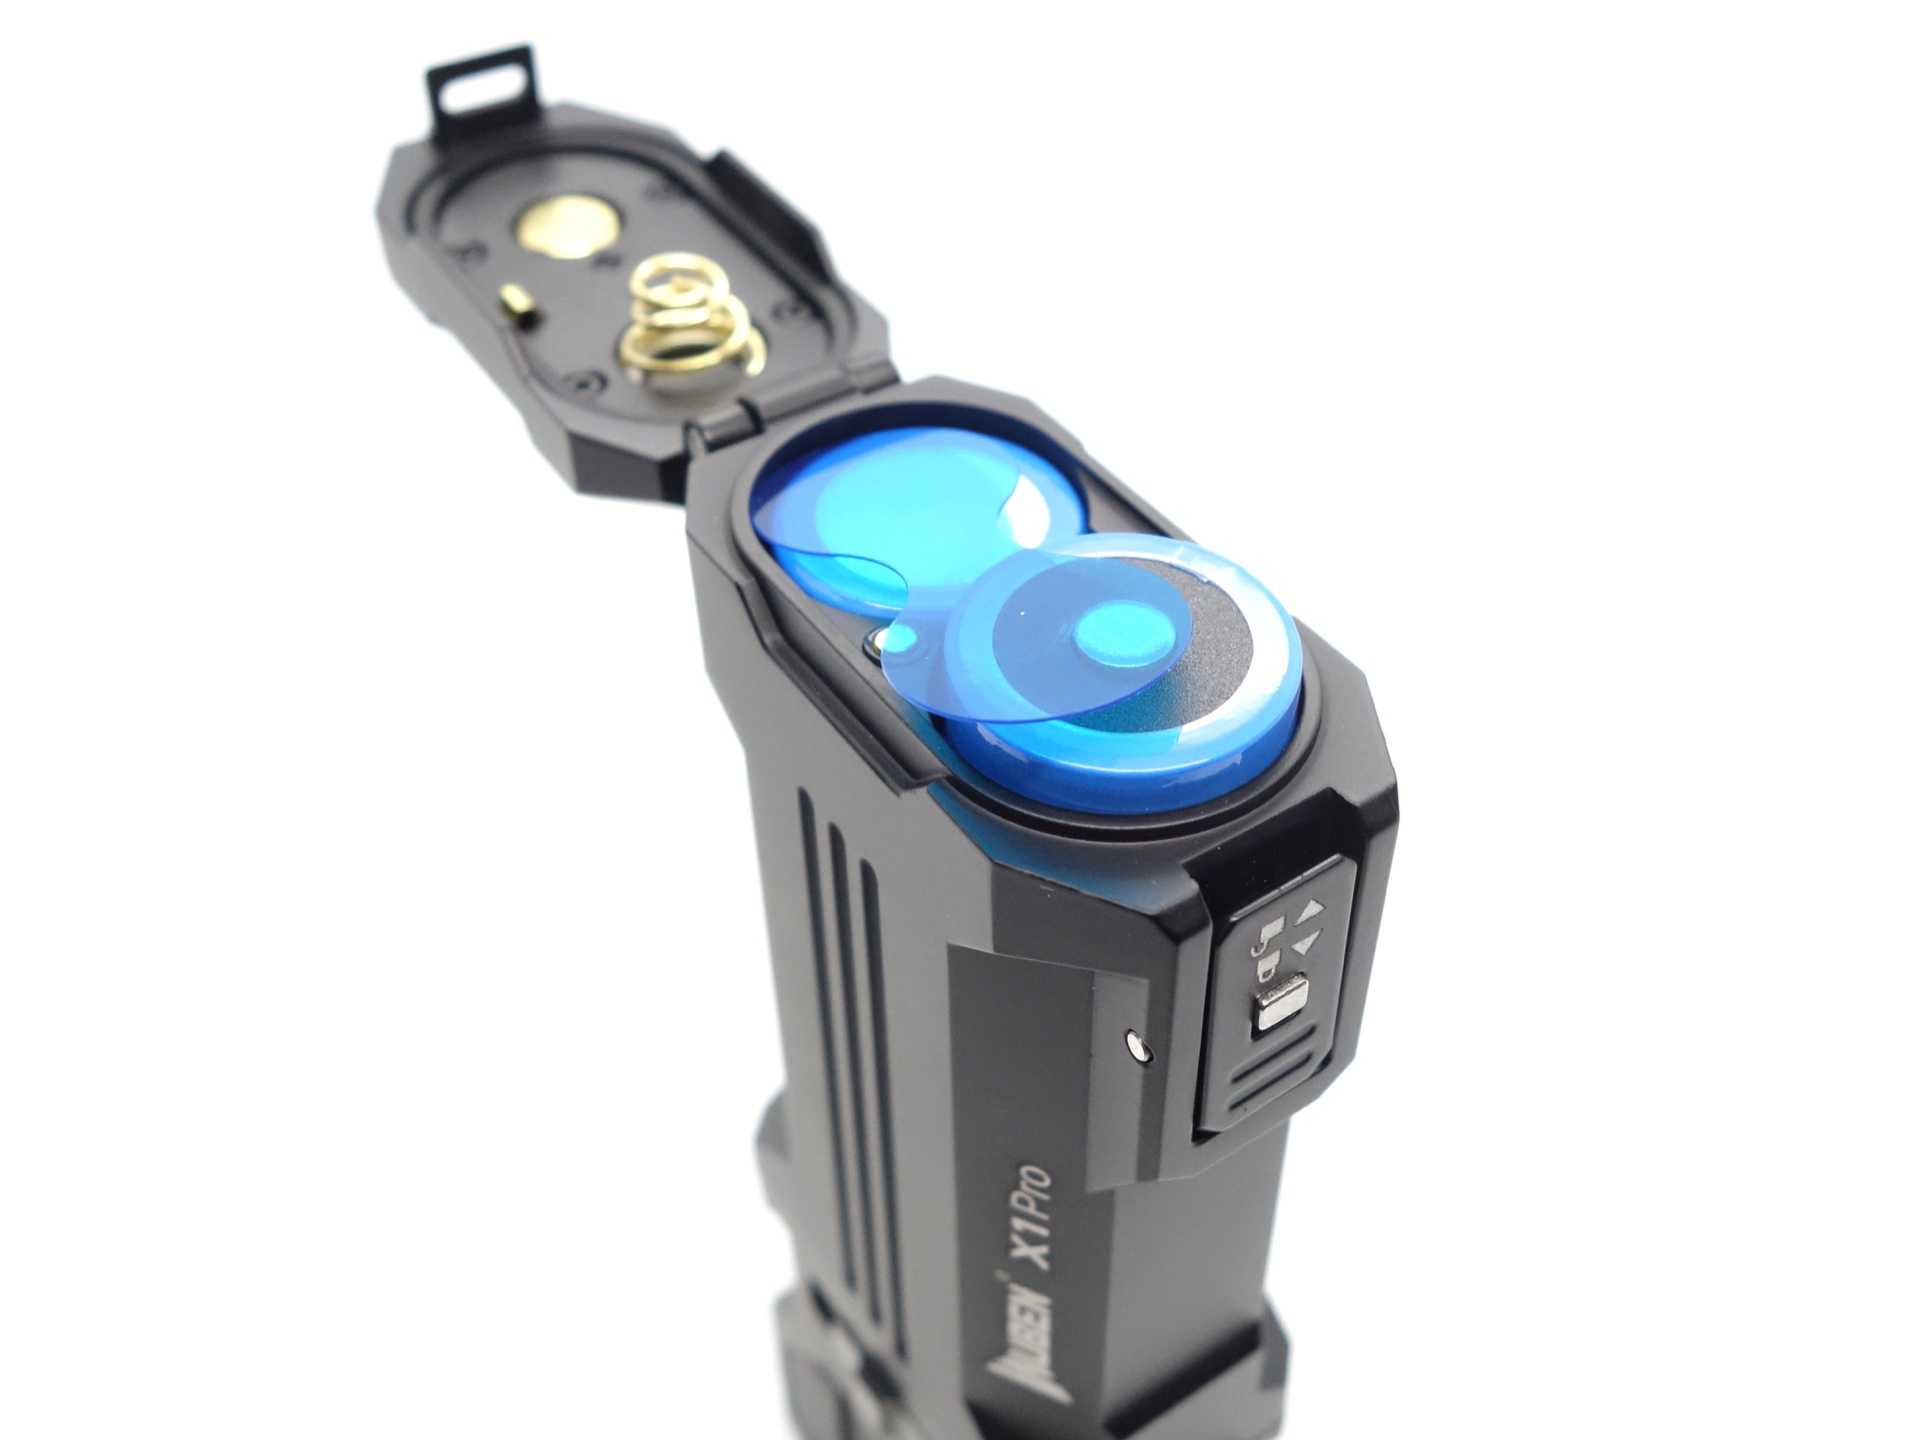
LED, bezel, lens and reflector#
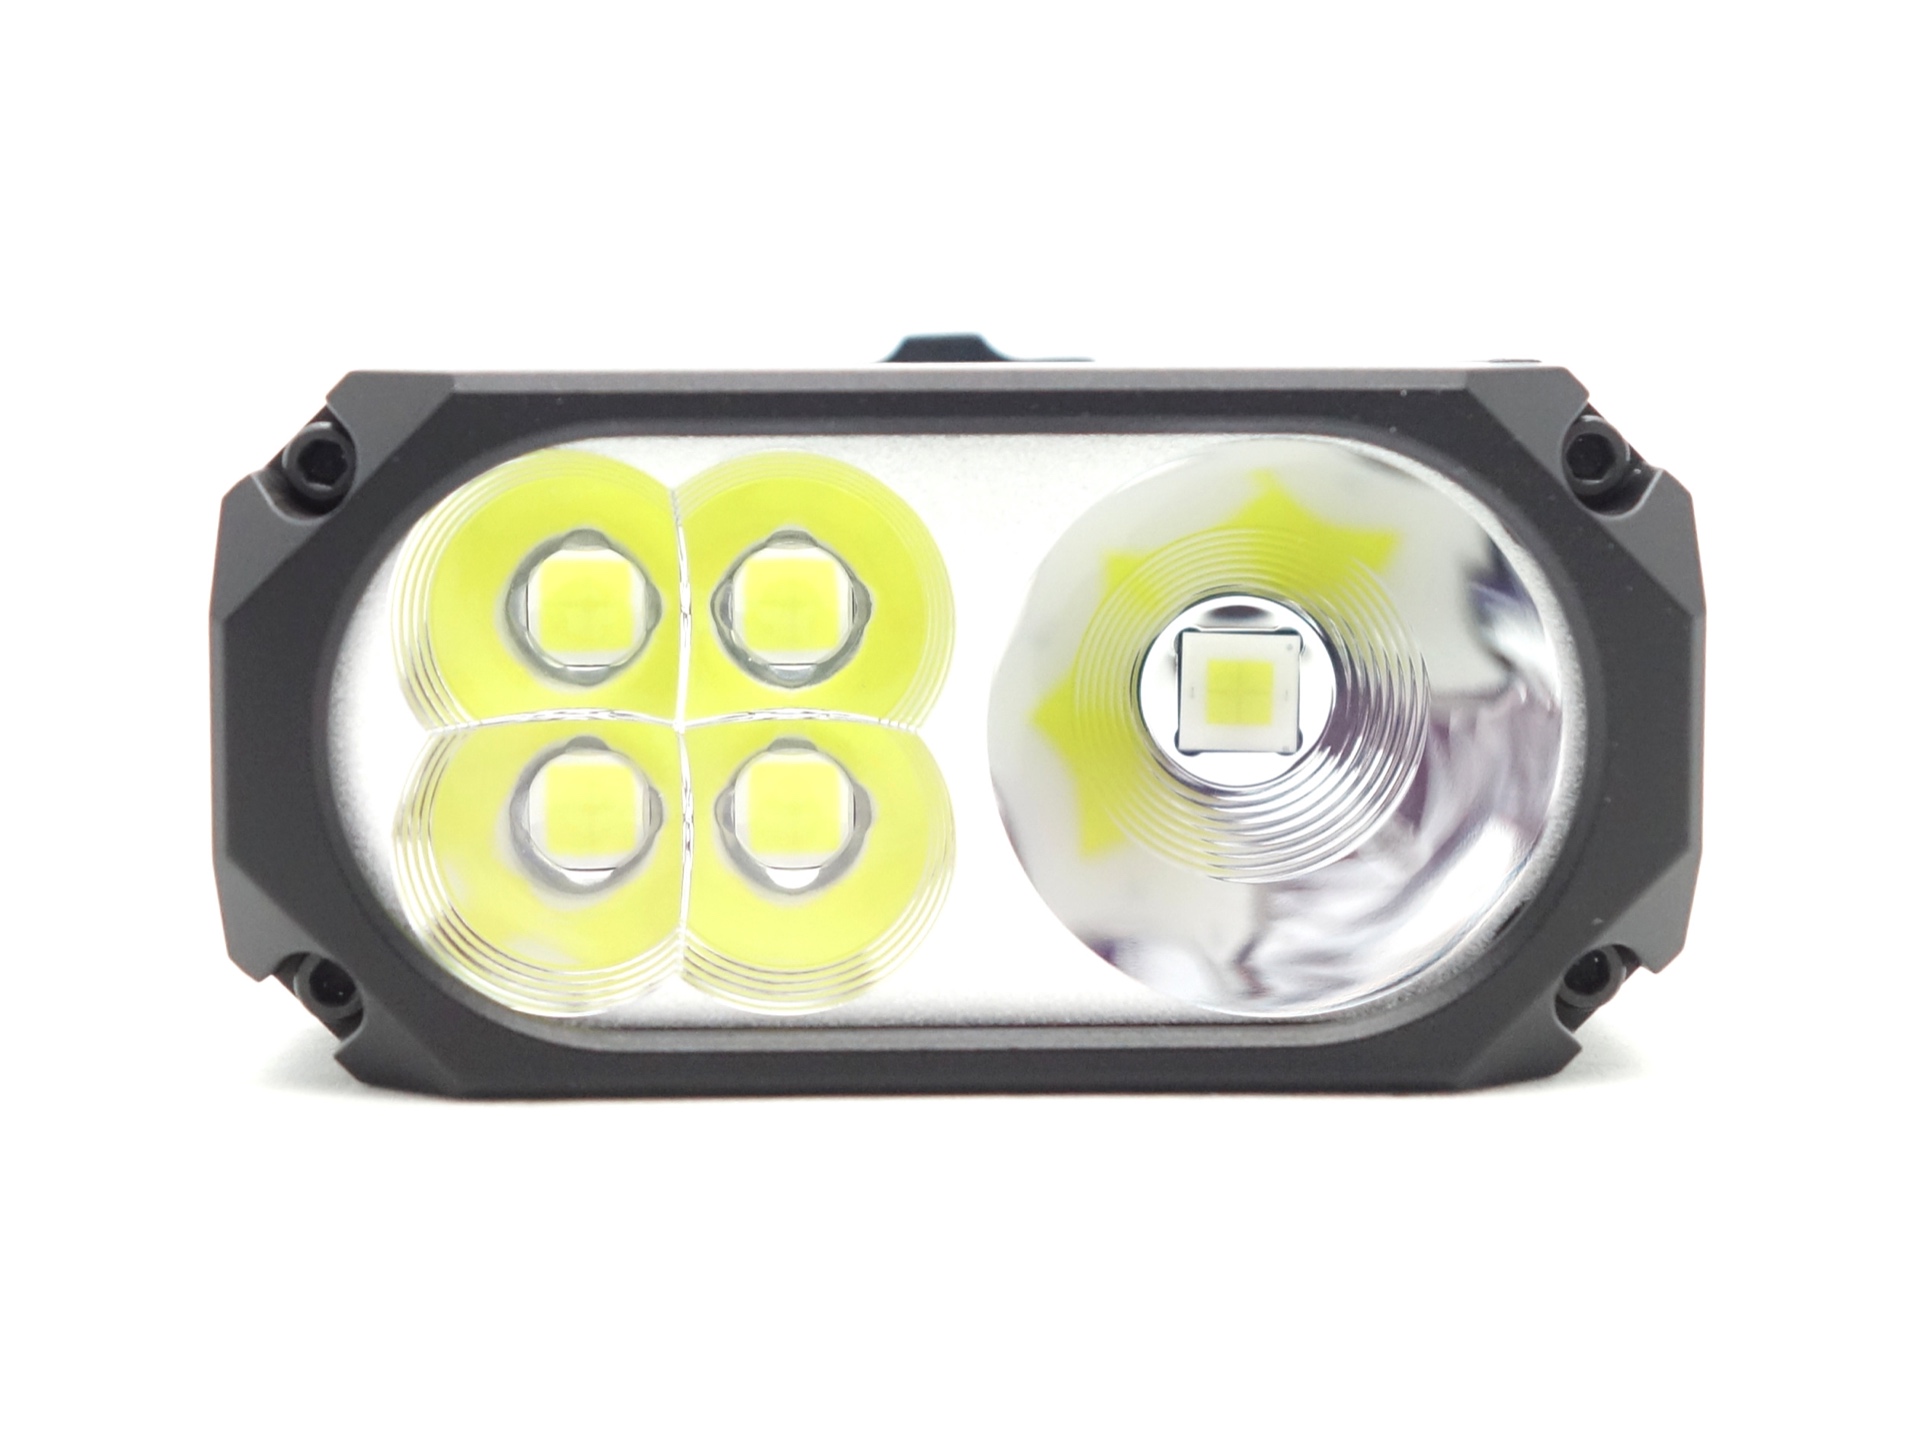
The Wuben X1 Pro has a domeless CREE XHP50.3 HI 6500K 70 CRI LED for the Spotlight and four domed CREE XHP50.3 HD LEDs for the Floodlight.
The glass lens appears to have an anti-reflective coating.
The Spotlight and the Floodlight both have mostly smooth reflectors. The reflector for the Spotlight has a wave pattern near the LED. And the reflector for the Floodlight has about five “waves” near the outer edge of the reflector.
CCT, CRI, and duv#
I have taken Correlated Colour Temperature (CCT) and Colour Rendering Index (CRI, RA of R1-R8) measurements with the torch positioned 1.42 metres away from an Opple Light Master Pro III (G3).
The CCT is around 6185K, the CRI is around 68 and the Delta u, v is slightly positive (green) for the Spotlight.
The beam produced by the Spotlight has an intense white hotspot surrounded by a green corona and a medium sized spill. The spill is not aa perfect circle. The bezel blocks the top and the bottom of the spill.
The CCT is around 5680K, the CRI is around 67 and the Delta u, v is positive (green) for the Floodlight.
The beam produced by the Floodlight looks like a plus symbol with an intense white hotspot in the middle. The plus symbol can be observed on a white wall when holding the torch up it in on the lowest mode. The beam looks floody on higher modes when using the torch normally.
The CCT is around 7600K, the CRI is around 57 and the Delta u, v is positive (green) when both the Spotlight and the Floodlight are on Turbo at the same time.
The hotspots for the Spotlight and the Floodlight line up nicely when both are turned on.
Spotlight#
| Mode | CCT (K) | CRI (Ra) | x | y | Duv |
|---|---|---|---|---|---|
| Eco | 5836 | 66.8 | 0.3245 | 0.3507 | 0.0084 |
| Low | 5956 | 67.7 | 0.3221 | 0.3458 | 0.0071 |
| Medium | 6067 | 68.2 | 0.3200 | 0.3418 | 0.0061 |
| High | 6306 | 69.1 | 0.3158 | 0.3342 | 0.0043 |
| Turbo | 6760 | 70.8 | 0.3092 | 0.3225 | 0.0016 |
Floodlight#
| Mode | CCT (K) | CRI (Ra) | x | y | Duv |
|---|---|---|---|---|---|
| Eco | 5671 | 67.8 | 0.3282 | 0.3606 | 0.0115 |
| Low | 5574 | 66.3 | 0.3306 | 0.3596 | 0.0100 |
| Medium | 5606 | 66.6 | 0.3298 | 0.3583 | 0.0097 |
| High | 5673 | 67.0 | 0.3282 | 0.3553 | 0.0090 |
| Turbo | 5880 | 68.6 | 0.3238 | 0.3459 | 0.0064 |
Both#
| Mode | CCT (K) | CRI (Ra) | x | y | Duv |
|---|---|---|---|---|---|
| Eco | 5813 | 67.2 | 0.3251 | 0.3507 | 0.0081 |
| Low | 5939 | 67.8 | 0.3224 | 0.3463 | 0.0072 |
| Medium | 6025 | 68.2 | 0.3208 | 0.3431 | 0.0064 |
| High | 6193 | 68.9 | 0.3177 | 0.3374 | 0.0050 |
| Turbo | 7601 | 57.7 | 0.2921 | 0.3353 | 0.0170 |
Calculate Duv from CIE 1931 xy coordinates
Dimensions and size comparison#
Dimensions#
I took the following measurements using a digital caliper.
| Measurement | Unit (mm) |
|---|---|
| Length | 138.3 |
| Width | 57.65 |
| Height | 29.6 |
Weight#
I took the following measurements using a digital scale.
| Weight | Unit (g) |
|---|---|
| Wuben X1 Pro | 231.63 |
| Batteries | 140.50 |
| Wuben X1 Pro | 372.13 |
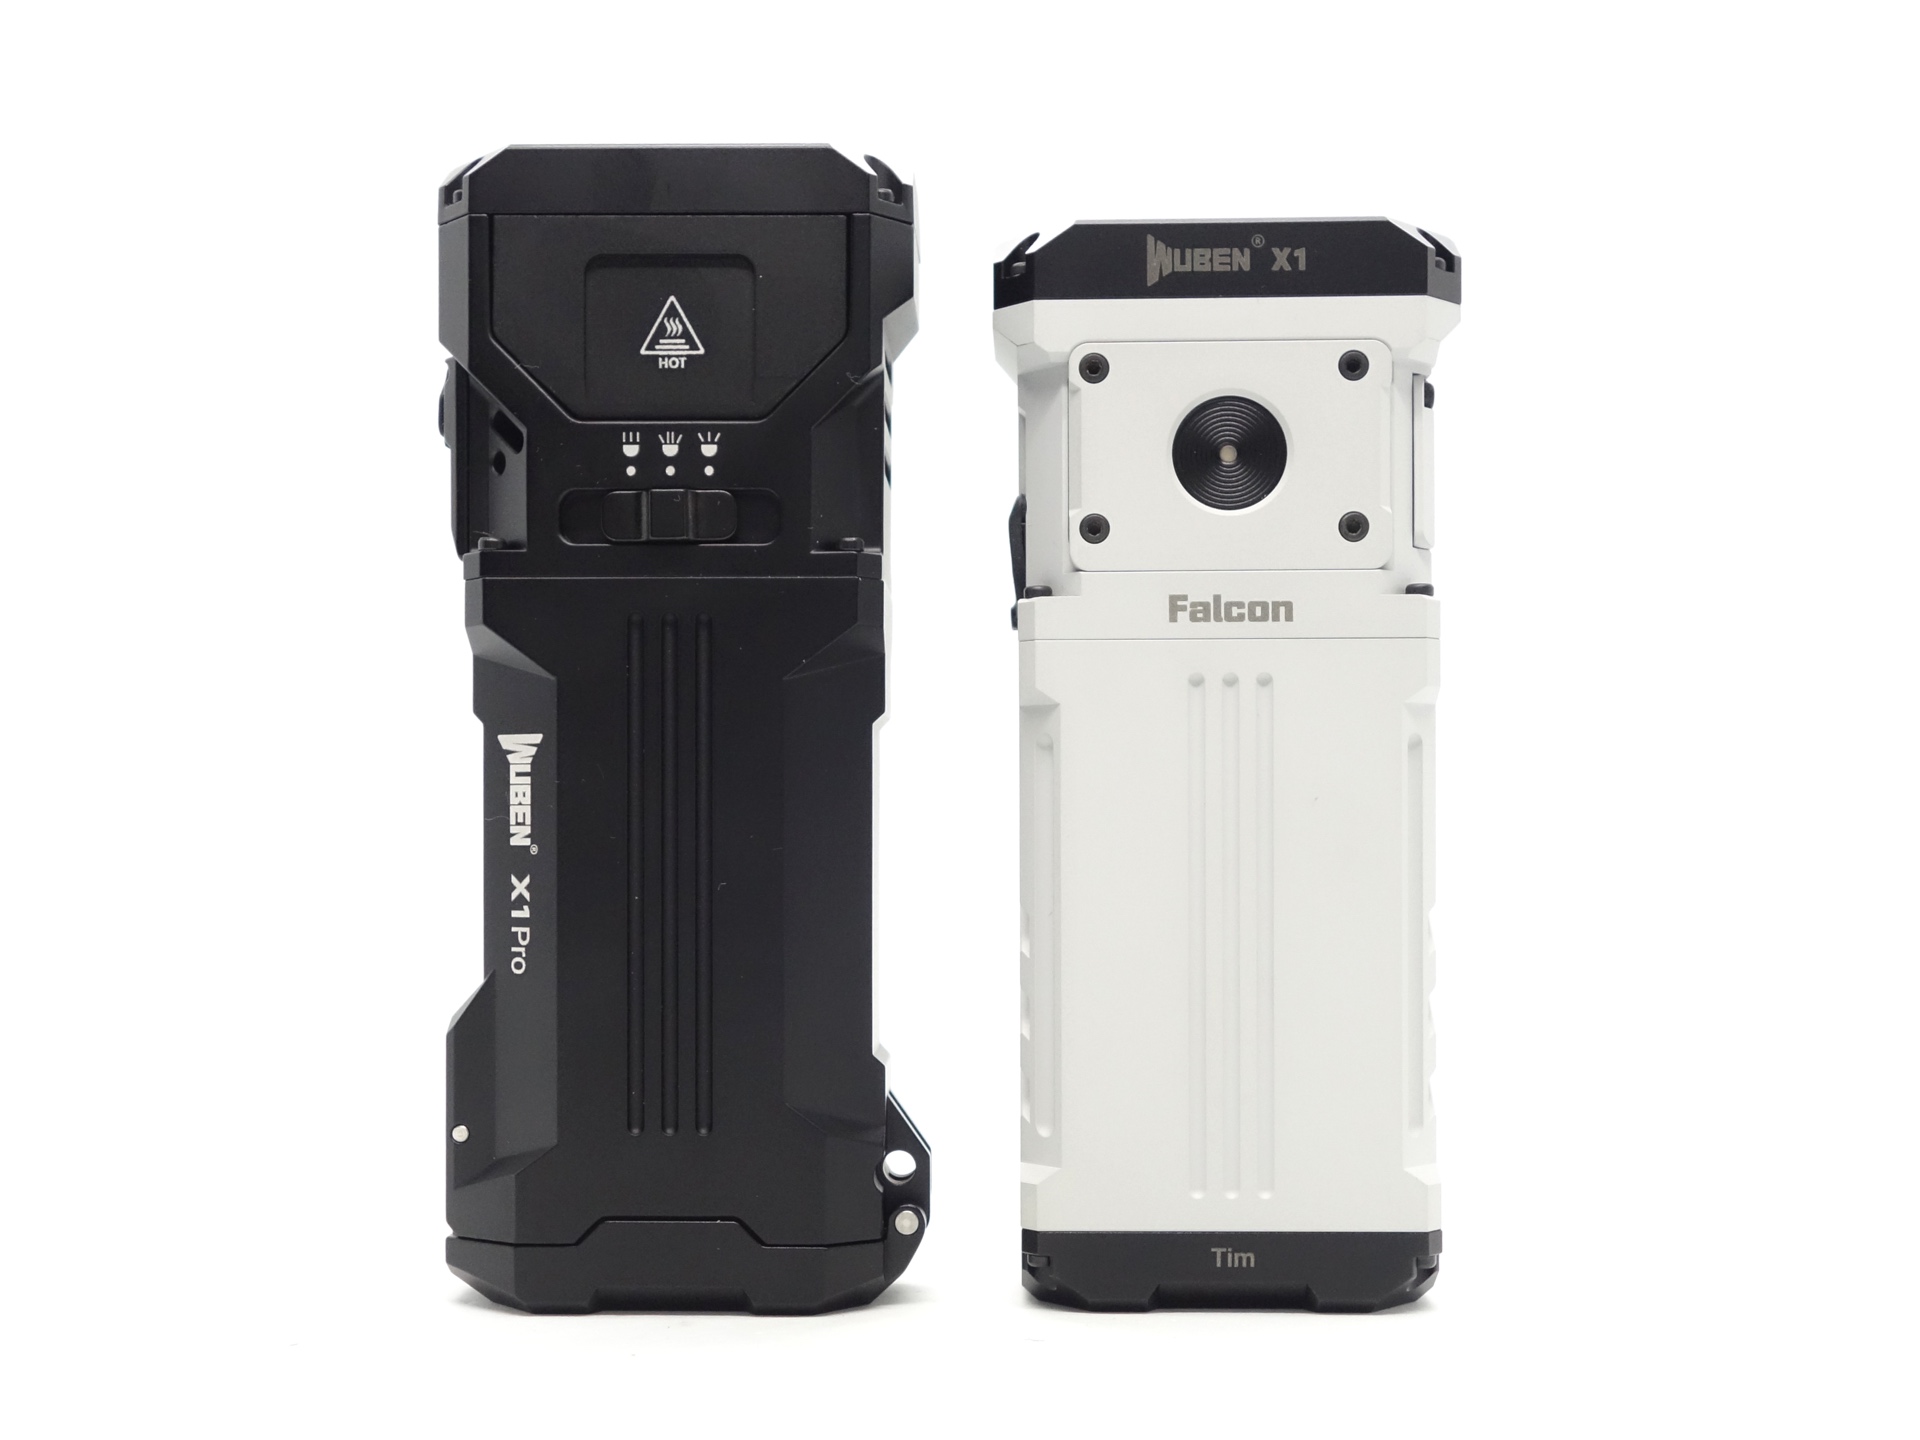
Size comparison with its competition#
From left to right: Wuben X1 Pro, Wuben X1
User interface#
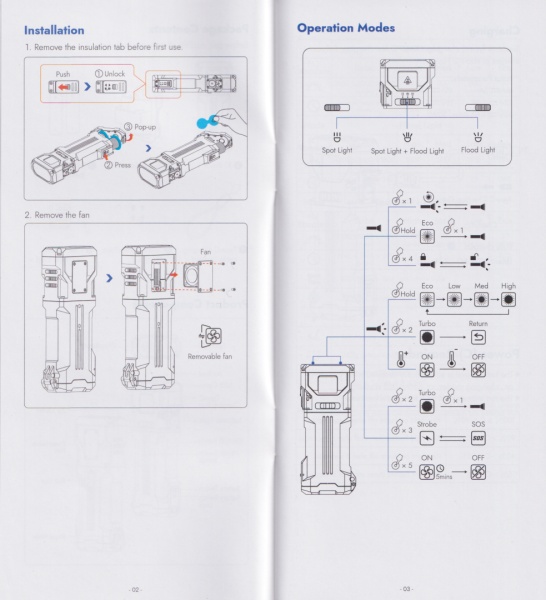
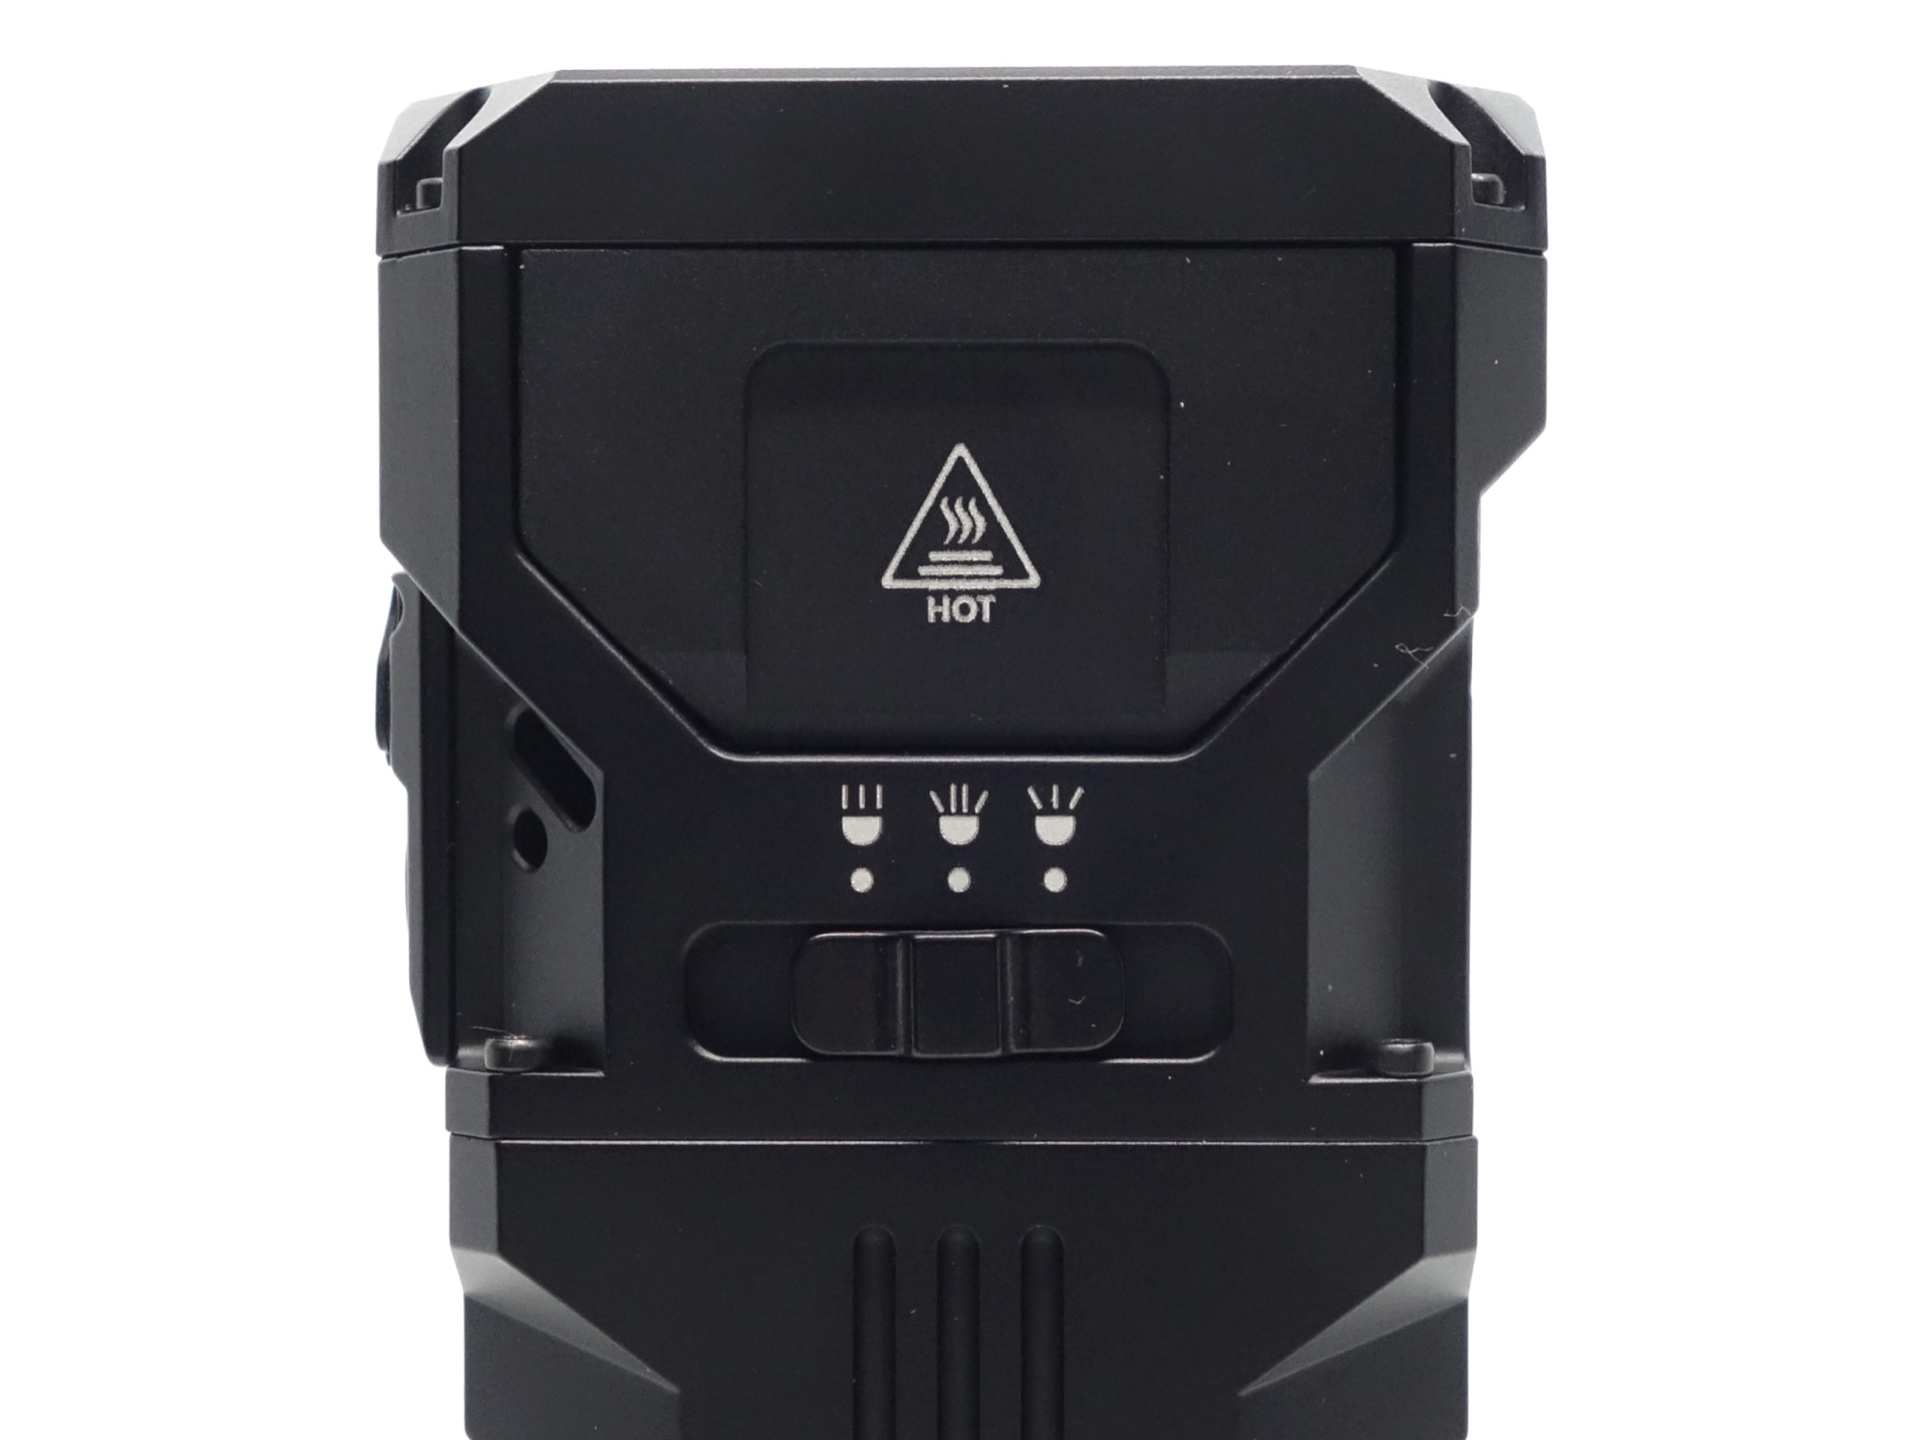
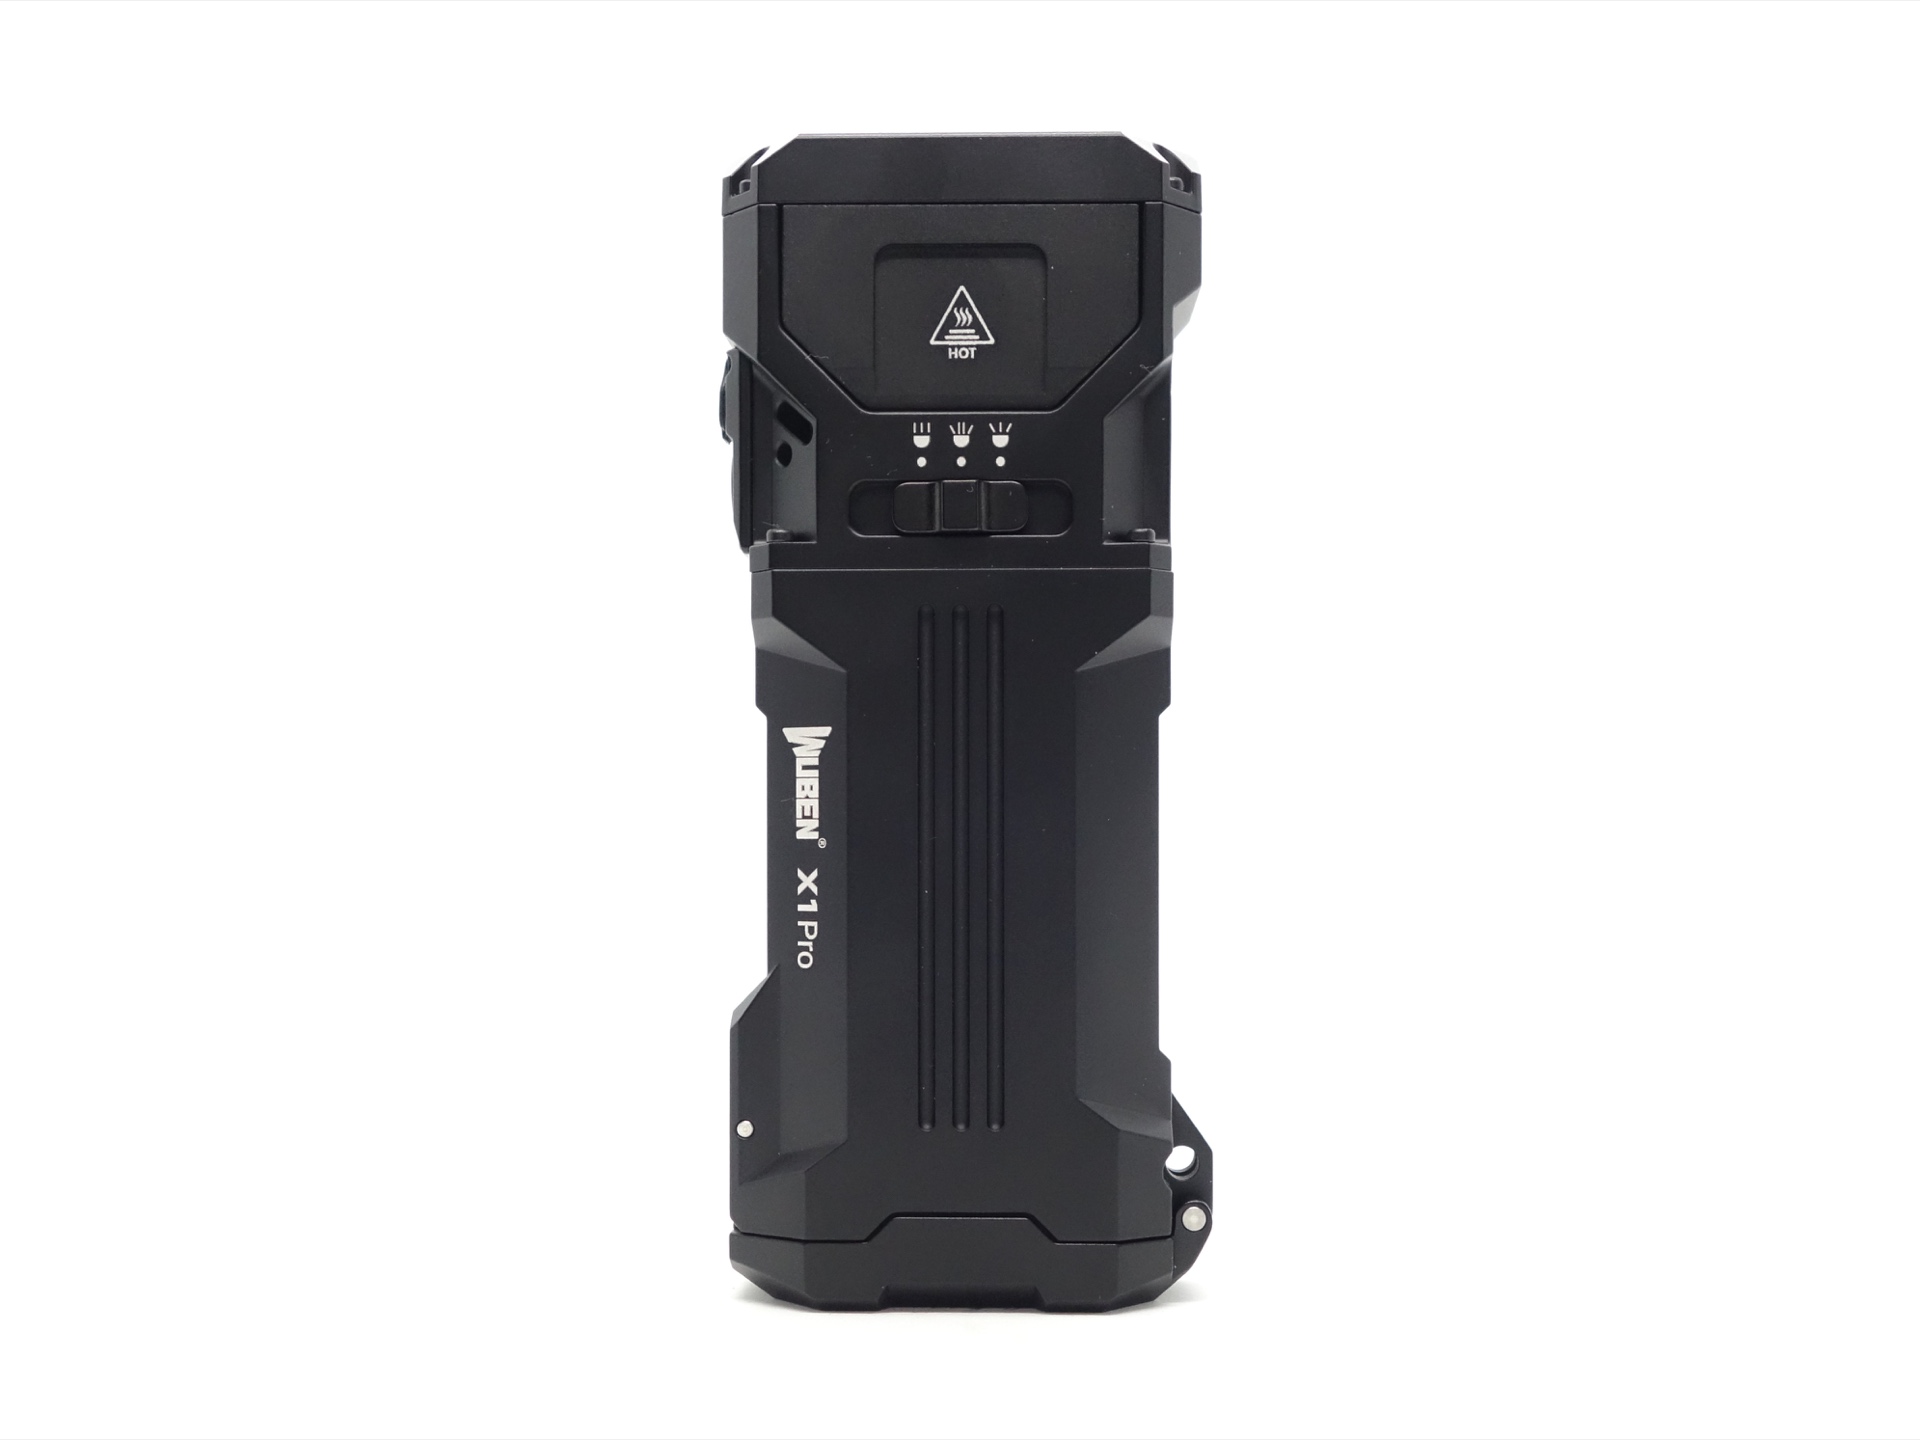
The Wuben X1 Pro can be controlled with a button and a slider.
The slider can be moved to select:
- Spotlight
- Both (Spotlight and Floodlight)
- Floodlight
There are four modes in the main group: Eco, Low, Medium and High.
There is a shortcut to Eco, Turbo and Strobe.
There are two blinky modes: Strobe and SOS.
| State | Action | Result |
|---|---|---|
| Any | Press and hold | Eco |
| Off | One click | On (mode memory) |
| On | Press and hold | Cycle (Eco, Low, Medium, High) |
| On | One click | Off |
| Any | Two clicks | Turbo |
| Any | Three clicks | Cycle (Strobe, SOS) |
| Off | Four clicks | Lockout |
| Lockout | Four clicks | Unlock |
| Any | Five clicks | Toggle fan on/off |
Lockout#
The light will flash three times when the torch is locked.
The status indicator will flash three times when a button is pressed while the torch is locked.
Mode memory#
There is mode memory. Eco, Low, Medium and High are memorised.
Turbo will revert to High.
Strobe or SOS will revert to the last used mode from the main group (Eco, Low, Medium or High).
The mode will remain the same when moving the slider between Spotlight, Both and Floodlight.
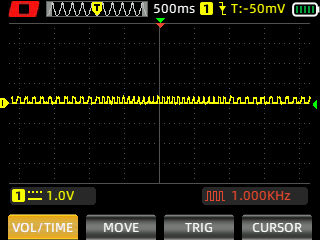
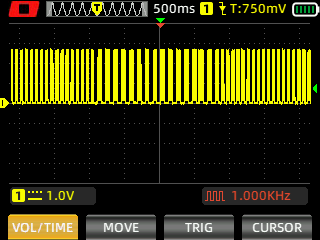
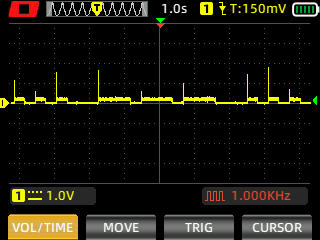
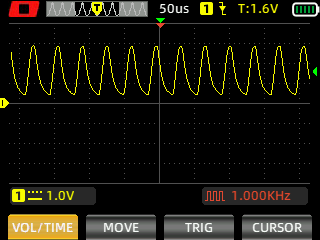
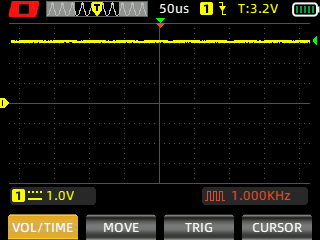
Strobe#
Strobe has an alternating frequency.
Floodlight (Strobe, SOS)

Spotlight (Strobe, SOS)
Both (Strobe, SOS)
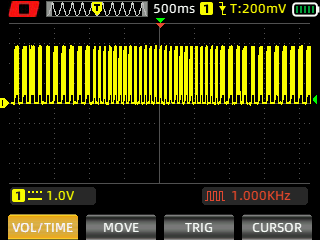
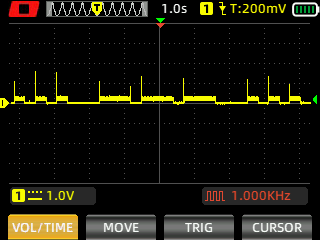
I measured Strobe and SOS with a Zoyi ZT-703S oscilloscope using High Speed mode.
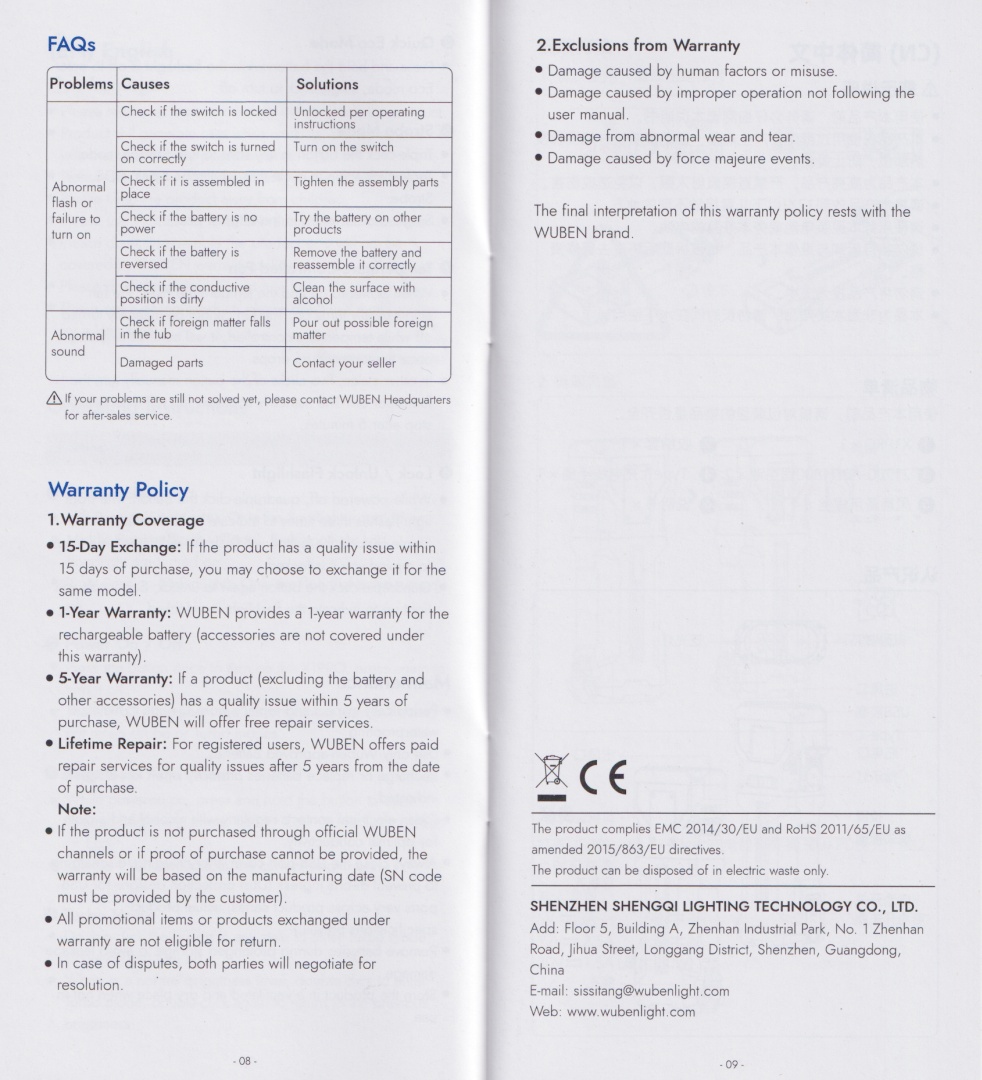
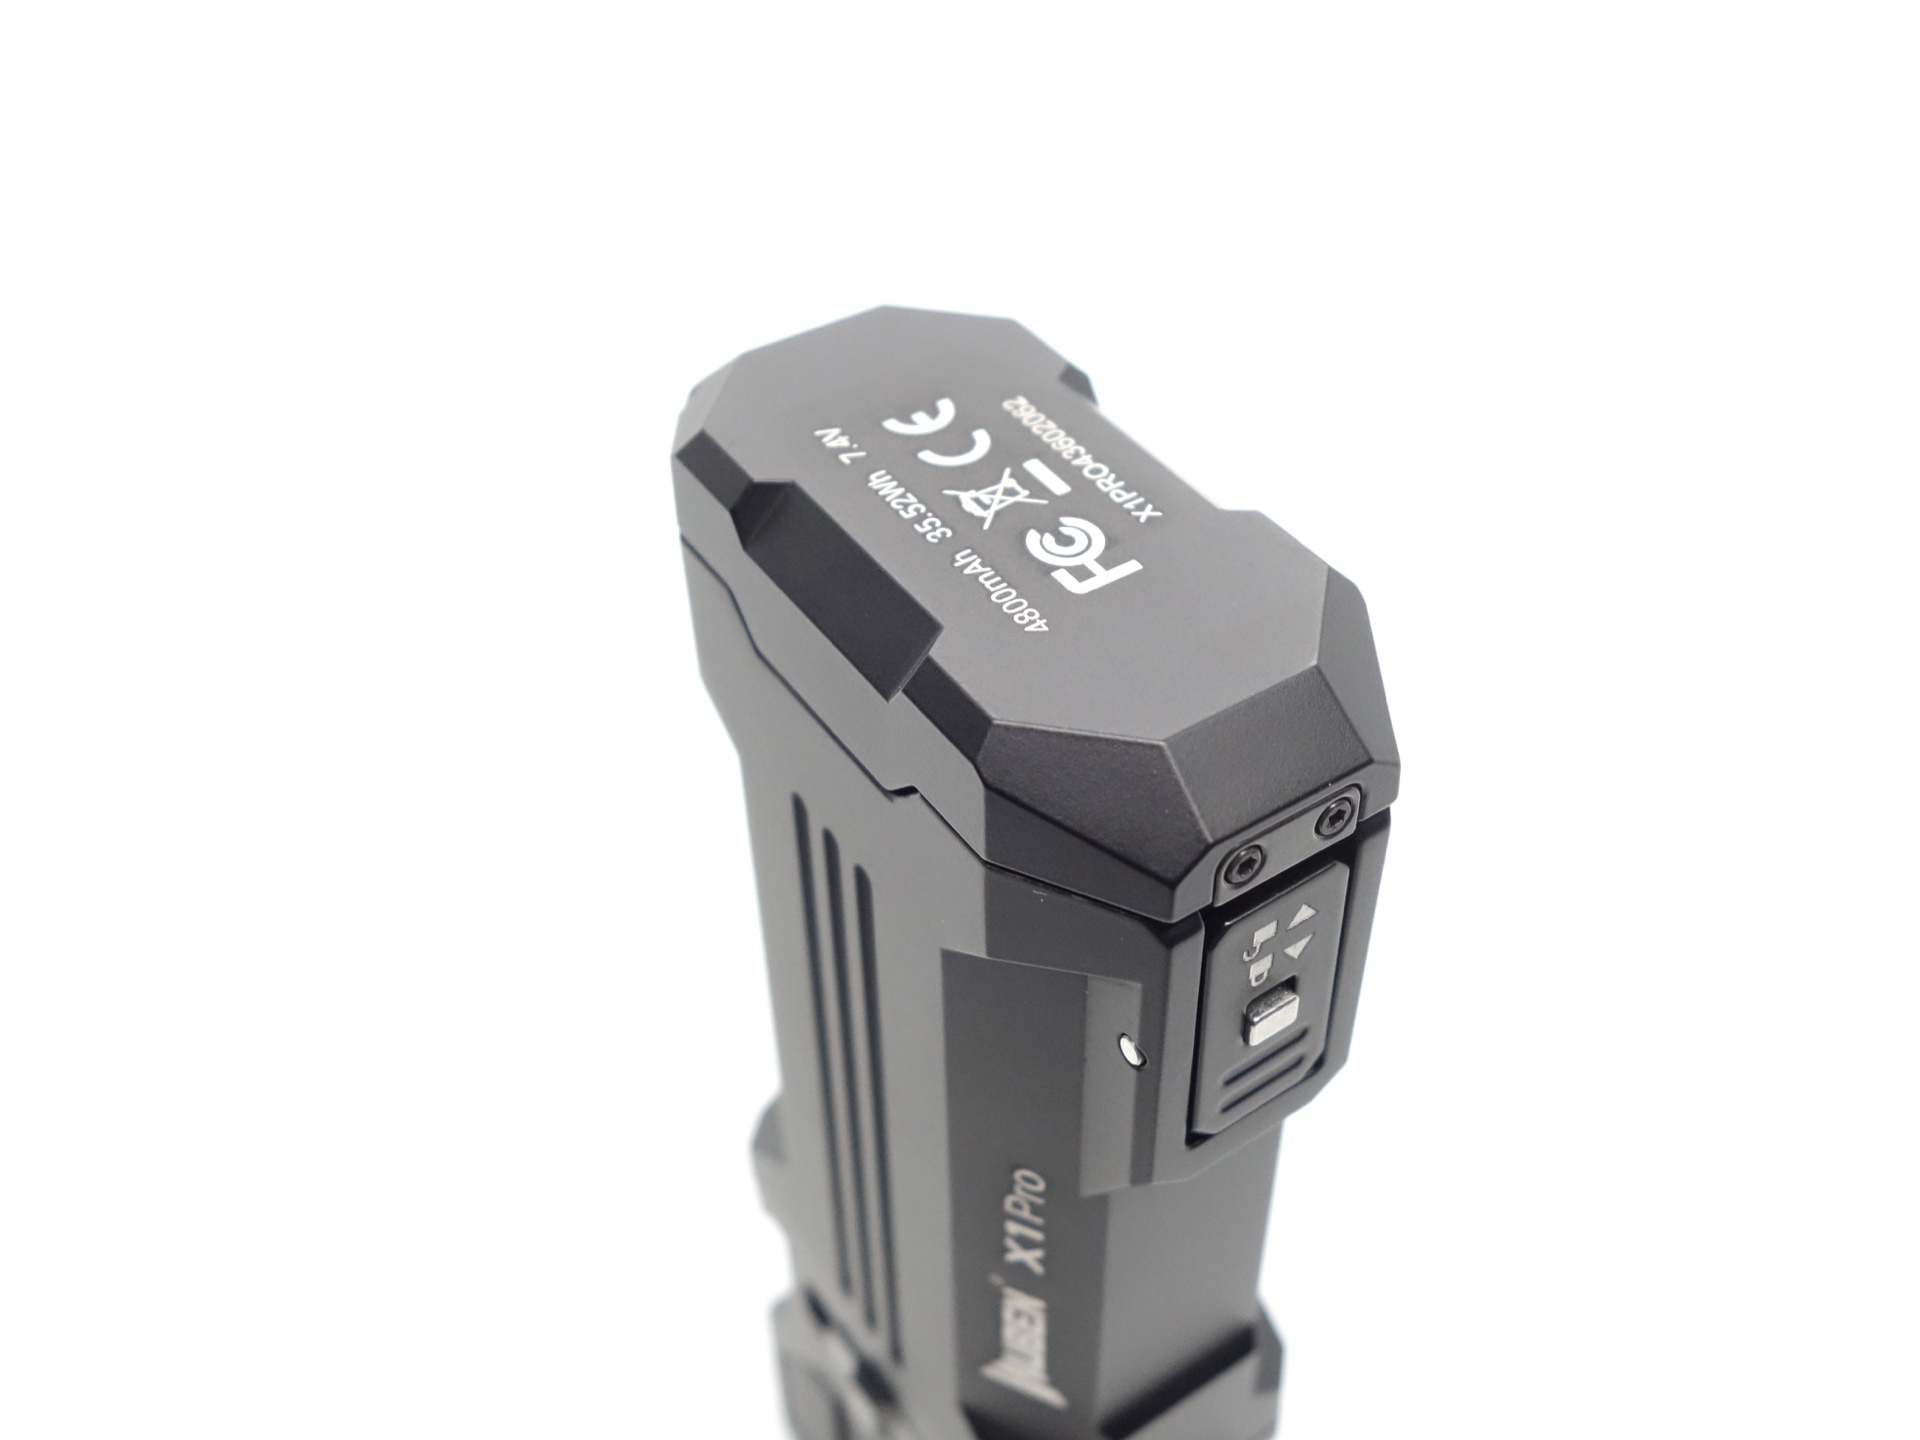
Battery status indicator#
The battery status indicator in the button will appear for five seconds when the torch is turned on.
| Colour | Battery status |
|---|---|
| Blue | 90% - 100% |
| Blue flash | 40% - 90% |
| Red | 15% - 40% |
| Red flash | 0% - 15% |
Low voltage protection#
There is low voltage protection. The light turns off around 5.62V.
I tested low voltage protection by connecting the torch to a bench power supply and then by lowering the voltage from 8.4.2V to 0V.
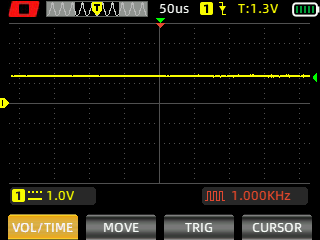
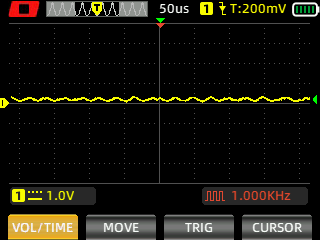
Pulse Width Modulation#
I did not notice any visible PWM (flickering).
I measured the PWM of the light with a Zoyi ZT-703S oscilloscope.
Spotlight (Eco, Low, Medium, High, Turbo)


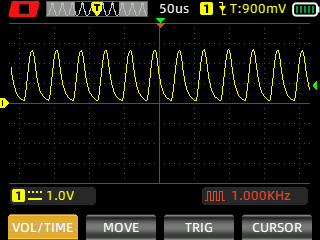
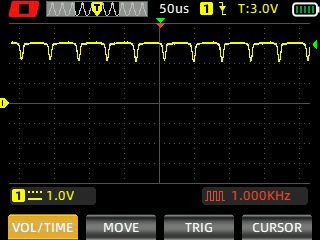
Floodlight (Eco, Low, Medium, High, Turbo)


Both (Eco, Low, Medium, High, Turbo)


What I like about the UI#
- Simple to use.
- Shortcut to Eco from off.
- Shortcut to Turbo from off.
- Shortcut to Strobe from off.
- The fan can be turned on or off when the torch is on or off.
What could be improved#
- Eco is a bit bright at 10-20 lumens. A 1 lumen mode would be nice.
- It would be nice if the lockout mode did not flash the lights to confirm that the torch has been locked out initially.
Batteries and charging#
Battery#
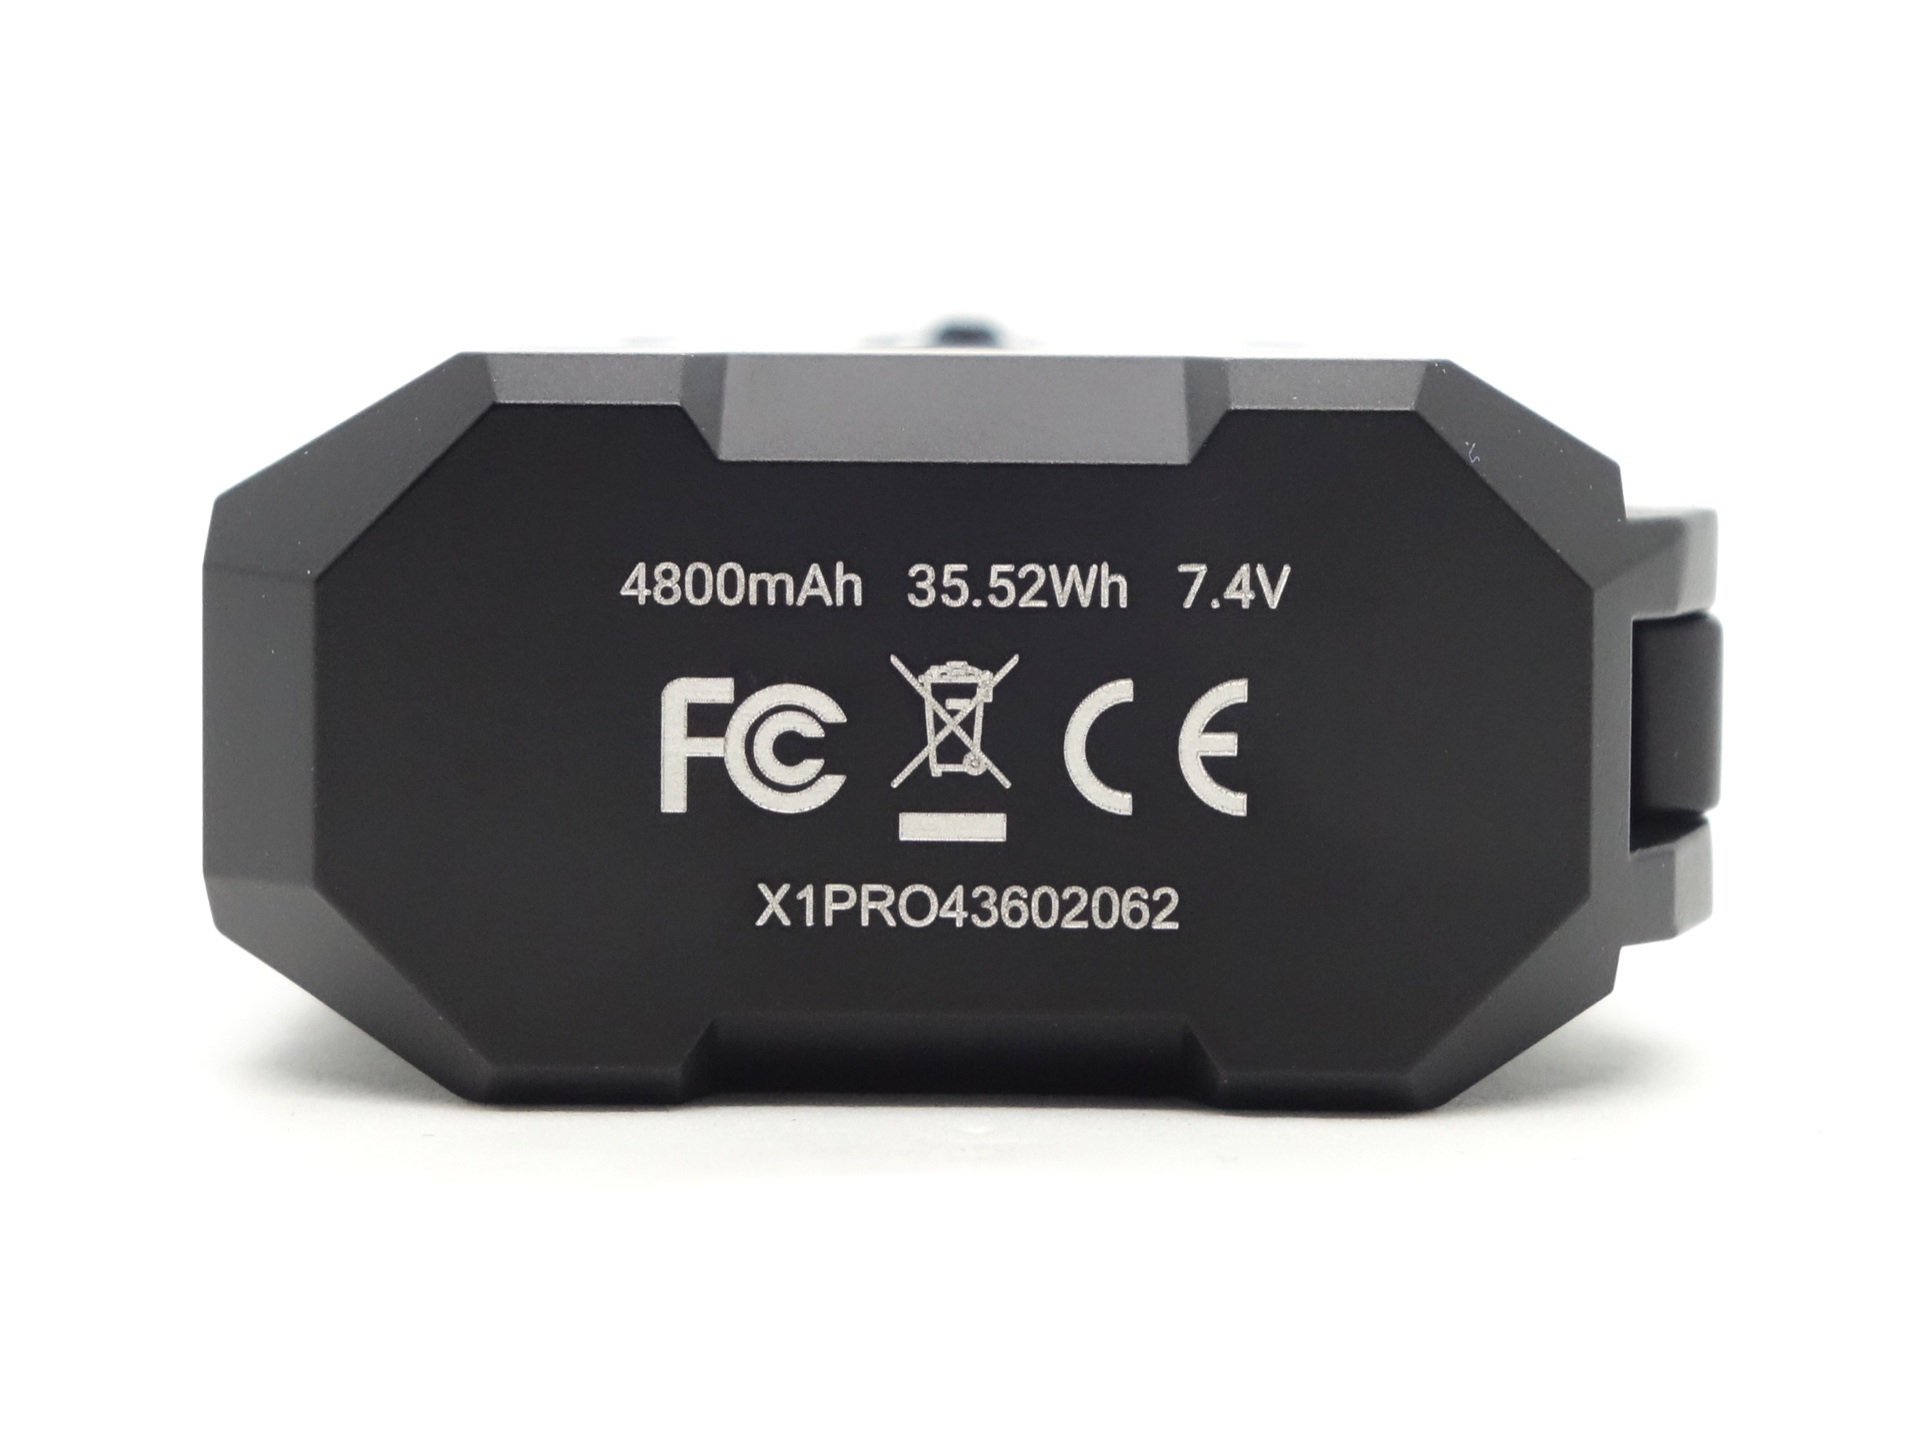
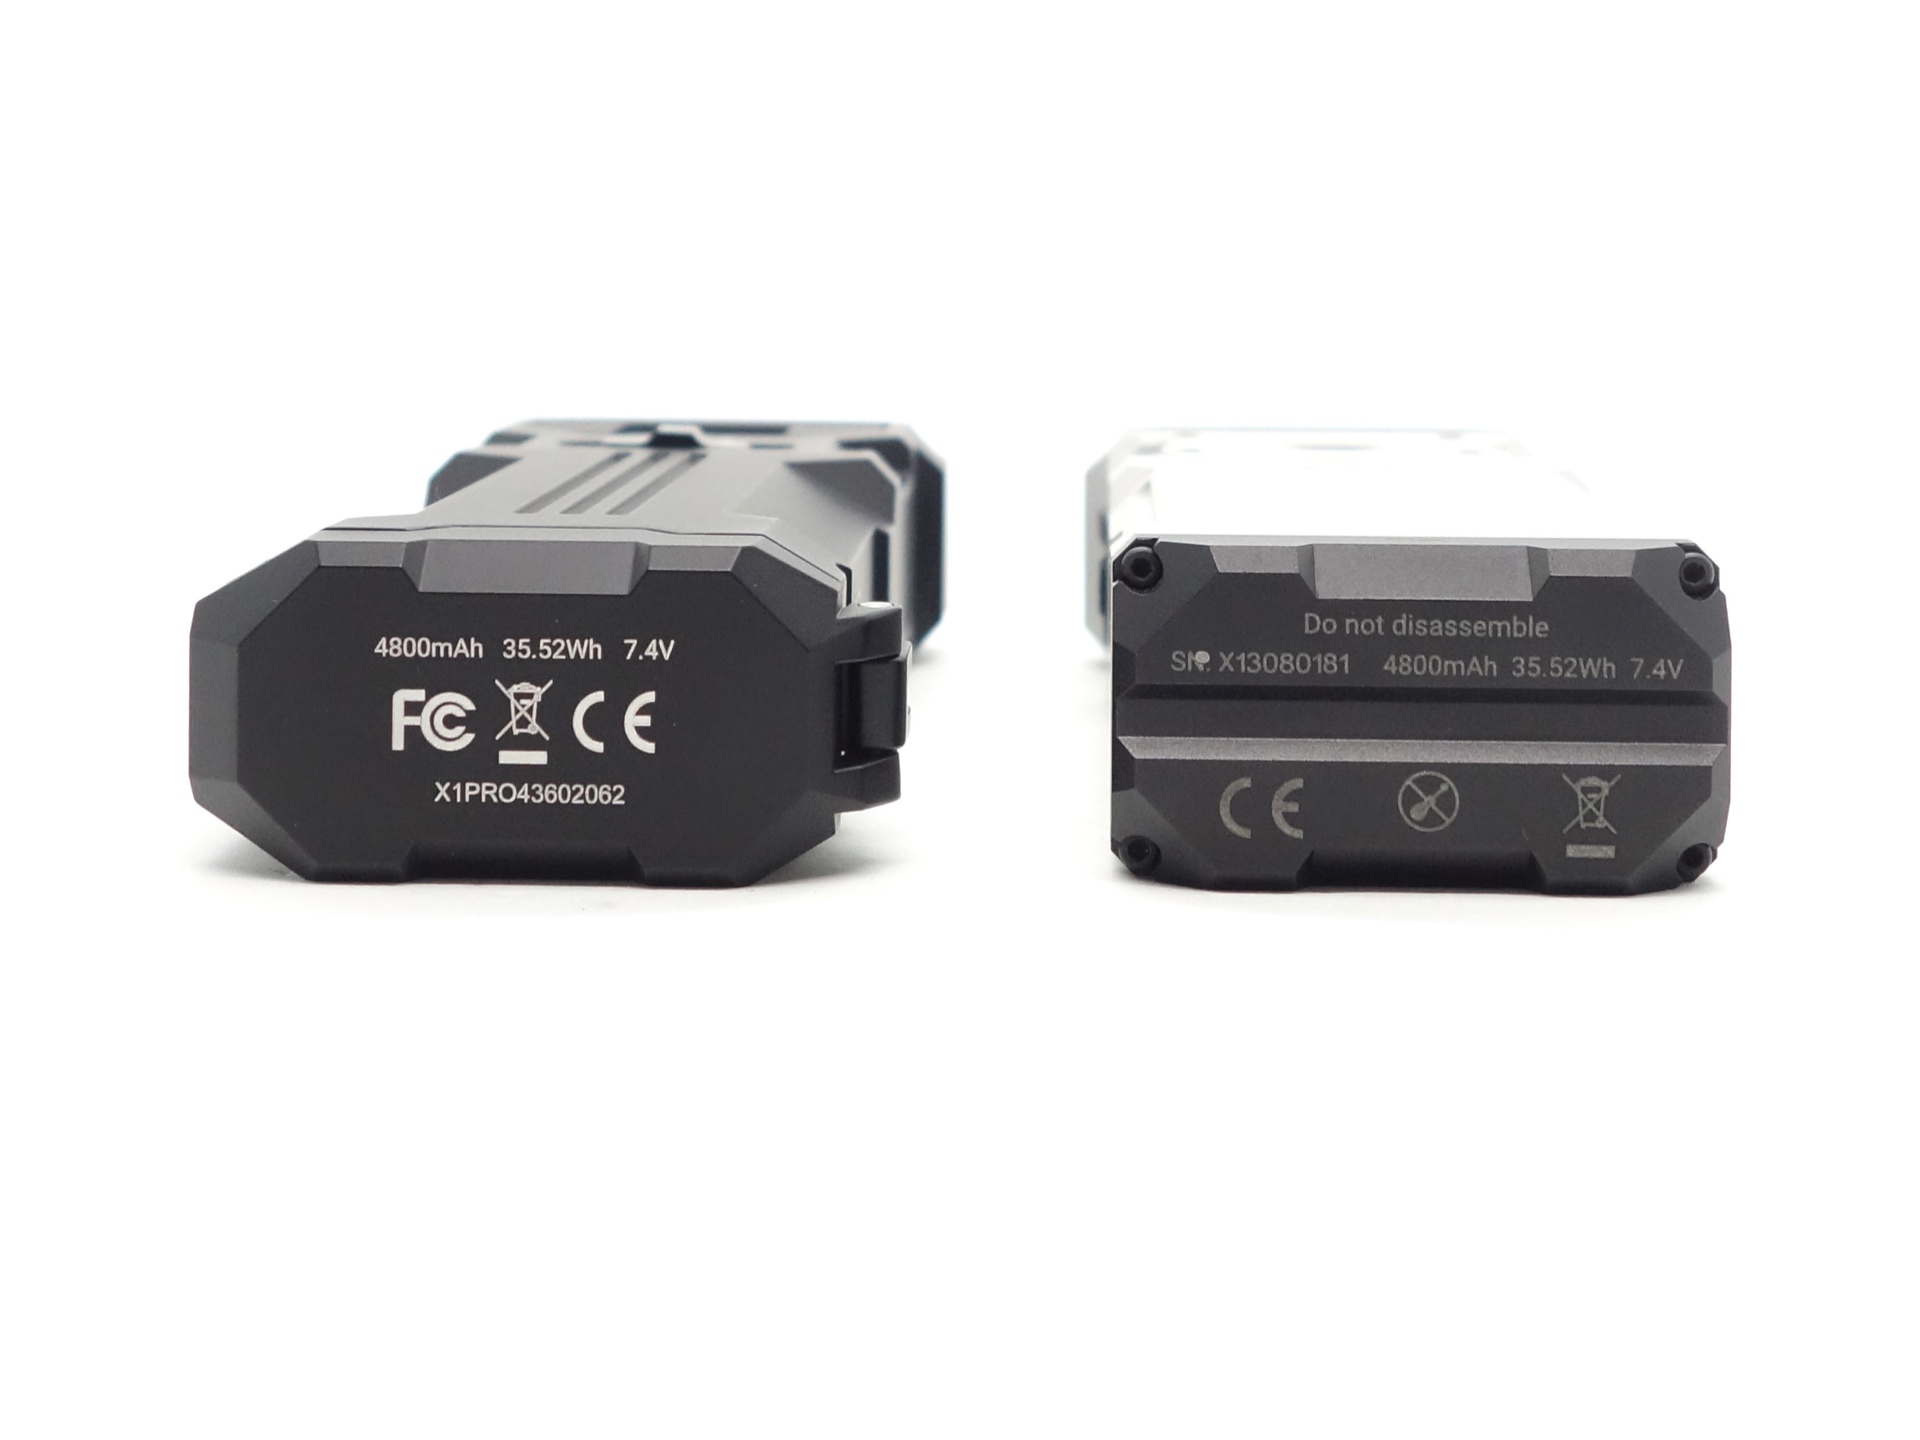
The Wuben X1 Pro arrived with two button top protected Wuben X1 21700 3.6V Li-ion 4800mAh cells. Each cell was approximately 3.81V upon arrival. The wrap on the cells rates them as 3.6V 4900mAh 17.64Wh each.
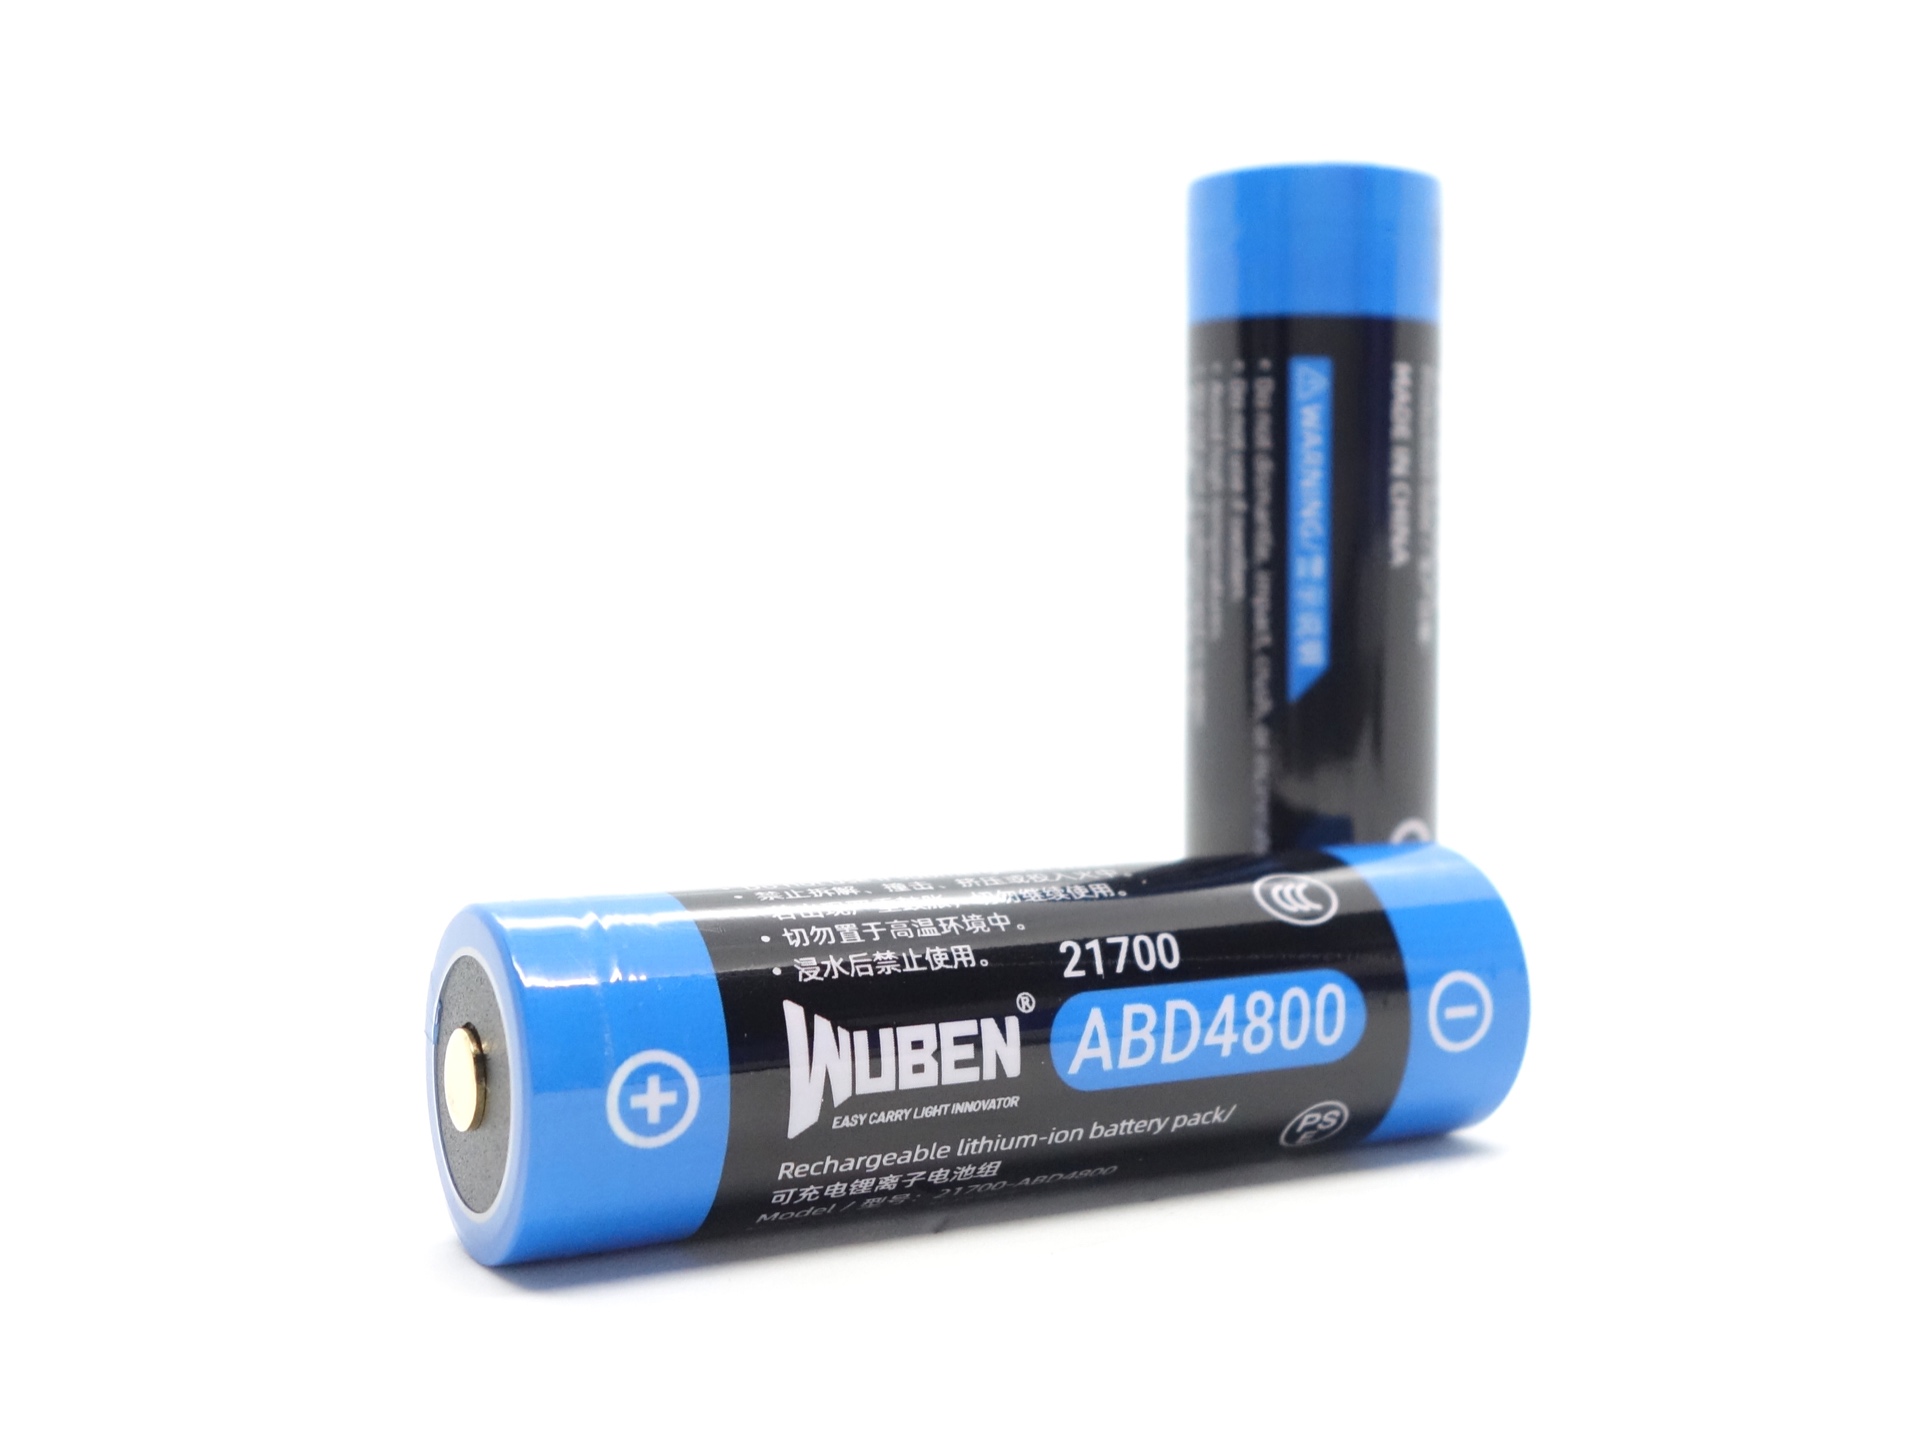
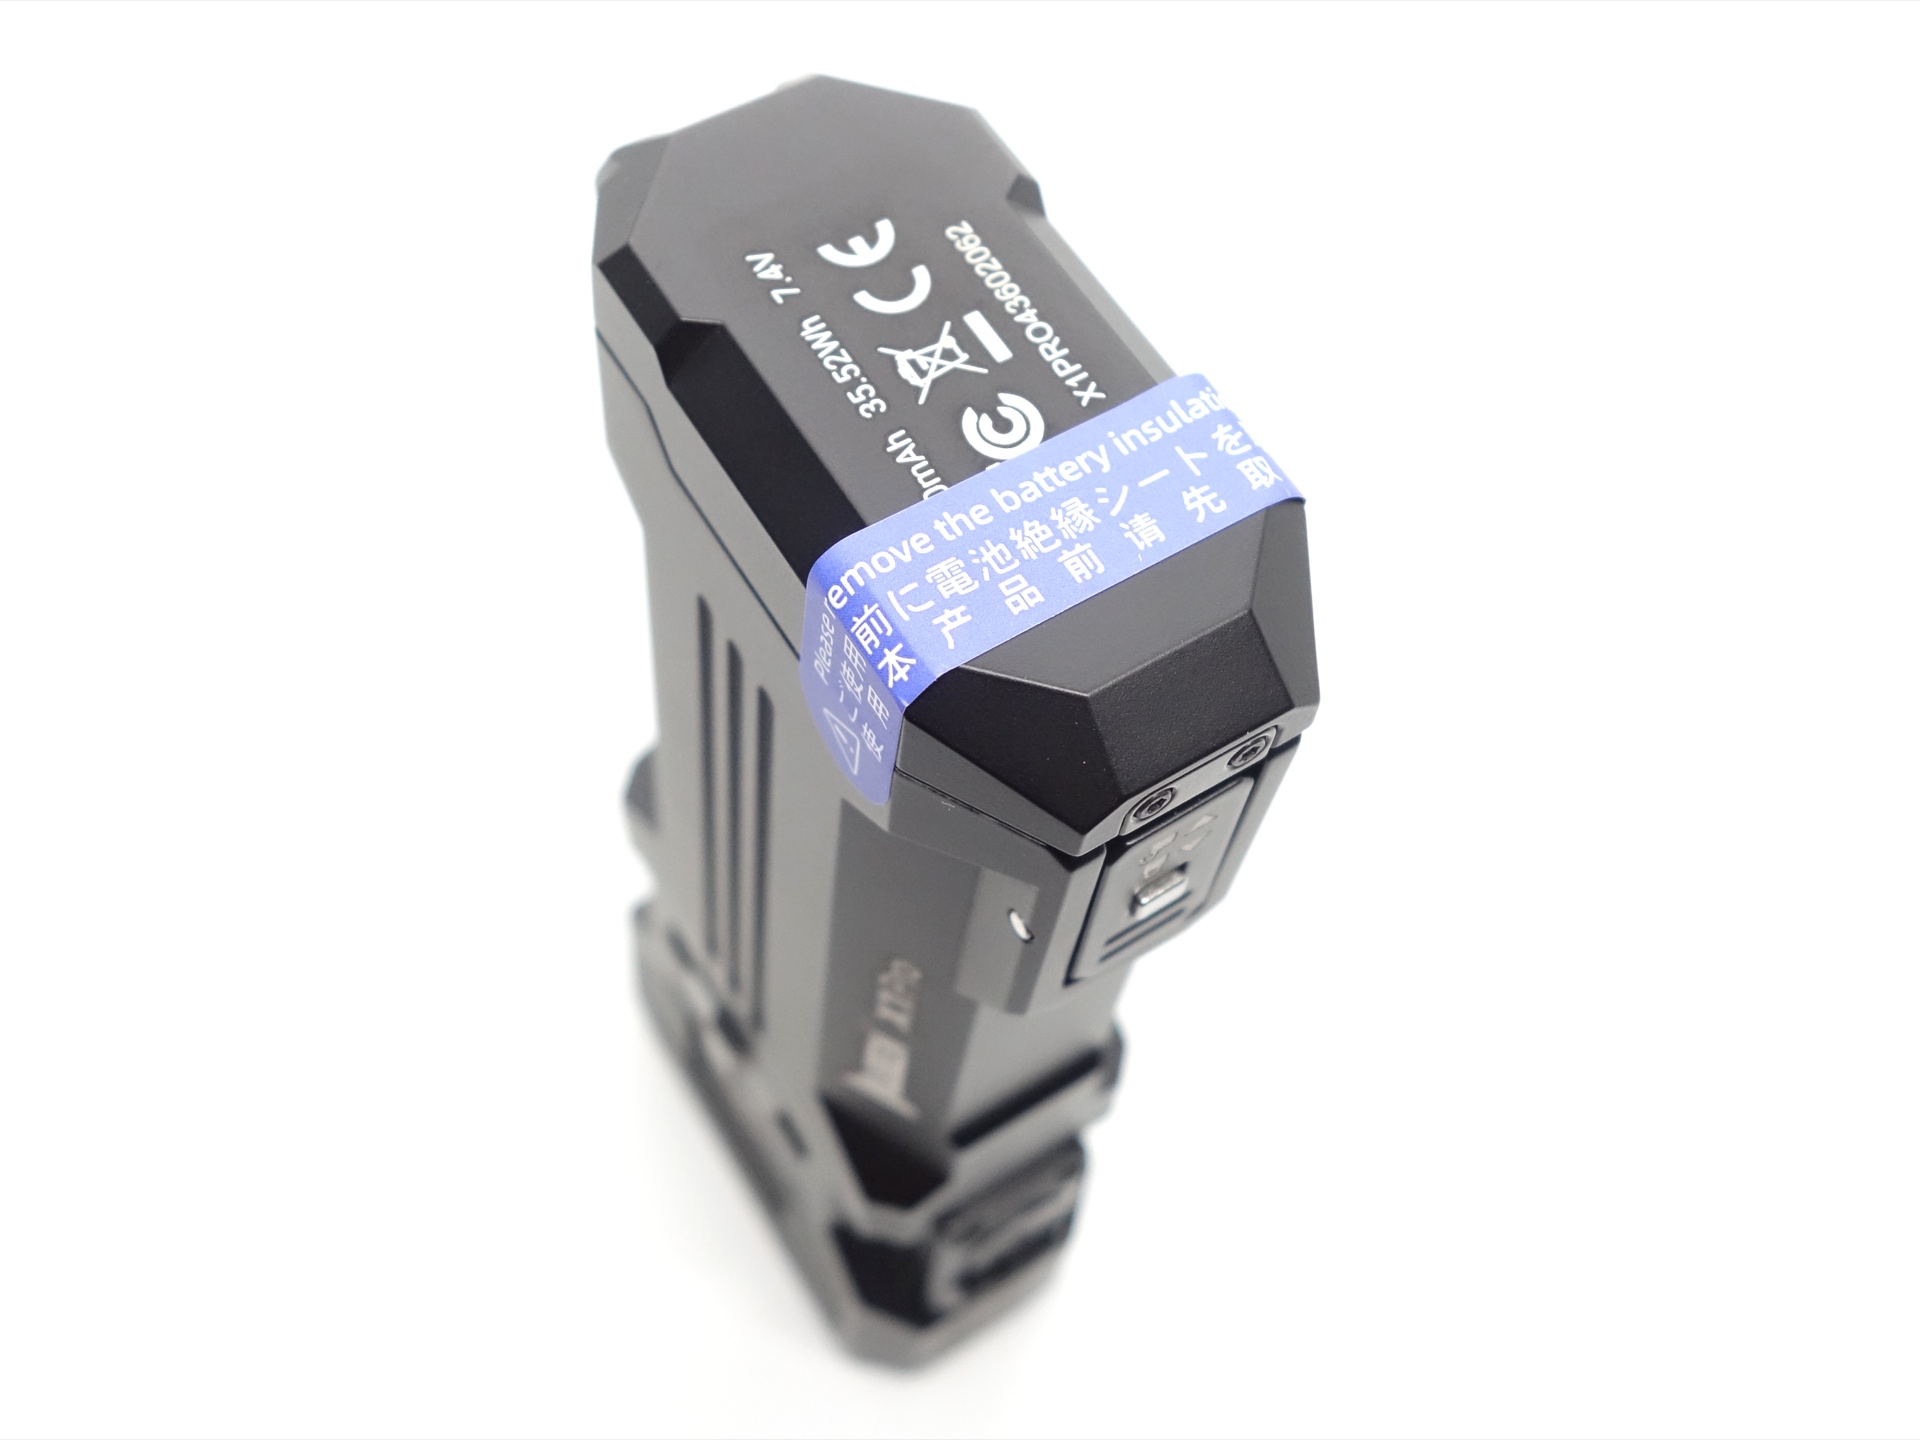
The cells were isolated with a piece of plastic to prevent accidentally turning the torch on.
I tried the following cells:
| Cell | Top | Compatible? | Comment |
|---|---|---|---|
| 2x Wuben ABD4800 21700 3.6V Li-ion 4800mAh | Button | Yes | |
| 2x EVE 50PL 21700 3.6V Li-ion 5000mAh | Button | Yes | Disconnects if rattled. |
| 2x Molicel P42A 21700 4200mAh | Flat | No | Too short. |
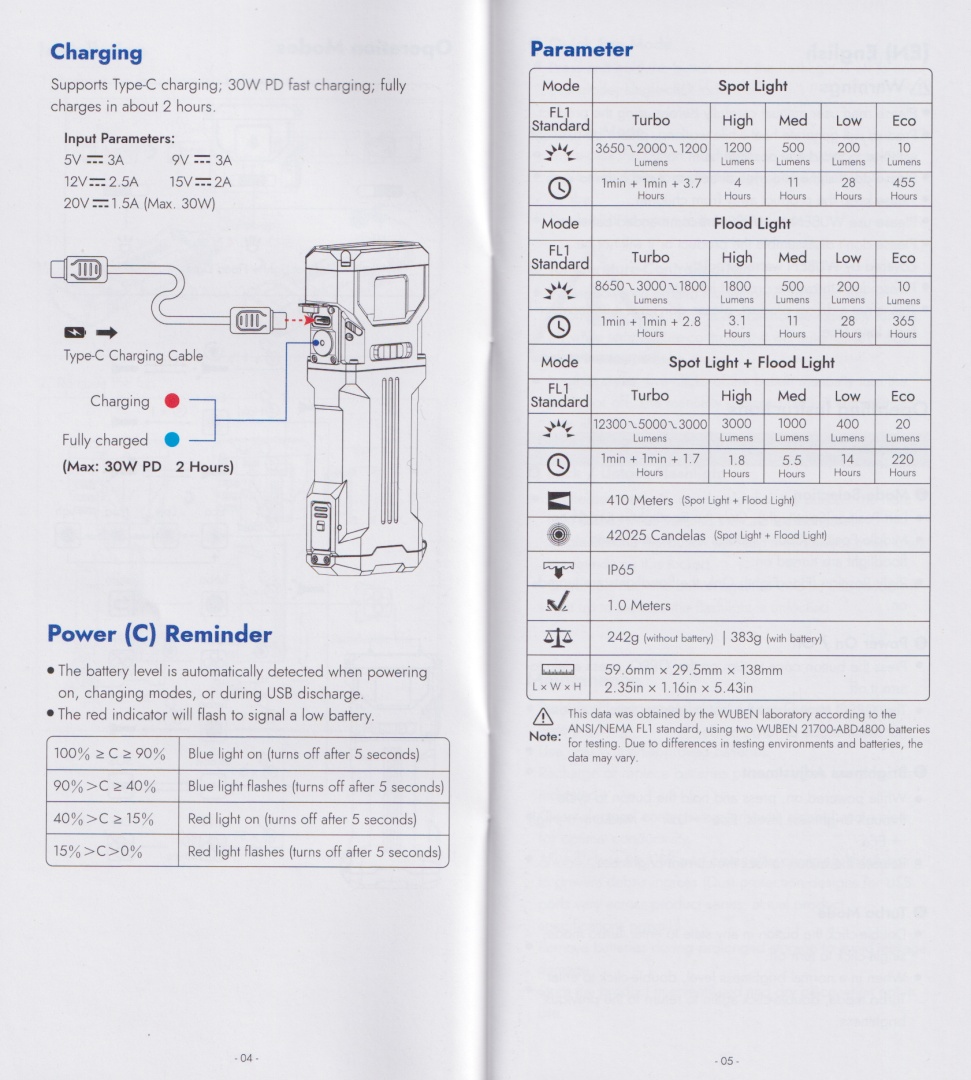
Charging#
The torch has built-in USB-C fast charging.
The torch supports the following inputs:
- 5V/3A, 9V/3A, 12V/2.5A, 15V/2A, 20V/1.5A
Power supply: Apple 140W
USB Meter: ChargerLAB Power-Z KM003C
Room temperature: 16 C
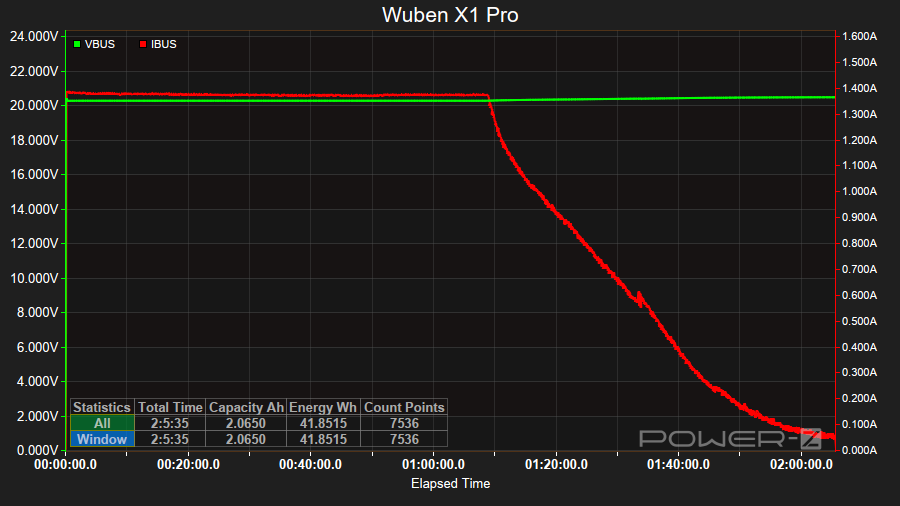
It took 2 hours 5 minutes to charge the torch at a rate of 20V/1.35A. The cells were charged from 3.05V and 3.07V to 4.19V and 4.19V in series.
The status indicator is red while charging and it becomes blue when charging is complete.
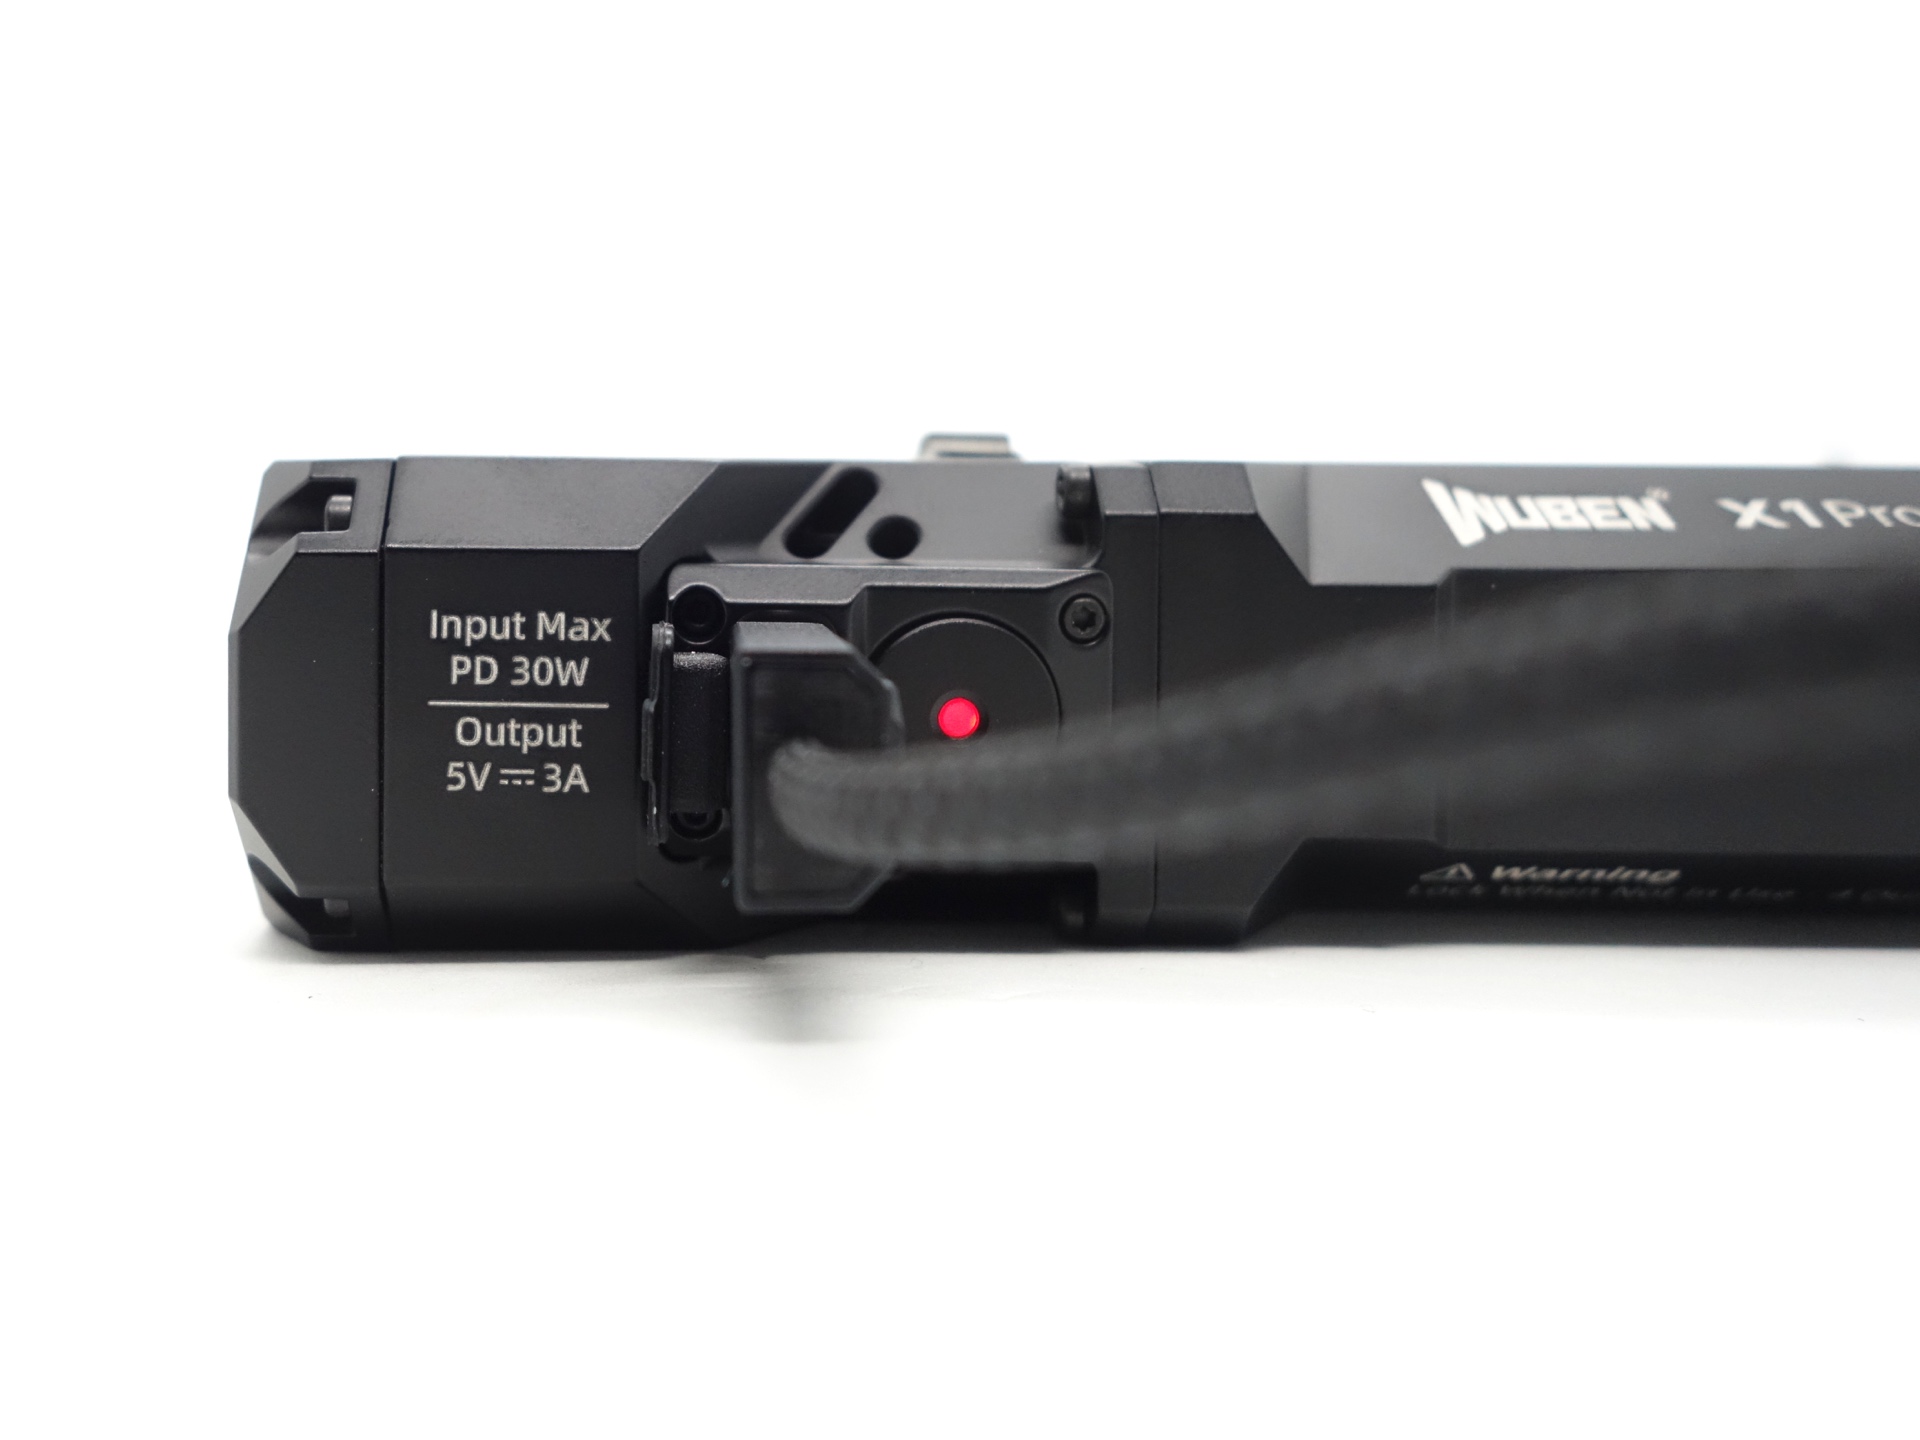
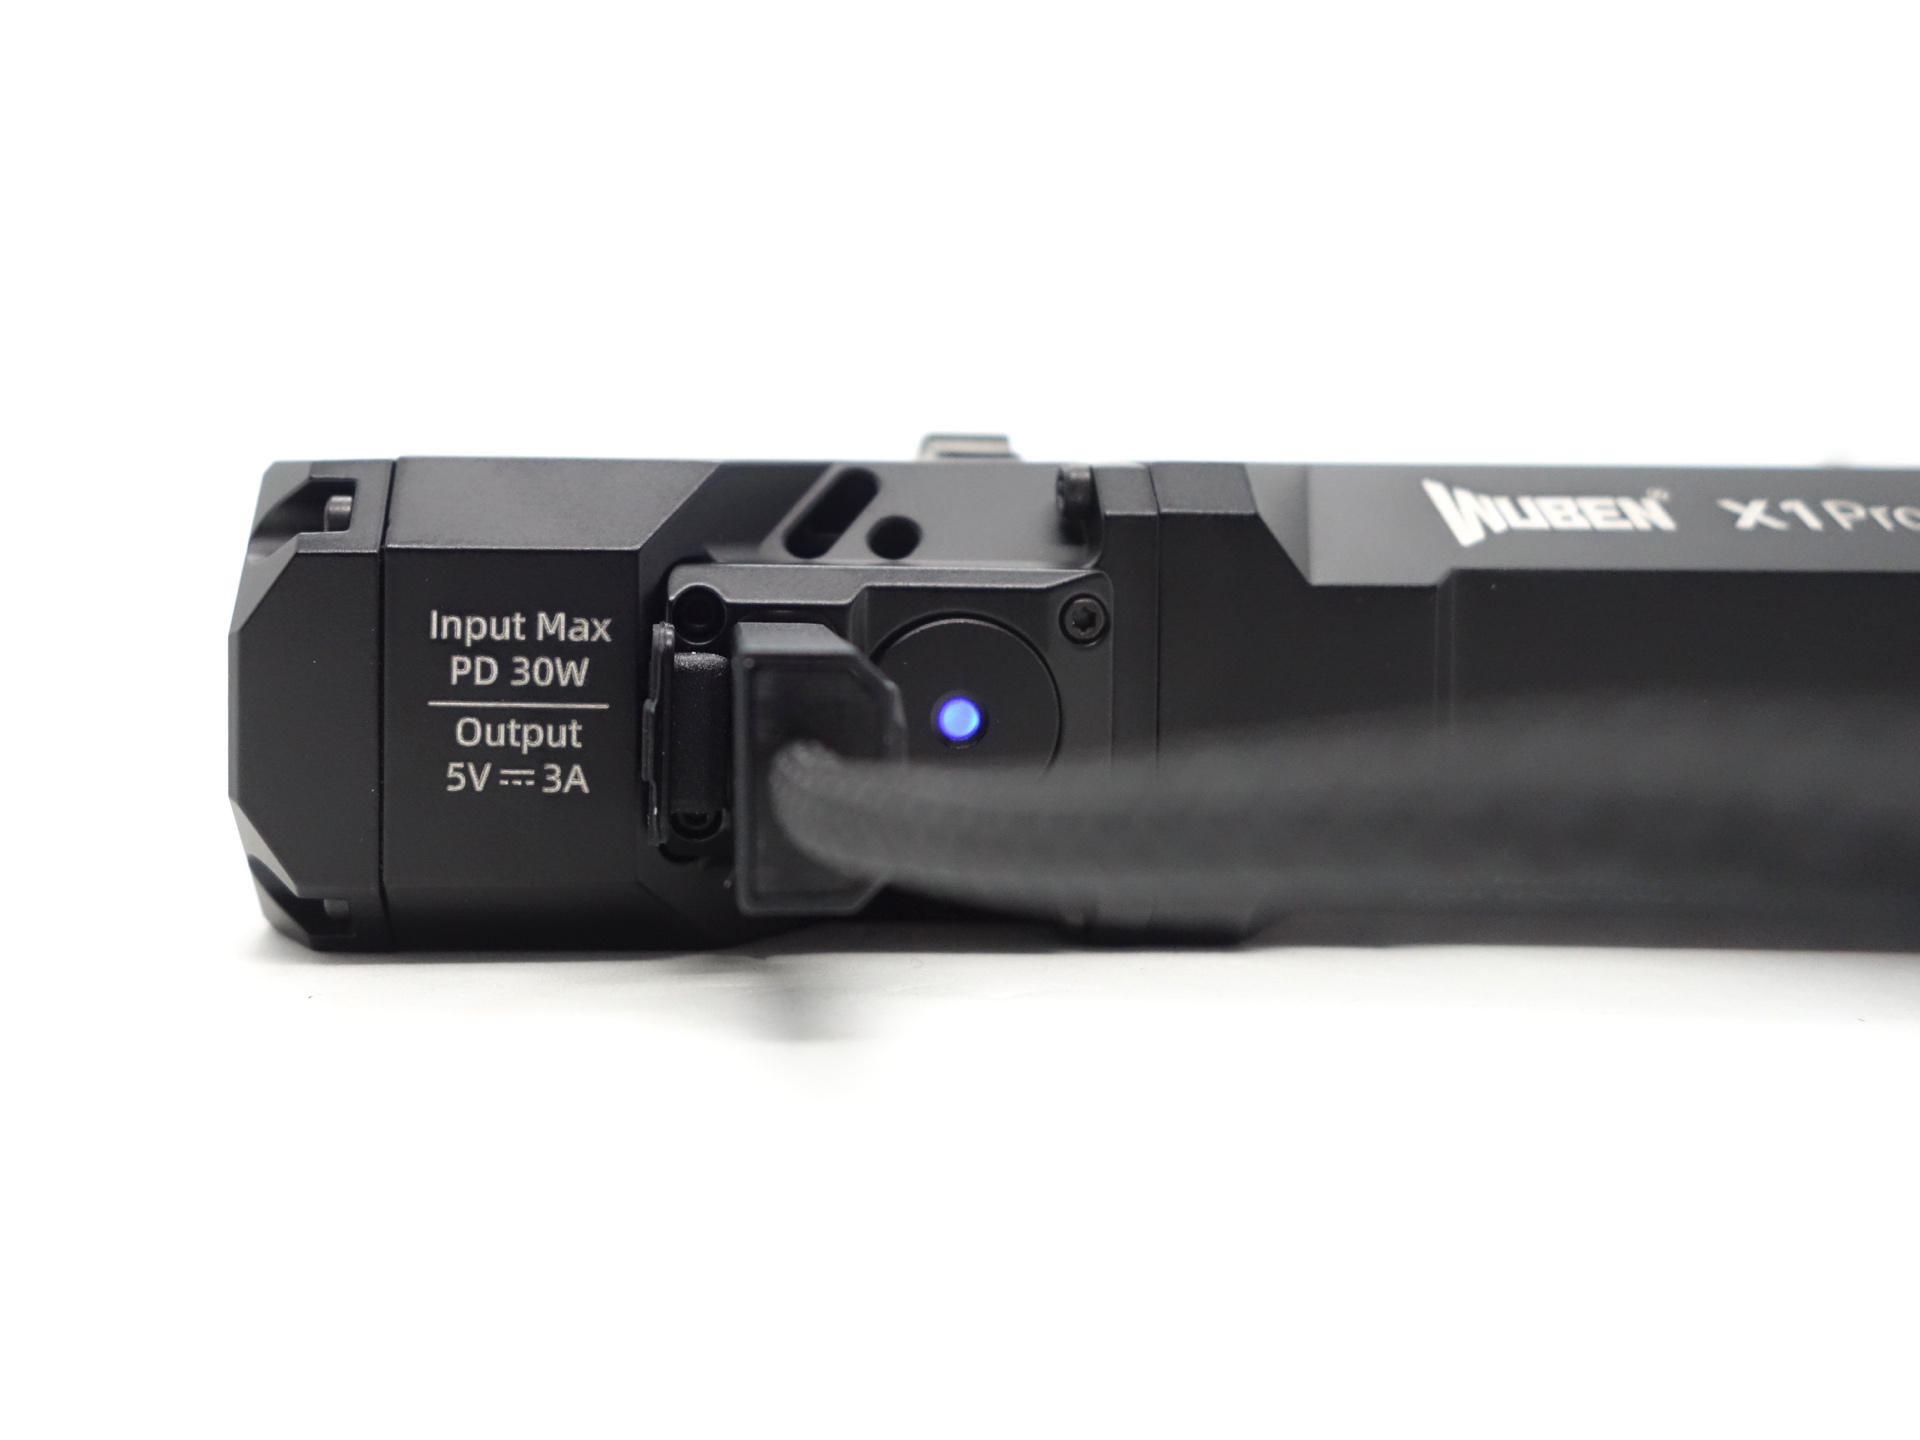
Powerbank#
The torch can be used as a powerbank with 15W (5V/3A) output.
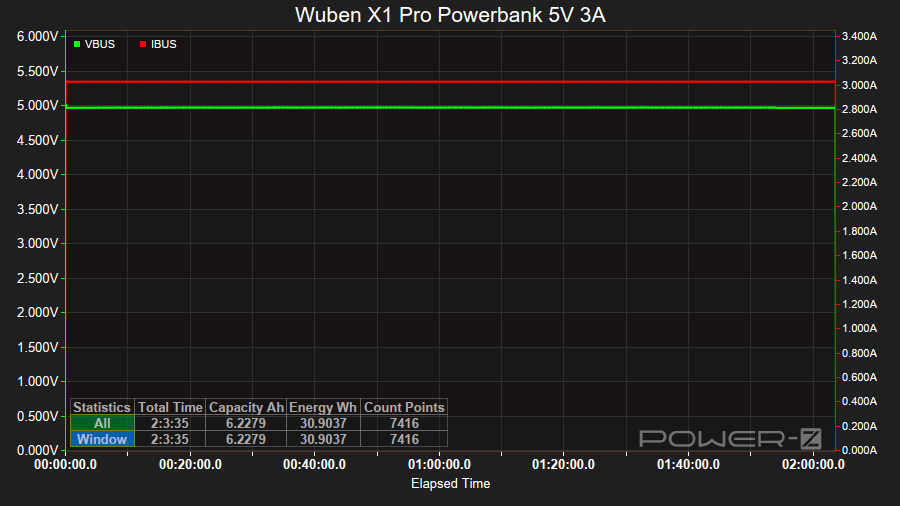
I used an ALIENTEK EL15 electronics load to discharge the torch at a rate of 5V/3A. It stopped discharging at 2 hours 3 minutes. The final cell voltages were 3.179V and 3.190V. The ChargerLAB Power-Z KM003C USB Meter measured 30.9 Wh. That is an efficiency of about 87.5%.
Power supply compatibility#
I tried the following power supplies with the USB-A magnetic charging cable:
| Power supply | USB Type | Protocol | Does it charge? |
|---|---|---|---|
| Apple 61W Power Adapter | USB-C | PD | Yes |
| PinePower Desktop | USB-C | PD | Yes |
| PinePower Desktop | USB-A | QC | Yes |
| PinePower Desktop | USB-A | Yes |
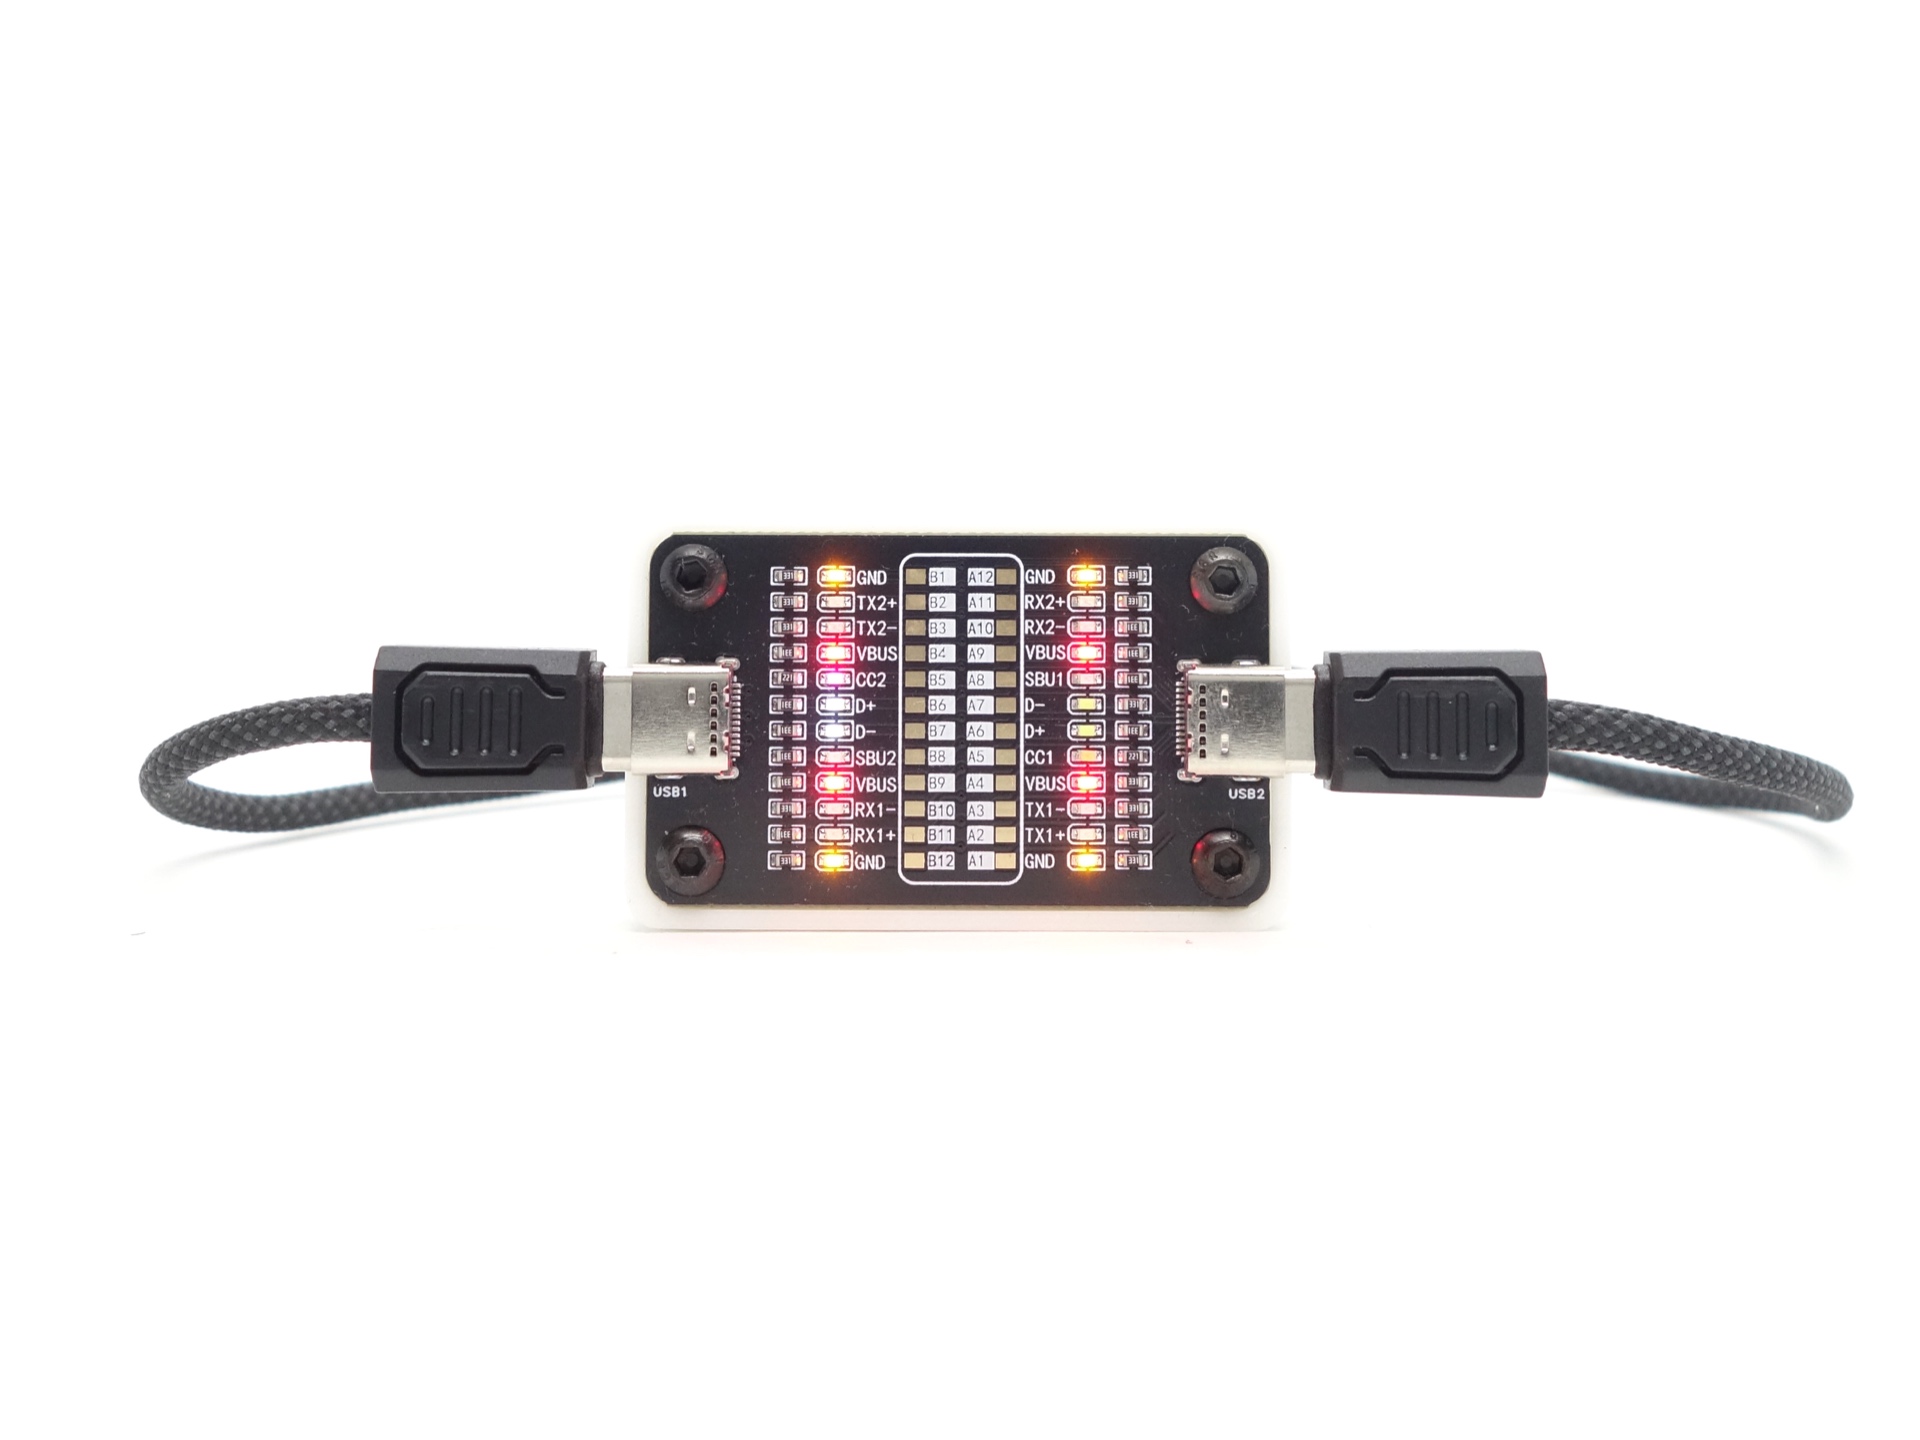
USB-C to USB-C charging works.
This shows which pins are connected in the USB-C cable:
Performance#
Specifications from the manual:
Spotlight#
| FL1 Standard | Turbo | High | Medium | Low | Eco |
|---|---|---|---|---|---|
| Output (lumens) | 3,650 + 2,000 + 1,200 | 1,200 | 500 | 200 | 10 |
| Runtime | 1min + 1min + 3h 42min | 4h | 11h | 28h | 455h |
Floodlight#
| FL1 Standard | Turbo | High | Medium | Low | Eco |
|---|---|---|---|---|---|
| Output (lumens) | 8,650 + 3,000 + 1,800 | 1,800 | 500 | 200 | 10 |
| Runtime | 1min + 1min + 2h 48min | 3h 6min | 11h | 28h | 365h |
Both (Spotlight and Floodlight)#
| FL1 Standard | Turbo | High | Medium | Low | Eco |
|---|---|---|---|---|---|
| Output (lumens) | 12,300 + 5,000 + 3,000 | 3,000 | 1,000 | 400 | 20 |
| Runtime | 1min + 1min + 1h 42min | 1h 48min | 5h 30min | 14h | 220h |
| Beam Distance (metres) | 410 | ||||
| Beam Intensity (cd) | 42,025 |
Lumen measurements#
I used a bench power supply to measure the current at turn on for most modes. I used a UNI-T UT139C Digital Multimeter to measure the current at turn on for Eco modes.
| LED | Mode | Amps at start | Specs | Lumens @turn on | Lumens @30 sec | Lumens @10 min |
|---|---|---|---|---|---|---|
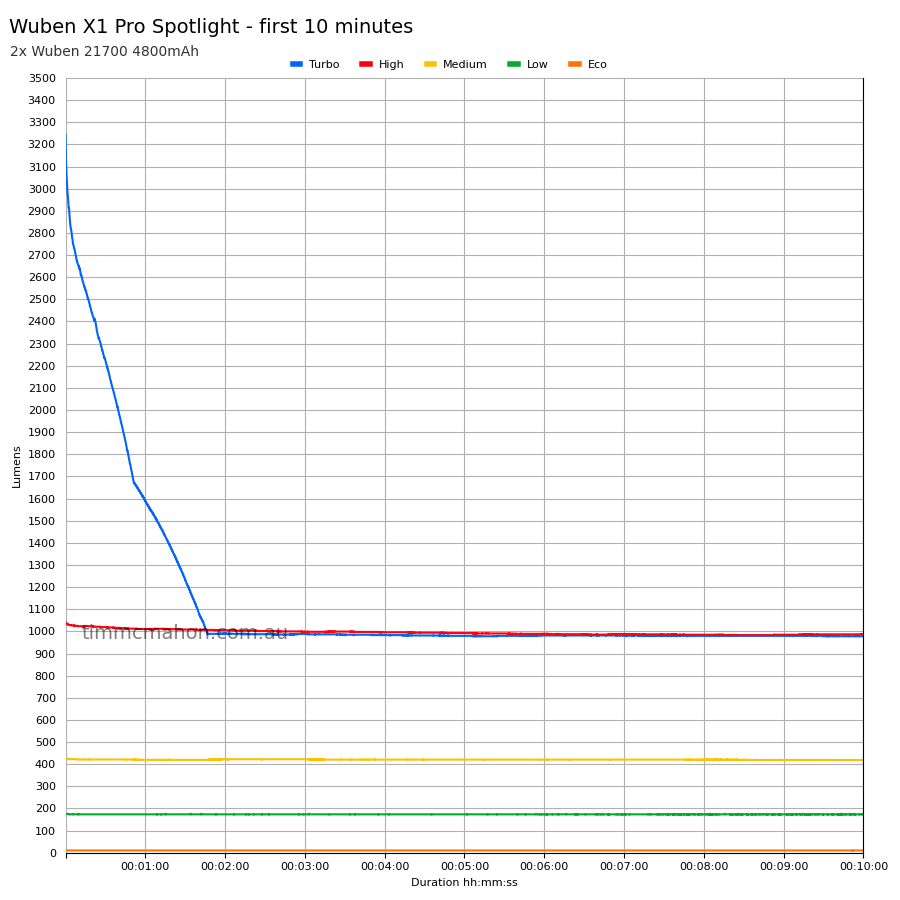
| Spotlight | Eco | 16 mA | 10 | 10 | 10 | 10 |
| Spotlight | Low | 0.13 A | 200 | 175 | 173 | 173 |
| Spotlight | Medium | 0.36 A | 500 | 428 | 421 | 418 |
| Spotlight | High | 1.09 A | 1,200 | 1,040 | 1,019 | 986 |
| Spotlight | Turbo | 4.66 A | 3,650 + 2,000 + 1,200 | 3,244 | 2,224 | 978 |
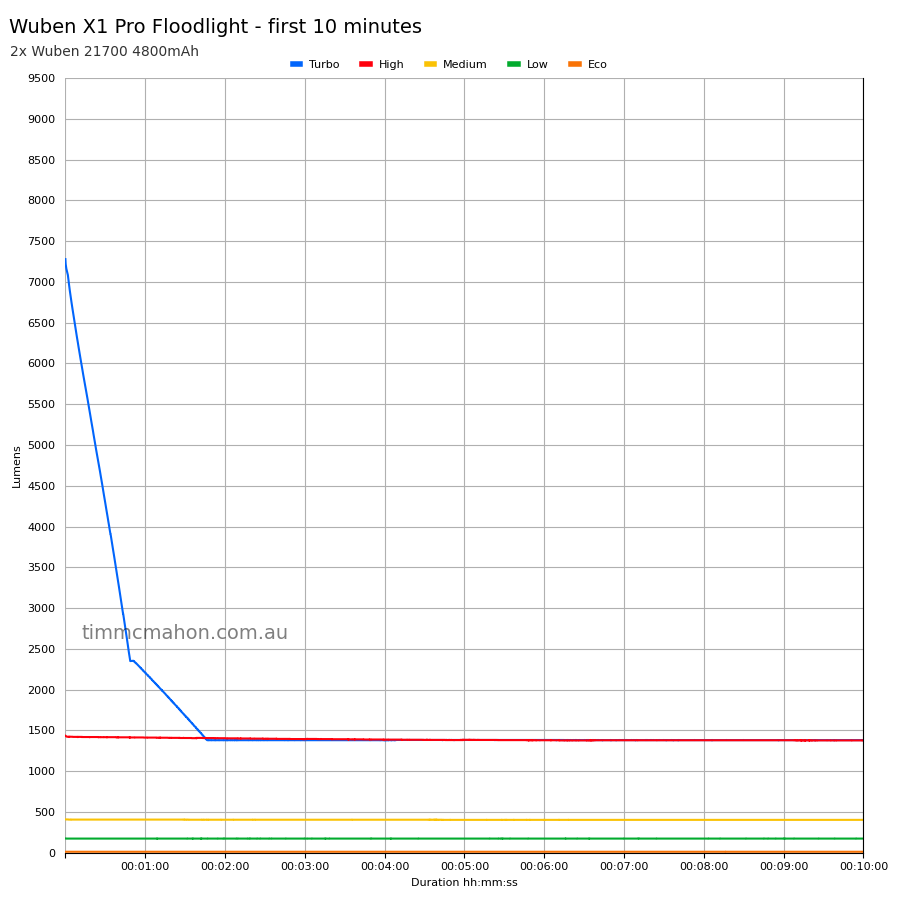
| Floodlight | Eco | 19 mA | 10 | 11 | 11 | 11 |
| Floodlight | Low | 0.13 A | 200 | 175 | 173 | 173 |
| Floodlight | Medium | 0.34 A | 500 | 409 | 406 | 402 |
| Floodlight | High | 1.30 A | 1,800 | 1,435 | 1,416 | 1,377 |
| Floodlight | Turbo | 9.86 A | 8,650 + 3,000 + 1,800 | 7,279 | 4,288 | 1,380 |
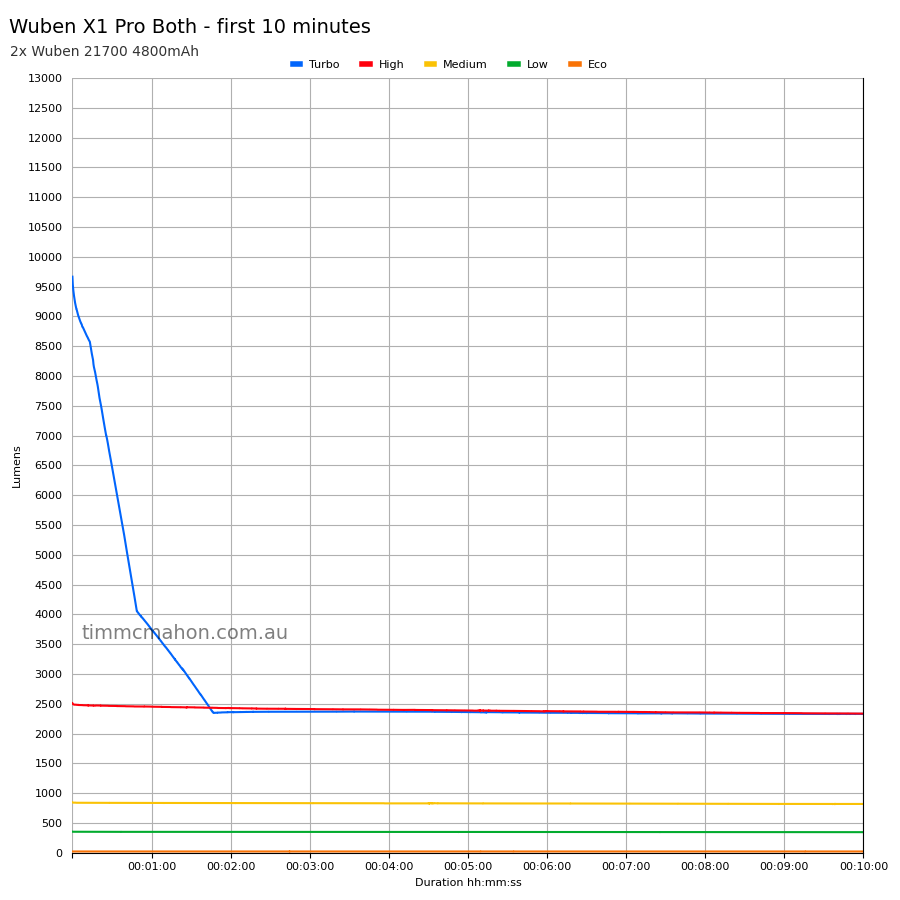
| Both | Eco | 28 mA | 20 | 21 | 21 | 21 |
| Both | Low | 0.28 A | 400 | 343 | 350 | 345 |
| Both | Medium | 0.71 A | 1,000 | 845 | 834 | 818 |
| Both | High | 2.41 A | 3,000 | 2,509 | 2,464 | 2,334 |
| Both | Turbo | 15.08 A | 12,300 + 5,000 + 3,000 | 9,666 | 6,486 | 2,329 |
Note: Lumen measurements may be off by 10% with my DIY lumen tube.
Runtime graphs#
I used my own DIY lumen tube with a TSL2591 sensor and forked bmengineer’s project RuTiTe to record runtimes.
The room temperature was approximately 16 C.
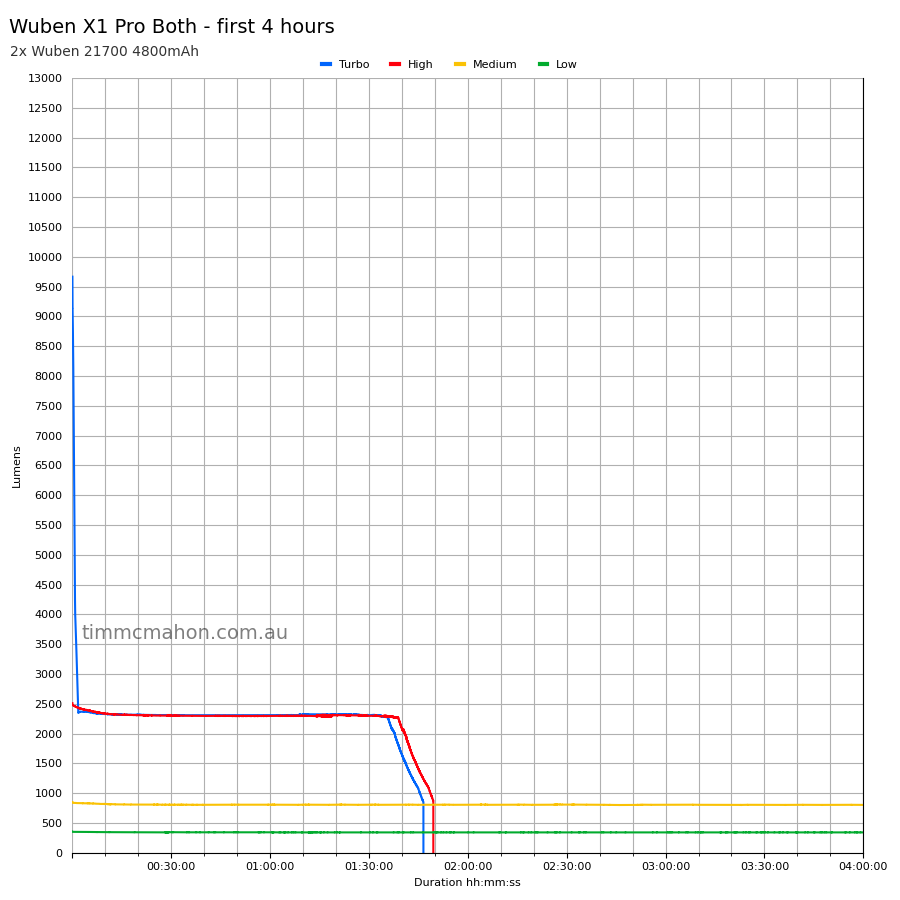
Both#

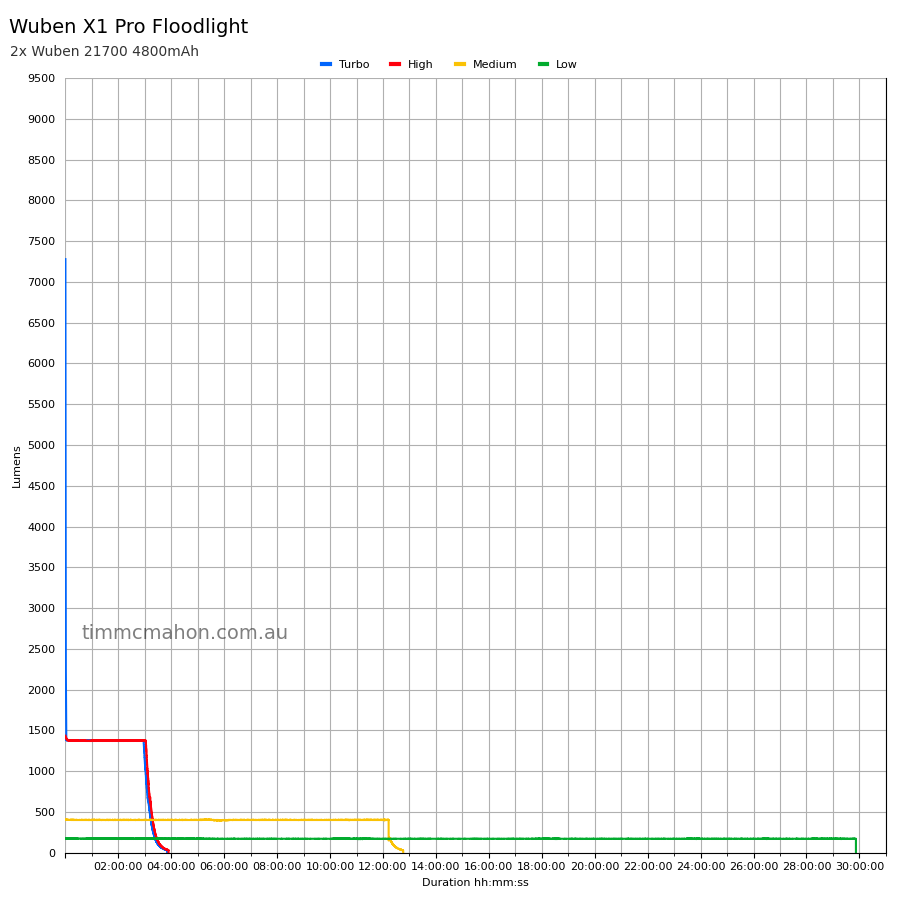
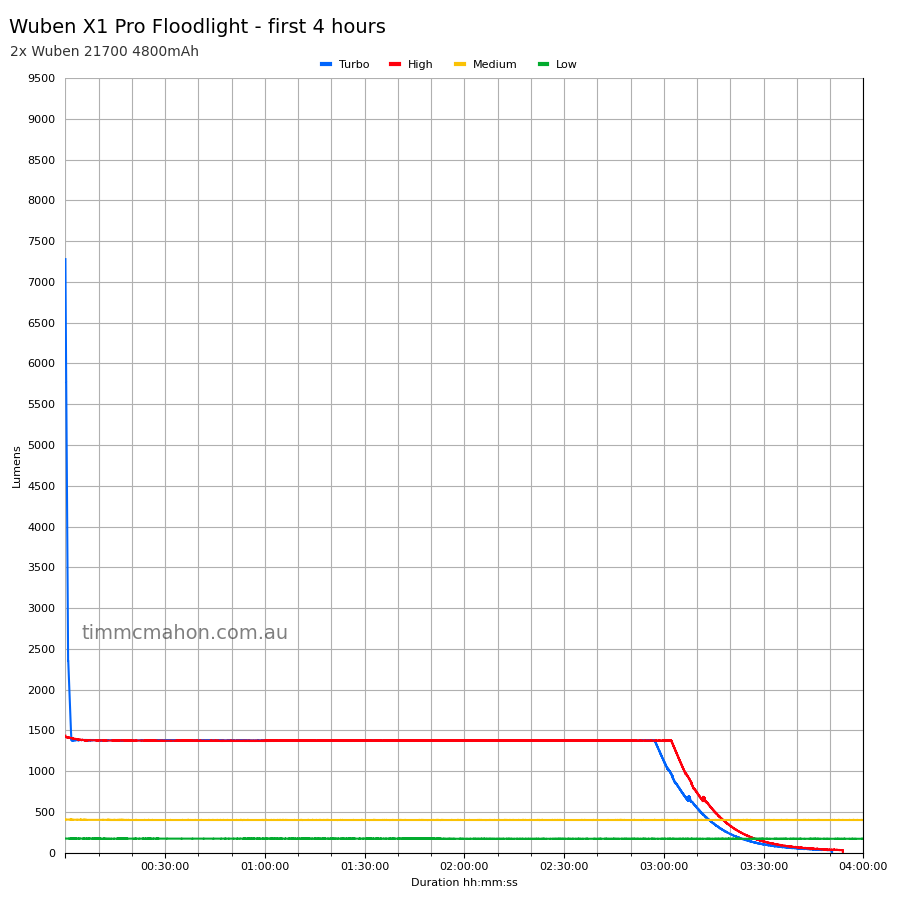
Floodlight#
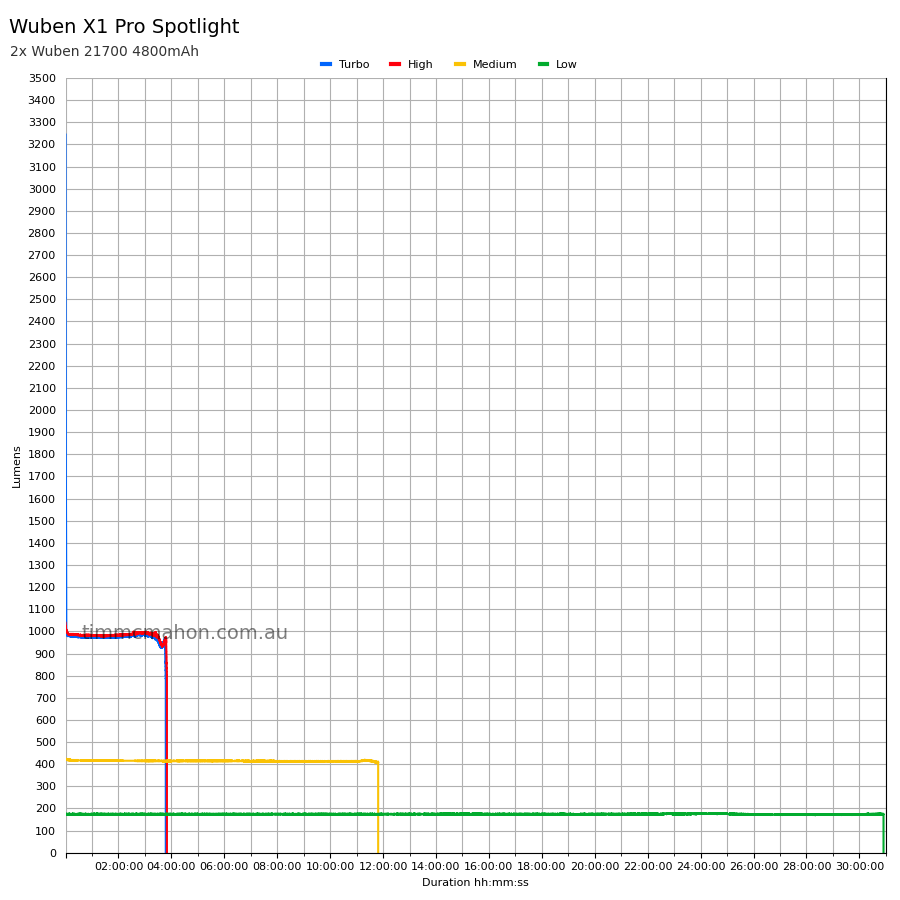
Spotlight#

Runtime#
Here is a summary of the runtime results:
| LED | Mode | User manual | Runtime | Turn off | Final voltage |
|---|---|---|---|---|---|
| Both | Turbo | 1min + 1min + 1h 42min | 1h 46min 30s | 1h 46min 30s | 3.03, 3.05 |
| Both | High | 1h 48min | 1h 49min 31s | 1h 49min 31s | 3.05, 3.07 |
| Both | Medium | 5h 30min | 6h 1min 39s | 6h 1min 39s | 3.03, 3.05 |
| Both | Low | 14h | 15h 12min 33s | 15h 12min 33s | 3.00, 3.02 |
| Both | Eco | 220h | 10min+ | 10min+ | |
| Spotlight | Turbo | 1min + 1min + 3h 42min | 3h 47min 18s | 3h 47min 18s | 2.95, 2.97 |
| Spotlight | High | 4h | 3h 49min 54s | 3h 49min 54s | 3.02, 3.05 |
| Spotlight | Medium | 11h | 11h 48min 51s | 11h 48min 51s | 3.01, 3.03 |
| Spotlight | Low | 28h | 30h 54min 1s | 30h 54min 1s | 2.98, 3.01 |
| Spotlight | Eco | 455h | 10min+ | 10min+ | |
| Floodlight | Turbo | 1min + 1min + 2h 48min | 3h 12min 55s | 3h 50min 36s | 2.97, 3.00 |
| Floodlight | High | 3h 6min | 3h 29min 41s | 3h 53min 51s | 2.94, 2.97 |
| Floodlight | Medium | 11h | 12h 38min 30s | 12h 38min 30s | 2.87, 2.90 |
| Floodlight | Low | 28h | 29h 52min 7s | 29h 52min 7s | 2.97, 3.00 |
| Floodlight | Eco | 365h | 10min+ | 10min+ |
“Runtime” is the time until the output reduces to 10% of the output at 30 seconds (as per the ANSI/PLATO FL1 2019 Standard).
“Turn off” is the time until my DIY lumen tube no longer detects more than 1 lumen.
“+” indicates that the light remained on after recording had stopped.
The runtime is slightly better than expected for most modes. It was slightly shorter than expected for the Spolight in High.
The output is well regulated.
The torch turned off for many of the modes when the output dropped below 10% of the output.
Throw#
I took lux measurements with a UNI-T UT383BT at 30 seconds. Turbo was measured at five metres.
| LED | Mode | Specs (cd) | Specs (m) | Candela measured (cd) | Distance (m) |
|---|---|---|---|---|---|
| Floodlight | Turbo | 10,975 | 209 | ||
| Spotlight | Turbo | 29,500 | 343 | ||
| Both | Turbo | 42,025 | 410 | 39,350 | 396 |
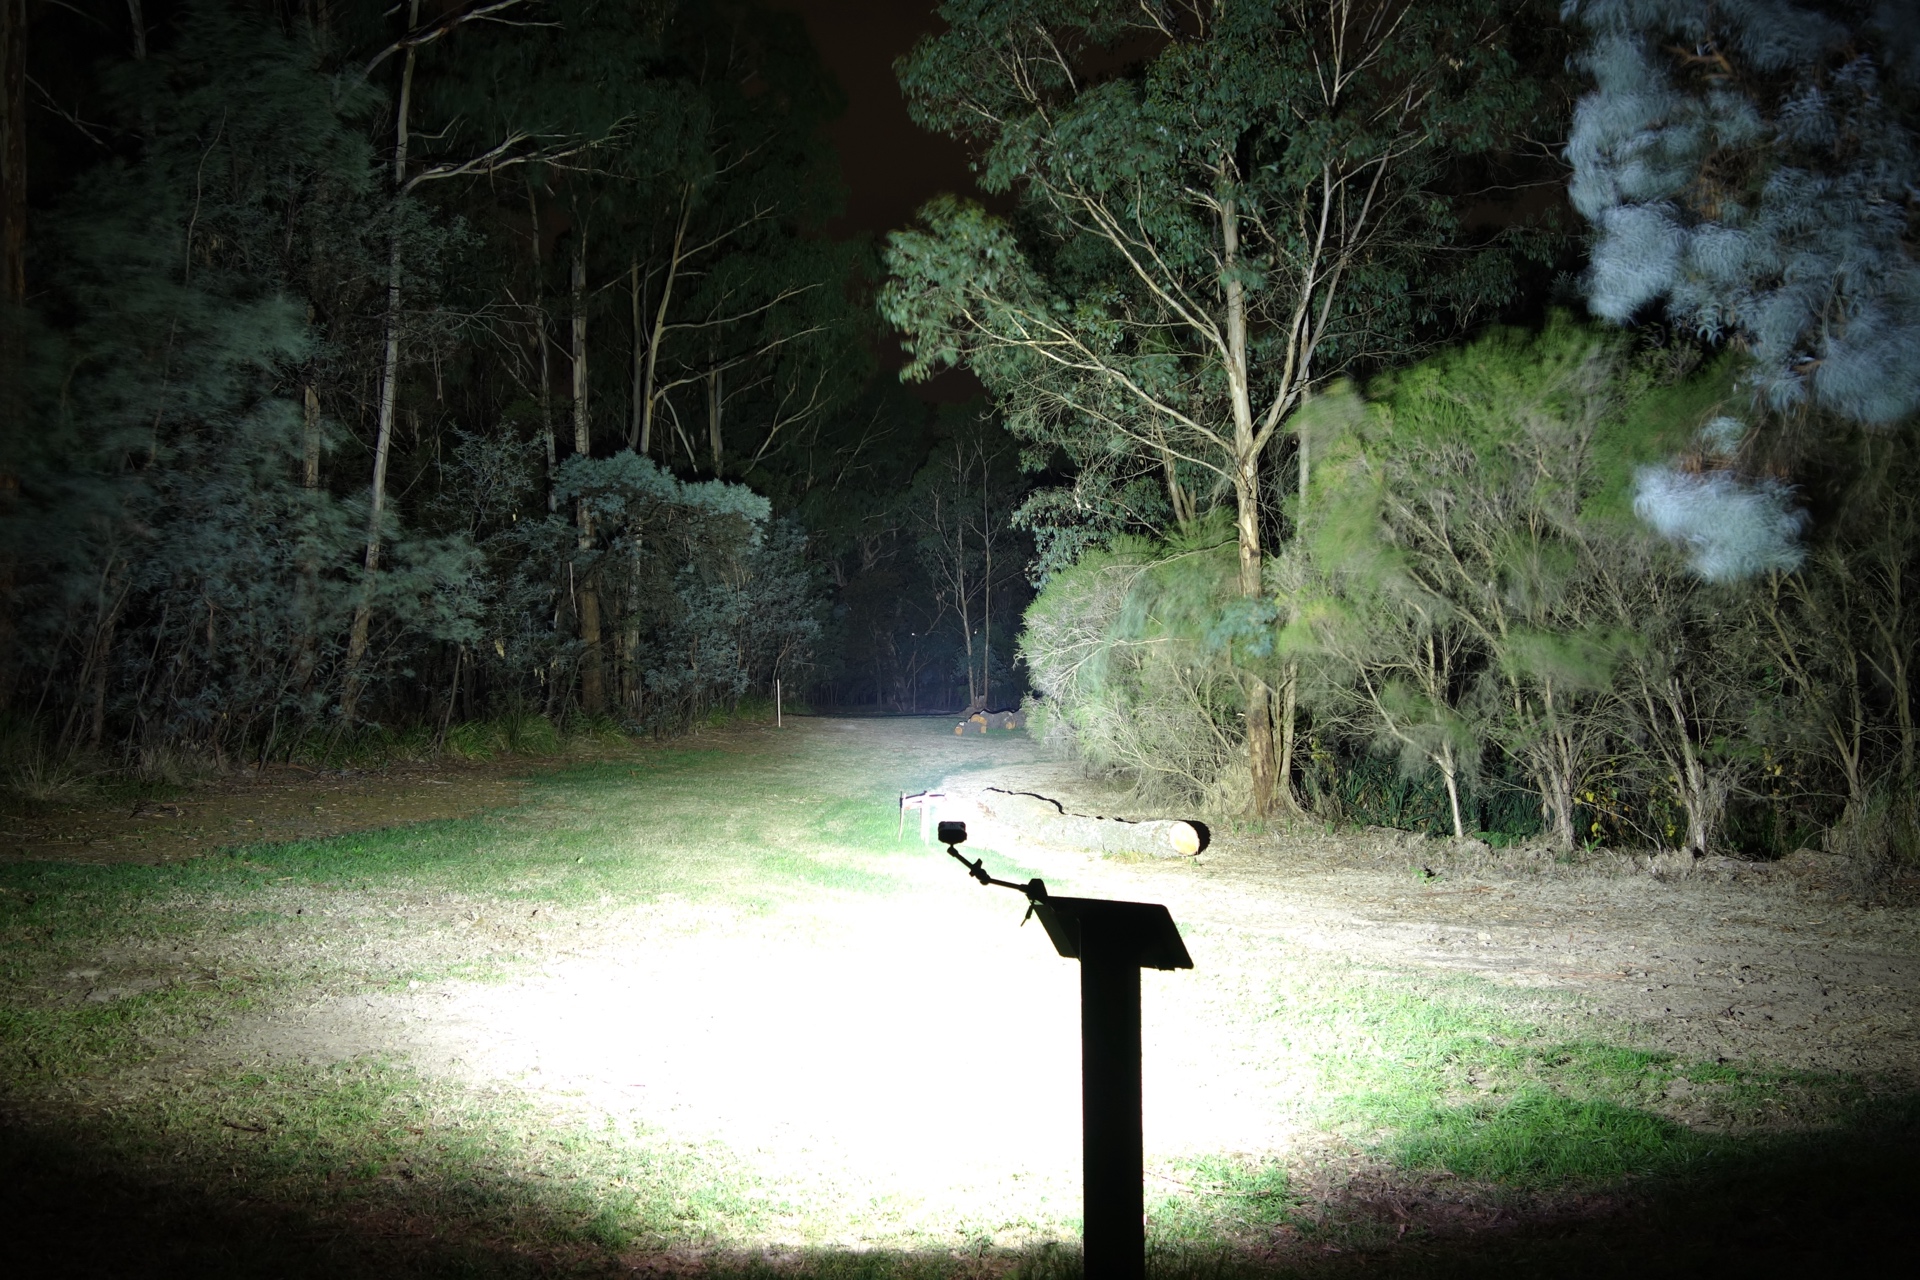
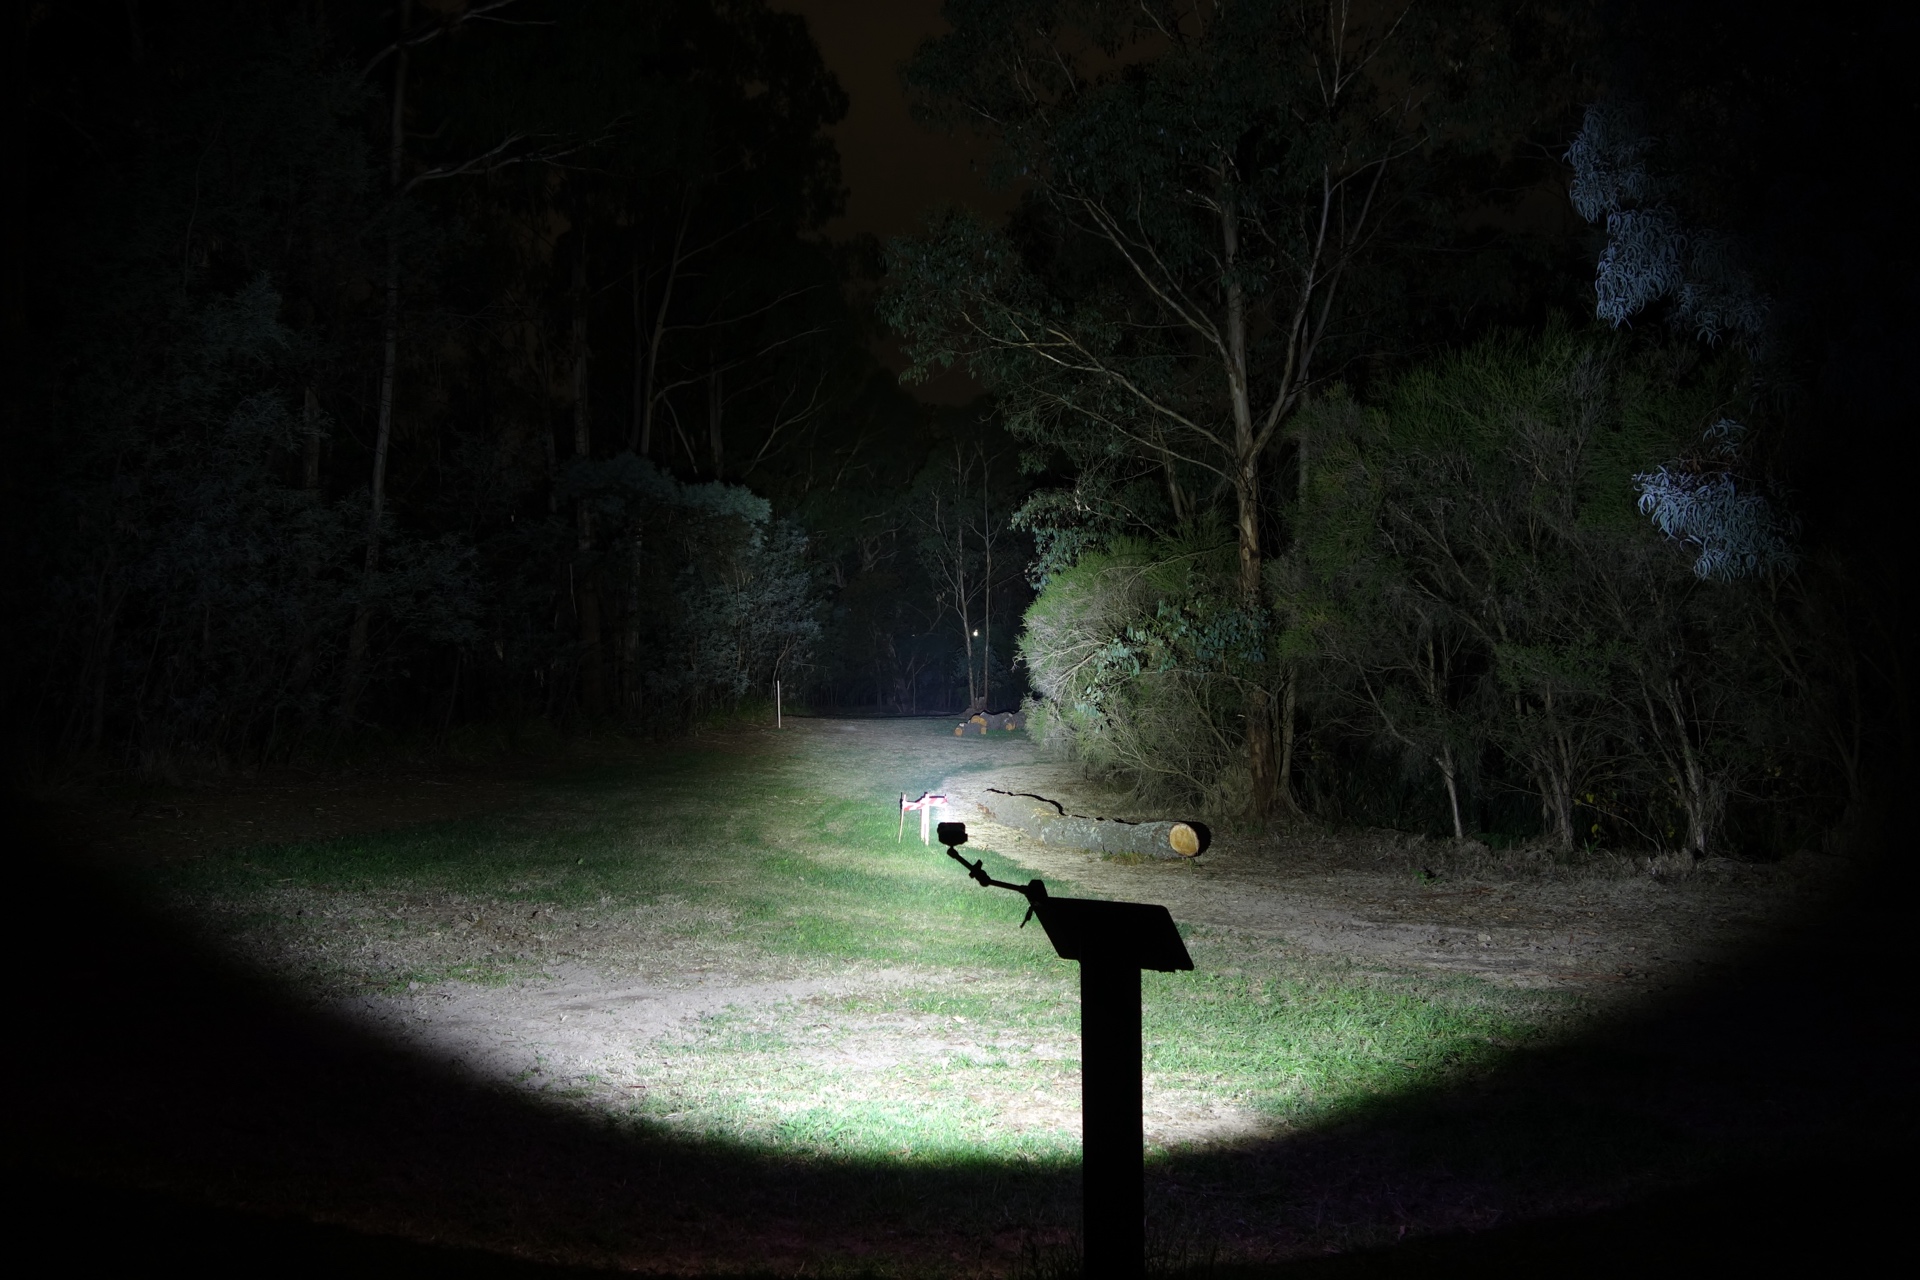
Beamshots#
I went to a local park and aimed the Wuben X1 Pro at a tree 70 metres away while using Turbo.
Beamshots were taken using a Sony RX100M2 using 3.2", f3.2, ISO 100, 5000K WB.
Wuben X1 Pro Both (Turbo)#
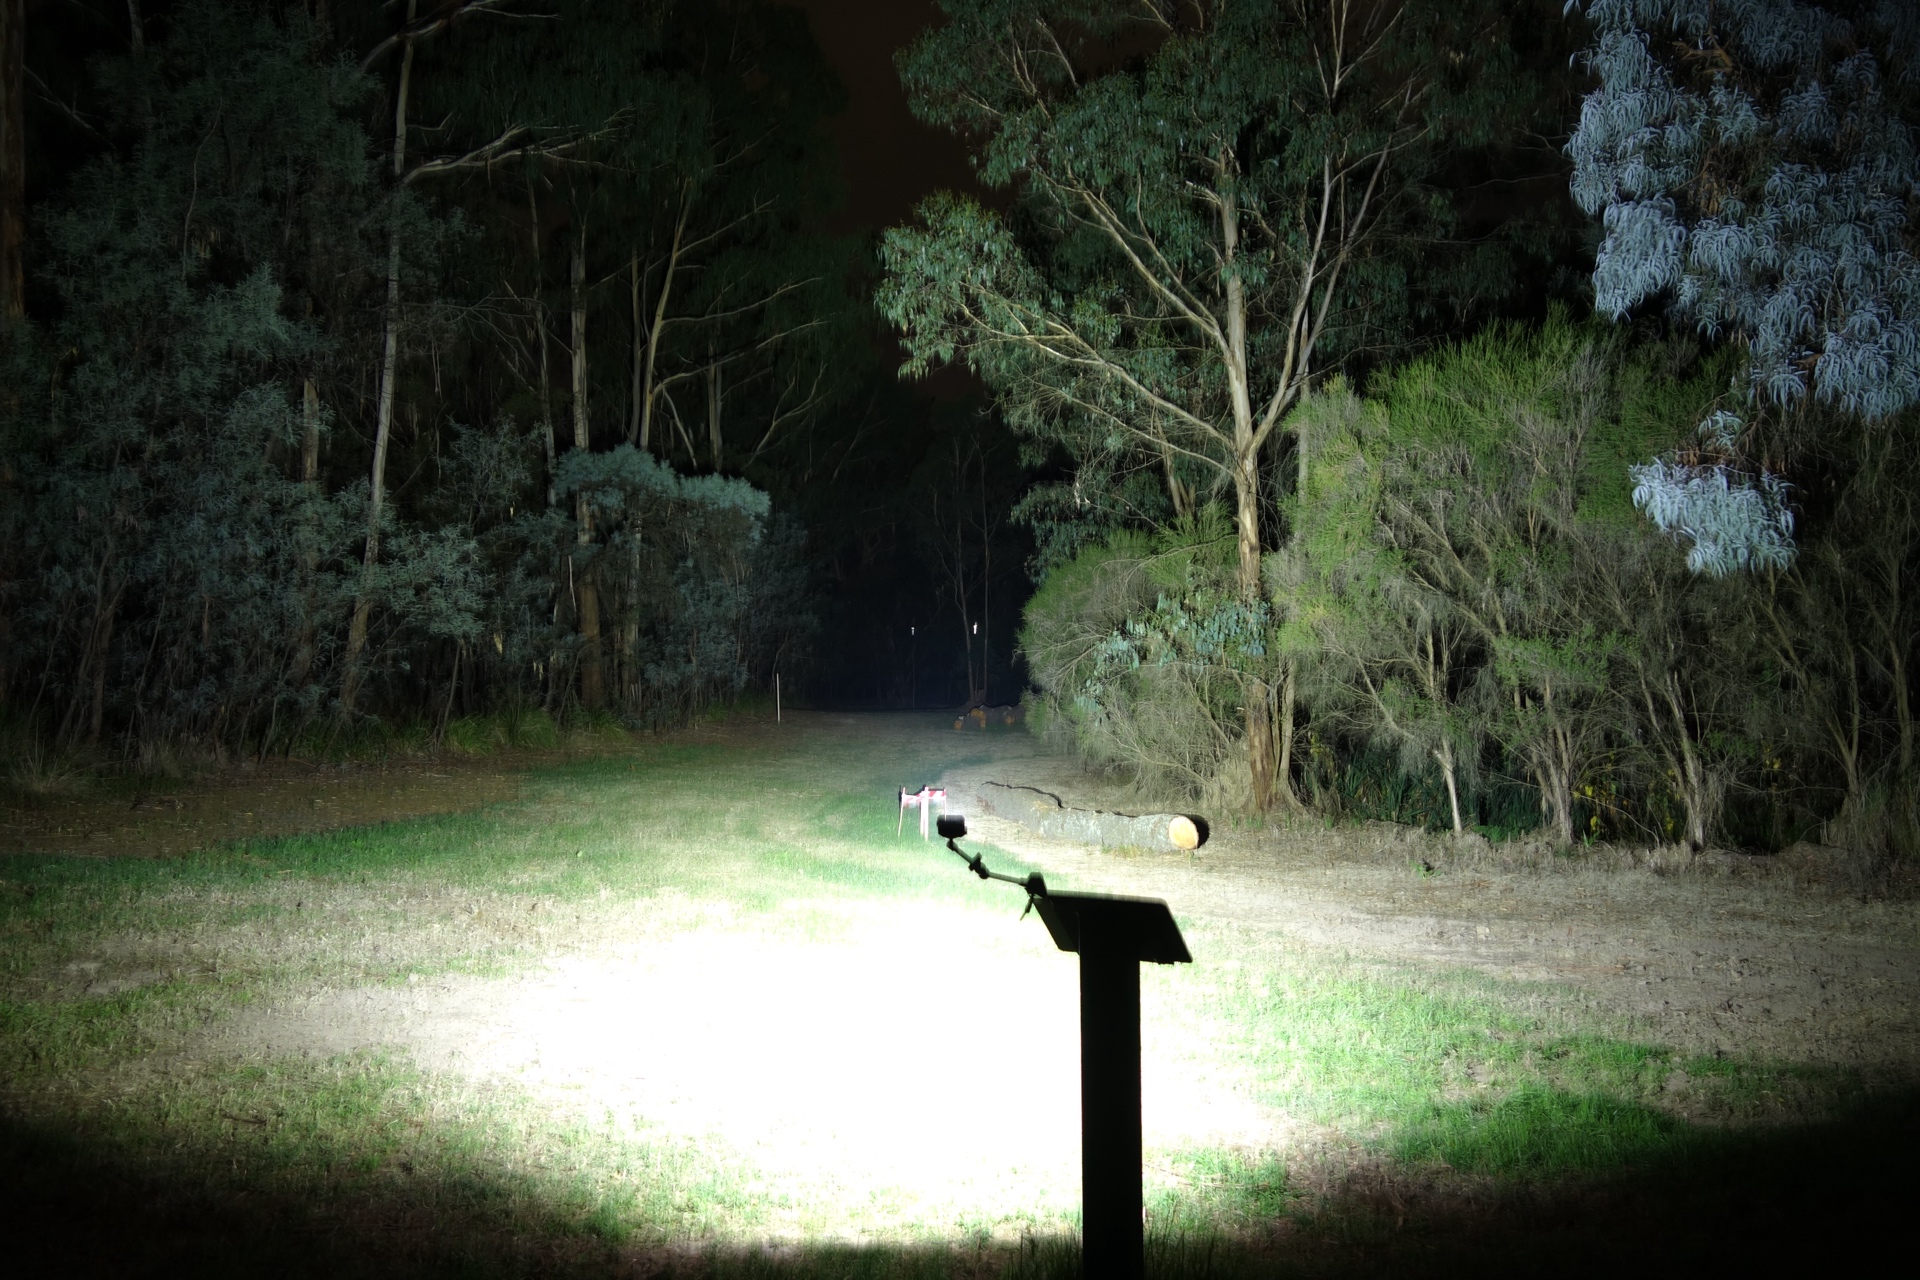
Wuben X1 Pro Spotlight (Turbo)#
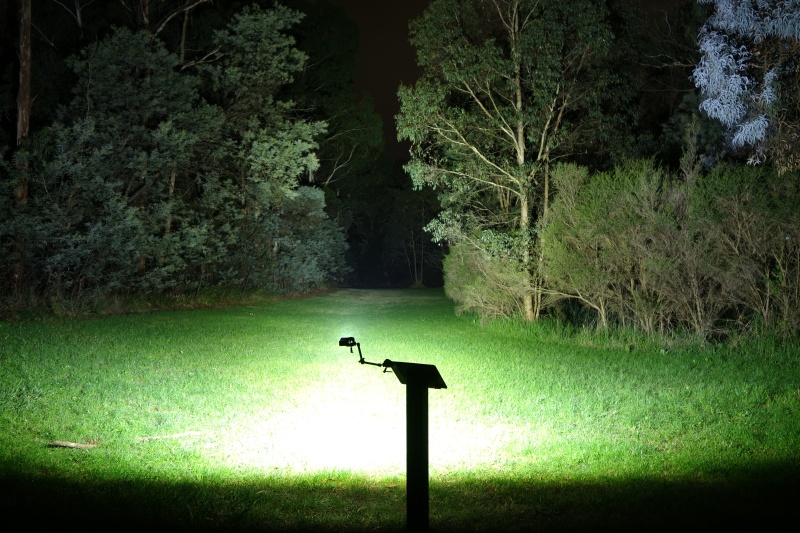
Wuben X1 Pro Floodlight (Turbo)#
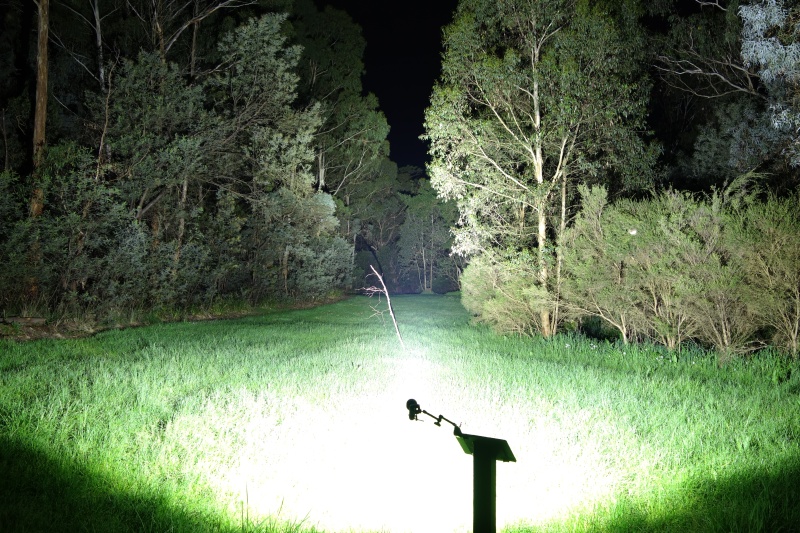
Wuben X1 Falcon (Turbo)#
Nightwatch Chaos NS59v2 9xSFQ60.3 (Turbo)#
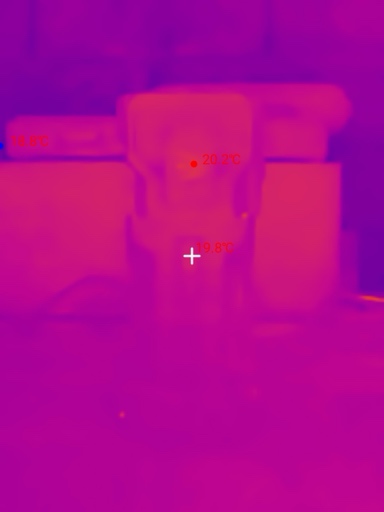
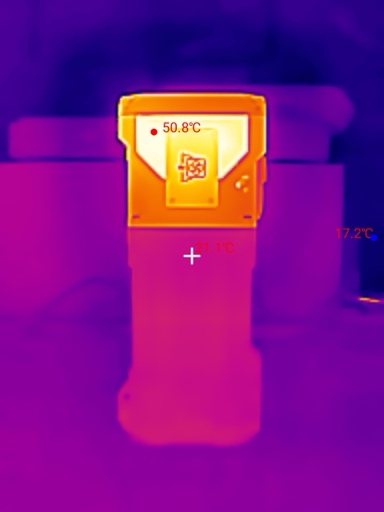
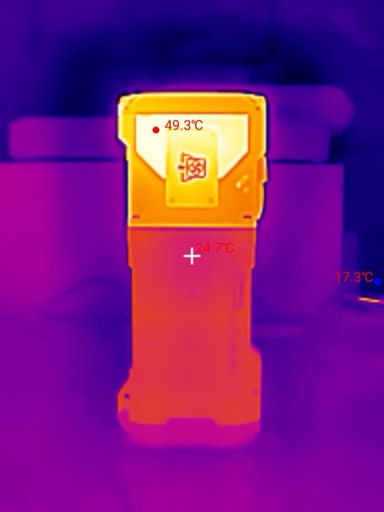
Thermal Images#
I used a Thermal Master P3 to take thermal images of the torch while using both the Spotlight and the Floodlight in Turbo mode. Get 10% off the Thermal Master P3 with code Mcmahon10
Room temperature: 16 C
| Time (mm:ss) | Max Temperature |
|---|---|
| 00:00 | 20.2 C |
| 01:00 | 50.8 C |
| 02:00 | 49.3 C |
| 03:00 | 47.0 C |
| 04:00 | 46.4 C |
| 05:00 | 46.4 C |


Conclusion#
The Wuben X1 Pro has a better user interface and more features compared to the Wuben X1.
The Wuben X1 is good at what it does. It sustains a higher lumen output for longer. It is a floodlight.
The ability to switch between Spotlight, Both or Floodlight makes the Wuben X1 Pro more versatile.
The CRI is relatively low at 70 and the floodlight beam is honestly a bit ugly. There is a green corona around the hotspot and the spill has a cross pattern (it looks like a big flower).
The battery compartment on the X1 Pro has been improved to include a quick release lock for easy access. It has more space. Perhaps too much space. Flat top cells are too short.
I am pretty happy to see the cells being balance-charged despite being configured in series.
The USB-C port has been improved to fast charge the torch or be used as a power bank. It would be even better if the USB-C port had a strong metal cover and if the power bank feature supported more modes (e.g. 5V/3A, 9V/3A, 12V/3A, 20V/1.5A).
The active cooling system has been improved. There are two heatsinks. The fan can be replaced. And the fan can be turned on or off.
Even if you already have the Wuben X1, the Wuben X1 Pro is worth checking out.
If you just want an intense wall of light then I would recommend the Wuben X1.
Pros:#
- Good build quality.
- Good runtimes.
- Good beam distance.
- Fan cooled.
- Lumen output is slightly lower than expected for Turbo.
- Simple user interface.
- USB-C fast charging.
- Balanced charging.
- Power bank feature.
Cons:#
- USB-C port cover keeps popping out.
- Low CRI.
- Power bank is limited ot 5V/3A output.
- Requires longer button top 21700 cells.
Price#
The Wuben X1 Pro is US$139.99 at wubenlight.com.
Product page#
Wuben X1 Pro at wubenlight.com (affiliate link)
Wuben X1 Pro at amazon.com.au (affiliate link)
I may earn a commission if you use an affiliate link or a promo code. This will help fund future torch reviews and tutorials.