Manker MC13 II SE Pocket Thrower Review

Manker MC13 II SE#
- Specifications
- Introduction
- Torch in use
- Build quality
- LED, bezel, lens, reflector and beam
- Size and comparison
- User interface
- Batteries and charging
- Performance
- Beamshots
- Thermal Images
- Conclusion
- Price
- Product page
Specifications#
| Brand/model | Manker MC13 II SE |
|---|---|
| LED | Cool White 6000K |
| Maximum lumens | 4,500 lm |
| Maximum beam intensity | 110,556 cd |
| Maximum throw | 665 m |
| Battery | 1*18350 Li-ion, 1*18650 (optional) |
| Onboard charging | Yes (USB-C) |
| Material | Aluminium |
| Modes | 4 |
| Blinkies | Strobe, SOS, Beacon |
| Reflector | Smooth |
| Waterproof | IP67 |
| Review date | July 2025 |
Introduction#
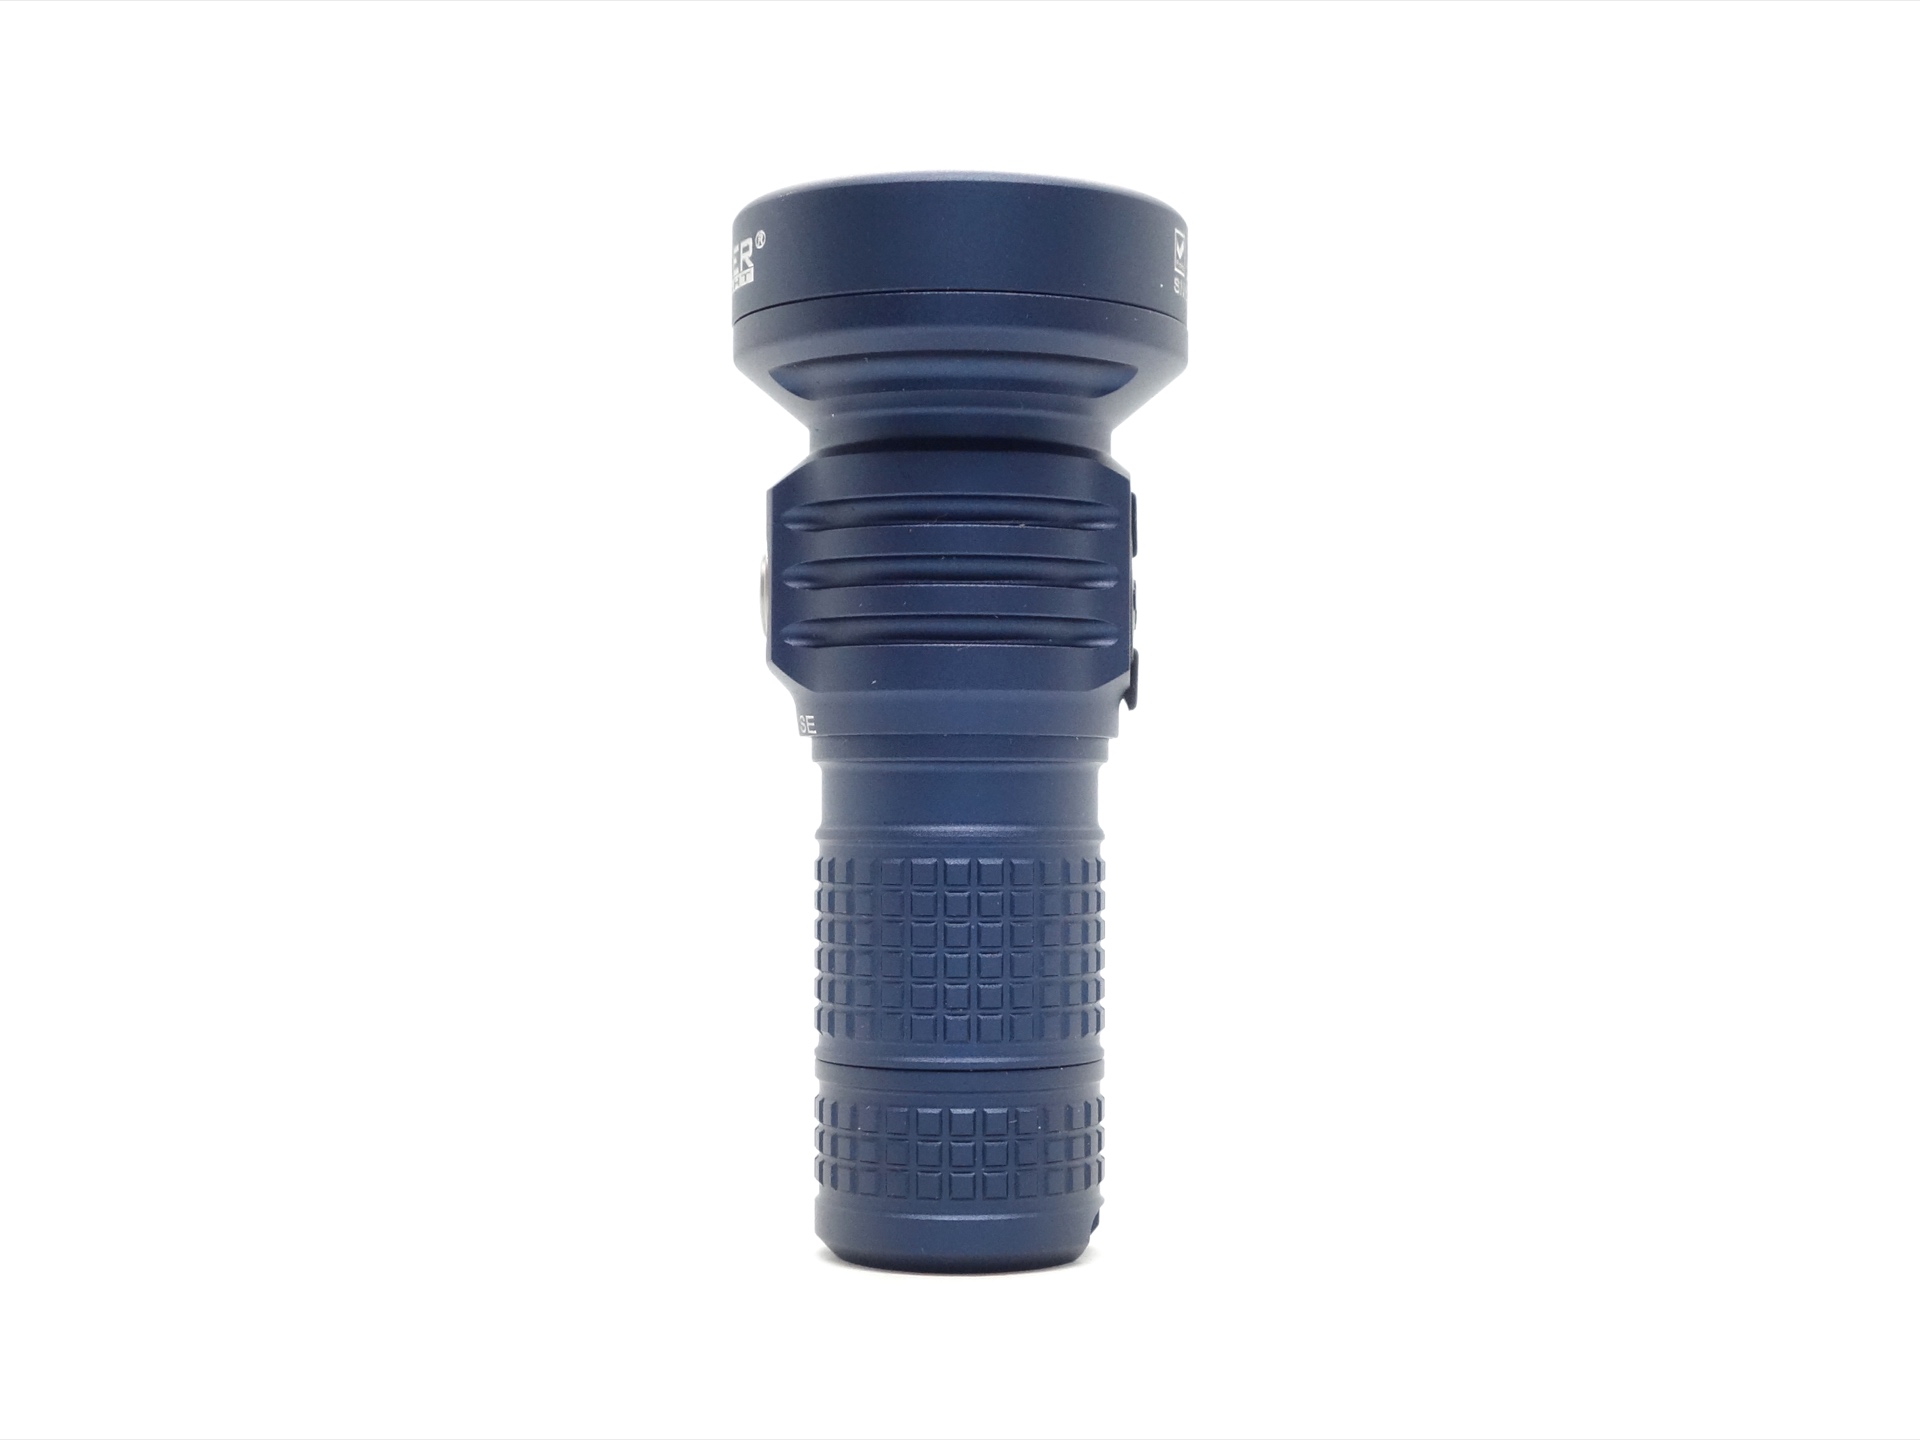
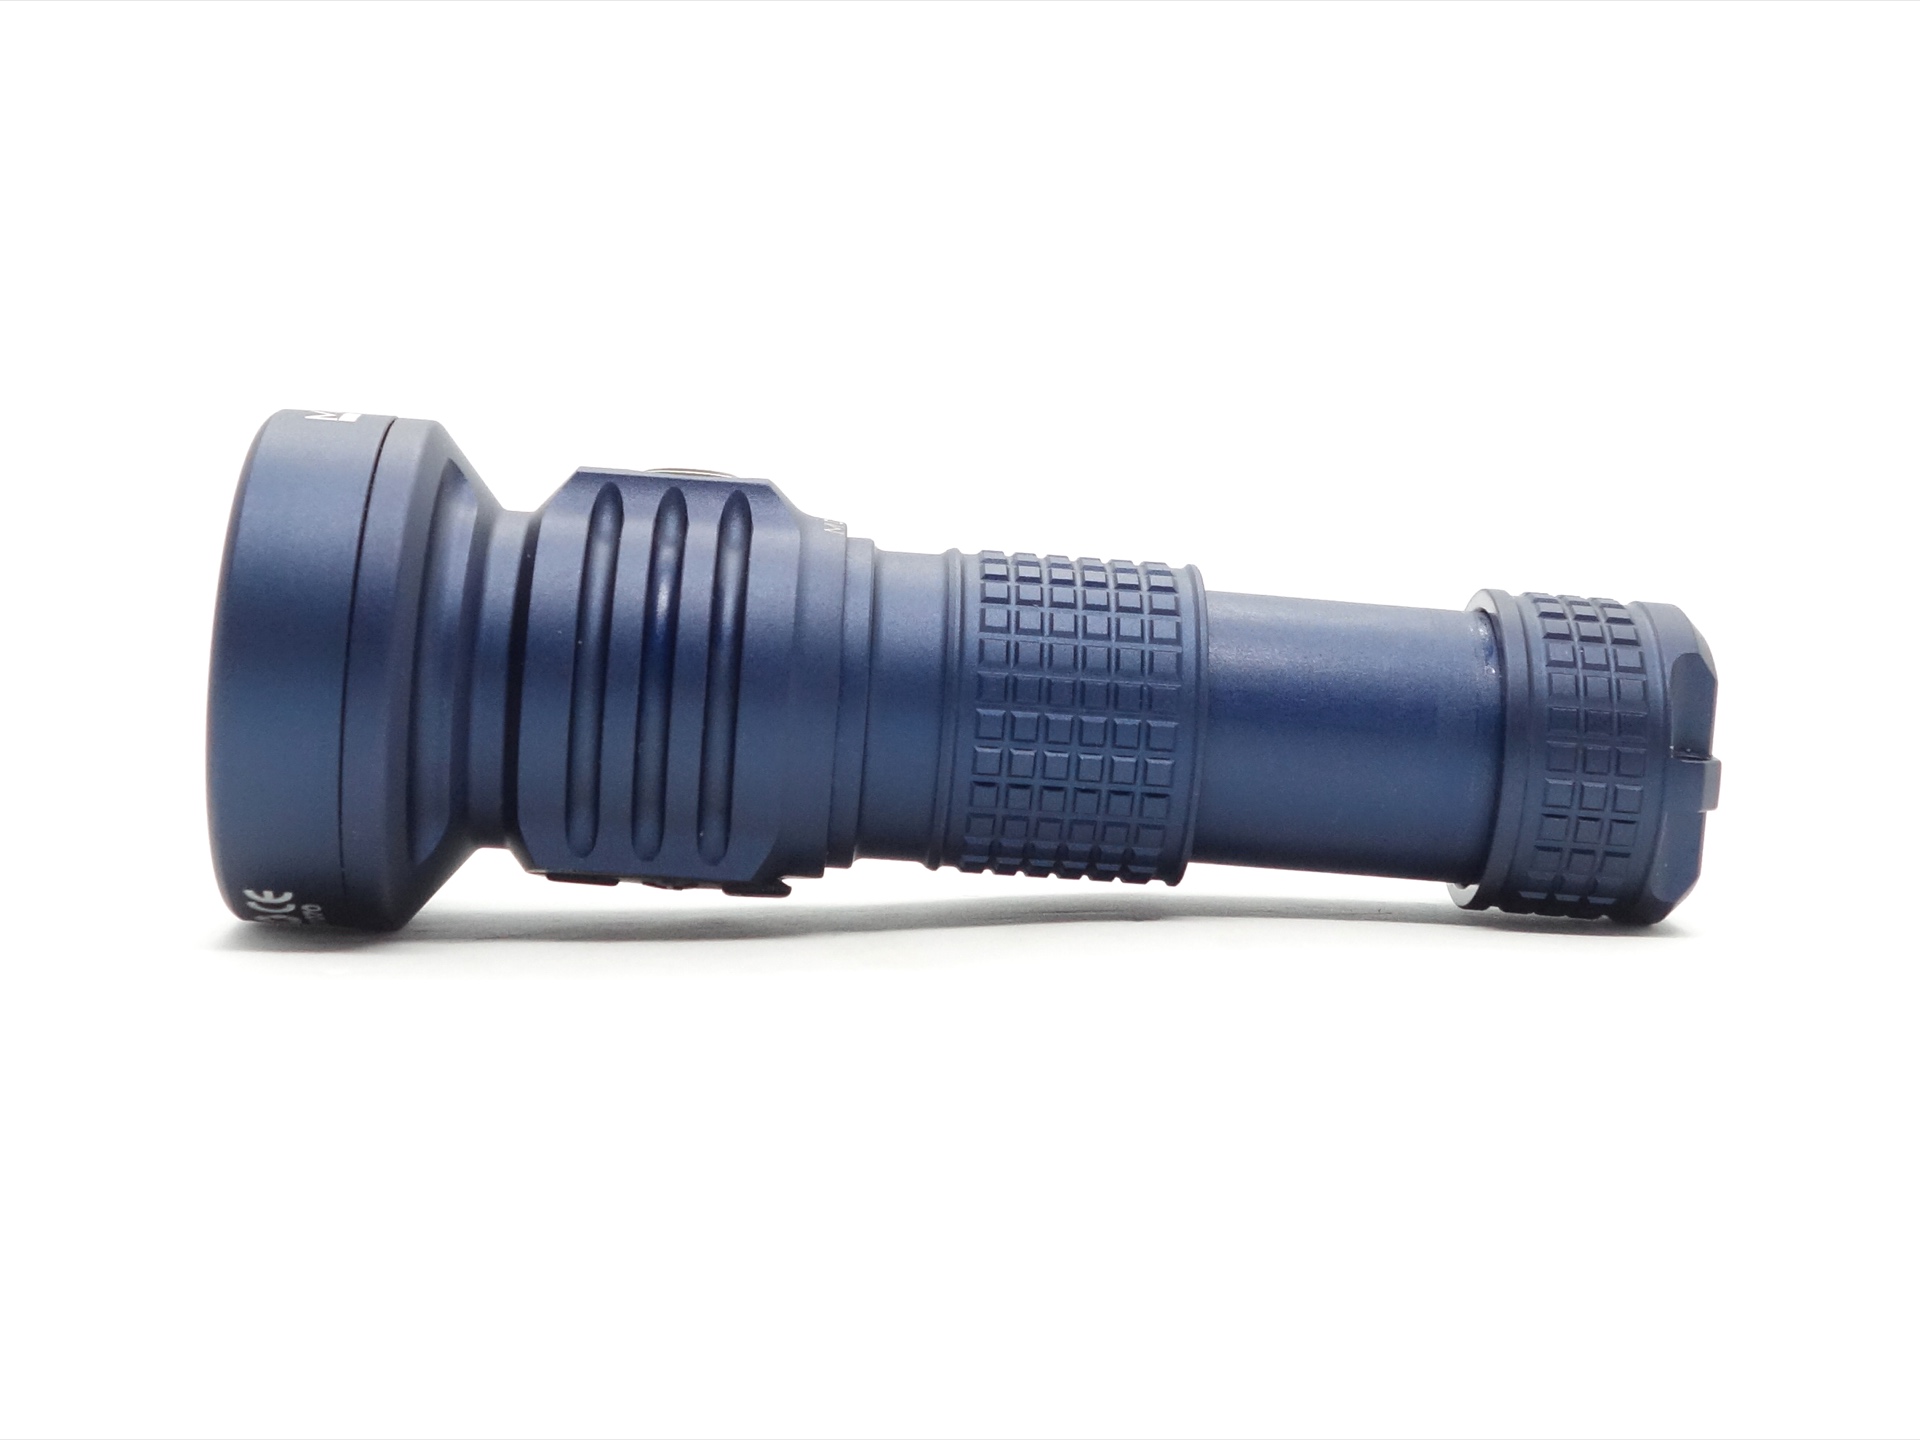
The Manker MC13 II SE is an 18350-sized pocket thrower! The battery tube extends to fit either an 18350 or an 18650 cell. It has a smooth reflector and a powerful emitter to produce a beam that can reach over 600 metres. And the head has built-in USB-C charging.
I previously made a Pocket Thrower Comparison of the Manker MC13, ThruNite Catapult Mini and the SPERAS M4.
The original Manker MC13 had a TIR optic, a small Osram emitter, and an electronic tail switch. The knurling was a bit sharp on the original tube.
The MC13 II SE has some notable improvements:
- Larger round emitter with a wider hot spot.
- Extendable battery tube (fits one 18350 or one 18650).
- The battery tube is much more comfortable to hold.
- Built-in USB-C charging.
- Electronic side switch with a battery status indicator.
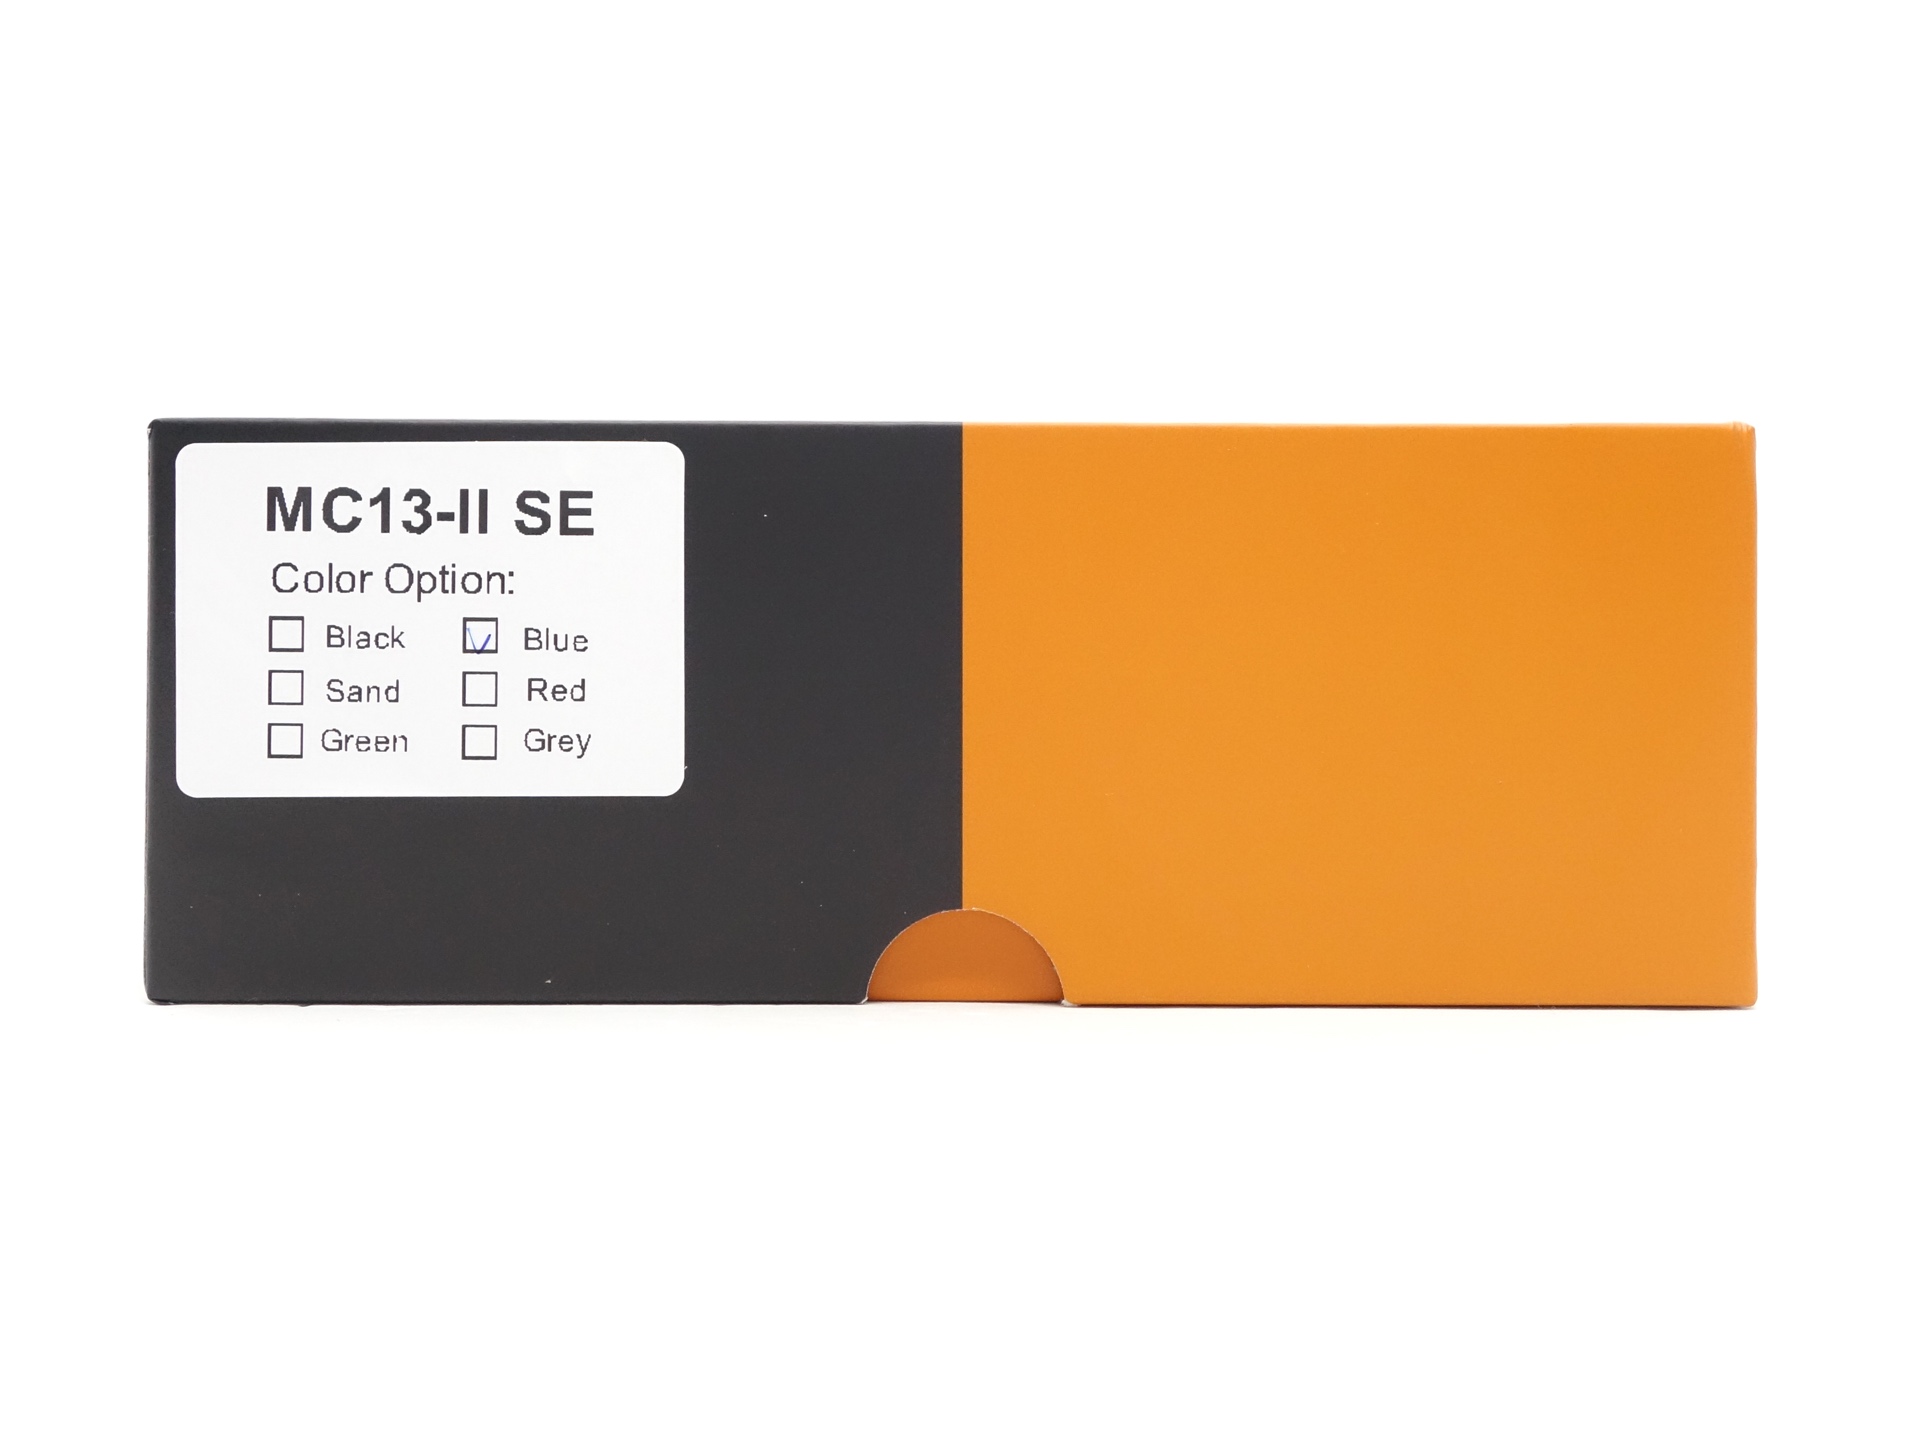
It is available in Sand, Blue, Black and Red at mankerlight.com.
Here is a hands-on video:
Here is a tour of the factory:
I have reviewed multiple EDC torches from Manker:
Manker Striker Mini, Manker E05 II, Manker F14
Manker kindly provided this torch for review. I have not been paid for this review nor have I held back my opinions of this torch.
Packaging#
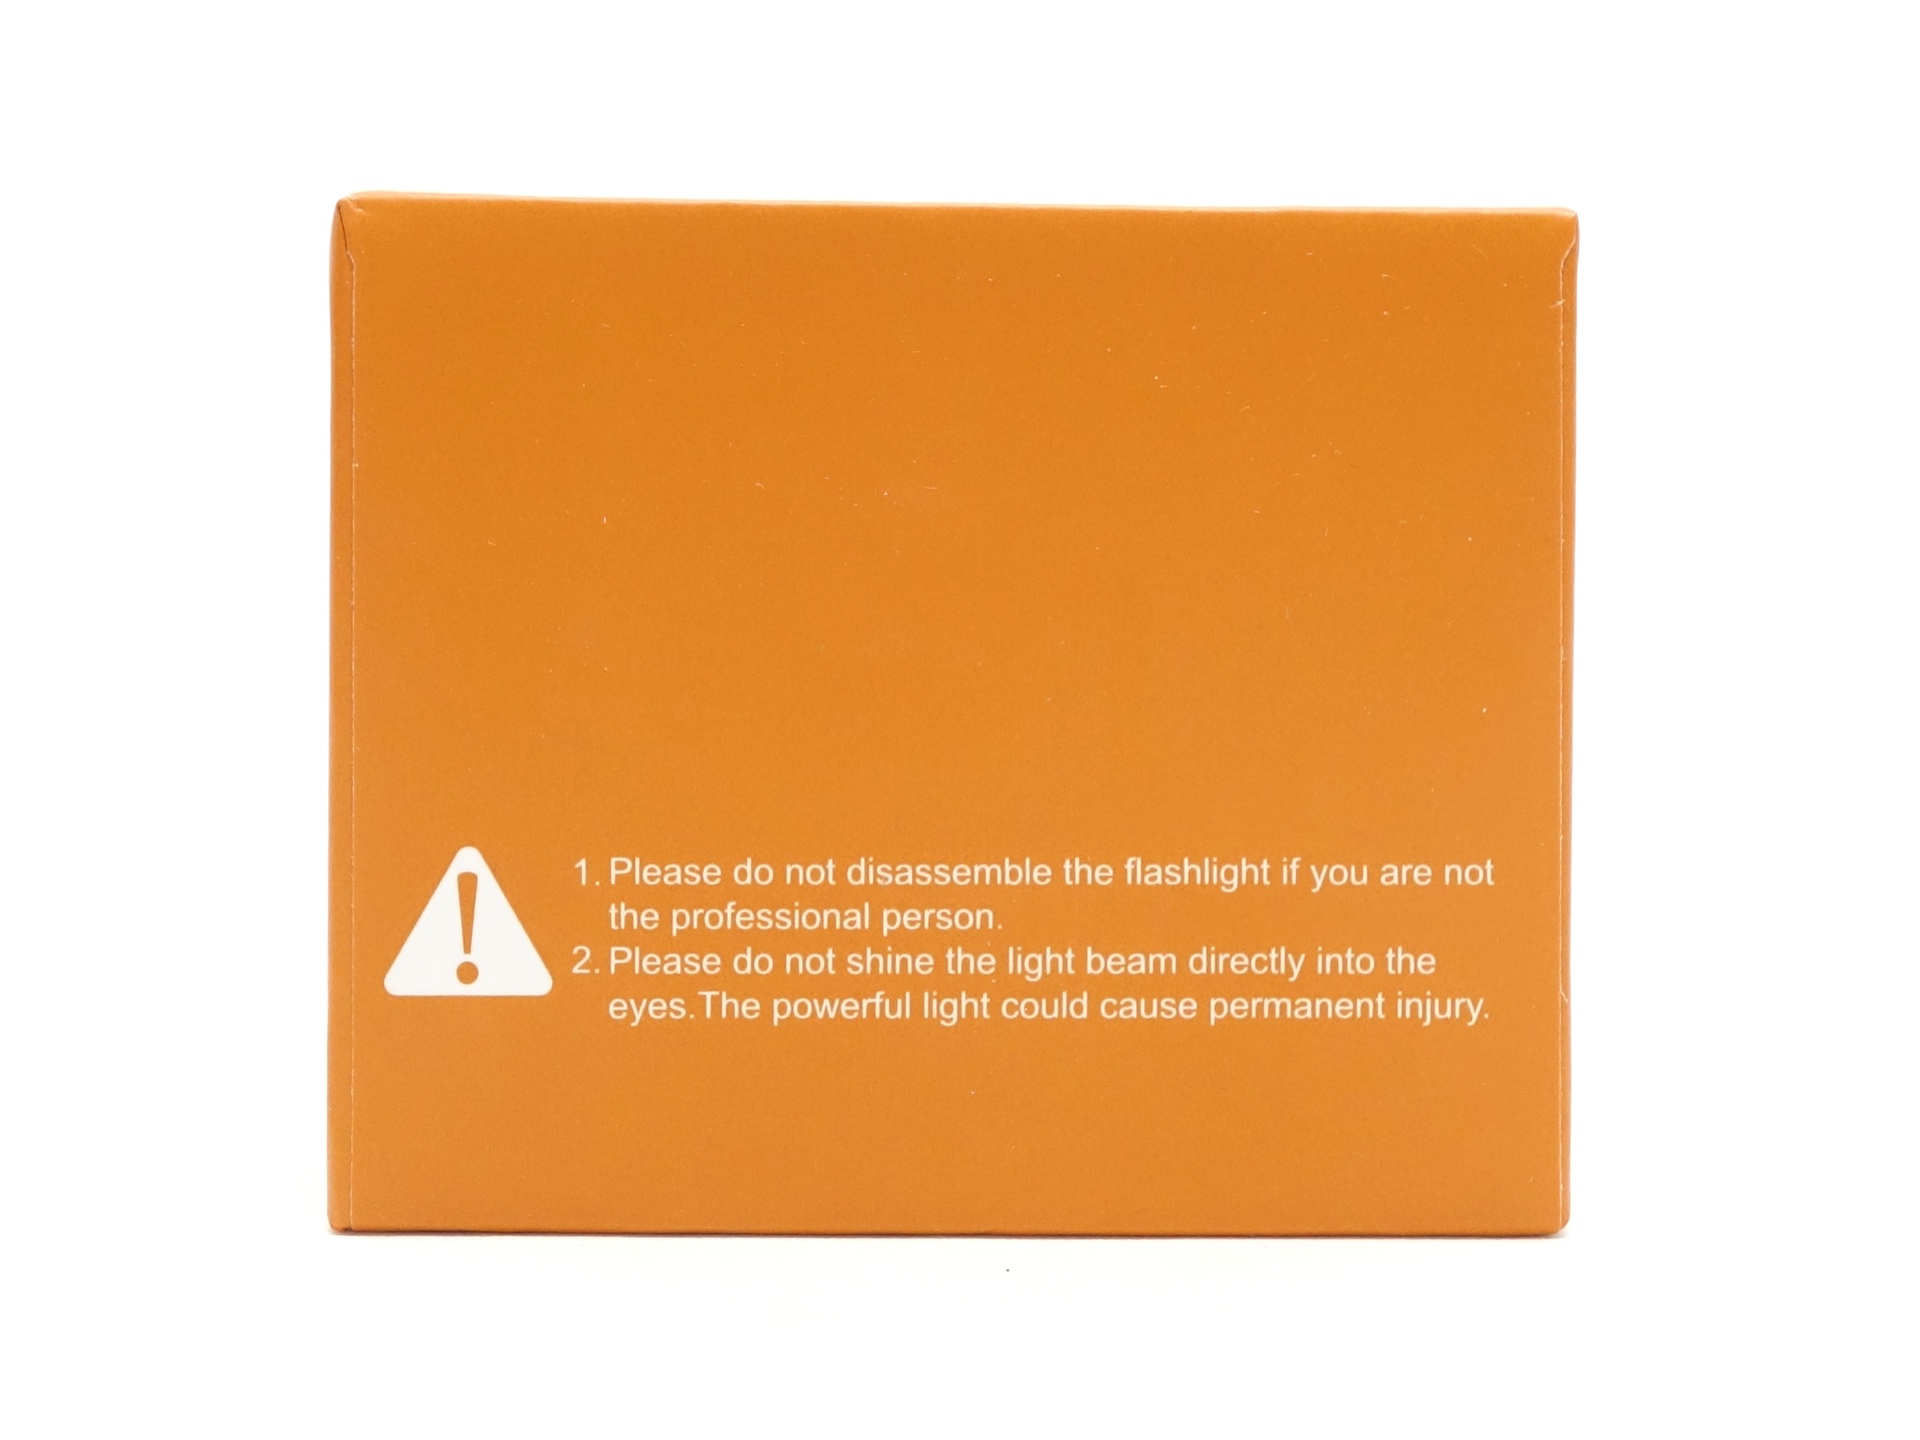
The Manker MC13 II SE comes in orange and black box (the colours of Manker).
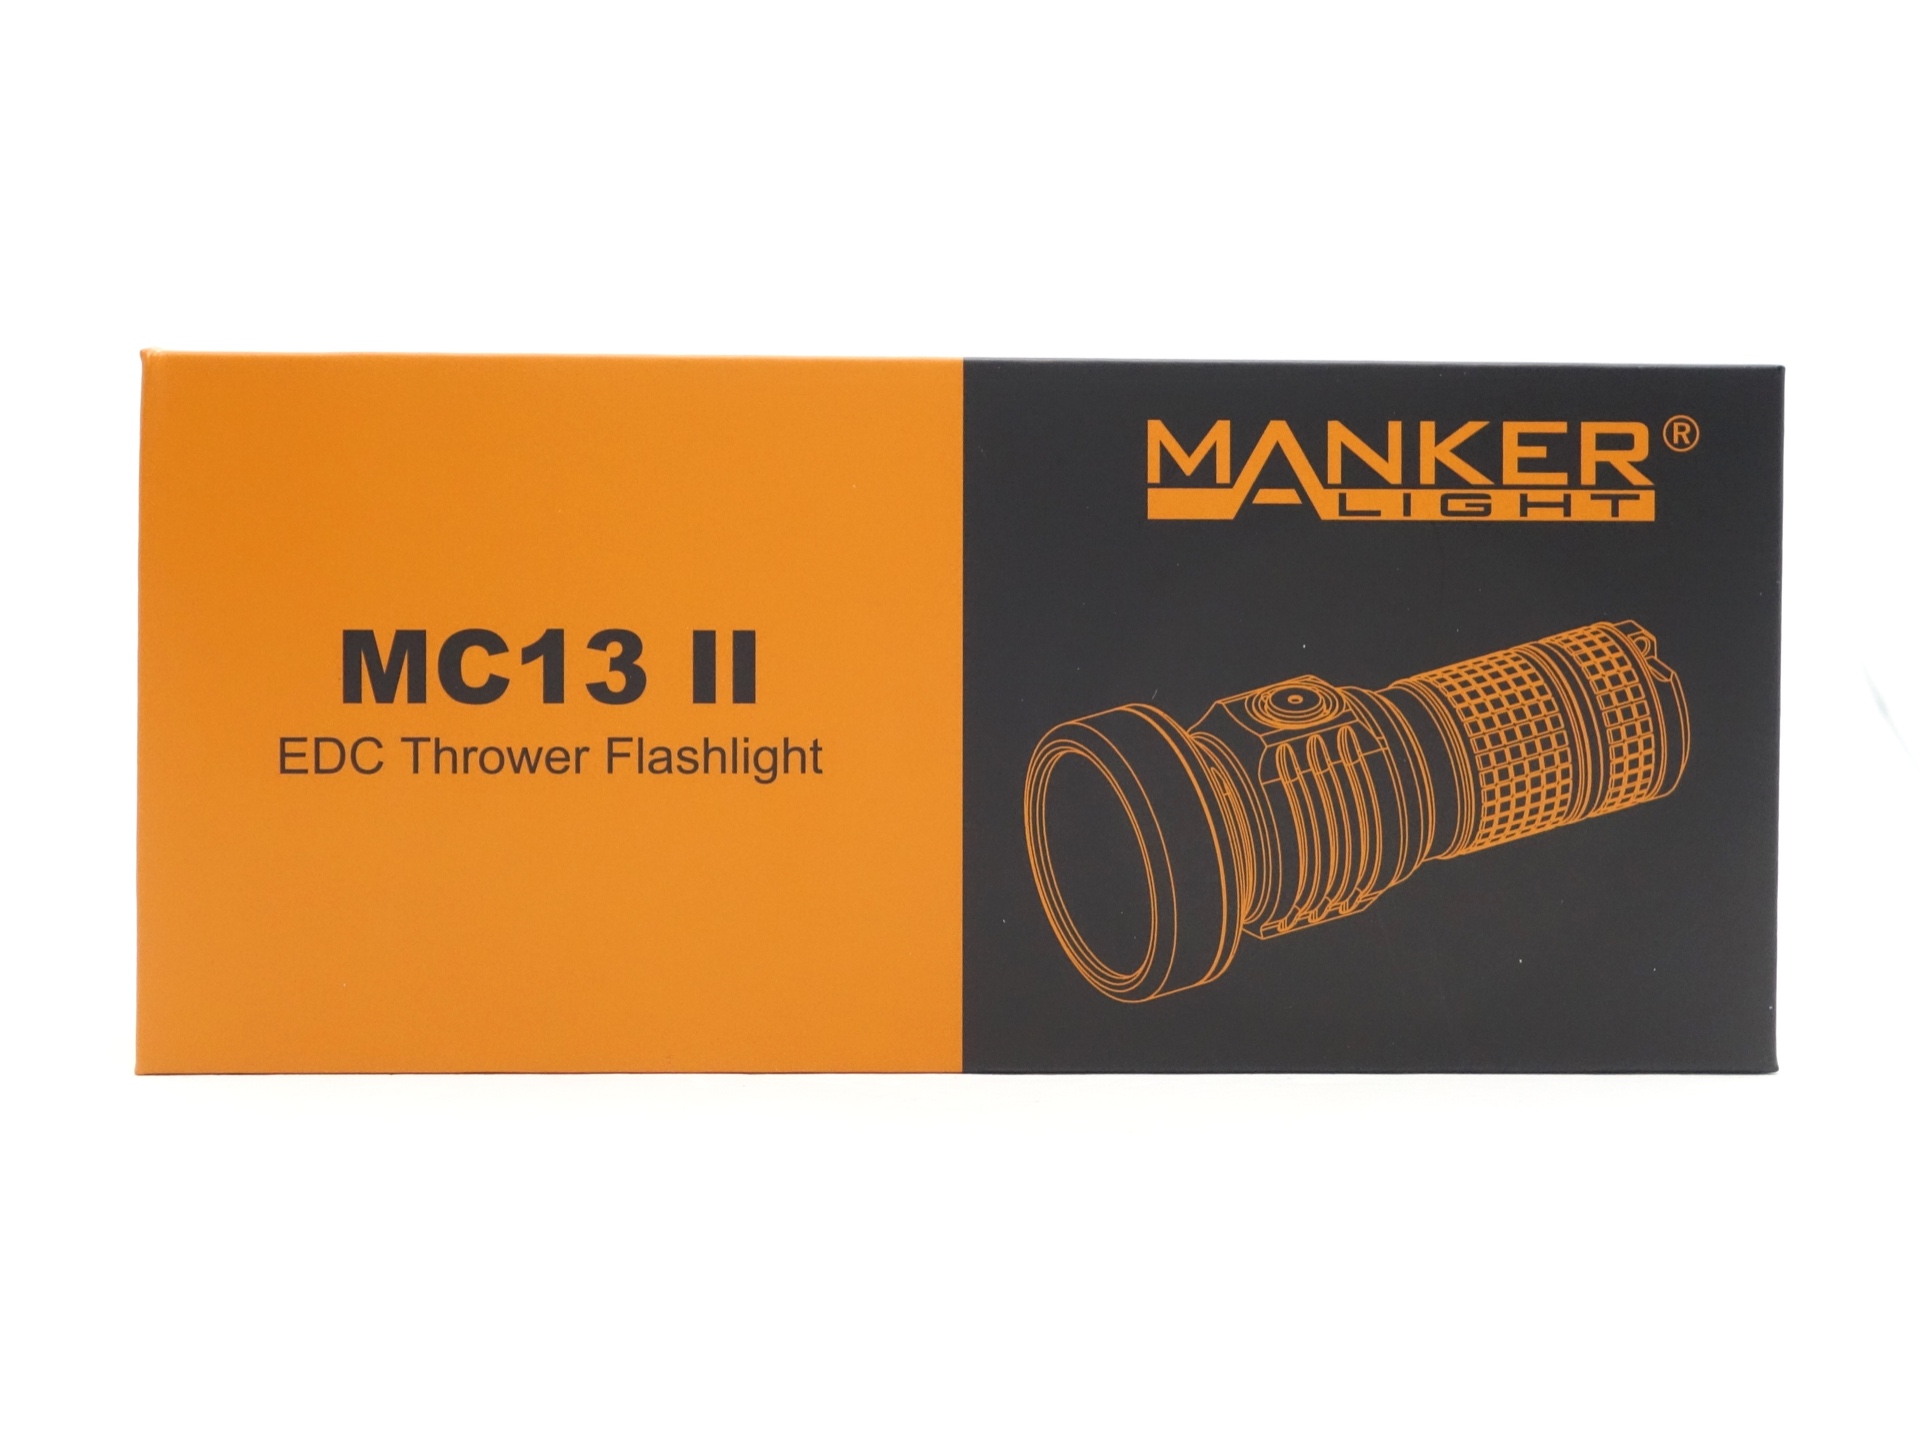
There is an image on the top and some basic information on the side.
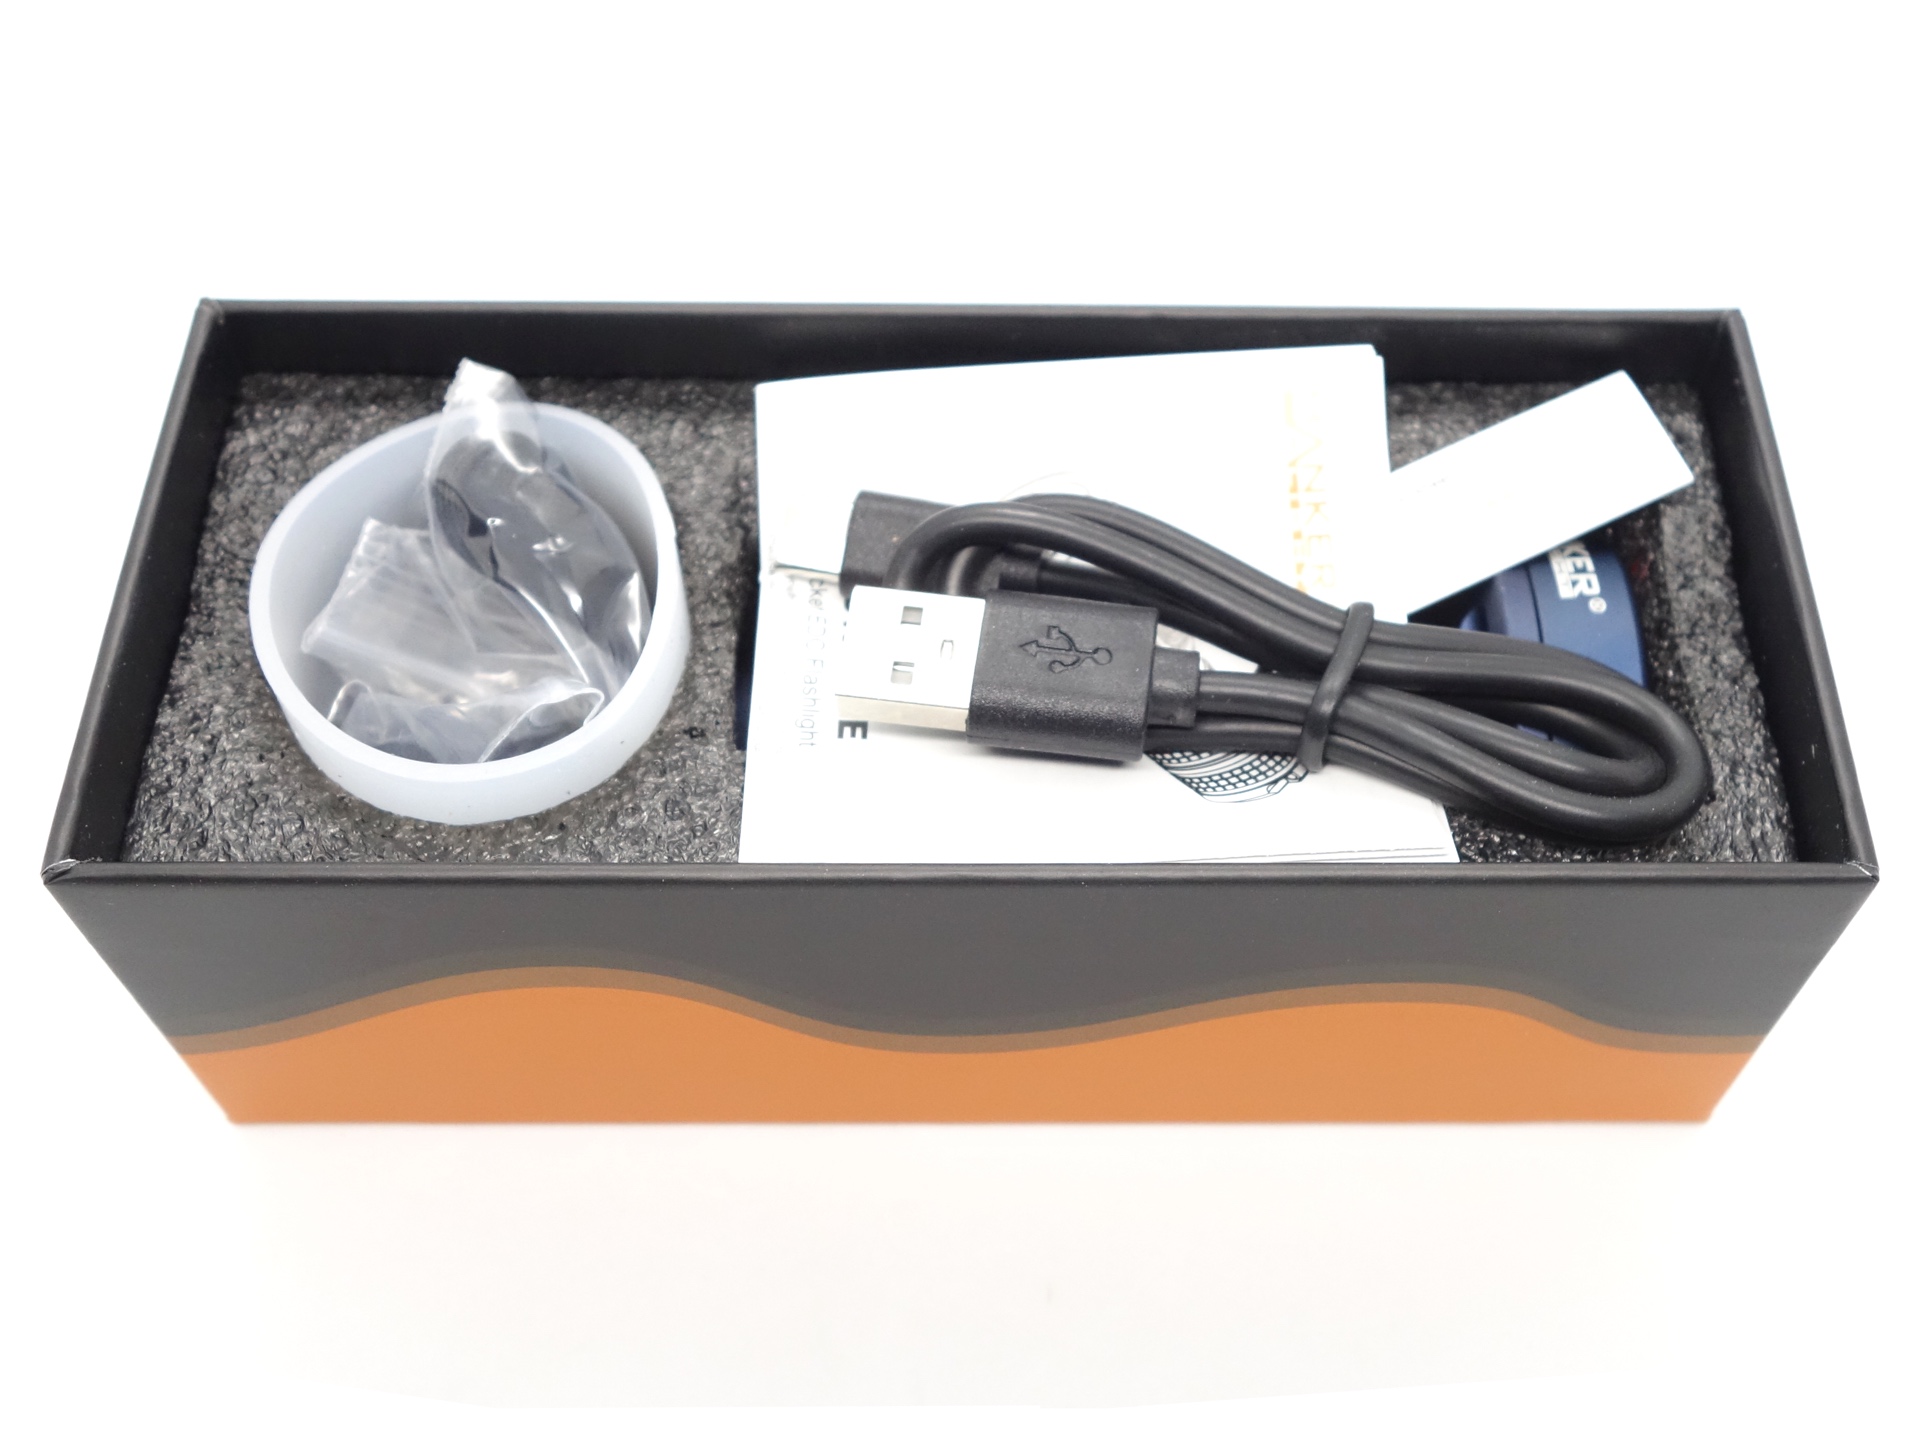
The following is included in the box:
- Manker MC13 II SE.
- Manker 18350 3.6V Li-ion 1100mAh cell.
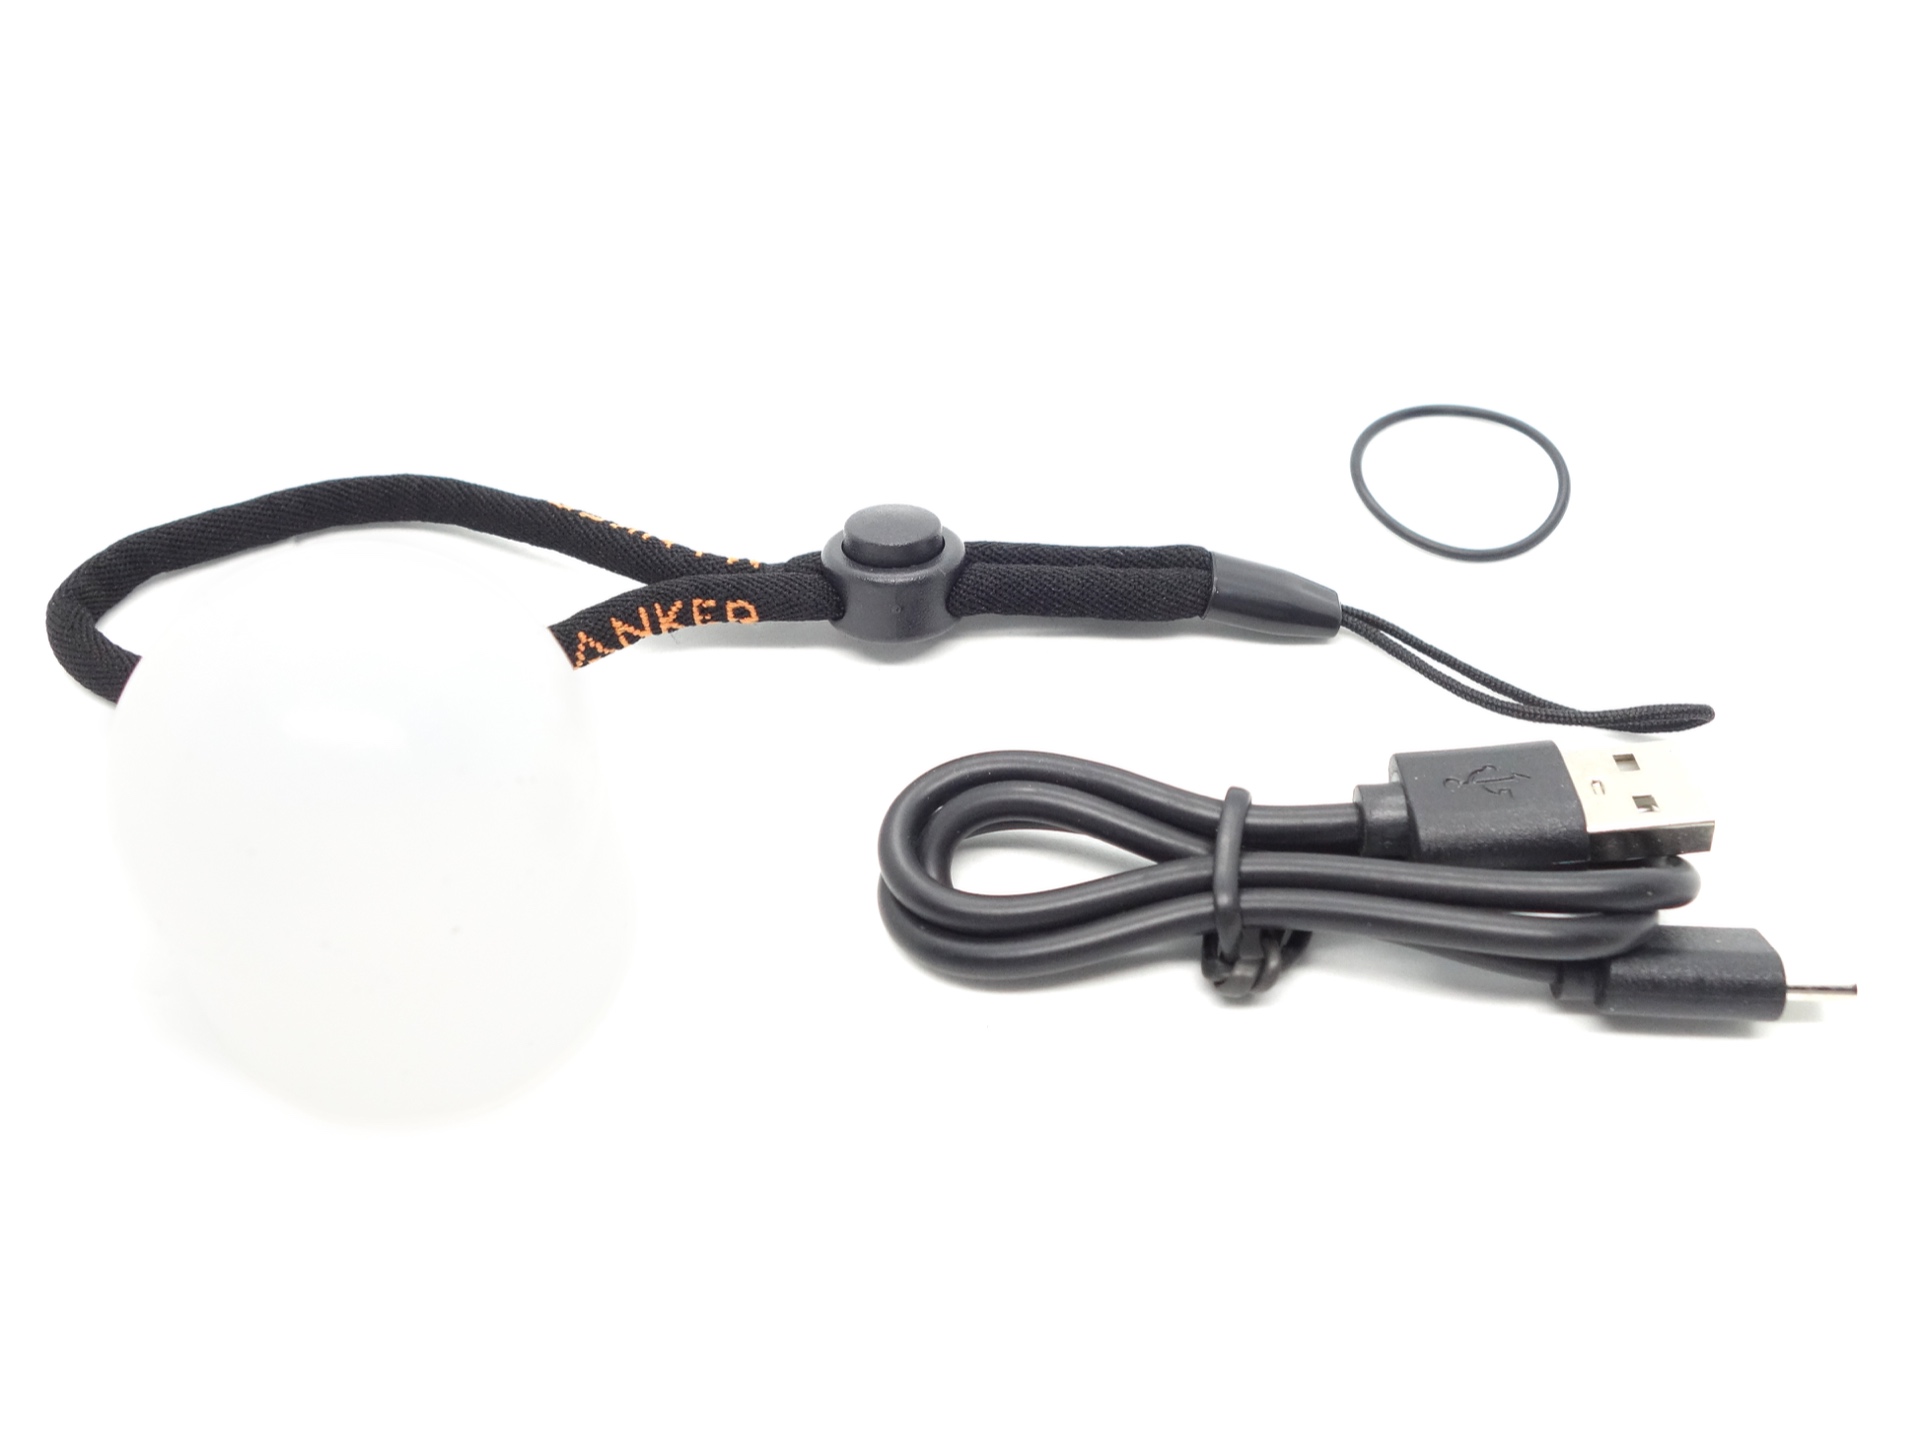
- USB-A to USB-C charging cable.
- Lanyard.
- Spare o-ring.
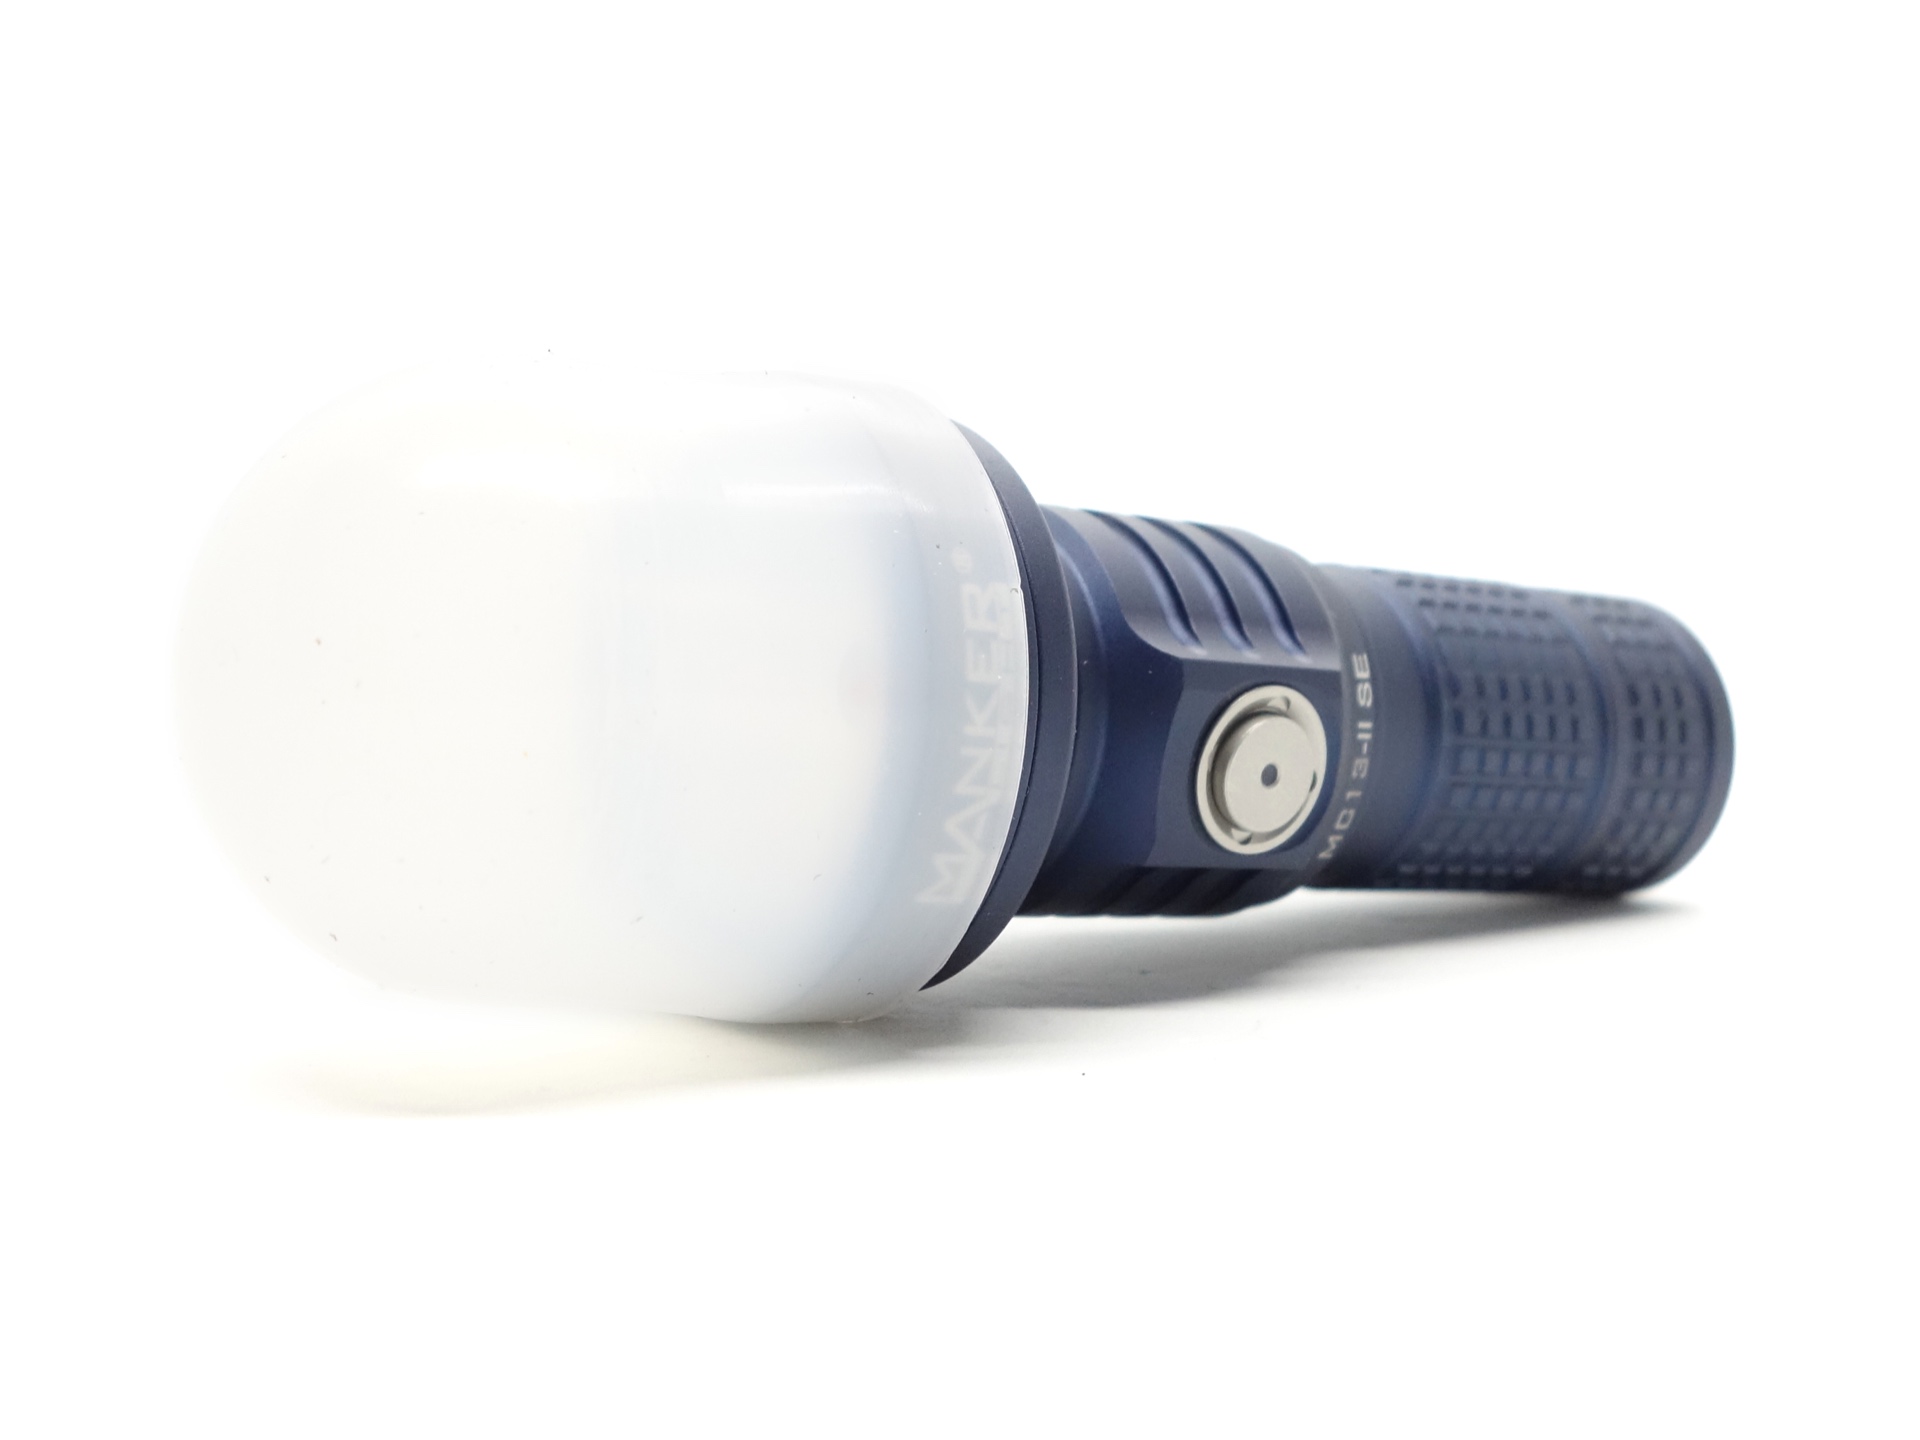
- White diffuser (subject to availability).
- User manual.
User Manual#
Torch in use#
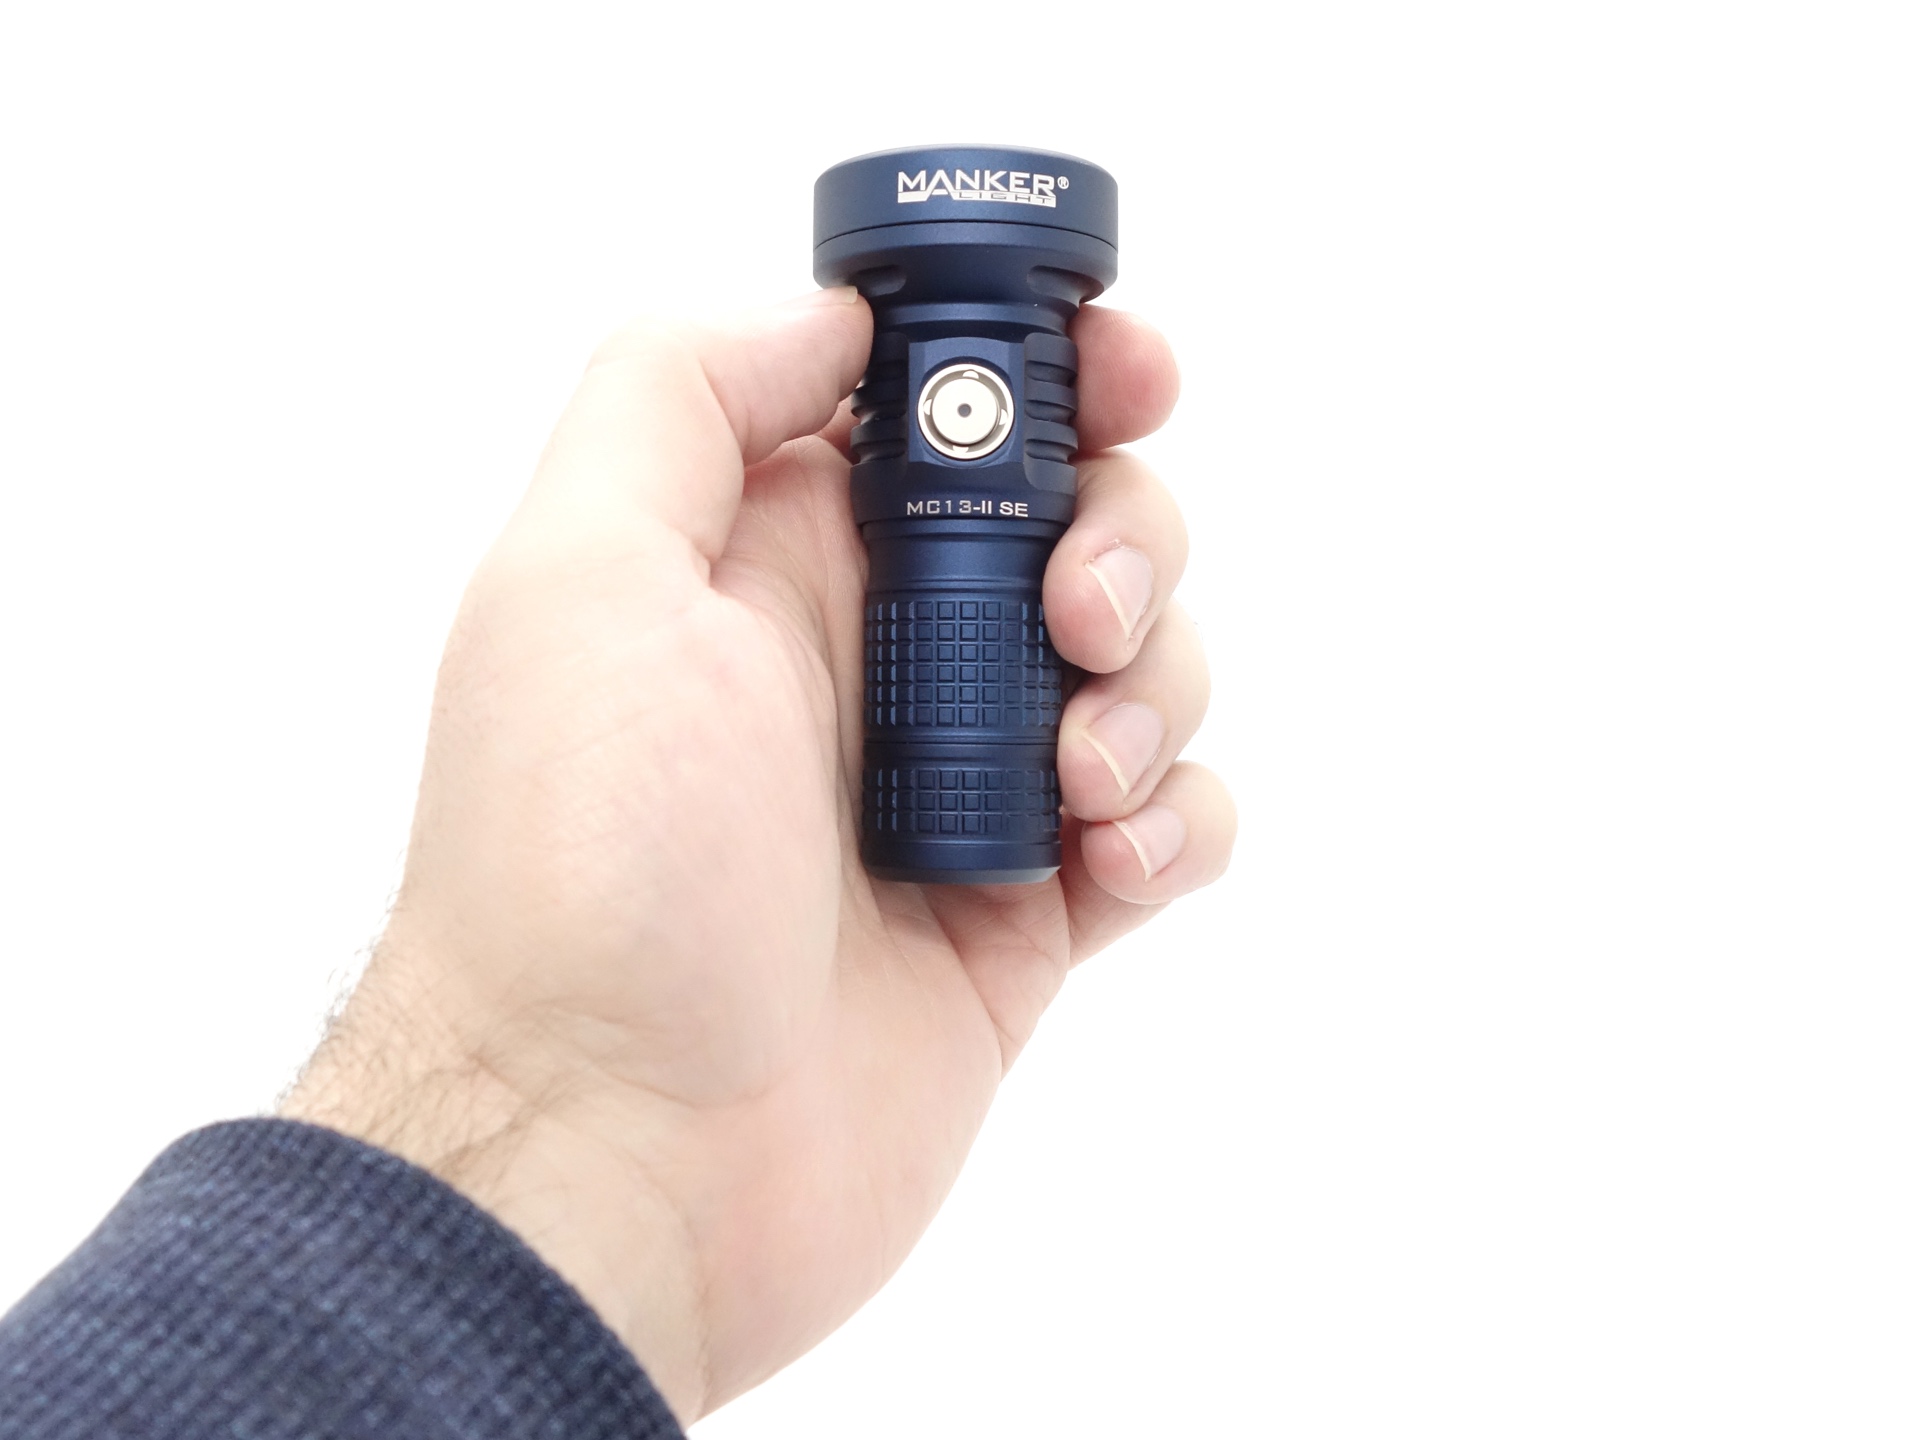
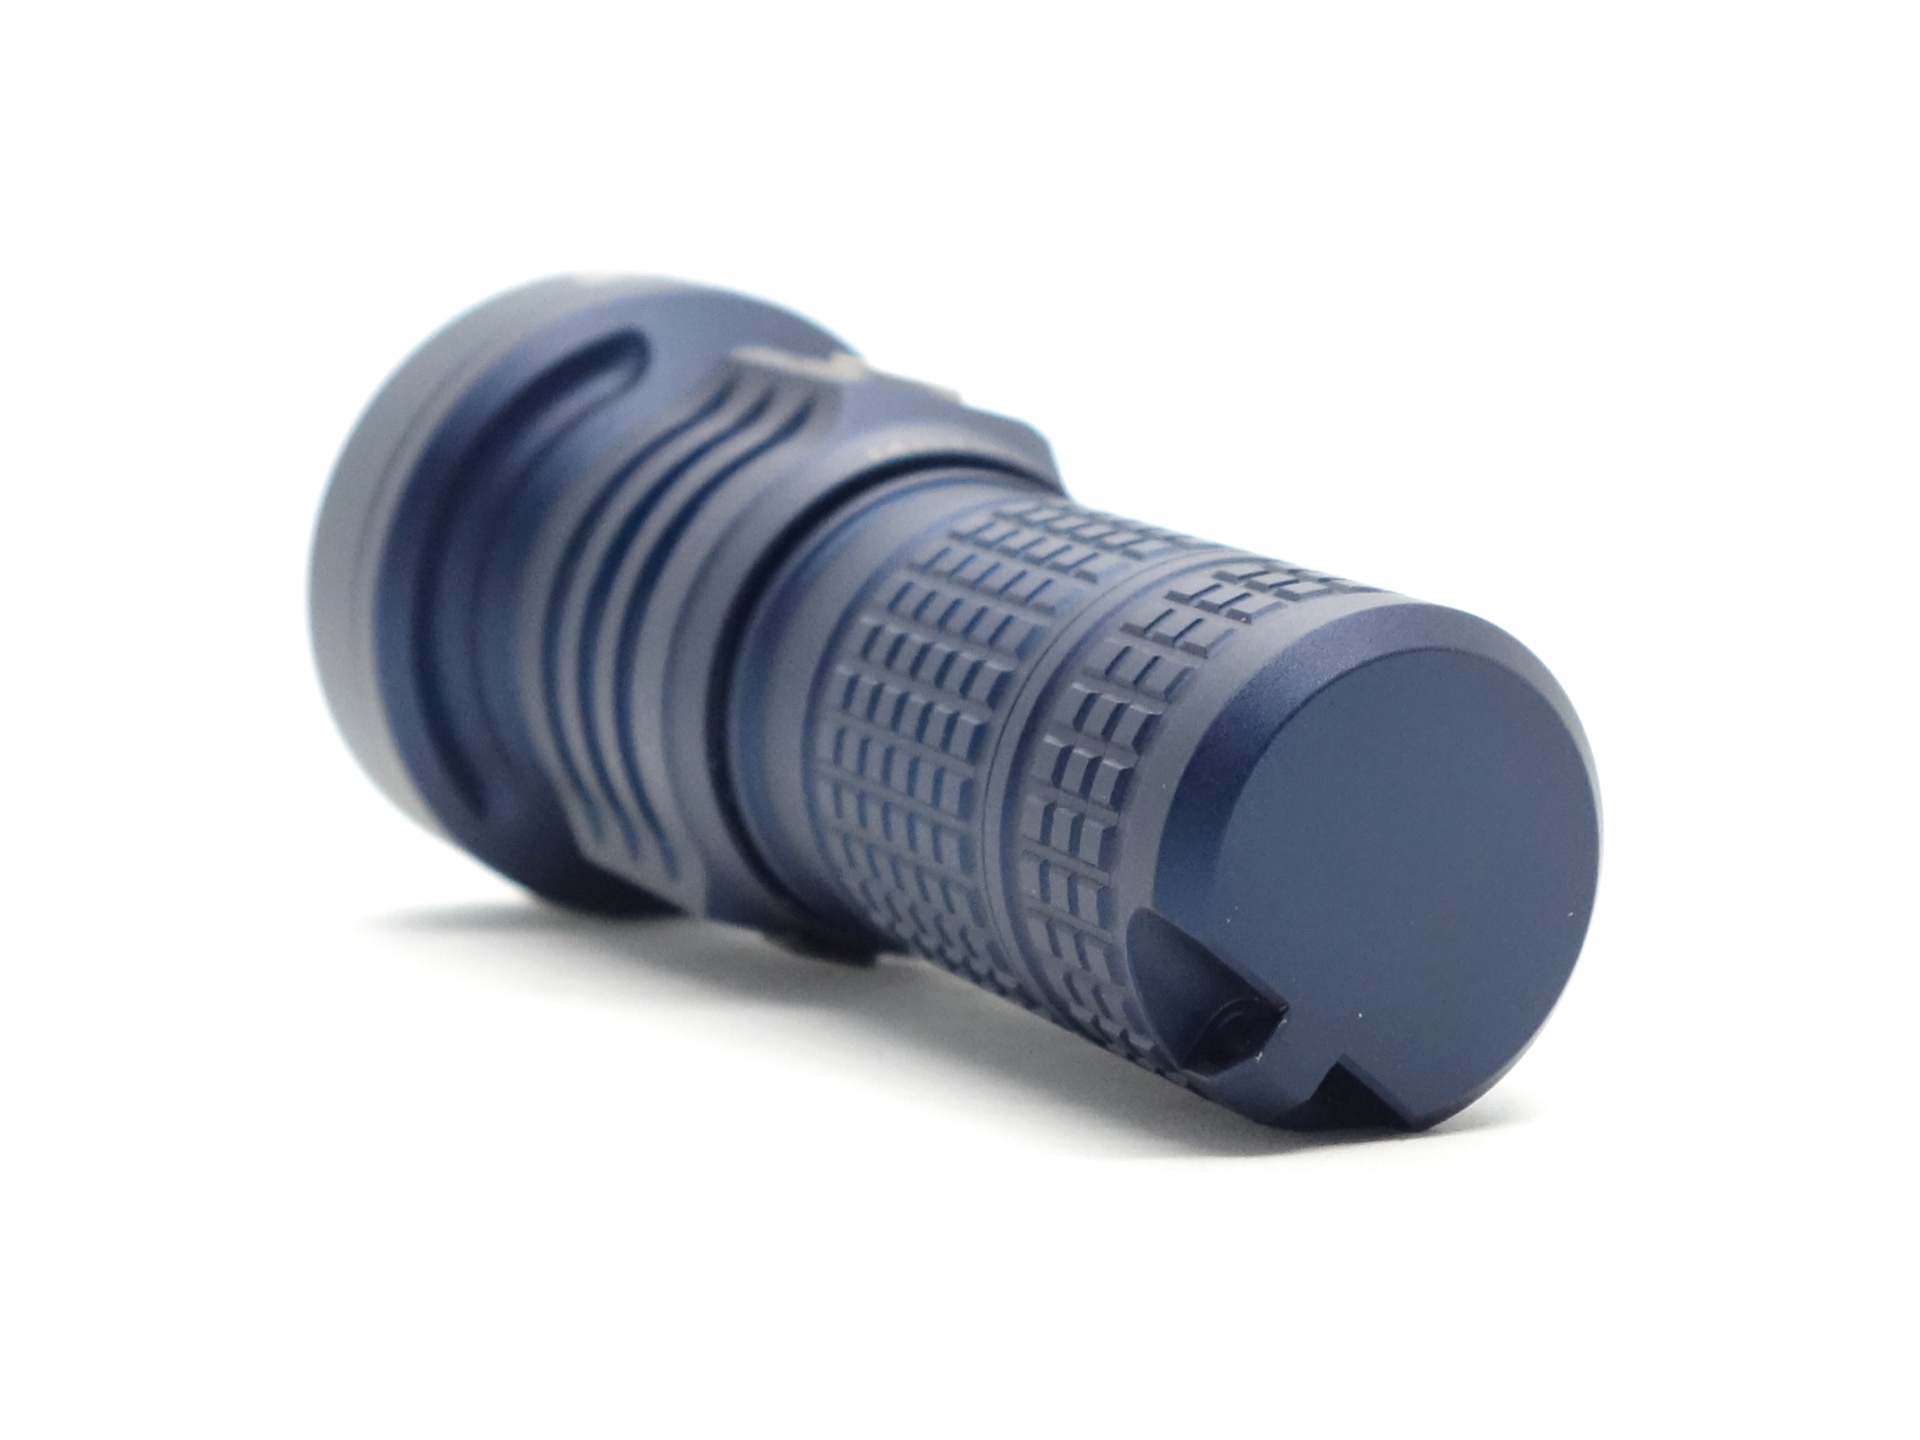
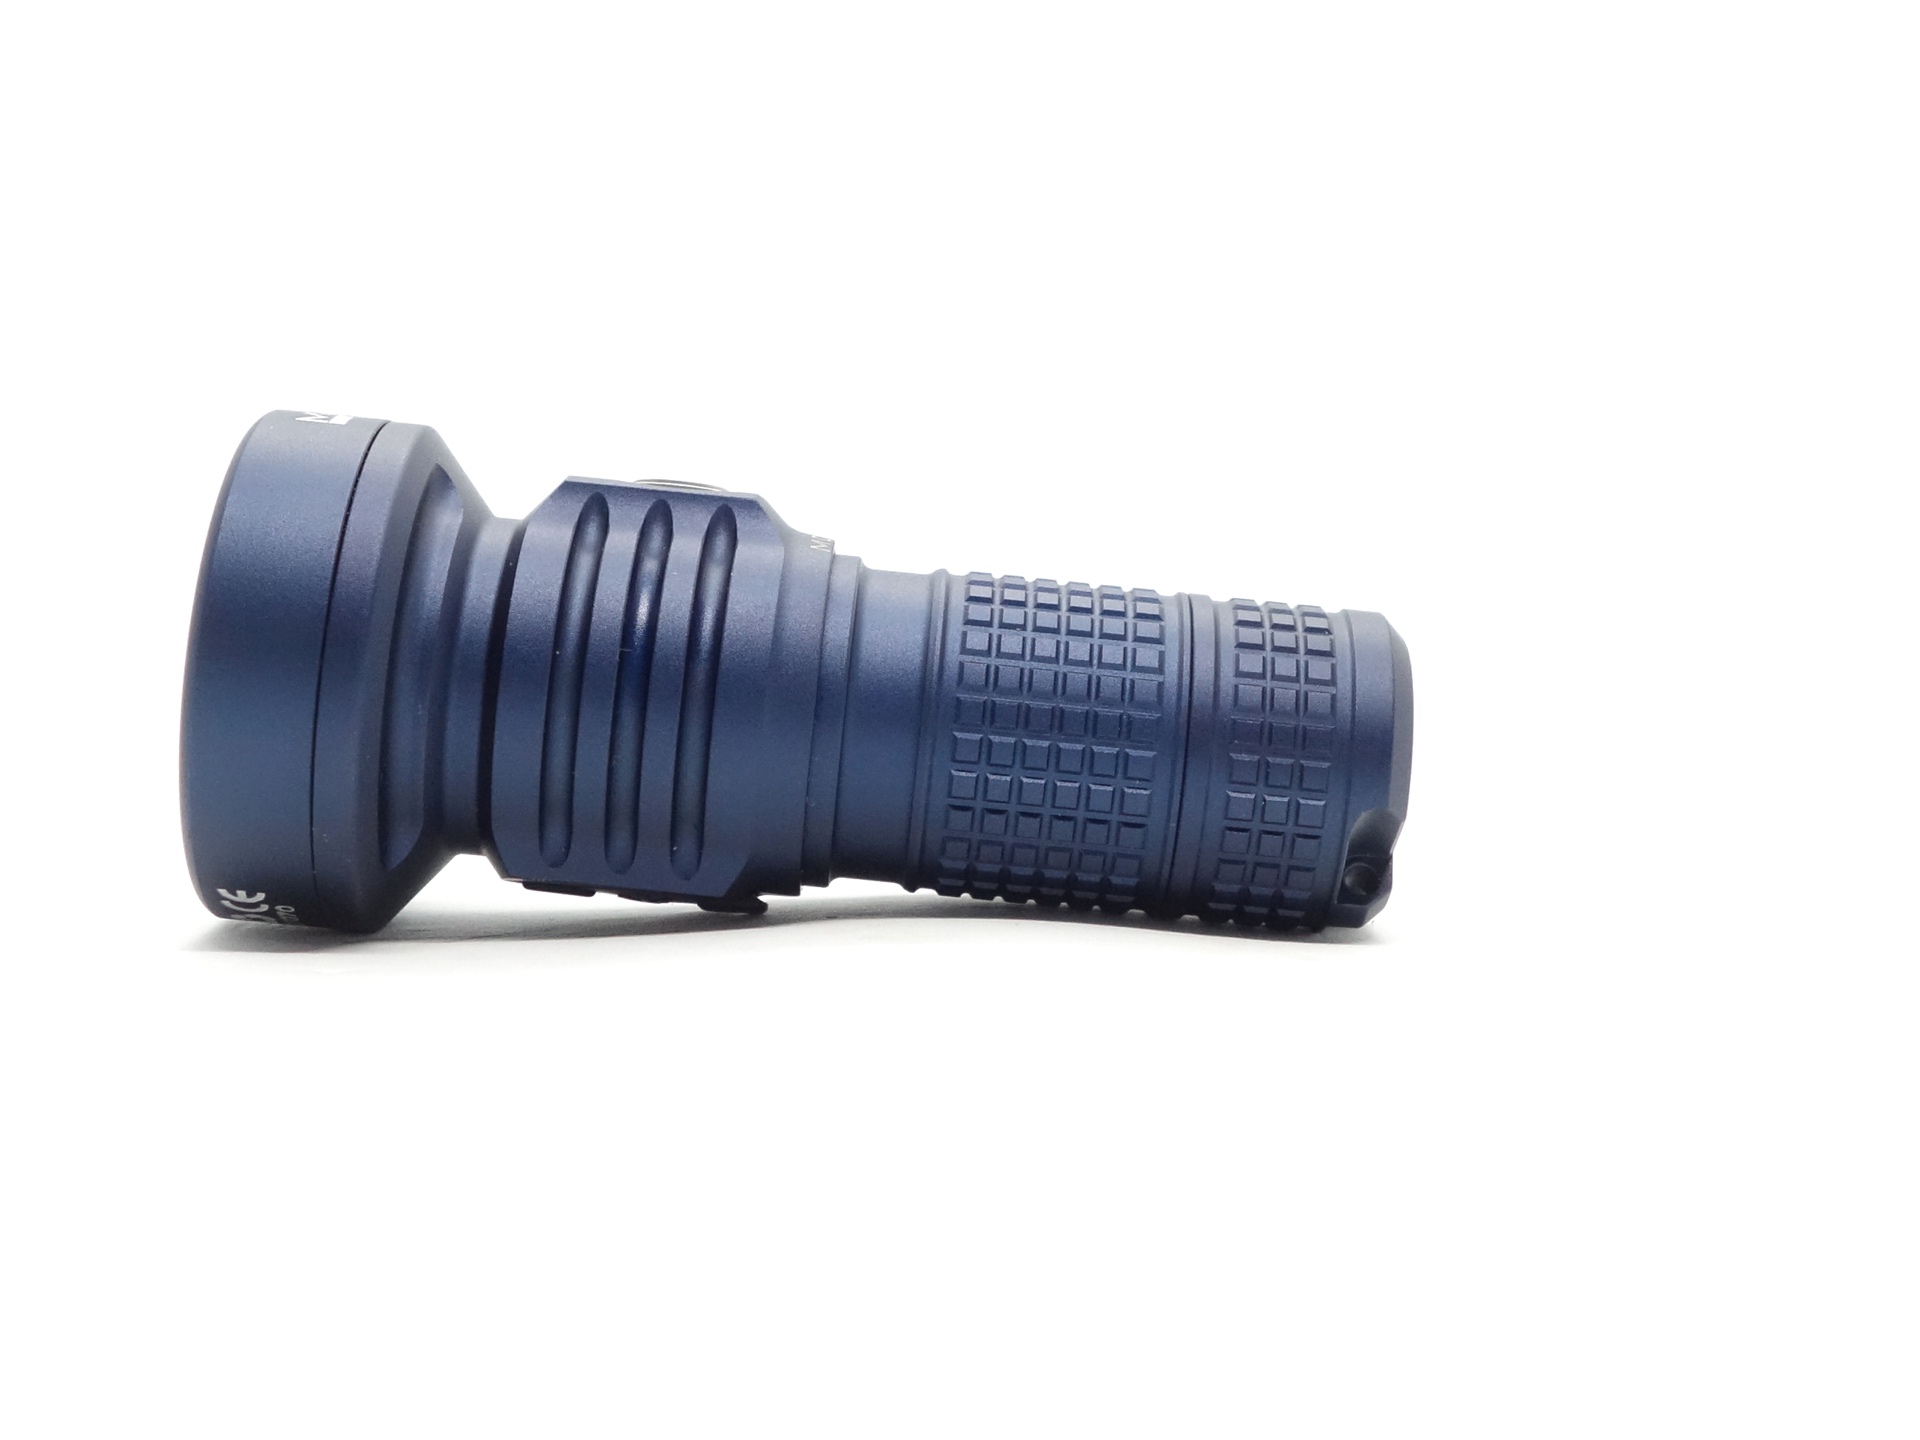
The Manker MC13 II SE feels like a mini torch in my hand!
Even when the tube is fully extended, it still feels small.
The smooth reflector and the powerful emitter produce a throwy beam. It is definitely more of a spotlight rather than an EDC light. That said, Manker has ridiculously low moonlight modes so you could EDC this light.
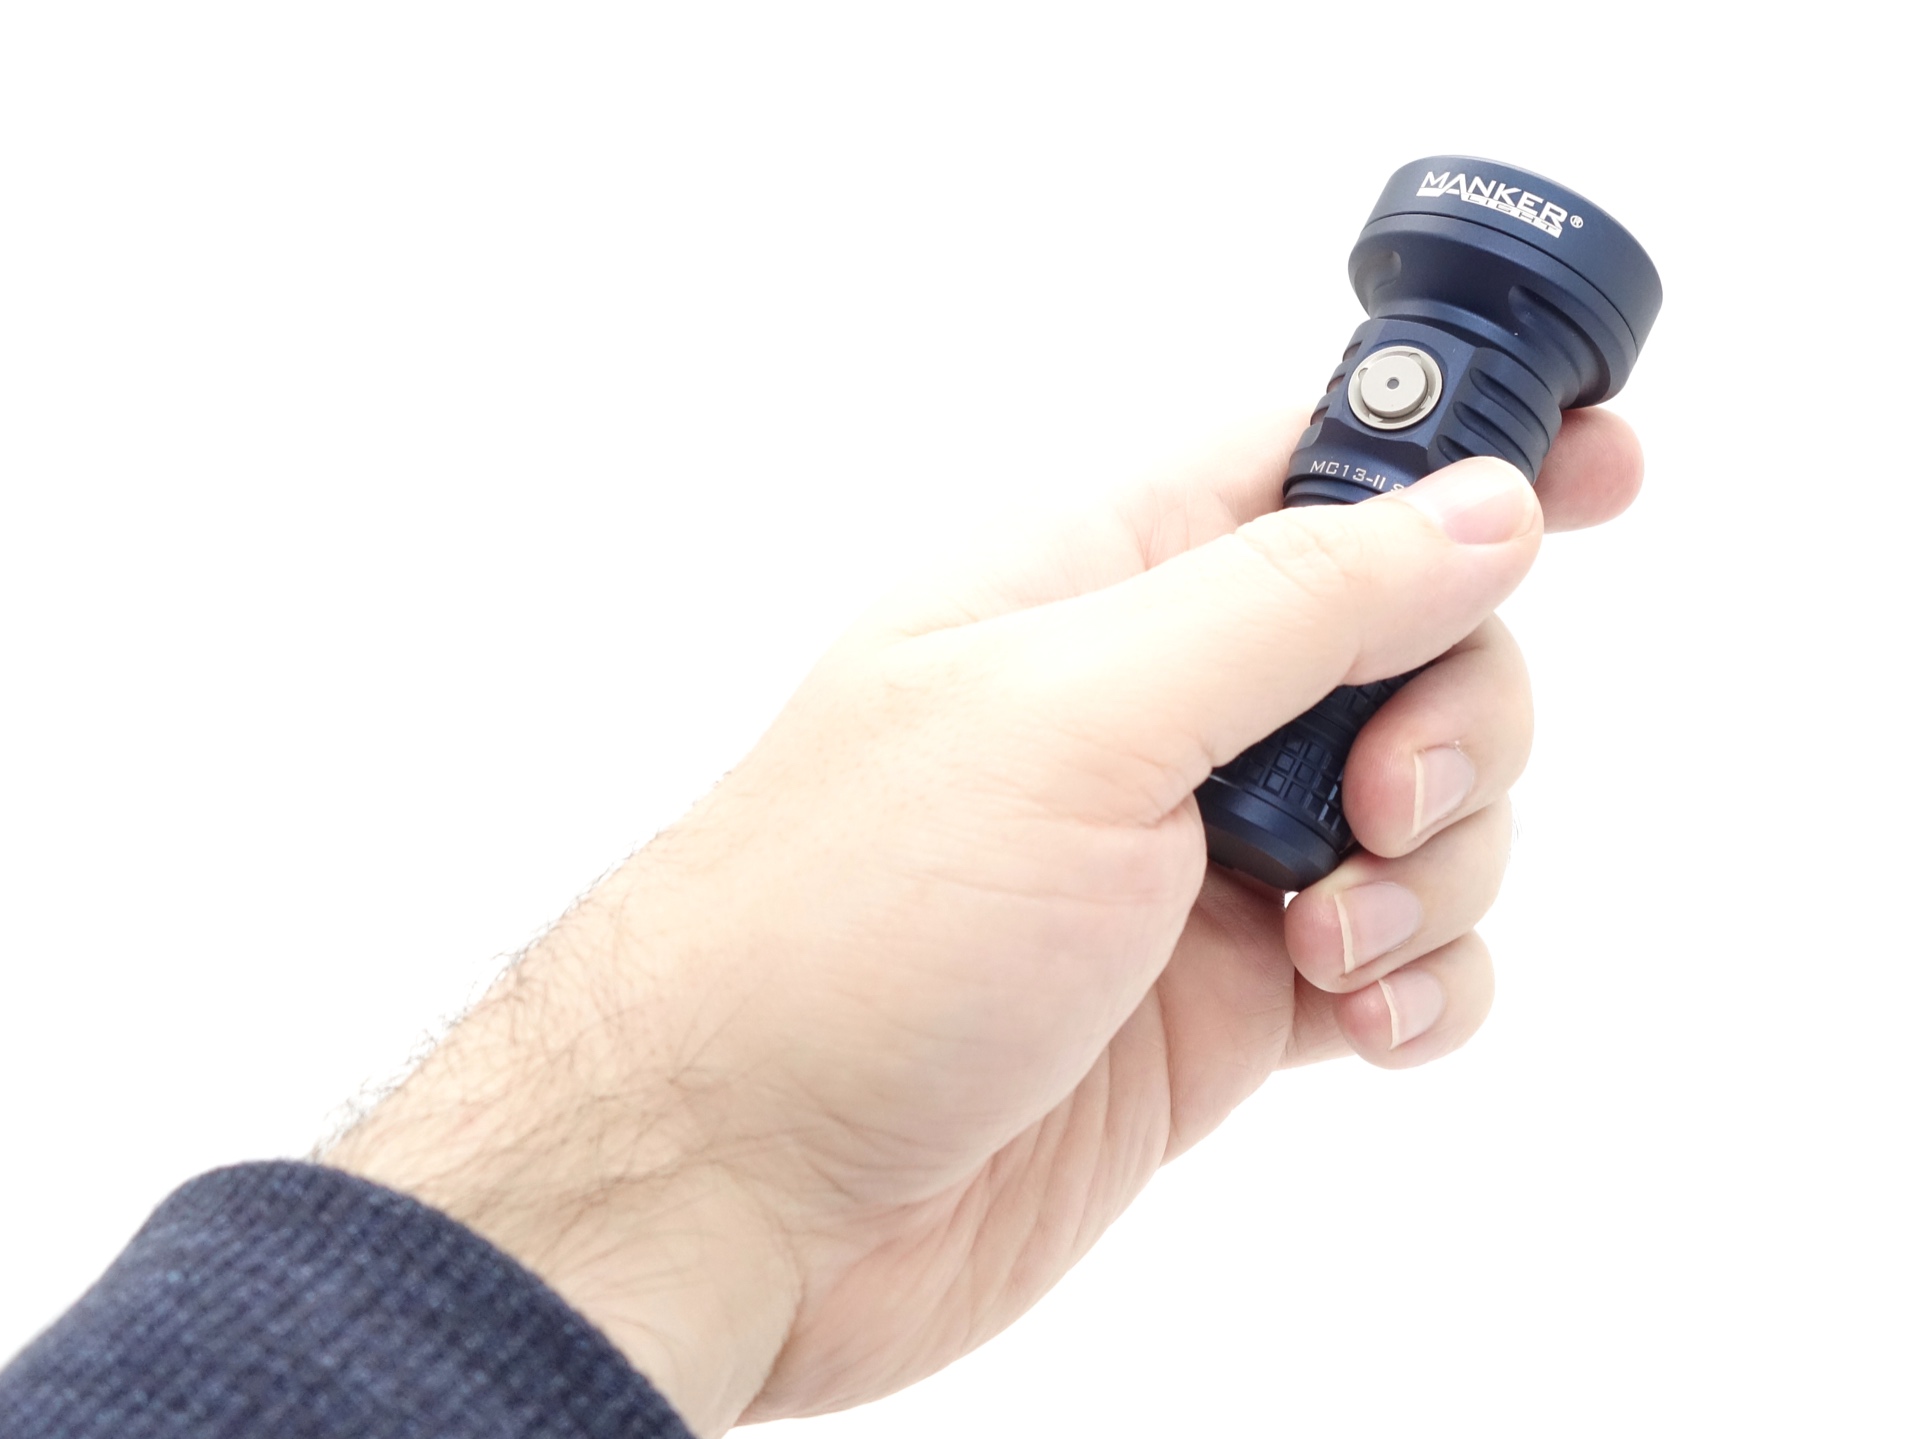
The electronic side switch can be used to control the torch.
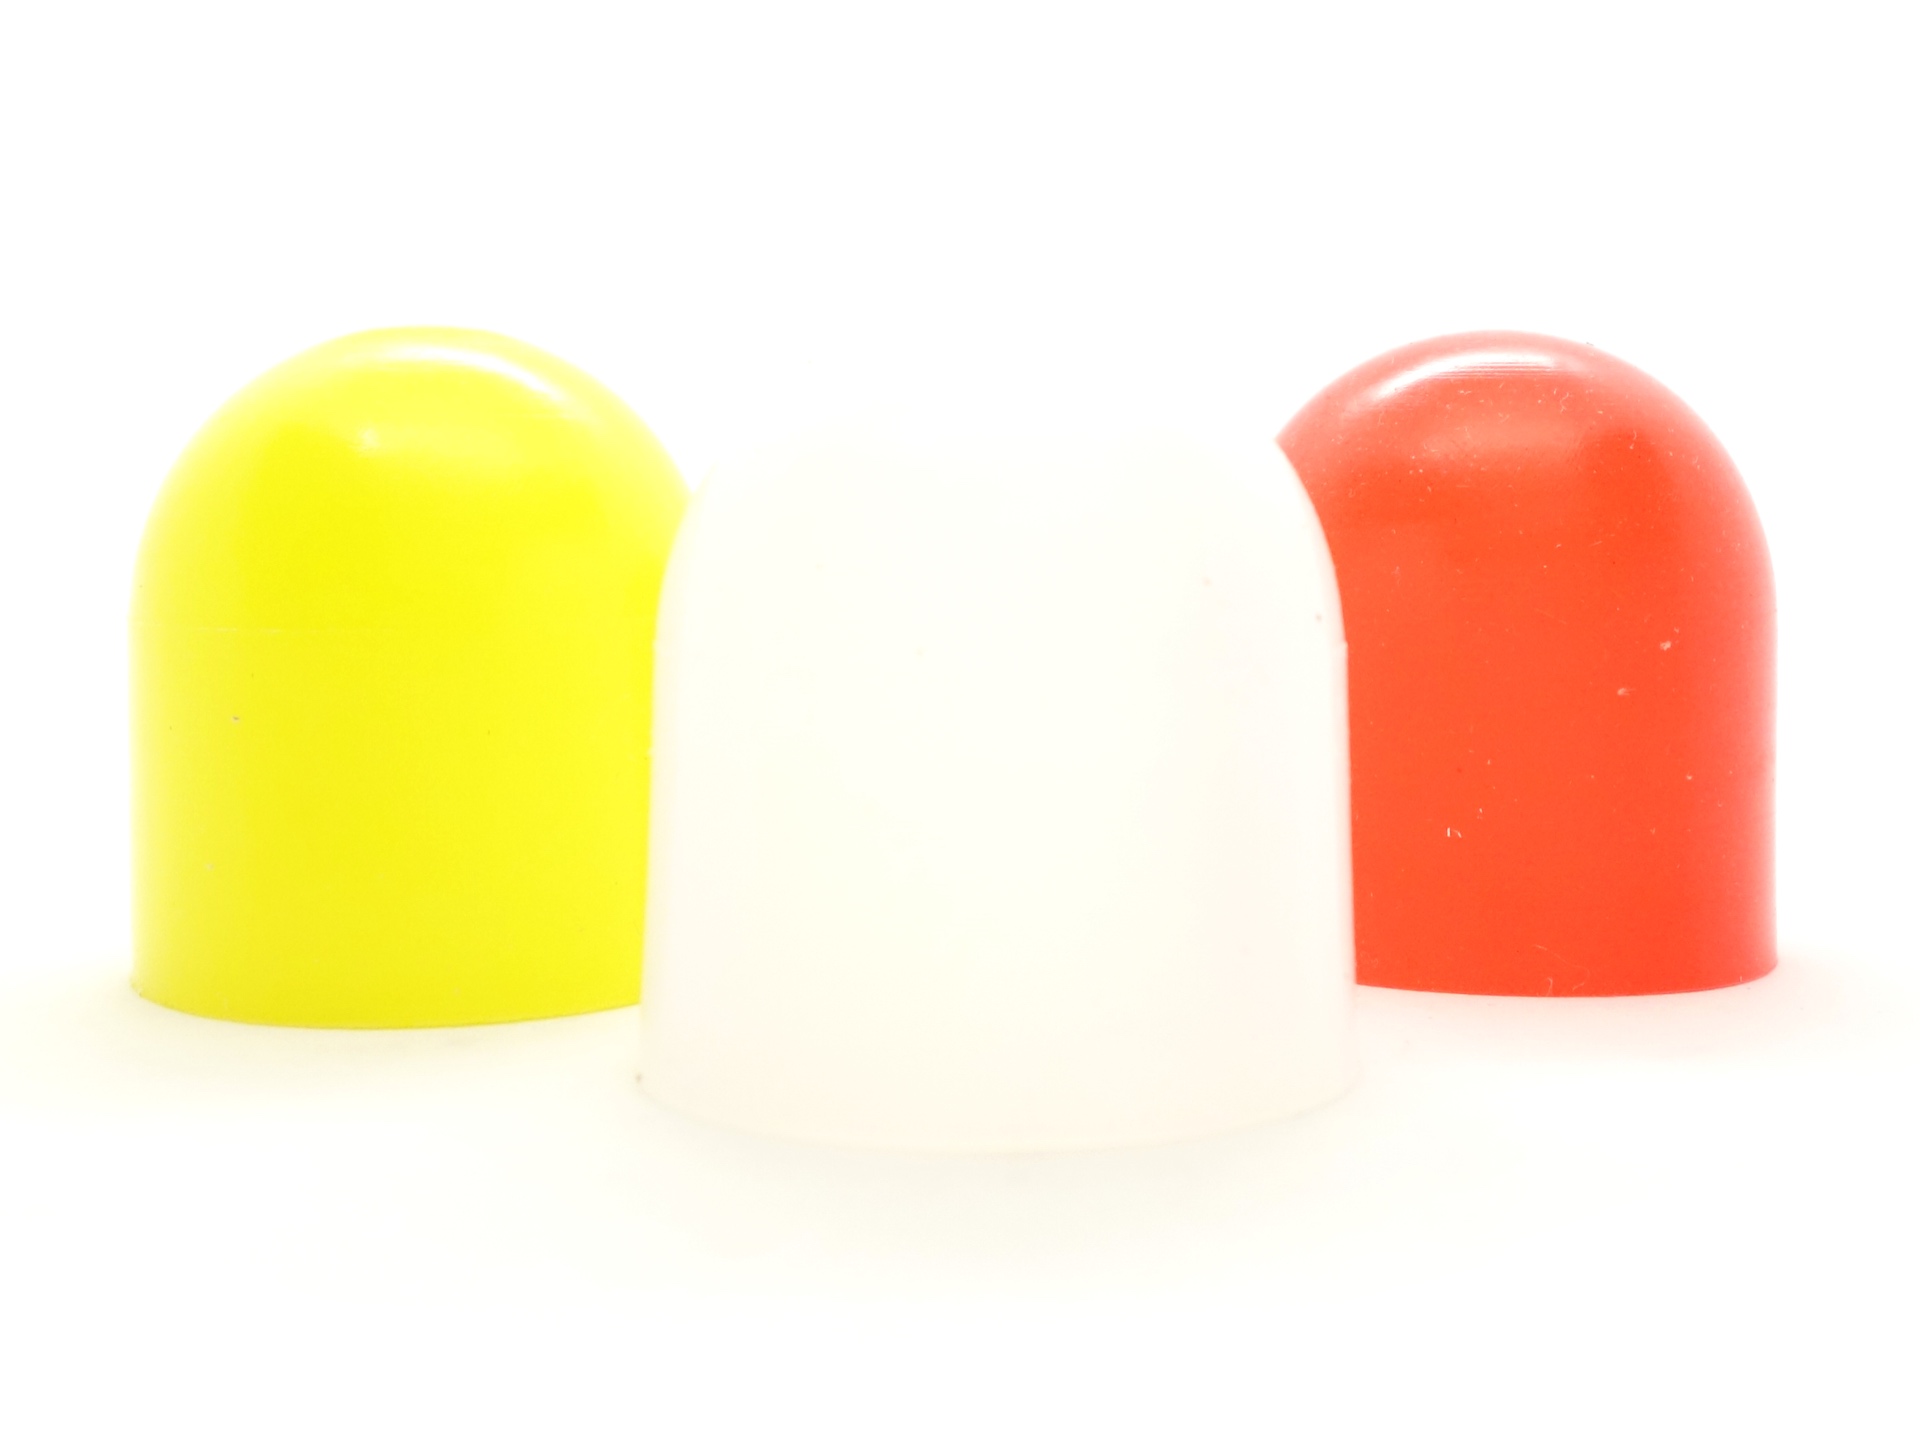
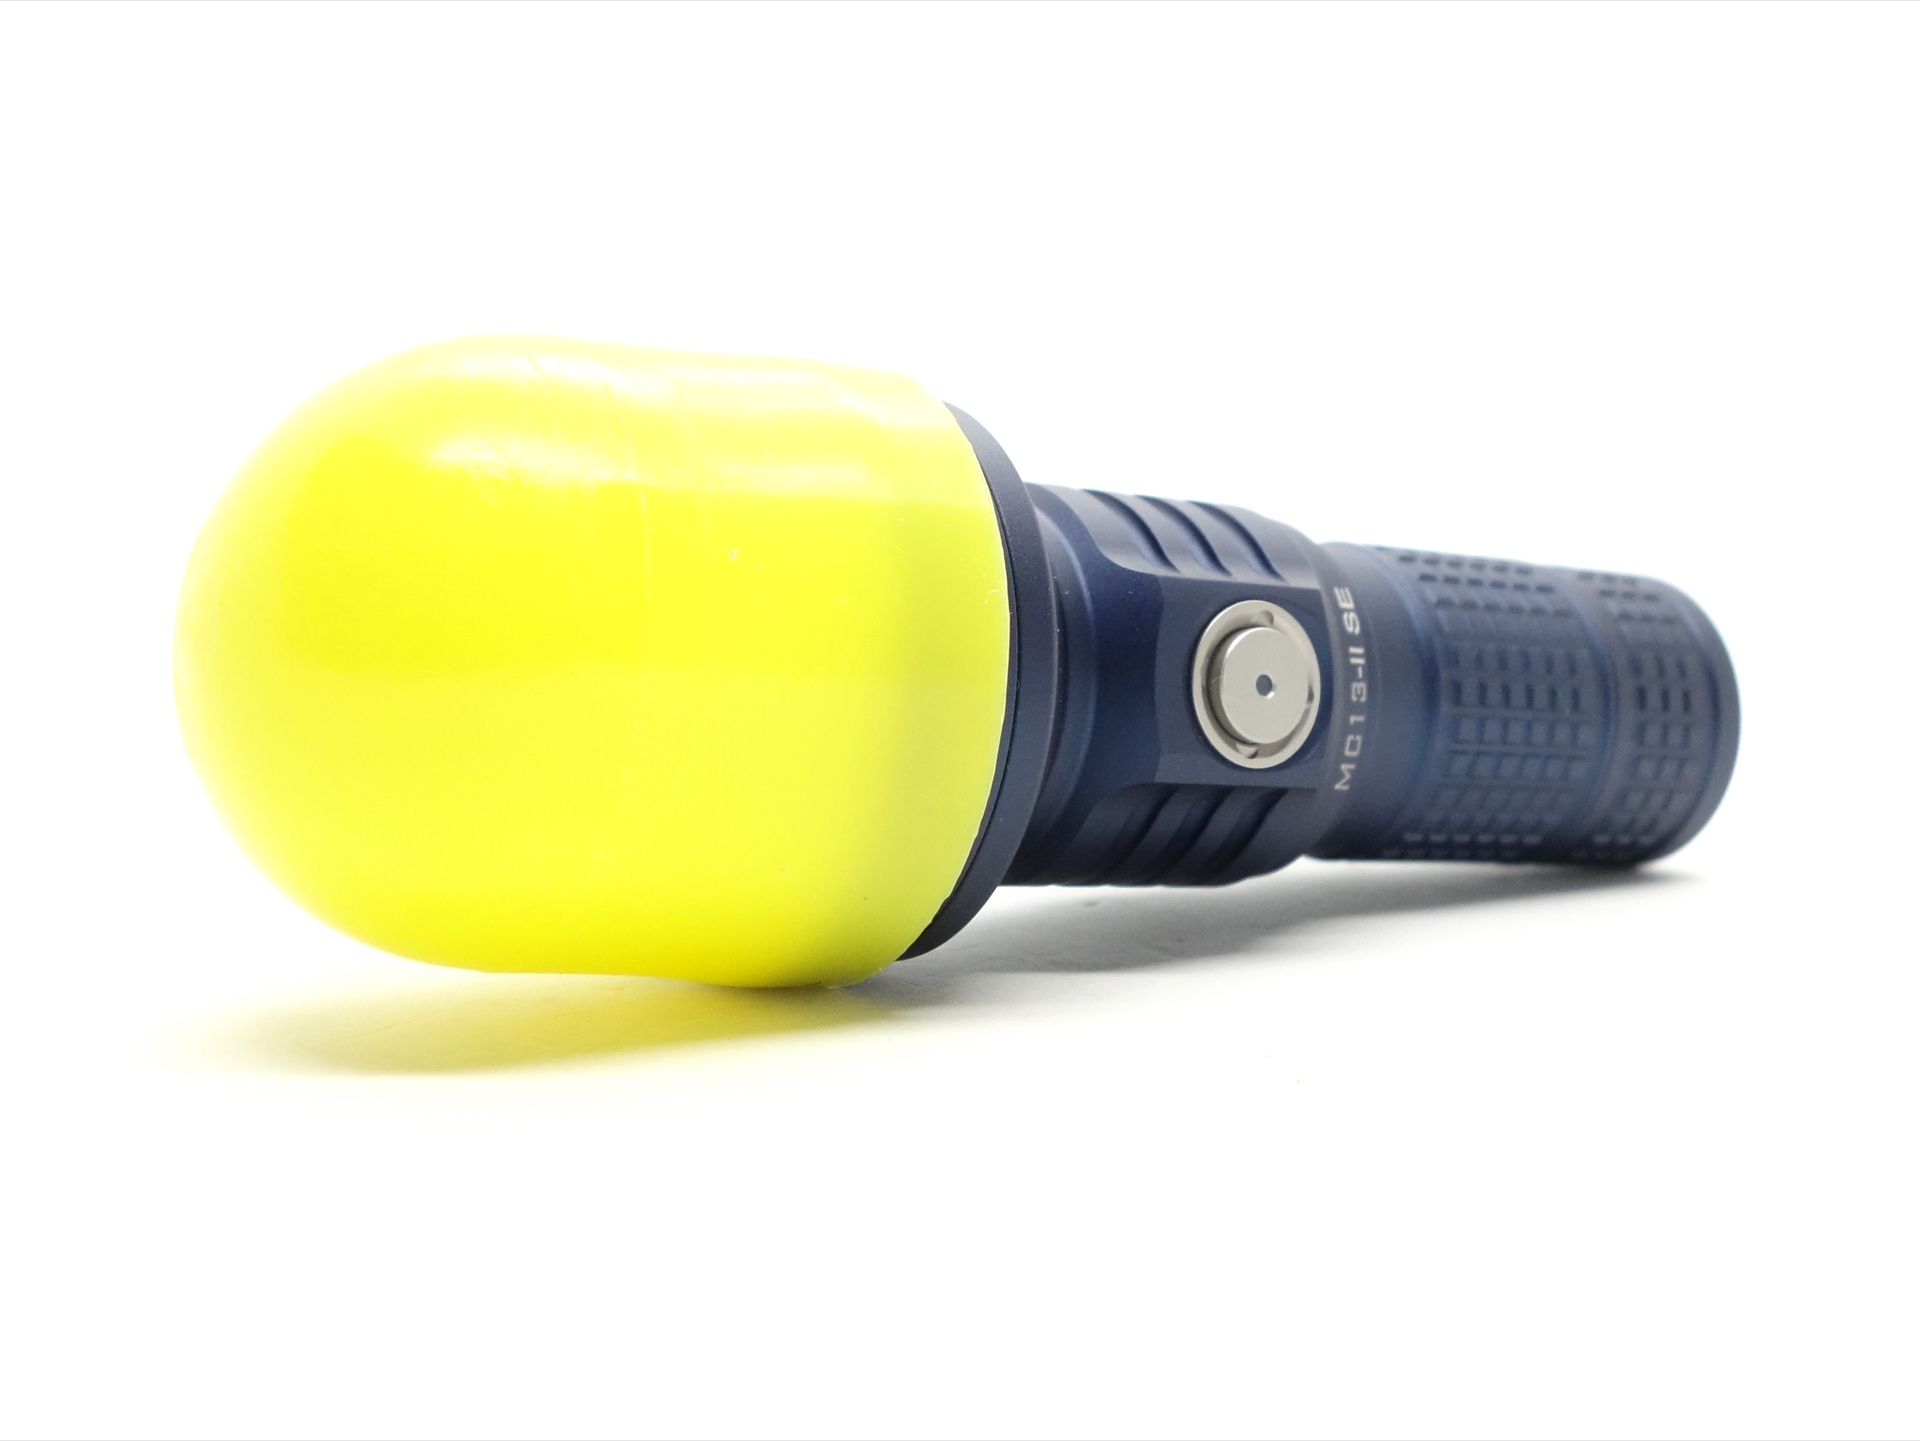
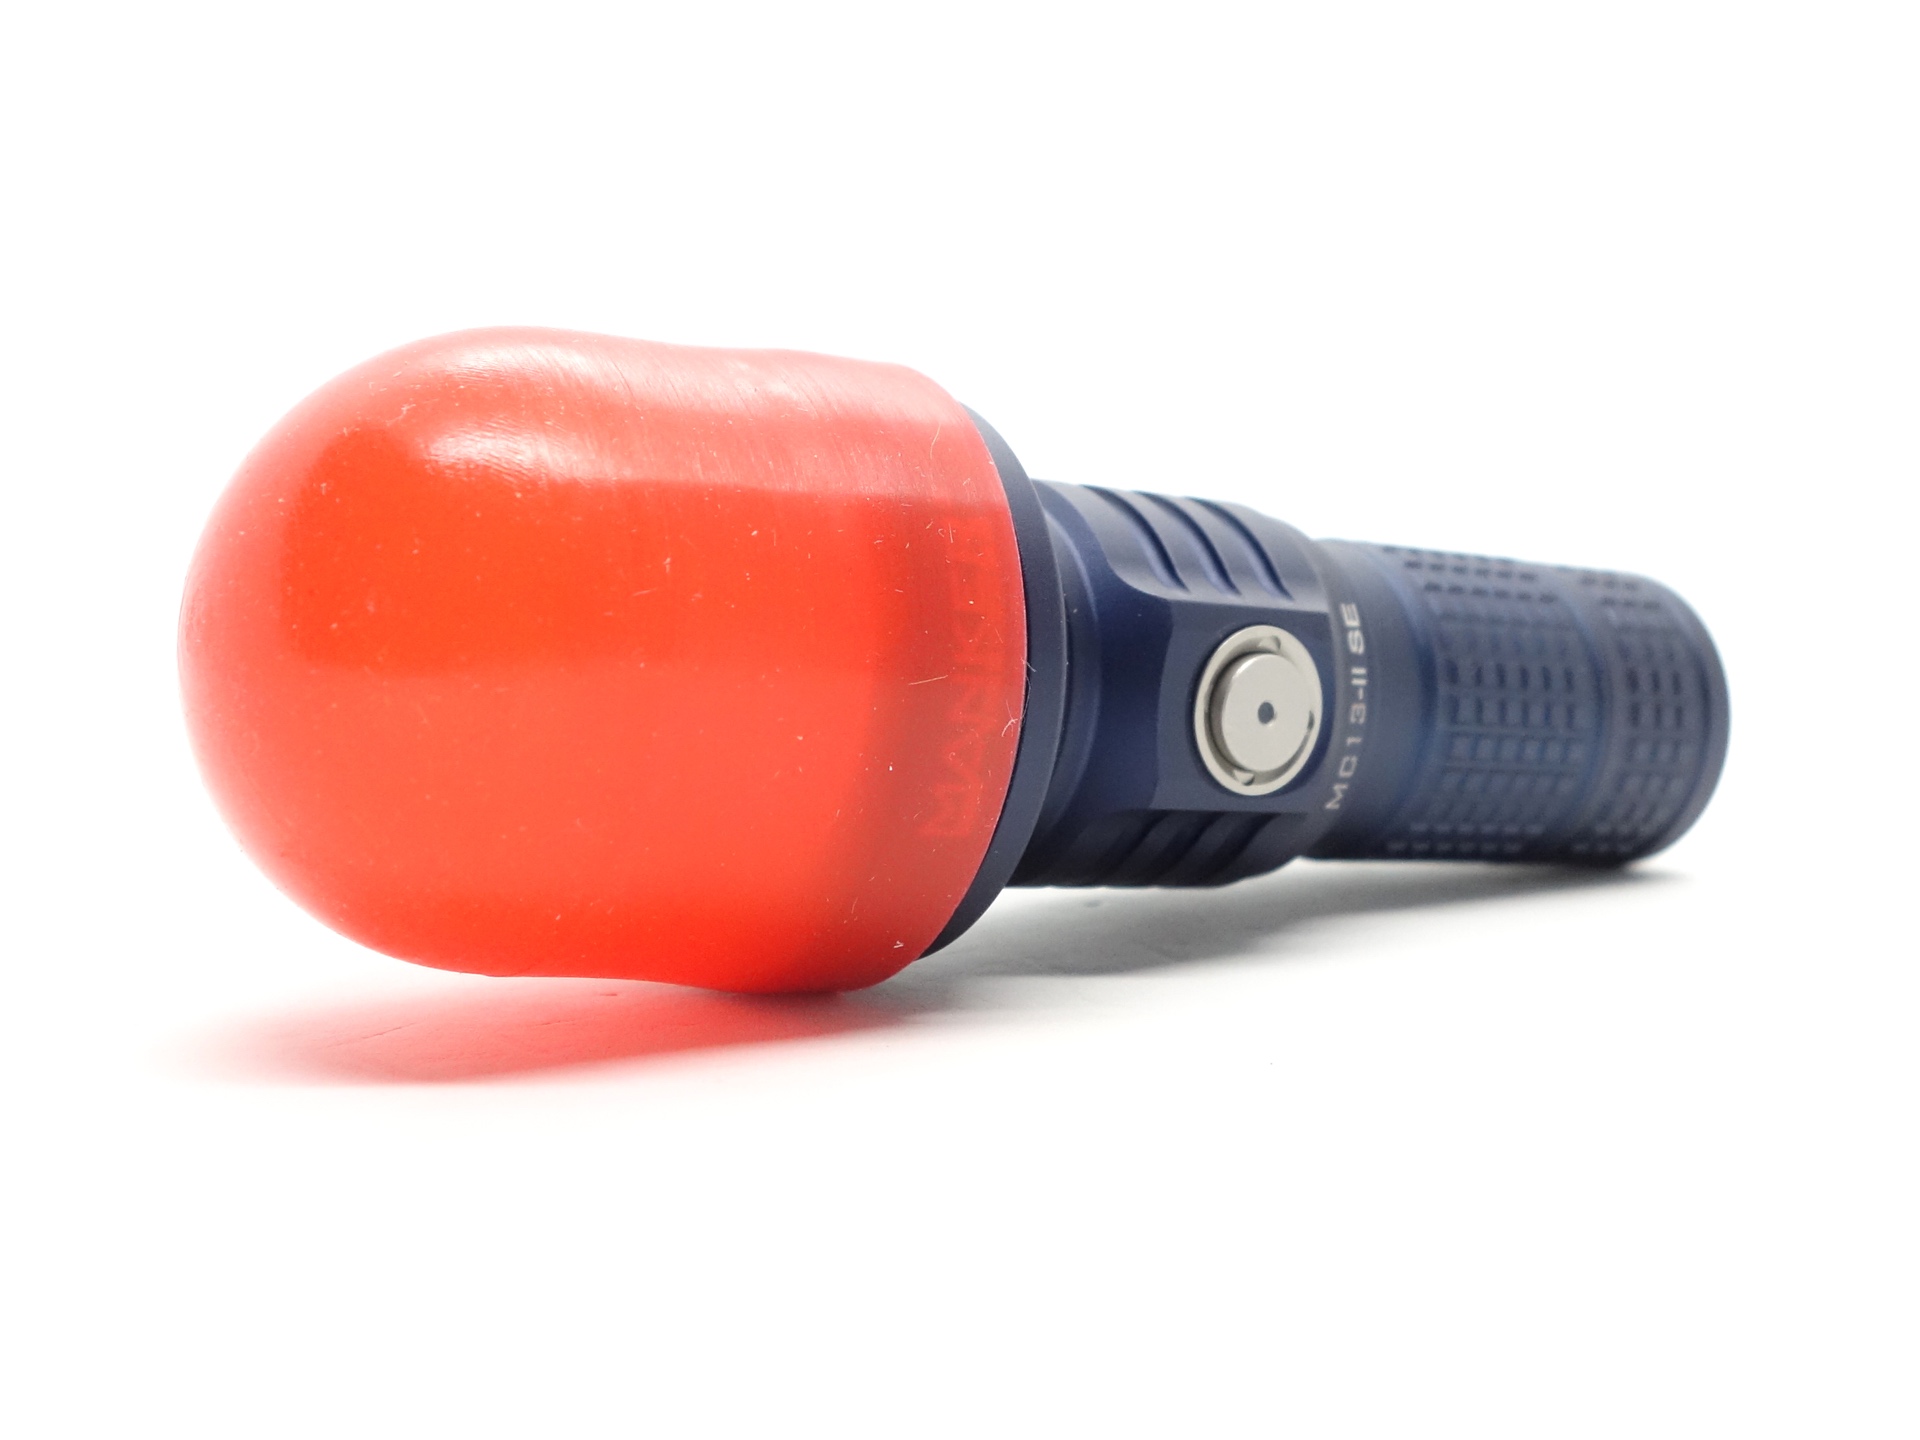
Yellow, white and red diffusers (optional) can be attached to the head to turn the torch into a traffic wand or a lantern.
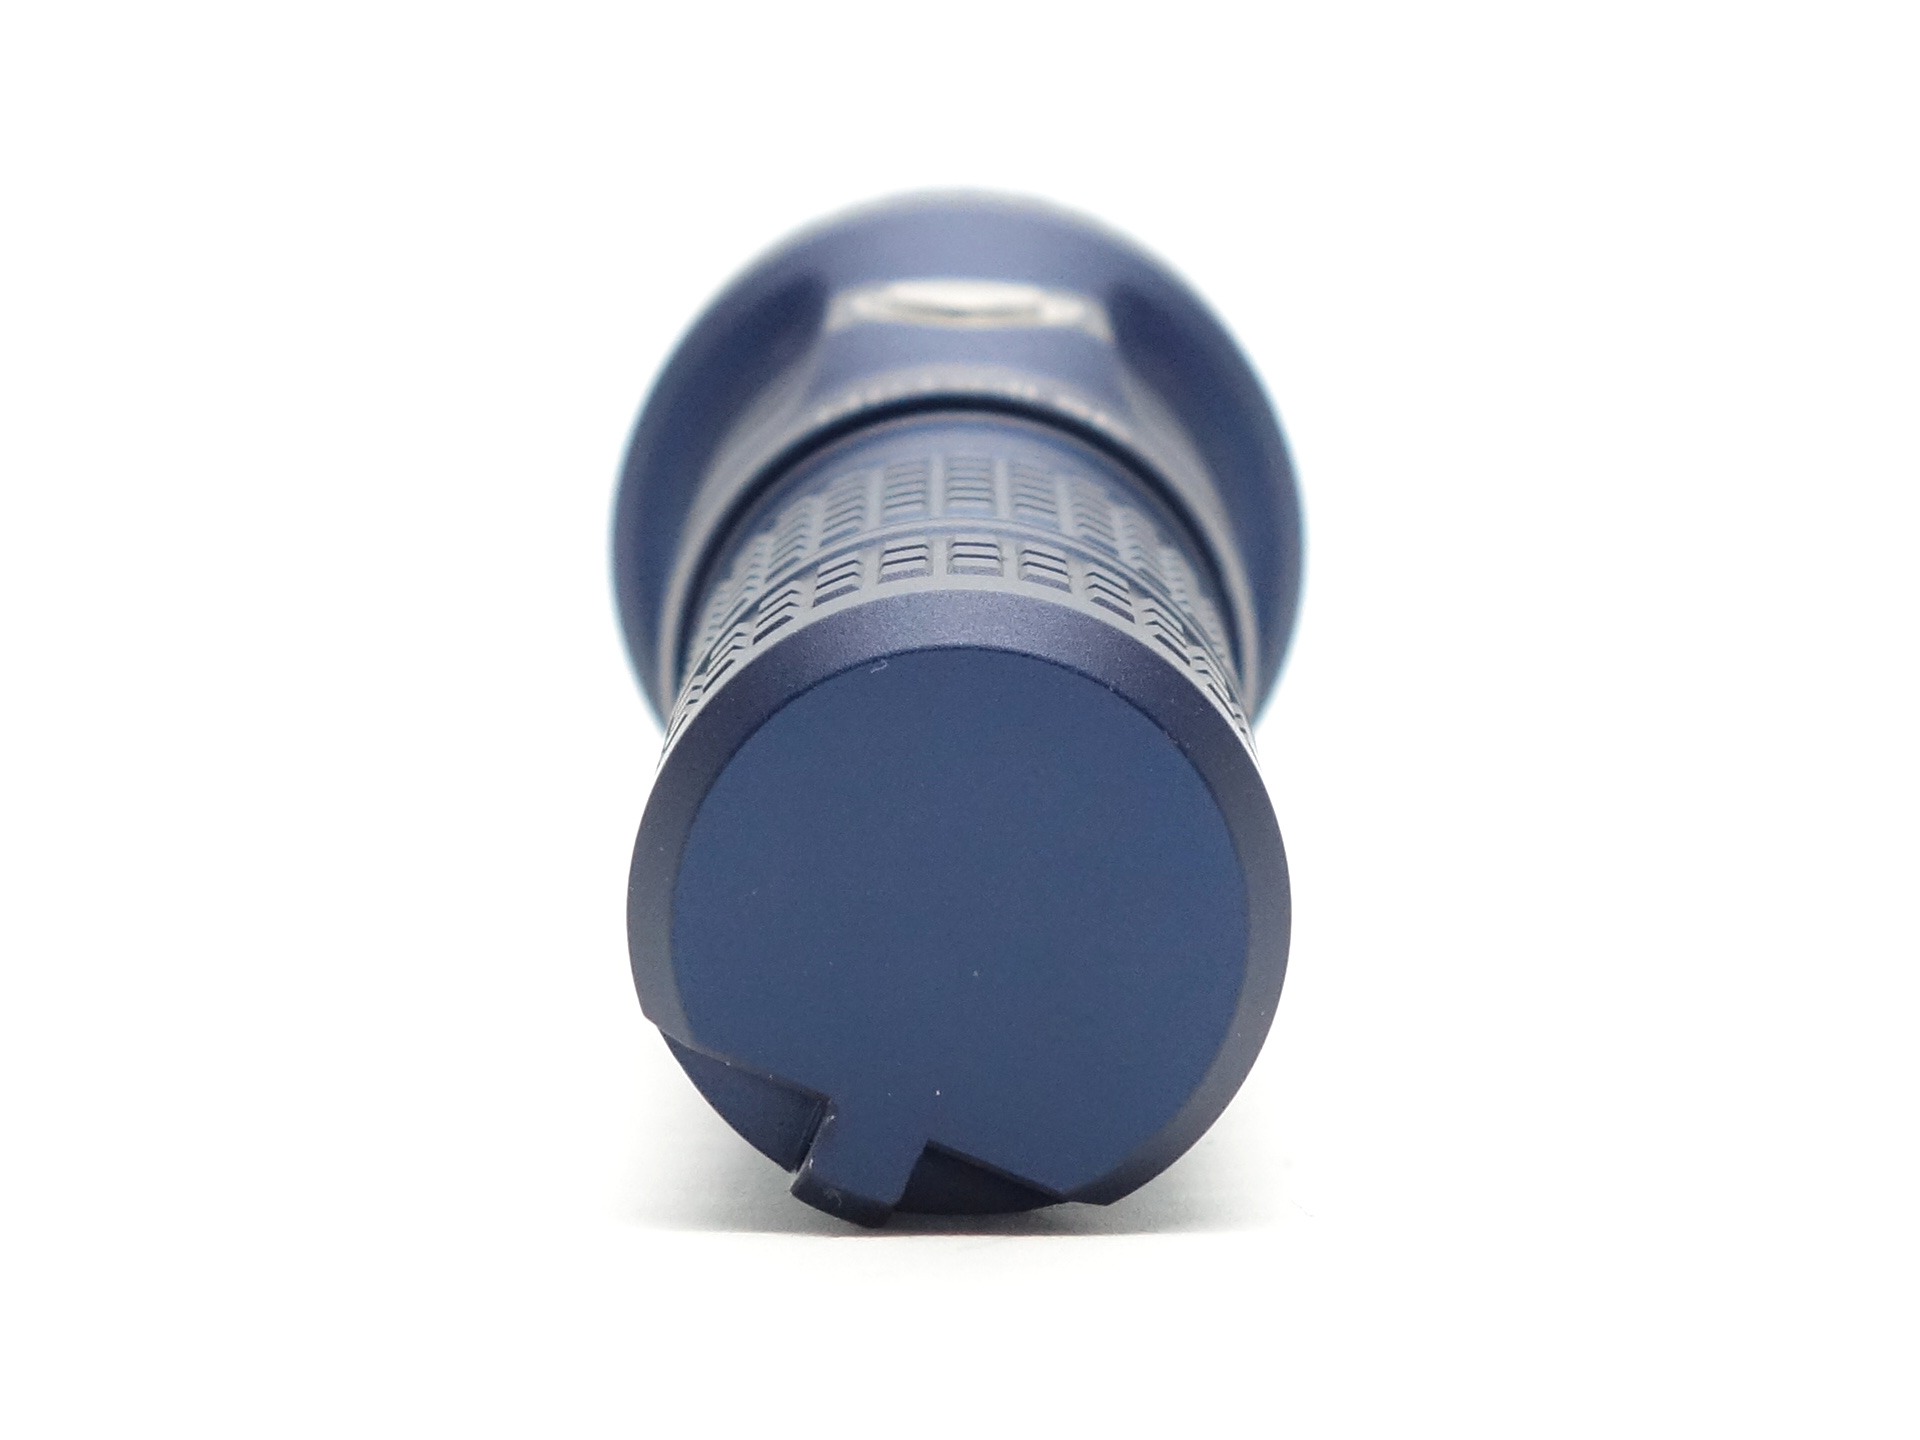
The included lanyard can be attached to the lanyard hole in the tailcap.
I like how the lanyard hole is in the side of the tailcap. This allows the torch to tailstand while a lanyard is attached.
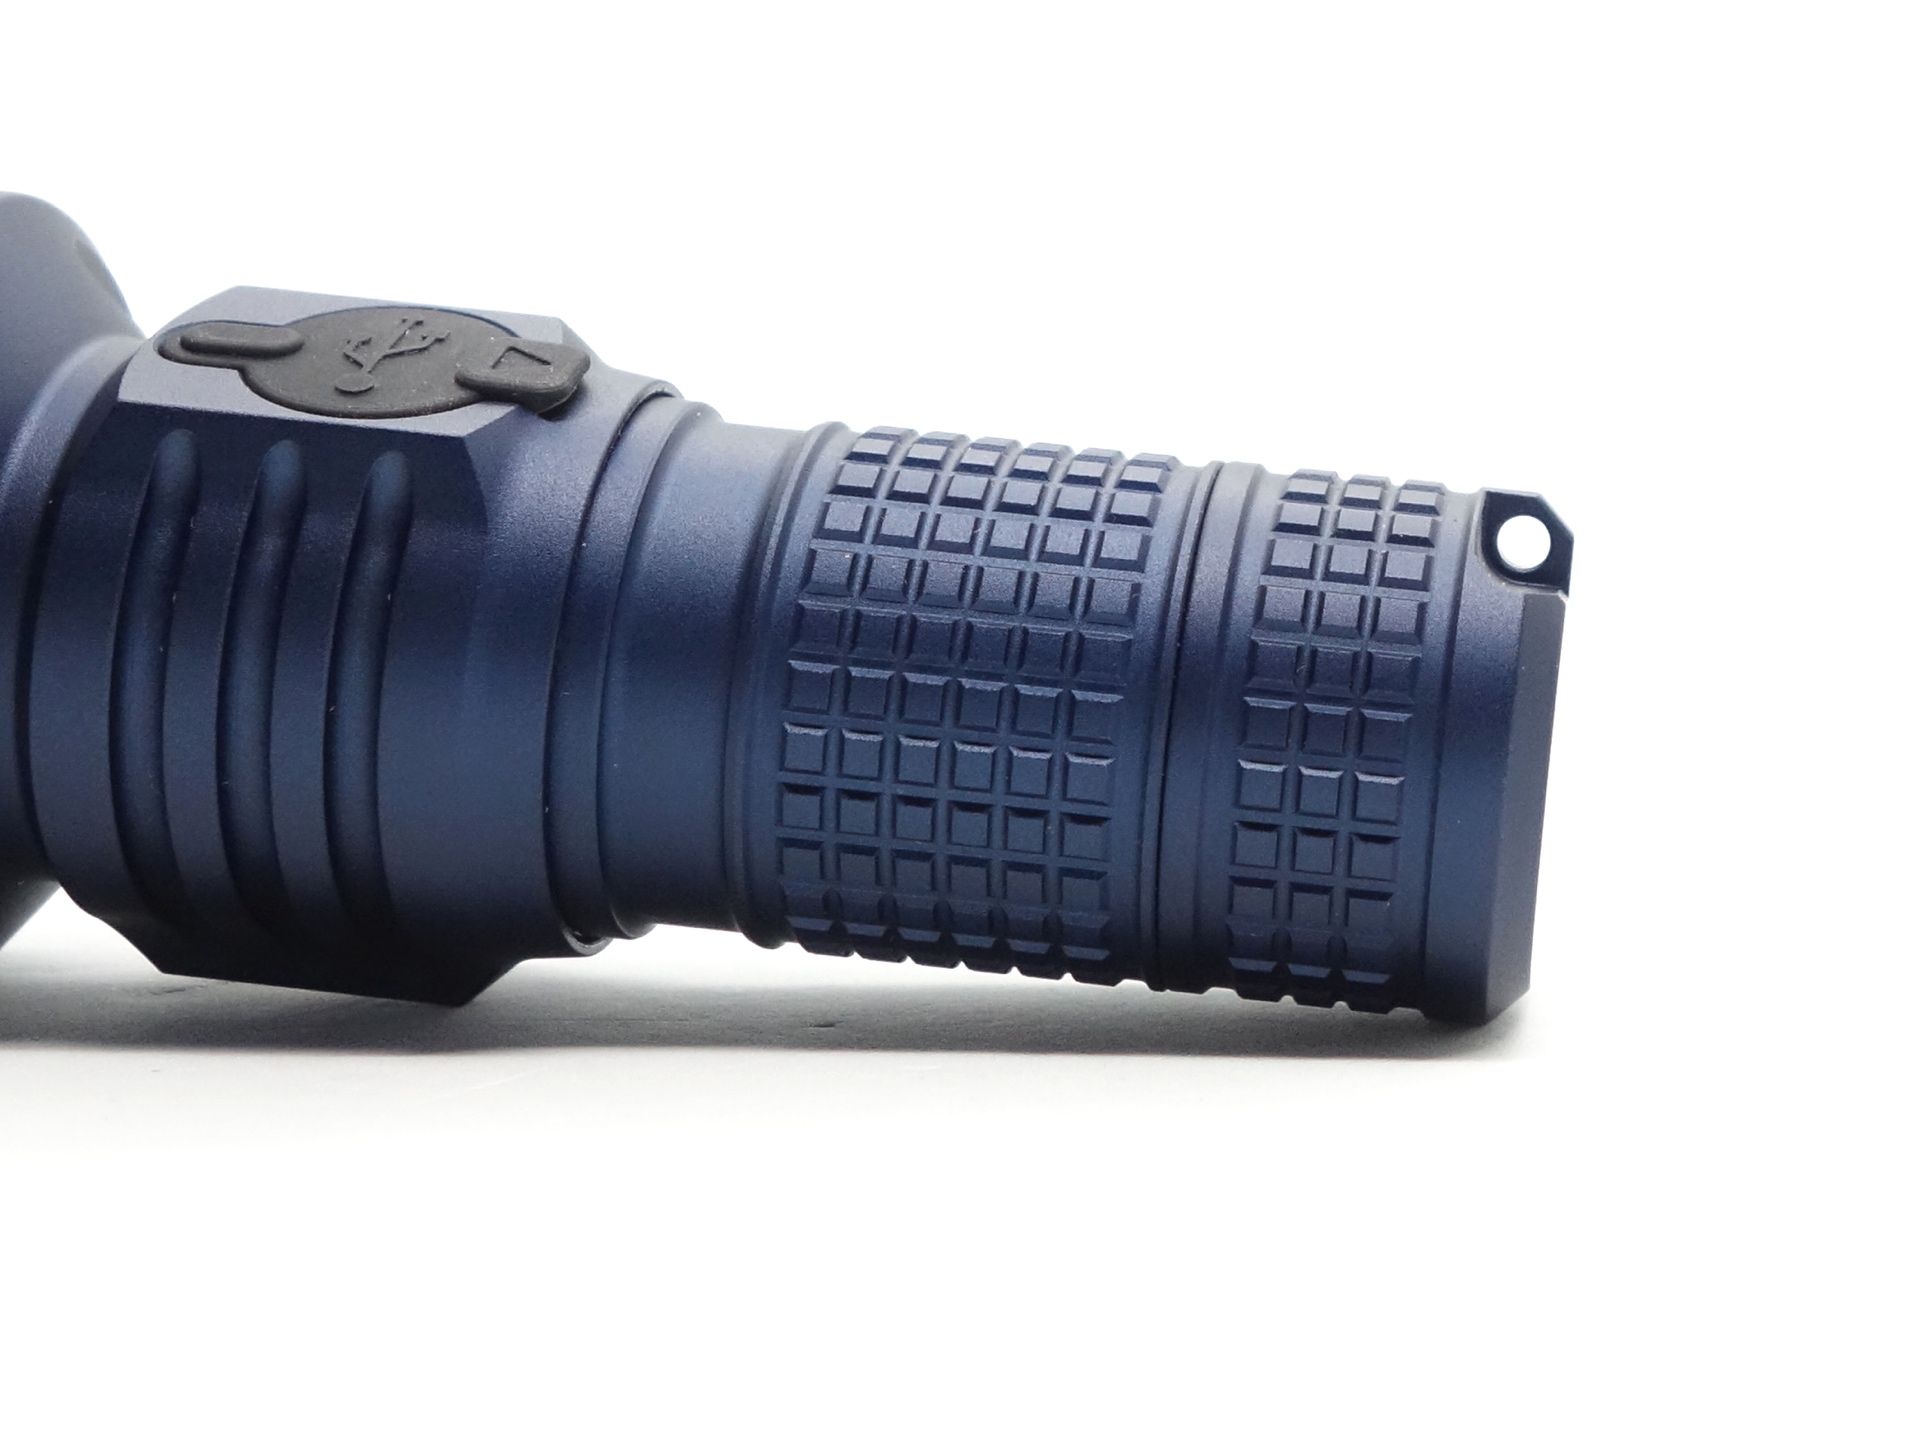
There is no pocket clip. But there is a flat section on the tube where I imagine that a pocket clip could be attached.
The lanyard hole and the strong magnet in the tailcap are definitely an improvement.
Build quality#
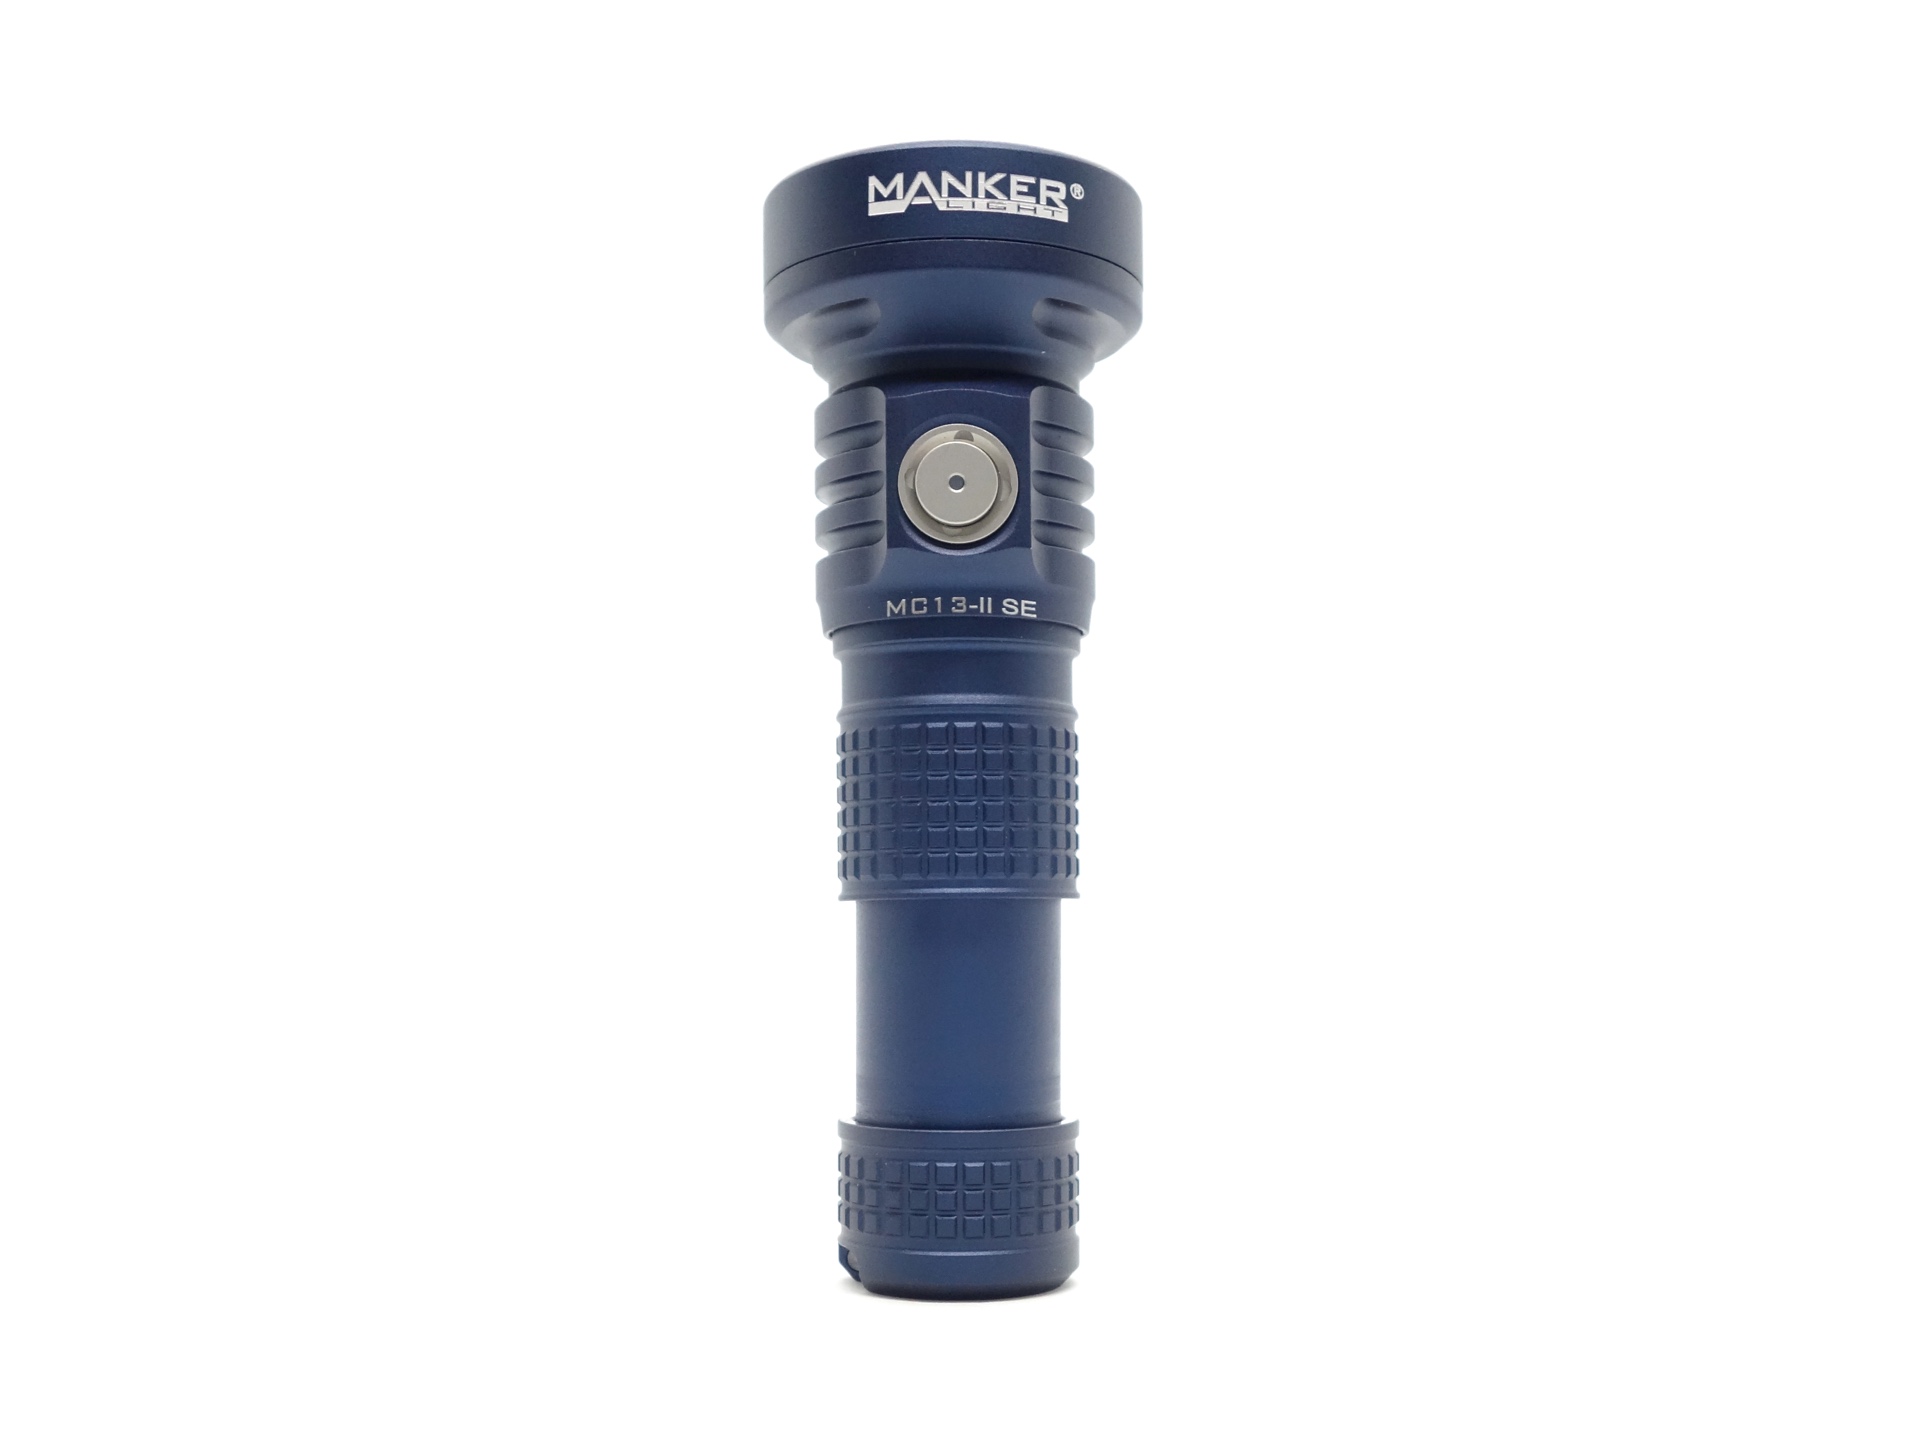
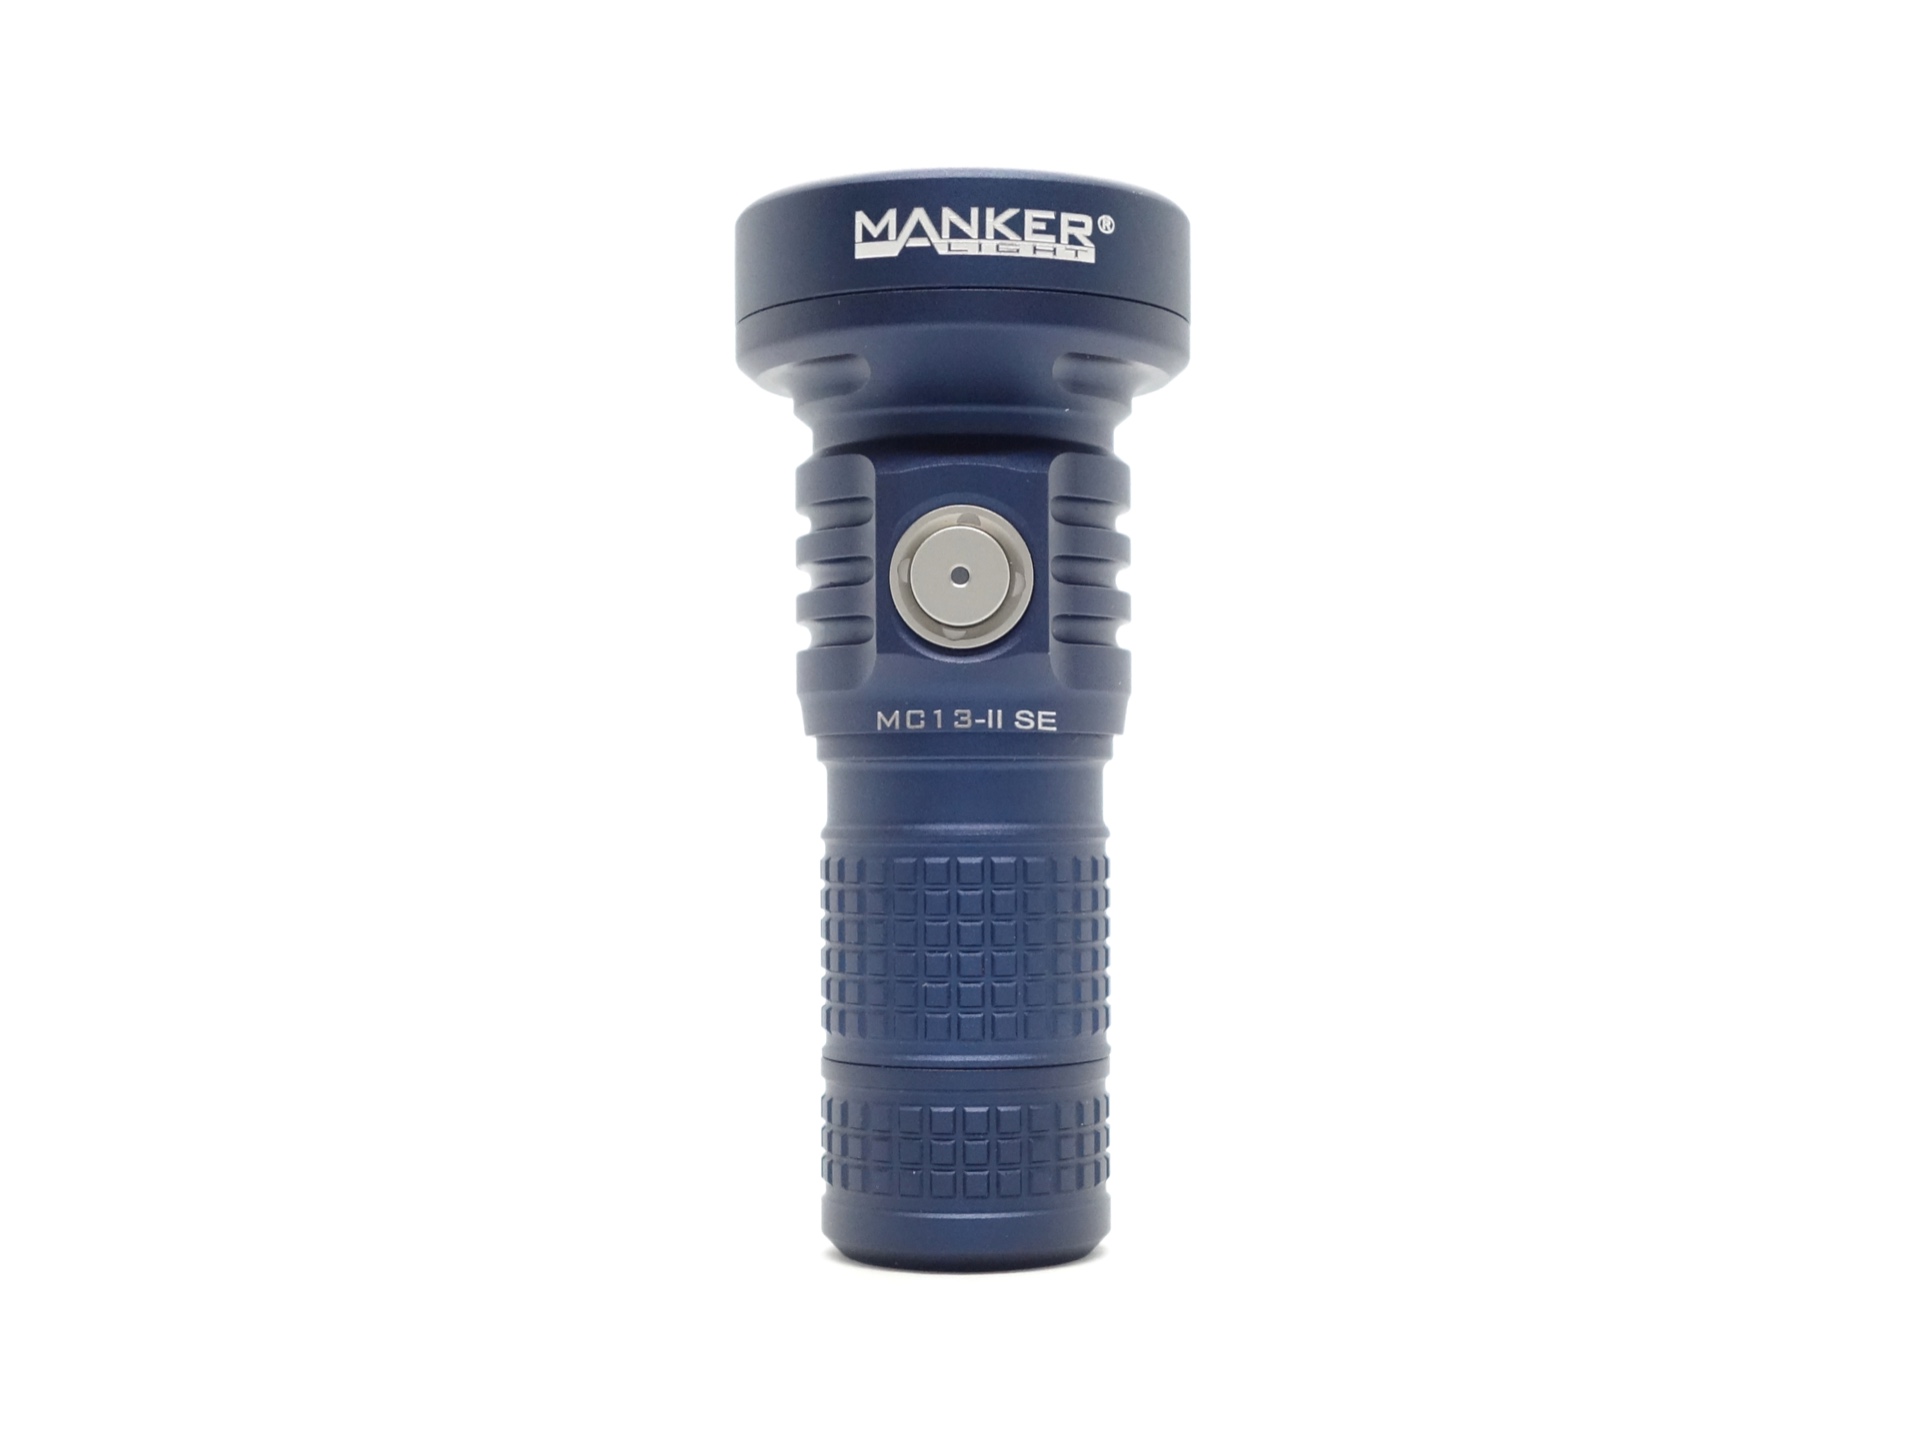
The Manker MC13 II SE is made of aluminium and it has a matte finish.
The tube has plenty of grip and there are no sharp edges.
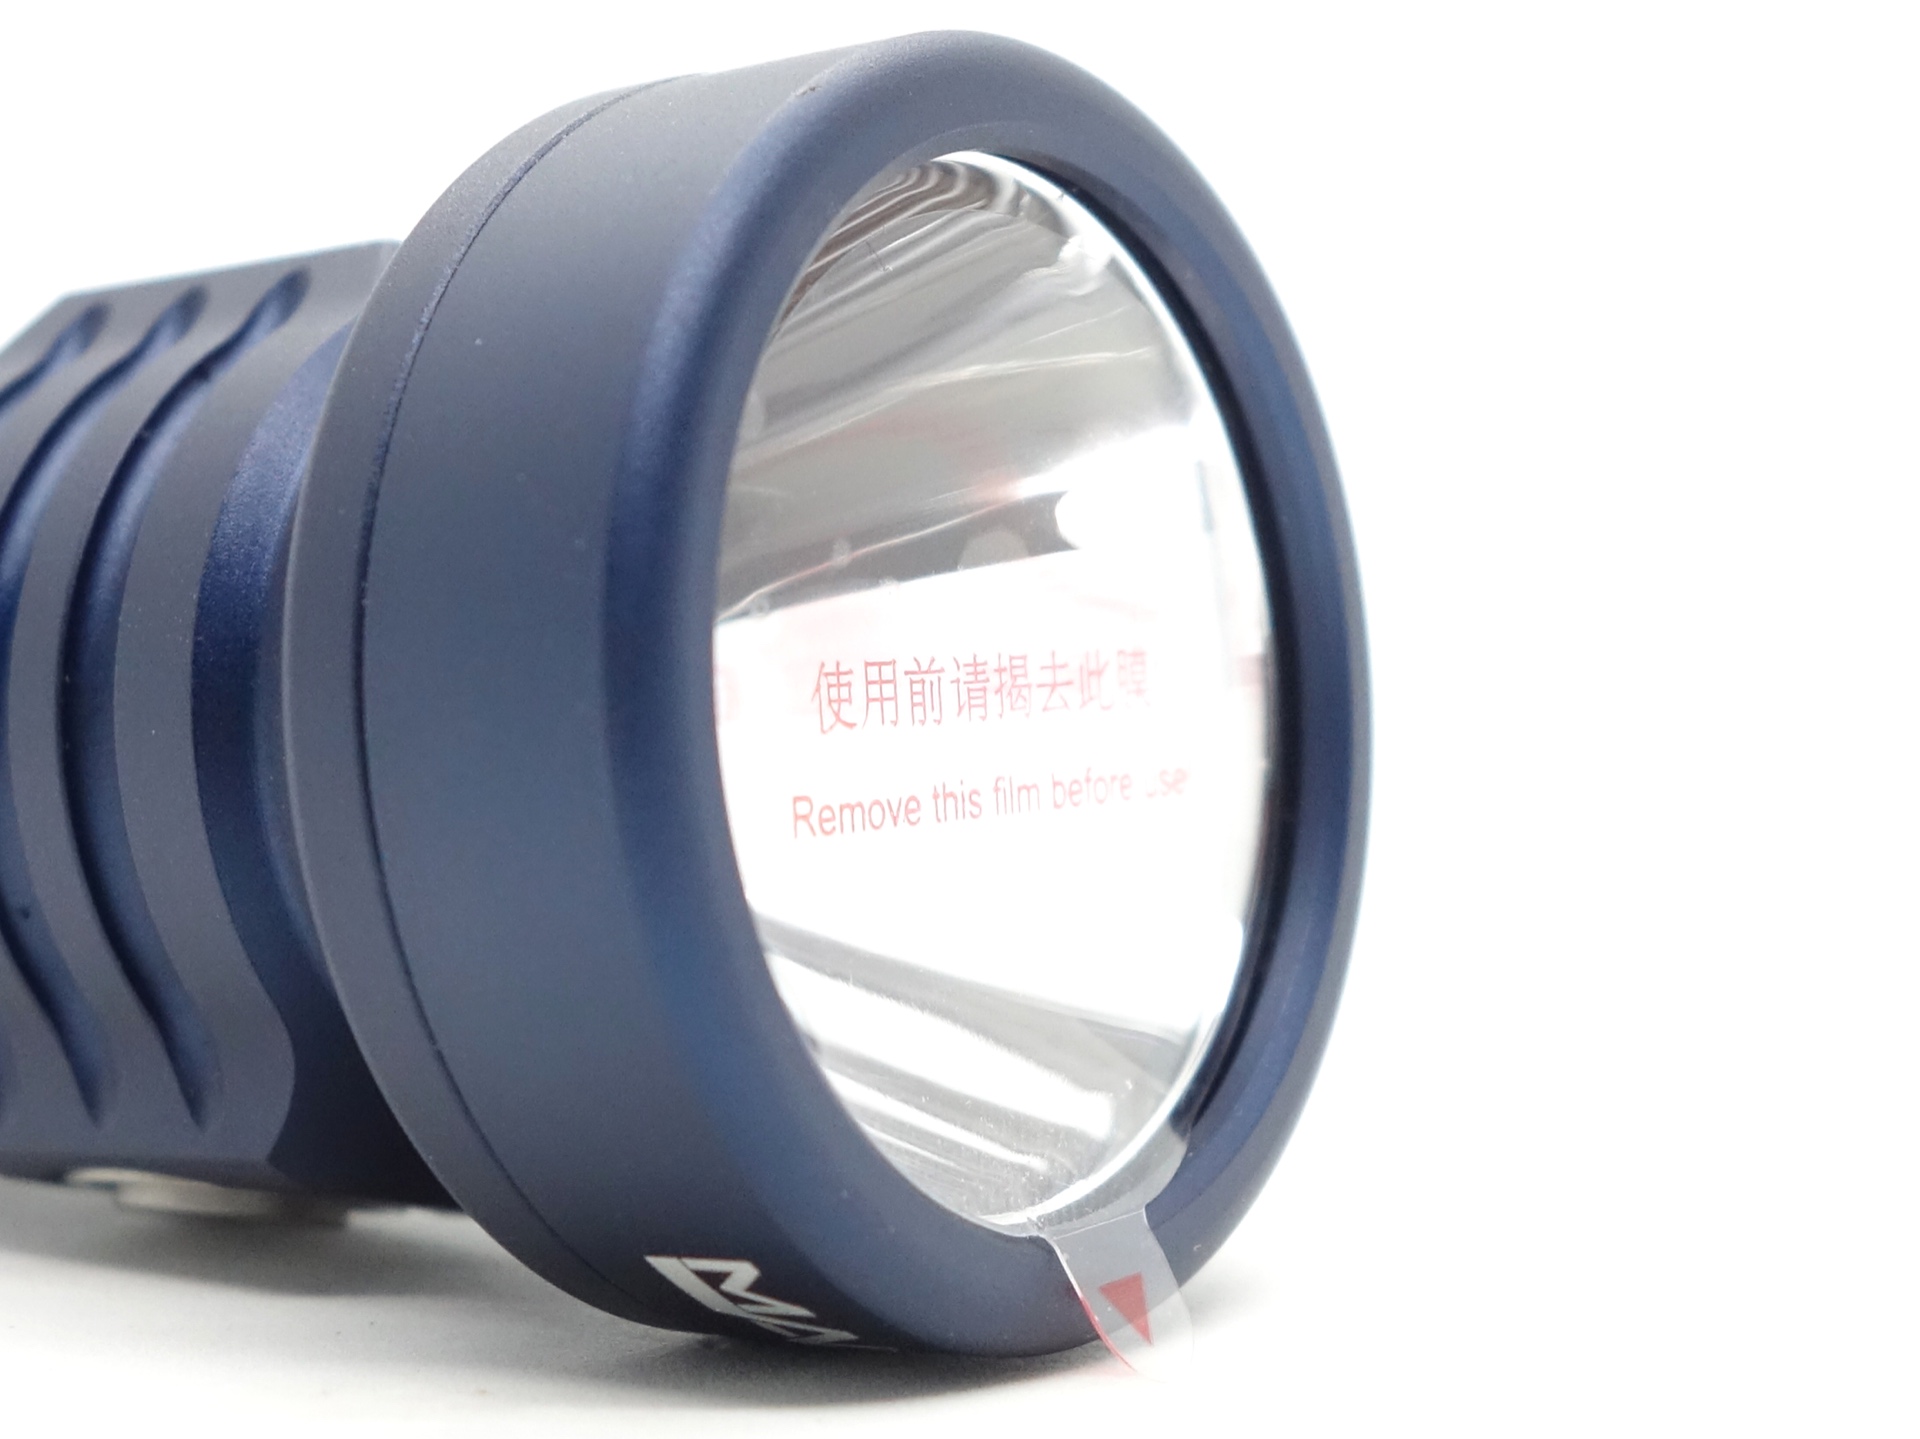
The lens came with protective film to remove.
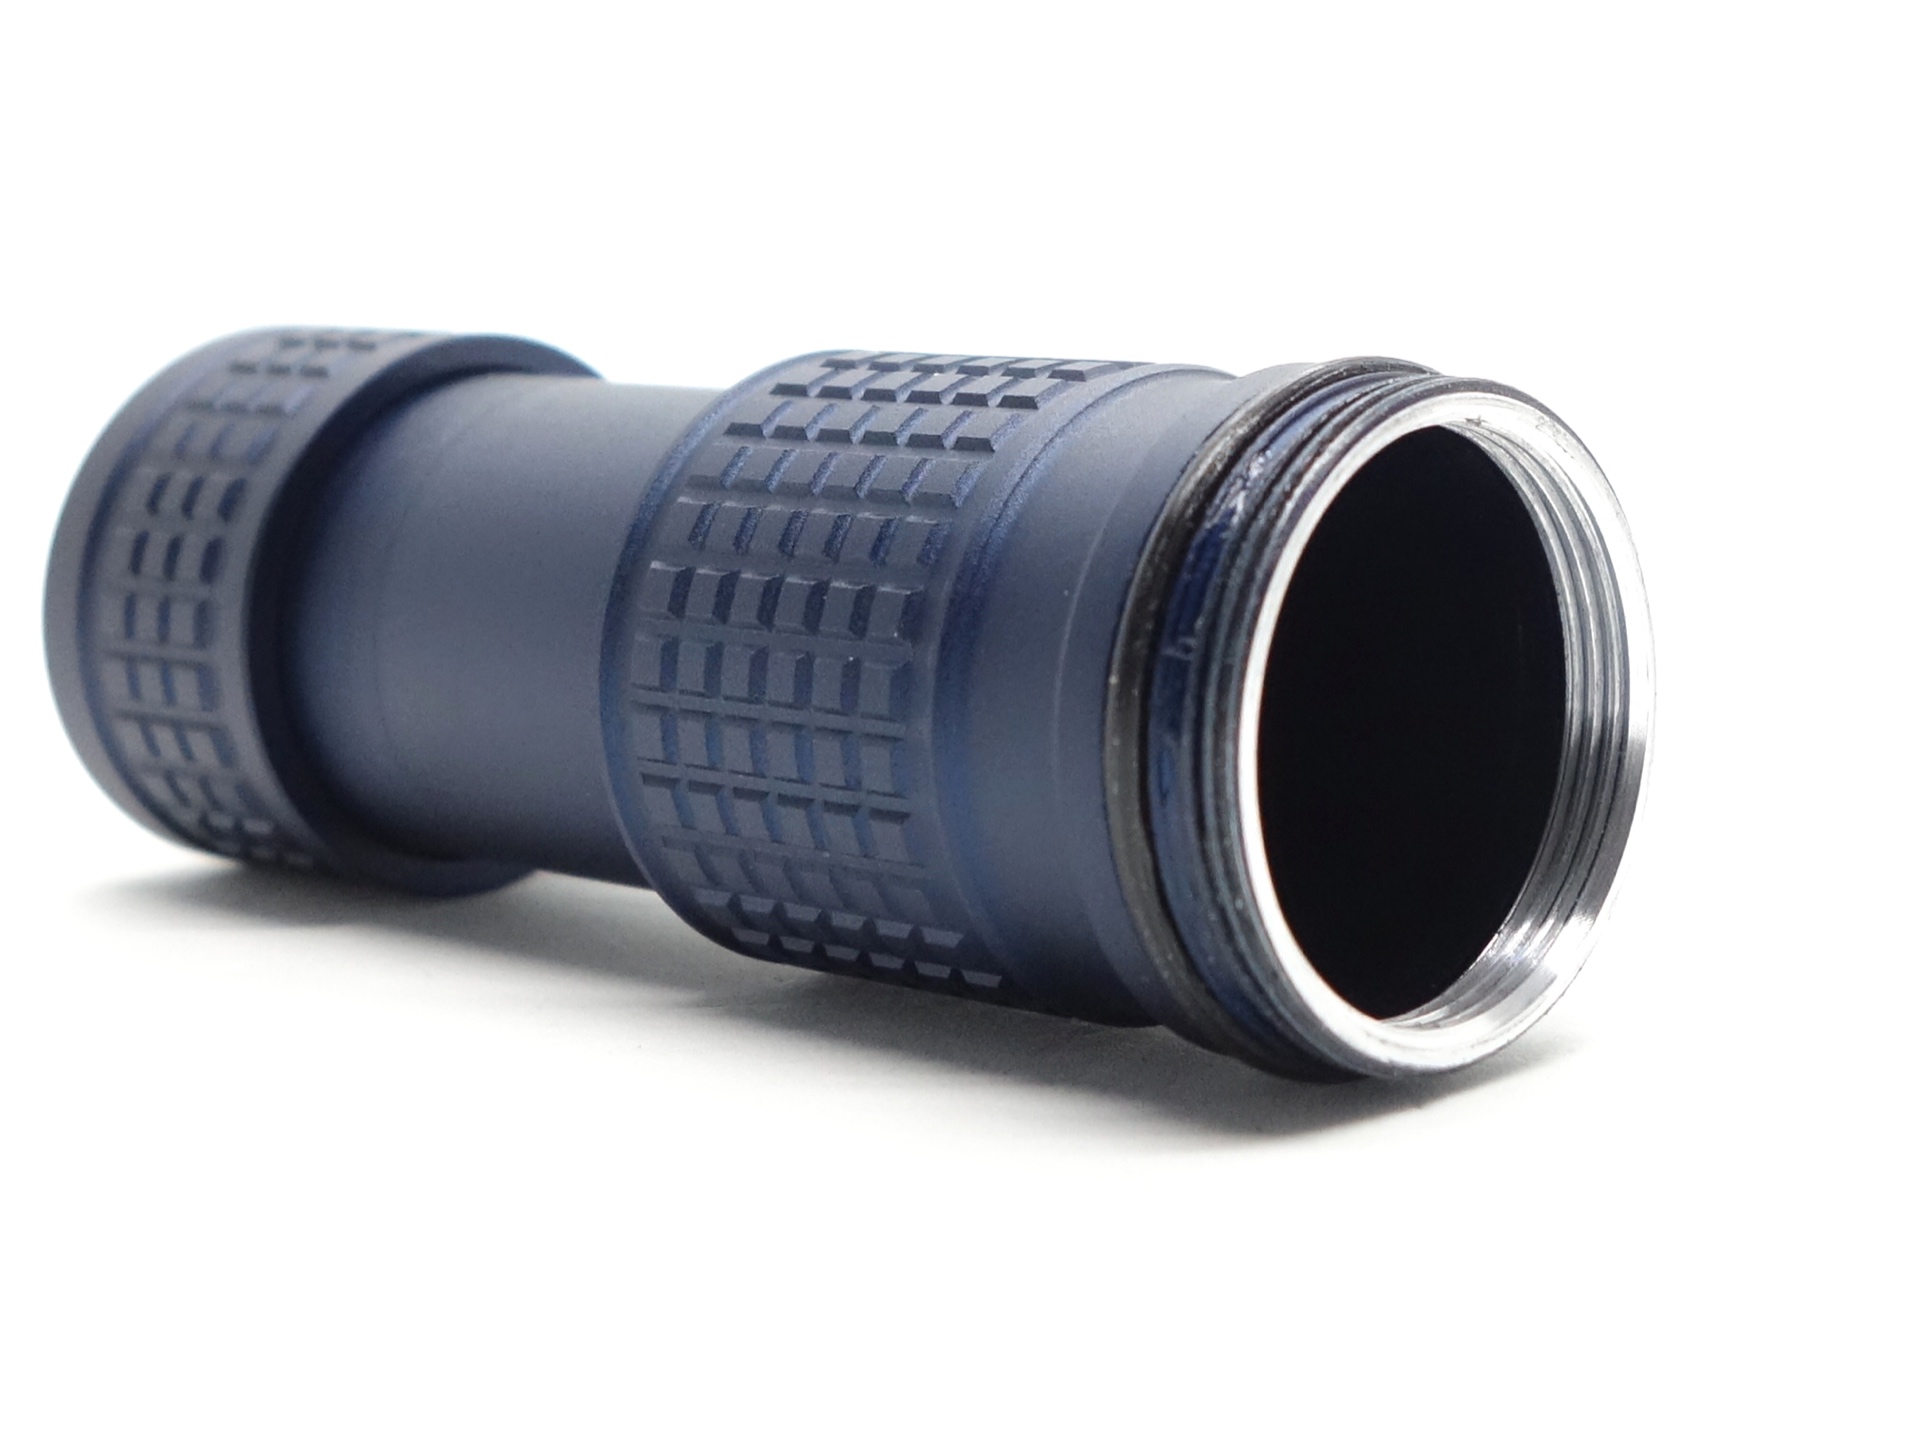
The threads on the tube are anodised near the head. They turn smoothly. But I noticed that the anodising starts to wear off after a lot of unscrewing and screwing of the tube.
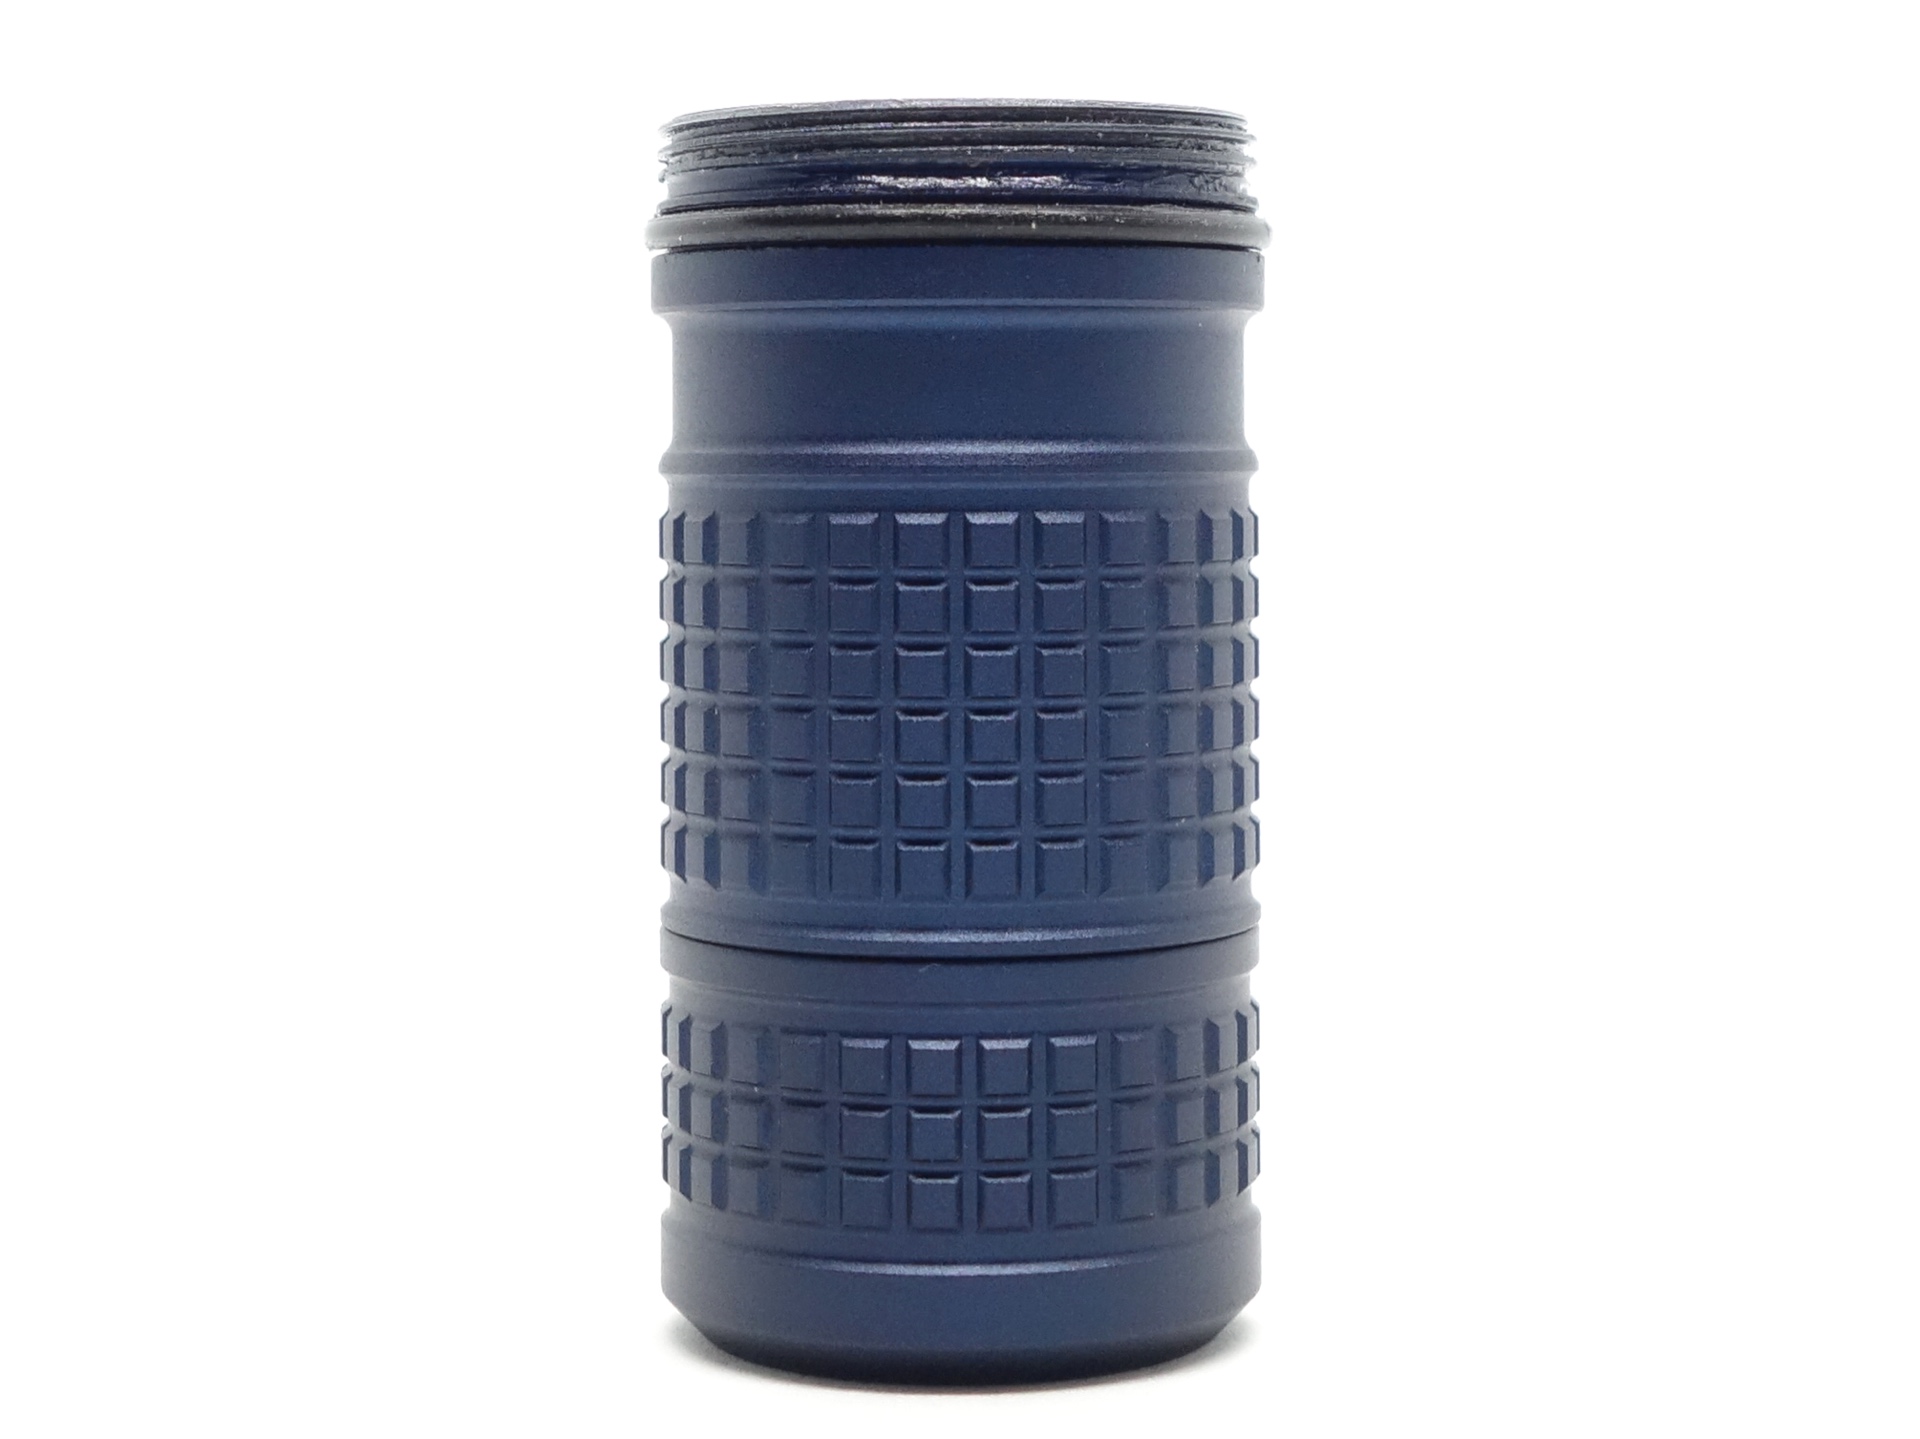
The battery tube can be extended to fit 18650 cells. There are threads on the inner tube near the head and there are threads near the tail.
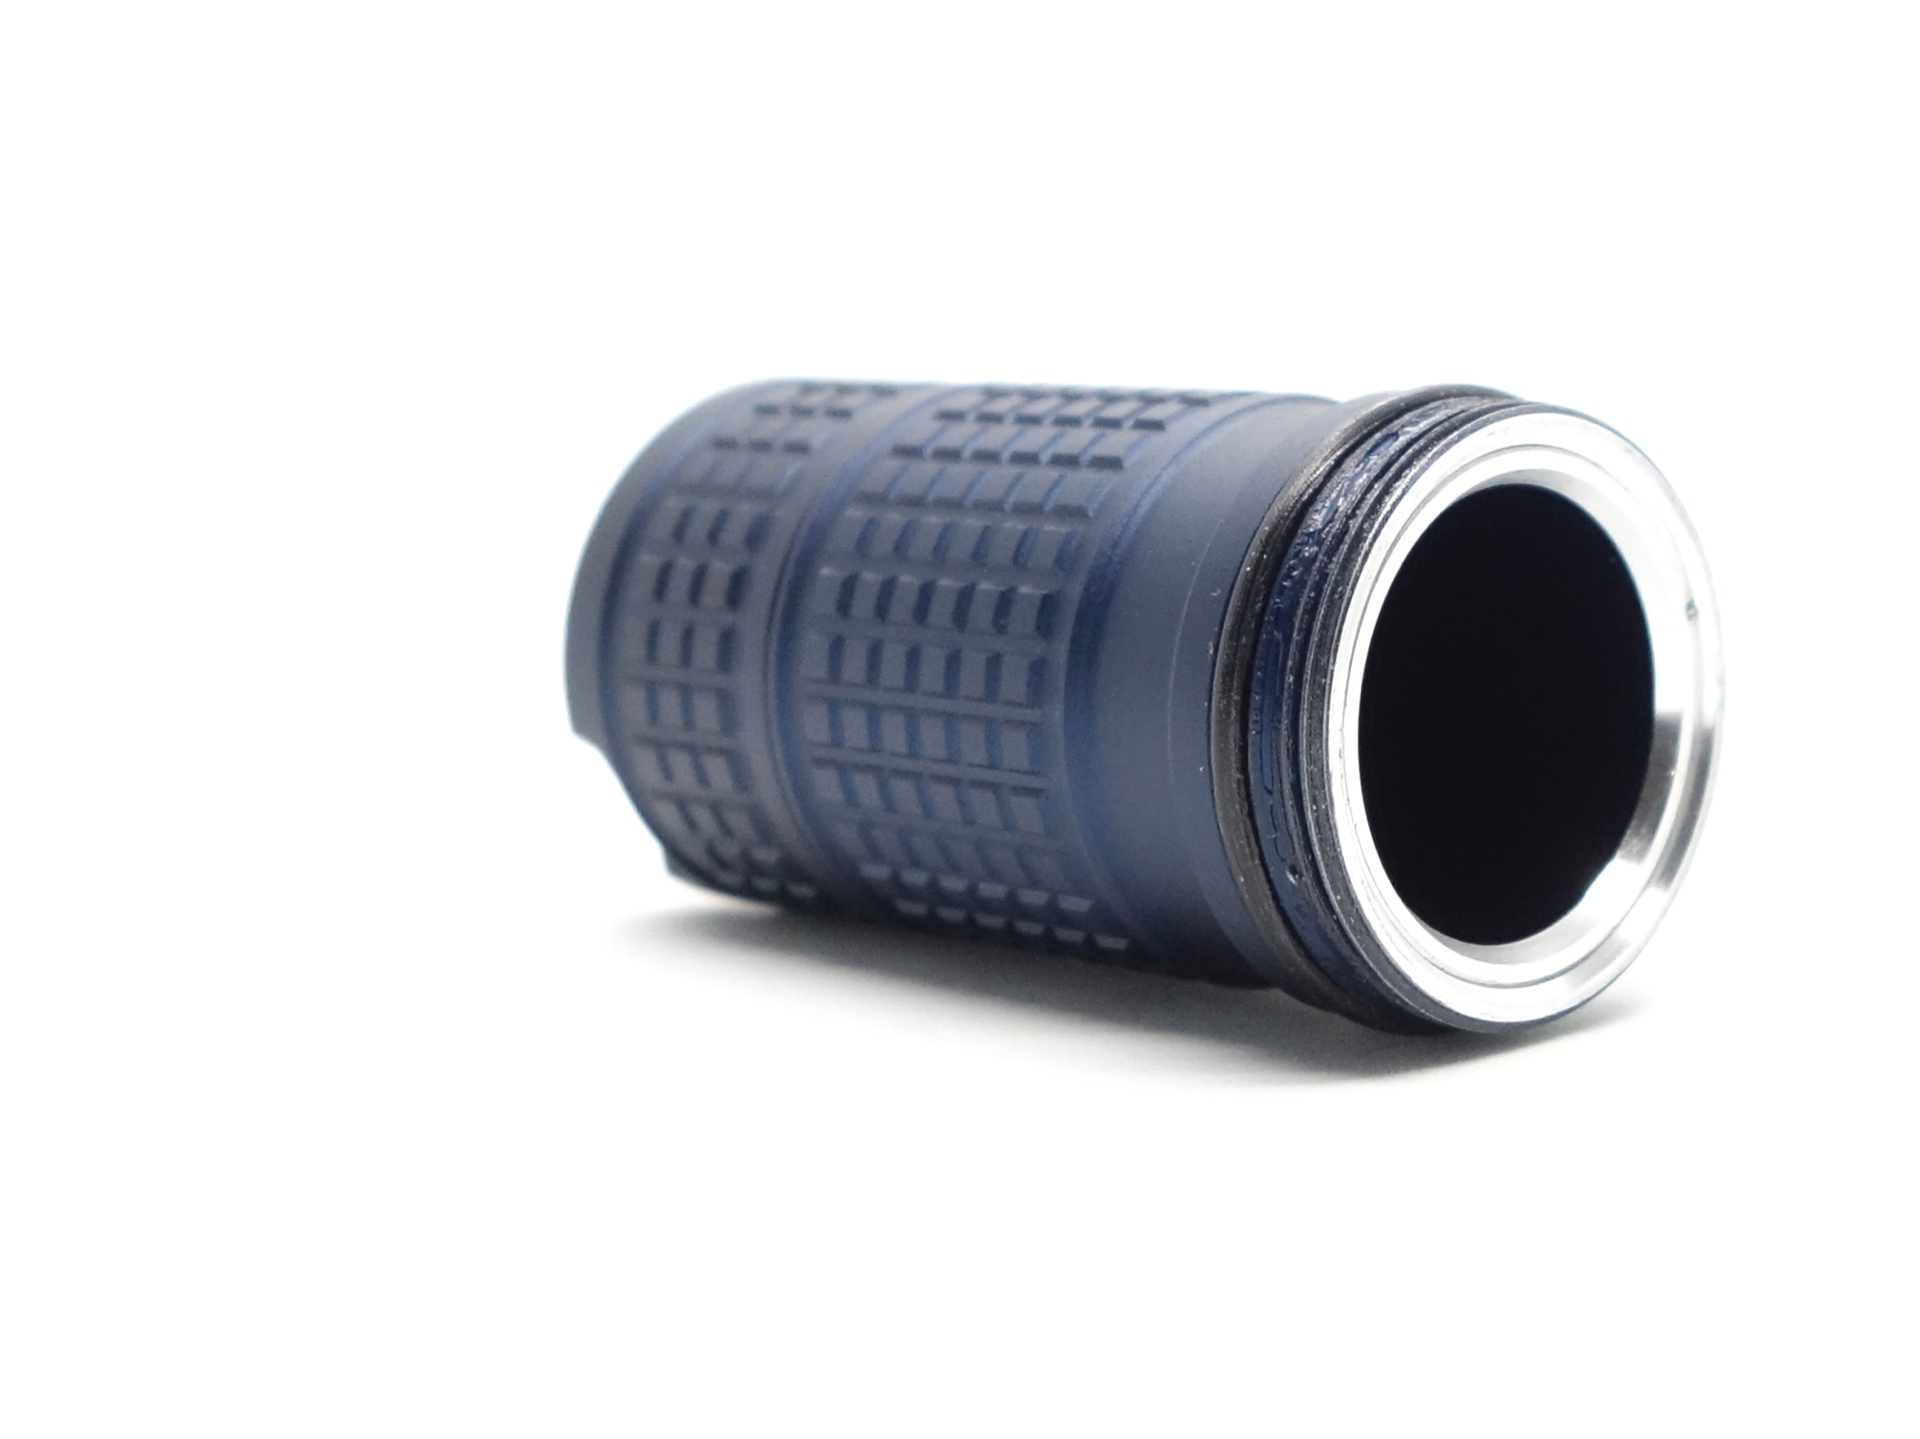
Simply unscrew the tailcap, fully extend the tube by pulling, and continue to “unscrew” the tube (it will tighten into a fully extended position). Be careful not to overtighten or you may end up unscrewing the tailcap.
Some long 18650 cells may not fit until the tube has been fully extended.
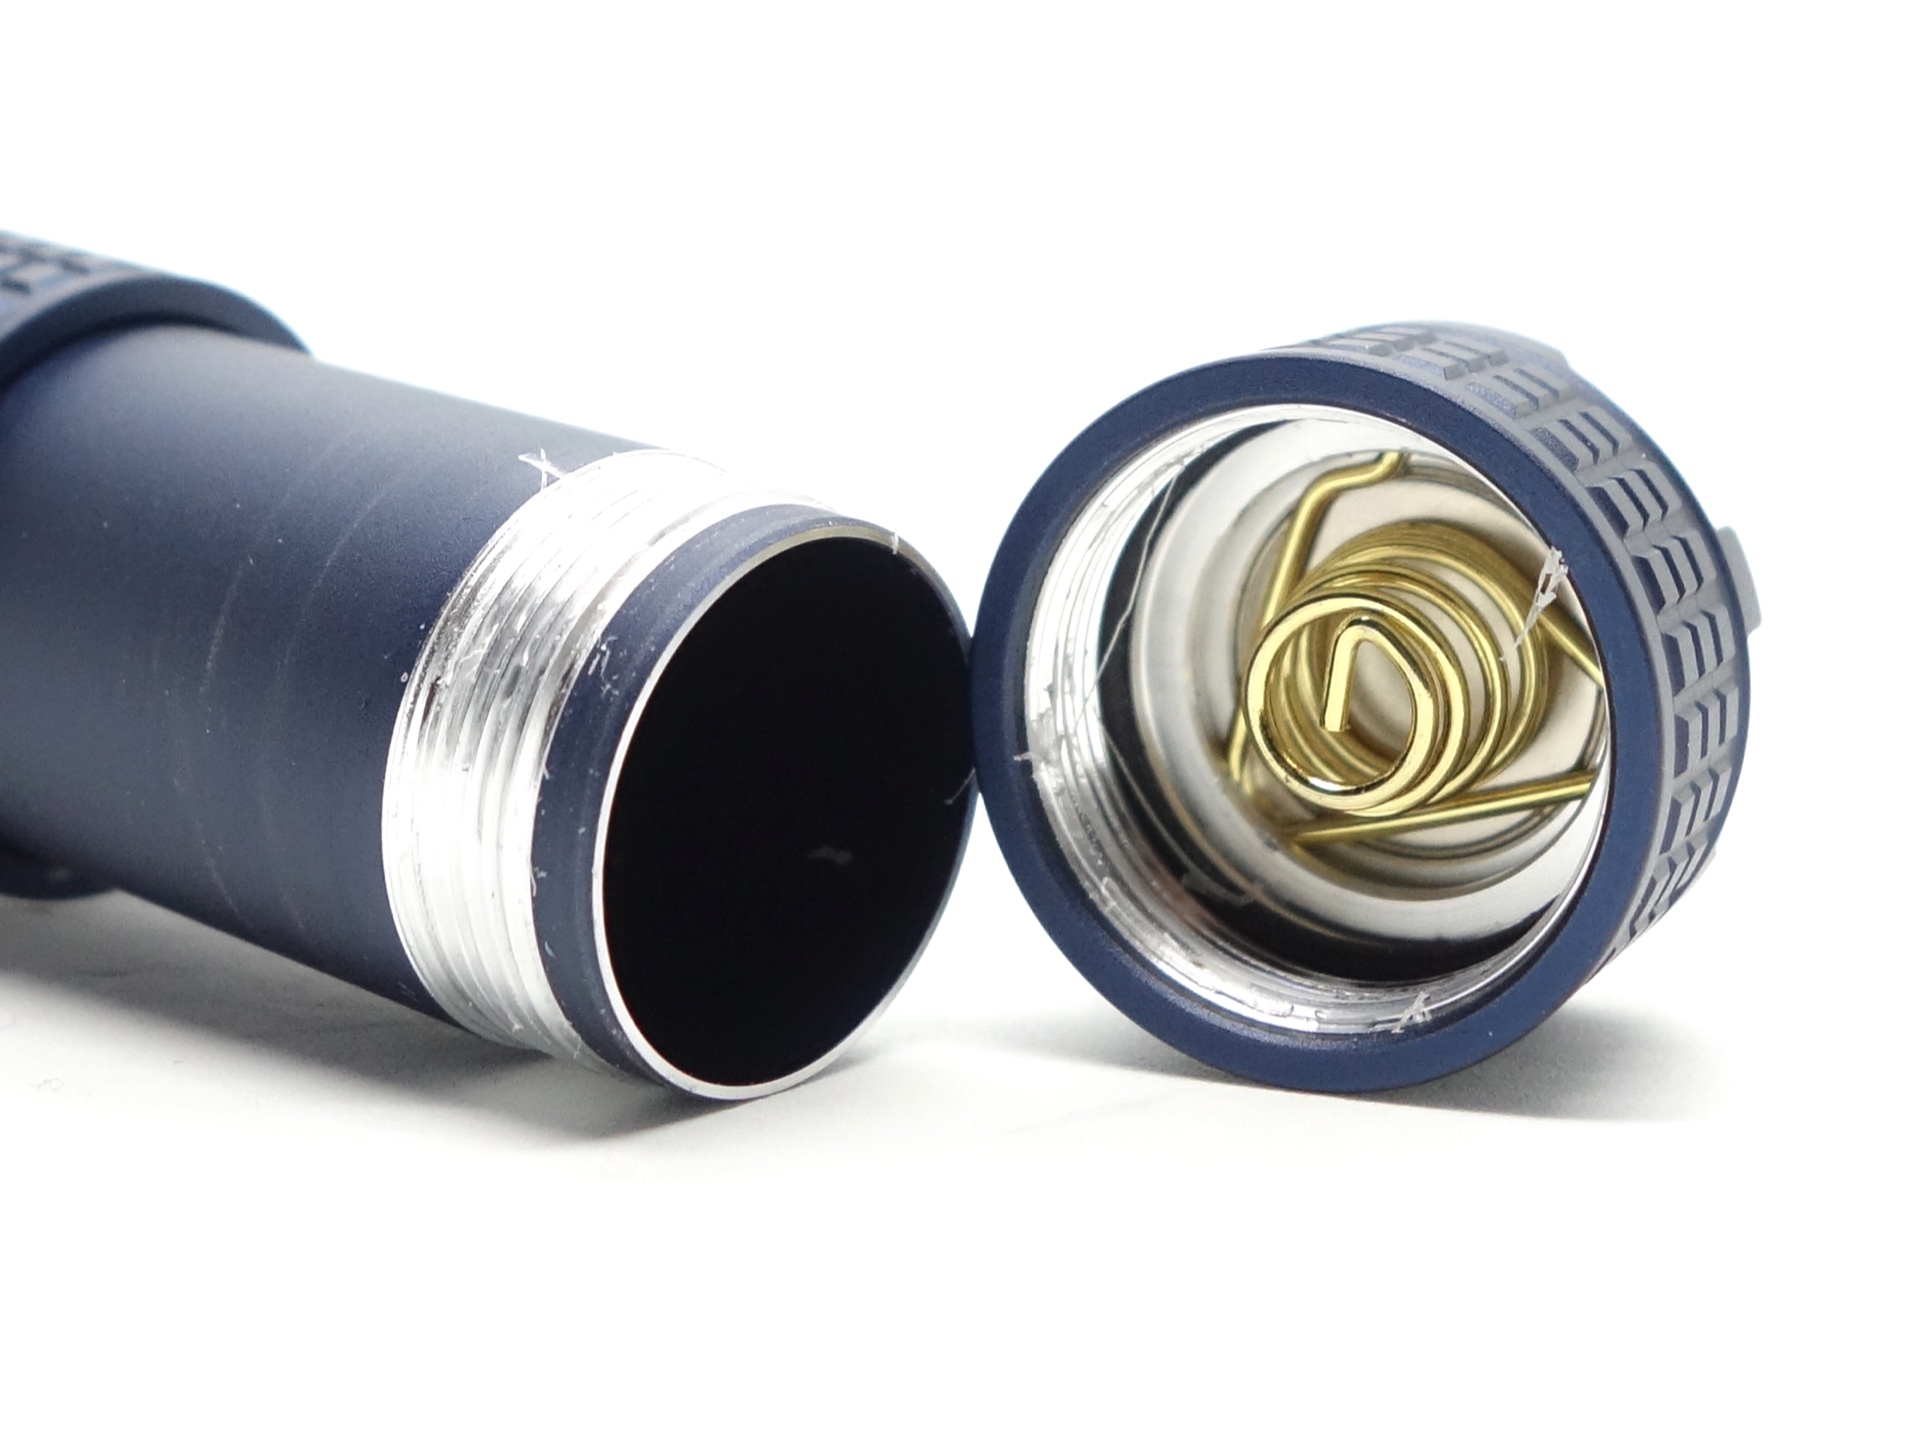
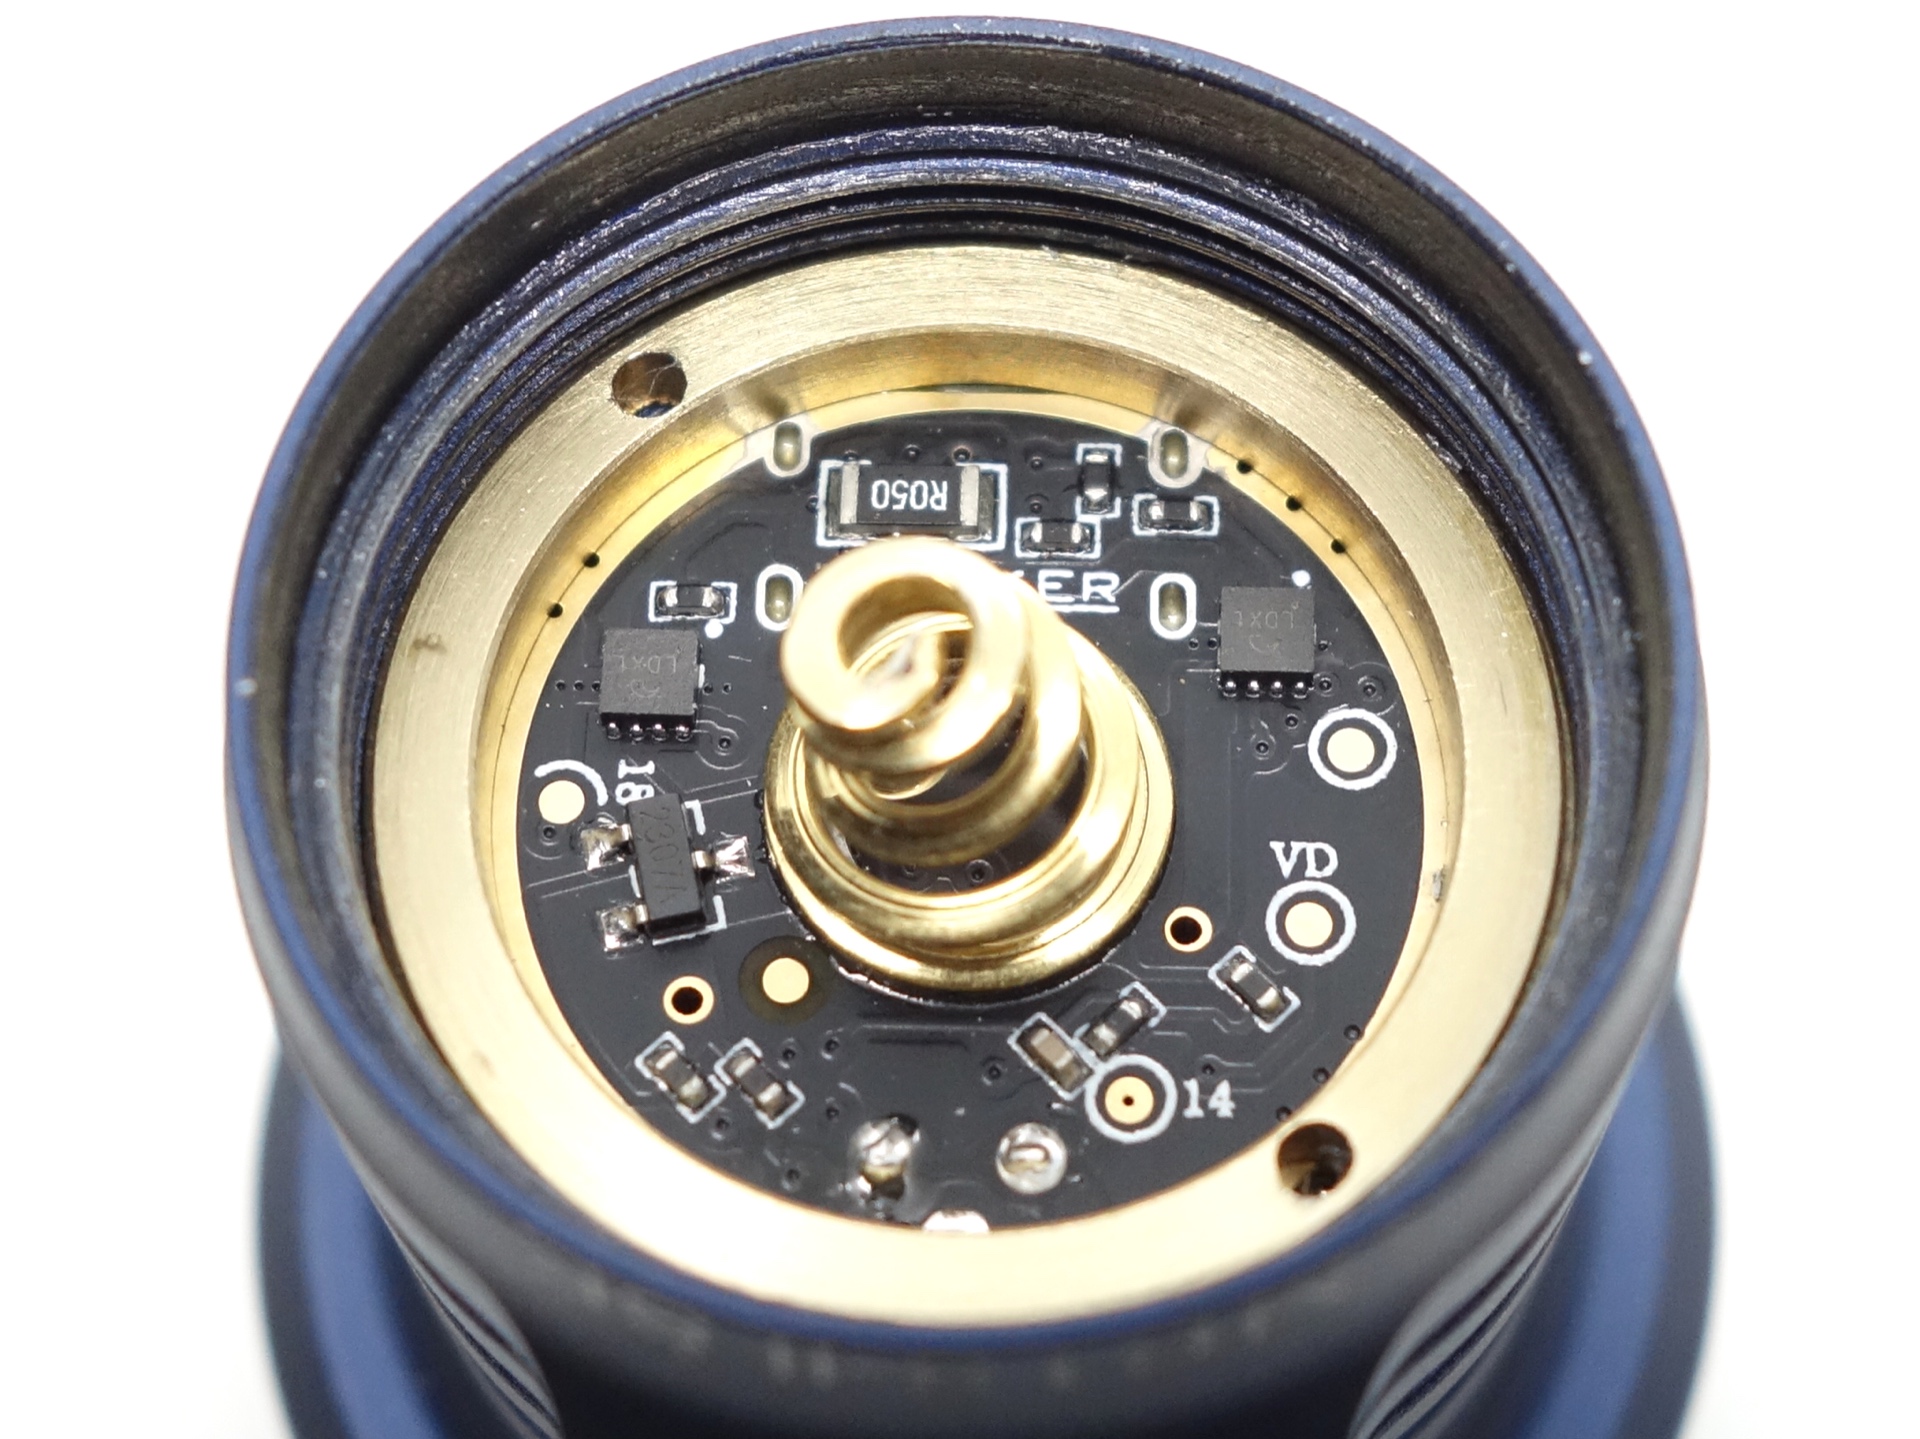
The spring on the driver is small and thick. The spring at the tail is pretty good too. Button top and flat top cells fit.
The torch appears to have reverse polarity protection. I put a flat top 18350 cell in backwards and I tried to turn the torch on. The torch did not turn on. The torch continued to work properly after I put the cell in the correct way. Warning: Do not try this at home.
LED, bezel, lens, reflector and beam#
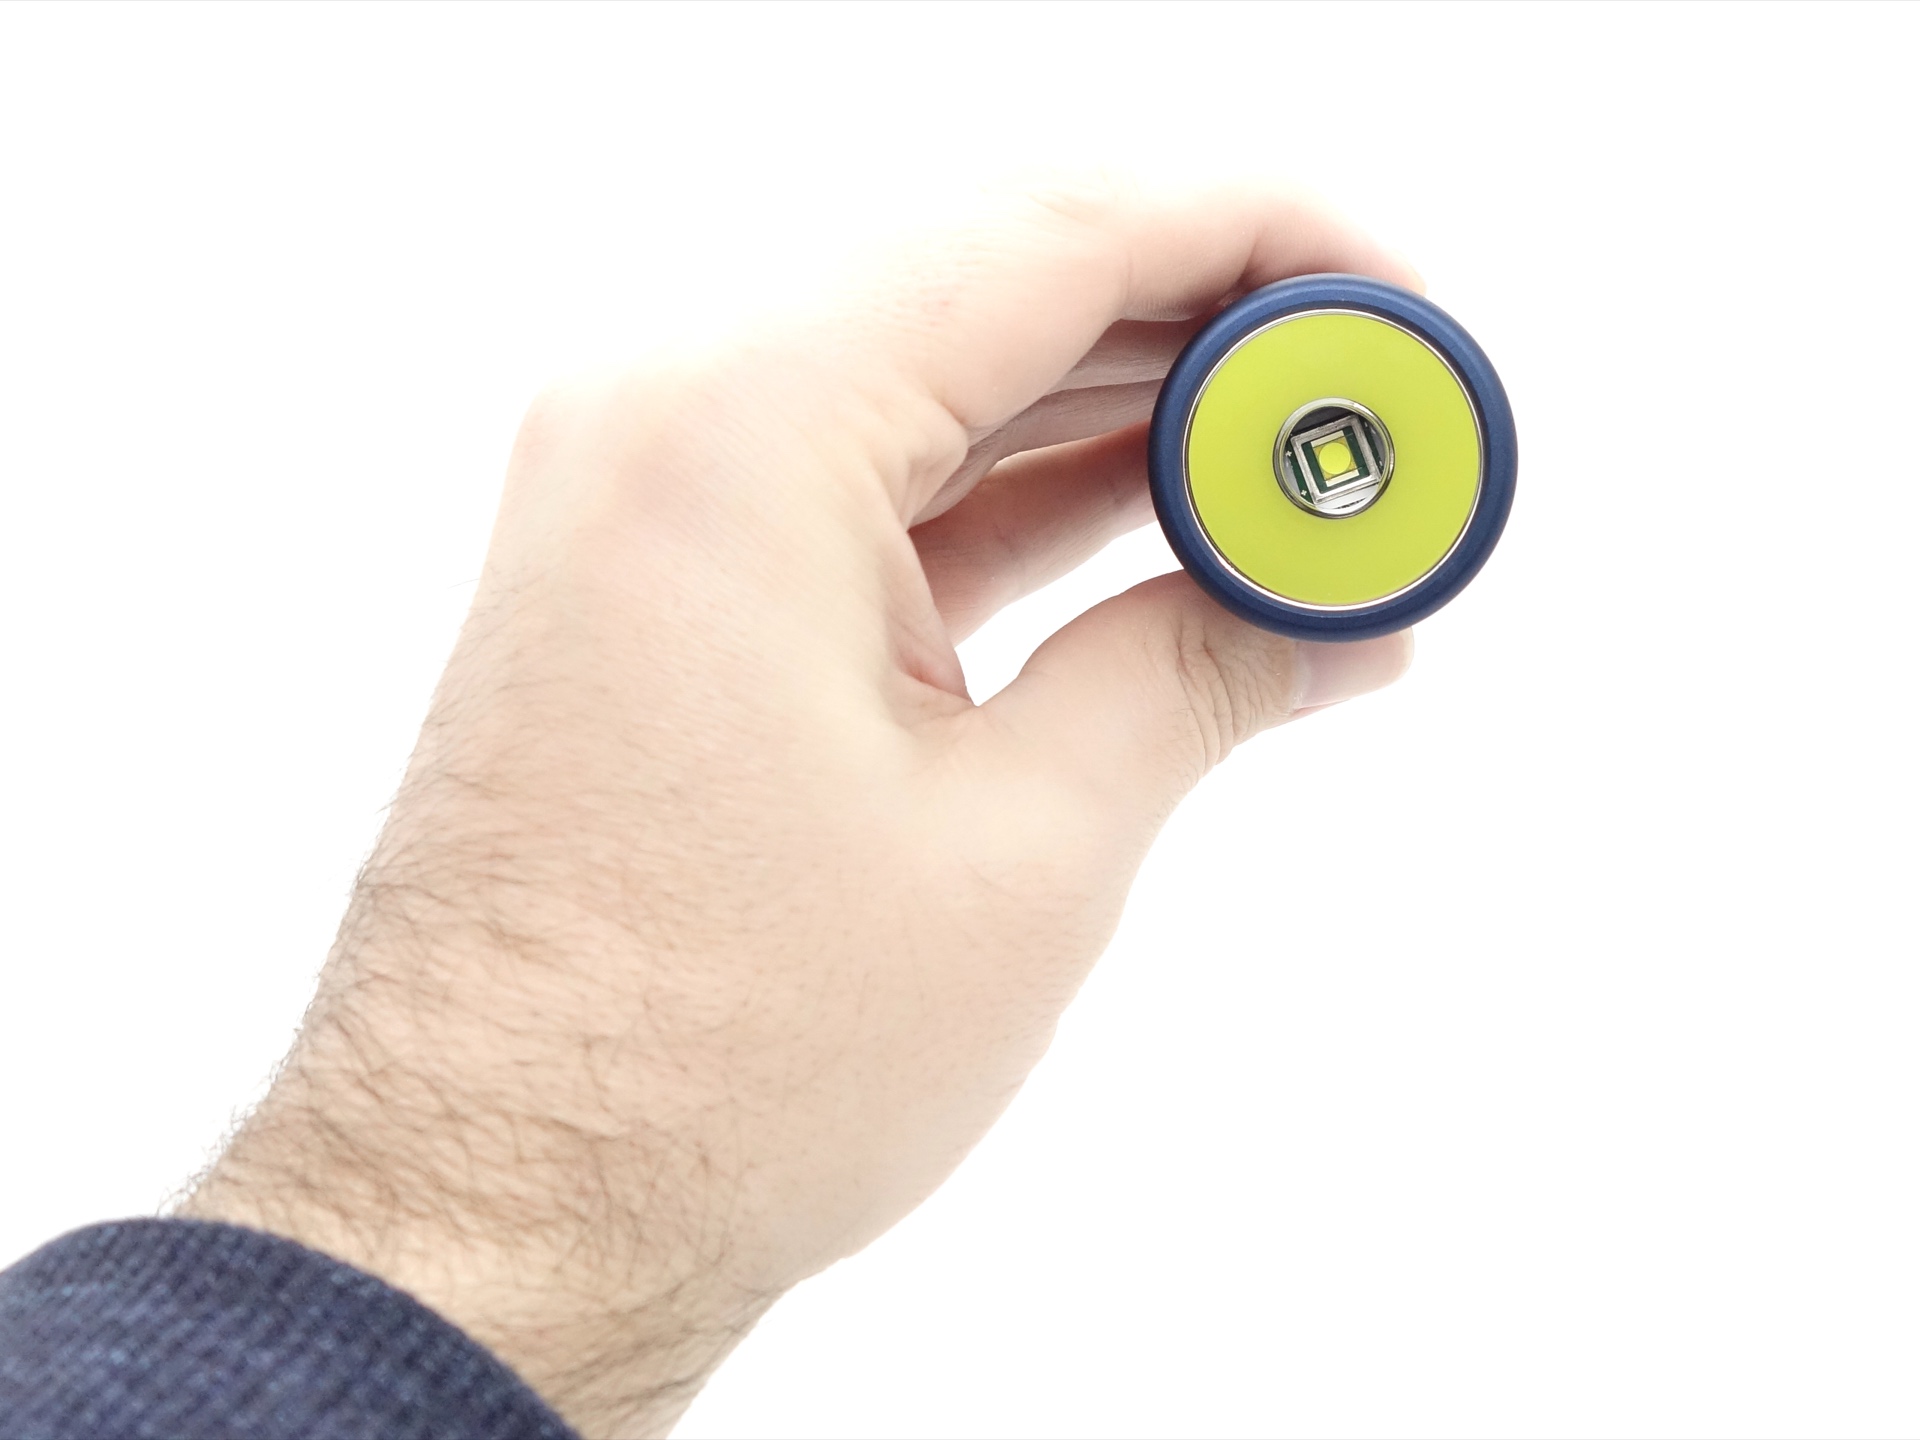
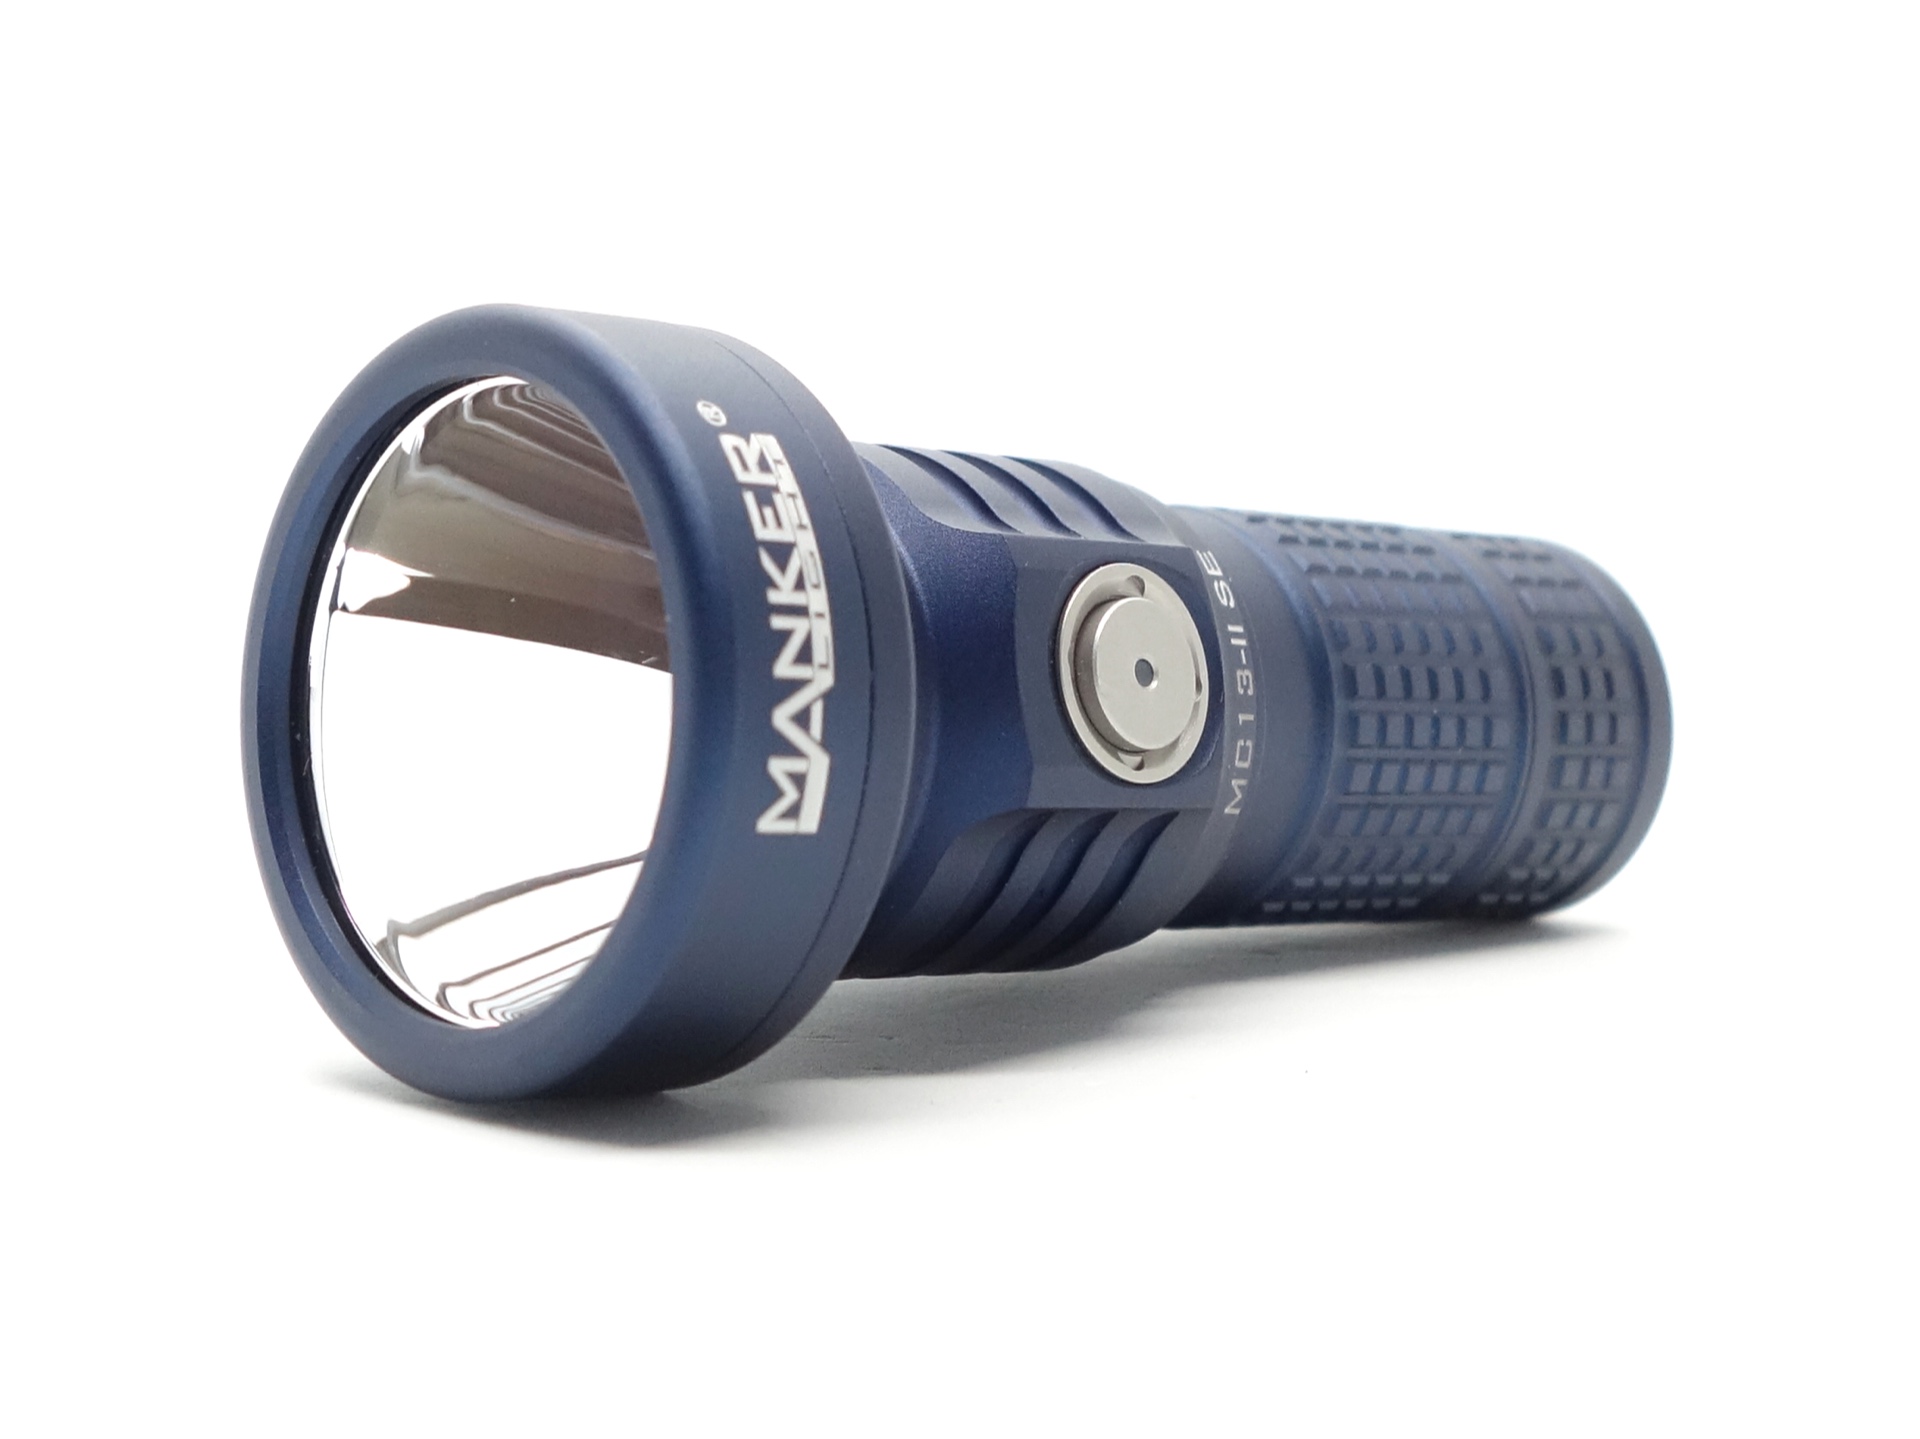
The Manker MC13 II SE has a large round cool white emitter surrounded by a smooth reflector.
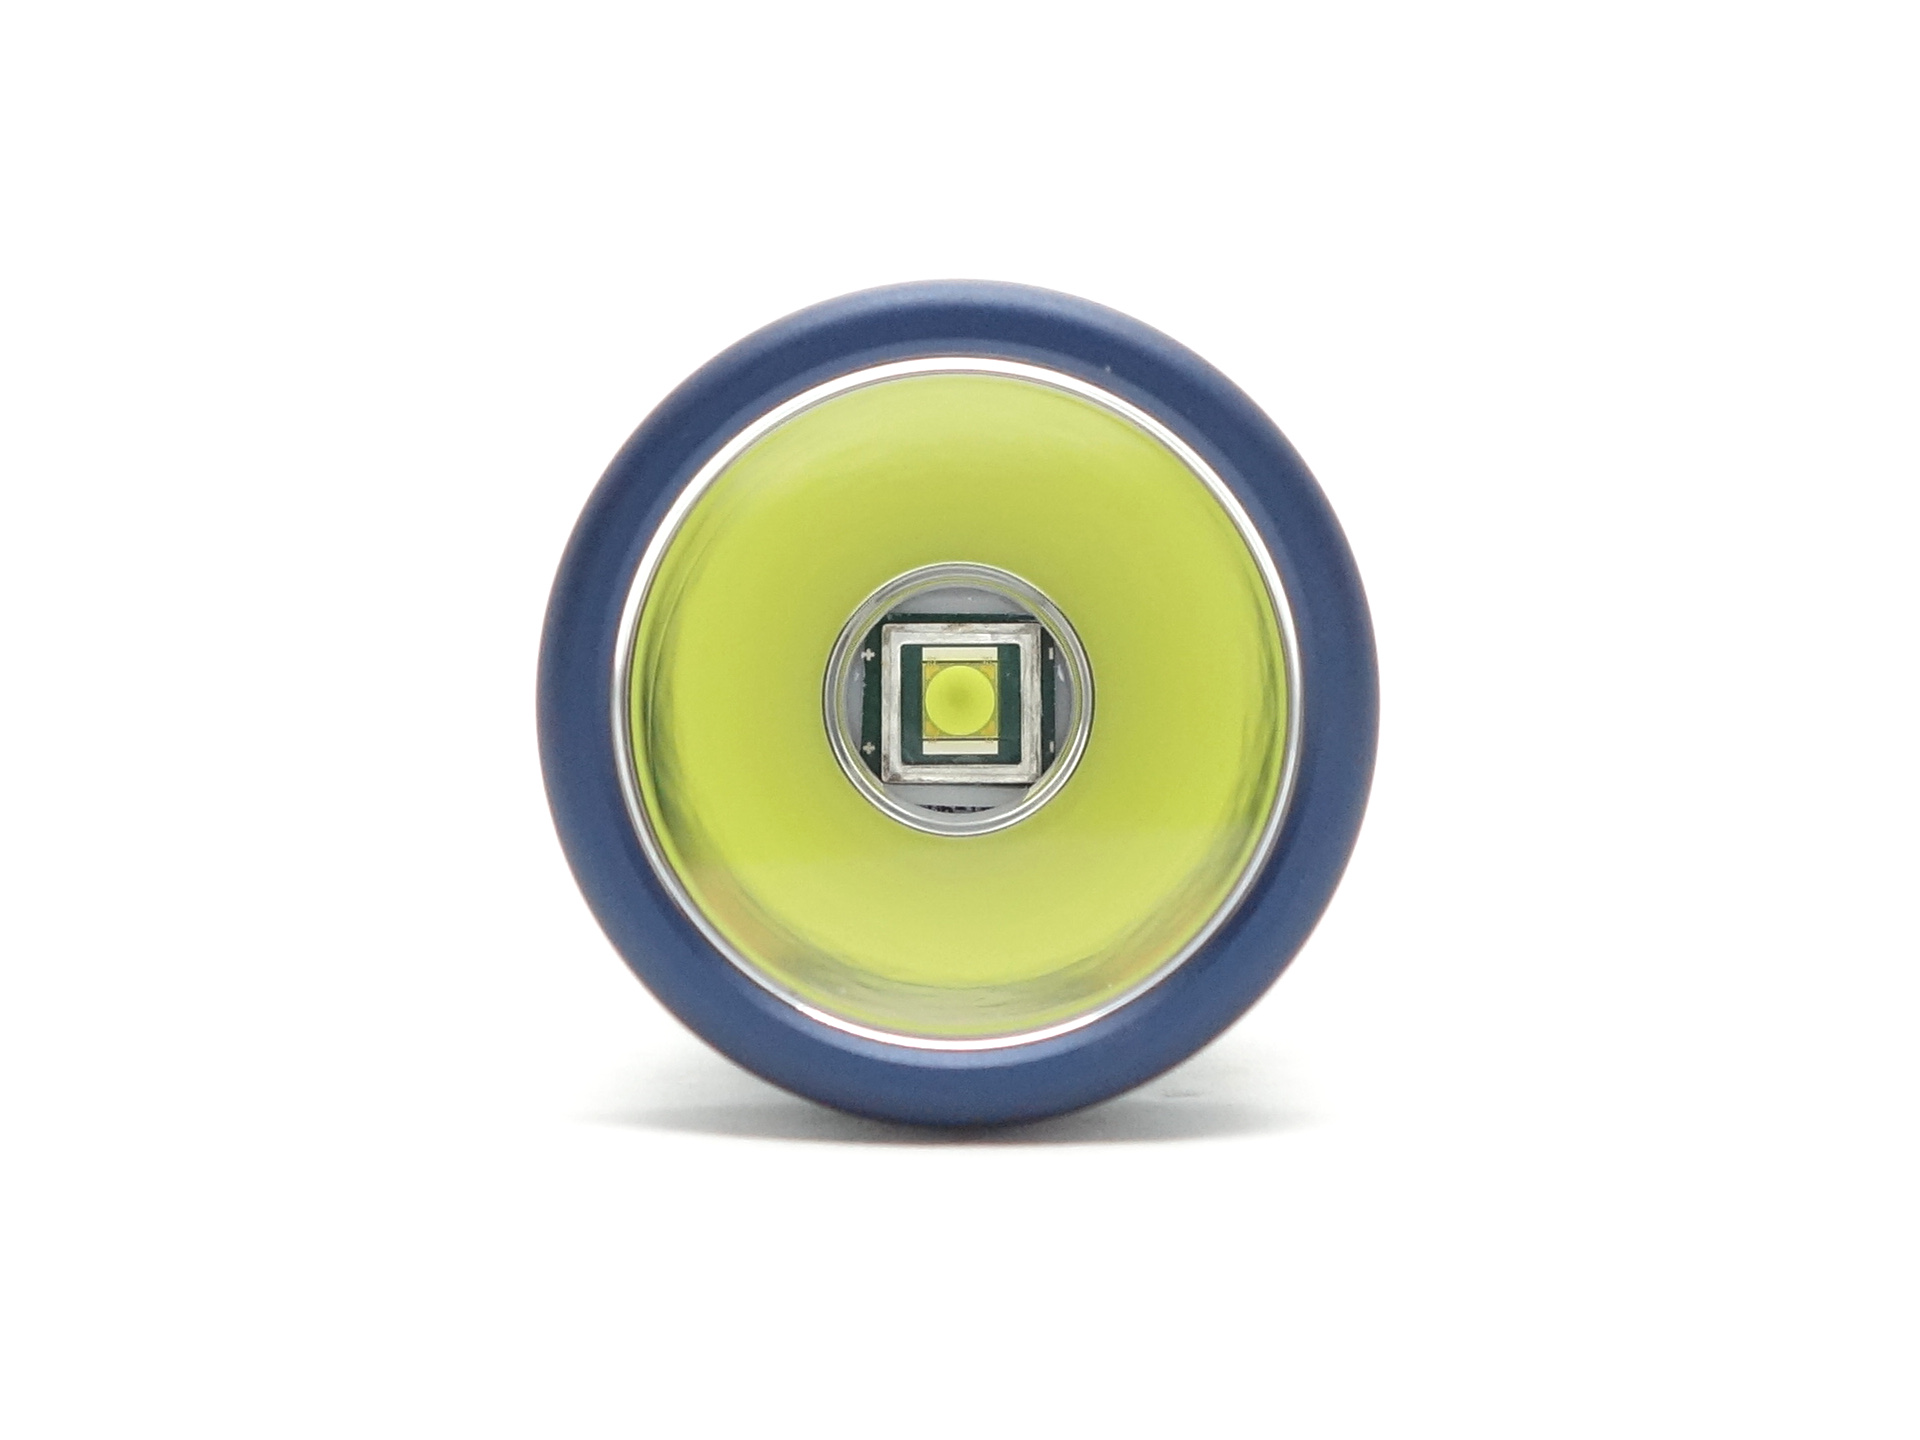
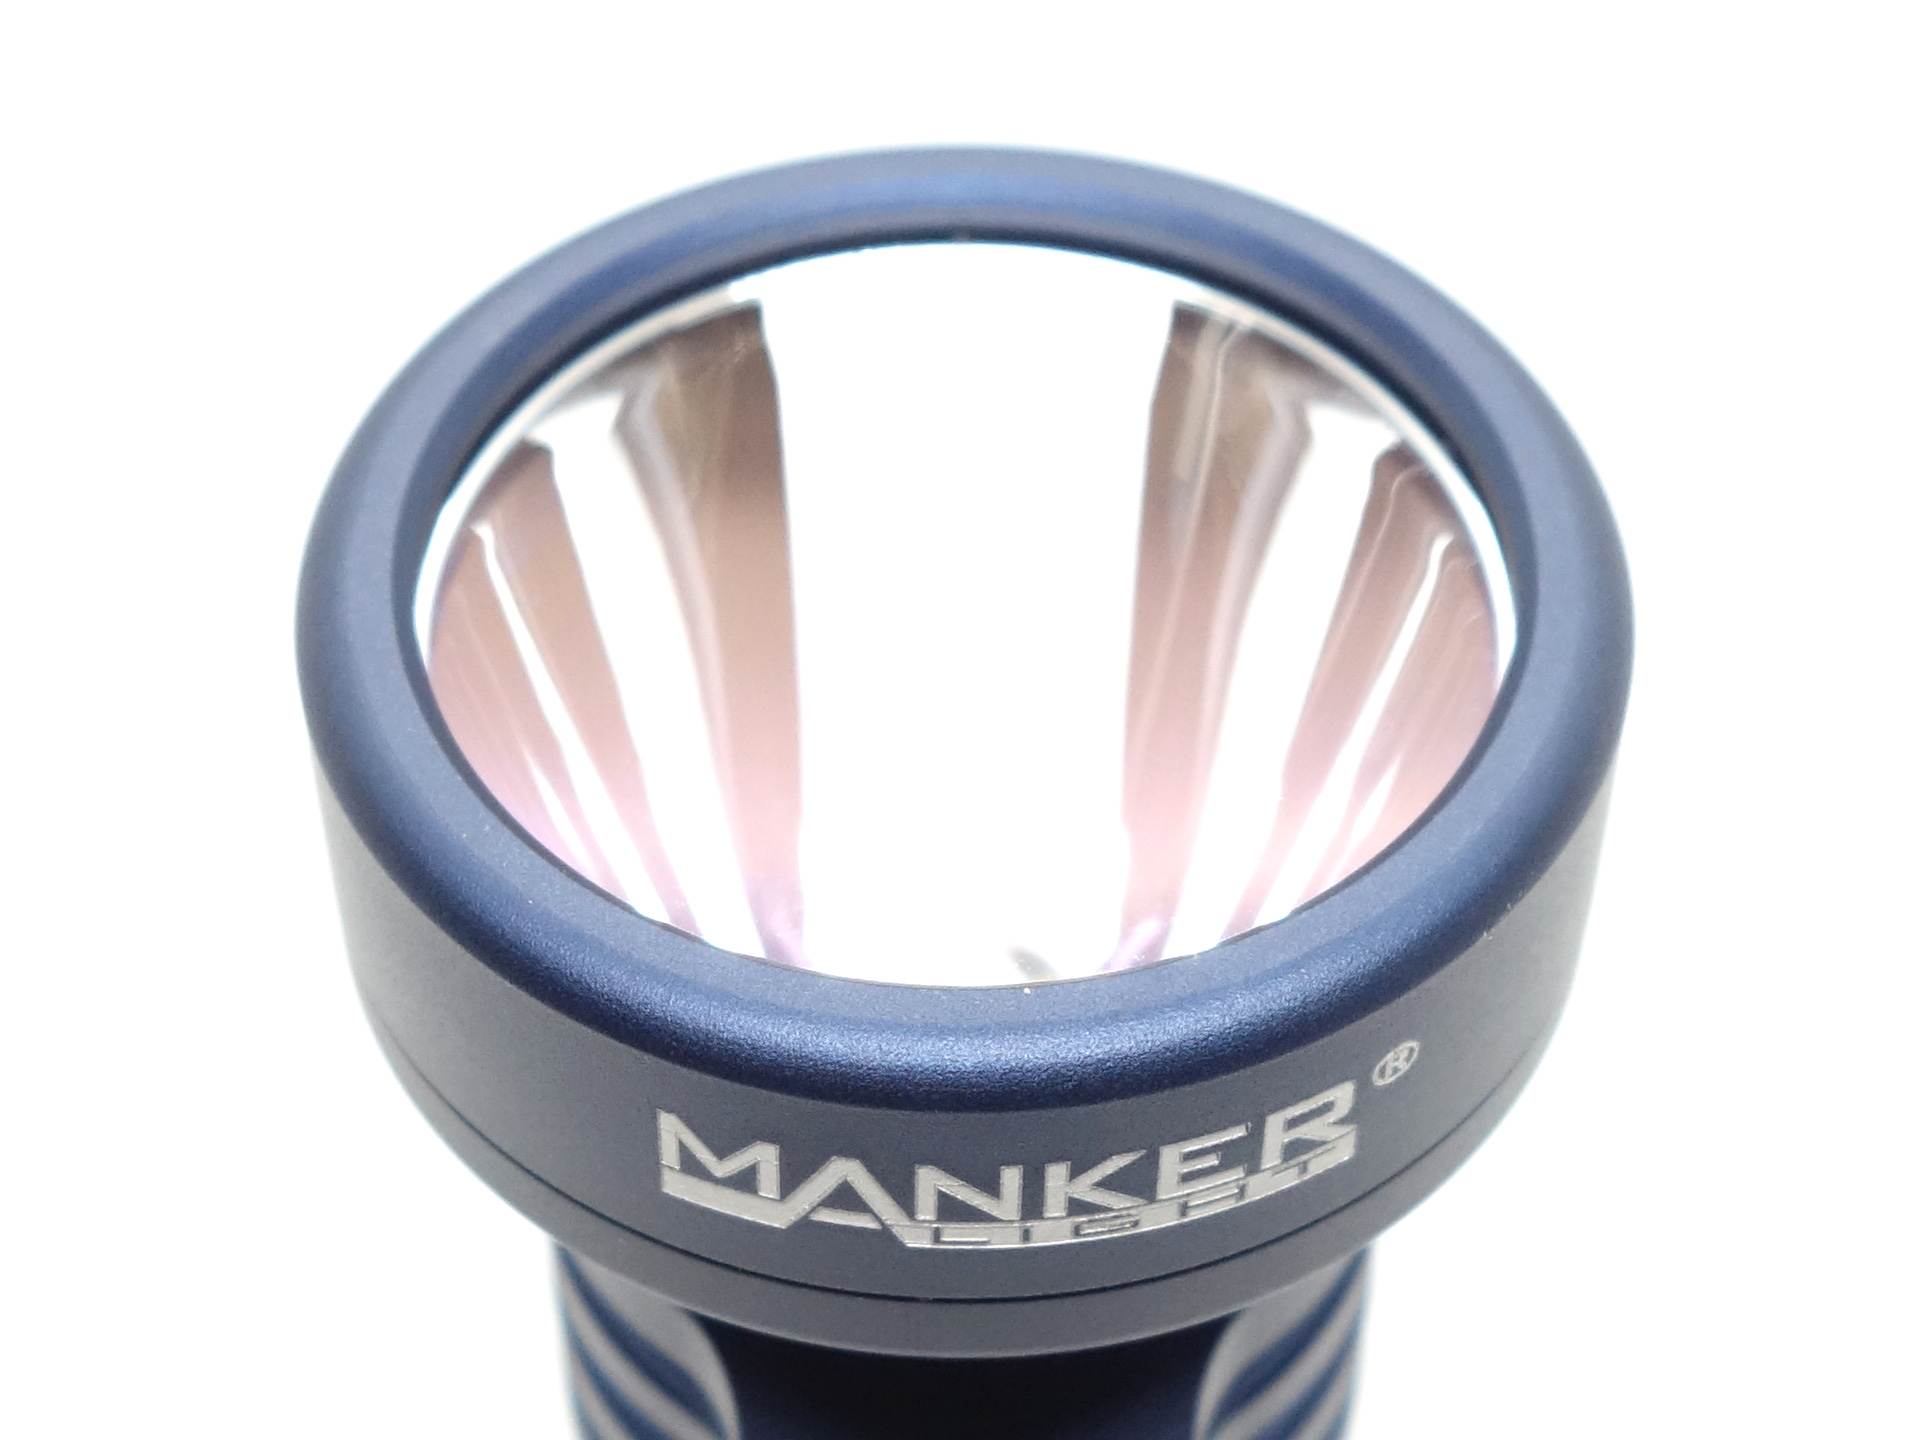
The glass lens appears to have an anti-reflective coating.
The bezel can be unscrewed. The threads have been anodised and there is an o-ring on the threads.
CCT, CRI, and duv#
I have taken Correlated Colour Temperature (CCT) and Colour Rendering Index (CRI, RA of R1-R8) measurements with the torch positioned five metres away from an Opple Light Master Pro III (G3).
The CCT is around 5700K, the CRI is around 65 and the Delta u, v is positive (slightly green).
The beam produced has an intense white hotspot and a wide spill. There is a corona around the hot spot and a dark region in the spill. The inner and outer parts of the spill are more intense.
| Cell | Mode | CCT (K) | CRI (Ra) | x | y | Duv |
|---|---|---|---|---|---|---|
| 18350 | Low | 5732 | 65.6 | 0.3269 | 0.3507 | 0.0073 |
| 18350 | Medium | 5766 | 65.8 | 0.3262 | 0.3494 | 0.0070 |
| 18350 | High | 5741 | 65.7 | 0.3268 | 0.3504 | 0.0072 |
| 18350 | Turbo | 5633 | 65.2 | 0.3292 | 0.3546 | 0.0082 |
Calculate Duv from CIE 1931 xy coordinates
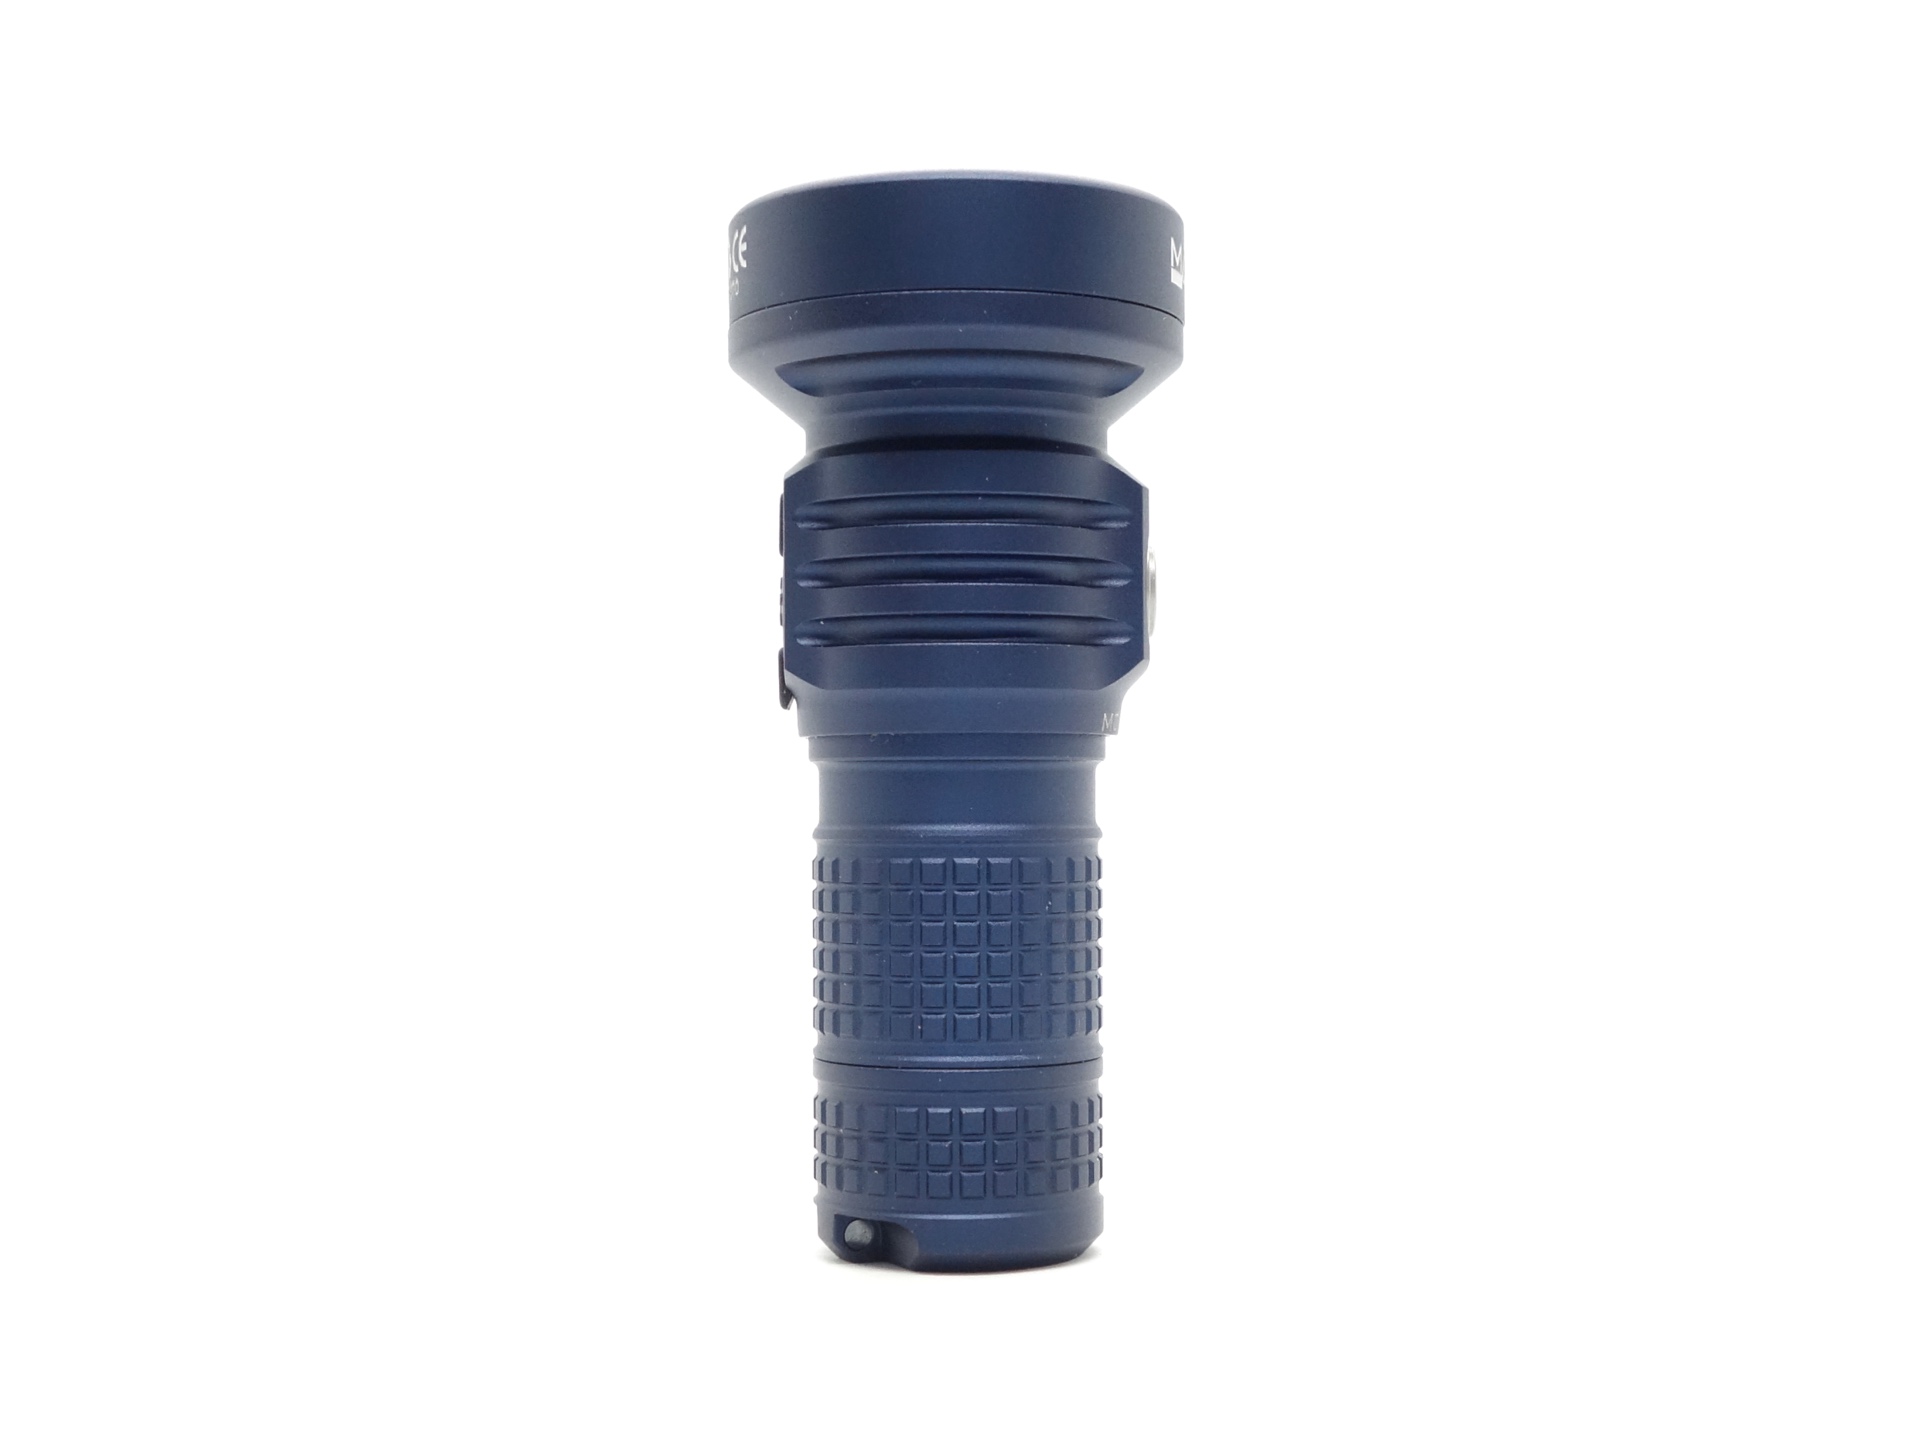
Dimensions and size comparison#
Dimensions#
I took the following measurements using a digital caliper.
| Measurement | Unit (mm) |
|---|---|
| Length | 92.20 |
| Length (extended) | 119.41 |
| Head diameter | 40.50 |
| Tube diameter | 21.95 |
| Tail diameter | 25.87 |
| Pocket clip diameter | 24.68 |
| Pocket clip height | 4.95 |
| USB-C width | 12.22 |
| USB-C height | 5.88 |
One of my USB-C cables was too wide.
Weight#
I took the following measurements using a digital scale.
| Weight | Unit (g) |
|---|---|
| Torch | 92.43 |
| 18350 | 22.82 |
| Torch with 18350 | 115.25 |
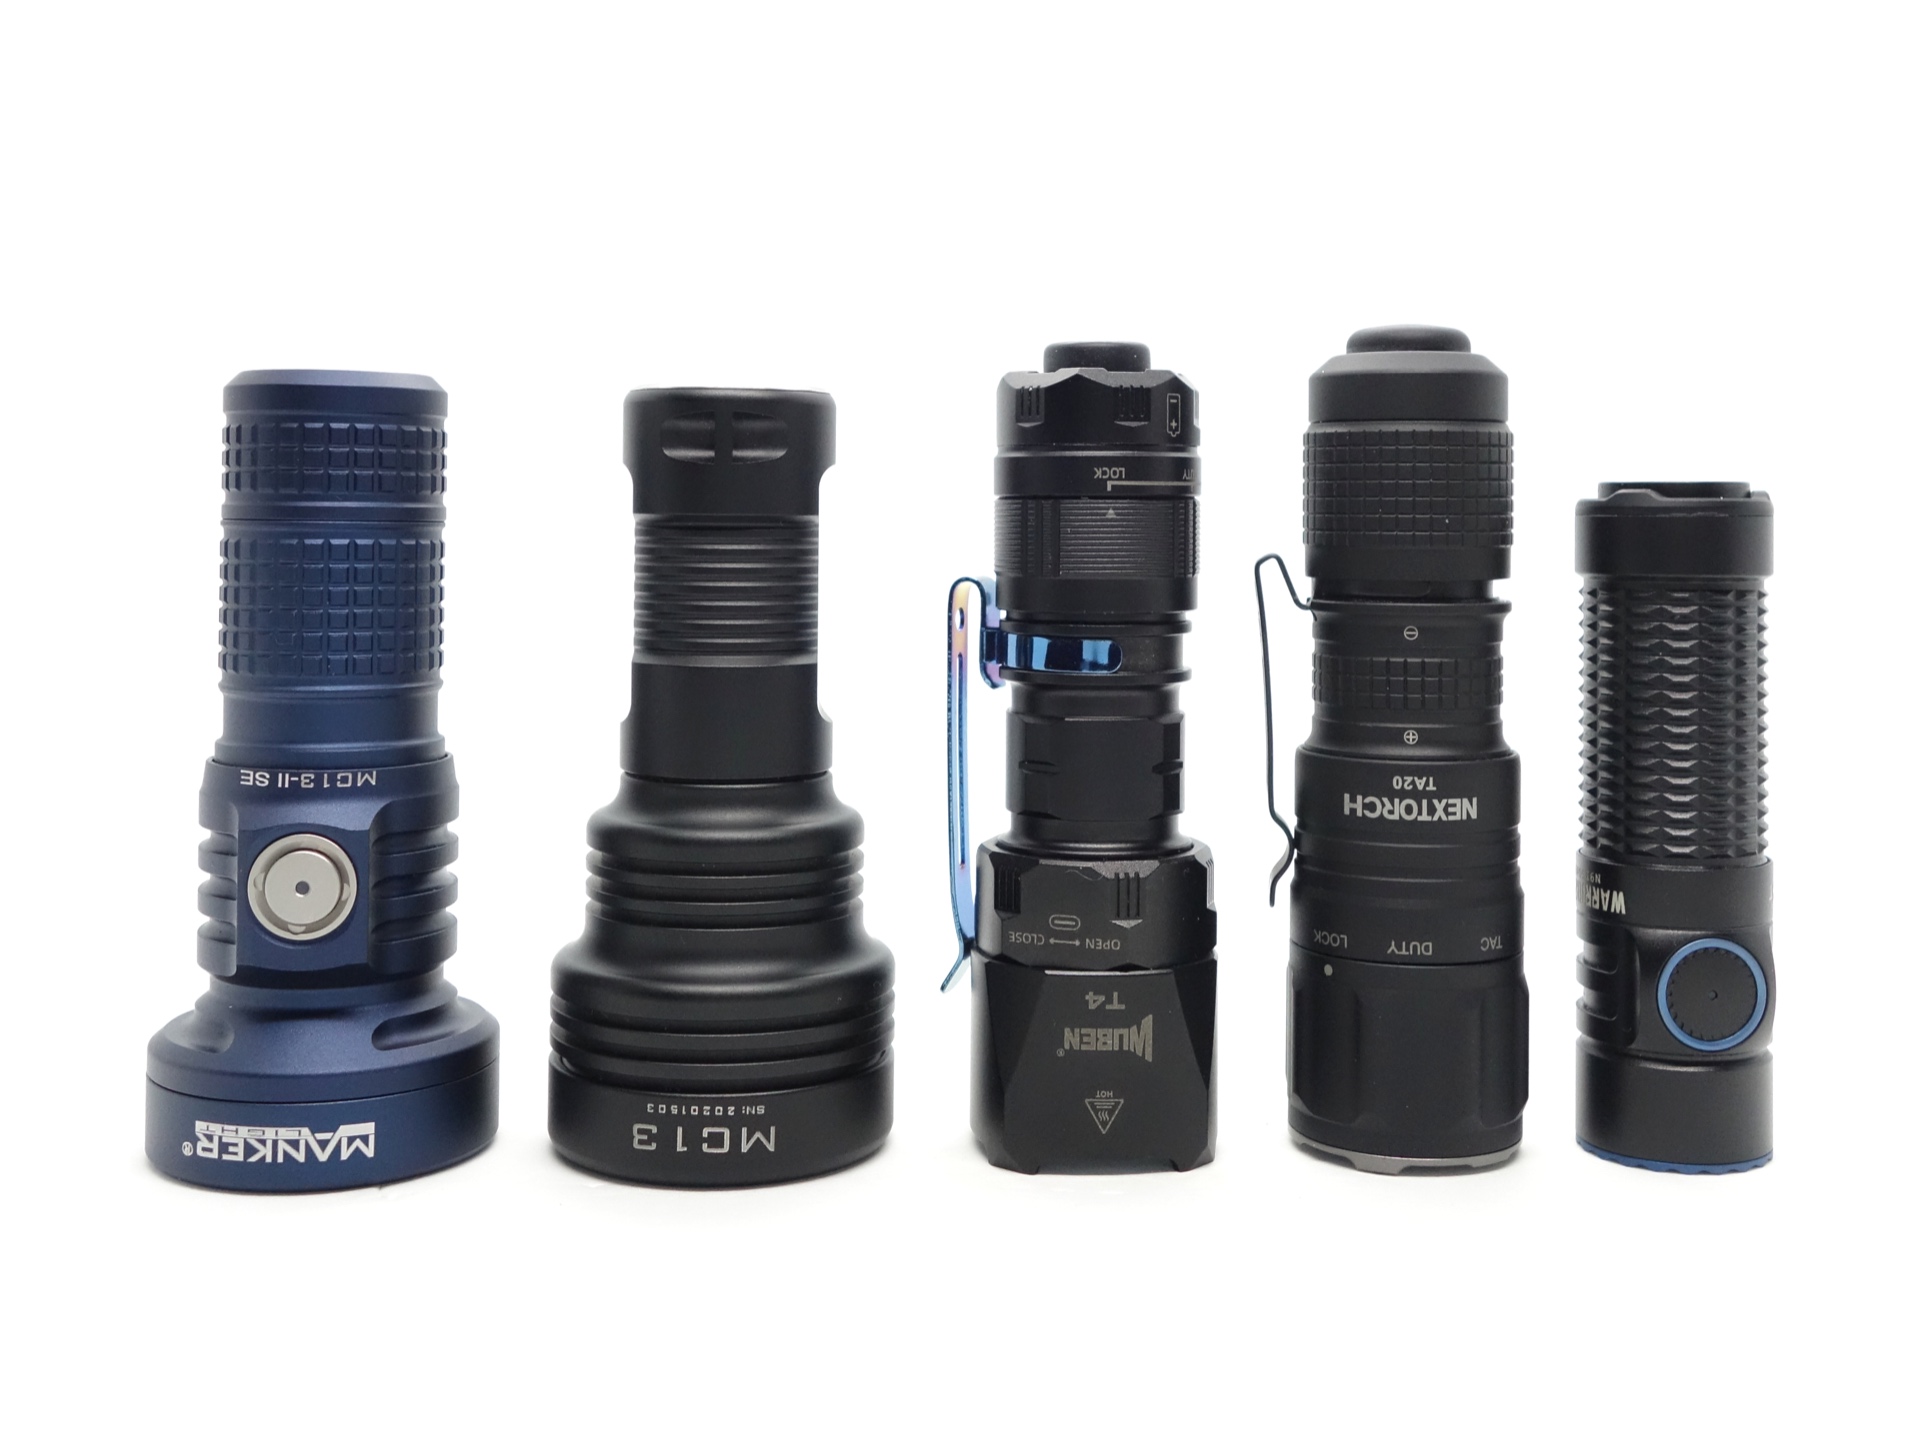
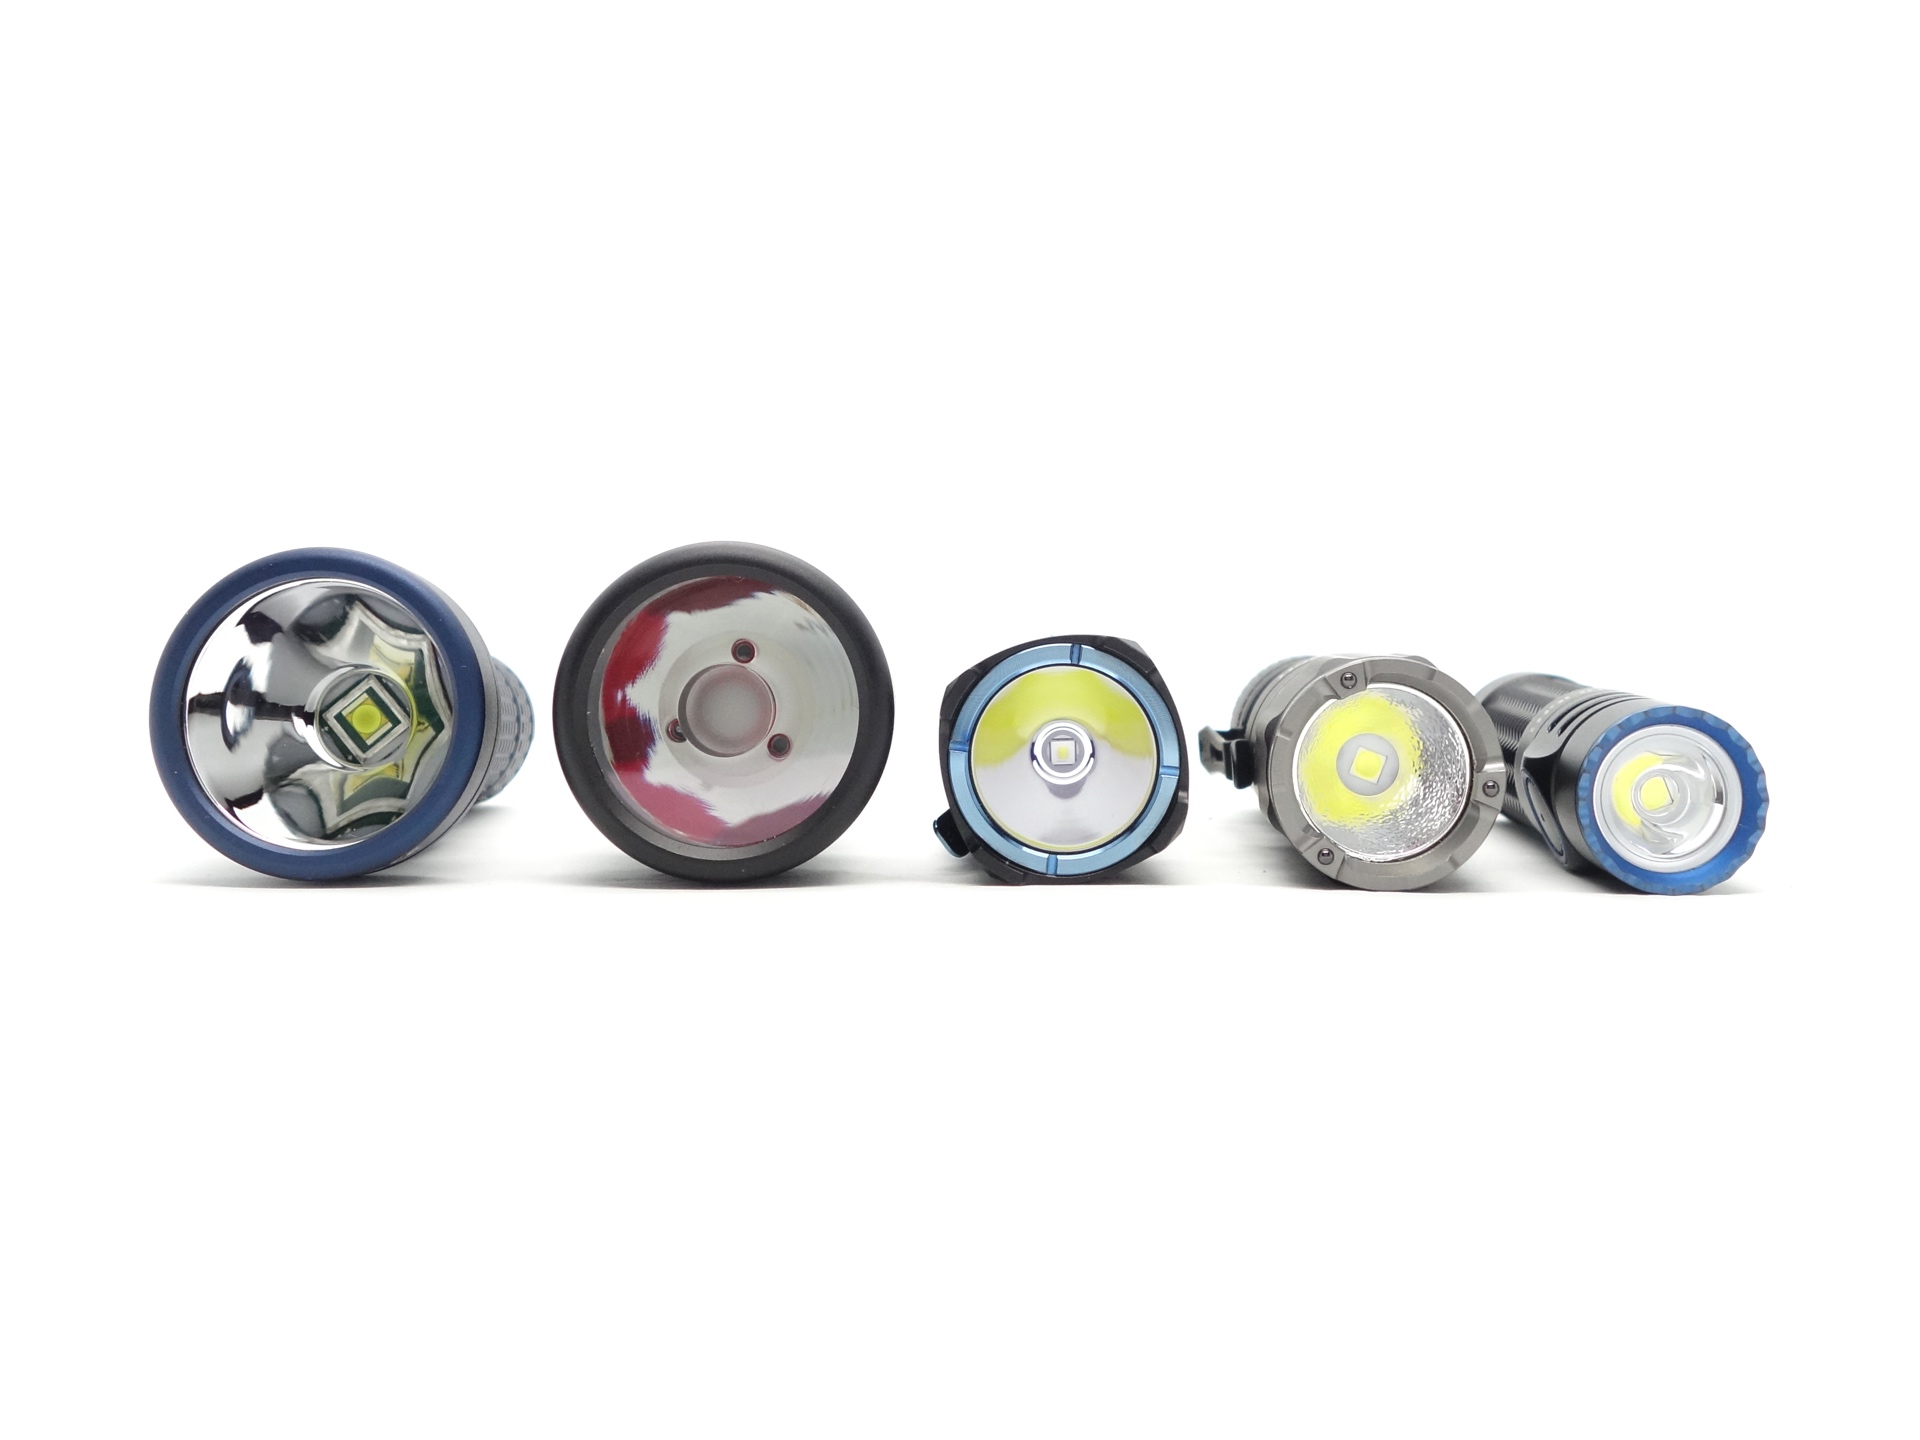
Size comparison with its competition#
From left to right: Manker MC13 II SE, Manker MC13, Wuben T4, NEXTORCH TA20, Olight Warrior Nano
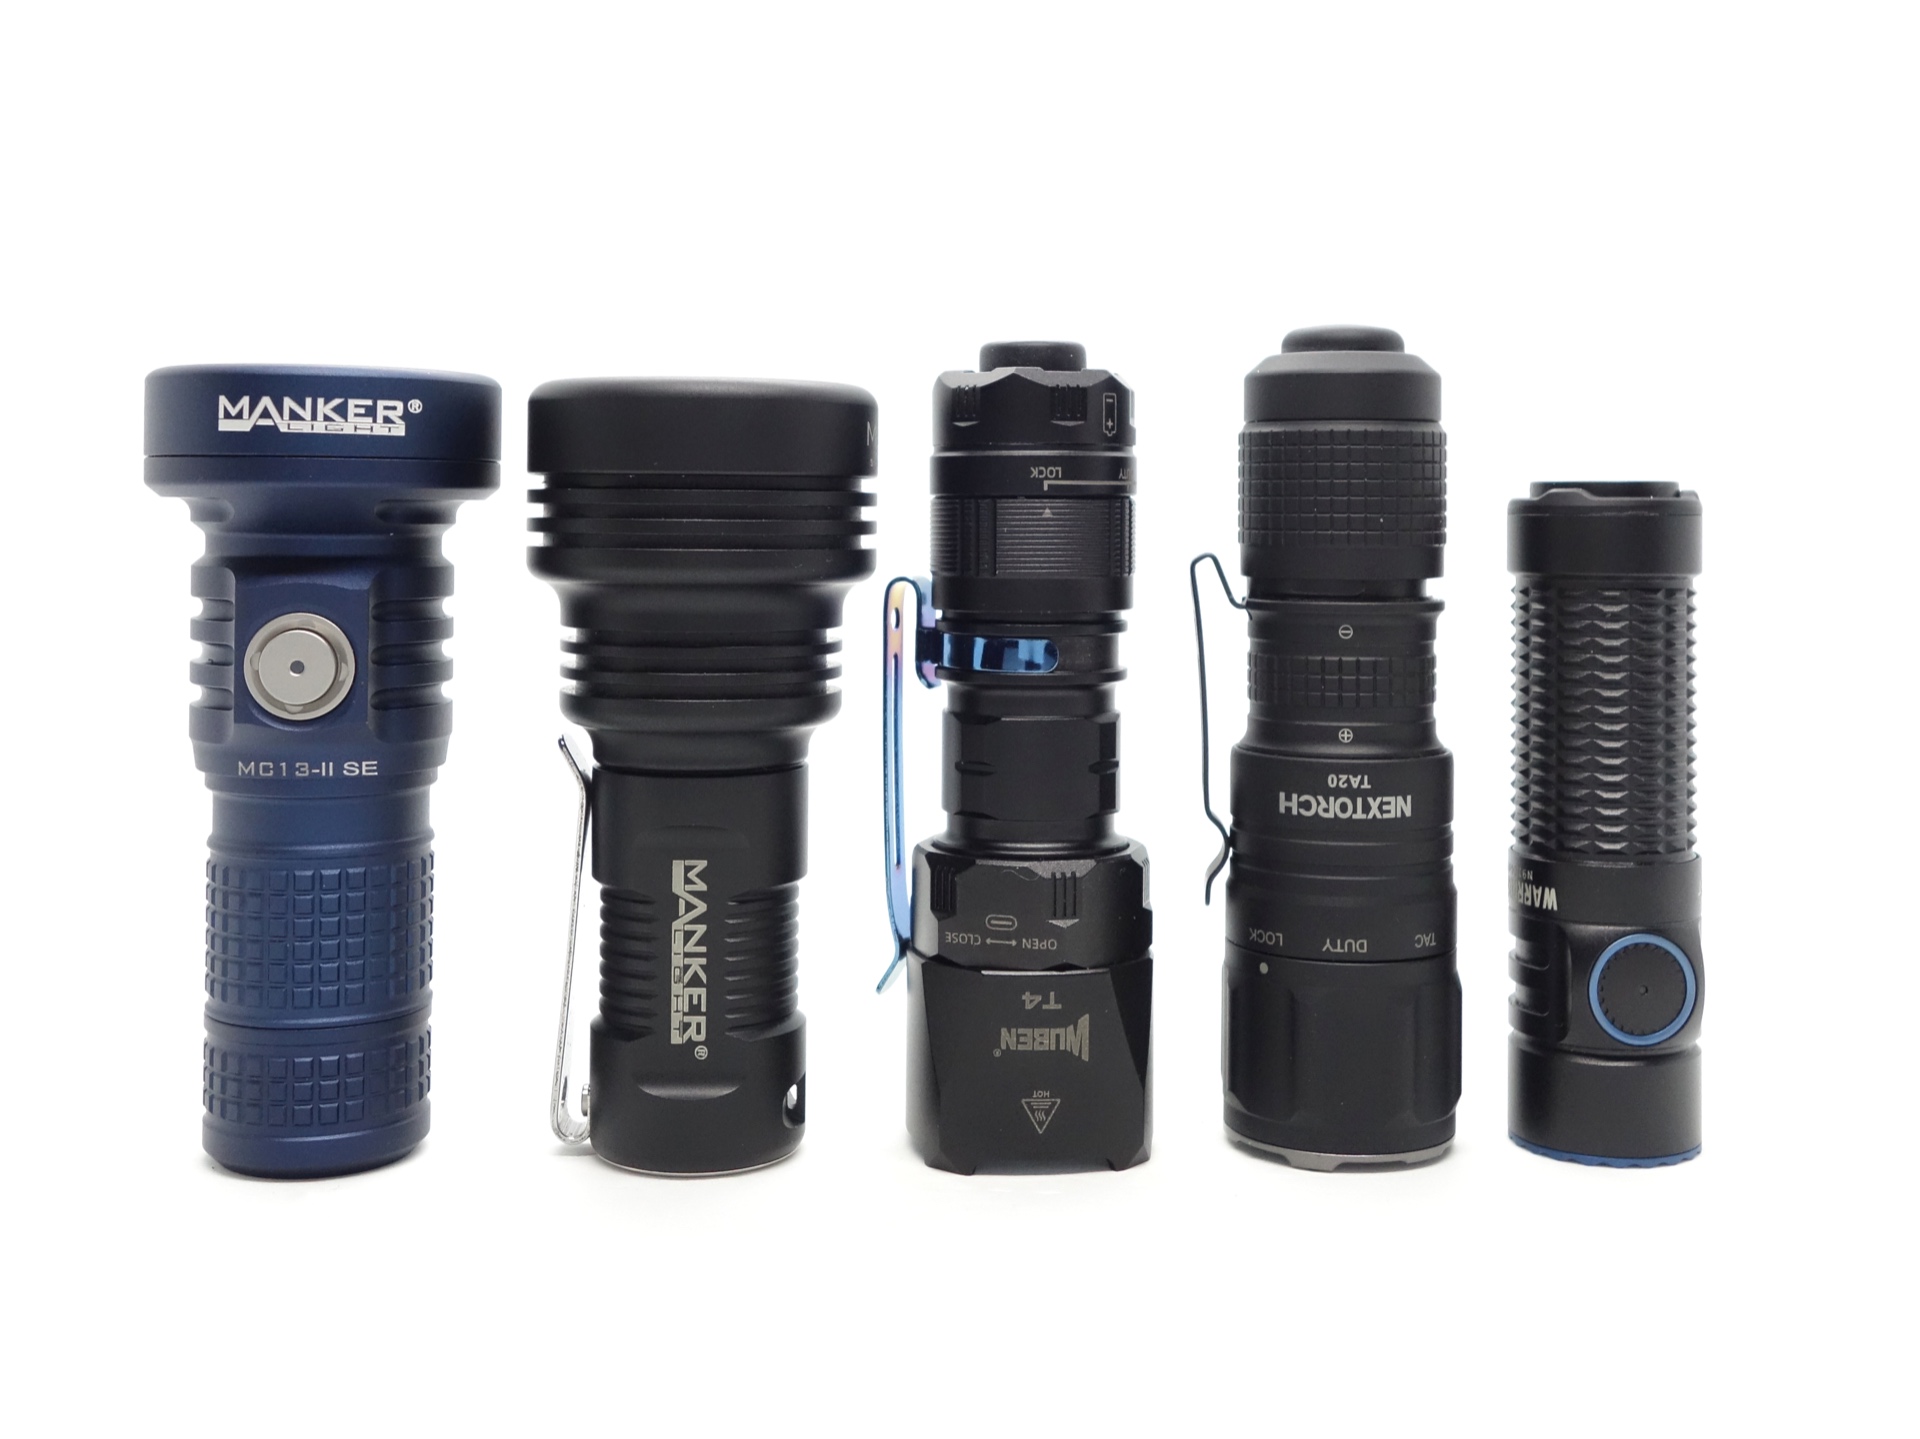
From left to right: Manker MC13 II SE, Manker MC13, Wuben T4, NEXTORCH TA20, Olight Warrior Nano
From left to right: Manker MC13 II SE, Manker MC13, Wuben T4, NEXTORCH TA20, Olight Warrior Nano
User interface#
The Manker MC13 II SE has an electronic side switch with a battery status indicator.
There are three Moonlight modes.
There are three General modes (Low, Medium and High).
There is a Turbo mode.
And there are three Special modes (Strobe, SOS and Beacon).
| State | Action | Result |
|---|---|---|
| Off | Press and hold | Moonlight |
| Moonlight | Press and hold | Cycle (Moon 1, Moon 2, Moon 3) |
| Off | Click | General (Mode Memory) |
| On | Click | Off |
| Any | Two clicks | Turbo |
| Turbo | Press and hold | General (Mode Memory) |
| Any | Three clicks | Special (Strobe) |
| Special | Press and hold | Cycle (Strobe, SOS, Beacon) |
| Special | Three clicks | General (Mode Memory) |
| Off | Four clicks | Lock |
| Locked | Click | Toggle battery status indicator |
| Locked | Four clicks | Unlock |
Engineering mode#
The default brightness of each level within the Moonlight and General modes (except Turbo) can be adjusted by entering engineering mode while a particular level has been selected.
Turn the torch on and select a level within Moonlight mode or General mode that you would like to adjust.
For example:
From off, click to enter General mode. Press and hold to cycle through until you reach Low mode.
Five clicks and hold on the 6th for 5 seconds. Battery status indicator will flash red to indicate that you are in engineering mode.
Click to reduce the brightness.
Double click to increase the brightness.
Press and hold to save the default brightness.
Mode memory#
There is mode memory.
The torch will memorise the last used General mode (Low, Medium, High).
Turbo, Strobe, SOS and Beacon are not memorised.
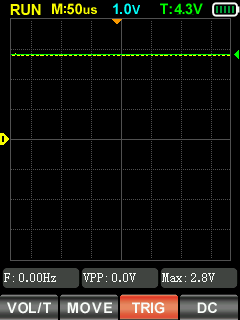
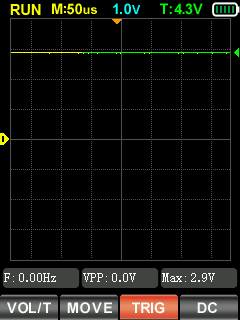
Strobe#
Strobe, SOS, Beacon
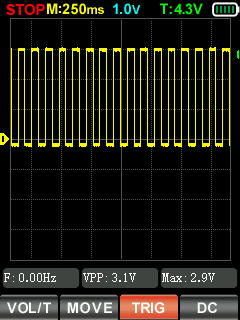
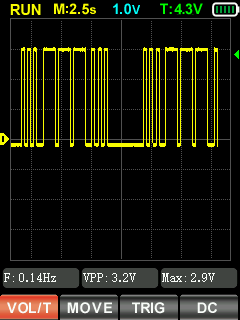
![]()
I measured Strobe, SOS and Beacon with a Zoyi ZT-701 oscilloscope.
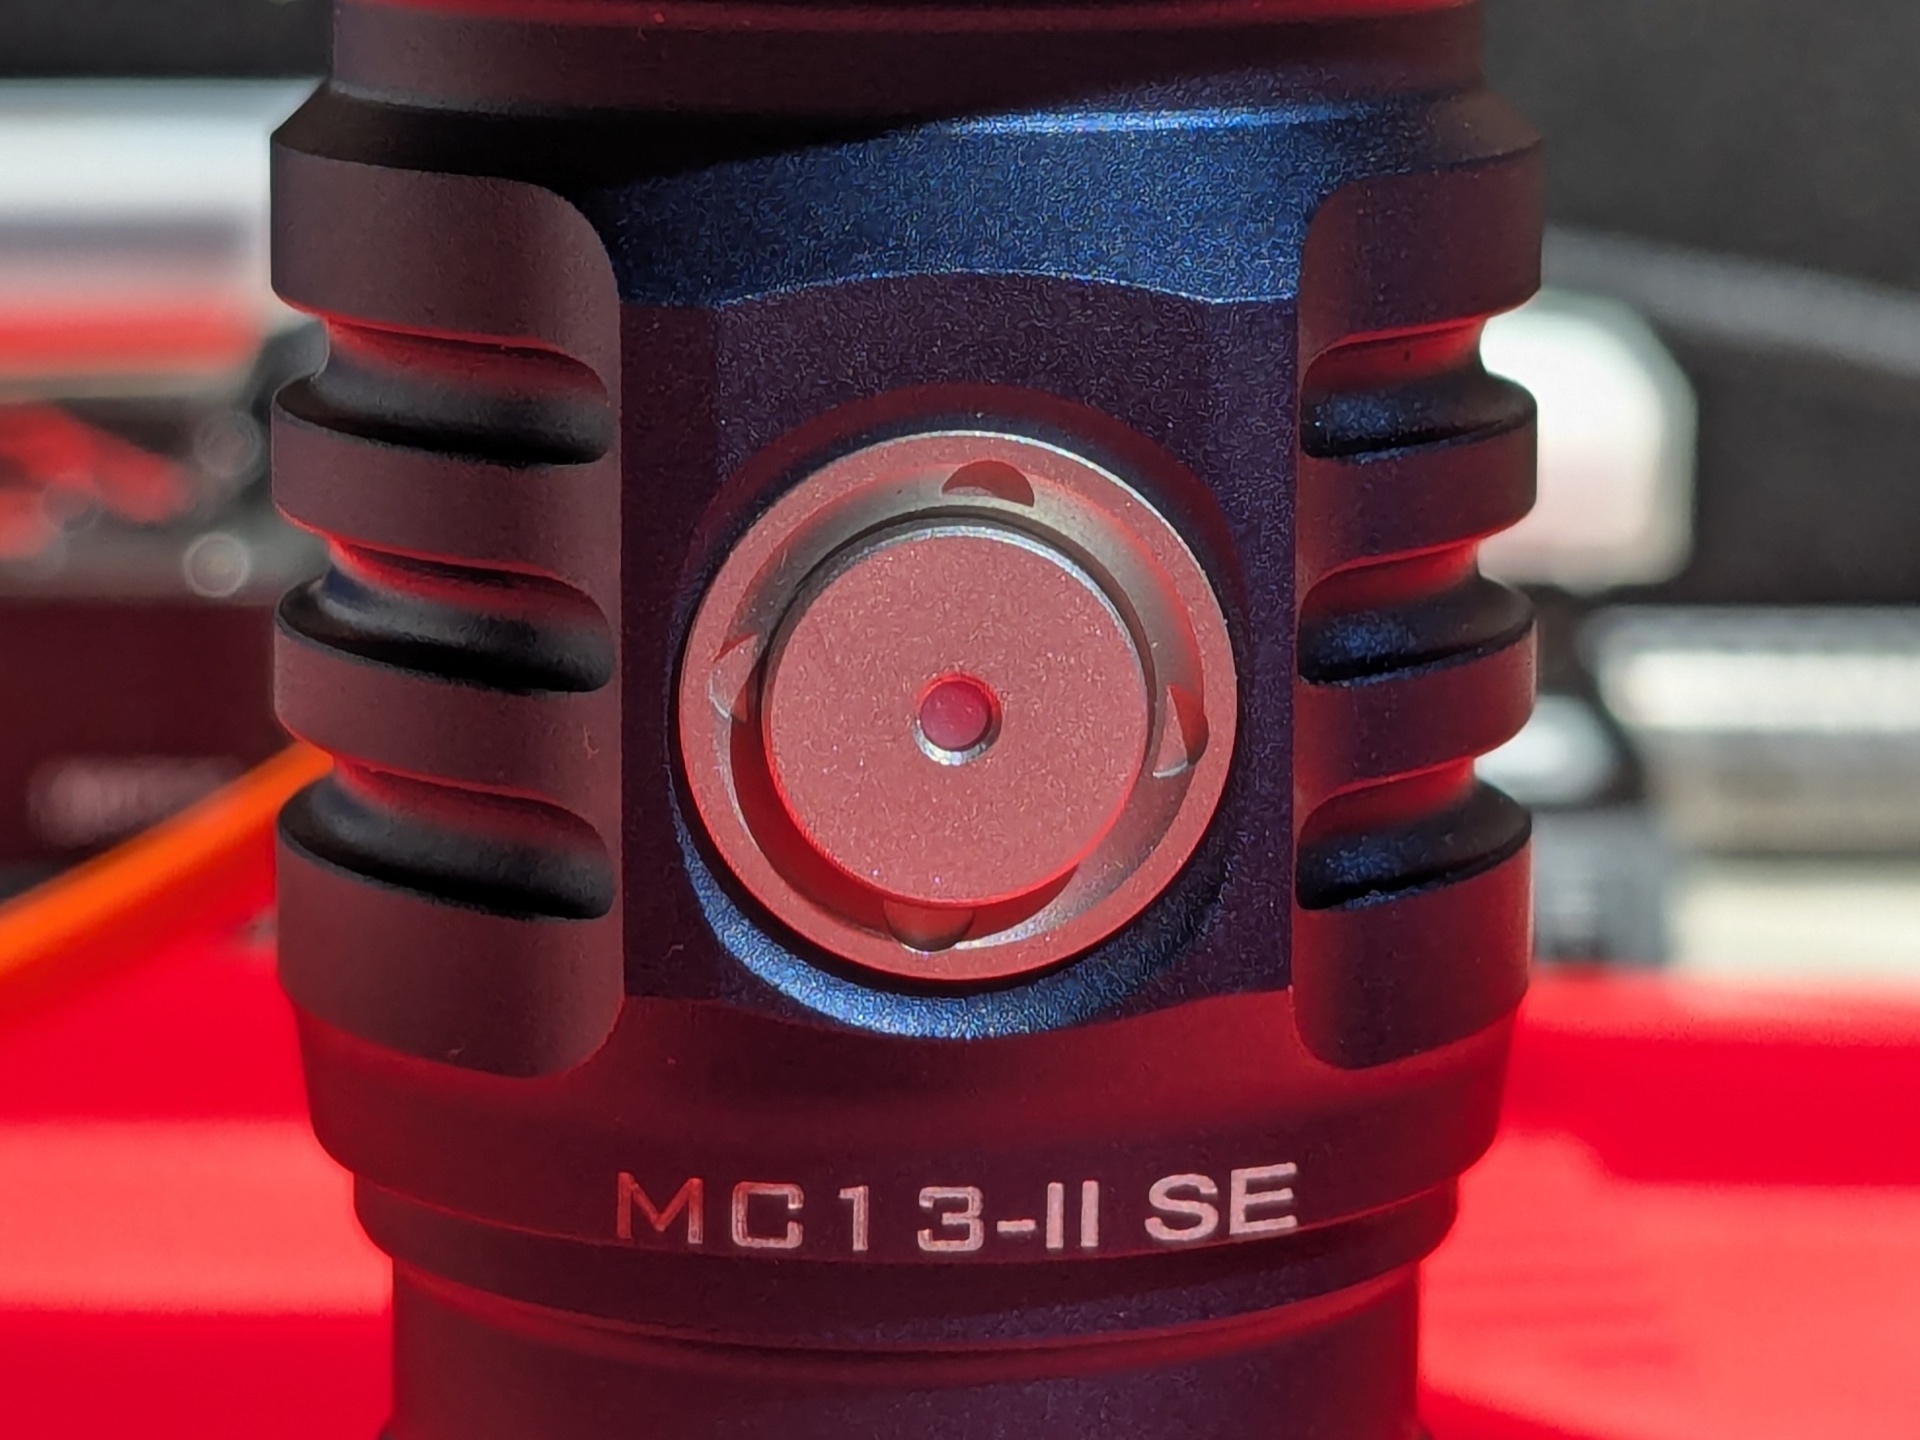
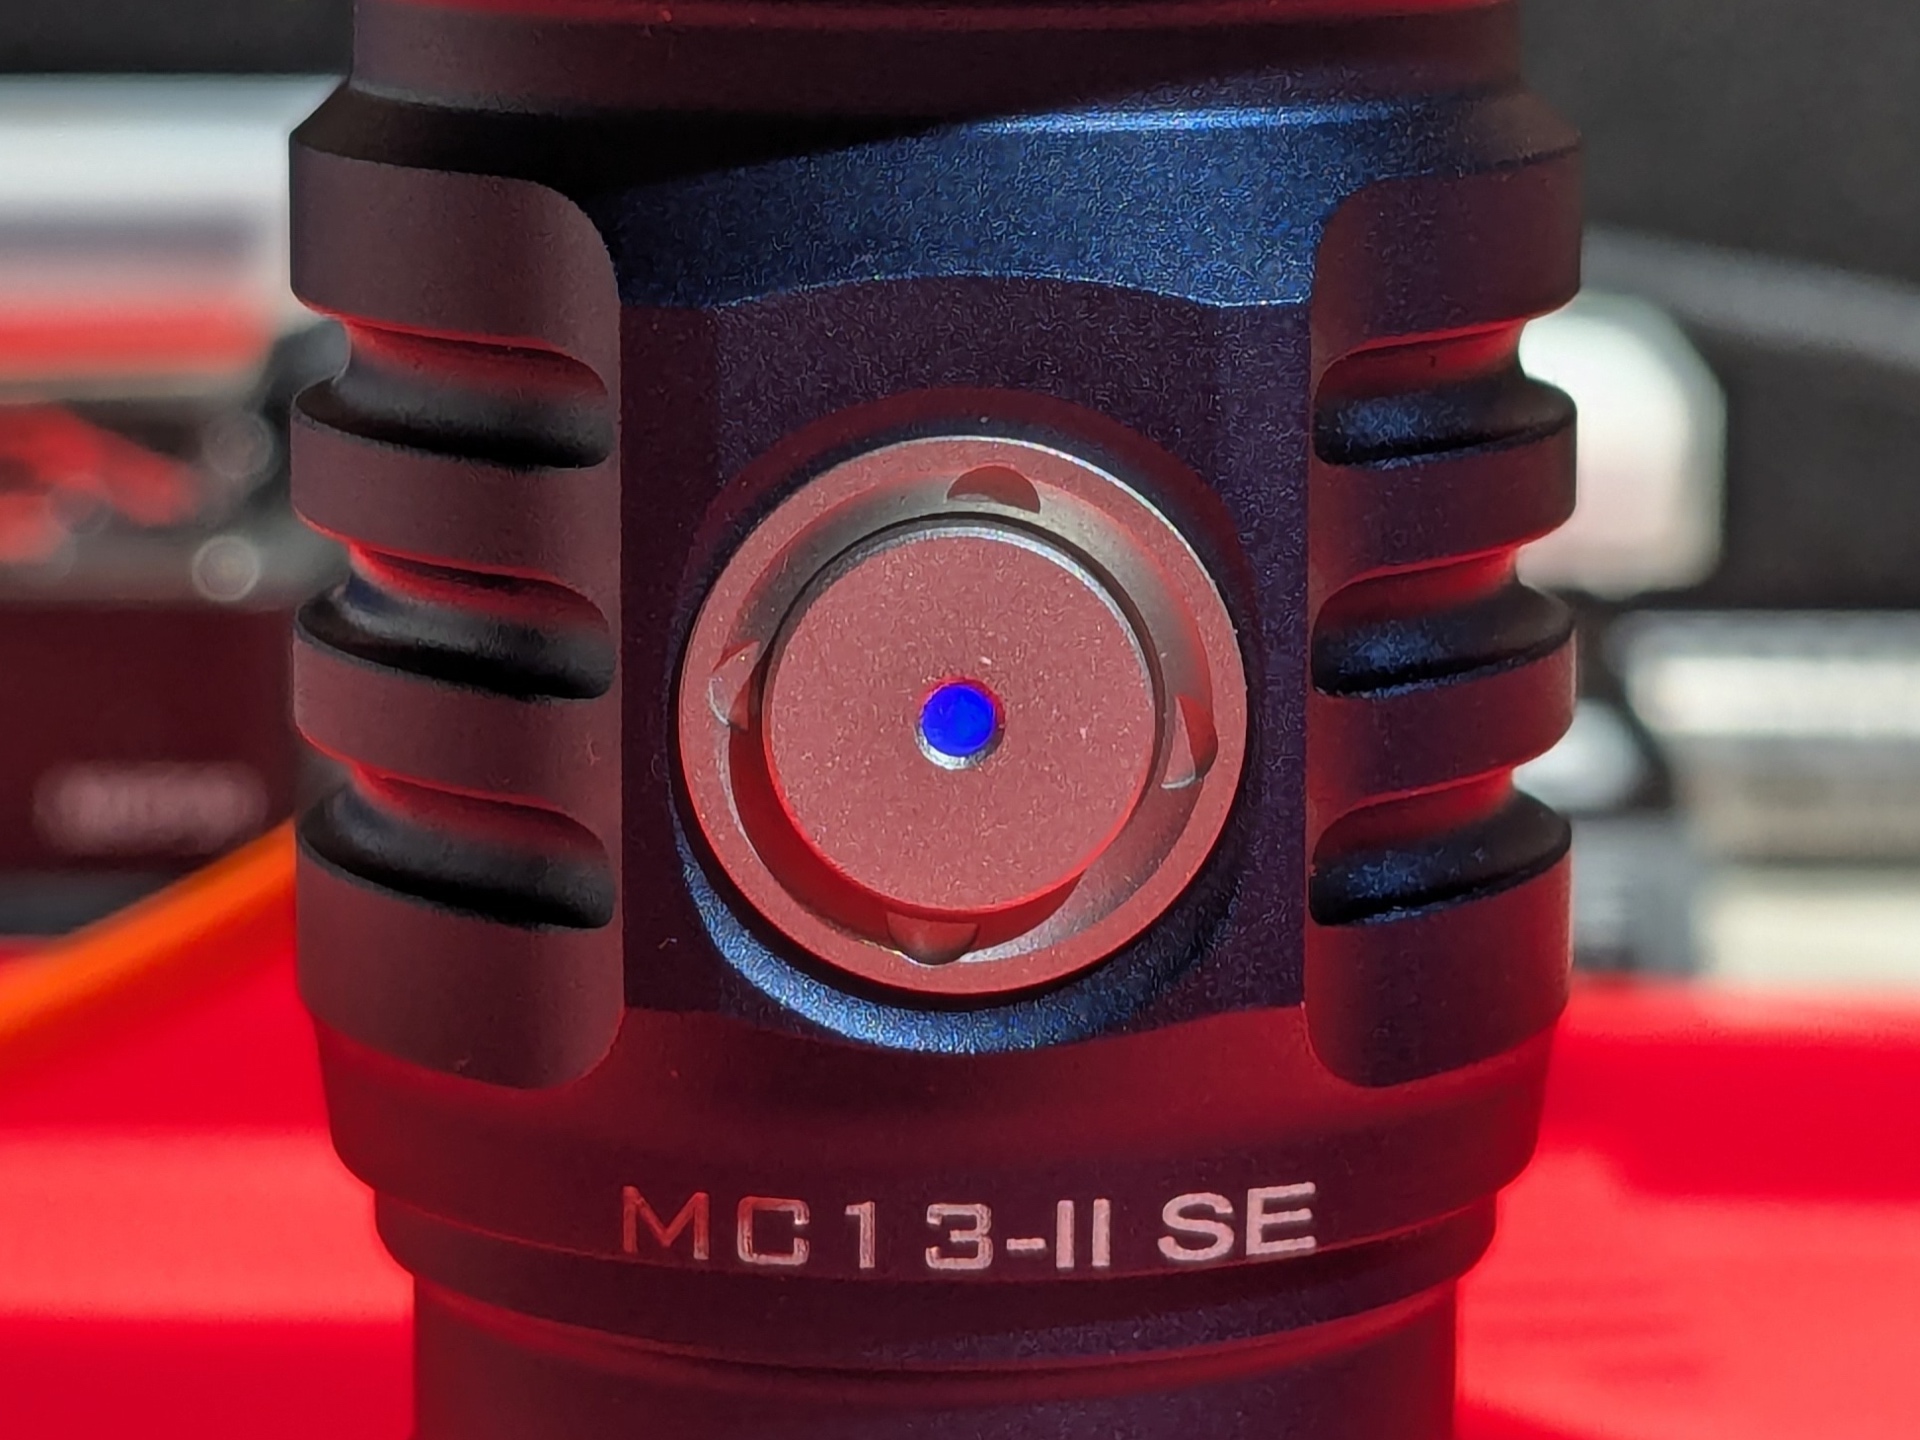
Battery level indicator#
A light in the button will display a particular colour when the torch is on to indicate the battery level.
| Battery voltage | Button light indicator | Duration |
|---|---|---|
| > 3.4V | Blue light | 10 seconds |
| 3.2V - 3.4V | Purple light | 10 seconds |
| 2.8V - 3.2V | Red light | Constantly on |
| <2.8V | Torch turns off |
Low voltage protection#
There is low voltage protection. The light turns off around 2.8V.
I tested low voltage protection by connecting the driver of the torch to a bench power supply and then by lowering the voltage from 4.2V to 0V.
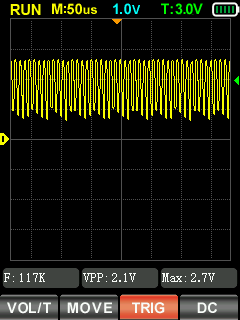
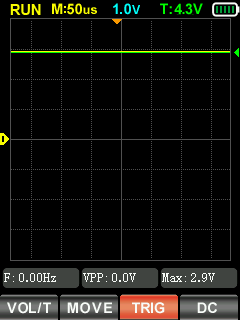
Pulse Width Modulation#
I did not notice any visible PWM (flickering).
I measured the PWM of the light with a Zoyi ZT-701 oscilloscope.
Low, Medium, High, Turbo
What I like about the UI#
- Moonlight modes!
- Direct access to Moonlight from off.
- Direct access to Turbo from off.
- Direct access to Strobe from off.
- Hidden engineering mode!
What could be improved#
I like the UI as it is. Engineering mode is great!
Batteries and charging#
Battery#
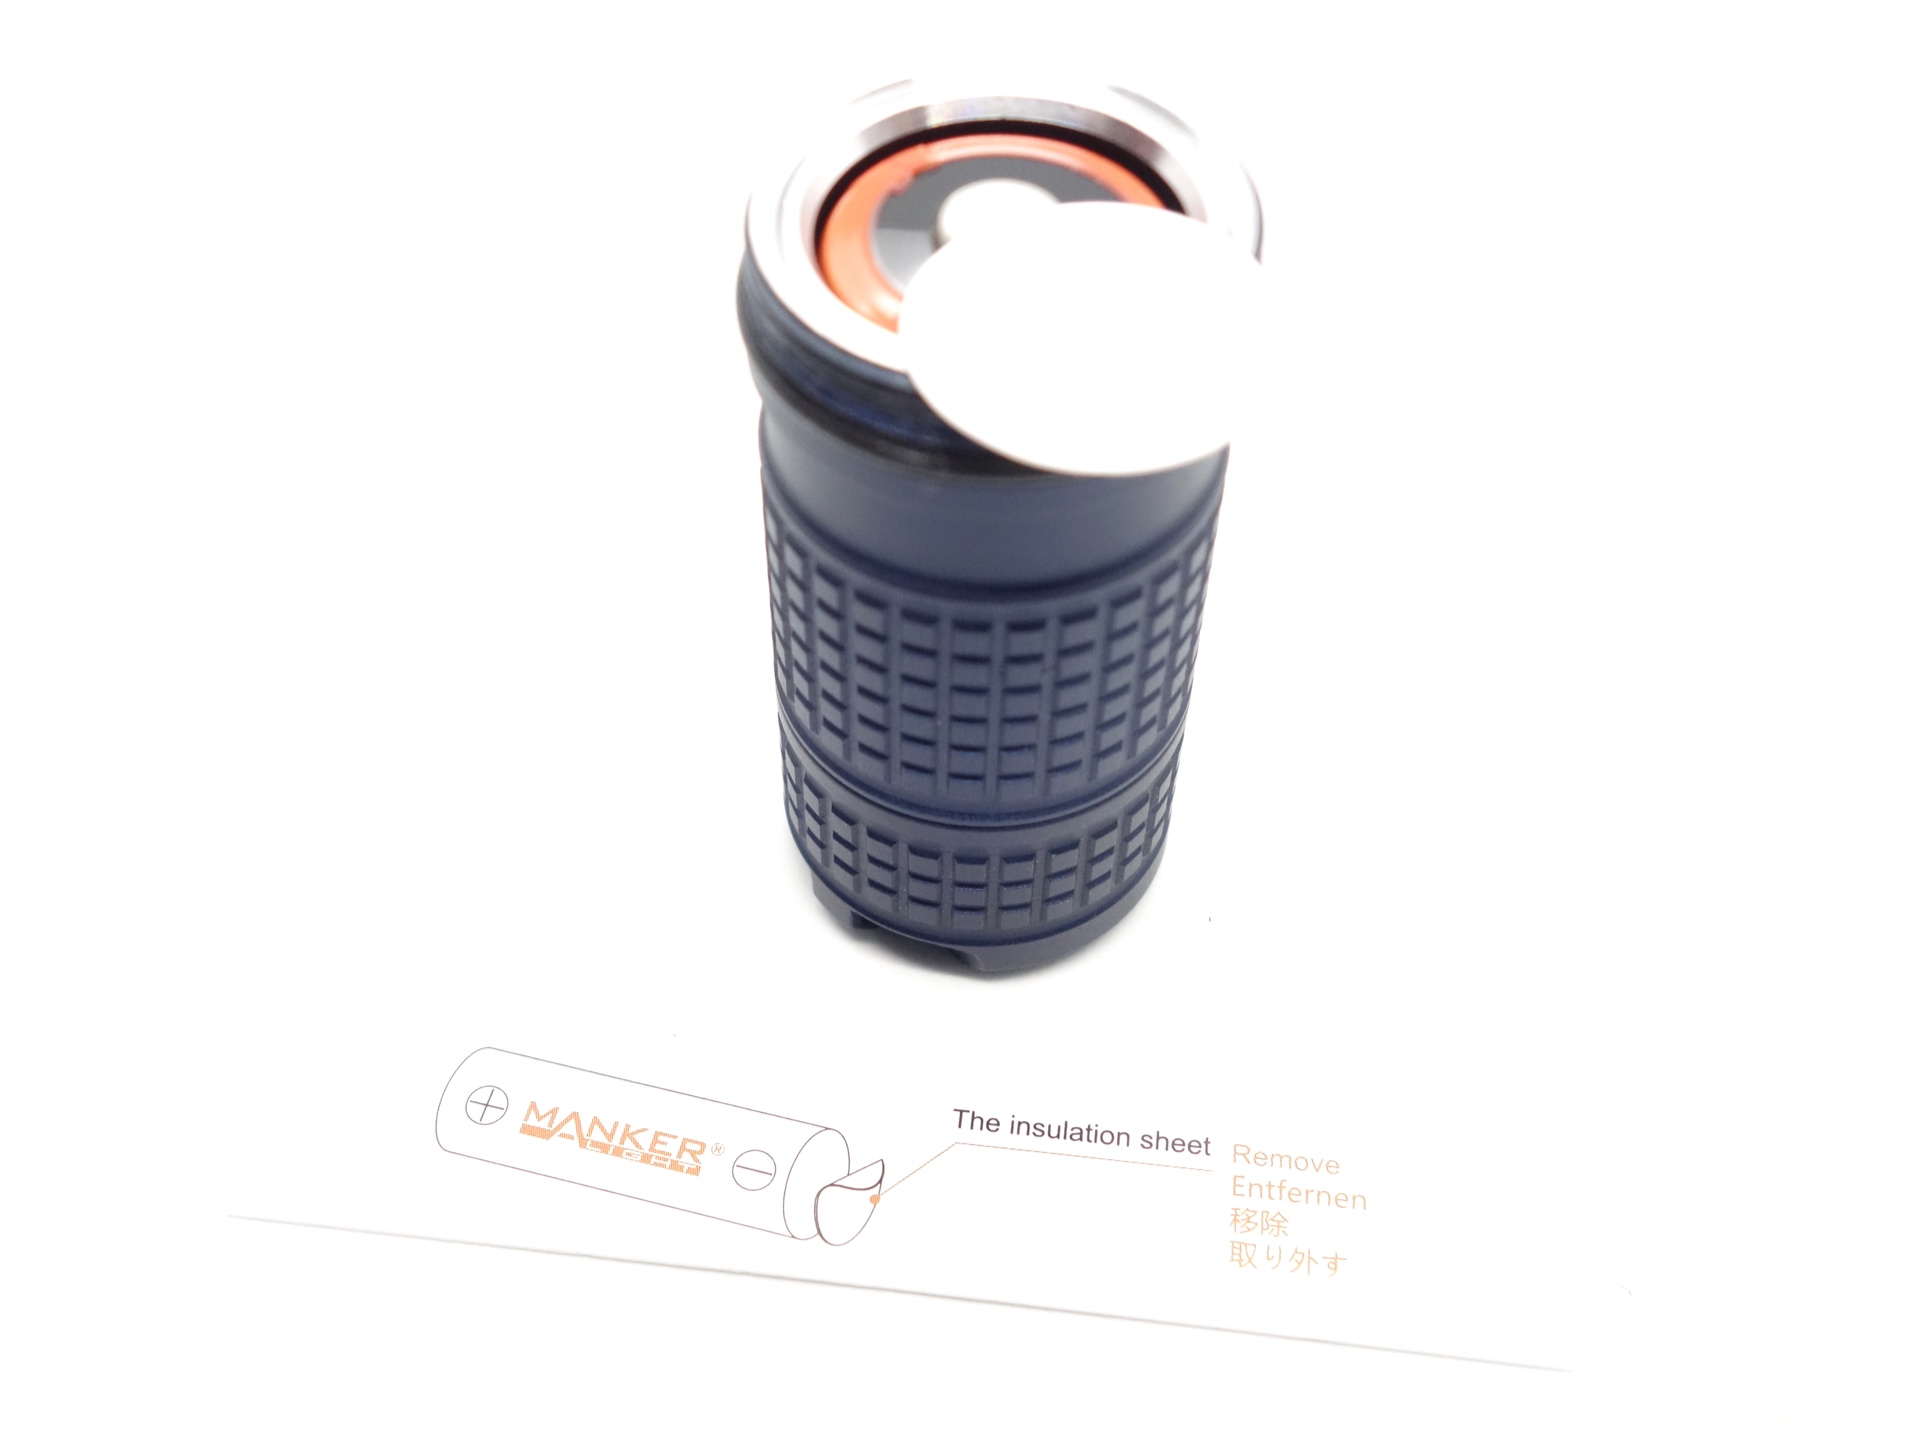
A protected button top Manker 18350 3.7V Li-ion 1100mAh cell was included inside the torch. The cell arrived with a voltage of 4.11V.
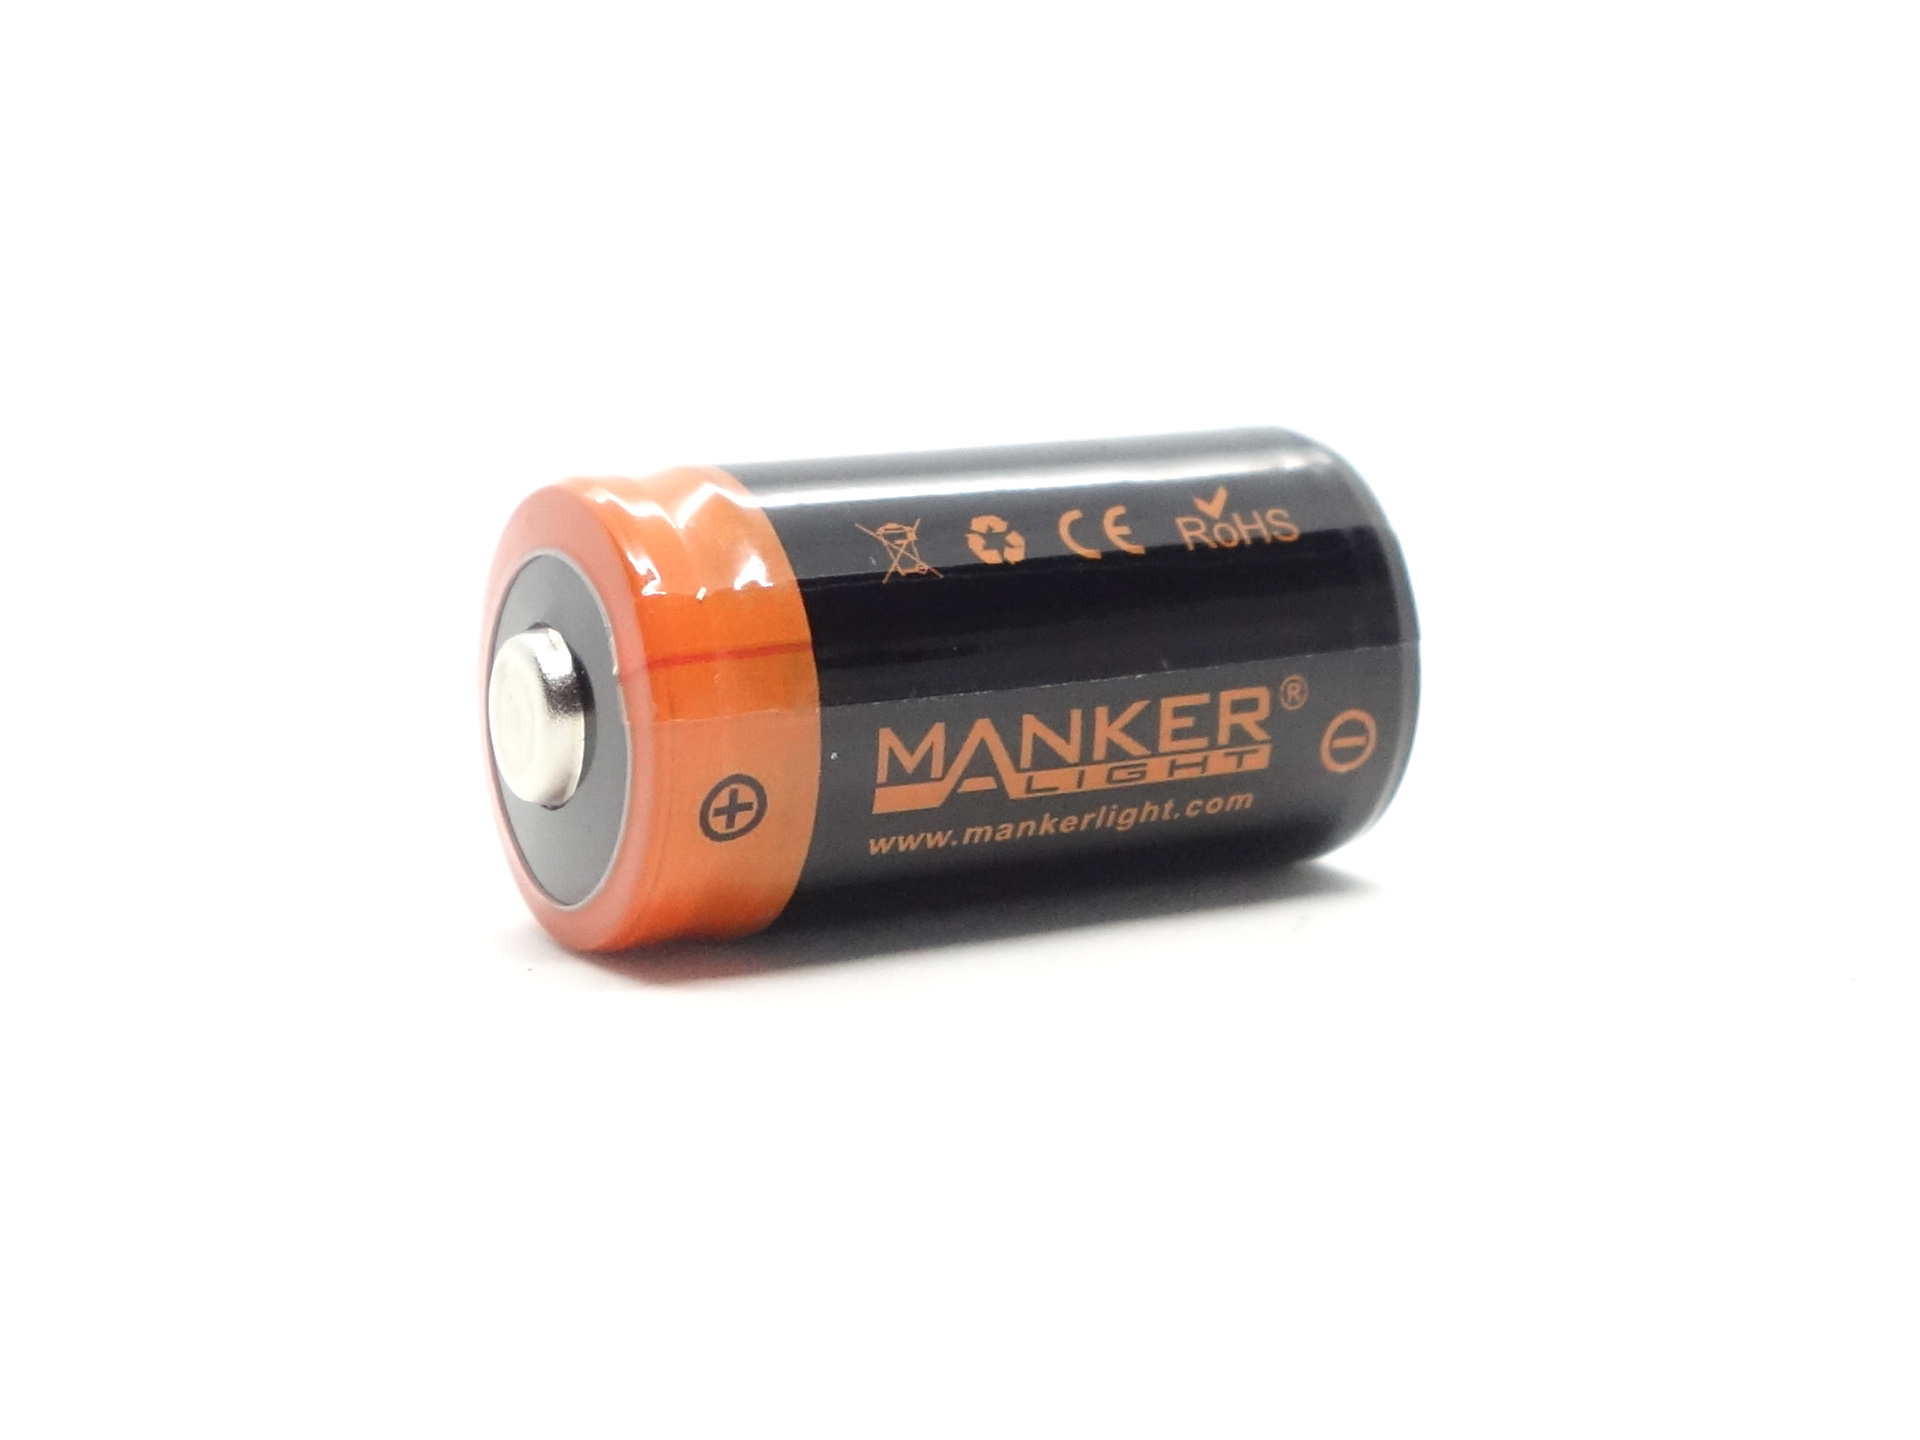
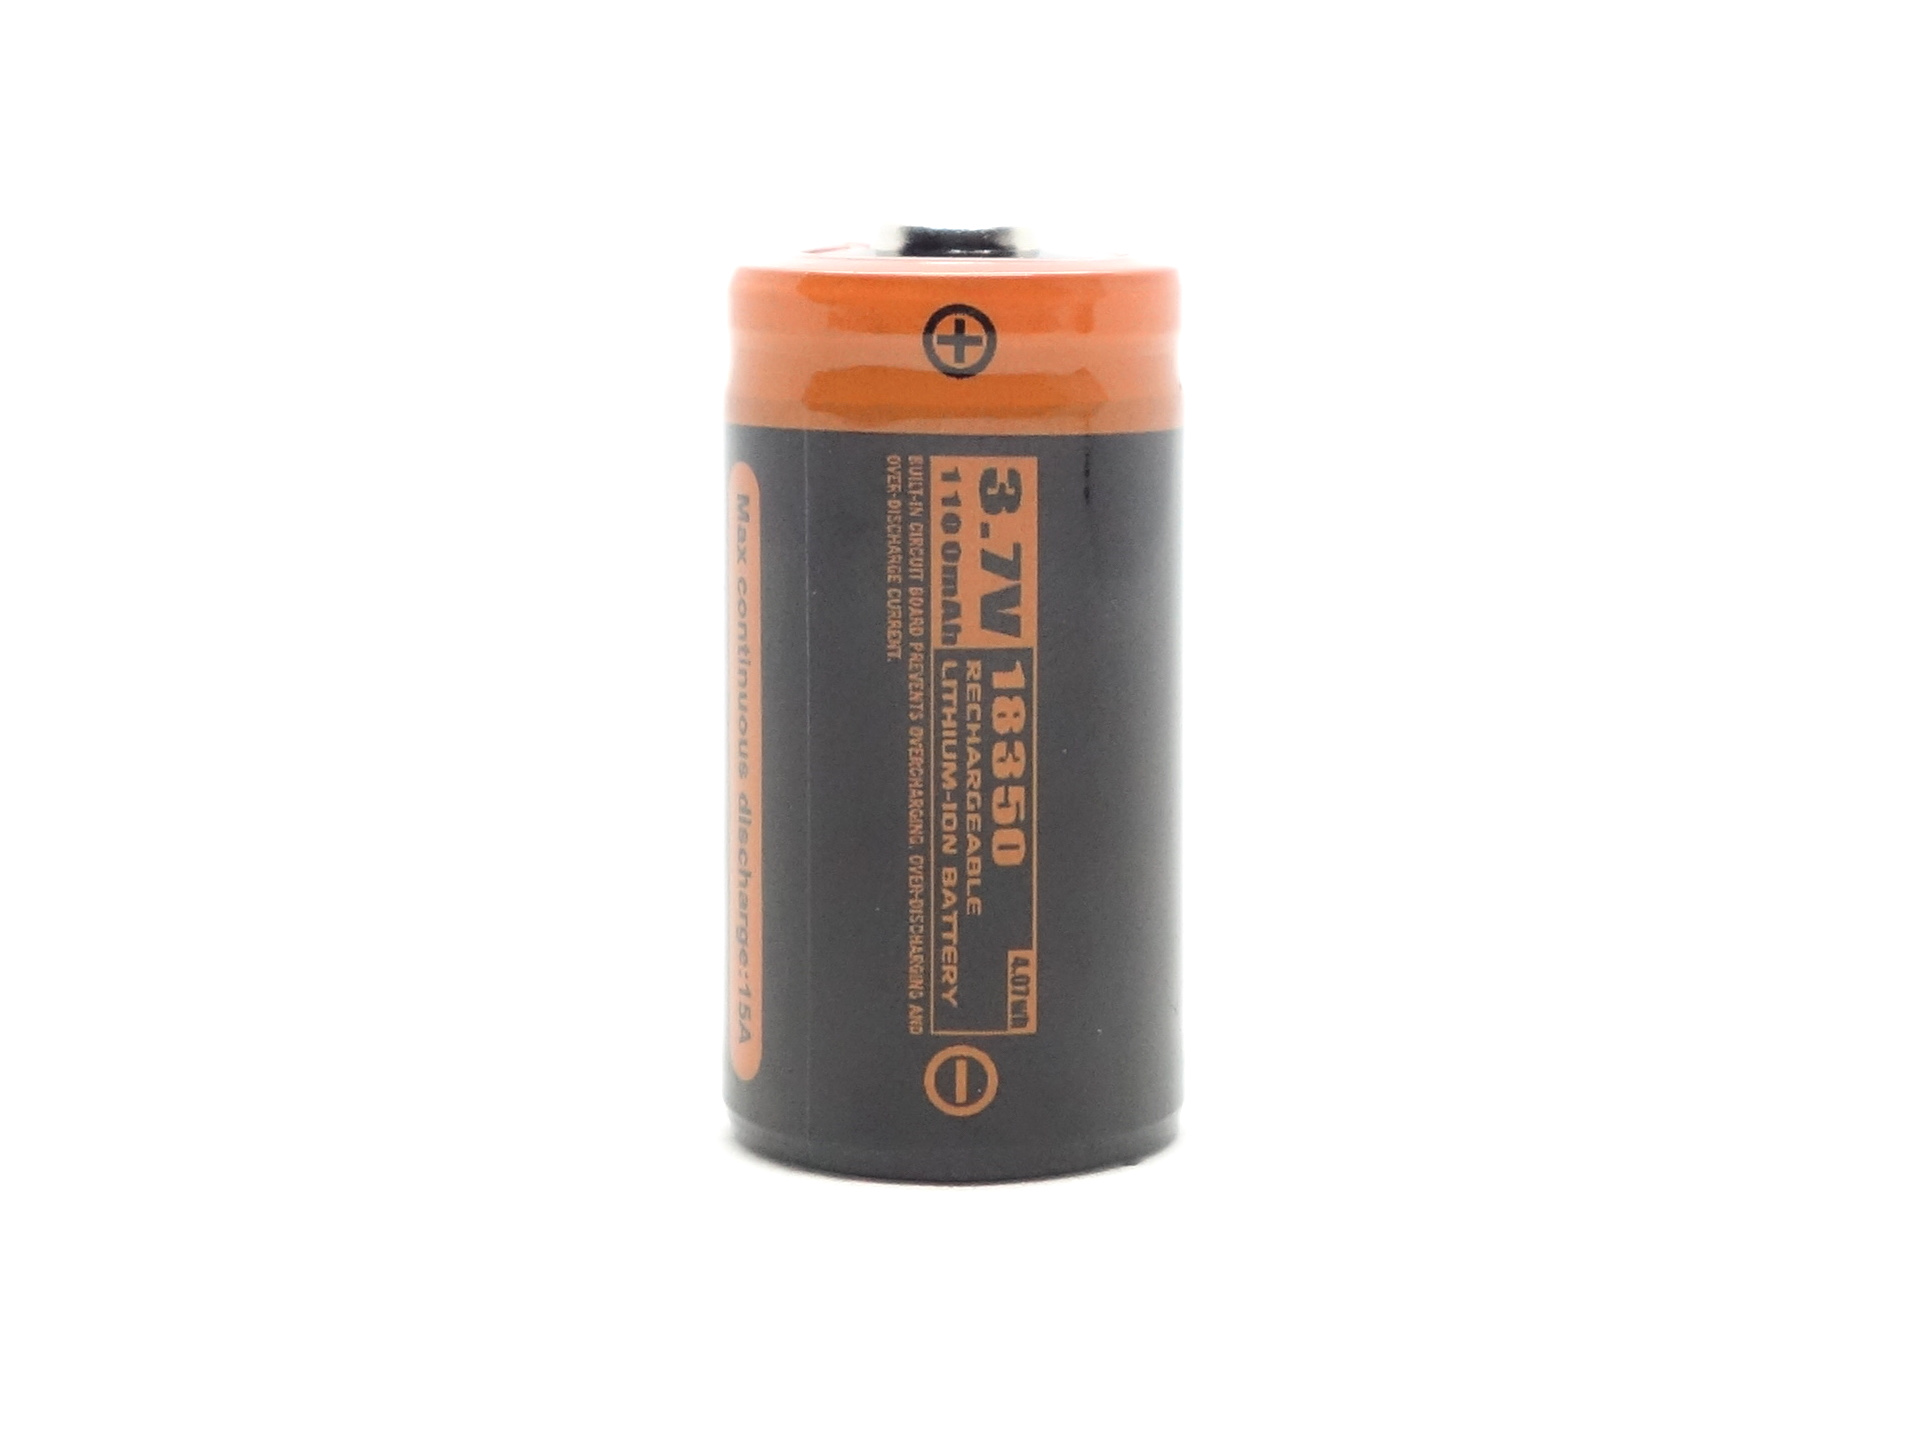
The cell was isolated with a piece of plastic to prevent accidentally turning the torch on.
I tried the following cells:
| Cell | Top | Compatible? | Comment |
|---|---|---|---|
| KeepPower IMR18350 3.7V Li-ion 1200mAh | Button | Yes | |
| KeepPower IMR18350 3.7V Li-ion 1200mAh | Flat | Yes | |
| Manker 18350 3.7V Li-ion 1100mAh USB-C | Button | ||
| Manker 18350 3.7V Li-ion 1100mAh | Button | Yes | |
| Olight ORB-183C11 3.7V Li-ion 1100mAh | Button | Yes | |
| Vapcell F14 18350 3.7V Li-ion 1400mAh (green) | Recessed | Yes | |
| Vapcell M11 18350 3.7V Li-ion 1100mAh (purple) | Flat | Yes | |
| Vapcell M11 V2 18350 3.7V Li-ion 1100mAh (yellow) | Flat | Yes | |
| Vapcell N40 18650 3.7V Li-ion 4000mAh | Flat | Yes | |
| Wuben ABJ1100C 18350 3.7V Li-ion 1100mAh | Button | Yes | |
| Acebeam ARC18650H-260A 15A 3.6V Li-ion 2600mAh | Button | Yes | |
| Acebeam ARC18650H-310A 3.6V Li-ion 3100mAh USB-C | Button | Yes | |
| Samsung 30Q 18650 3.7V Li-ion 3000mAh | Flat | Yes | |
| Sanyo NCR18650GA 3.7V Li-ion 3450mAh | Flat | Yes | |
| Sofirn 18650 3.7V Li-ion 3000mAh | Button | Yes | |
| Sony Murata VTC6 18650 3.7V Li-ion 3000mAh | Flat | Yes | |
| XTAR 18650 3.6V Li-ion 4000mAh | Button | Yes |
Most 18350 and 18650 cells fit.
Charging#
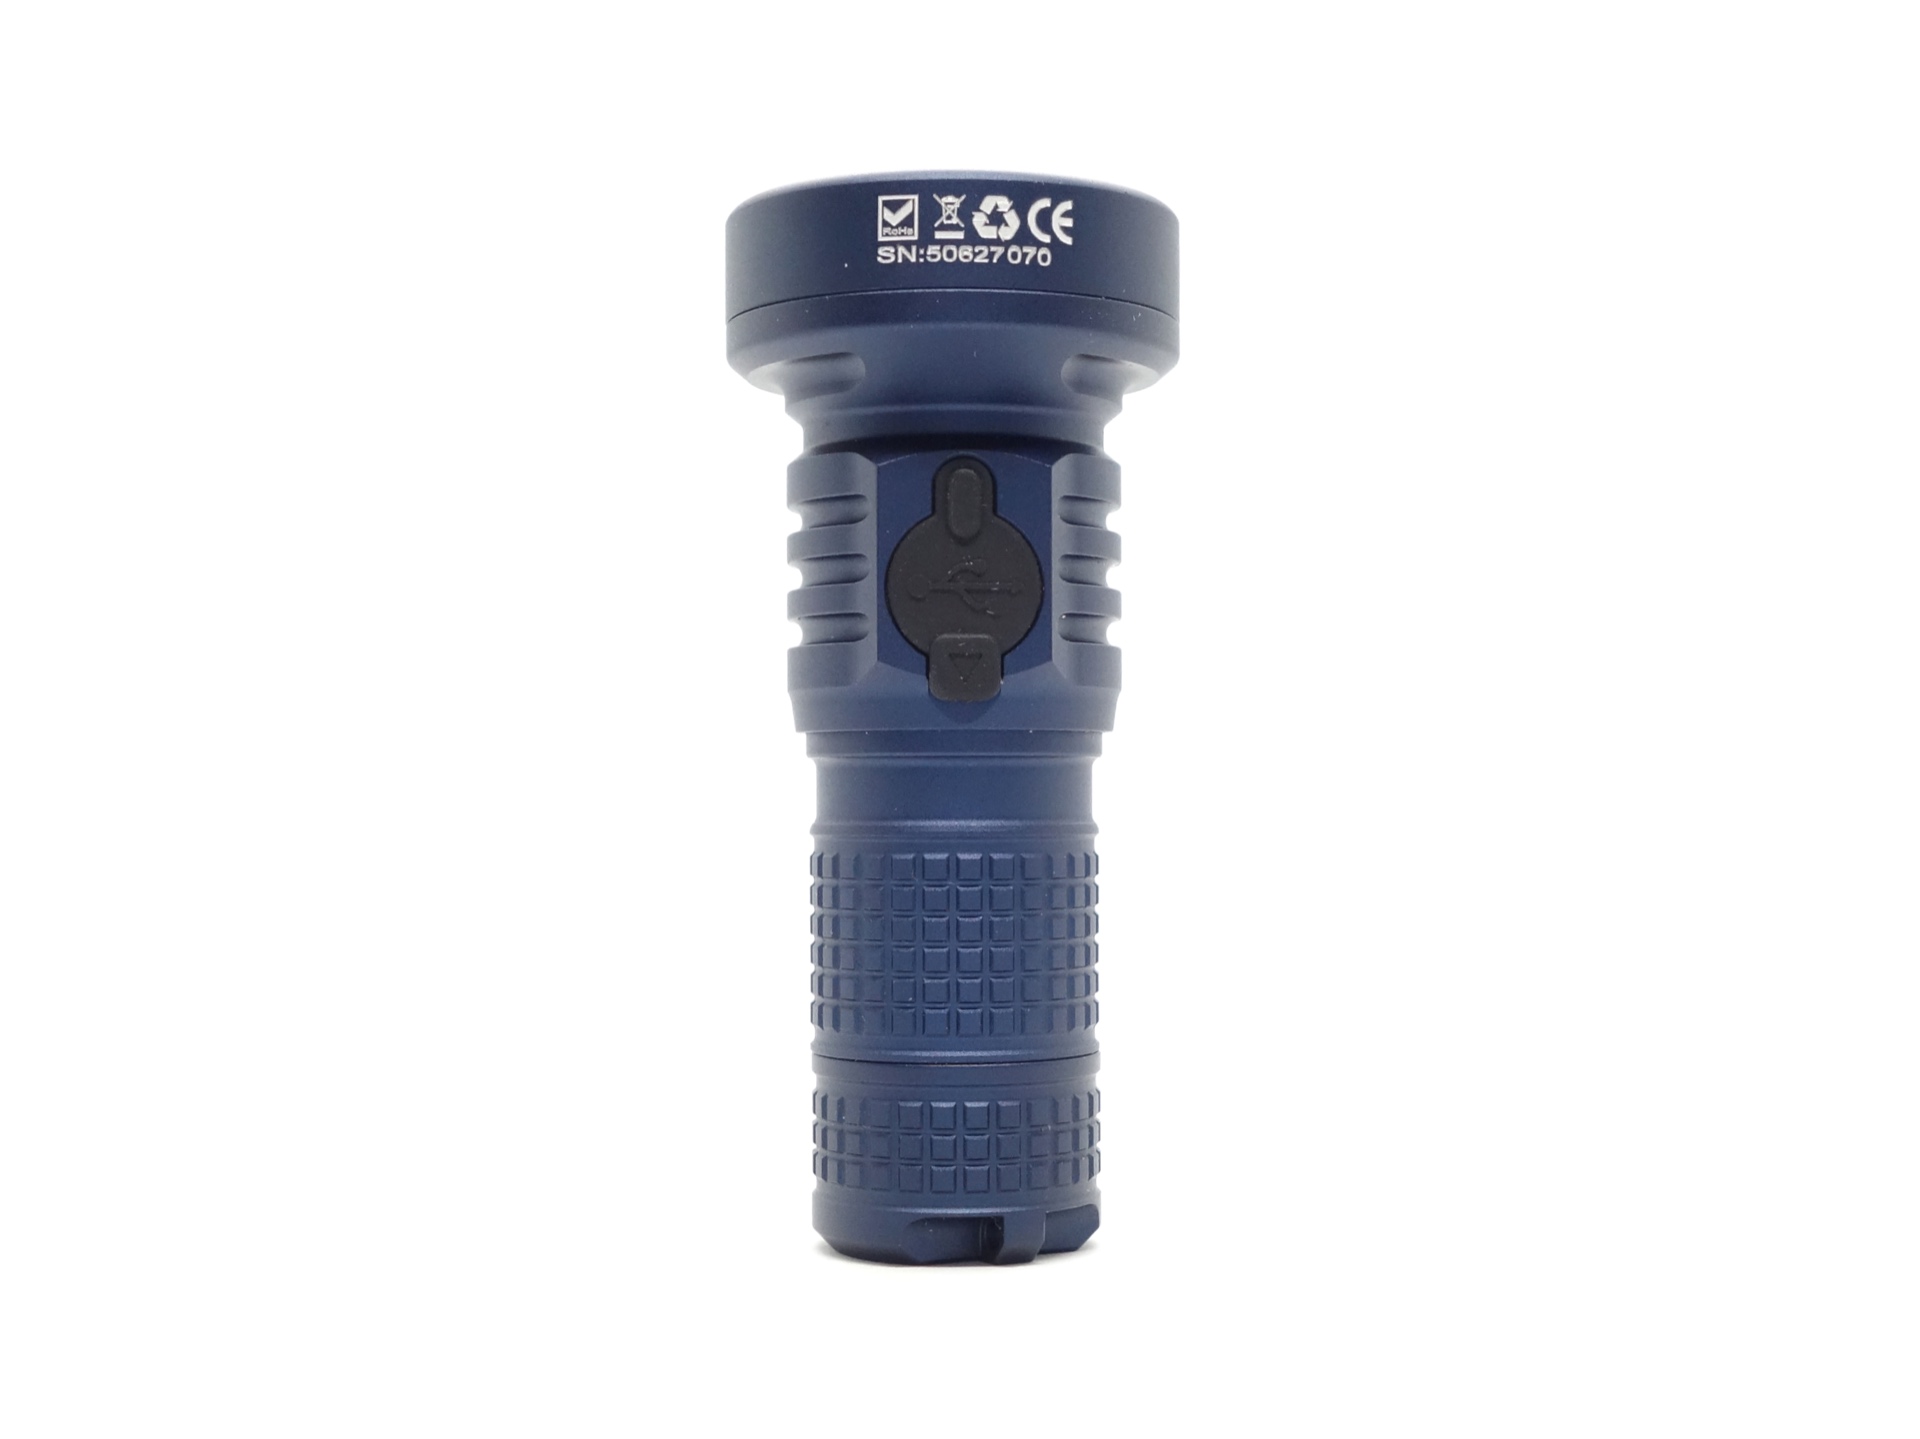
The Manker MC13 II SE has built-in USB-C charging.
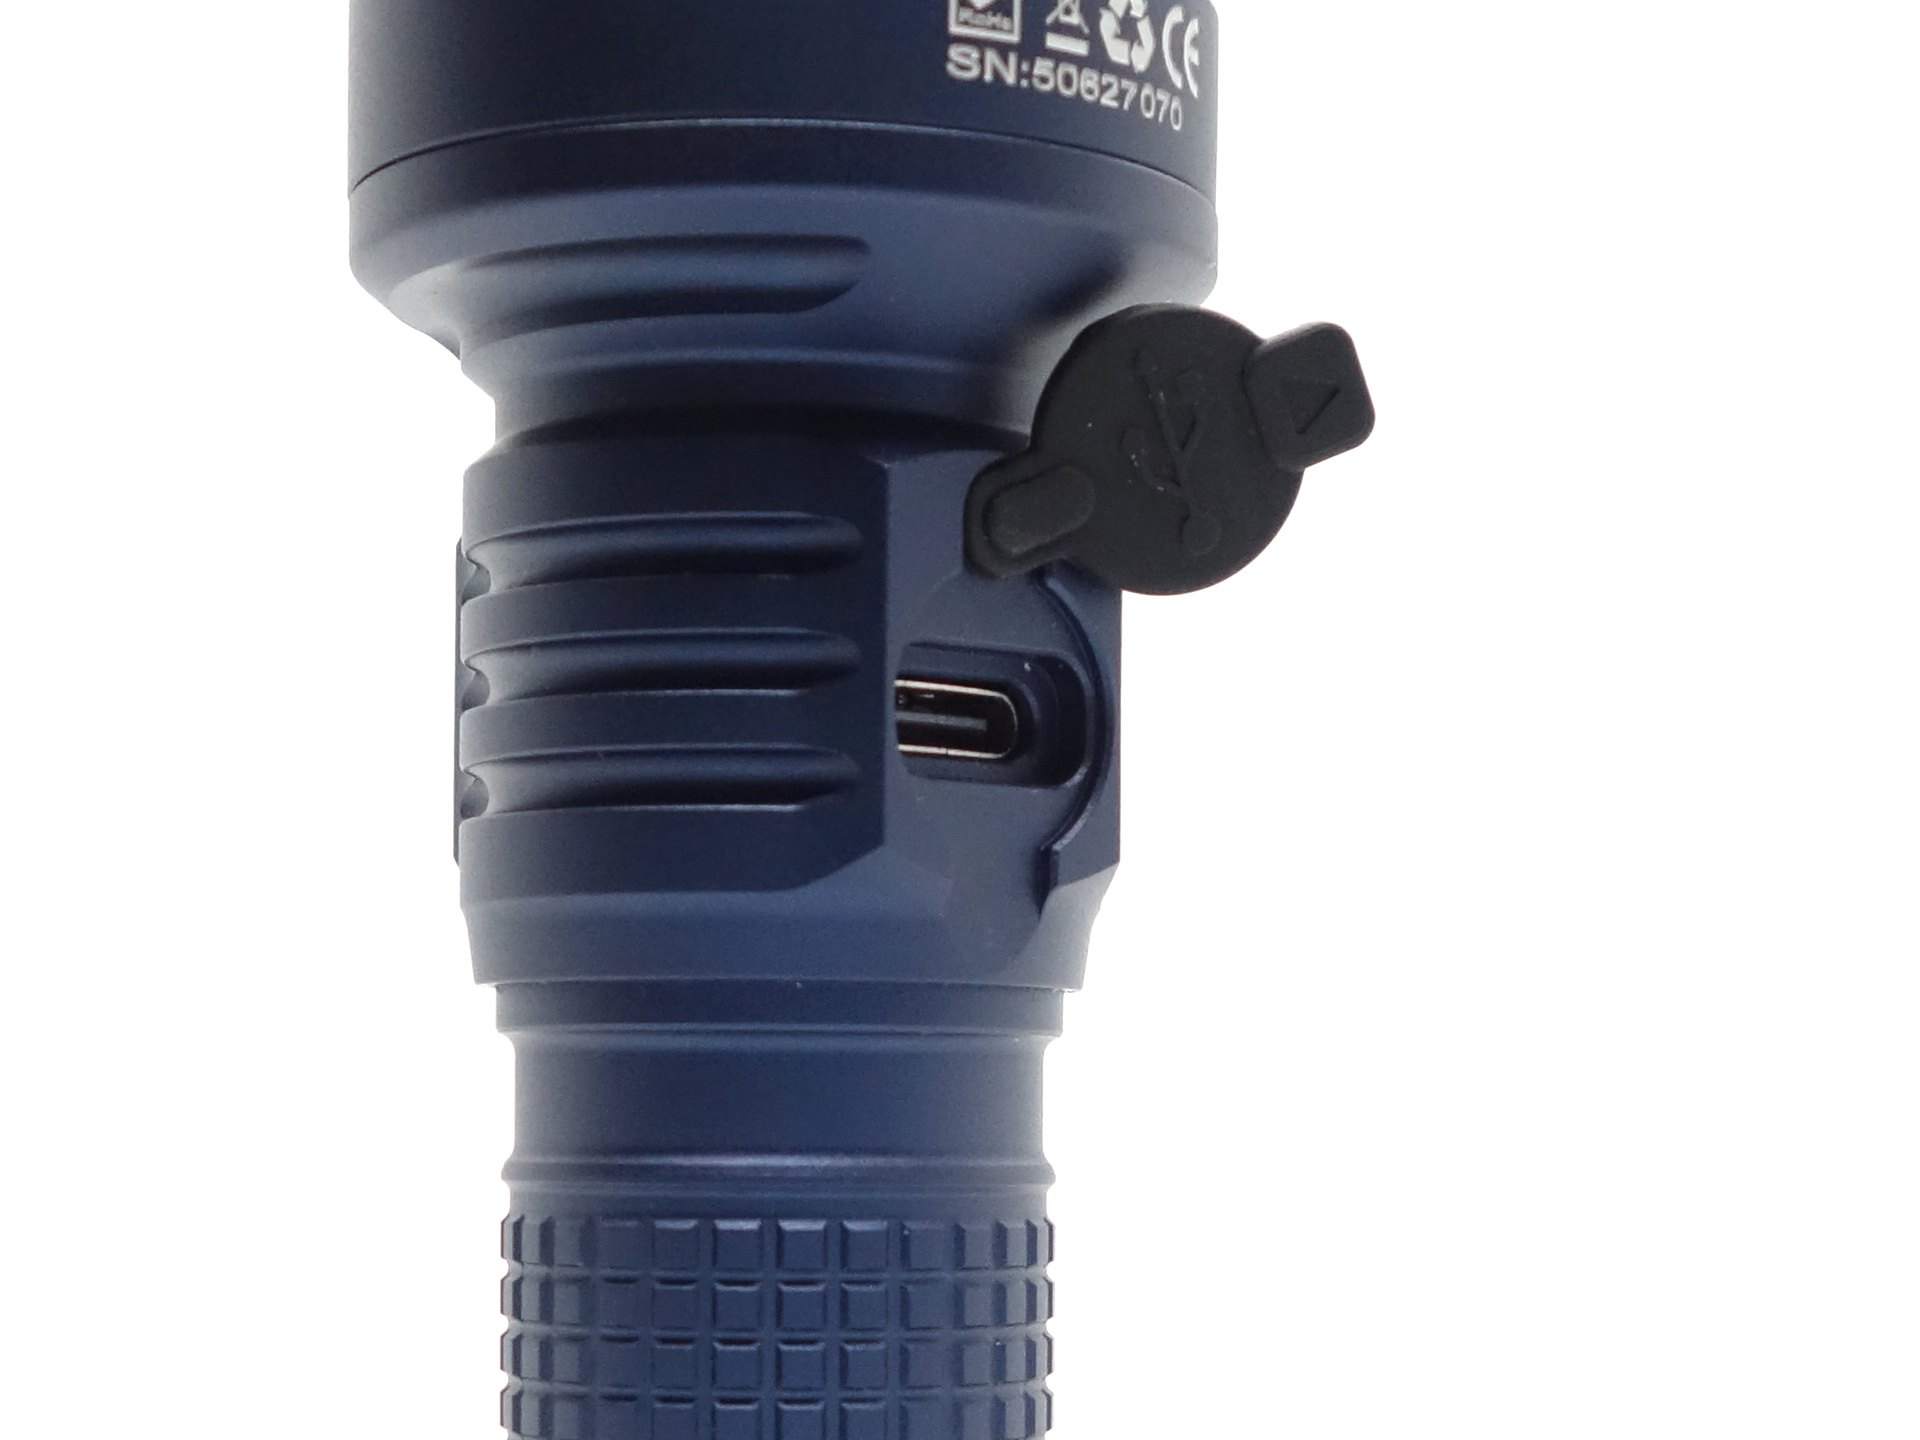
The torch can charge 18350 or 18650 cells by extending the tube.
Power supply: PinePower Desktop USB-C
USB Meter: ChargerLAB Power-Z KM003C
Room temperature: 13 C
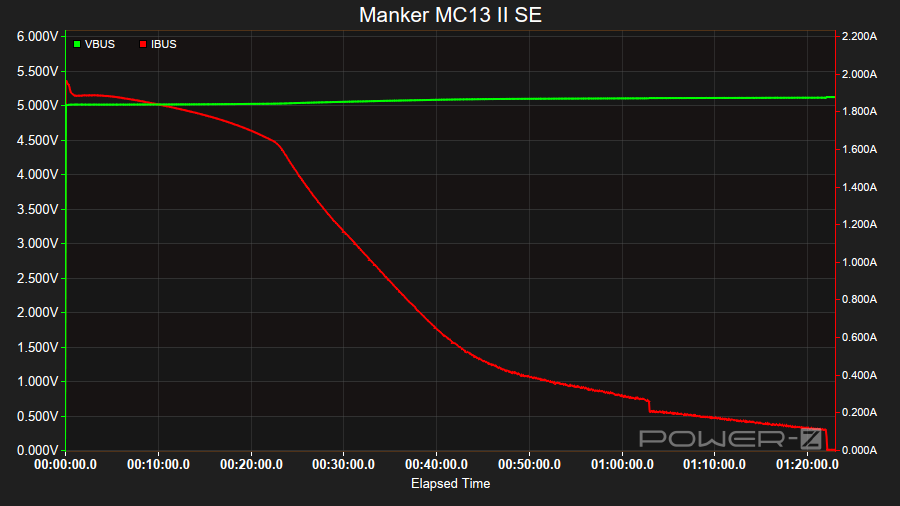
It took 1 hour 21 minutes to charge an 18350 cell from 3.14V to 4.20V at a rate of 5V/1.8A.
1.8A is a bit high for a 18350 cell. It would be better to stay under 1A.
Charging Status#
The charging status indicator in the switch will glow red when the voltage is less than 4.2V, and it will turn blue when the voltage is ≥4.2V (charging is complete).
Power supply compatibility#
I tried the following power supplies with the built-in USB-C charger:
| Power supply | USB Type | Protocol | Does it charge? |
|---|---|---|---|
| Apple 61W Power Adapter | USB-C | PD | Yes |
| Google Pixel Power Adapter | USB-C | PD | Yes |
| PinePower Desktop | USB-C | PD | Yes |
| PinePower Desktop | USB-A | QC | Yes |
| PinePower Desktop | USB-A | Yes |
USB-C to USB-C charging works.
Performance#
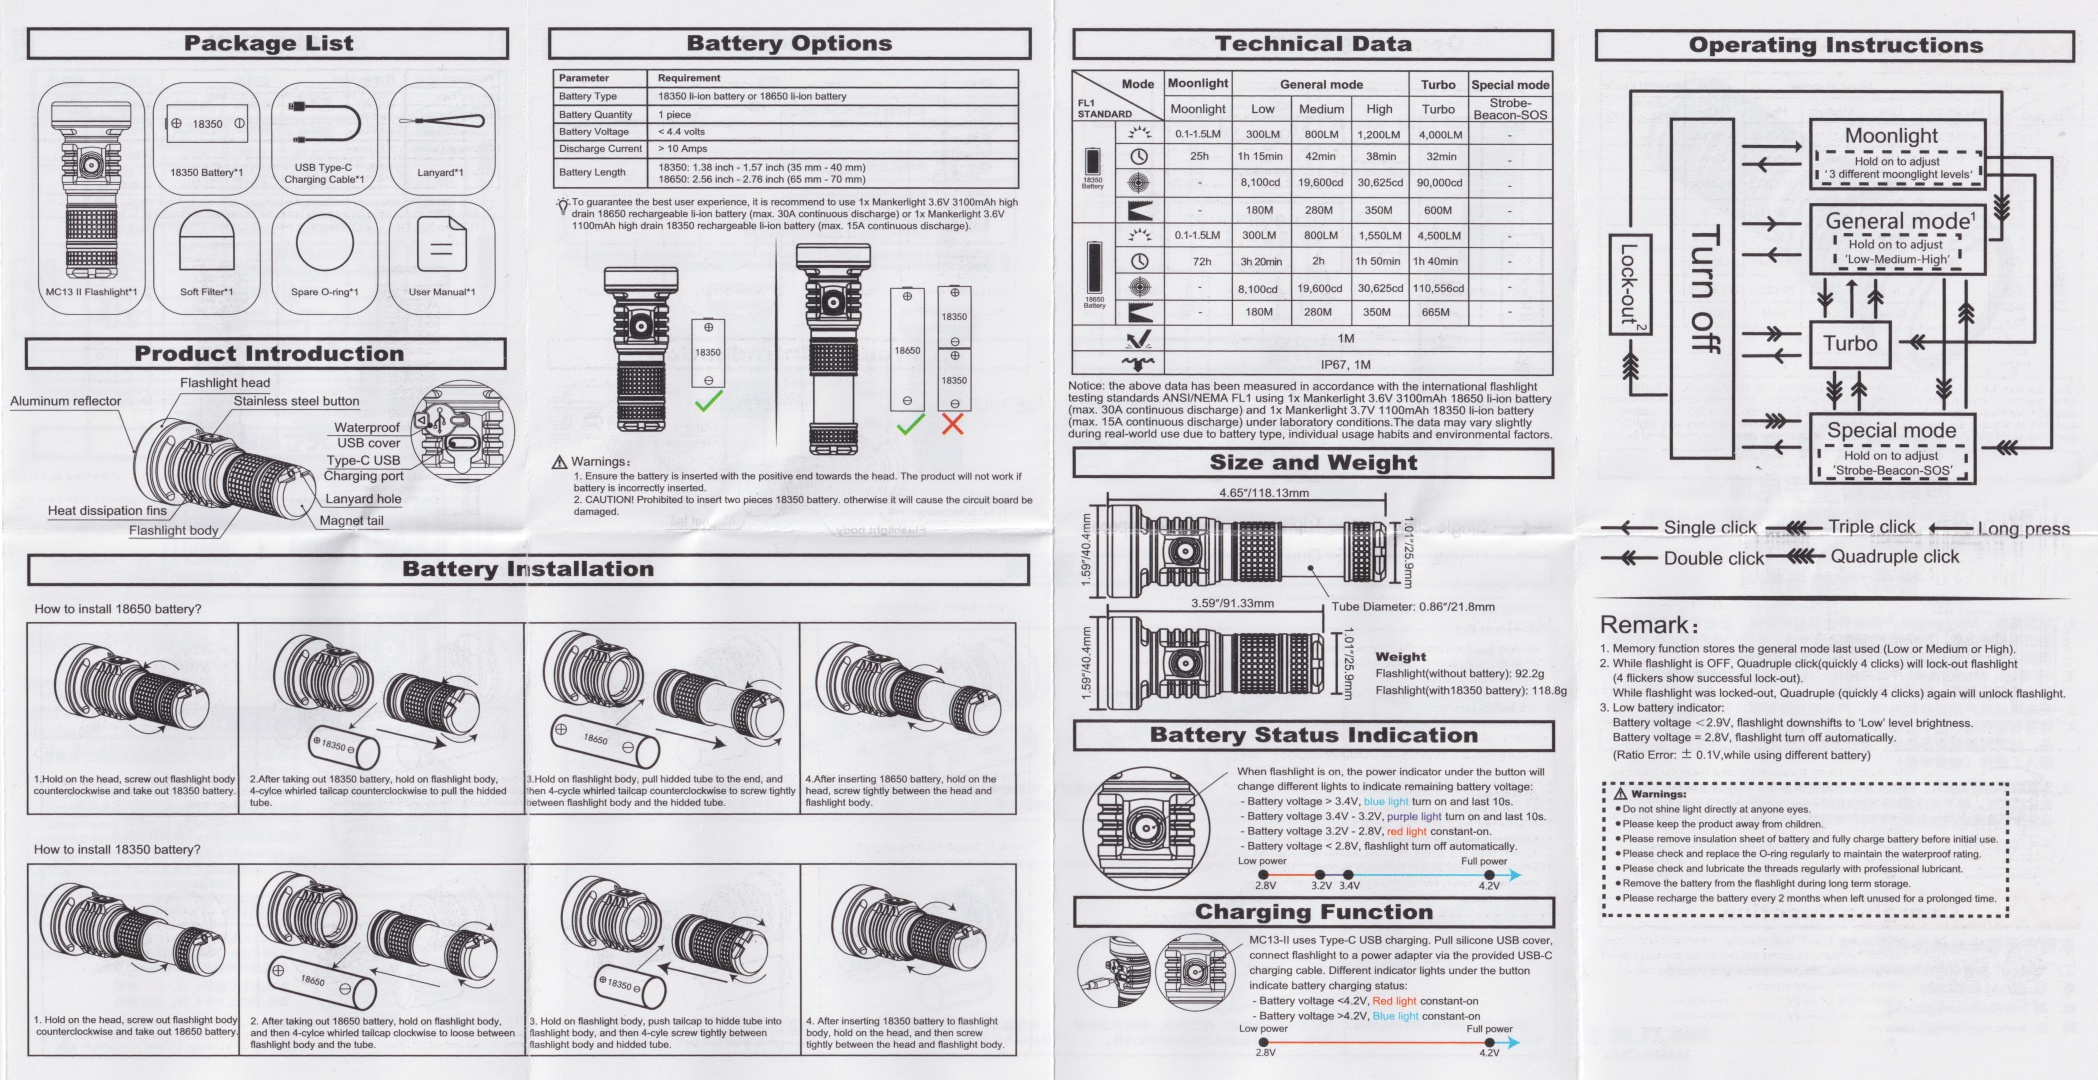
Specifications from the user manual:
| FL1 Standard / Mode | Cell | Moonlight | Low | Medium | High | Turbo |
|---|---|---|---|---|---|---|
| Output (lumens) | 18350 | 0.1-1.5 | 300 | 800 | 1,200 | 4,000 |
| Runtime | 18350 | 25h | 1h 15min | 42min | 38min | 32min |
| Beam Intensity (cd) | 18350 | 8,100 | 19,600 | 30,625 | 90,000 | |
| Beam Distance (metres) | 18350 | 180 | 280 | 350 | 600 | |
| Output (lumens) | 18650 | 0.1-1.5 | 300 | 800 | 1,550 | 4,500 |
| Runtime | 18650 | 72h | 3h 20min | 2h | 1h 50min | 1h 40min |
| Beam Intensity (cd) | 18650 | 8,100 | 19,600 | 30,625 | 110,556 | |
| Beam Distance (metres) | 18650 | 180 | 280 | 350 | 665 |
Manker used a Manker 18350 3.7V Li-ion 1100mAh 15A Max CDR cell and a Manker 18650 3.6V Li-ion 3100mAh 30A Max CDR cell to test.
I tested the torch using the included Manker 18350 3.7V Li-ion 1100mAh cell. I also used a Vapcell M11 V2 18350 3.7V Li-ion 1100mAh (yellow) 10A Max CDR cell and a Vapcell N40 18650 3.7V 4000mAh 10A Max CDR cell.
Lumen measurements#
I used a bench power supply to measure the current at turn on.
| Cell | Mode | Amps at start | Specs | Lumens @turn on | Lumens @30 sec | Lumens @10 min |
|---|---|---|---|---|---|---|
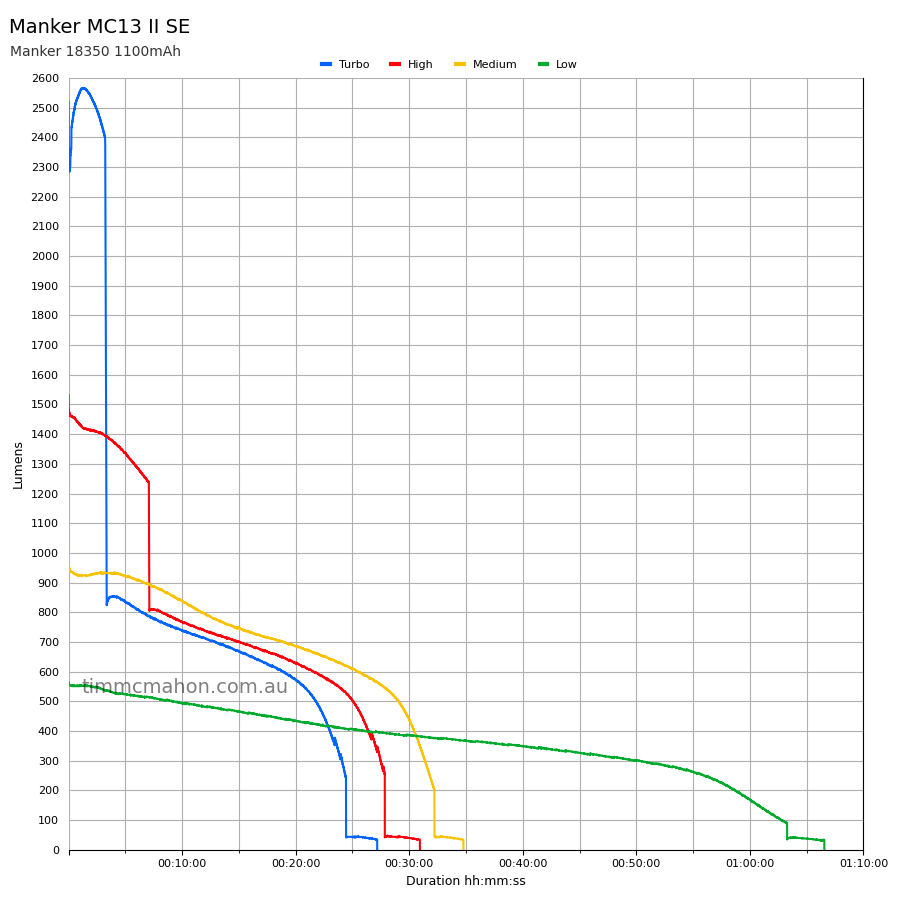
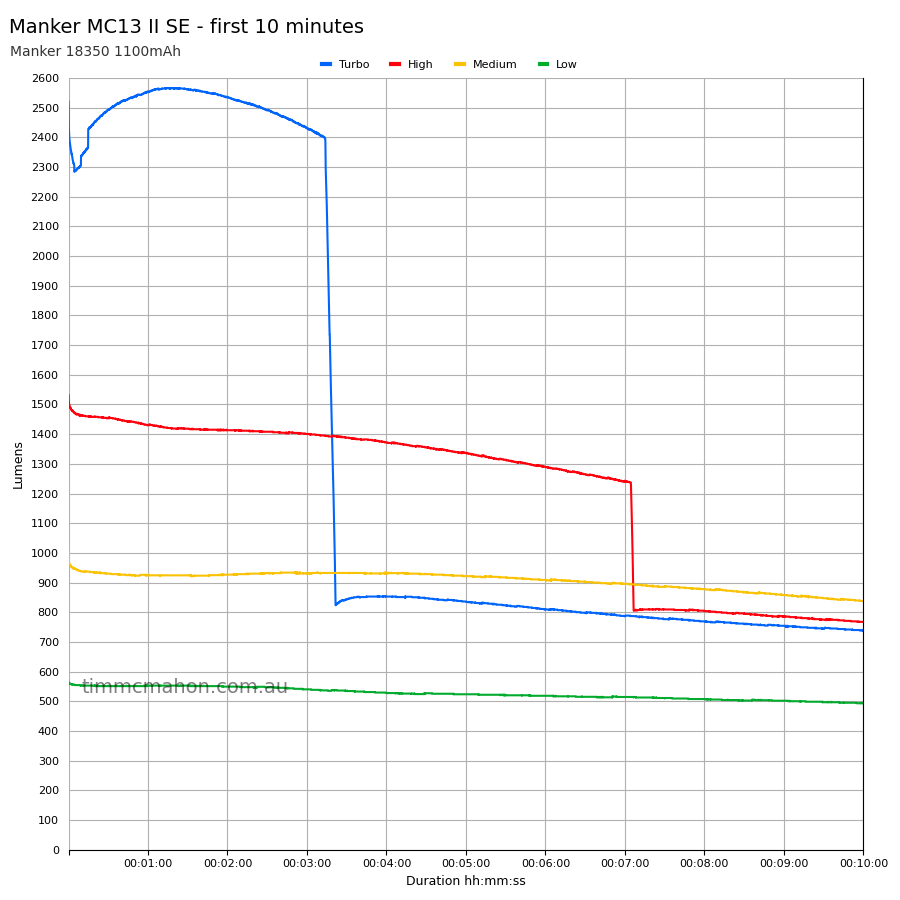
| 18350 | Low | 300 | 565 | 552 | 493 | |
| 18350 | Medium | 800 | 1,002 | 930 | 838 | |
| 18350 | High | 1,200 | 1,532 | 1,456 | 767 | |
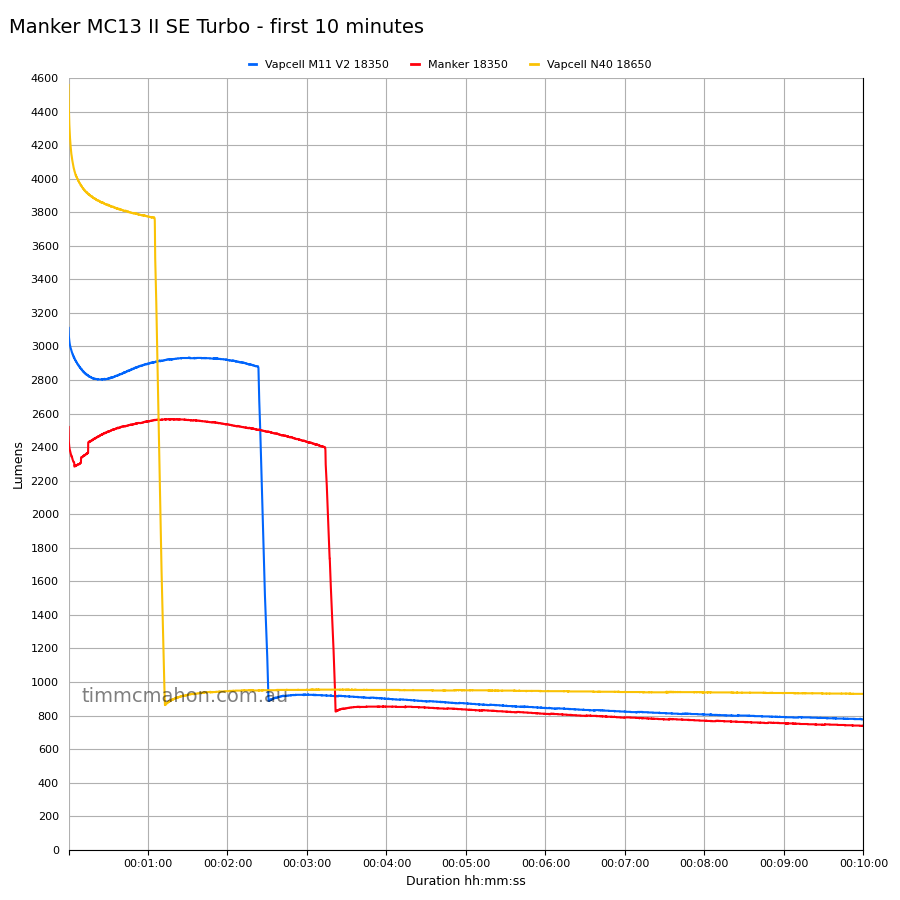
| 18350 | Turbo | 4,000 | 2,519 | 2,364 | 746 | |
| M11V2 | Turbo | 4,000 | 3,110 | 2,808 | 776 | |
| 18650 | Low | 2.15 A | 300 | 551 | 516 | 509 |
| 18650 | Medium | 4.60 A | 800 | 1,042 | 966 | 930 |
| 18650 | High | 7.77 A | 1,550 | 1,751 | 1,575 | 923 |
| 18650 | Turbo | 15.00 A | 4,500 | 4,558 | 3,843 | 929 |
The lumen output for 18350 on Turbo fell short (2,808 lumens at 30 seconds instead of 4,000 lumens).
The torch is much brighter with an 18650 cell. But the output for Turbo dropped to 3,843 lumens by 30 seconds (expecting 4,500 lumens). The torch might maintain 4,500 lumens for 30 seconds if you use a better 18650 cell.
I used a Vapcell N40 18650 3.7V 4000mAh with a 10A maximum continuous discharge rate instead of one capable of 30A. So my test results will not be as good as the manufacturer.
Standby drain#
137 µA
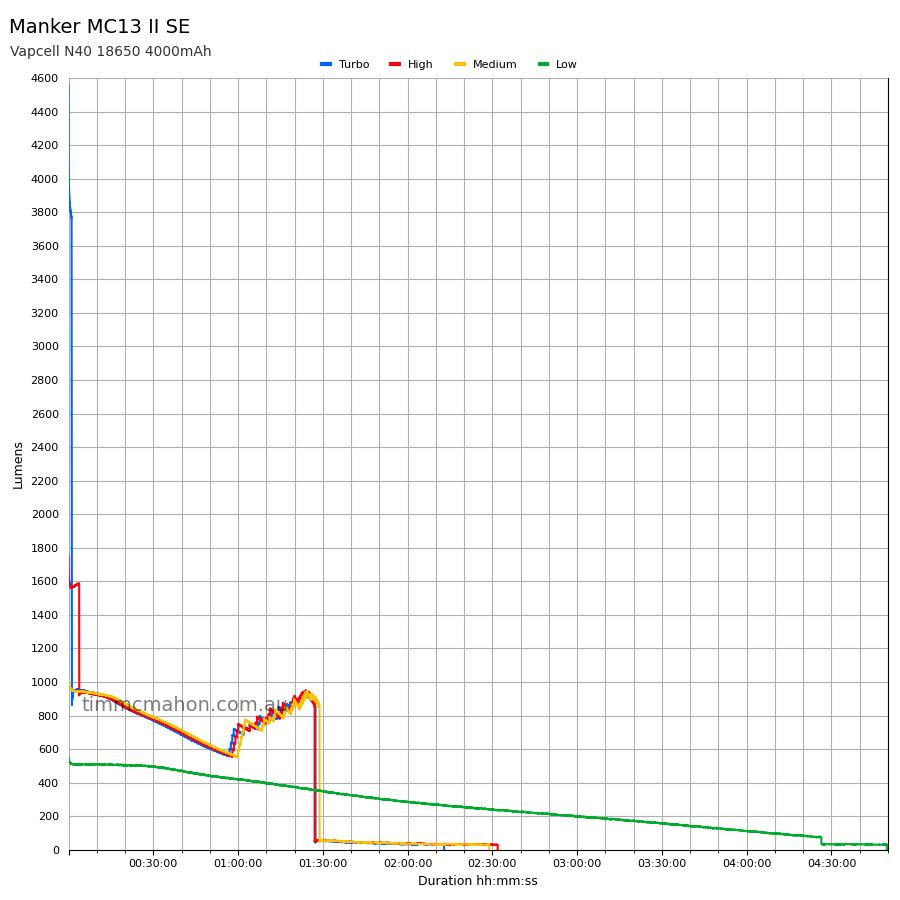
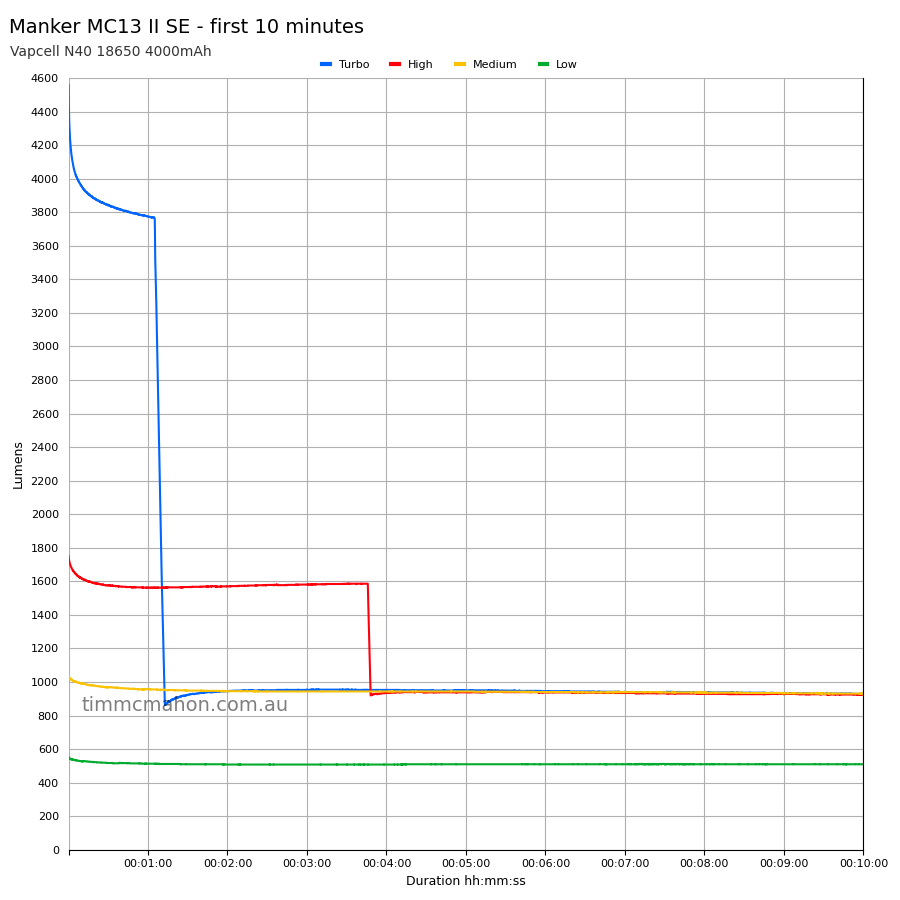
Runtime graphs#
I used my own DIY lumen tube with a TSL2591 sensor and forked bmengineer’s project RuTiTe to record runtimes.
Note: Lumen measurements may be off by 10% with my DIY lumen tube.
The room temperature was approximately 13 C.
Turbo#
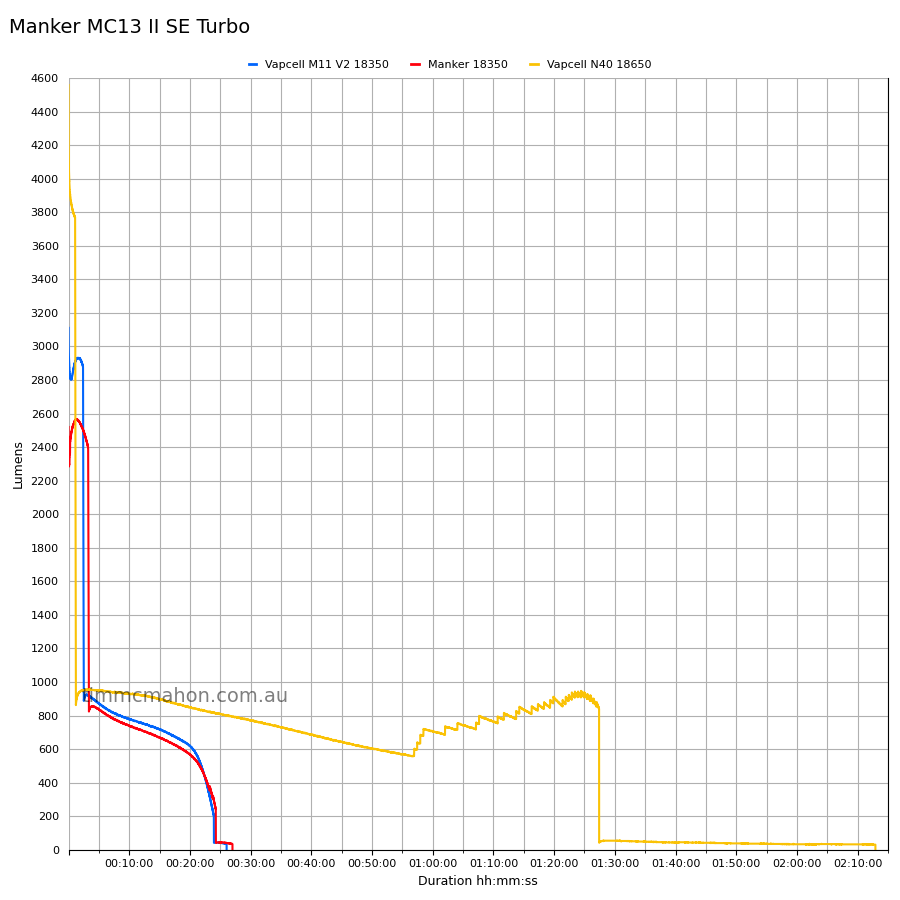
18350#
18650#
Runtime#
Here is a summary of the runtime results:
| Cell | Mode | User manual | Runtime | Turn off | Final voltage |
|---|---|---|---|---|---|
| M11V2 | Turbo | 32min | 23min 28s | 26min 2s | 3.01 |
| 18350 | Turbo | 32min | 24min 43s | 27min 28s | 2.98 |
| 18350 | High | 38min | 27min 40s | 30min 46s | 3.06 |
| 18350 | Medium | 42min | 32min 3s | 34min 36s | 3.01 |
| 18350 | Low | 1h 15min | 1h 3min 17s | 1h 6min 33s | 3.06 |
| 18650 | Turbo | 1h 40min | 1h 27min 24s | 2h 12min 55s | 2.87 |
| 18650 | High | 1h 50min | 1h 27min 5s | 2h 31min 52s | 2.87 |
| 18650 | Medium | 2h | 1h 28min 49s | 2h 28min 54s | 2.96 |
| 18650 | Low | 3h 20min | 4h 26min 24s | 4h 49min 36s | 2.96 |
“Runtime” is the time until the output reduces to 10% of the output at 30 seconds (as per the ANSI/PLATO FL1 2019 Standard).
“Turn off” is the time until my DIY lumen tube no longer detects more than one lumen.
“+” indicates that the light remained on after recording had stopped.
The runtime results were pretty close to what Manker claimed but they fell slightly short.
The regulation could be improved.
Throw#
I took lux measurements with a UNI-T UT383BT after 30 seconds. Each mode was measured at five metres.
| Cell | Mode | Specs (cd) | Specs (m) | Candela measured (cd) | Distance (m) |
|---|---|---|---|---|---|
| 18350 | Low | 8,100 | 180 | 12,650 | 224 |
| 18350 | Medium | 19,600 | 280 | 23,325 | 305 |
| 18350 | High | 30,625 | 350 | 34,675 | 372 |
| 18350 | Turbo | 90,000 | 600 | 62,675 | 500 |
| M11V2 | Turbo | 90,000 | 600 | 70,950 | 532 |
| 18650 | Turbo | 110,556 | 665 | 94,175 | 613 |
The beam distance peaked at around 1 minute 10 seconds with 18350 cells. It dropped off from turn on with a Vapcell N40 18650 cell.
The beam distance fell short for 18350 on Turbo (500 metres instead of 600 metres).
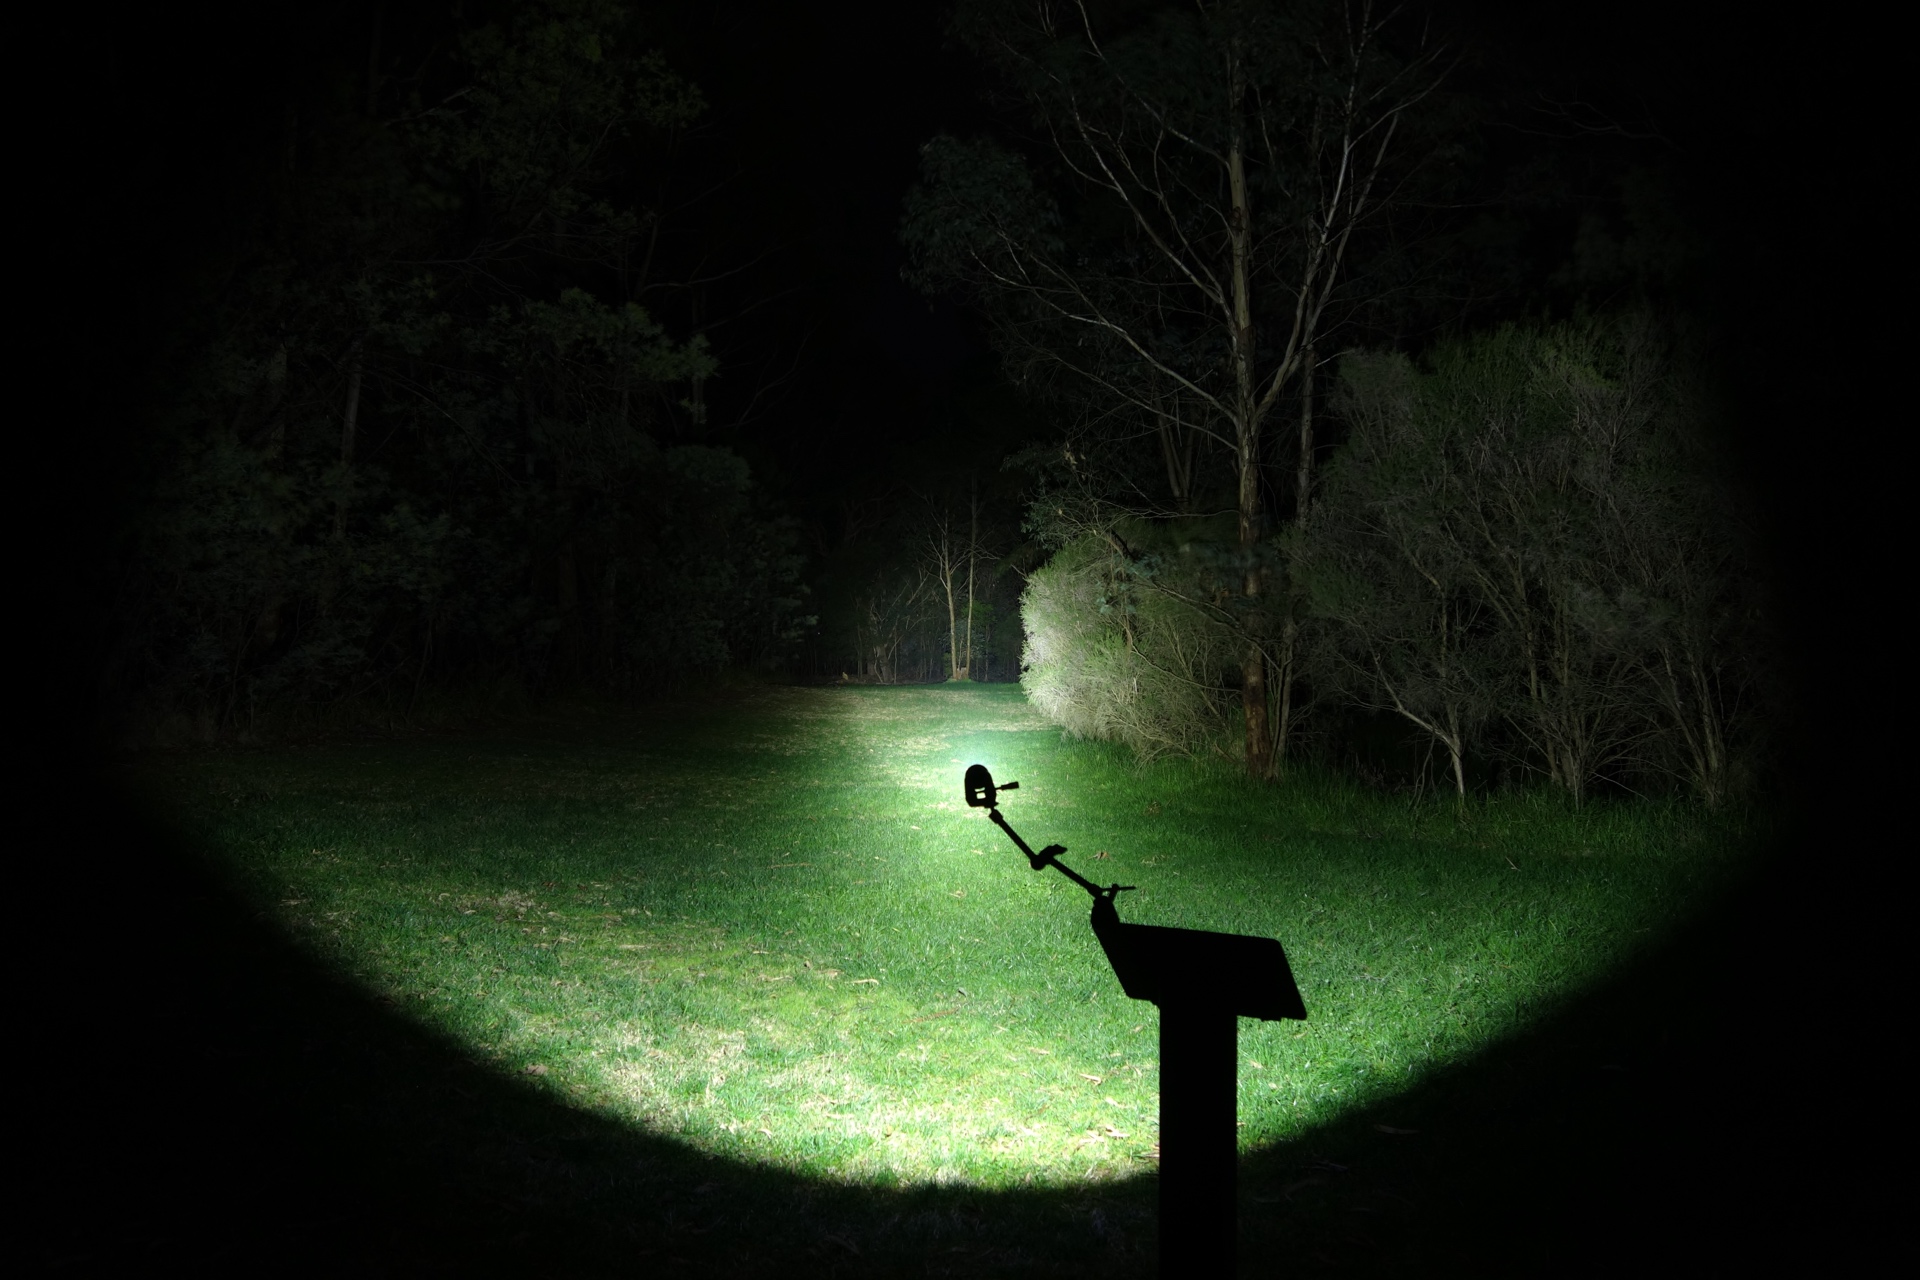
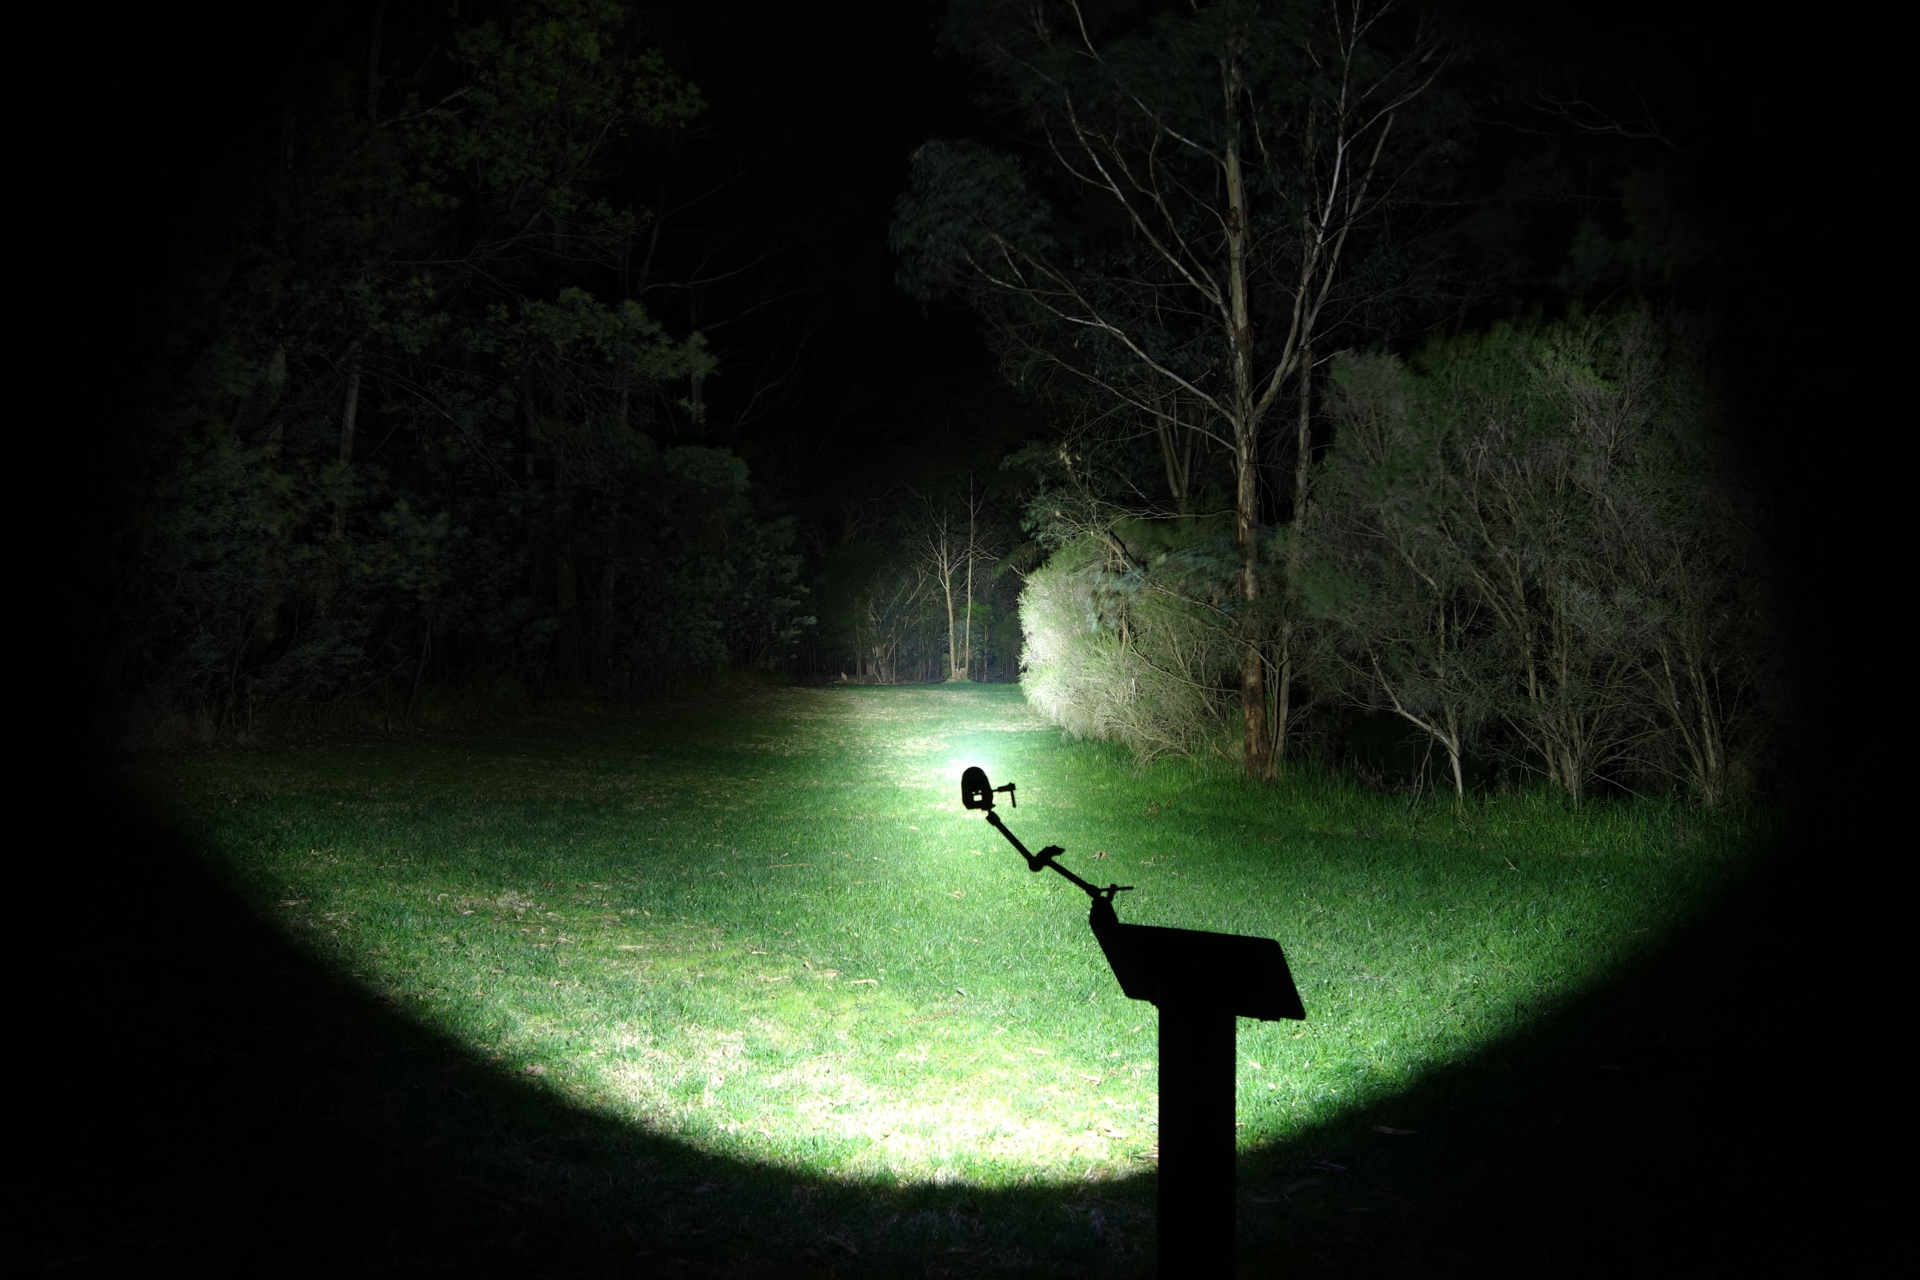
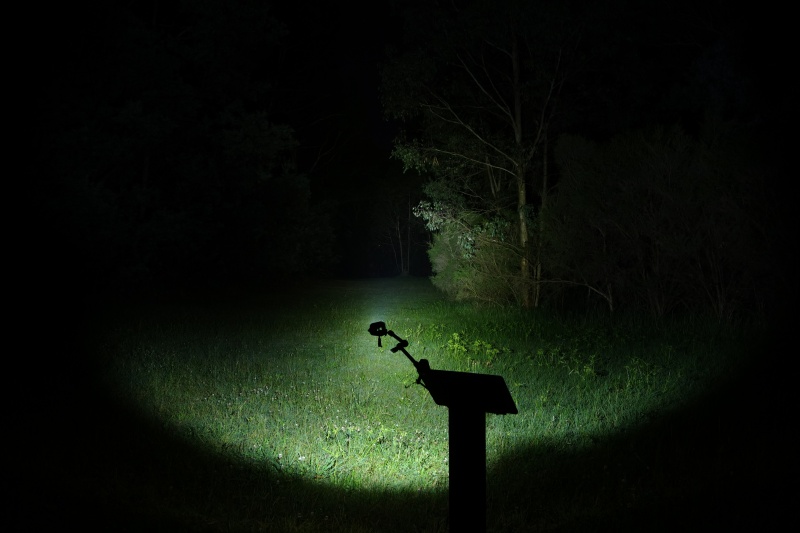
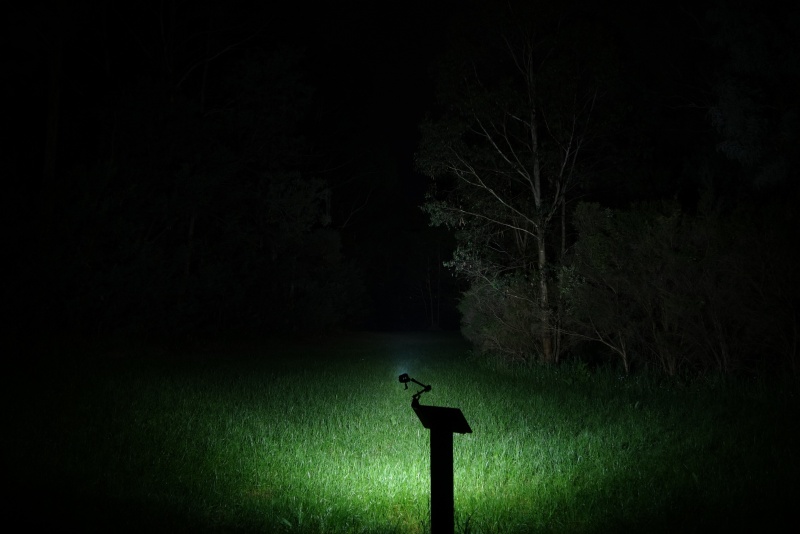
Beamshots#
I went to a local park and I aimed the torch at a tree 70 metres away while using Turbo.
Beamshots were taken using a Sony RX100M2 using 3.2", f3.2, ISO 800, 5000K WB.
Manker MC13 II SE (Turbo) 18350#
Manker MC13 II SE (Turbo) 18650#
NEXTORCH TA20 (High)#
Olight Warrior Nano (Turbo)#
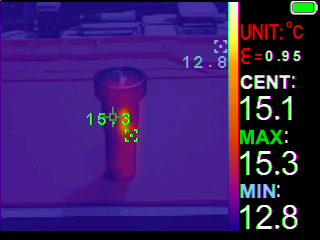
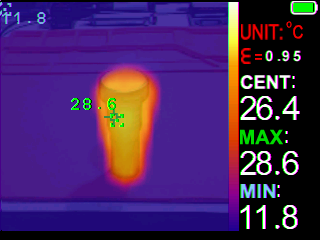
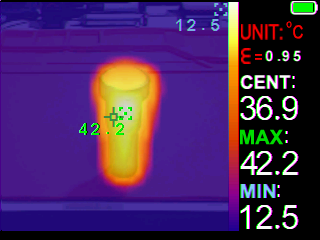
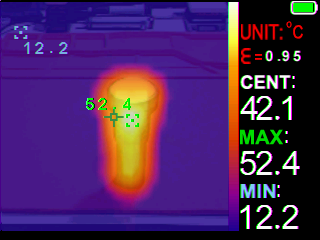
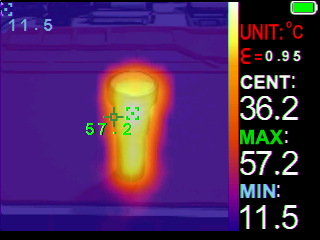
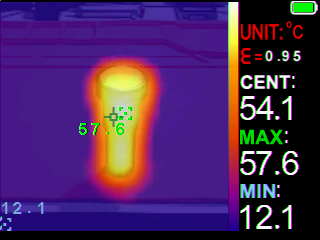
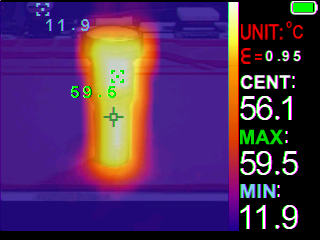
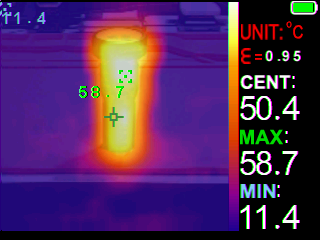
Thermal Images#
I used a Zoyi ZT-R01 IR Thermography Multimeter to take thermal images of the torch on a silicone mat while using Turbo.
Room temperature: 12 C
| Time (mm:ss) | Max Temperature |
|---|---|
| 00:00 | 15.3 C |
| 01:00 | 28.6 C |
| 02:00 | 42.2 C |
| 03:00 | 52.4 C |
| 04:00 | 57.2 C |
| 05:00 | 57.6 C |
| 06:00 | 59.6 C |
| 07:00 | 58.7 C |
The temperature peaked at about 59 C within the first 7 minutes.
Conclusion#
The Manker MC13 II SE is a little powerhouse!
The build quality and design has definitely improved since the original Manker MC13.
I love the extendable tube design. The knurling is practical and there are no sharp edges.
The lumen output and beam distance was slightly lower than expected. I did not use a high drain 18650 cell so that could impact the results when using an 18650. You really need to use high drain cells to get the most out of this light.
It would be even better if regulation for the driver is improved.
The user interface is simple to use but it is built for enthusiasts. There are common shortcuts (Turbo, Strobe) and there is a hidden engineering mode to adjust the brightness of Moonlight.
I can highly recommend the MC13 II SE. It is an awesome pocket thrower.
Pros:#
- Excellent build quality.
- Built-in USB-C fast charging.
- Extendable battery tube.
- Good lumen output.
- Multiple Moonlight modes.
- Engineering mode.
- Lanyard hole and a magnet in the tailcap.
Cons:#
- Runtimes fell slightly short.
- Beam distance fell slightly short.
- Regulation could be improved.
Price#
The Manker MC13 II SE is US$84.95 at mankerlight.com.
Product page#
15% off with promo code: TIM15
Manker MC13 II SE at mankerlight.com (affiliate link)
Manker MC13 II SE at amazon.com (affiliate link)
I may earn a commission if you use an affiliate link or a promo code. This will help fund future torch reviews and tutorials.