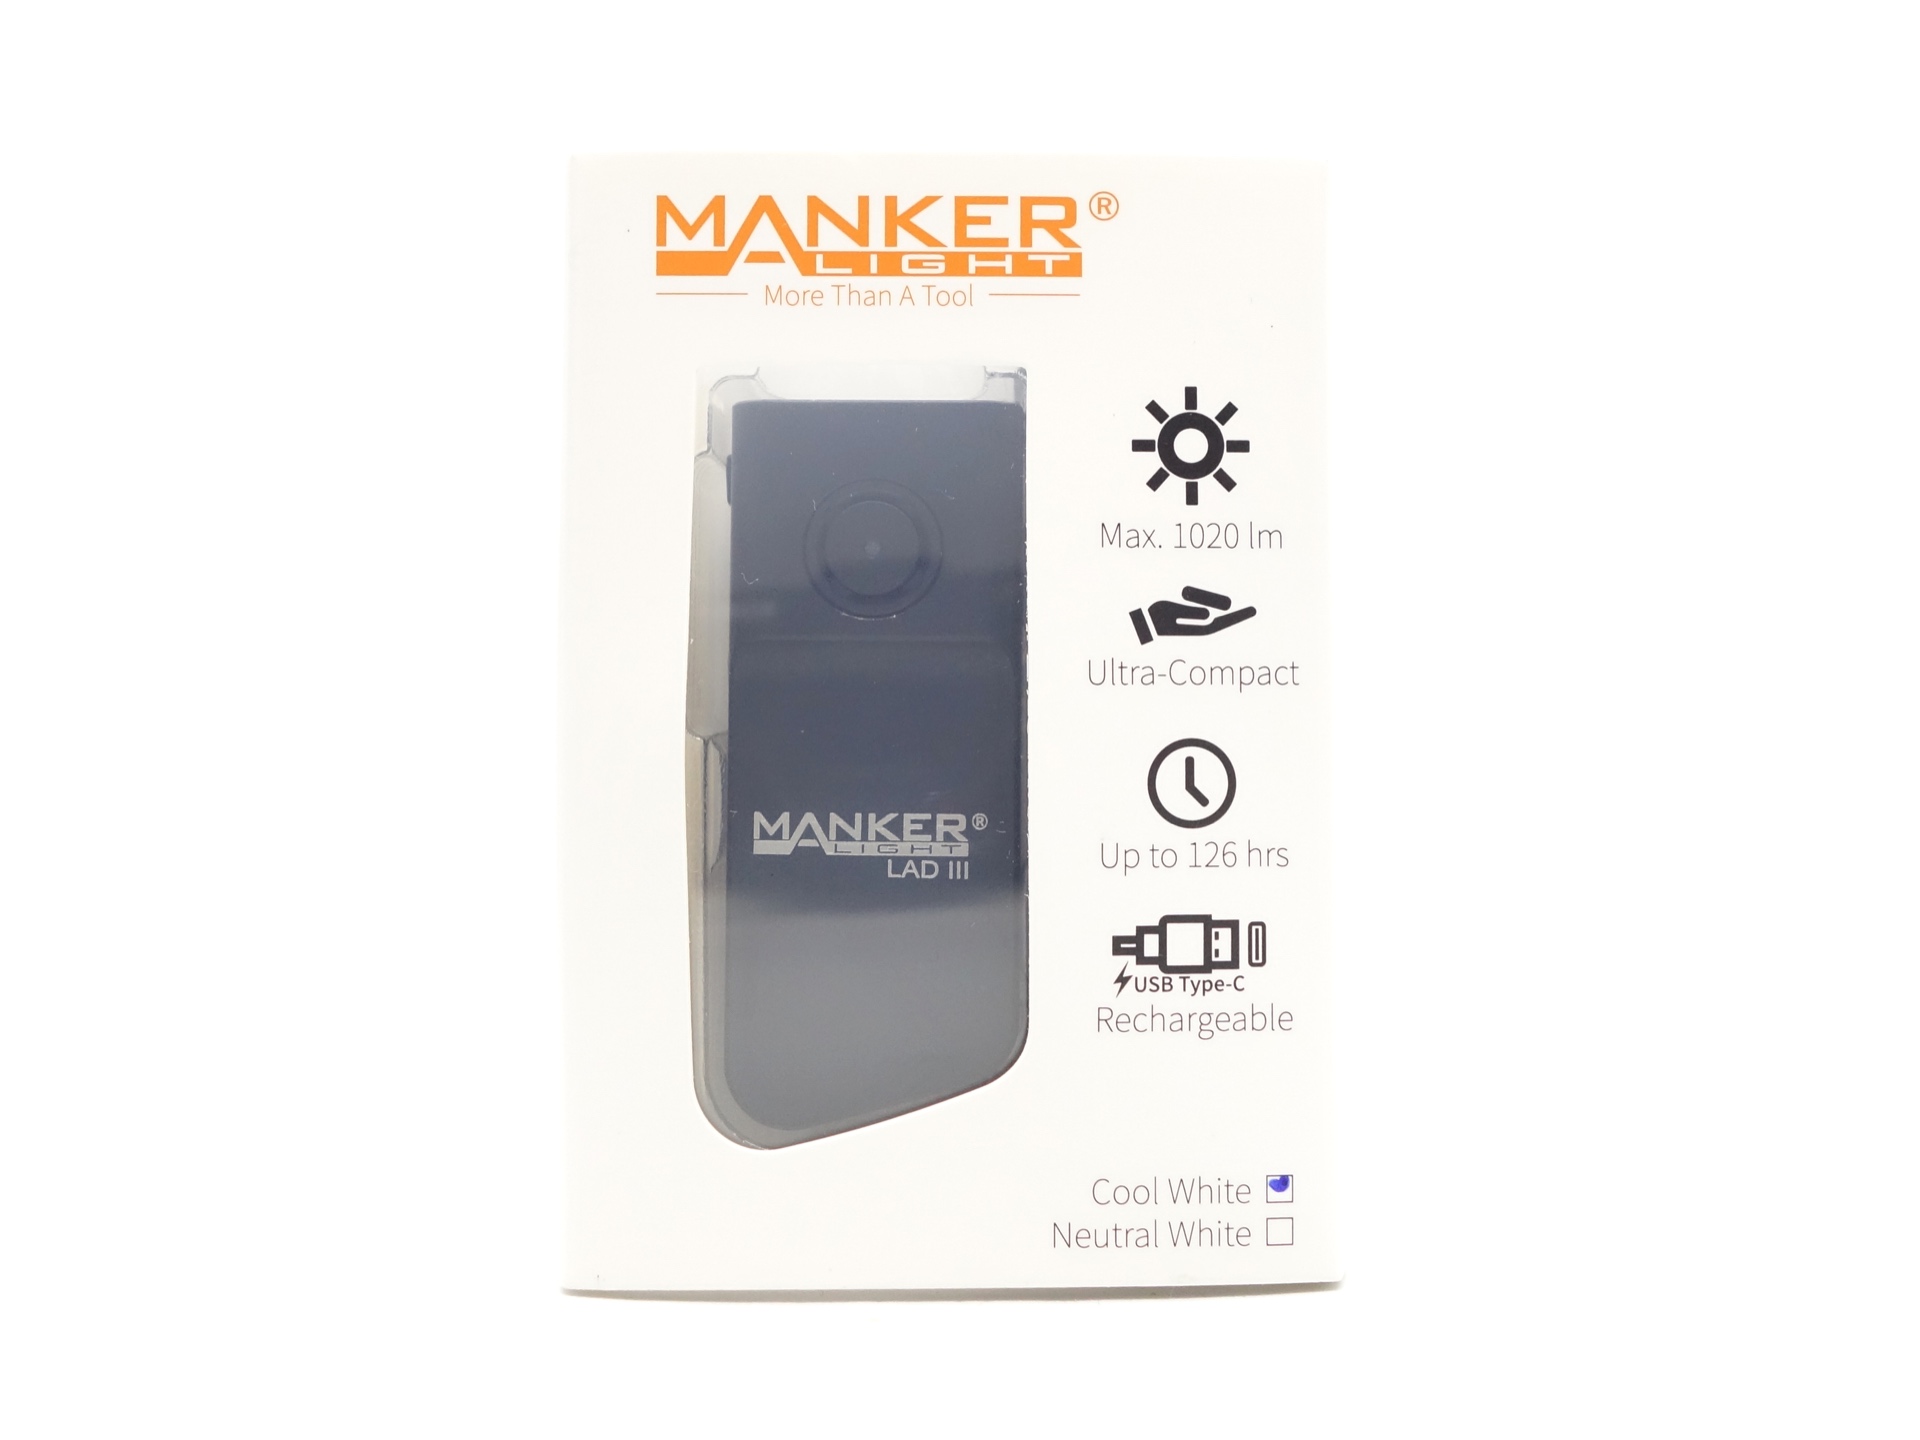
Manker LAD III Cool White EDC Torch Review

Manker LAD III CW#
- Specifications
- Introduction
- Torch in use
- Build quality
- LED, bezel, lens, reflector and beam
- Size and comparison
- User interface
- Batteries and charging
- Performance
- Beamshots
- Thermal Images
- Conclusion
- Price
- Product page
Specifications#
| Brand/model | Manker LAD III CW |
|---|---|
| LED | Luminus SST20 Cool White 6500K |
| Maximum lumens | 1,020 lm |
| Maximum beam intensity | 1,228 cd |
| Maximum throw | 70 m |
| Battery | Built-in 500mAh LiPo |
| Onboard charging | Yes (USB-C) |
| Material | Aluminium |
| Modes | 7 |
| Blinkies | Strobe, SOS, Beacon |
| Reflector | TIR |
| Waterproof | IP67 |
| Review date | December 2025 |
Introduction#
The Manker LAD III Cool White is a small keyring EDC torch with two LEDs, a TIR optic, multiple moonlight modes, a hidden engineering mode and built-in USB-C charging.
While visiting Manker earlier this year, Tony kindly gave me the Neutral White and the Cool White versions of the Manker LAD III.
Version III has two LEDs instead of one, a TIR optic instead of an orange-peel reflector, the metal button can be removed by unscrewing the bezel, and the TIR optic can be popped out by unclipping it with a thin shim. Version III is easier to modify and repair.
Manker kindly provided this torch for review. I have not been paid for this review nor have I held back my opinions of this torch.
Packaging#
The Manker LAD III CW comes in a transparent box witha Manker branded sheath.
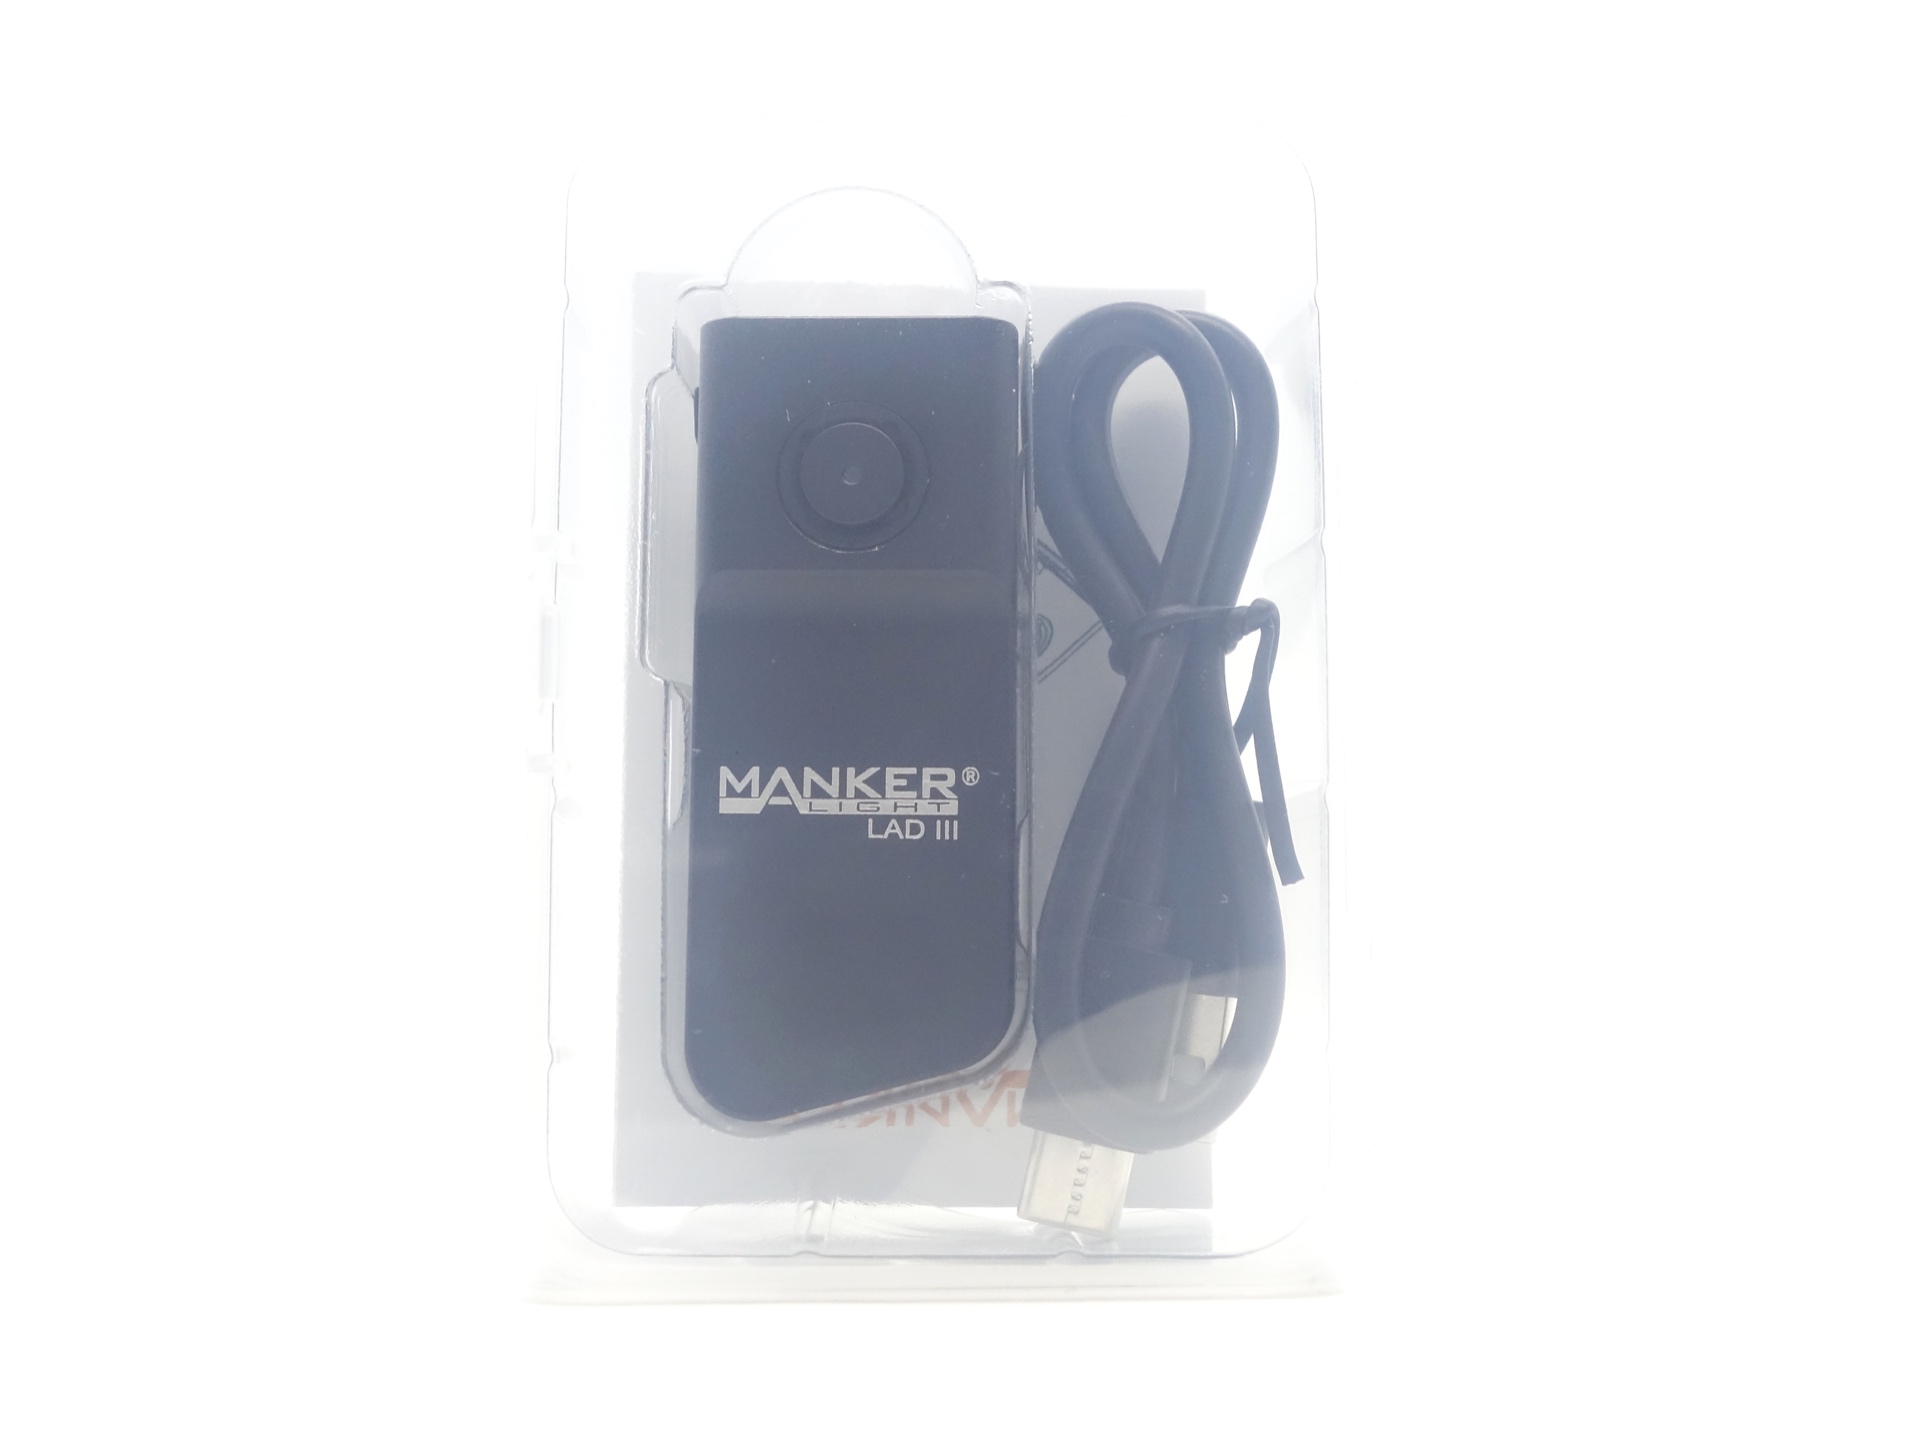
The following is included in the box:
- Manker LAD III CW.
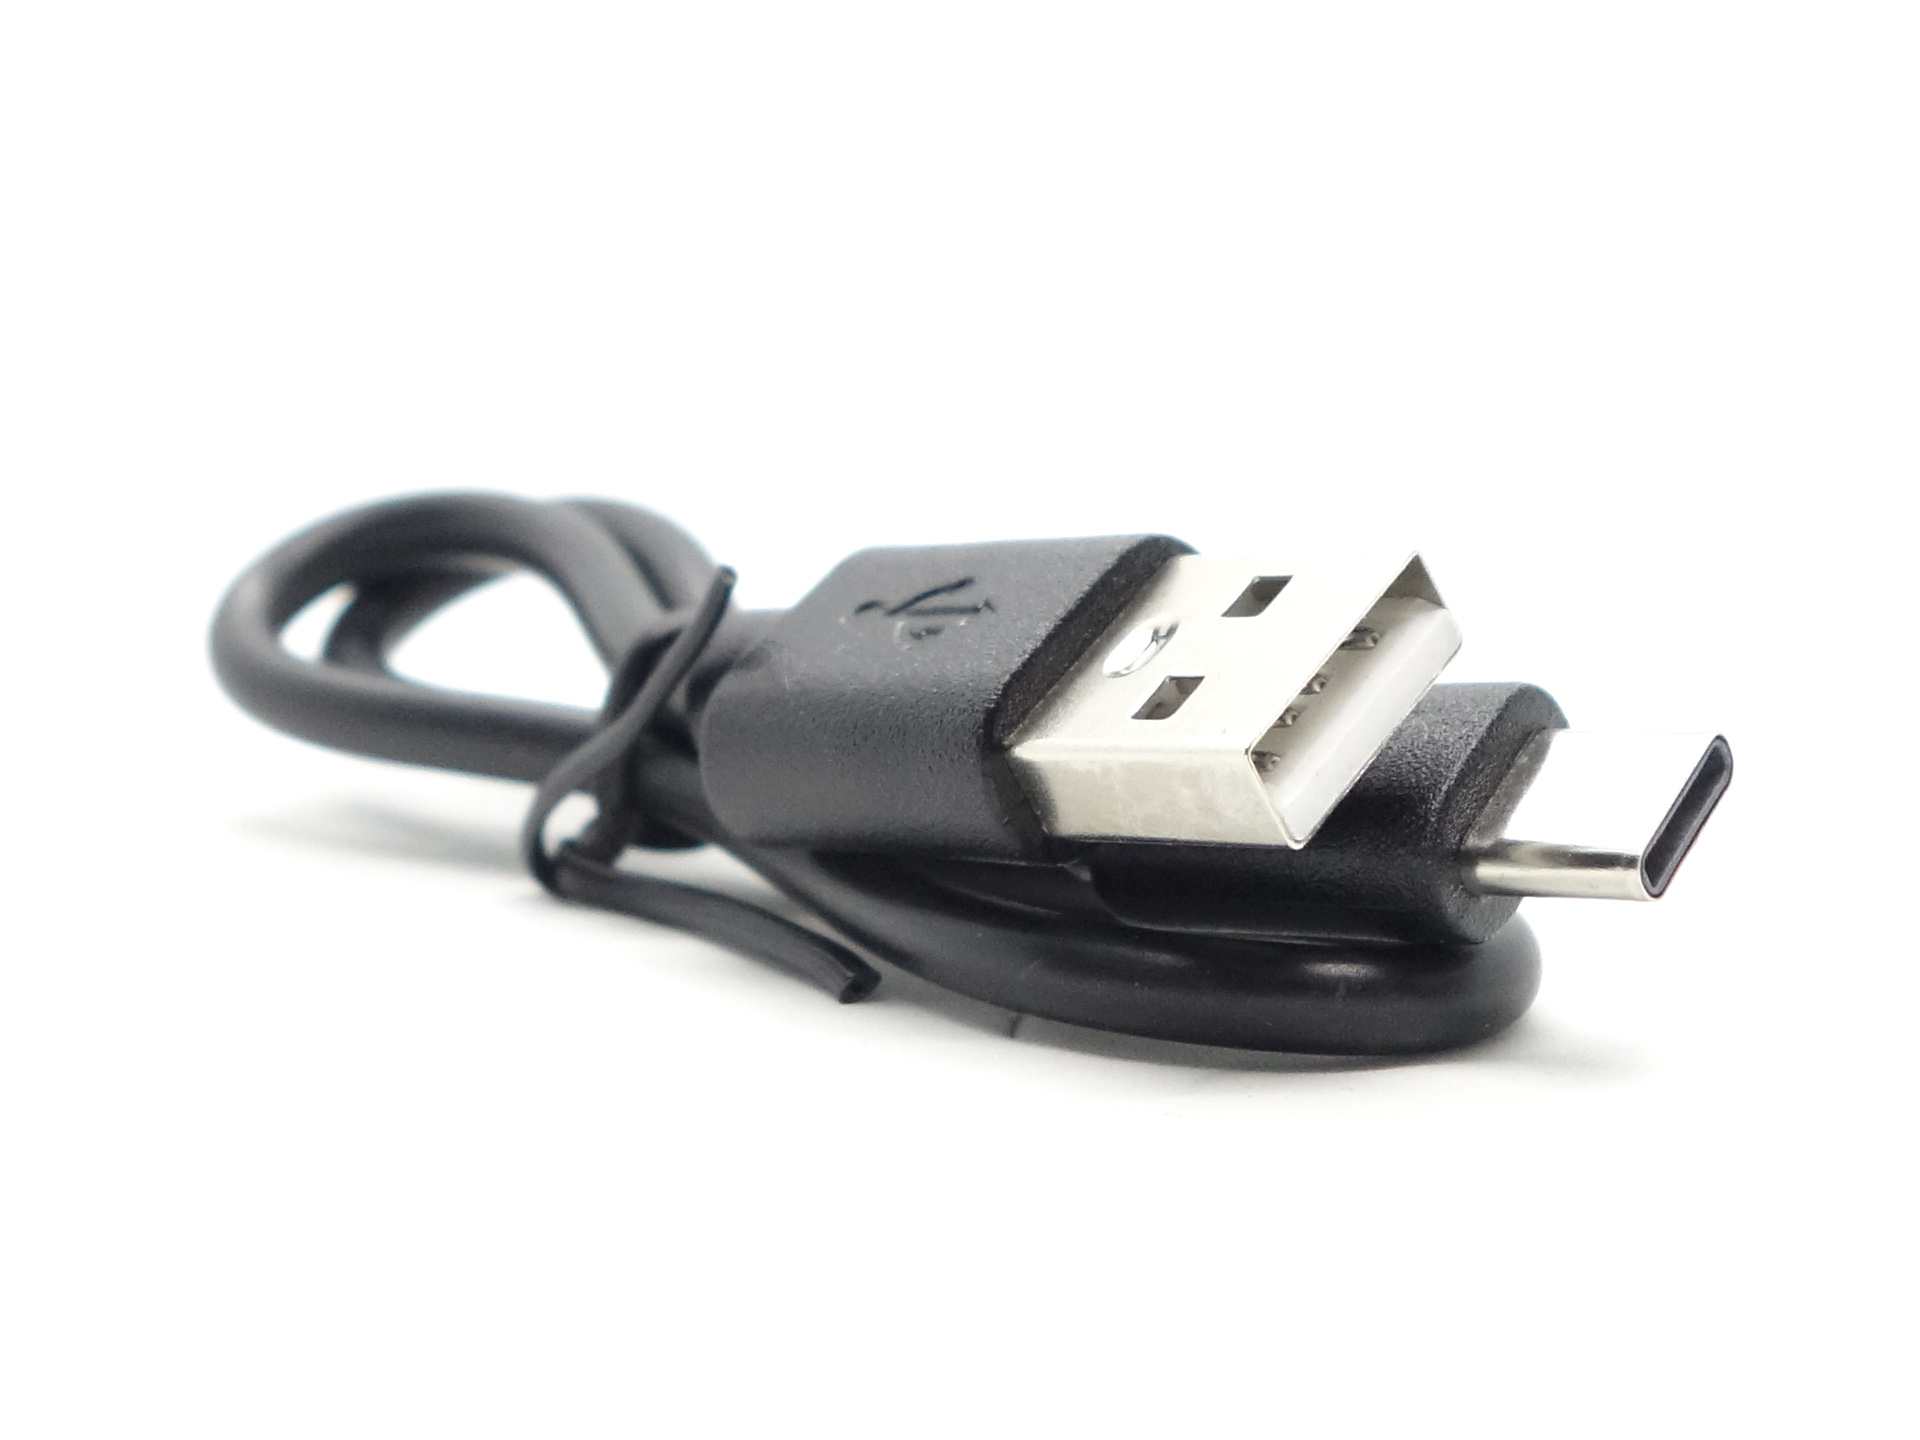
- USB-A to USB-C charging cable.
- User manual.
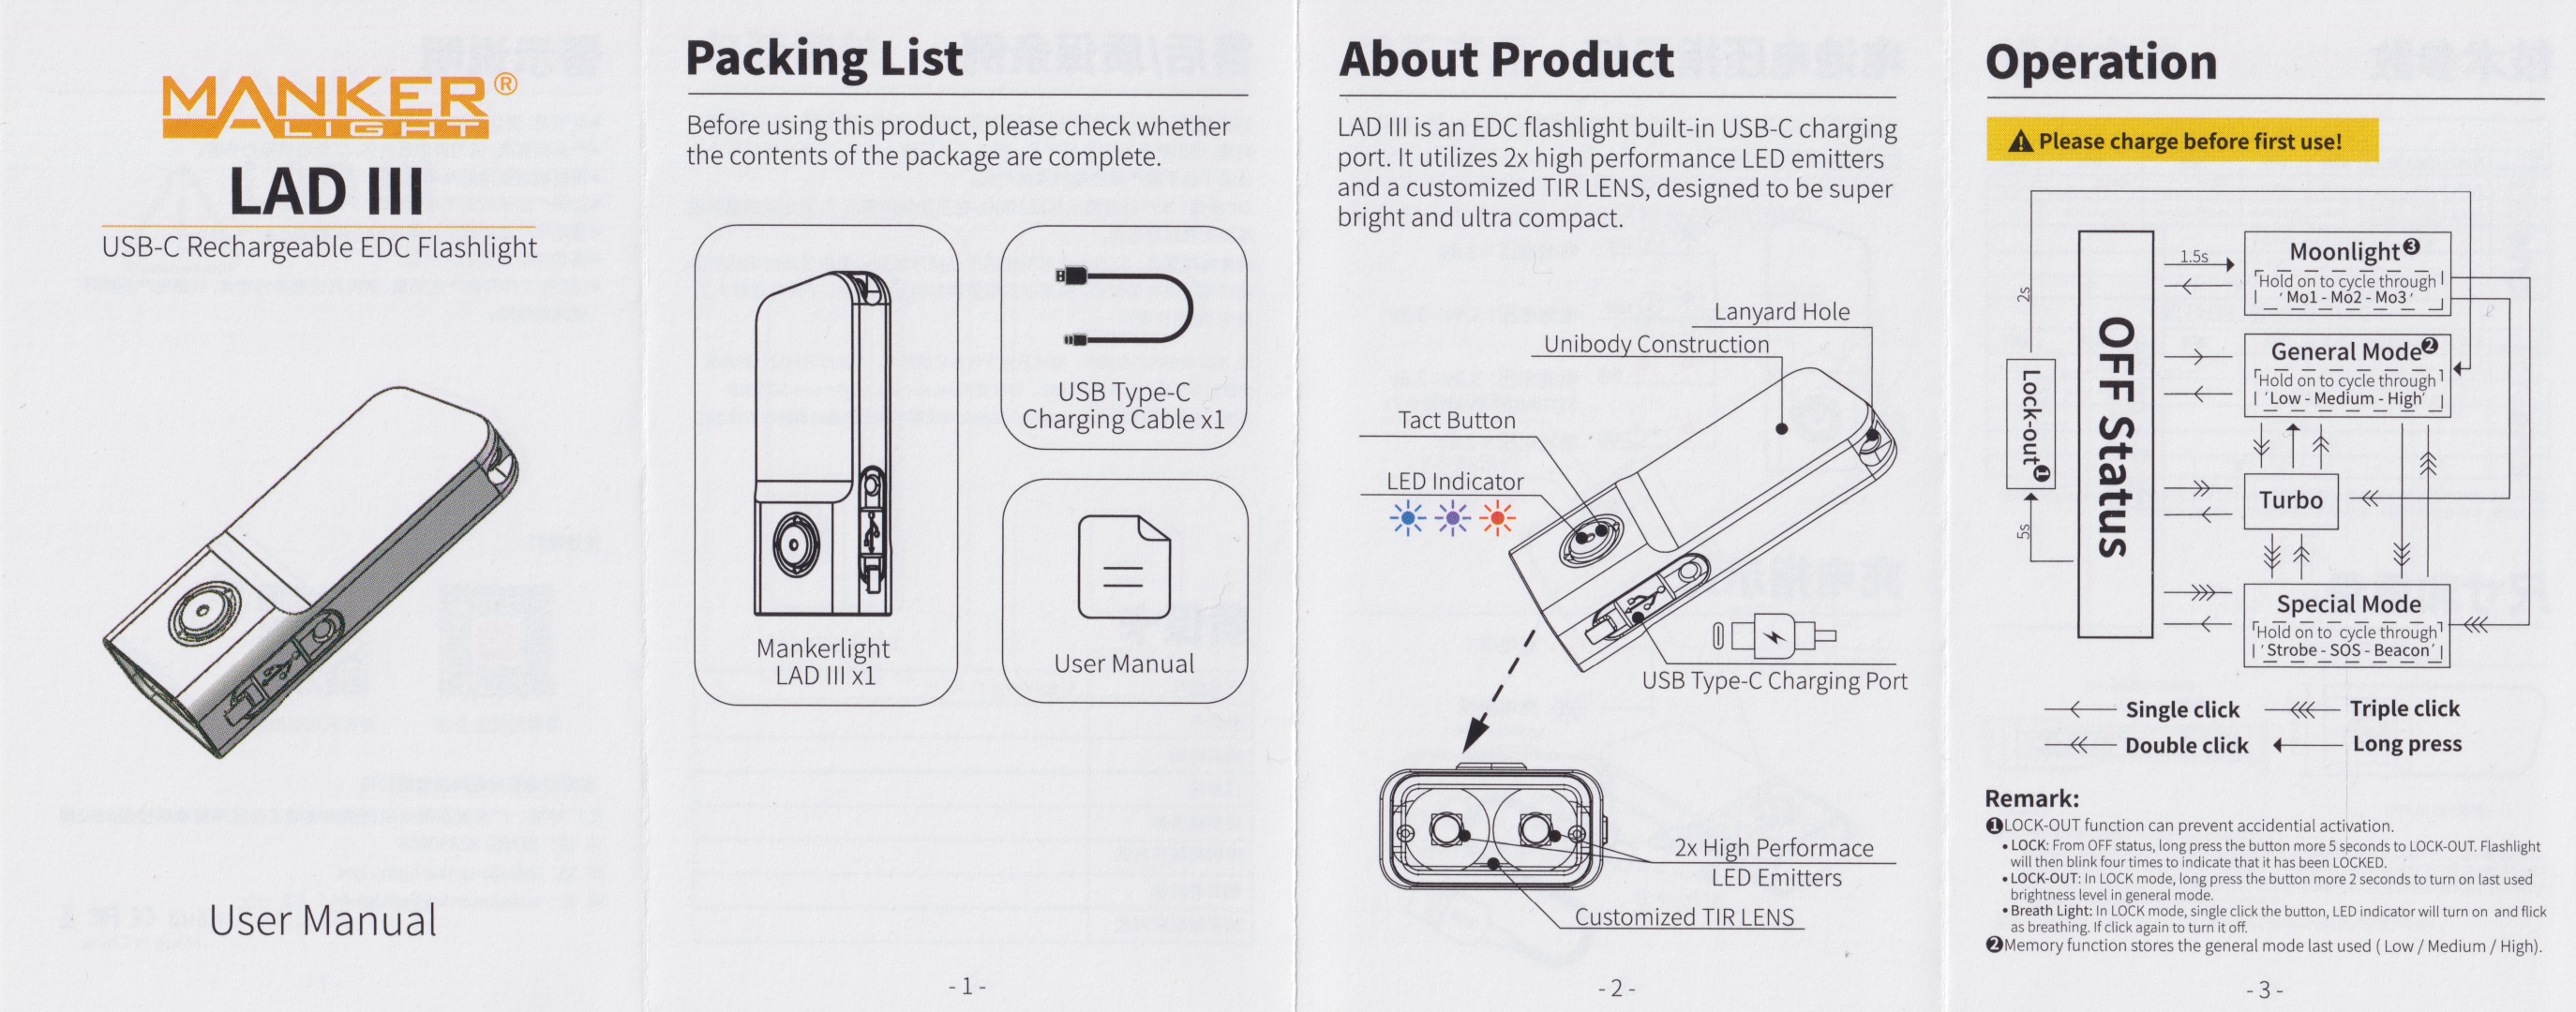
User Manual#
Torch in use#
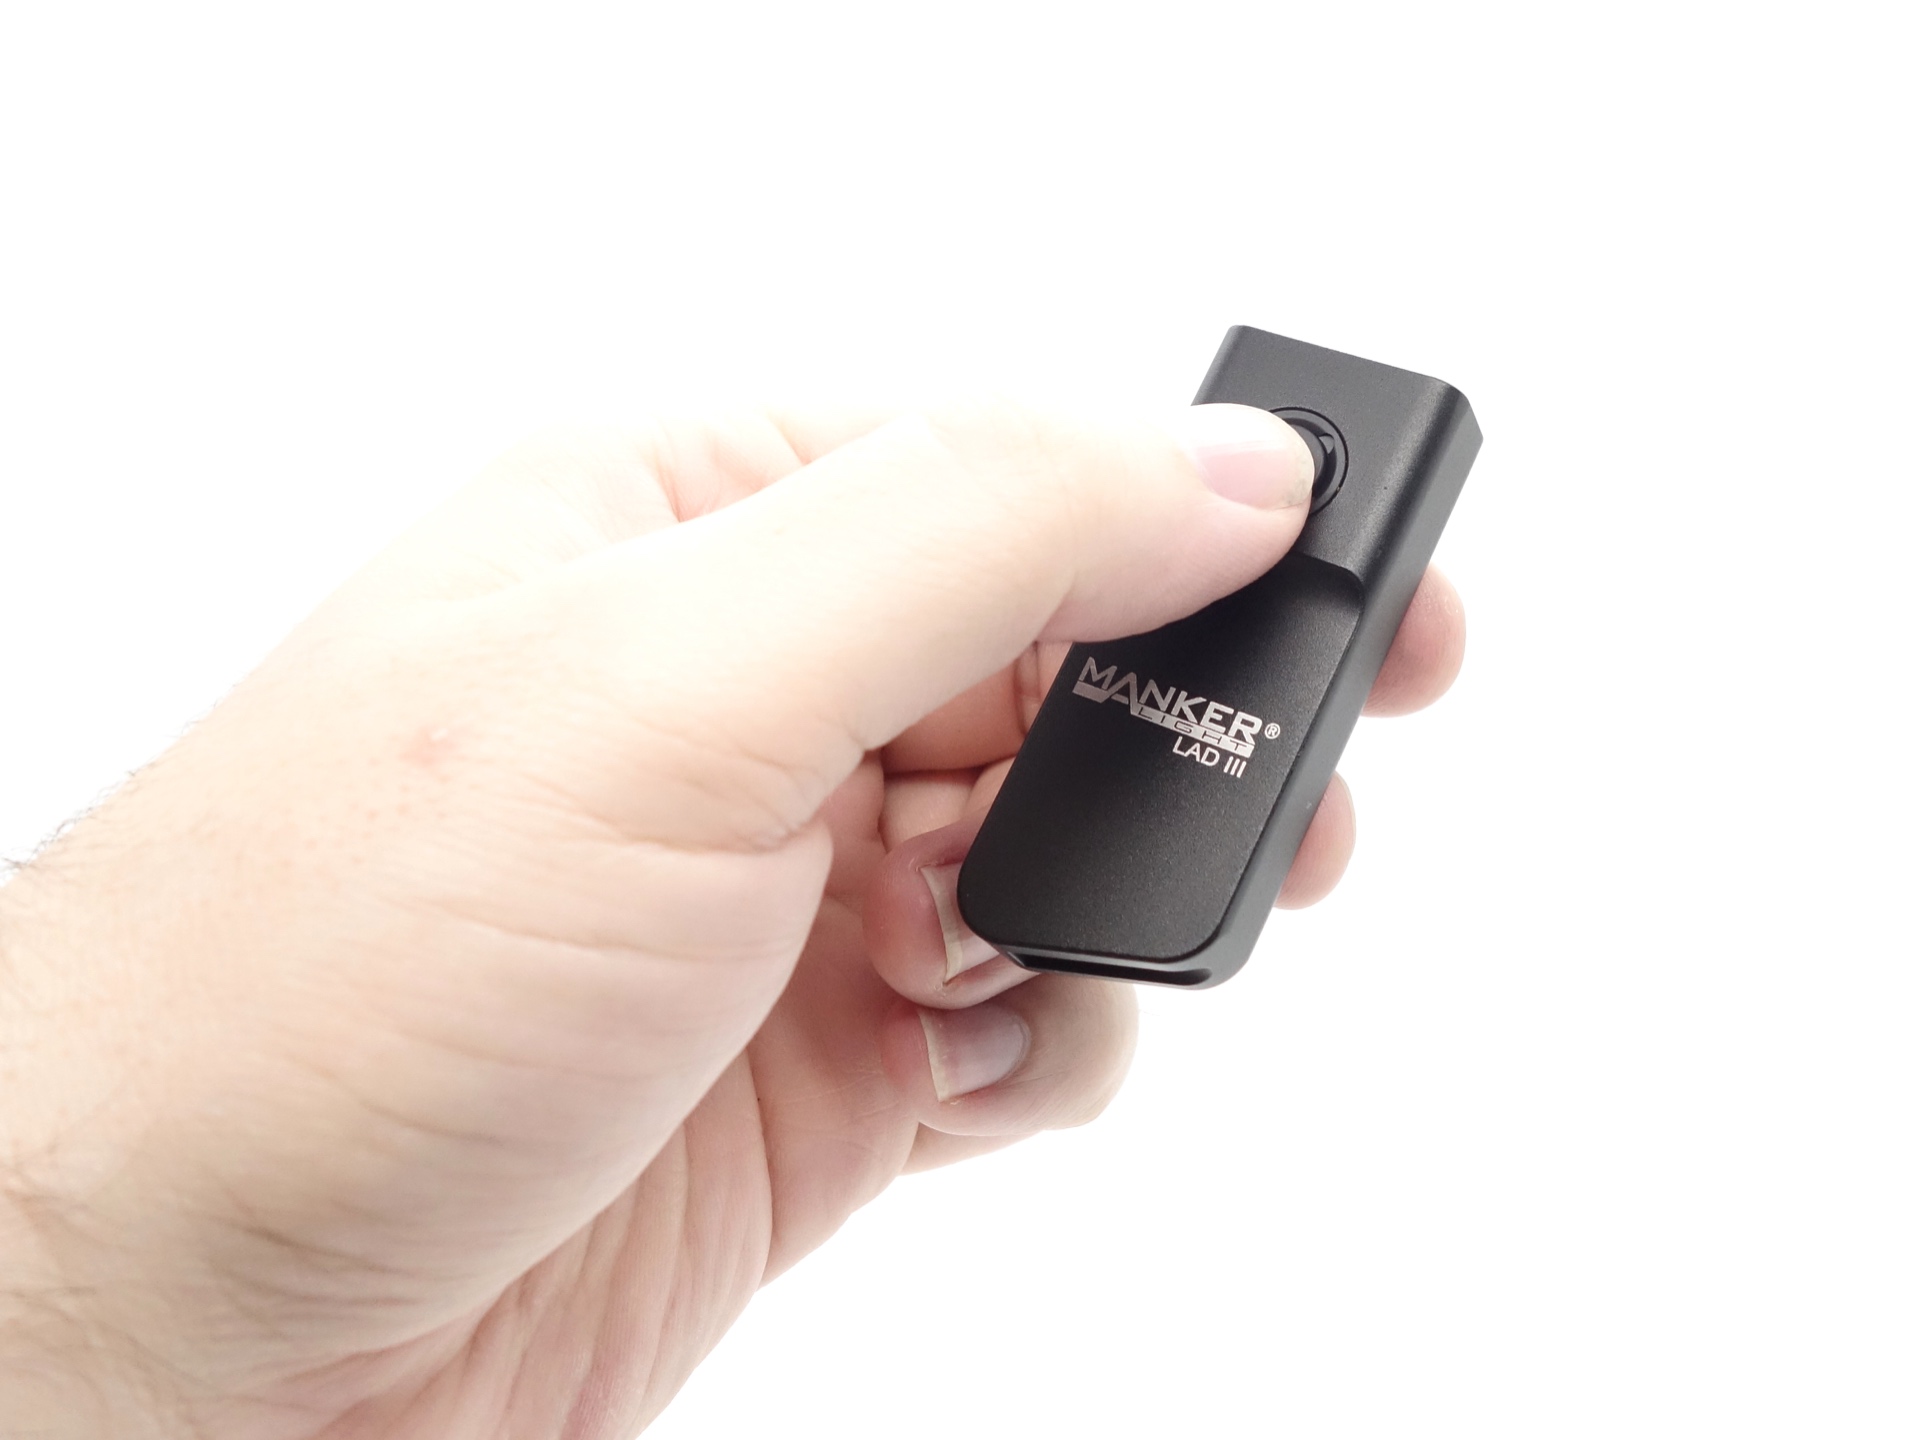
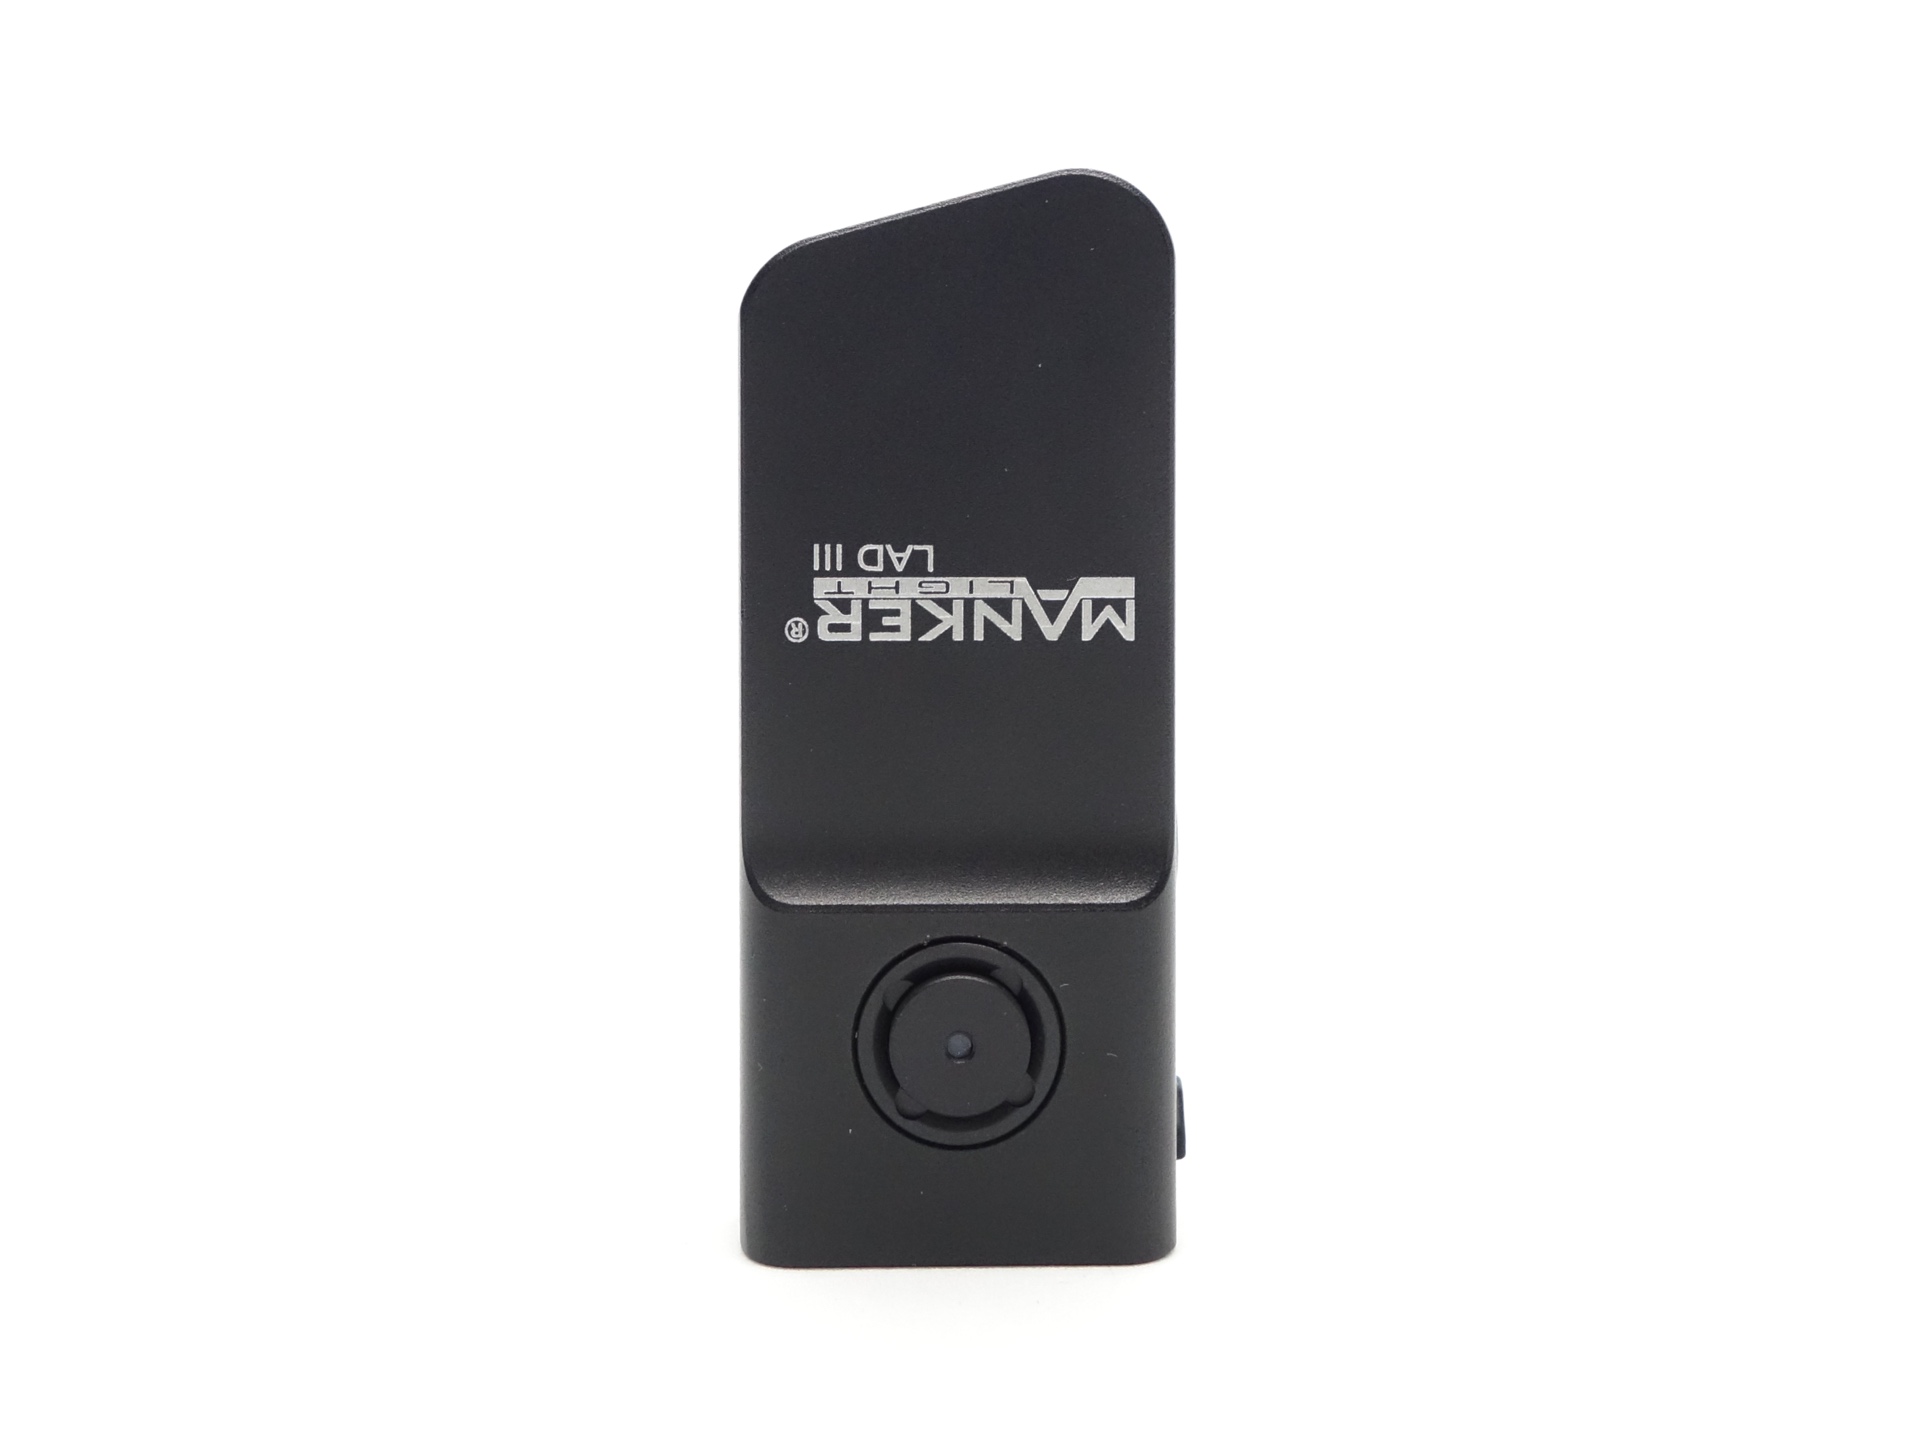
The Manker LAD III feels small and smooth.

The metal button with a battery status indicator gives a satisfying click.
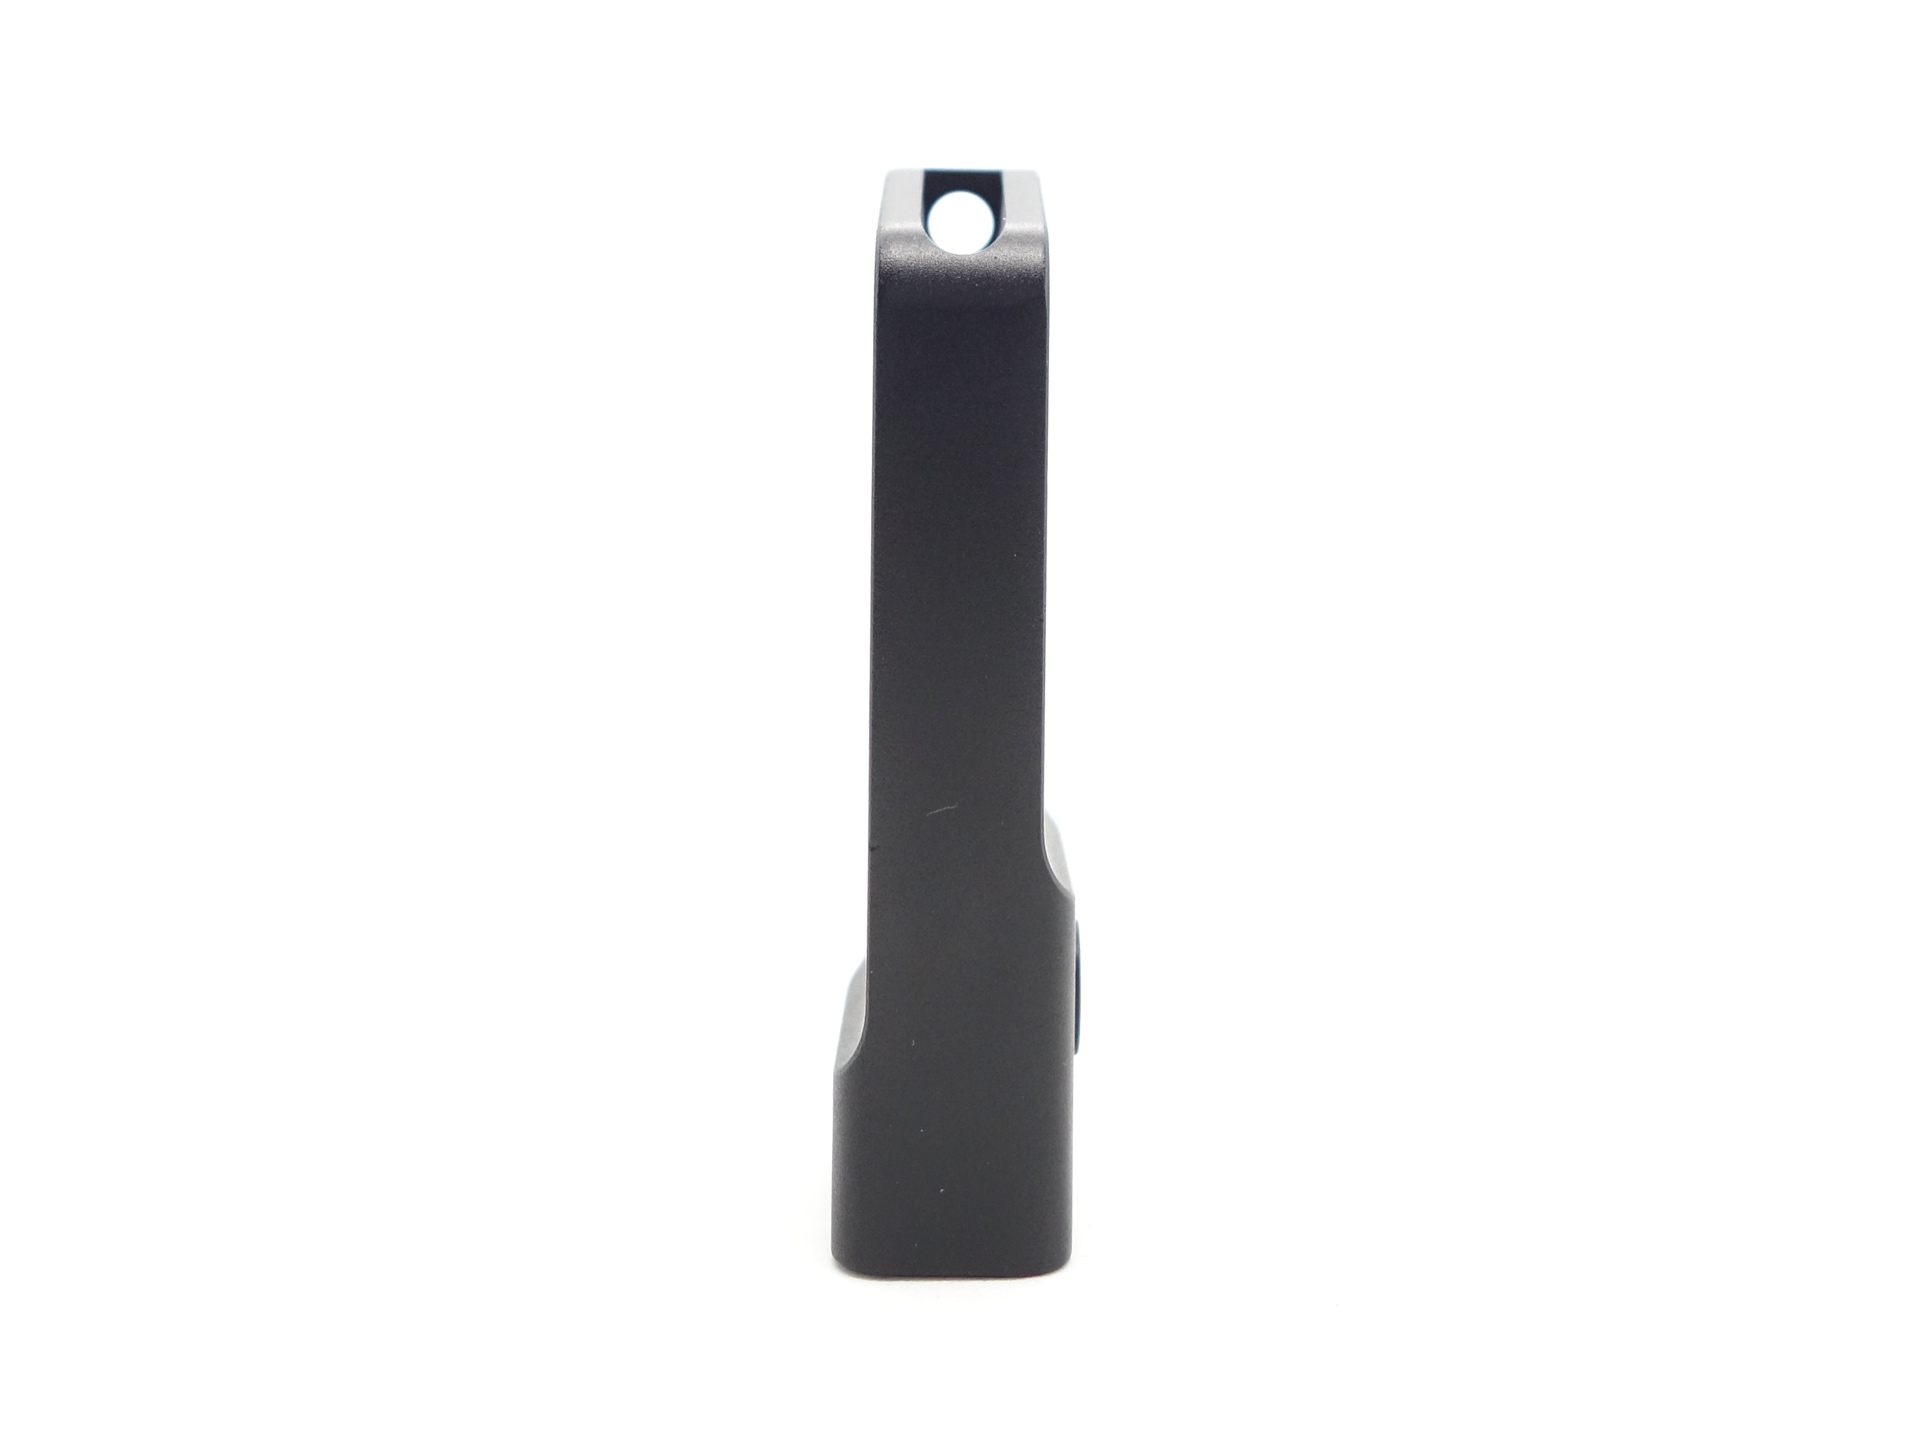
The torch can tailstand with a bit of practice if the lanyard hole is empty but it may topple over easily.
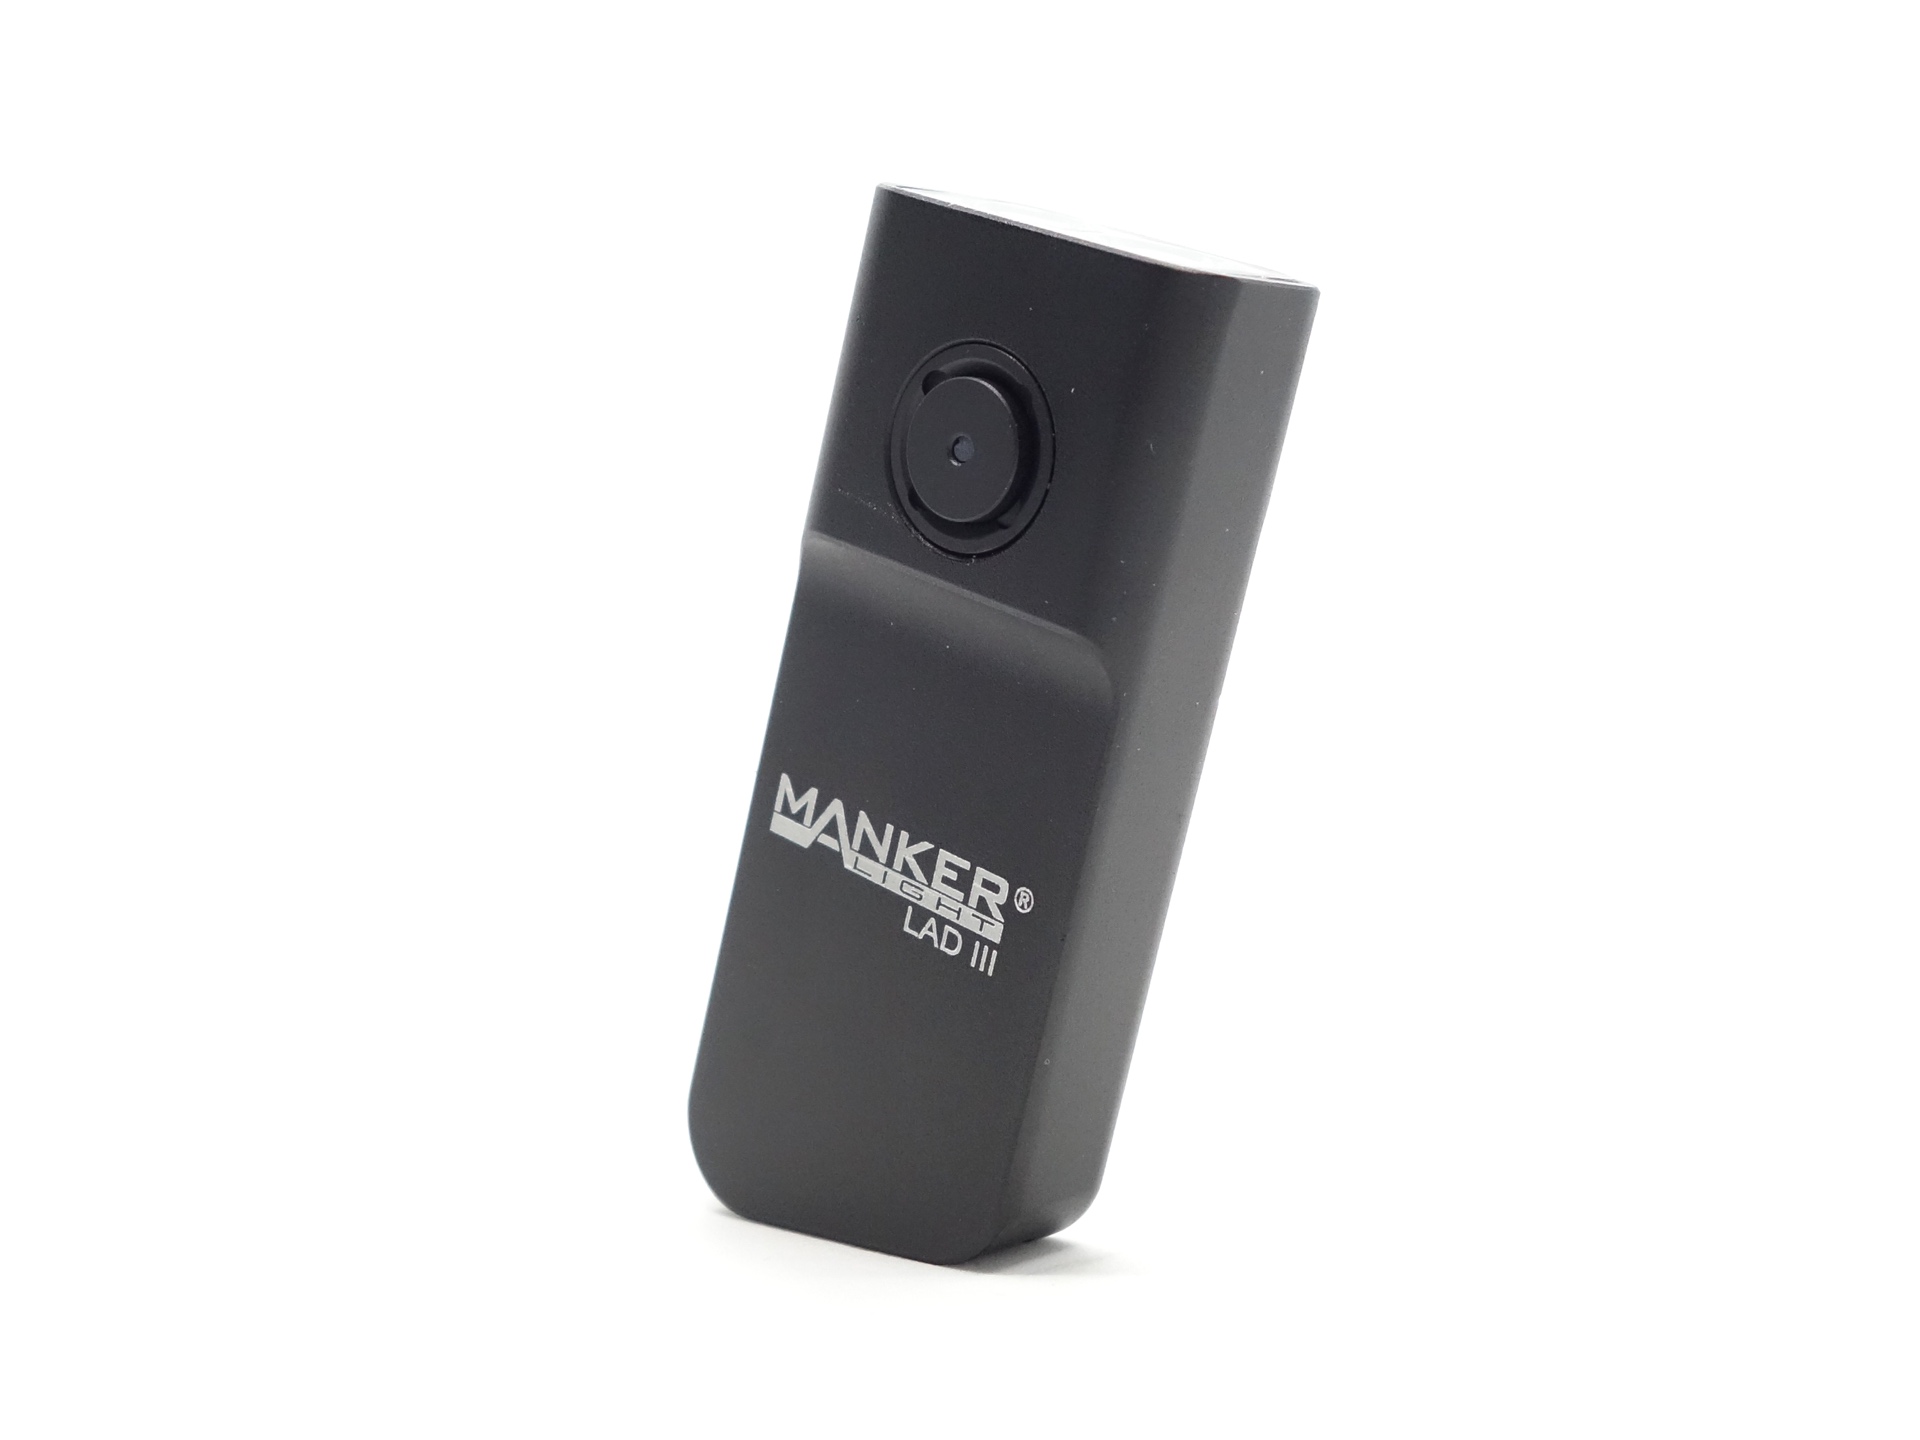
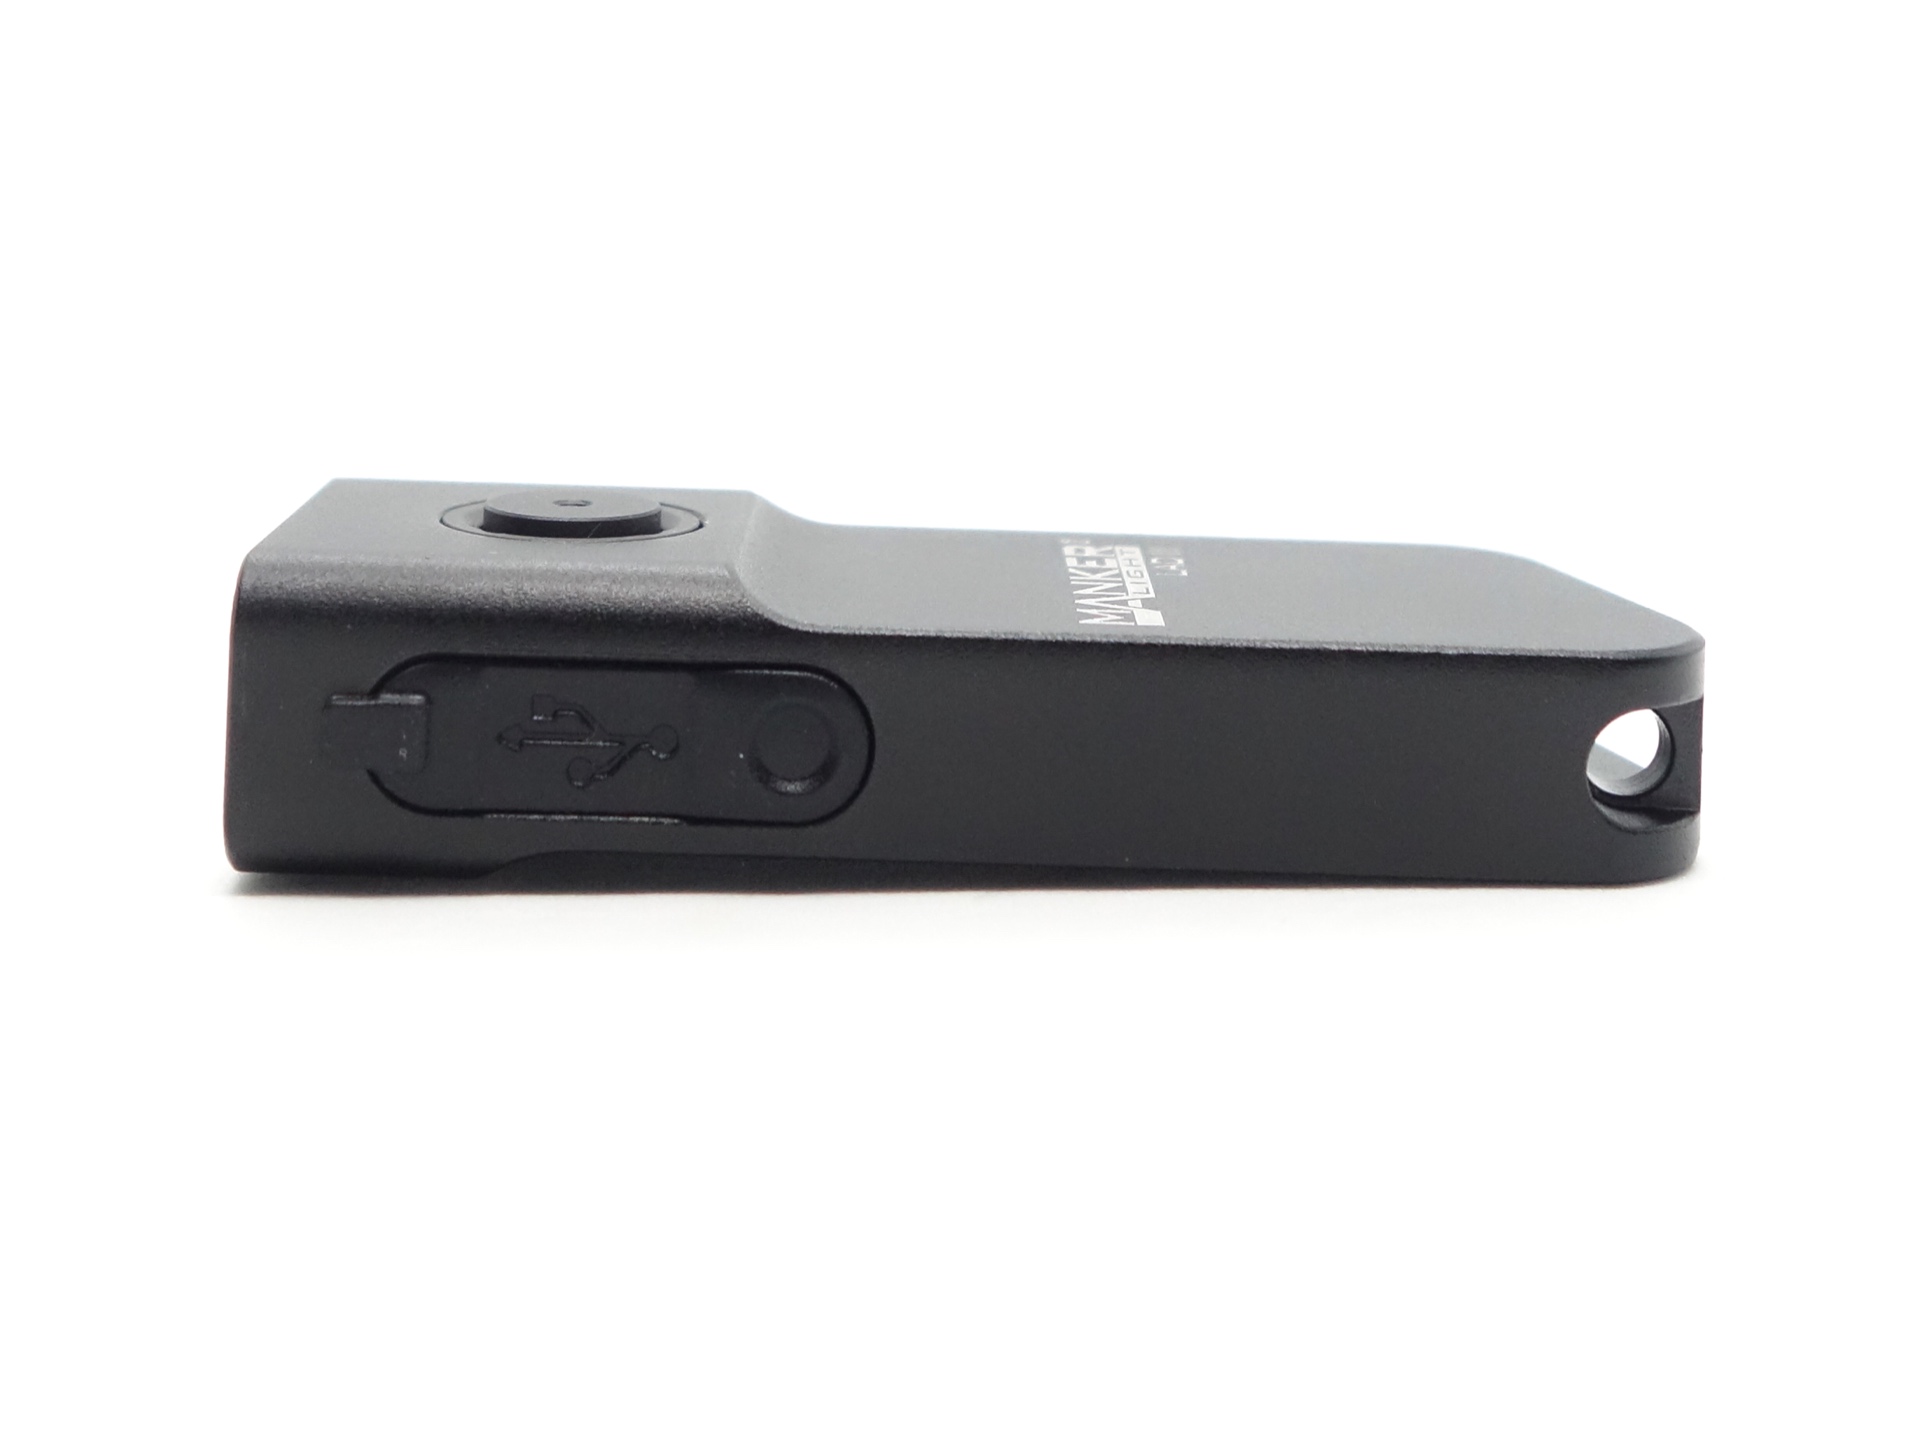
There is a hole at the tail to attach a lanyard, paracord or a keyring for EDC use.
Build quality#
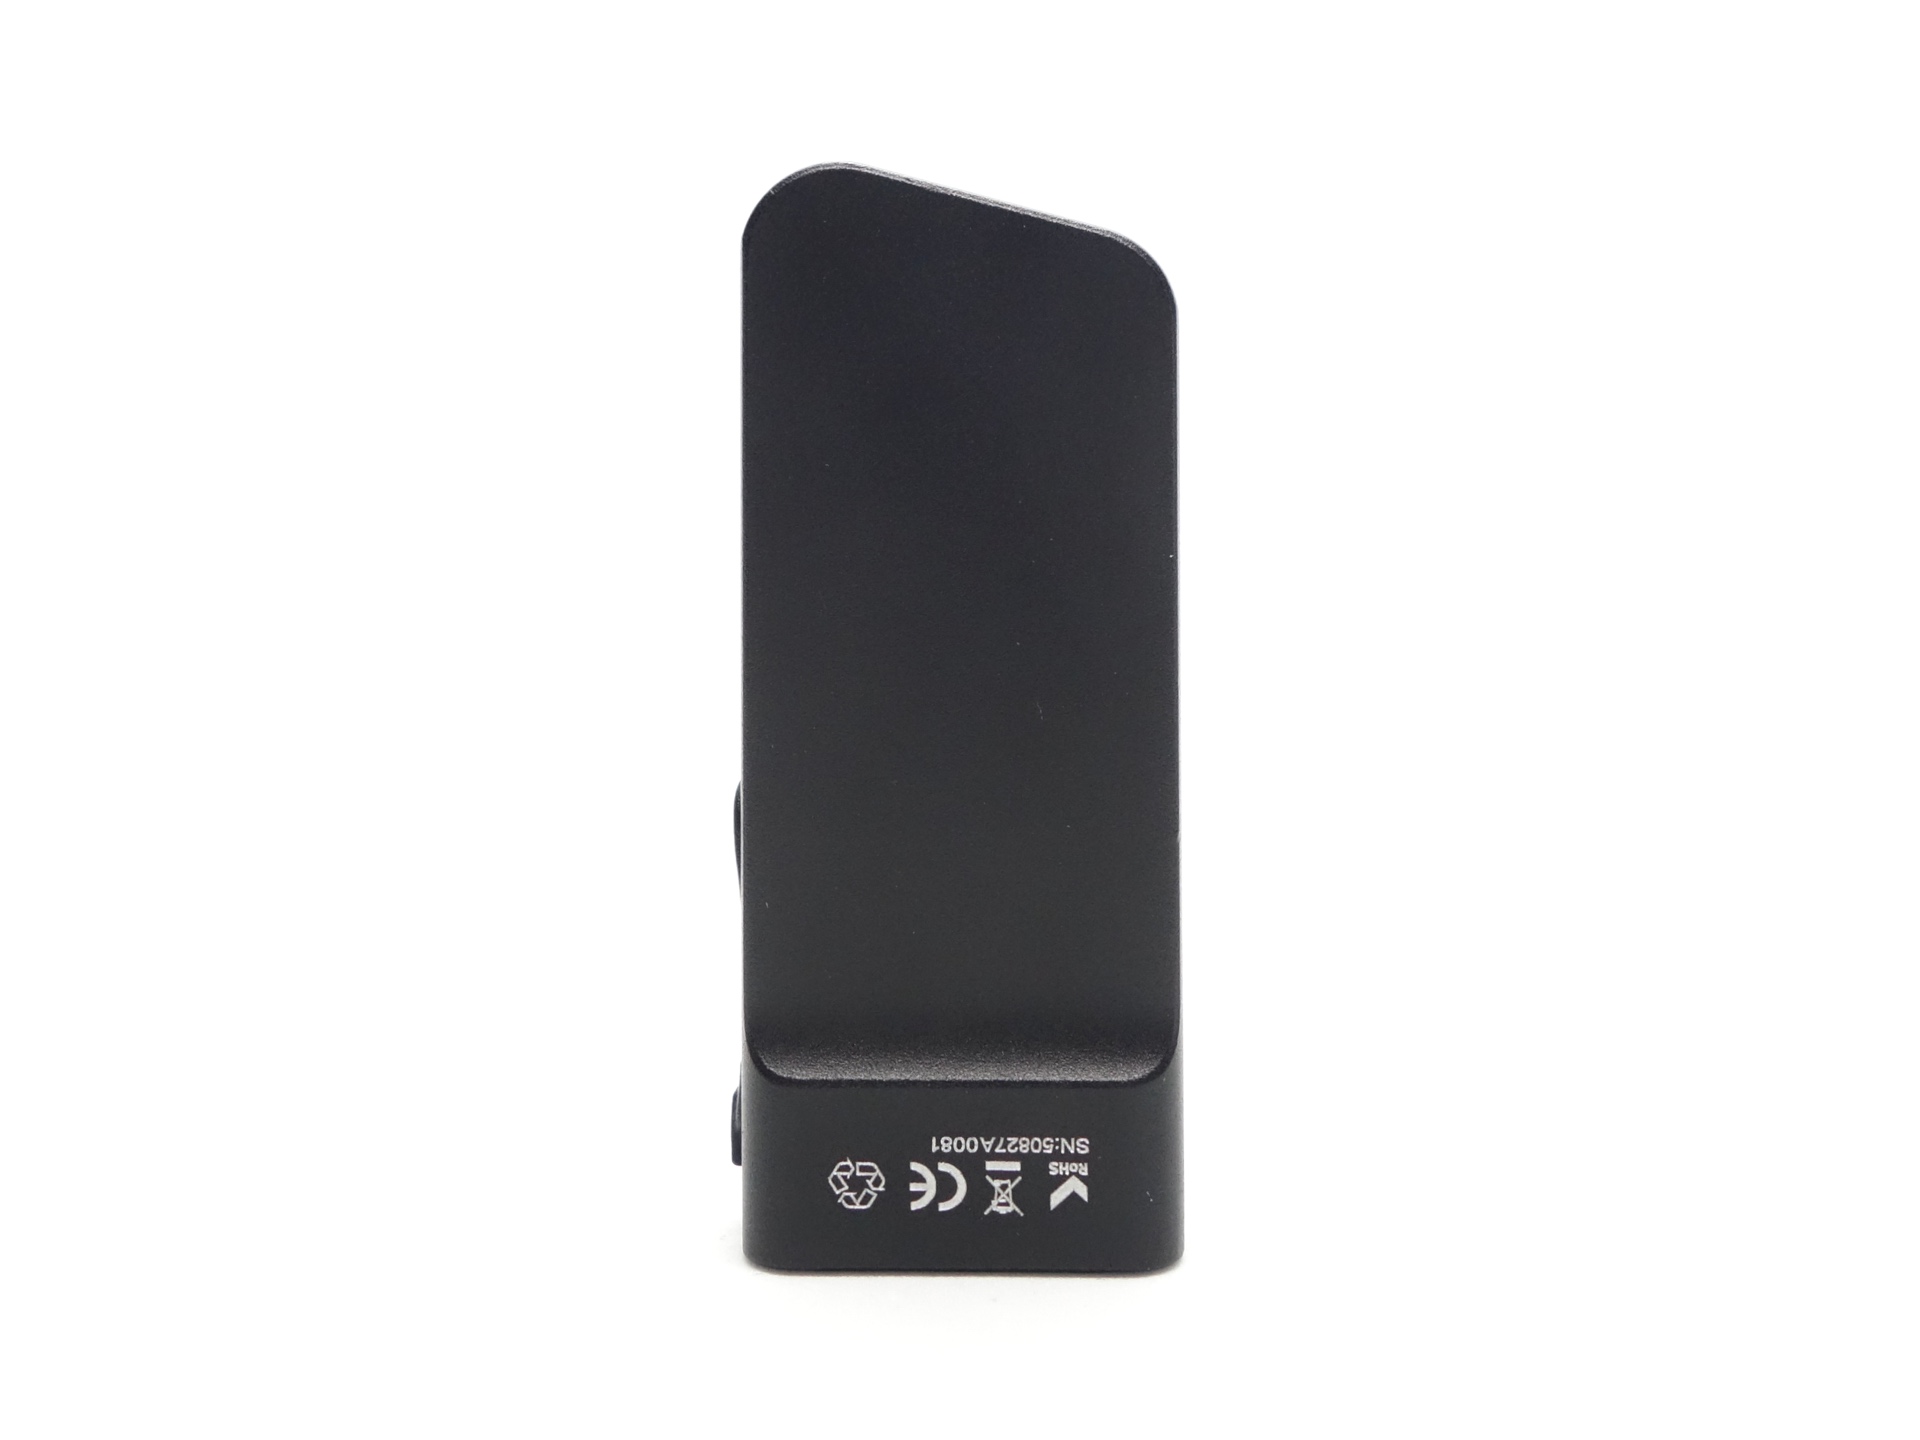
The Manker LAD III CW has a matte black anodised finish. It is also available in other colours.
It is much easier to headstand the torch.
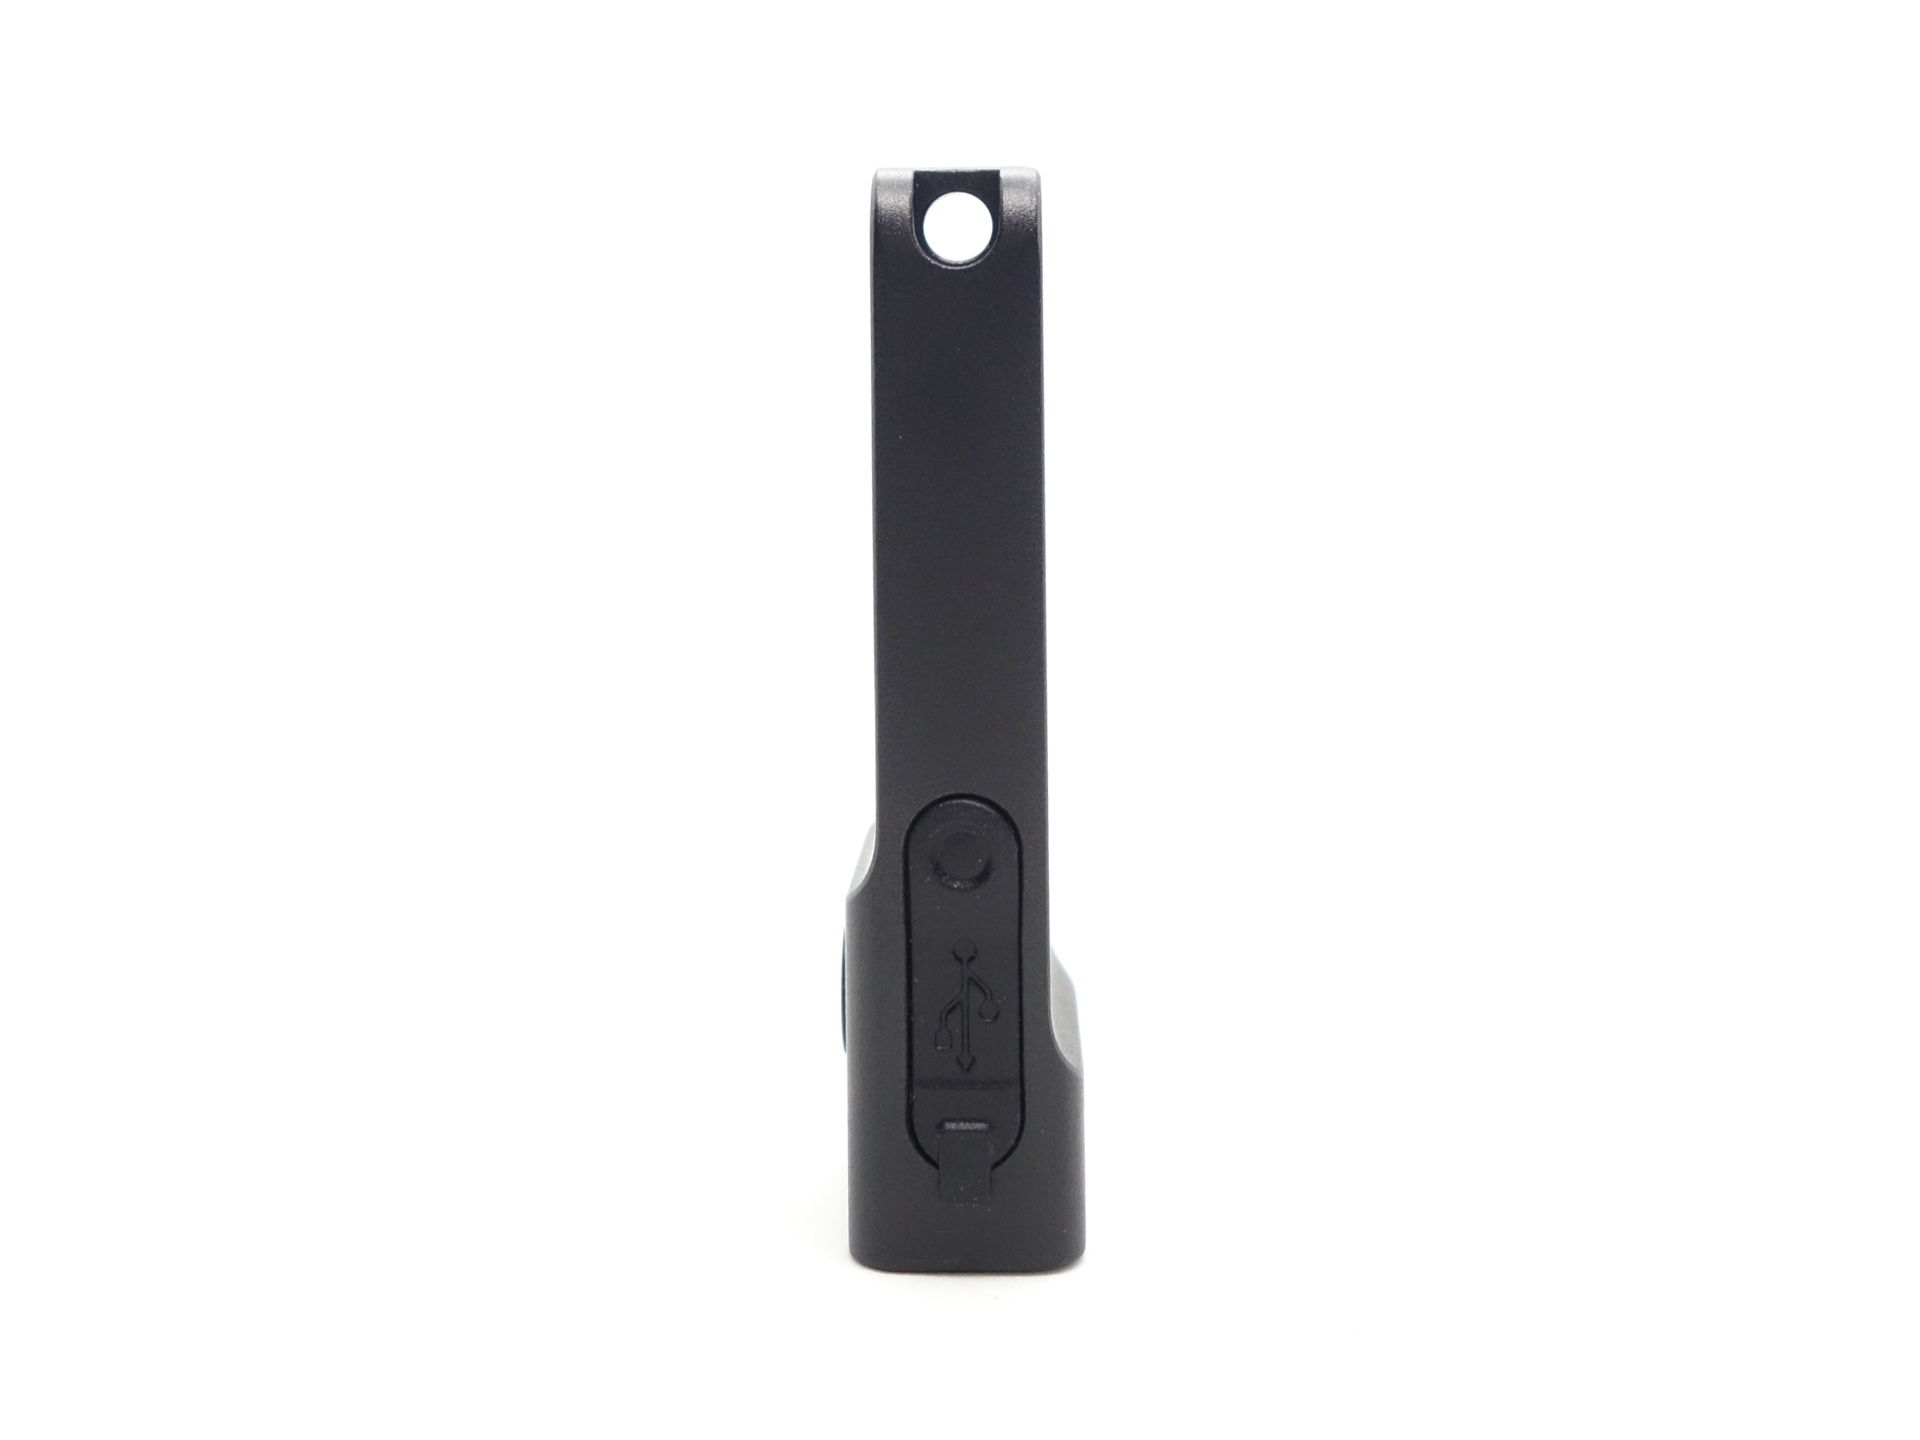
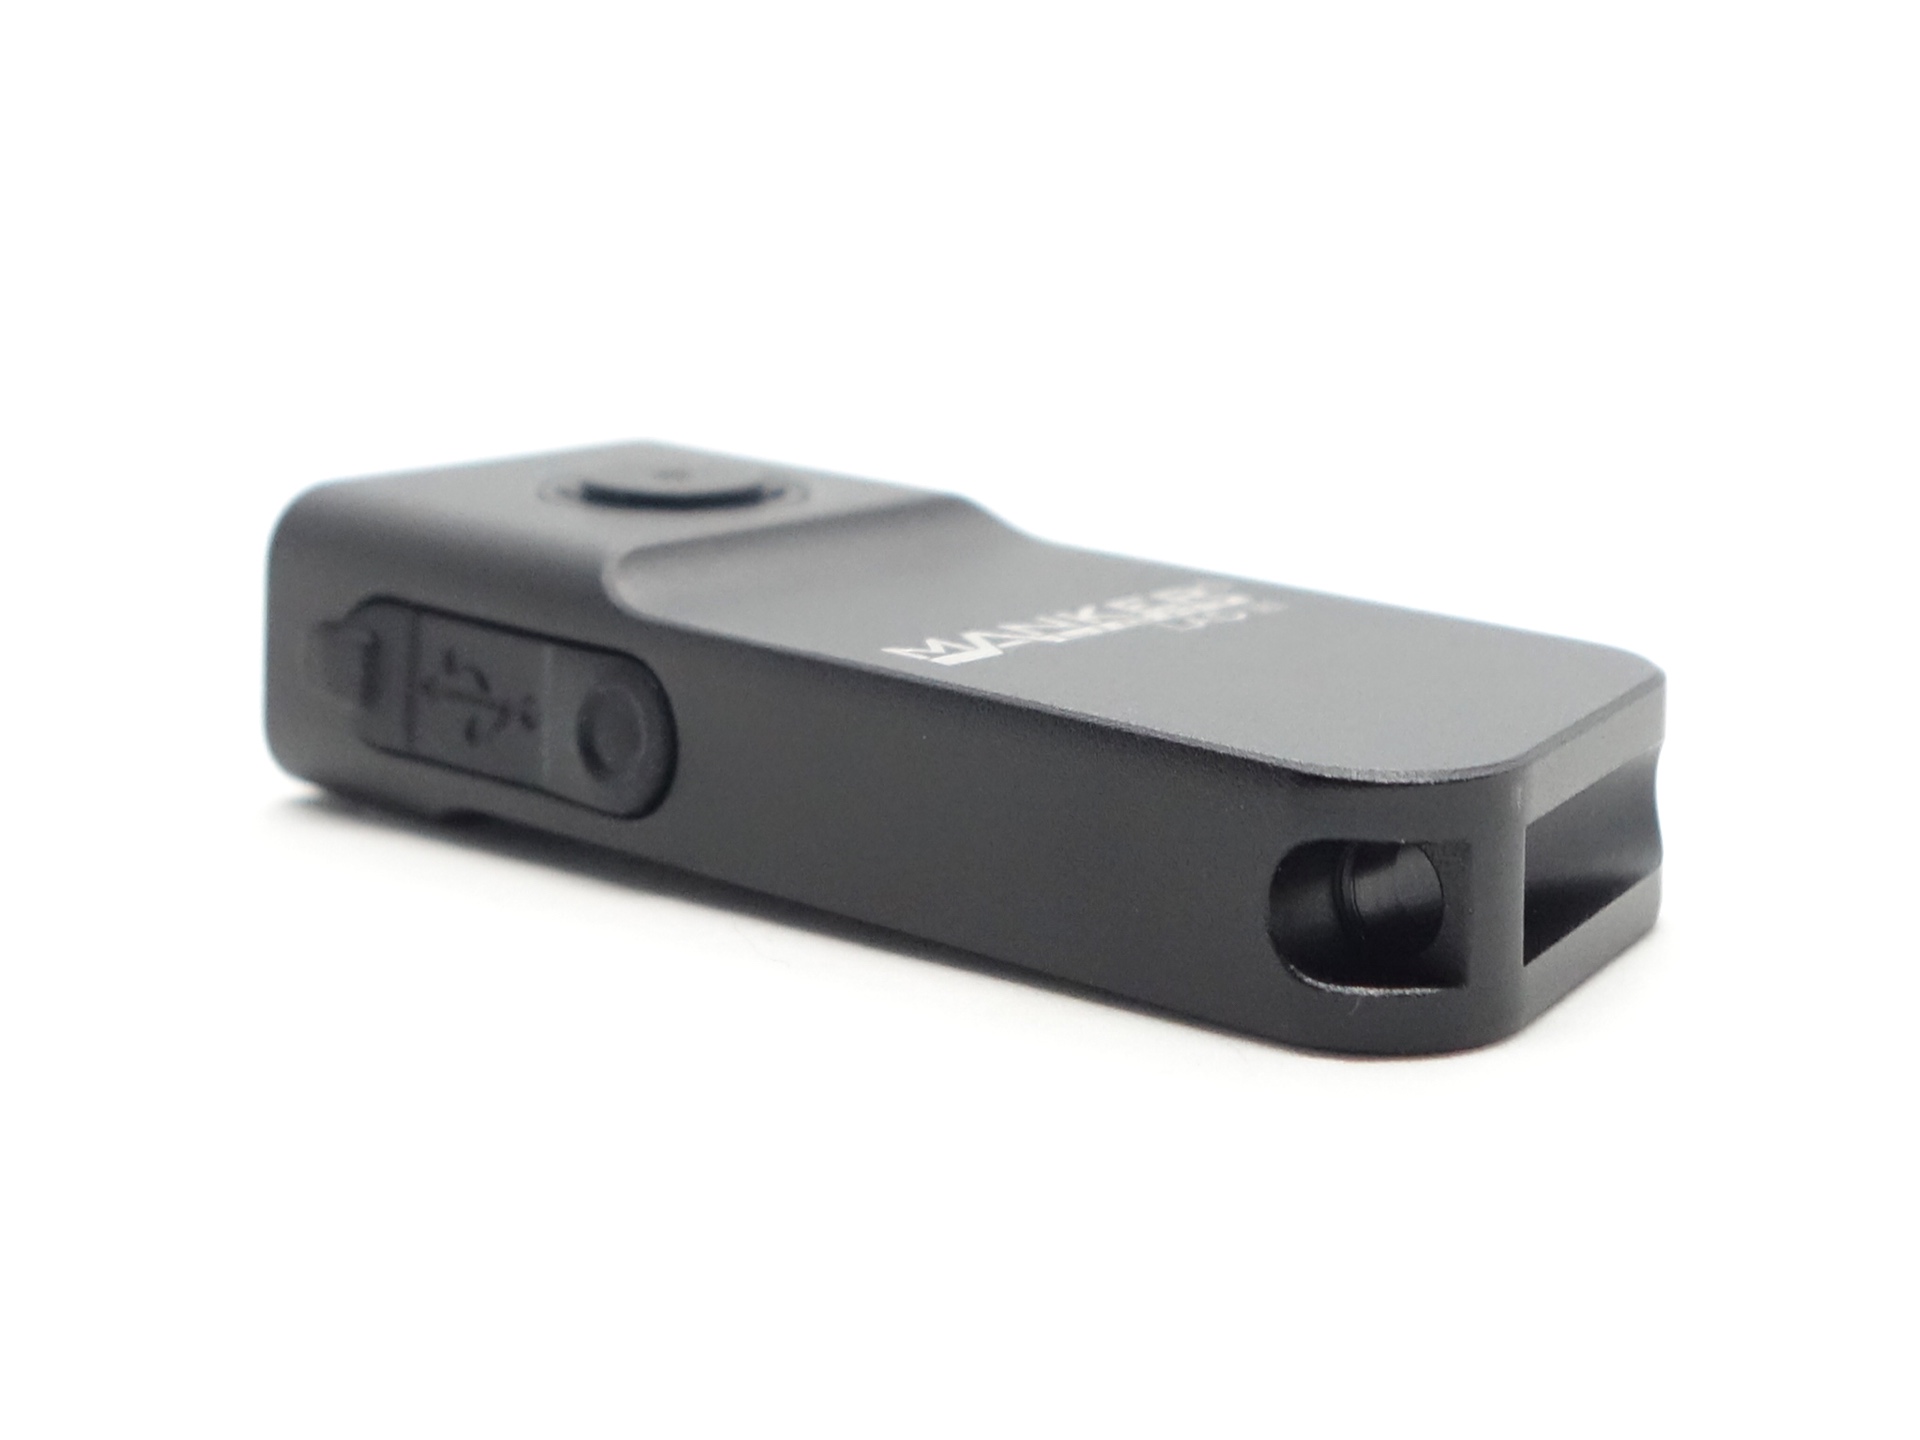
The USB port cover is very flexible and there is plenty of space to fit most USB-C plugs.

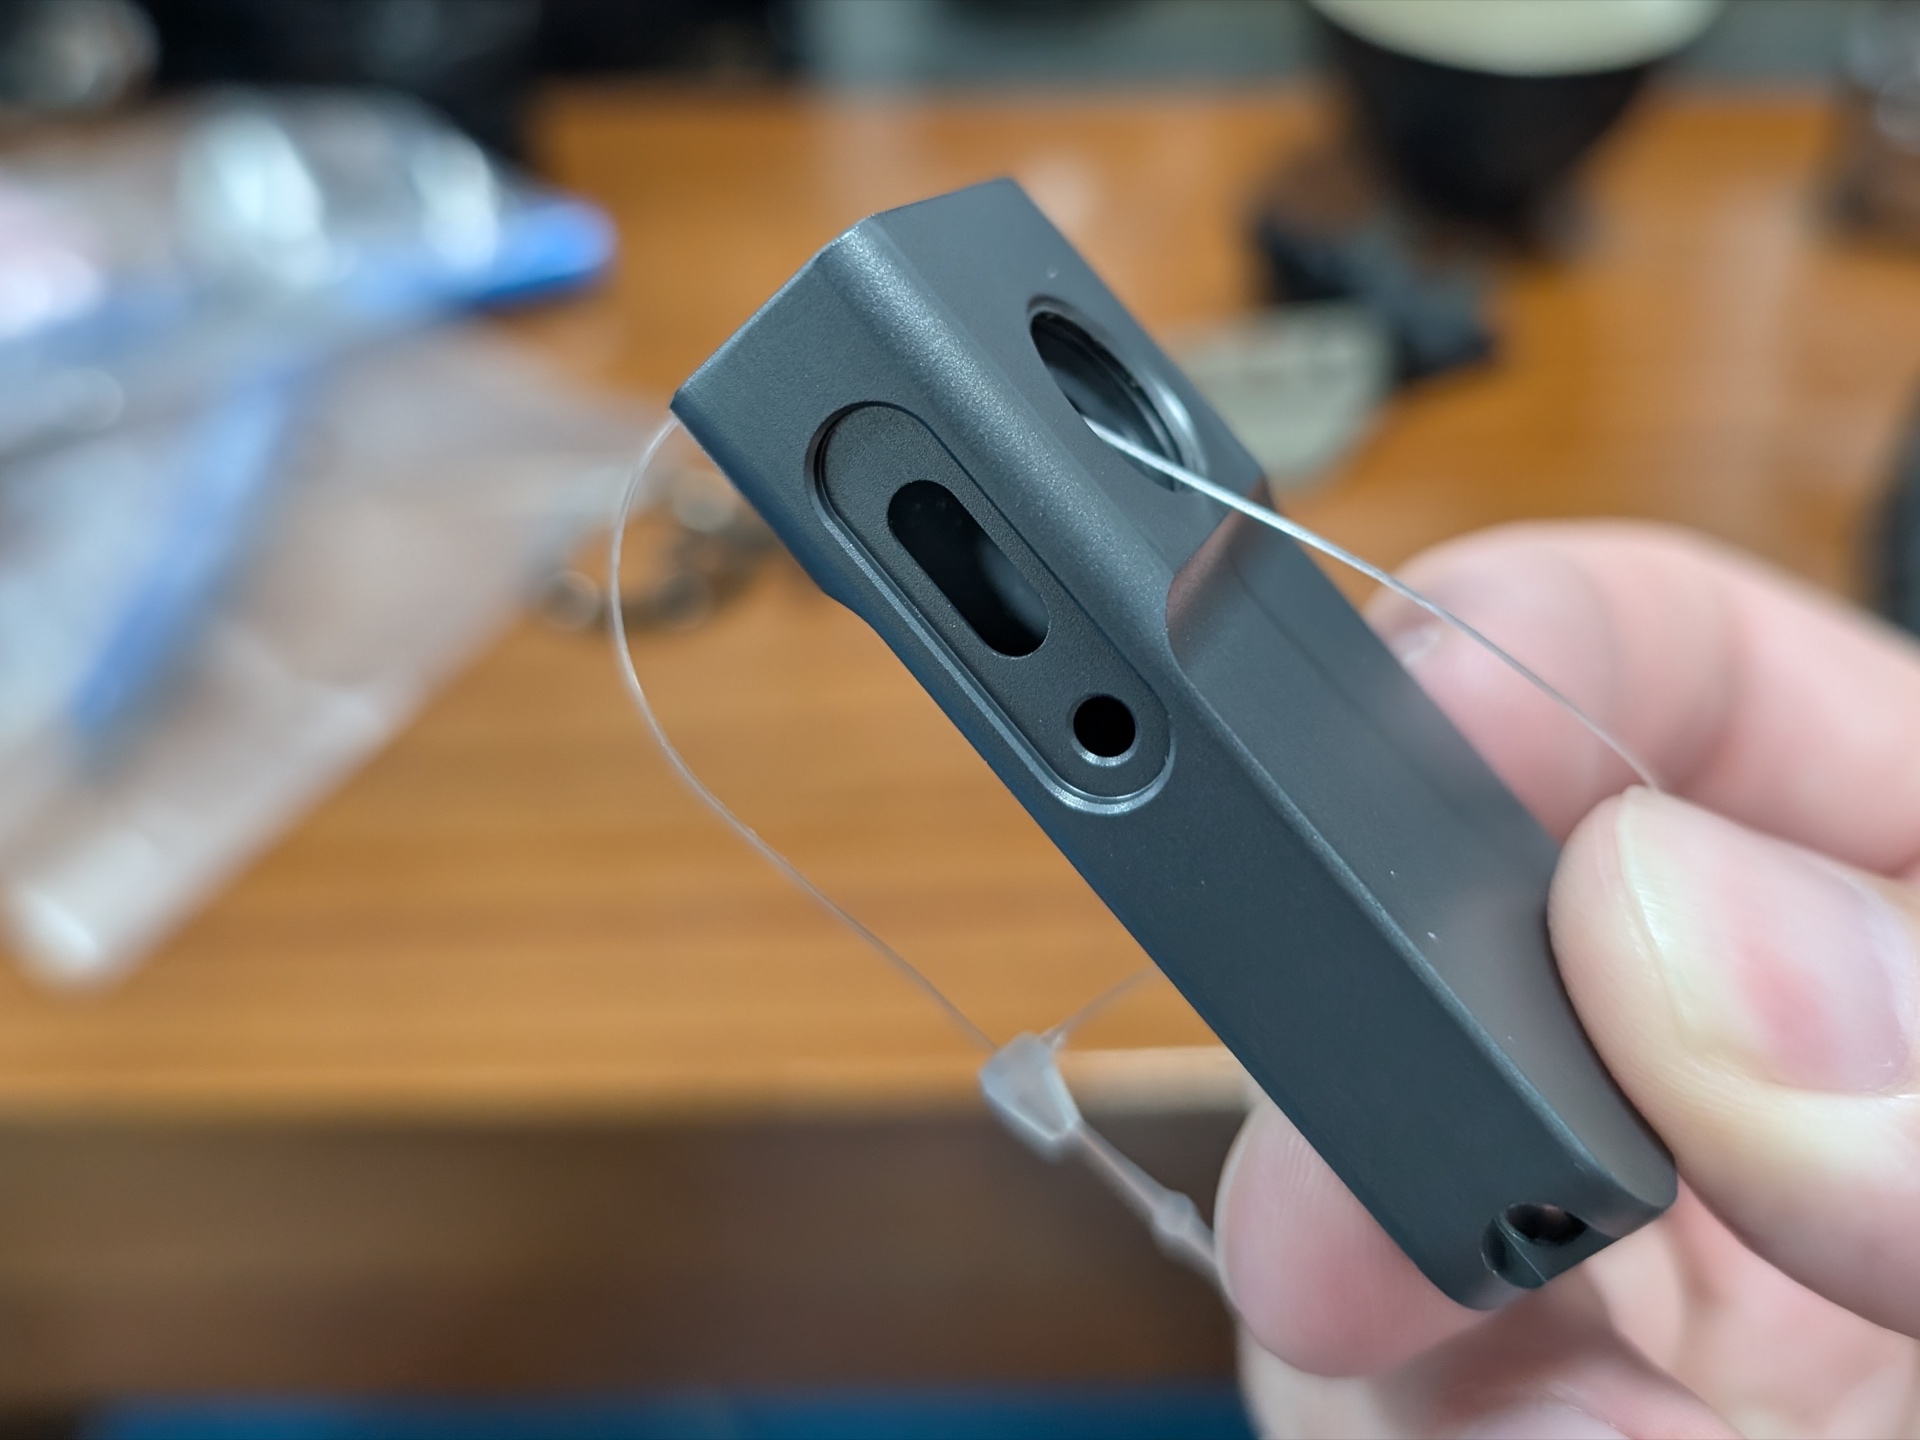
Teardown#
I took some photos of the Manker LAD III components while visiting Manker.
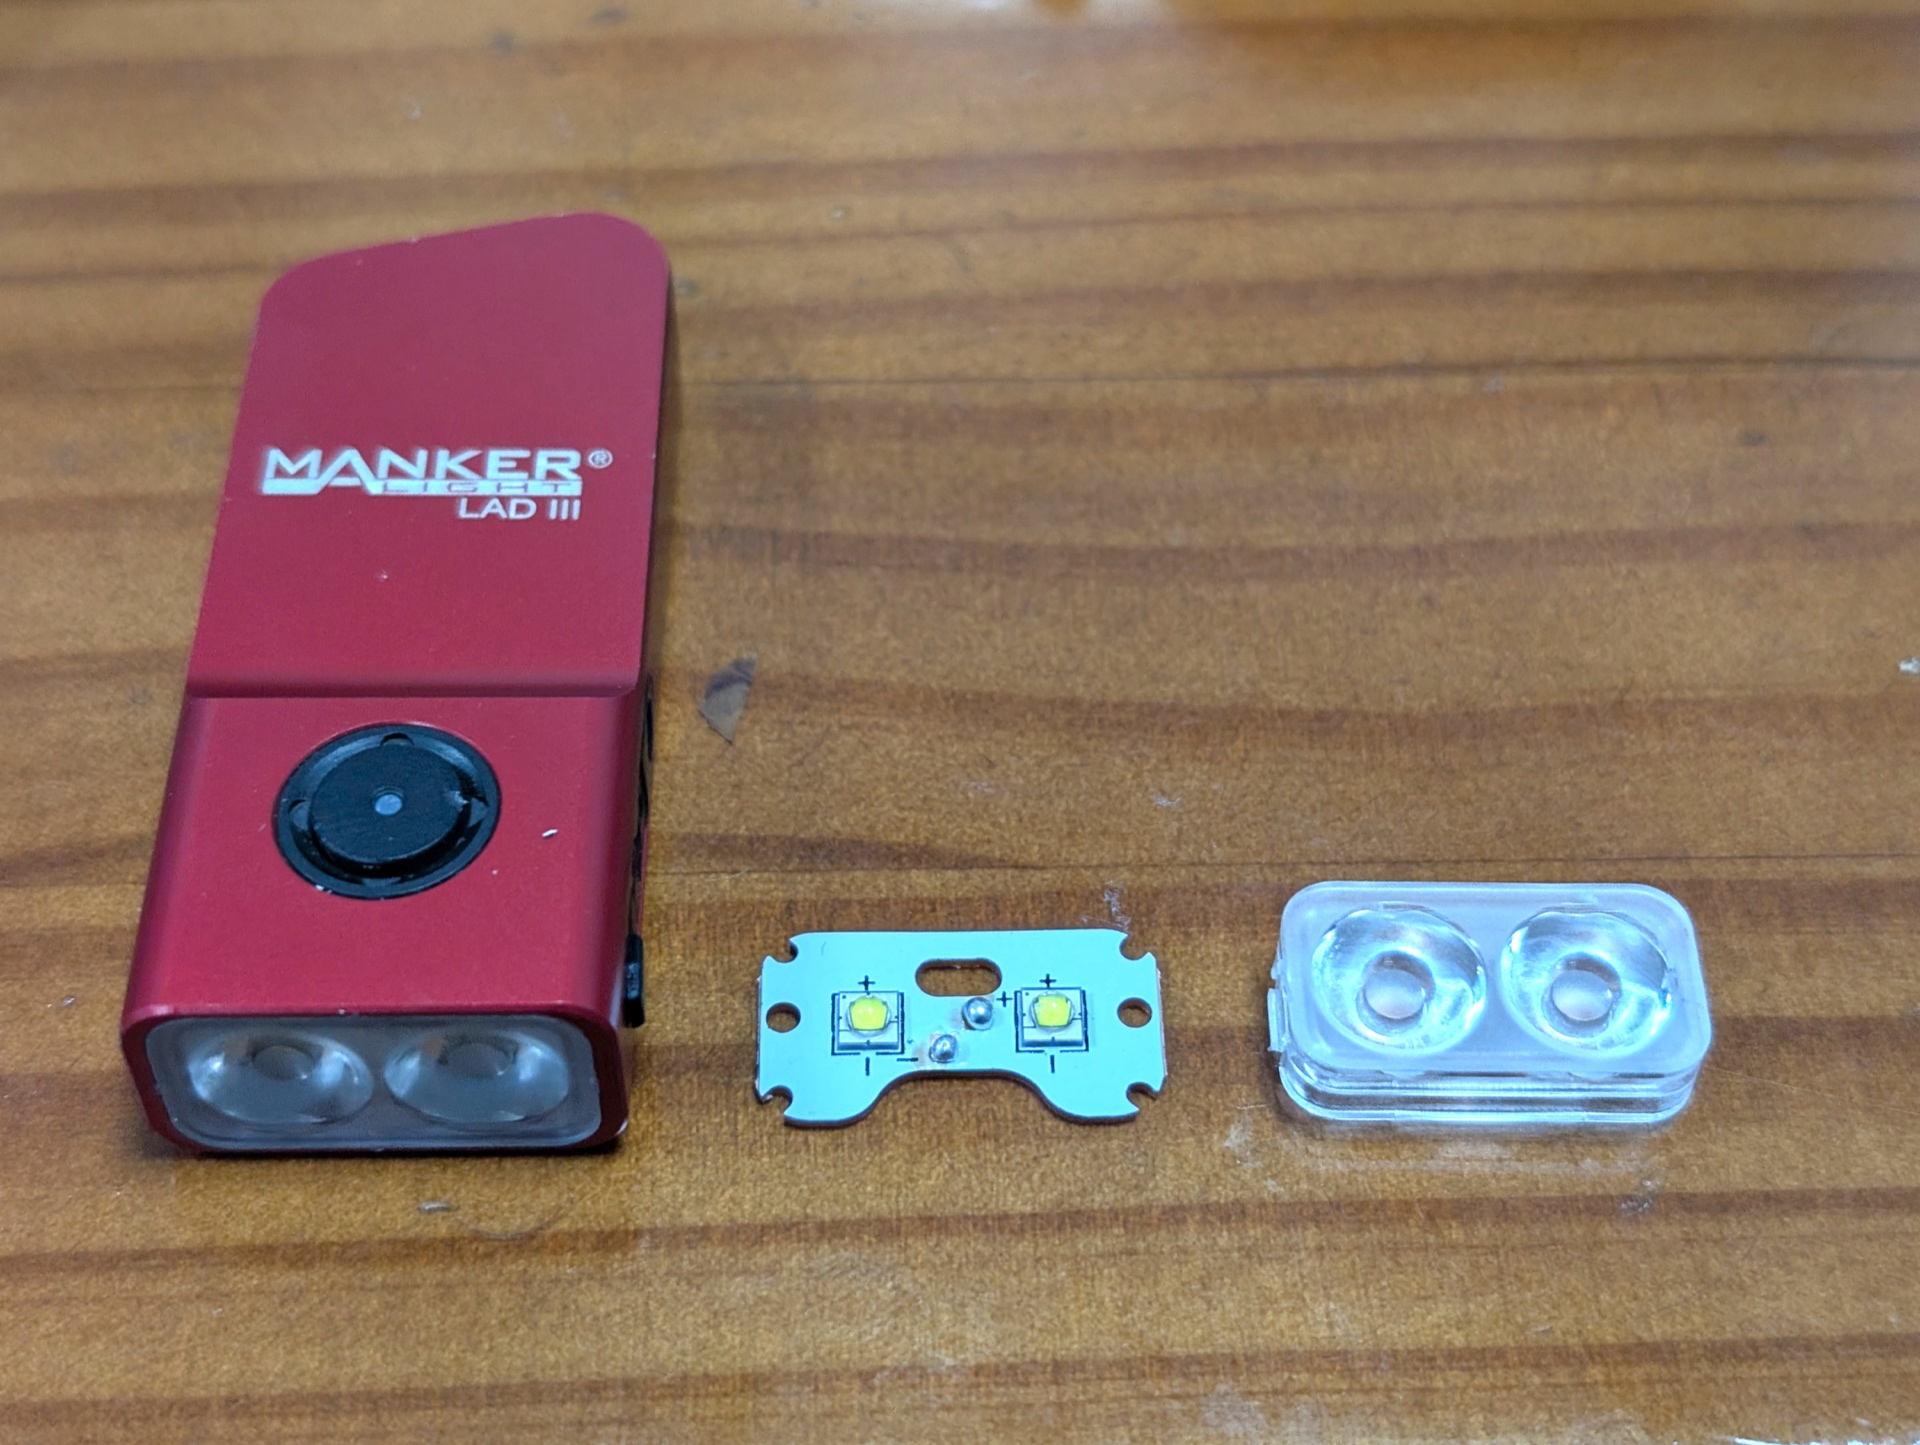
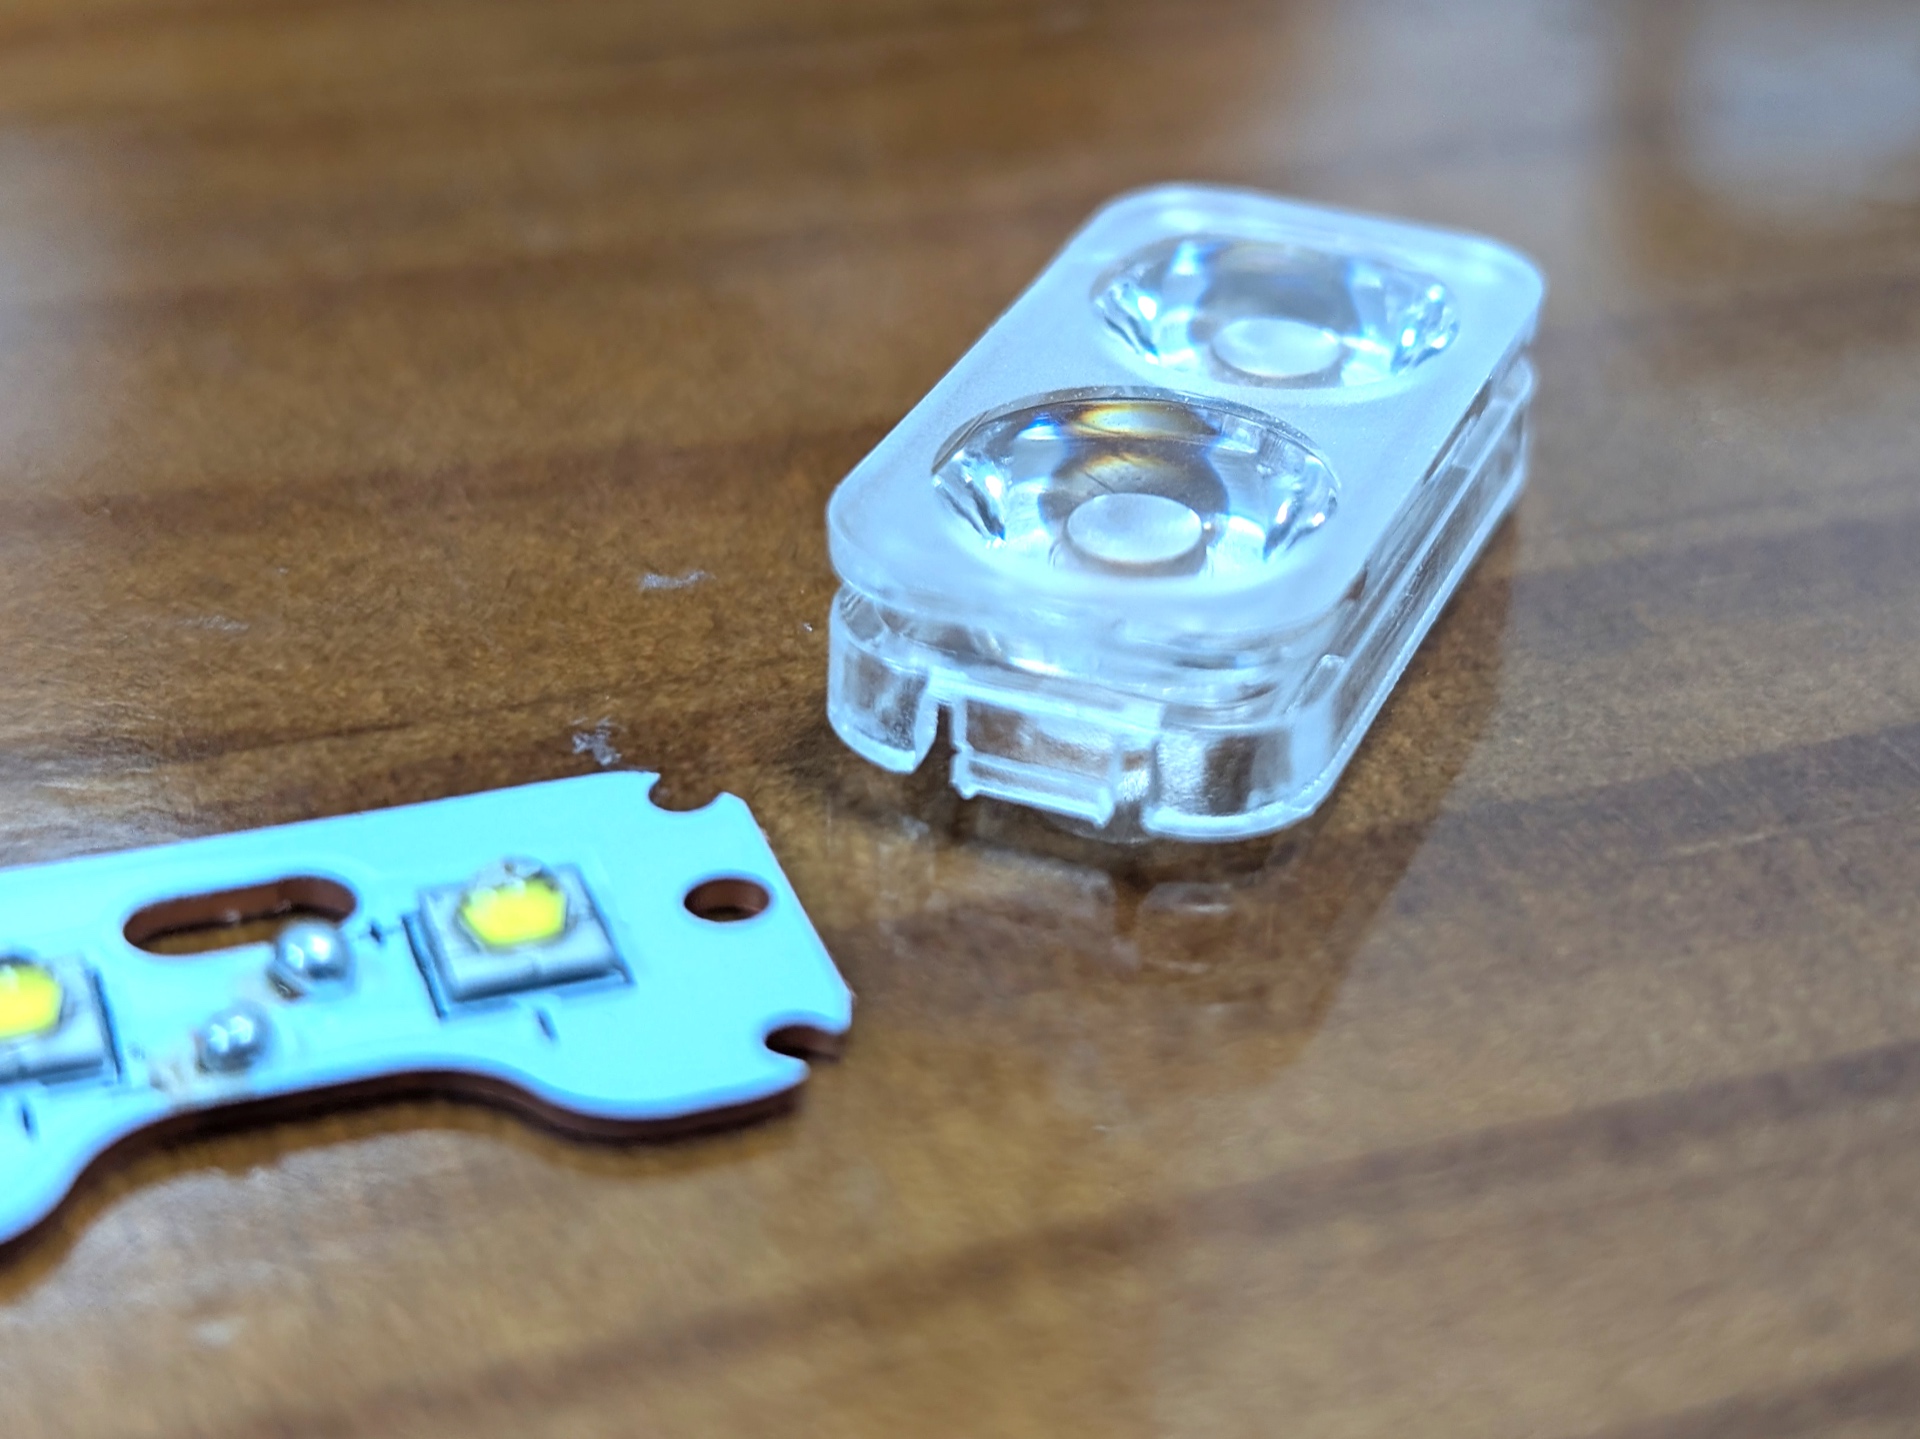
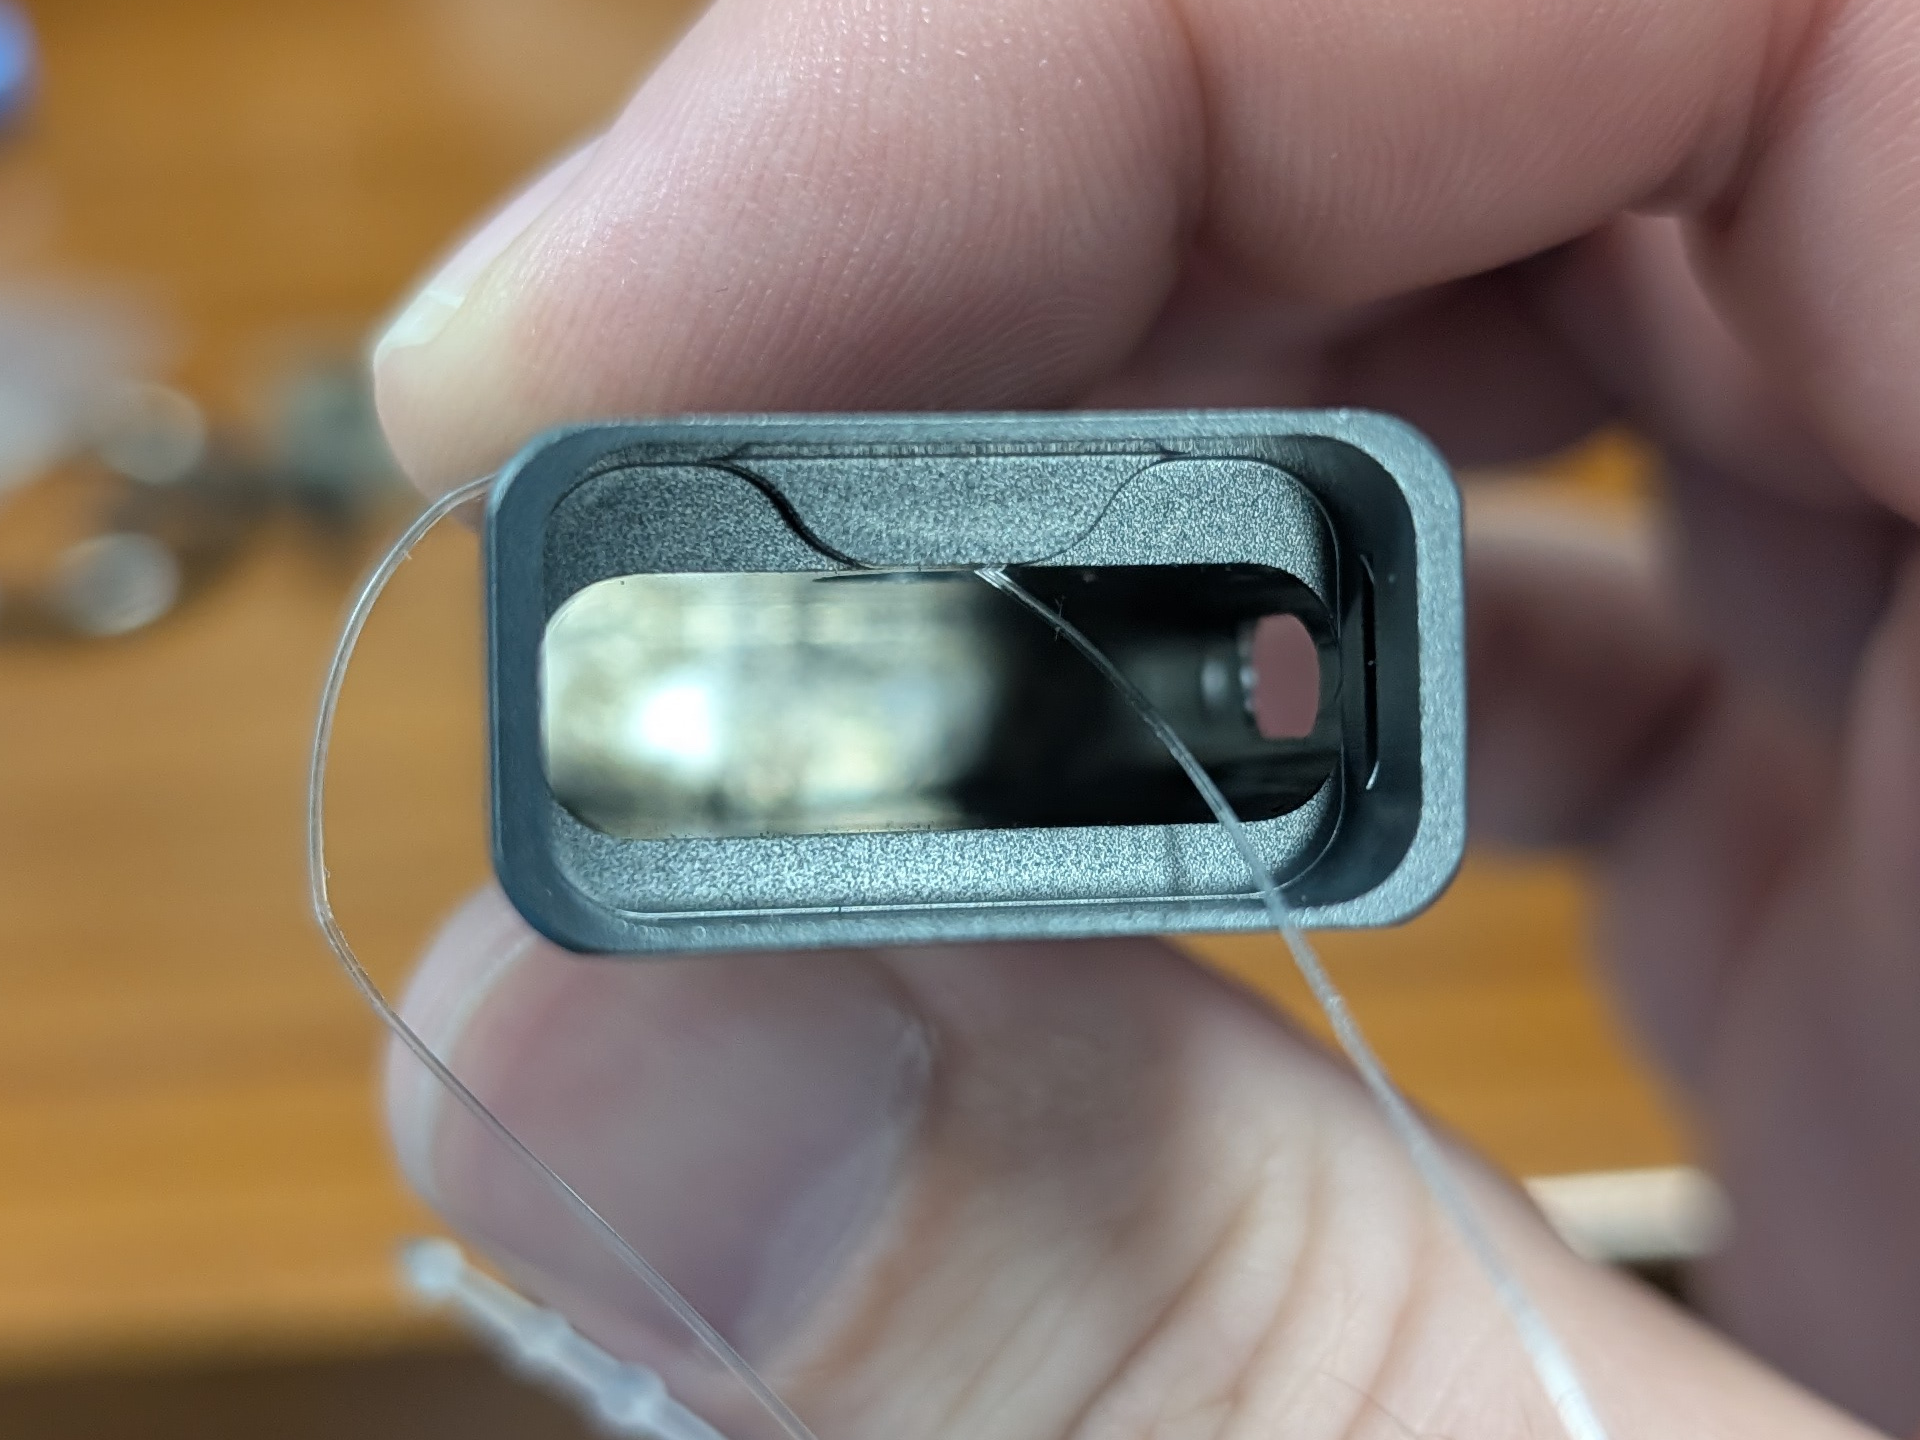
The TIR optic can be popped out by using a very thin shim to press one of the clips in, and then by pulling the TIR optic out.
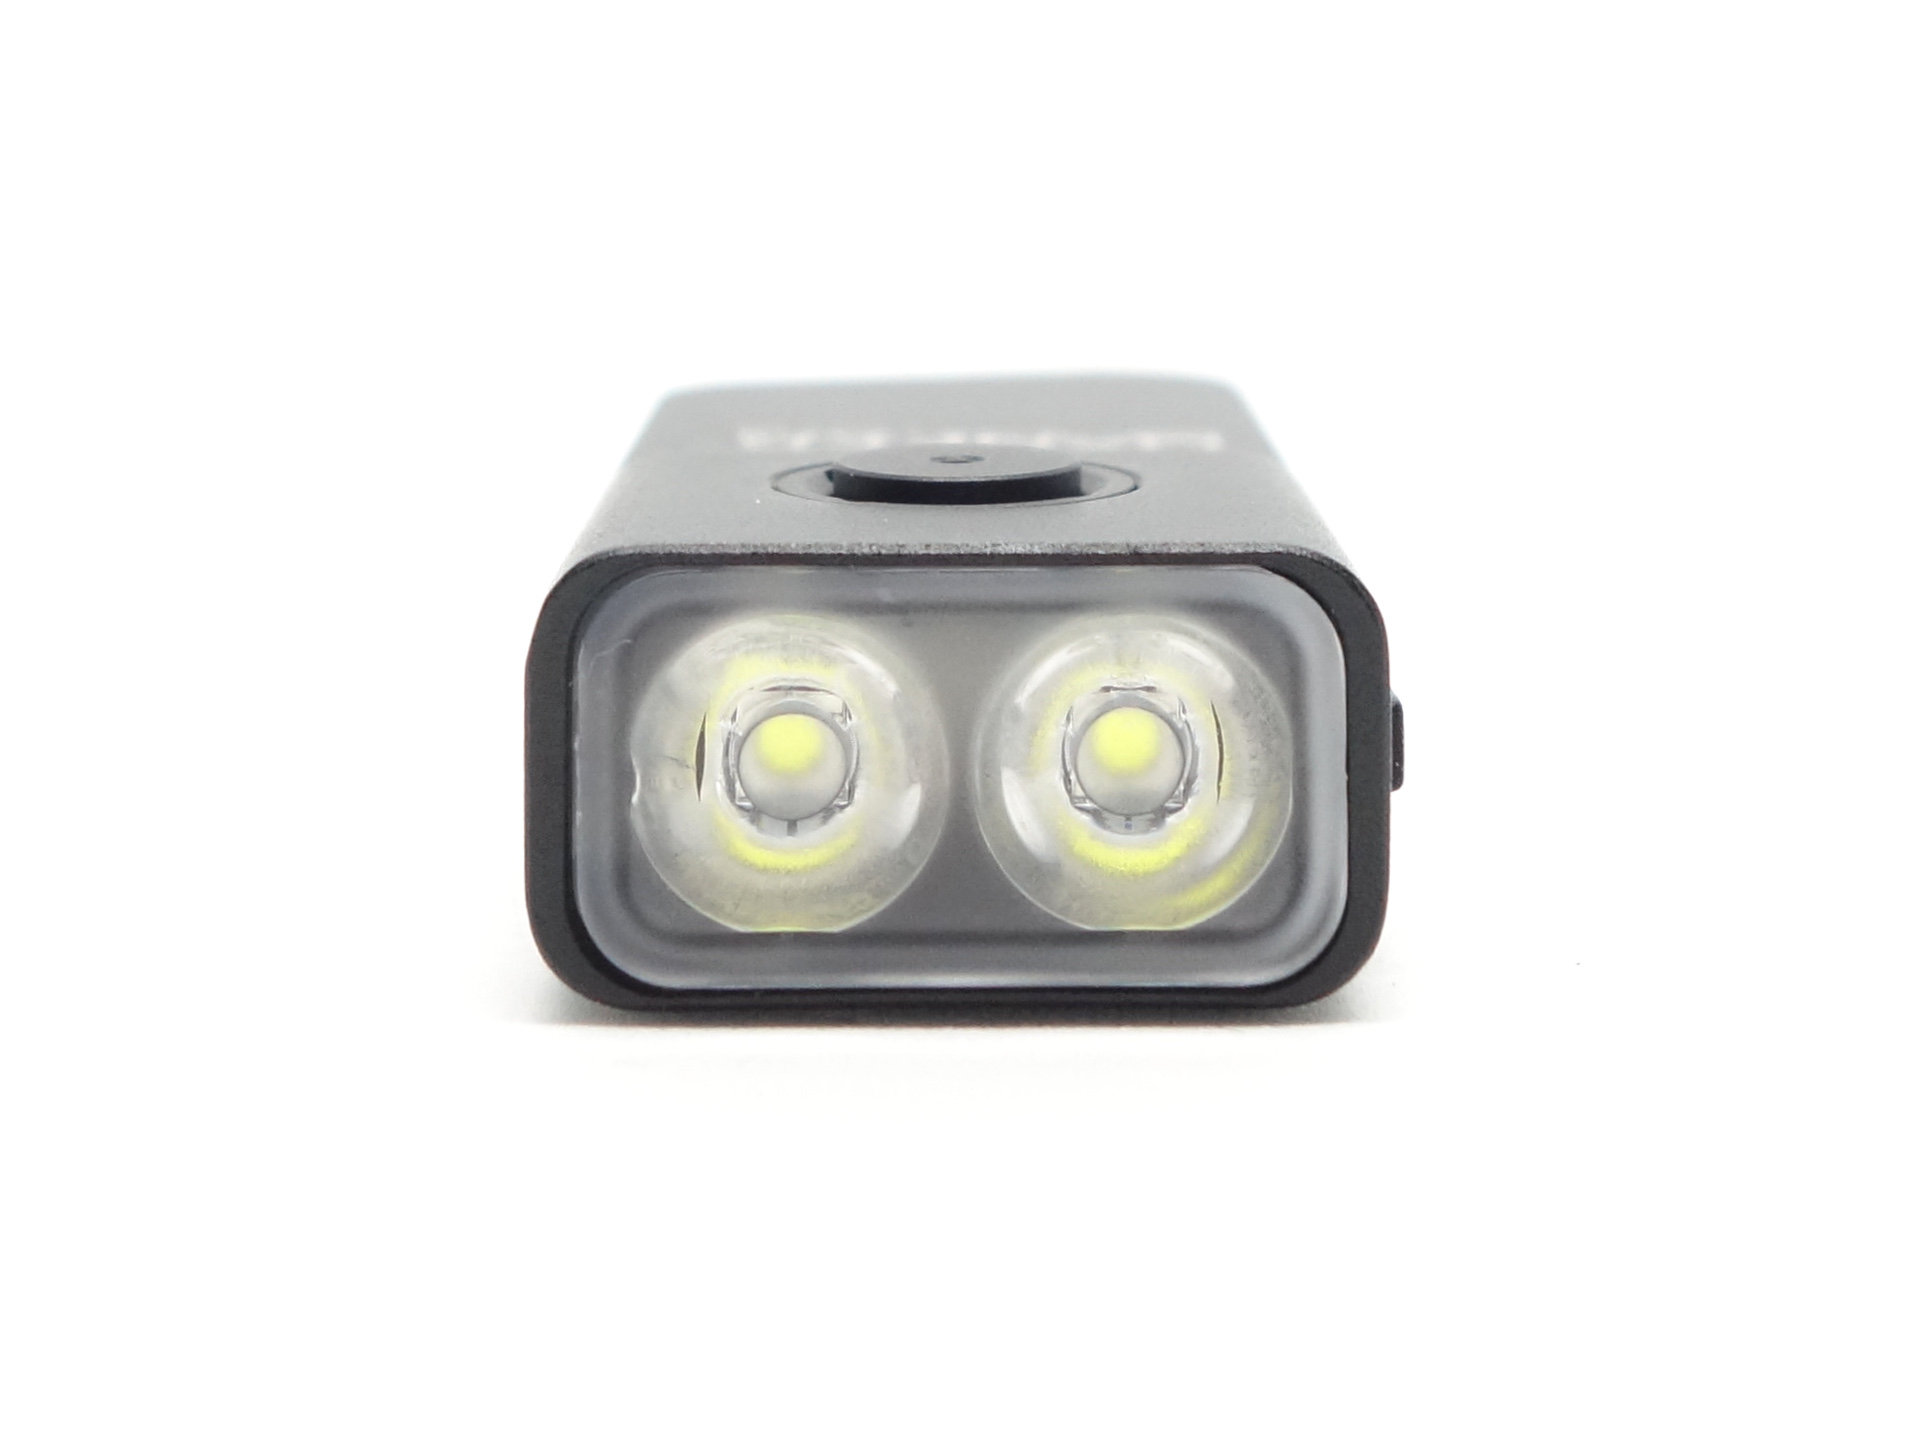
LED, bezel, lens, reflector and beam#
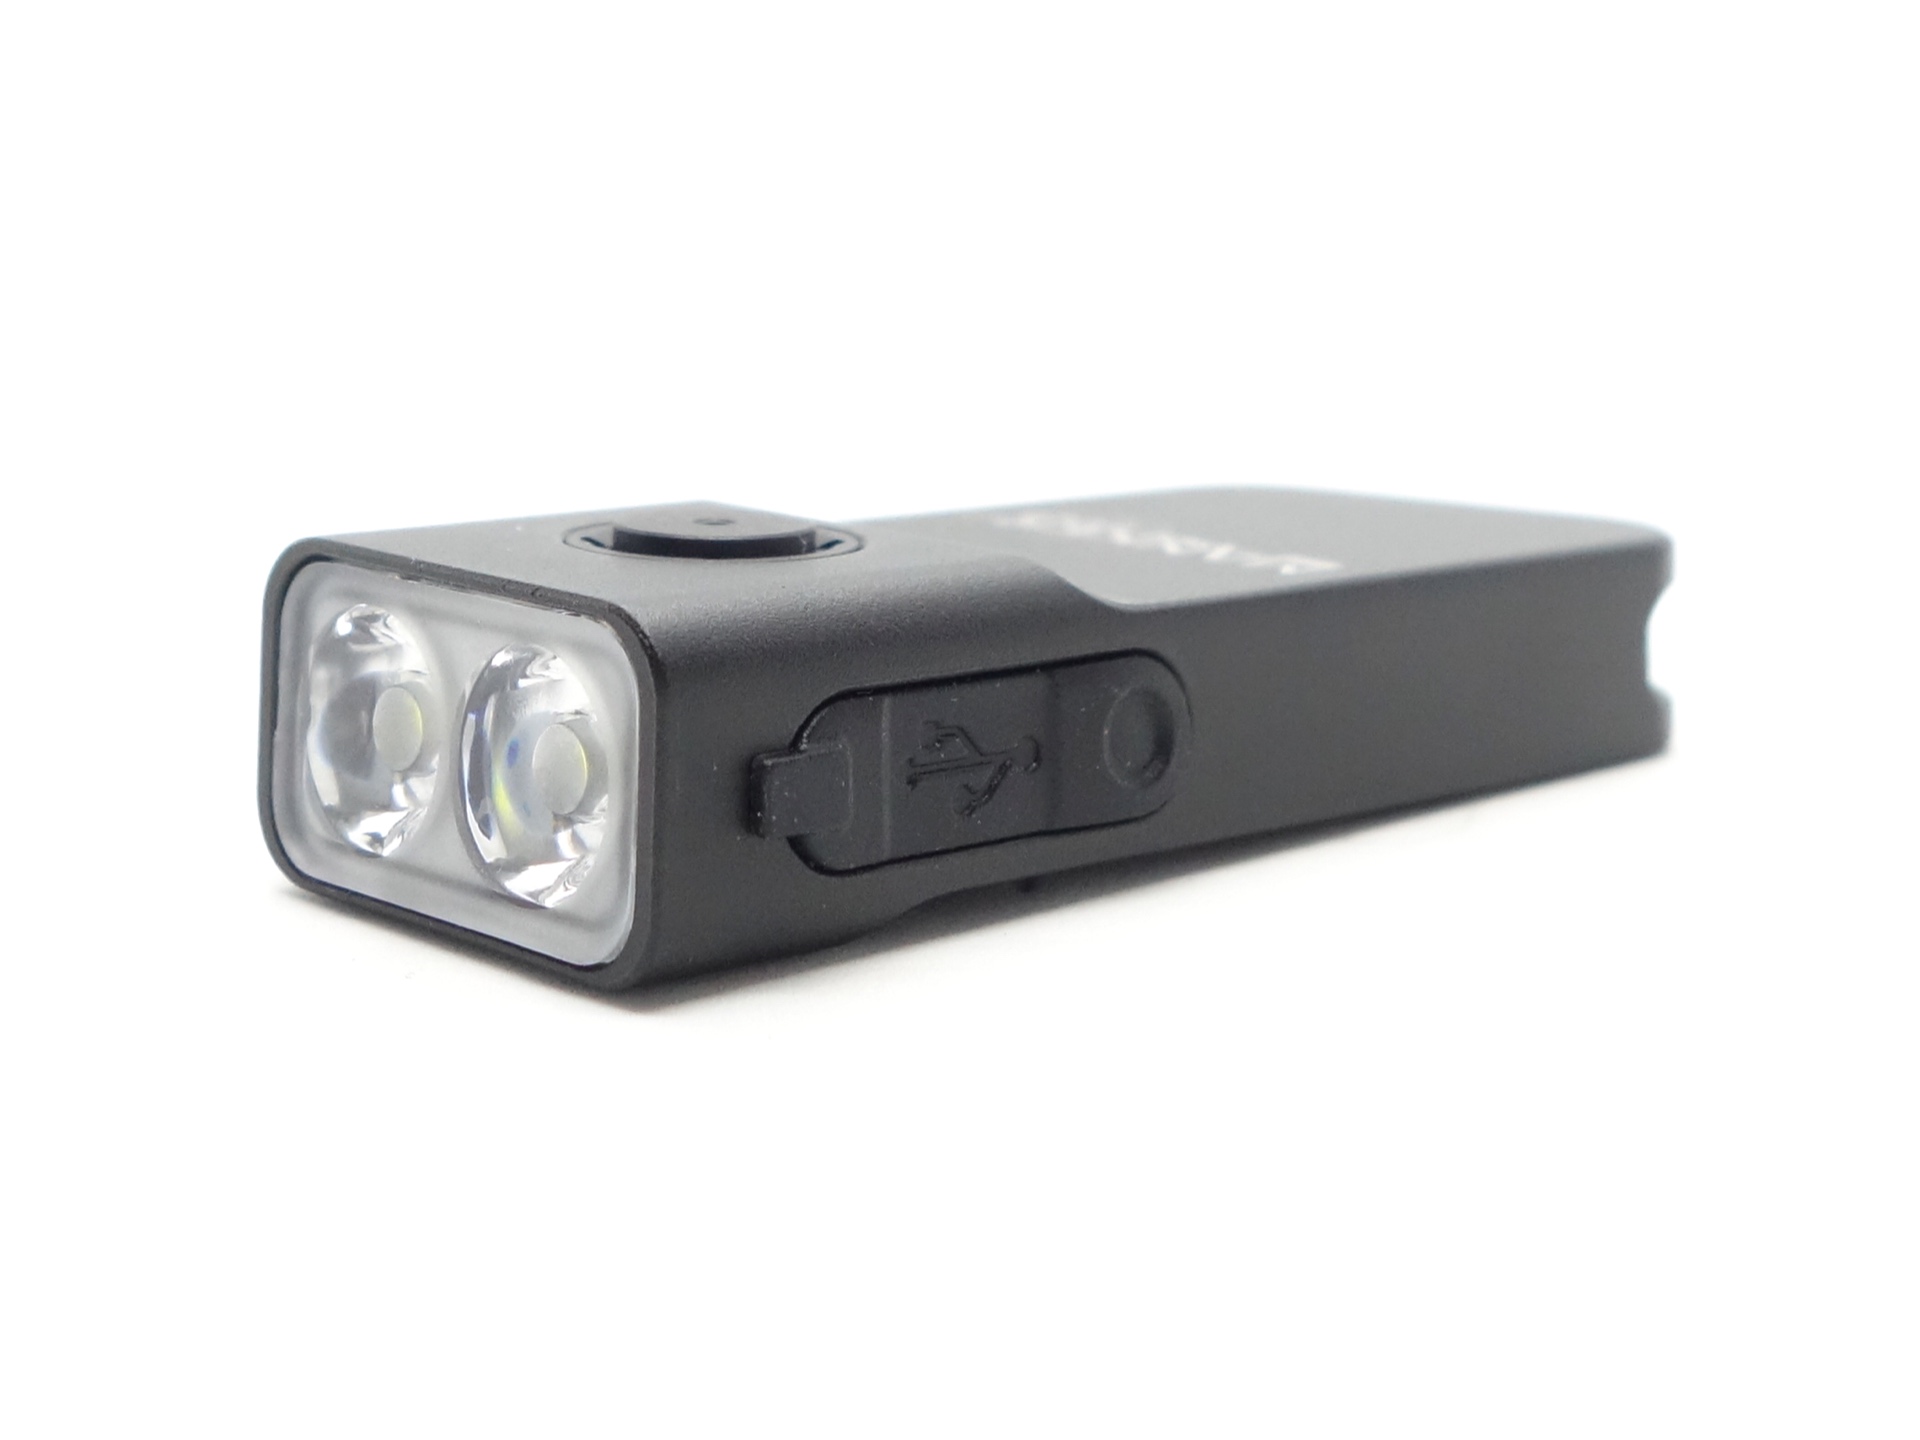
This Manker LAD III CW has Luminus SST20 Cool White 6500K emitters behind a TIR optic and a bezel. The torch is also available with Neutral White 4000K 90 CRI emitters.
The TIR optic sits slightly proud so it might scratch if you place it face down on a surface.
CCT, CRI, and duv#
I have taken Correlated Colour Temperature (CCT) and Colour Rendering Index (CRI, RA of R1-R8) measurements with the torch positioned one metre away from an Opple Light Master Pro III (G3).
The CCT is around 5960K, the CRI is around 66 and the Delta u, v is slightly positive (green).
The beam produced is very floody. The dual TIR optic focuses the beam into an oval shape. There are some artefacts around the edges. Some of the green corona is visible in the middle of the beam on lower modes.
| Mode | CCT (K) | CRI (Ra) | x | y | Duv |
|---|---|---|---|---|---|
| Low | 5327 | 64.3 | 0.3374 | 0.3734 | 0.0136 |
| Medium | 5469 | 64.6 | 0.3334 | 0.3675 | 0.0126 |
| High | 5690 | 66.4 | 0.3278 | 0.3554 | 0.0092 |
| Turbo | 5981 | 68.9 | 0.3216 | 0.3448 | 0.0069 |
Calculate Duv from CIE 1931 xy coordinates
Dimensions and size comparison#
Dimensions#
I took the following measurements using a digital caliper.
| Measurement | Unit (mm) |
|---|---|
| Length | 64.17 |
| Head width | 26.05 |
| Head height | 14.05 |
Weight#
I took the following measurements using a digital scale.
| Weight | Unit (g) |
|---|---|
| Torch | 33.78 |
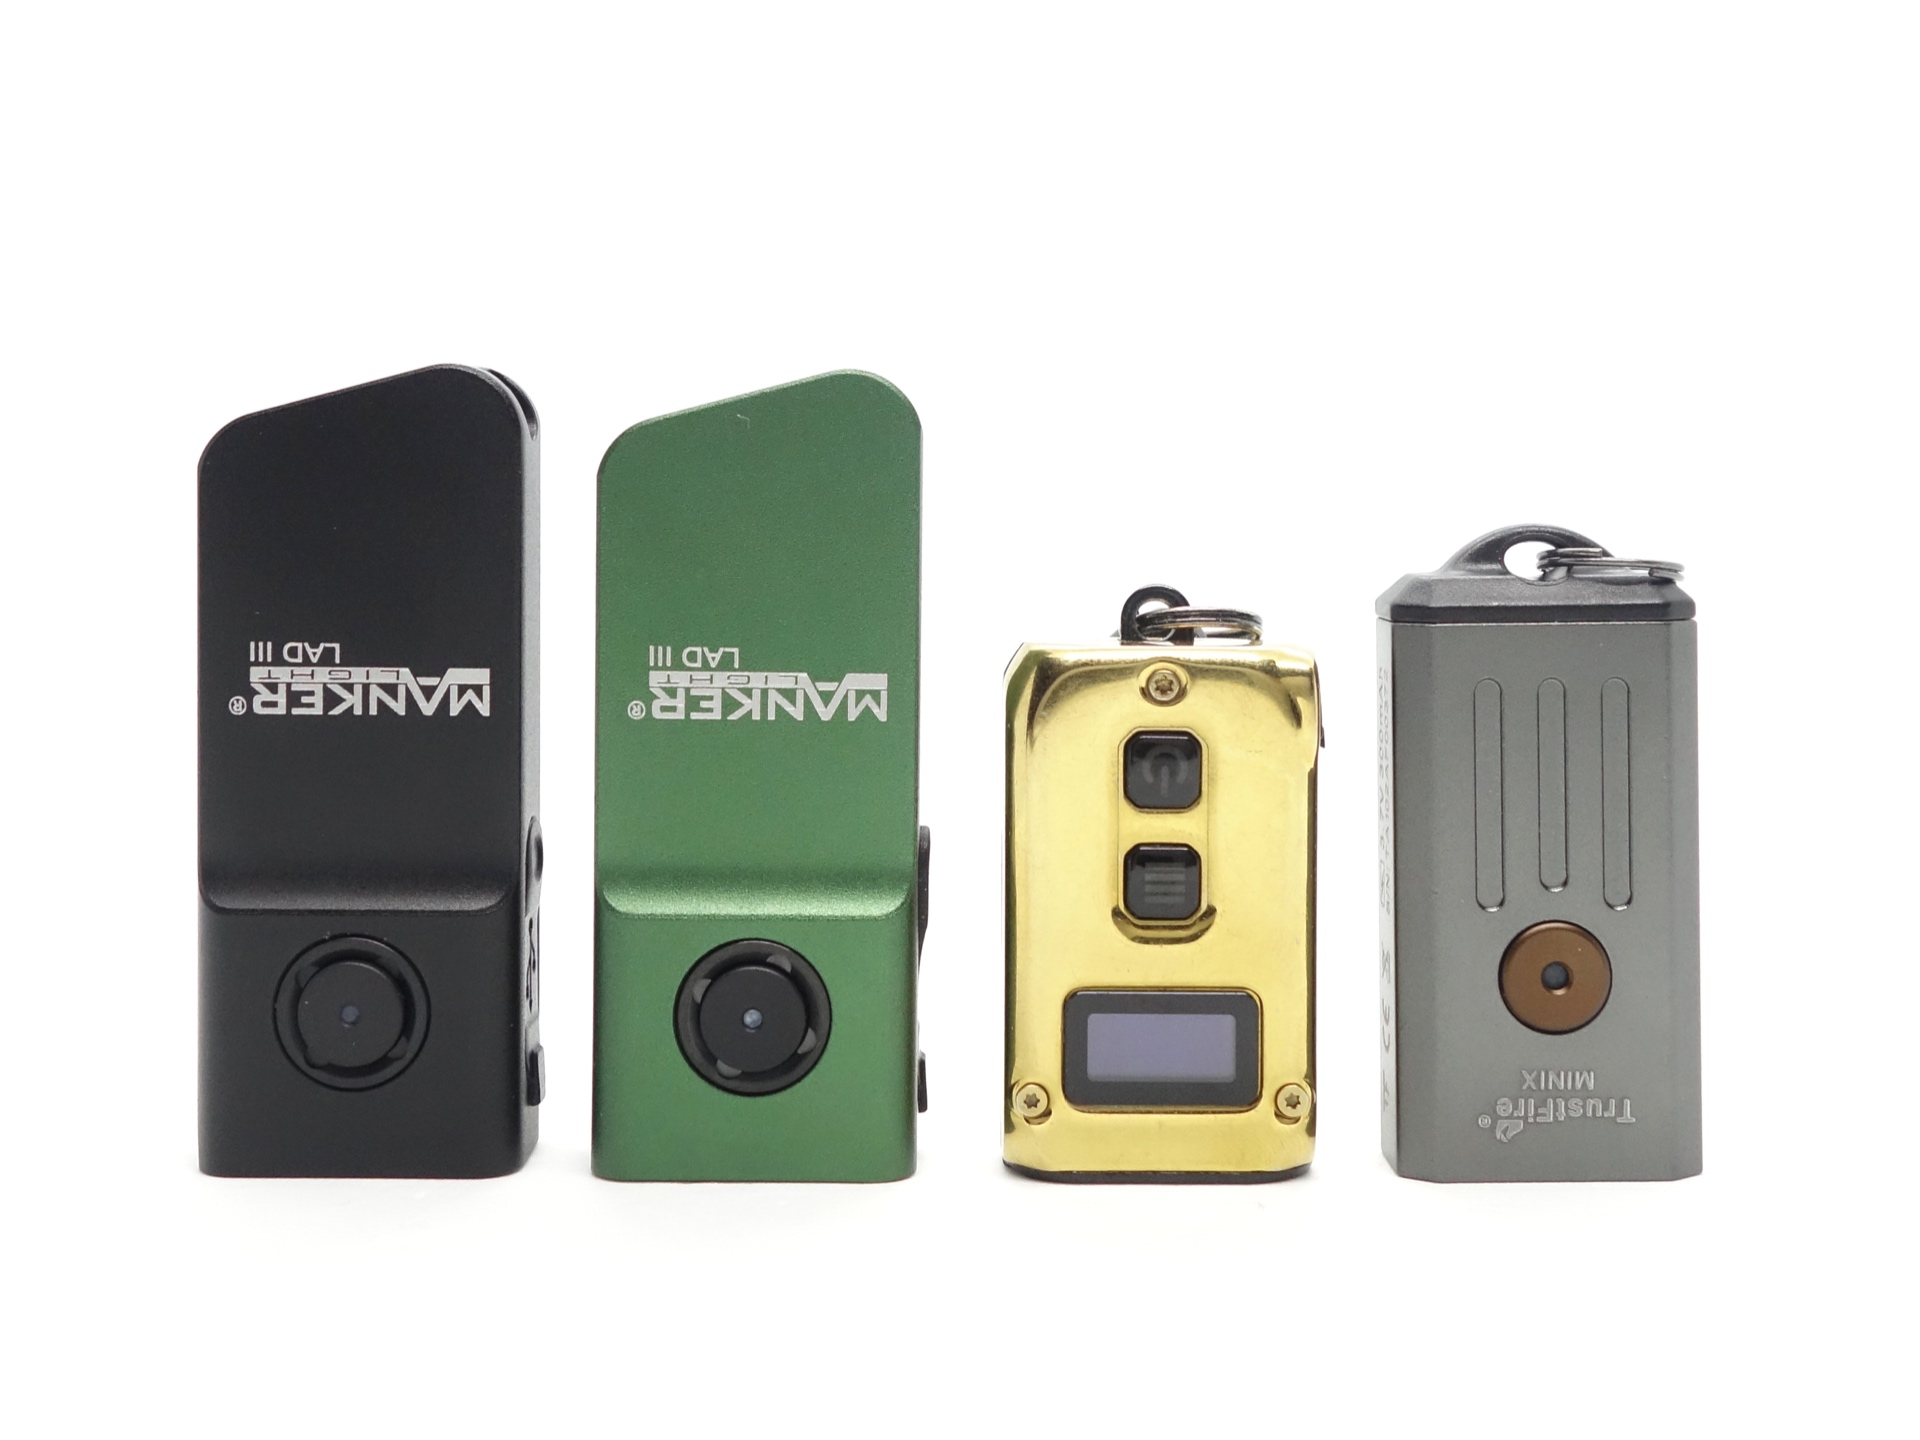
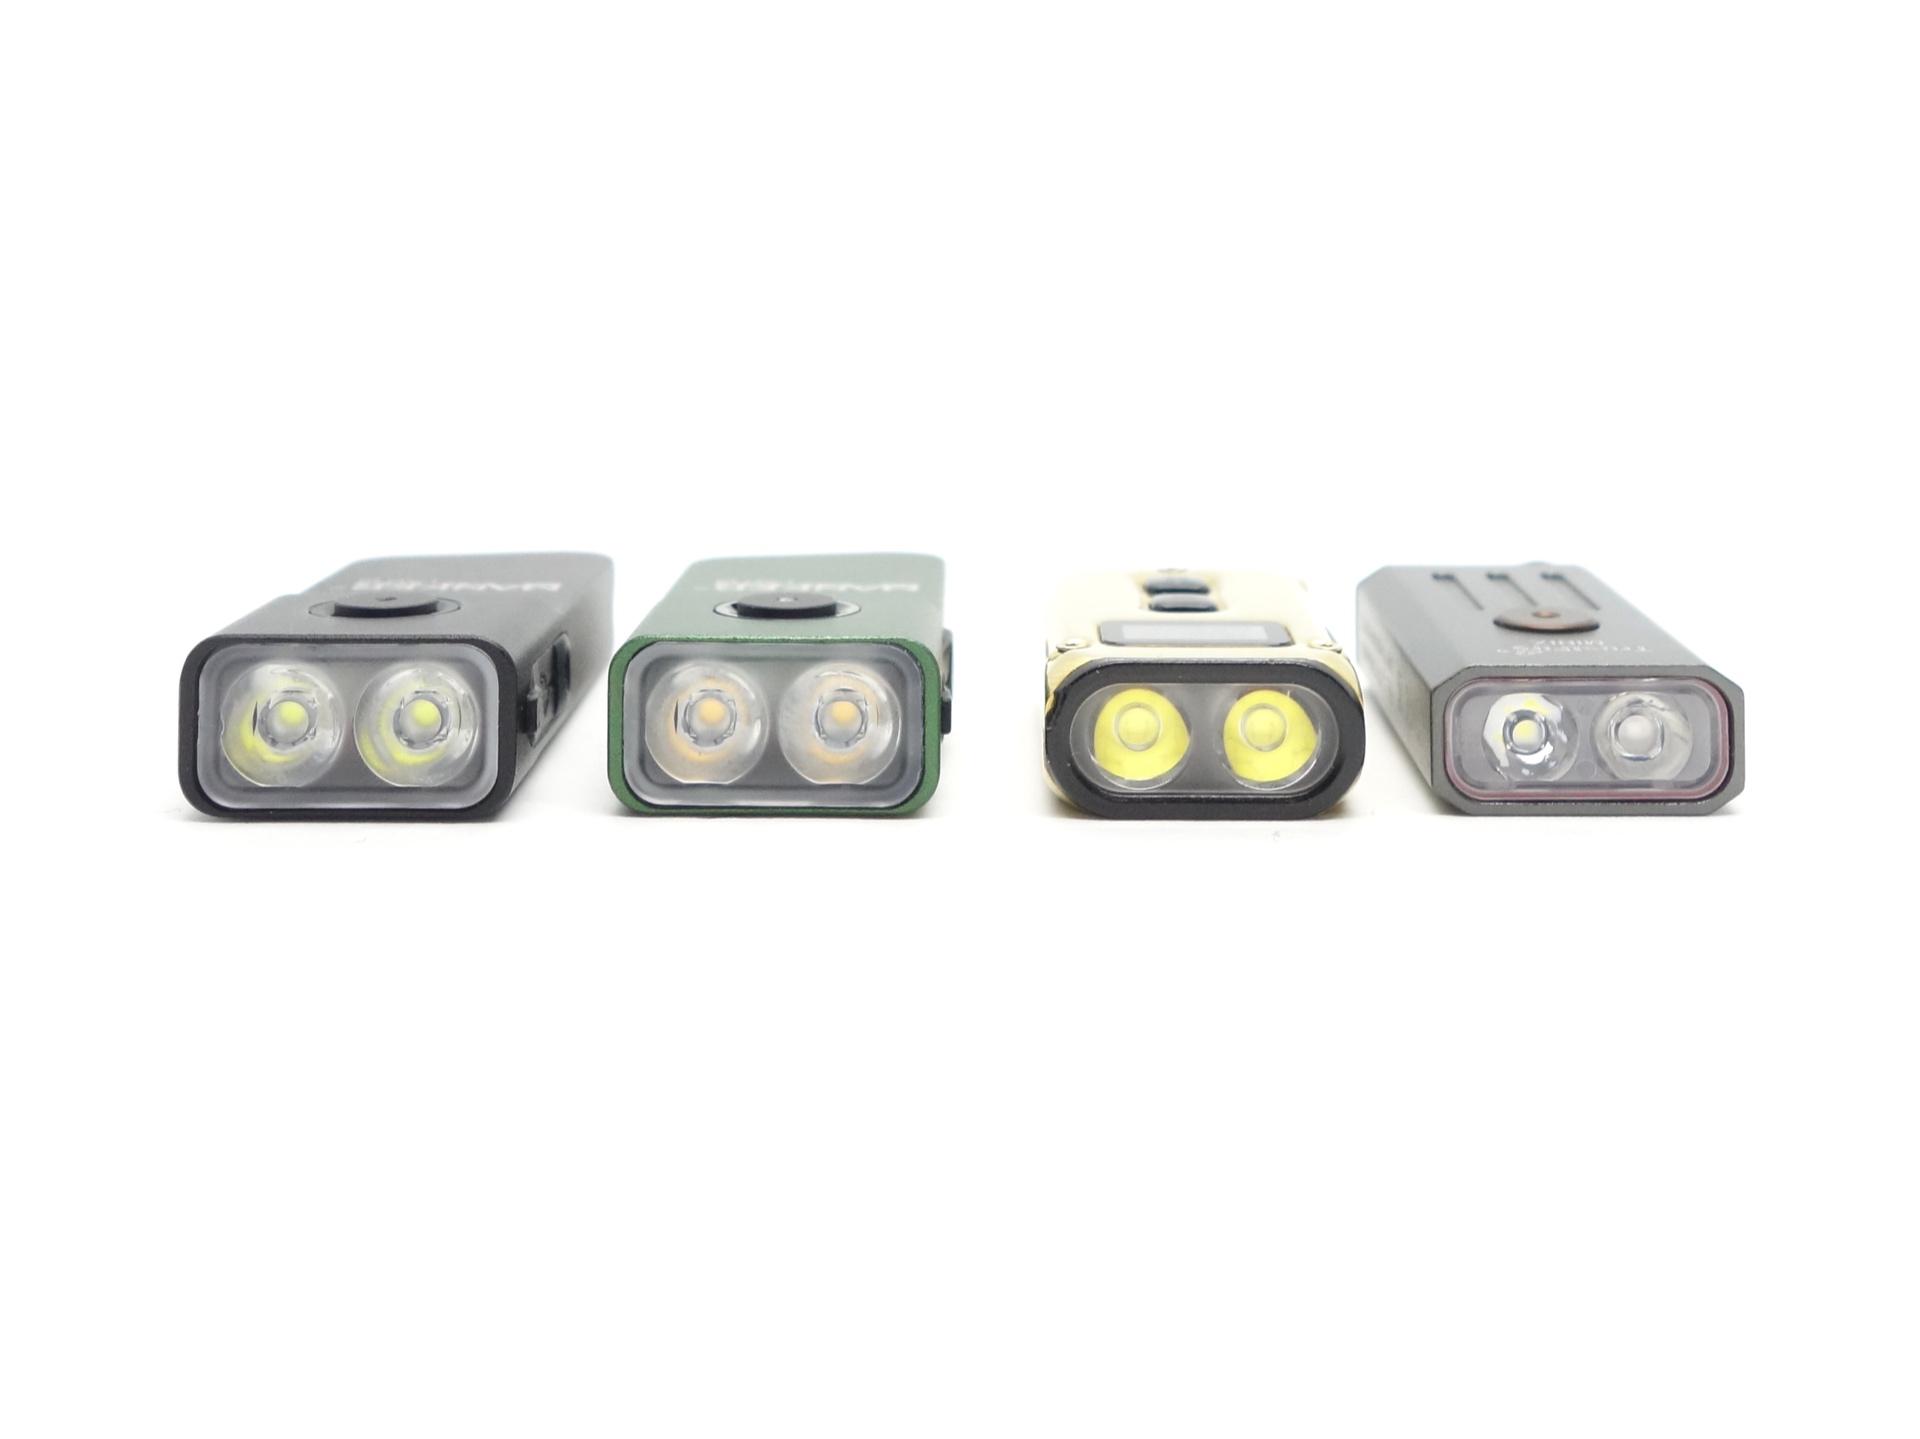
Size comparison with its competition#
From left to right: Manker LAD III CW, Manker LAD III NW, Nitecore Tini2, TrustFire Mini X
User interface#
The Manker LAD III CW has an electronic side switch with a battery status indicator.
There are three Moonlight modes.
There are three General modes (Low, Medium and High).
There is a Turbo mode.
And there are three Special modes (Strobe, SOS and Beacon).
| State | Action | Result |
|---|---|---|
| Off | Press and hold | Moonlight |
| Moonlight | Press and hold | Cycle (Moon 1, Moon 2, Moon 3) |
| Off | Click | General (Mode Memory) |
| On | Click | Off |
| Any | Two clicks | Turbo |
| Turbo | Press and hold | General (Mode Memory) |
| Any | Three clicks | Special (Strobe) |
| Special | Press and hold | Cycle (Strobe, SOS, Beacon) |
| Special | Three clicks | General (Mode Memory) |
| Off | Four clicks | Lock |
| Locked | Click | Toggle battery status indicator |
| Locked | Four clicks | Unlock |
Engineering mode#
Warning: You cannot factory reset the Manker LAD III. Once you adjust the brightness of a particular mode, you will need to figure out how to change it back.
The default brightness of each level within the Moonlight and General modes (except Turbo) can be adjusted by entering engineering mode while a particular level has been selected.
Turn the torch on and select a level within Moonlight mode or General mode that you would like to adjust.
For example:
From off, click to enter General mode. Press and hold to cycle through until you reach Low mode.
Five clicks and hold on the 6th for 5 seconds. Battery status indicator will flash red to indicate that you are in engineering mode.
Click to reduce the brightness.
Double click to increase the brightness.
Press and hold to save the default brightness.
Mode memory#
There is mode memory.
The torch will memorise the last used General mode (Low, Medium, High).
Turbo, Strobe, SOS and Beacon are not memorised.
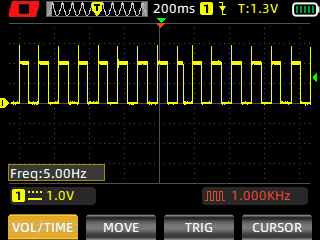
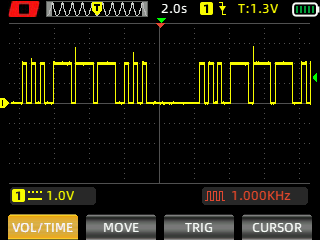
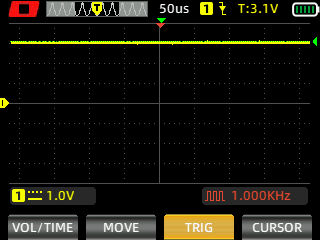
Strobe#
Strobe has a constant frequency.
Strobe, SOS, Beacon
![]()
I measured Strobe, SOS and Beacon with a Zoyi ZT-703S oscilloscope.
Low voltage protection#
The torch will display a red battery status indicator and automatically reduce the brightness or turn off when the voltage is too low.
If you try to use Low mode when the voltage is too low, the torch may turn off after 60 seconds and then after 20 seconds or 10 seconds.
If you attempt to use Medium or High then the output might immediately drop to Low.
You can use one of the moonlight modes for a few minutes after the torch automatically turns off. This is a nice way of ensuring that you are not left in the dark.
The torch will automatically turn off sooner each time you turn it back on when the voltage is low.
Low voltage protection is implemented slightly differently on other models like the Manker E02 III where that will let you use a mode for about 10 minutes before low voltage protection kicks in.
Battery level indicator#
A light in the button will display a particular colour when the torch is on to indicate the battery level.
| Battery voltage | Button light indicator | Duration |
|---|---|---|
| > 3.4V | Blue light | 10 seconds |
| 3.2V - 3.4V | Purple light | 10 seconds |
| 2.8V - 3.2V | Red light | Constantly on |
| <2.8V | Torch turns off |
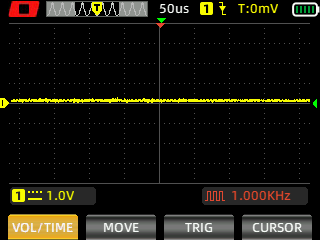
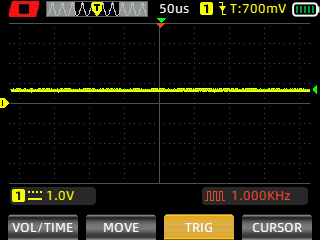
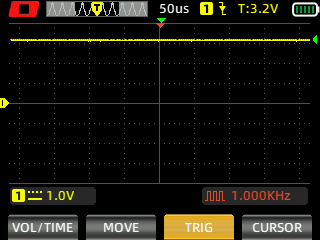
Pulse Width Modulation#
I did not notice any visible PWM (flickering).
I measured the PWM of the light with a Zoyi ZT-703S oscilloscope.
Low, Medium, High, Turbo
What I like about the UI#
- Moonlight modes.
- Direct access to Moonlight from off.
- Direct access to Turbo from off.
- Direct access to Strobe from off.
- Hidden engineering mode.
What could be improved#
- The ability to factory reset the torch would be nice.
Batteries and charging#
Battery#
The torch has a built-in 500mAh LiPo battery.
Charging#
The Manker LAD III NW has built-in USB-C charging.

Power supply: PinePower Desktop USB-C
USB Meter: ChargerLAB Power-Z KM003C
Room temperature: 15 C
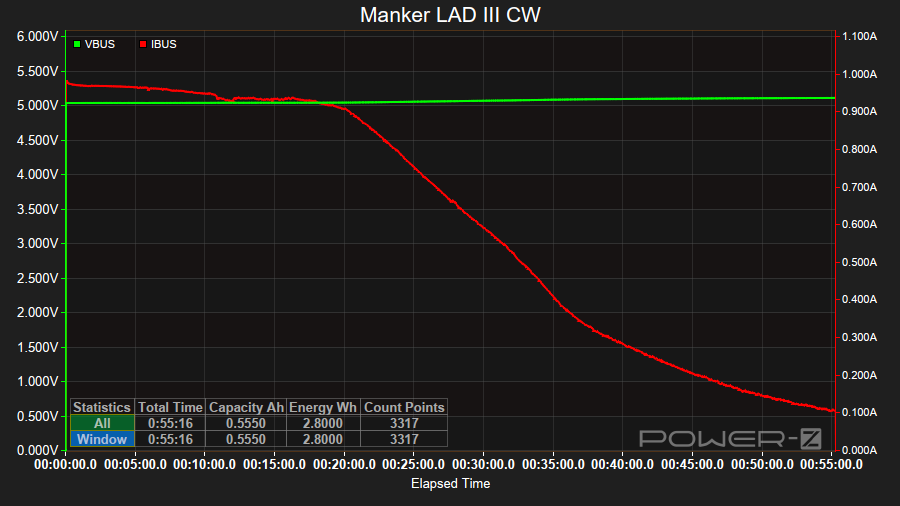
It took 55 minutes the torch at a rate of 5V/1A.
The charging status indicator is red while charging and it becomes blue when charging is complete.
Power supply compatibility#
I tried the following power supplies with the included 14500 cell:
| Power supply | USB Type | Protocol | Does it charge? |
|---|---|---|---|
| Apple 61W Power Adapter | USB-C | PD | Yes |
| PinePower Desktop | USB-C | PD | Yes |
| PinePower Desktop | USB-A | QC | Yes |
| PinePower Desktop | USB-A | Yes |
USB-C to USB-C charging works.
Performance#
Specifications from the user manual:
2x Cool White LED
| FL1 Standard | Mo1 | Mo2 | Mo3 | Low | Medium | High | Turbo | Strobe |
|---|---|---|---|---|---|---|---|---|
| Output (lumens) | 0.2 | 1 | 3 | 30 | 100 | 500 + 300 | 1,020 + 300 | 1,020 |
| Runtime | 126h | 85h 33min | 11h 29min | 5h | 2h 12min | 1min 49s + 50min | 30s + 47min | |
| Beam Intensity (cd) | 1,228 | |||||||
| Beam Distance (metres) | 70 |
2x Neutral White LED
| FL1 Standard | Mo1 | Mo2 | Mo3 | Low | Medium | High | Turbo | Strobe |
|---|---|---|---|---|---|---|---|---|
| Output (lumens) | 0.2 | 1 | 3 | 30 | 70 | 370 + 210 | 720 + 210 | 720 |
| Runtime | 118h 24min | 75h 48min | 10h 47min | 4h 12min | 2h 6min | 1min 10s + 55min | 30s + 51min | |
| Beam Intensity (cd) | 692 | |||||||
| Beam Distance (metres) | 53 |
Lumen measurements#
| Mode | Specs | Lumens @turn on | Lumens @30 sec | Lumens @10 min |
|---|---|---|---|---|
| Mo1 | 0.2 | |||
| Mo2 | 1 | 3 | 3 | 3 |
| Mo3 | 3 | 8 | 6 | 6 |
| Low | 30 | 25 | 23 | 23 |
| Medium | 100 | 109 | 108 | 108 |
| High | 500 + 300 | 568 | 554 | 322 |
| Turbo | 1,020 + 300 | 1,029 | 878 | 323 |
Moonlight 1 (Mo1) was too low for my DIY lumen tube to detect.
Note: Lumen measurements may be off by 10% with my DIY lumen tube.
Runtime graphs#
I used my own DIY lumen tube with a TSL2591 sensor and forked bmengineer’s project RuTiTe to record runtimes.
The room temperature was approximately 15 C.
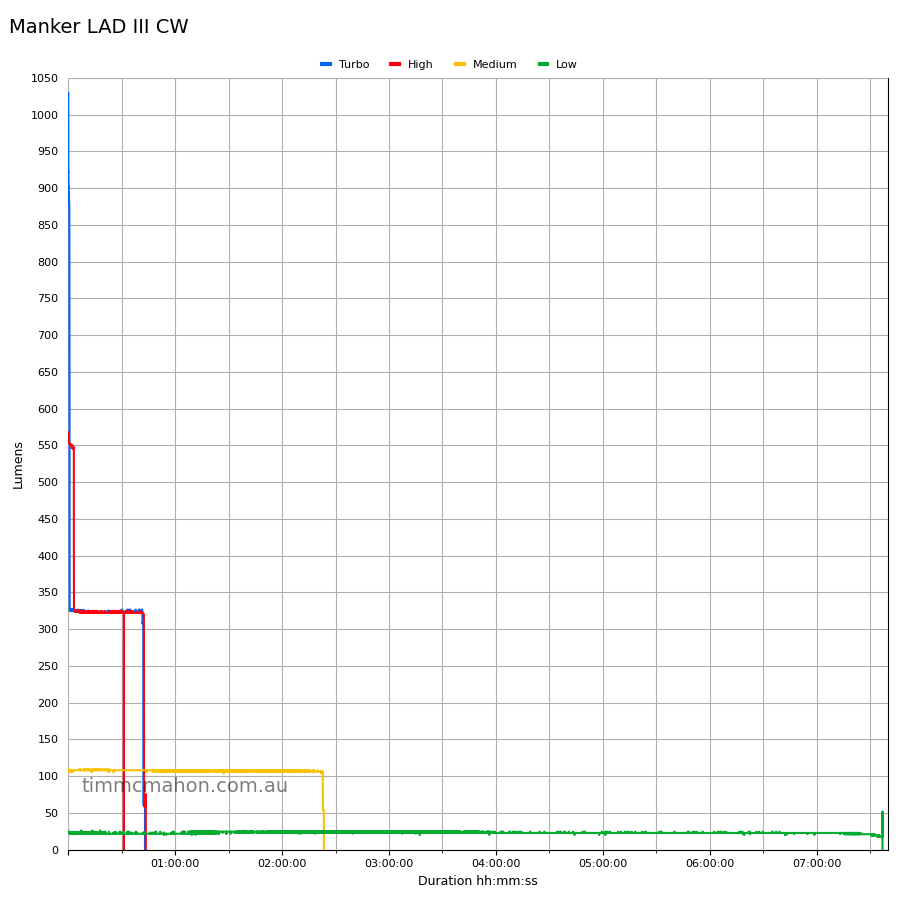

Runtime#
Here is a summary of the runtime results:
| Mode | User manual | Runtime | Turn off |
|---|---|---|---|
| Turbo | 30s + 47min | 42min 5s | 43min 2s |
| High | 1min 49s + 50min | 43min 30s | 43min 30s |
| Medium | 2h 12min | 2h 23min 24s | 2h 23min 24s |
| Low | 5h | 7h 36min 55s | 7h 36min 55s |
“Runtime” is the time until the output reduces to 10% of the output at 30 seconds (as per the ANSI/PLATO FL1 2019 Standard).
“Turn off” is the time until my DIY lumen tube no longer detects more than one lumen.
“+” indicates that the light remained on after recording had stopped.
The runtime is slightly shorter than expected for High and Turbo.
The runtime was longer than expected for Low and Medium.
The output is well regulated.
Throw#
I took lux measurements with a UNI-T UT383BT at 30 seconds. Low and Medium were measured at one metre. High and Turbo were measured at five metres.
| Mode | Specs (cd) | Specs (m) | Candela measured (cd) | Distance (m) |
|---|---|---|---|---|
| Low | 34 | 11 | ||
| Medium | 168 | 25 | ||
| High | 800 | 56 | ||
| Turbo | 1,228 | 70 | 1,225 | 70 |
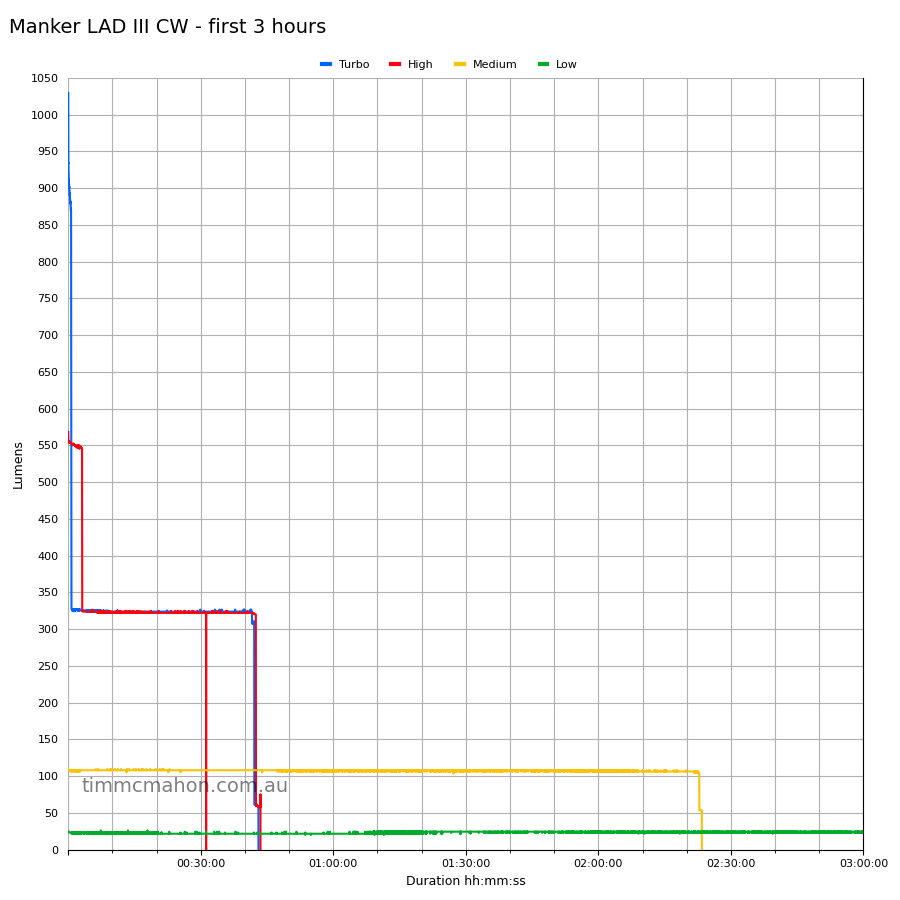
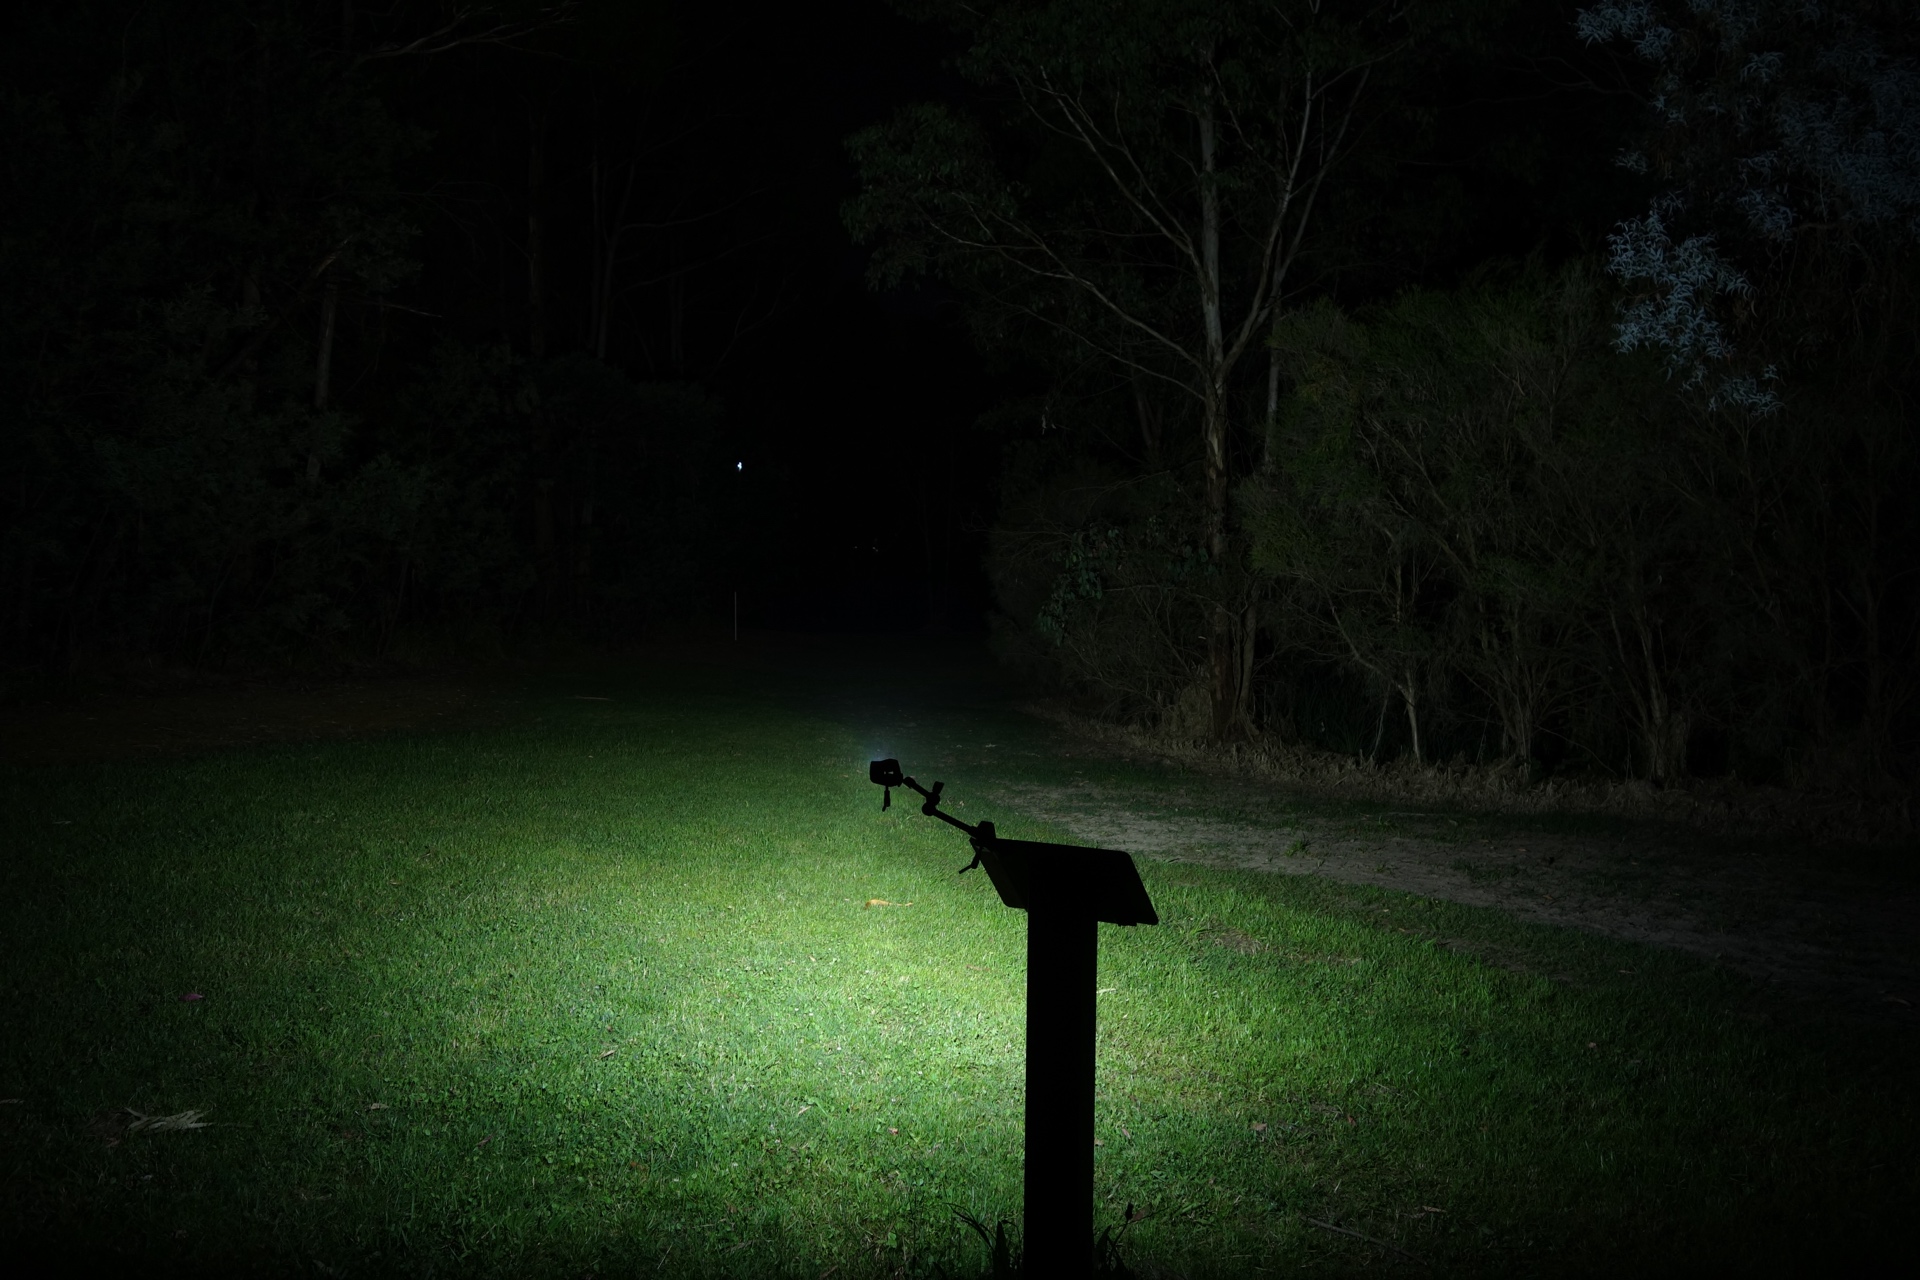
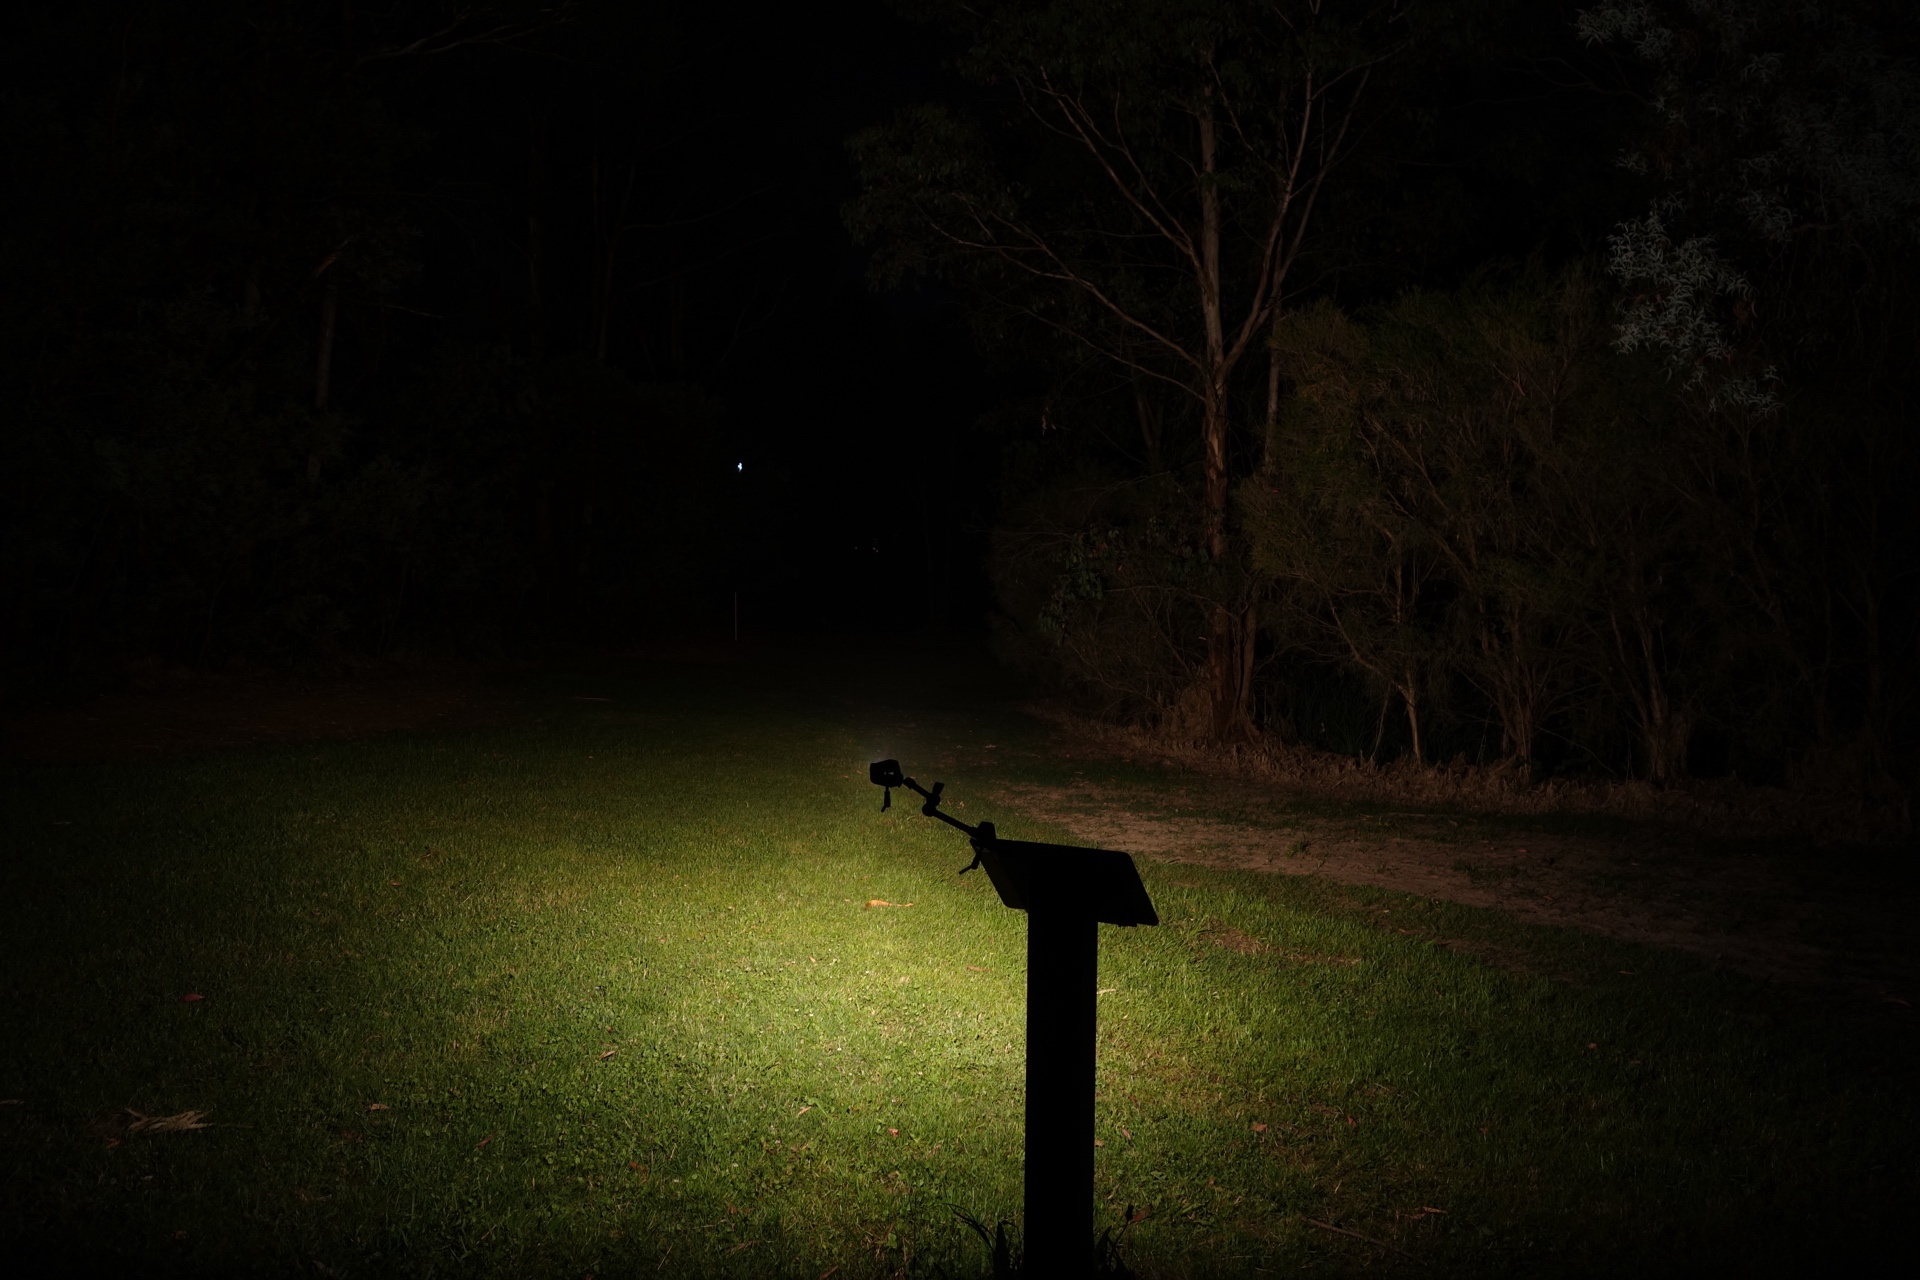
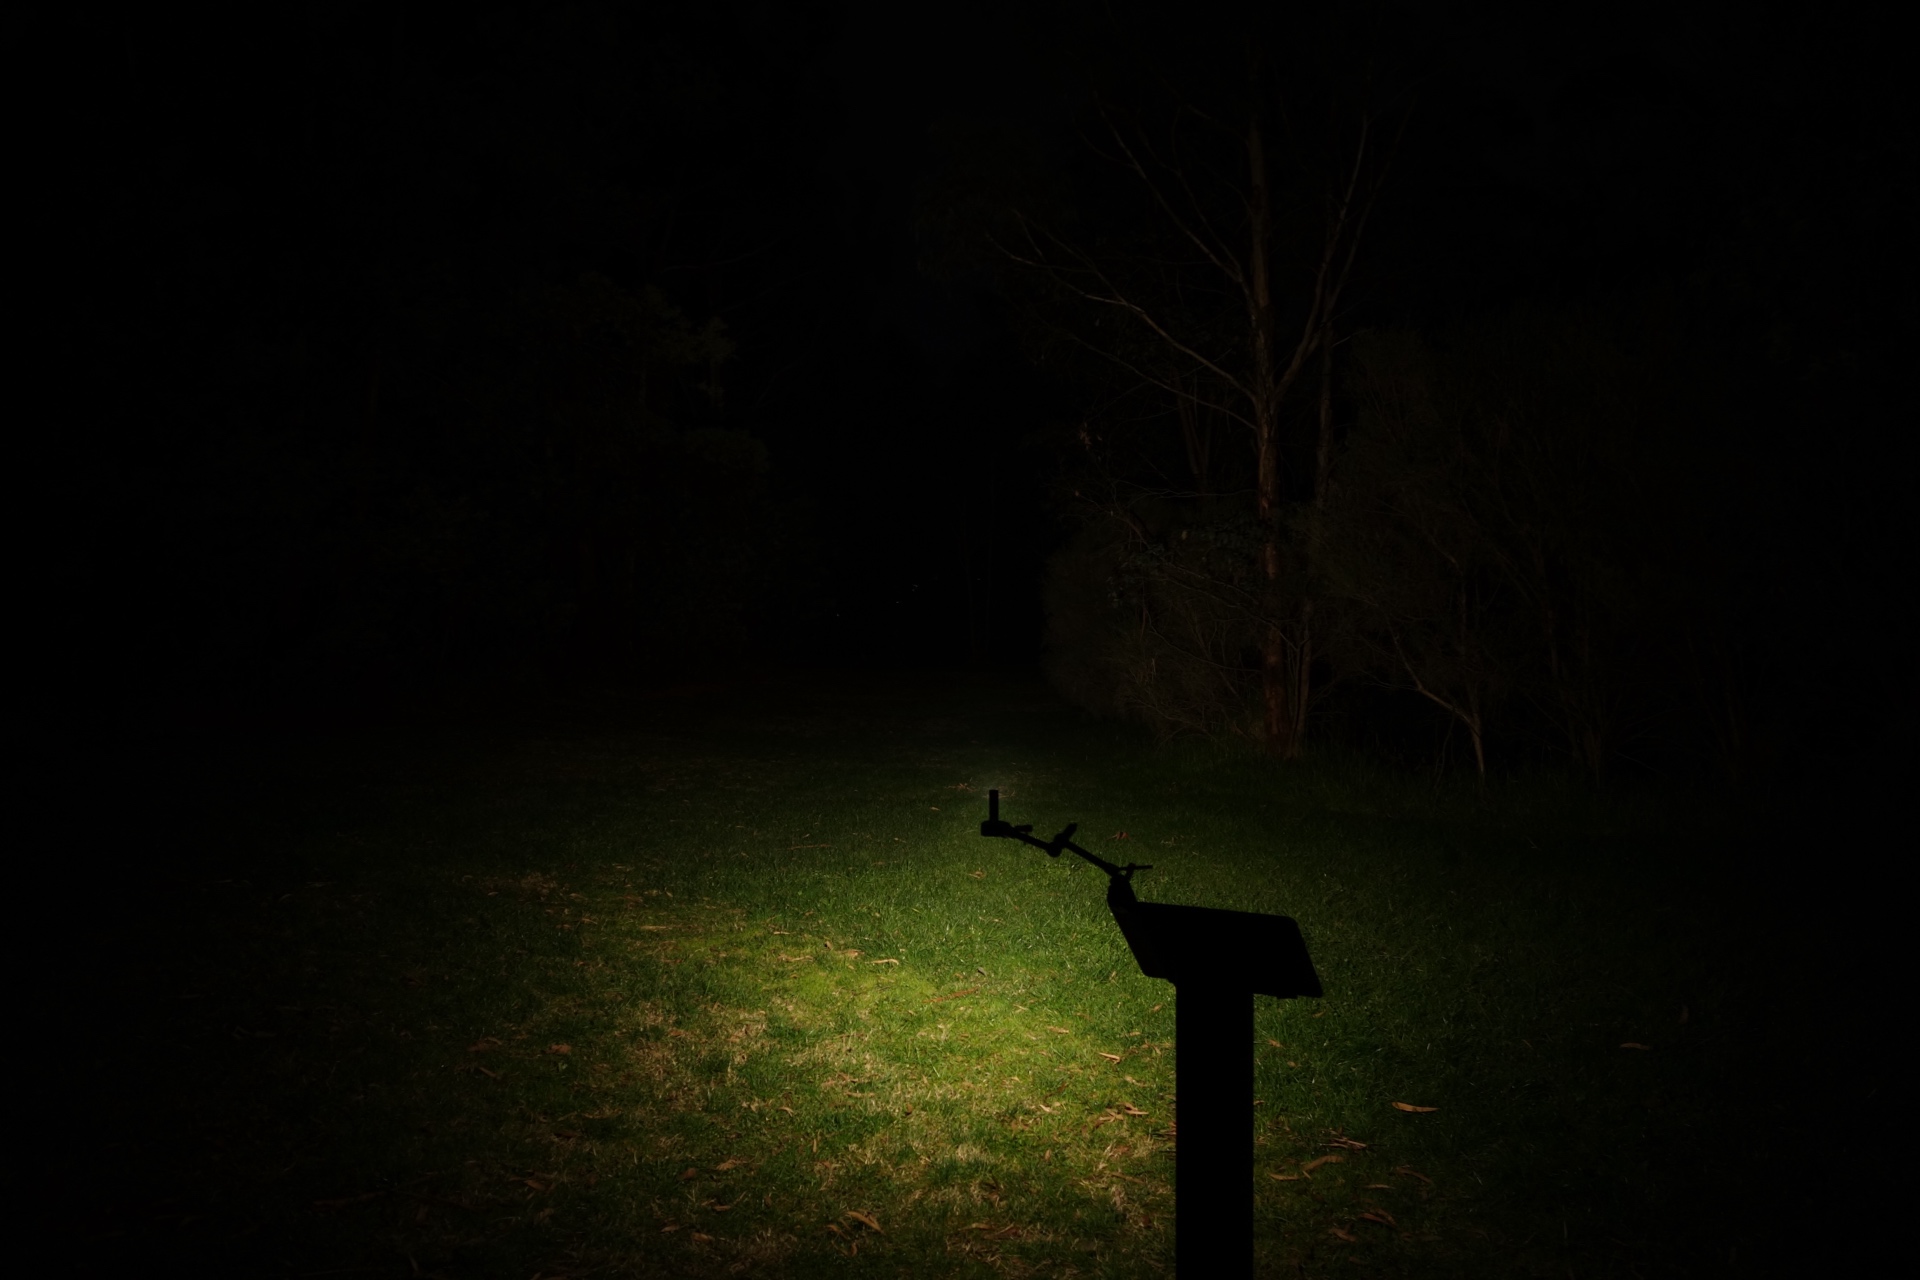
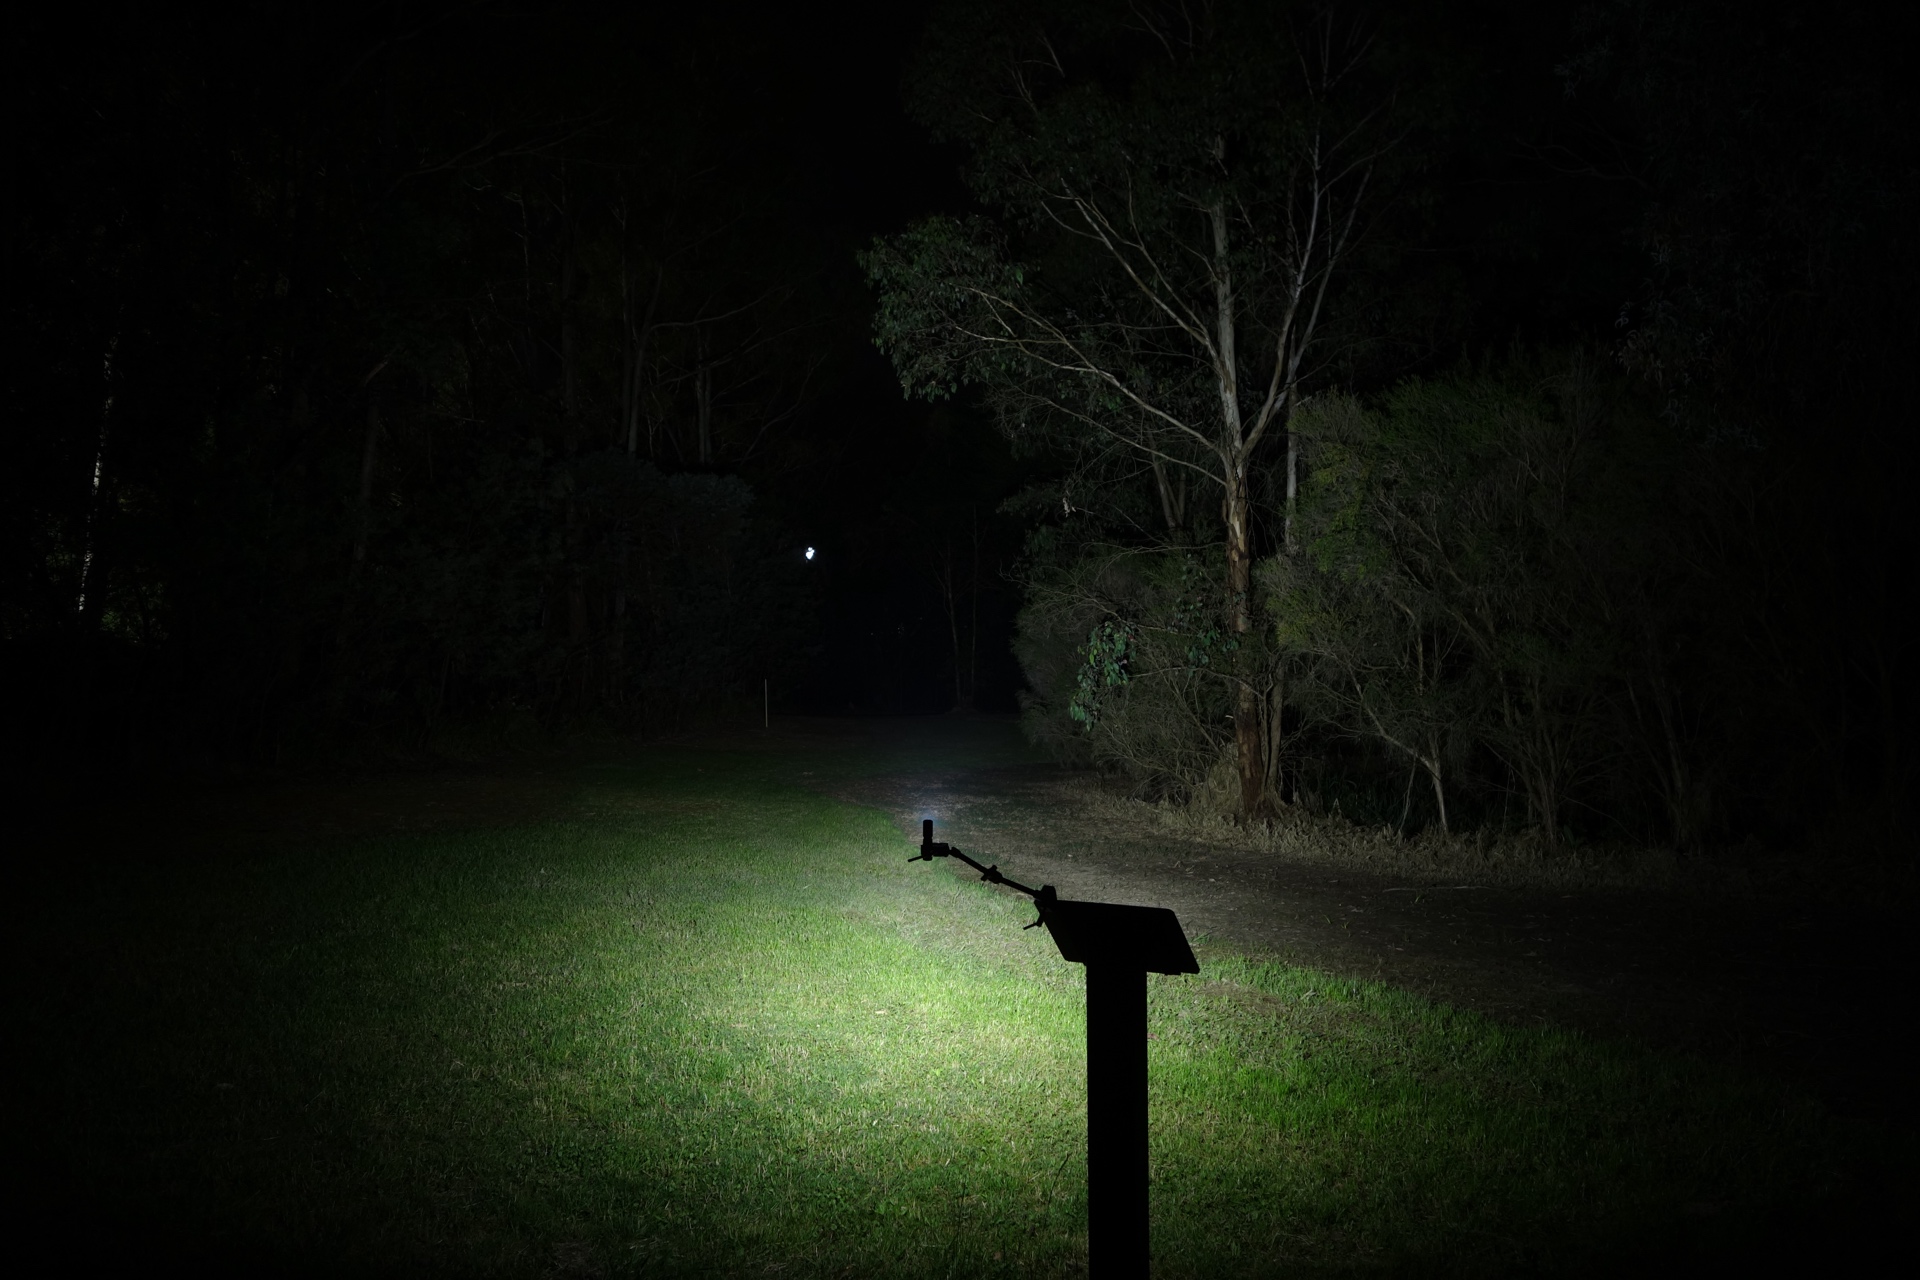
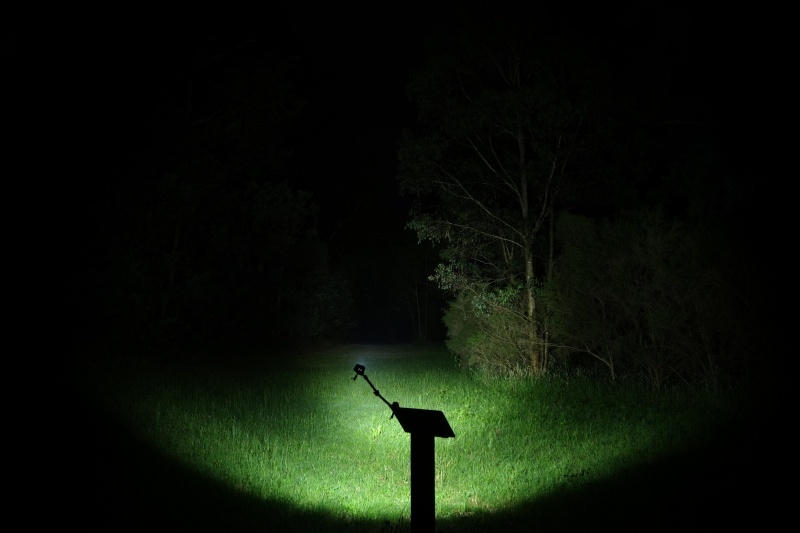
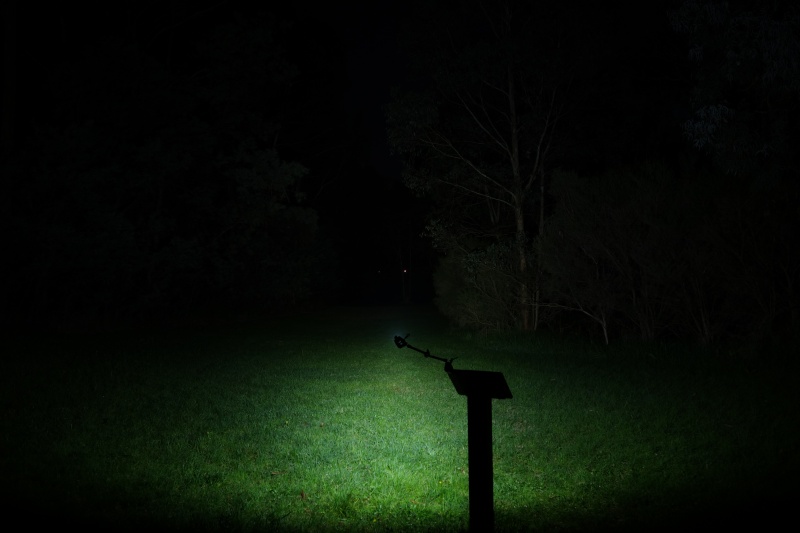
Beamshots#
I went to a local park and aimed the torch at a tree 70 metres away while using Turbo.
Beamshots were taken using a Sony RX100M2 using 3.2", f3.2, ISO 100, 5000K WB.
Manker LAD III CW (Turbo)#
Manker LAD III NW (Turbo)#
Manker E02 III (Turbo)#
Manker E03H III (Turbo)#
Manker E05 II (High)#
LOOP SK03 Pro (Turbo)#
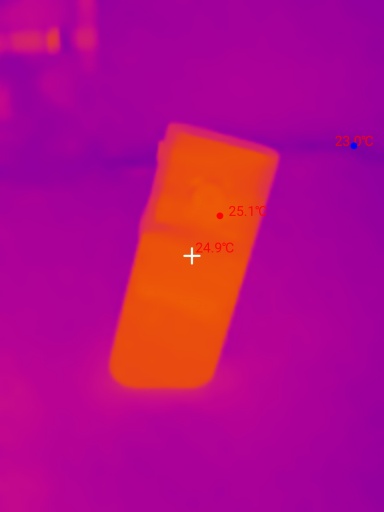
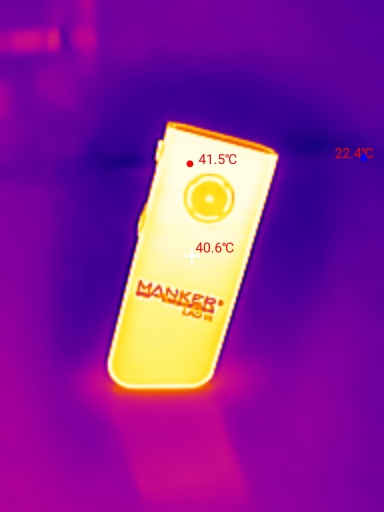
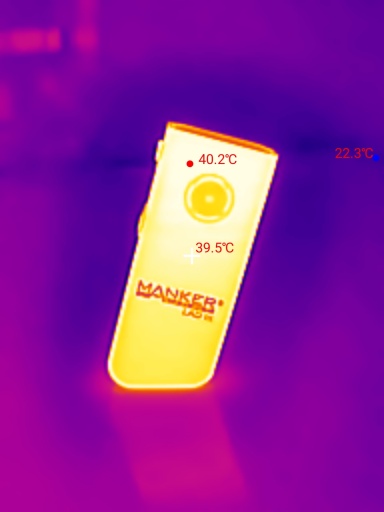
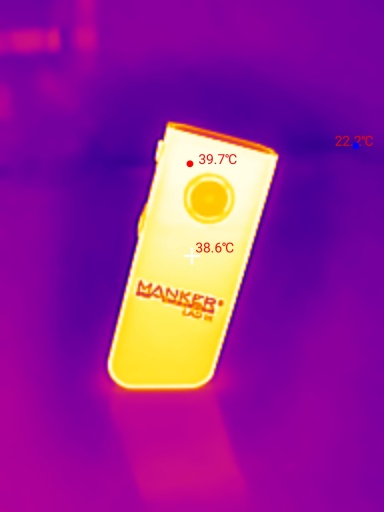
Thermal Images#
I used a Thermal Master P3 to take thermal images of the torch while using Turbo. Get 10% off the Thermal Master P3 with code Mcmahon10
Room temperature: 22 C
| Time (mm:ss) | Max Temperature |
|---|---|
| 00:00 | 25.1 C |
| 01:00 | 41.7 C |
| 02:00 | 41.5 C |
| 03:00 | 41.0 C |
| 04:00 | 40.2 C |
| 05:00 | 39.7 C |
The torch reached 41.7 C within the first 5 minutes.


Conclusion#
The Manker LAD III is Manker’s answer to a keyring torch. It has some features that enthusiasts may appreciate (moonlight modes, engineering mode, intuitive UI).
The output is well regulated. The lumen output and beam distance is better than expected.
The LEDs produce a floody cool white beam. There is also a Neutral White version with high CRI LEDs.
It would be nice if Manker included a keyring and a lanyard to make it a complete set.
Pros:#
- Good build quality.
- Good lumen output.
- Good beam distance.
- Output is well regulated.
- Multiple moonlight modes.
- Hidden engineering mode.
- Battery status indicator.
Cons:#
- No lanyard or keyring included.
- Artefacts around the edge of the beam.
Price#
The Manker LAD III CW is US$22.06 from mankerlight.com after applying a promo code.
Product page#
15% off with promo code: TIM15
Manker LAD III CW at mankerlight.com (affiliate link)
Manker LAD III NW at amazon.com) (affiliate link)
Promo code: BGCMP1652
Manker LAD III at banggood.com (affiliate link)
I may earn a commission if you use an affiliate link or a promo code. This will help fund future torch reviews and tutorials.