Fenix LR50R V2 Search Light Review

Fenix LR50R V2#
- Specifications
- Introduction
- Torch in use
- Build quality
- LED, bezel, lens and reflector
- Size and comparison
- User interface
- Batteries and charging
- Performance
- Beamshots
- Thermal Images
- Conclusion
- Price
- Product page
Specifications#
| Brand/model | Fenix LR50R V2 |
|---|---|
| LED | 6x Luminus SST70, 1x SBT10X UV, 1x OSRAM KR CSLNM1.23 |
| Maximum lumens | 18,000 lm |
| Maximum beam intensity | 178,864 cd |
| Maximum throw | 846 m |
| Battery | 46950 3.6V Li-ion 32,000mAh |
| Onboard charging | Yes (2x USB-C) |
| Powerbank | Yes (USB-C) |
| Material | Aluminium |
| Modes | Rotary dial |
| Blinkies | Strobe, SOS |
| Reflector | Reflector |
| Waterproof | IP68 |
| Review date | May 2026 |
Introduction#
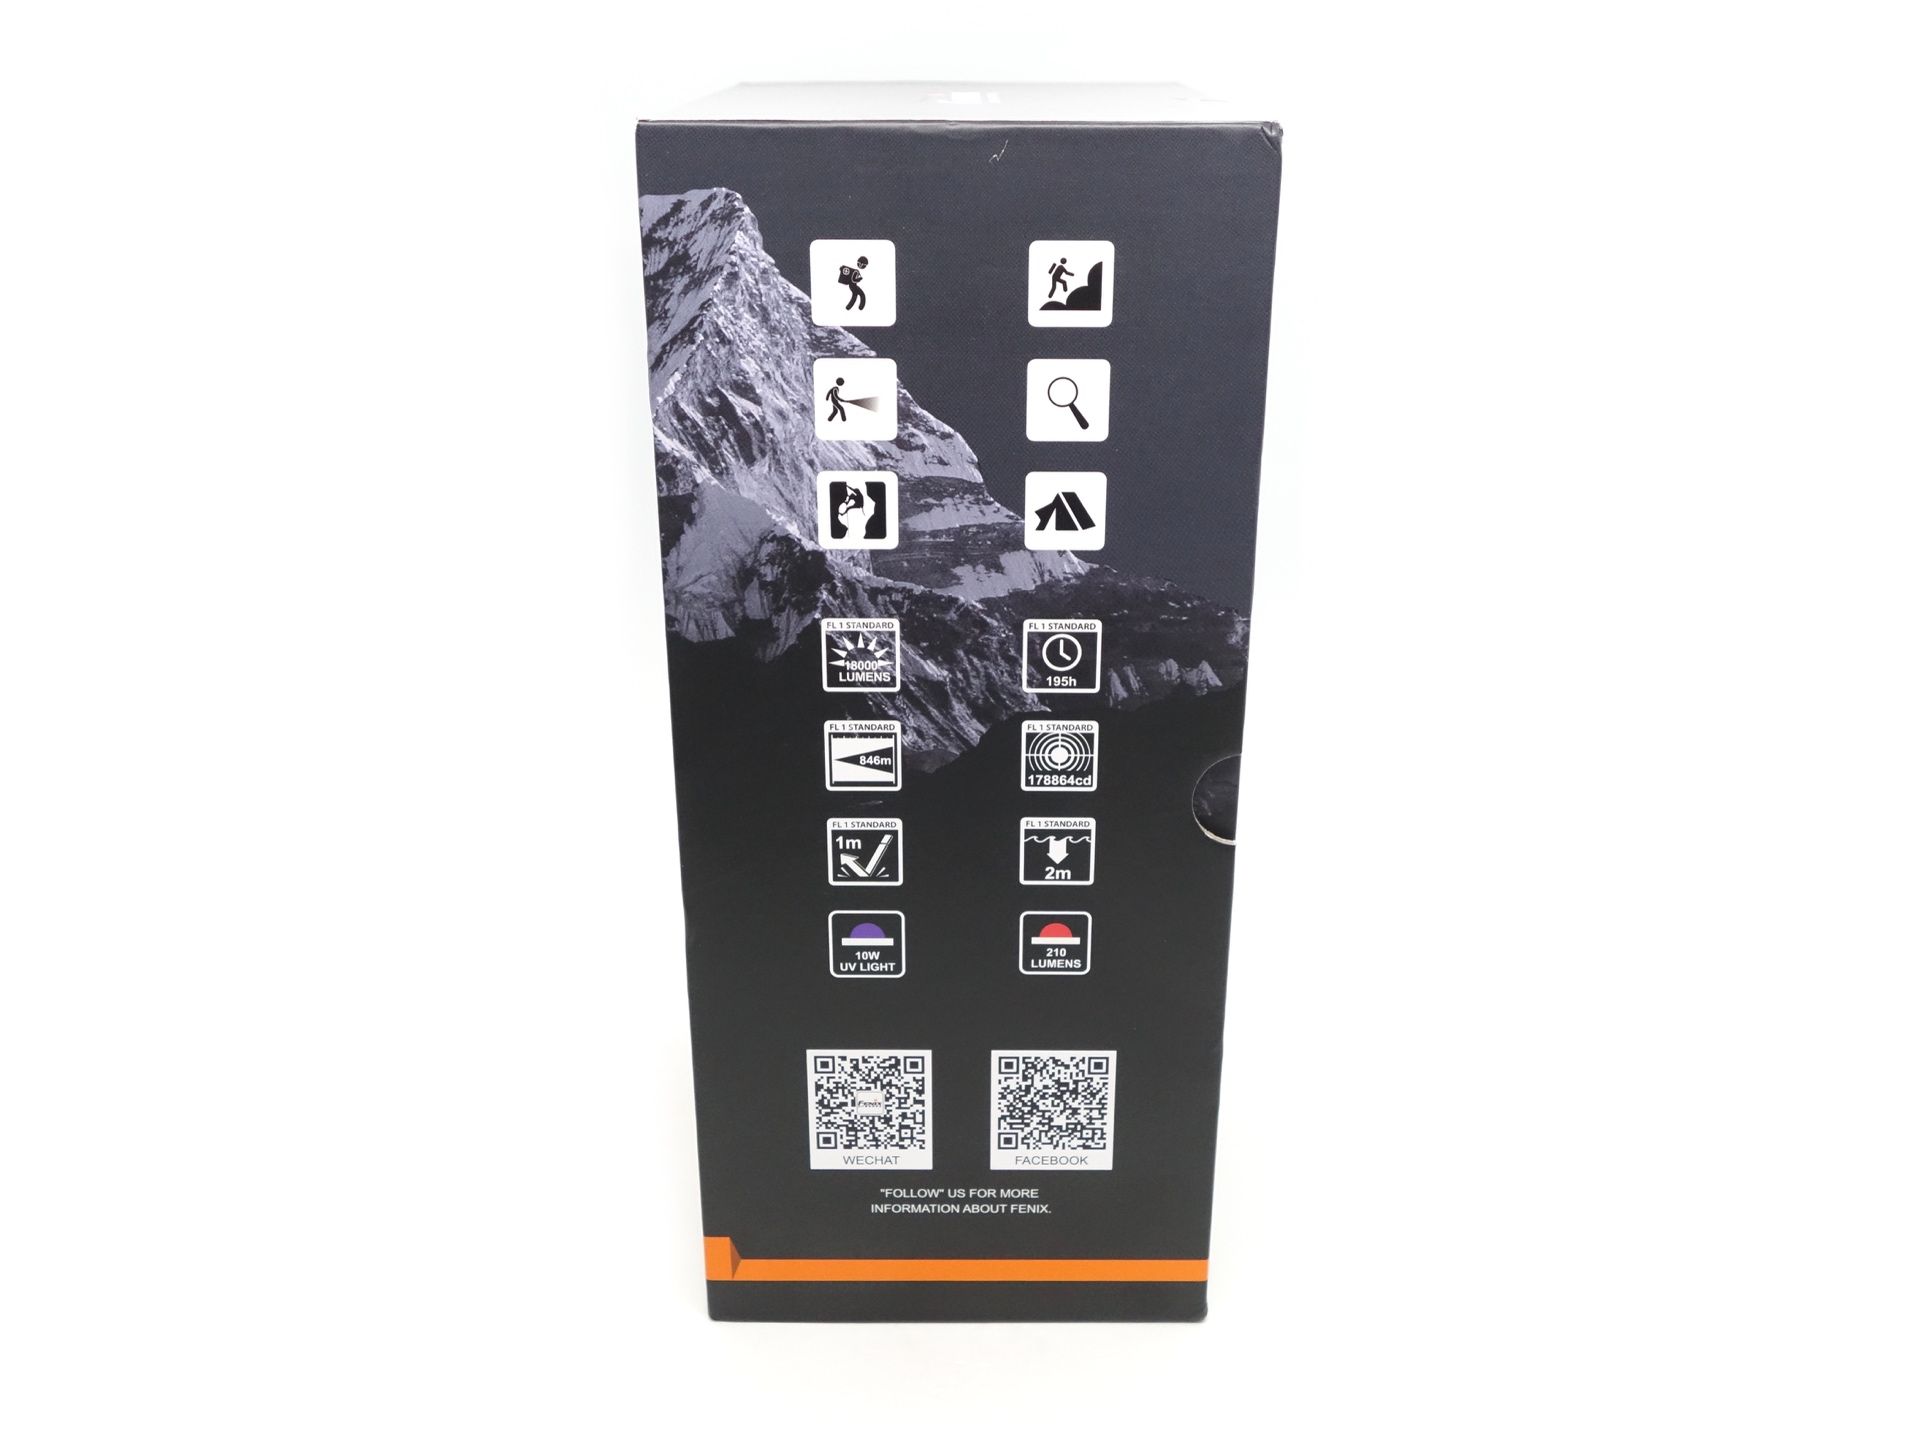
The Fenix LR50R V2 is an upgraded Search Light with a massive battery, Spotlight mode, Floodlight mode, S+F mode, a UV light and a red light.
It is controlled by a side switch to select the mode and a rotary dial to select the brightness.
There is a display to see the mode, brightness level and battery status.
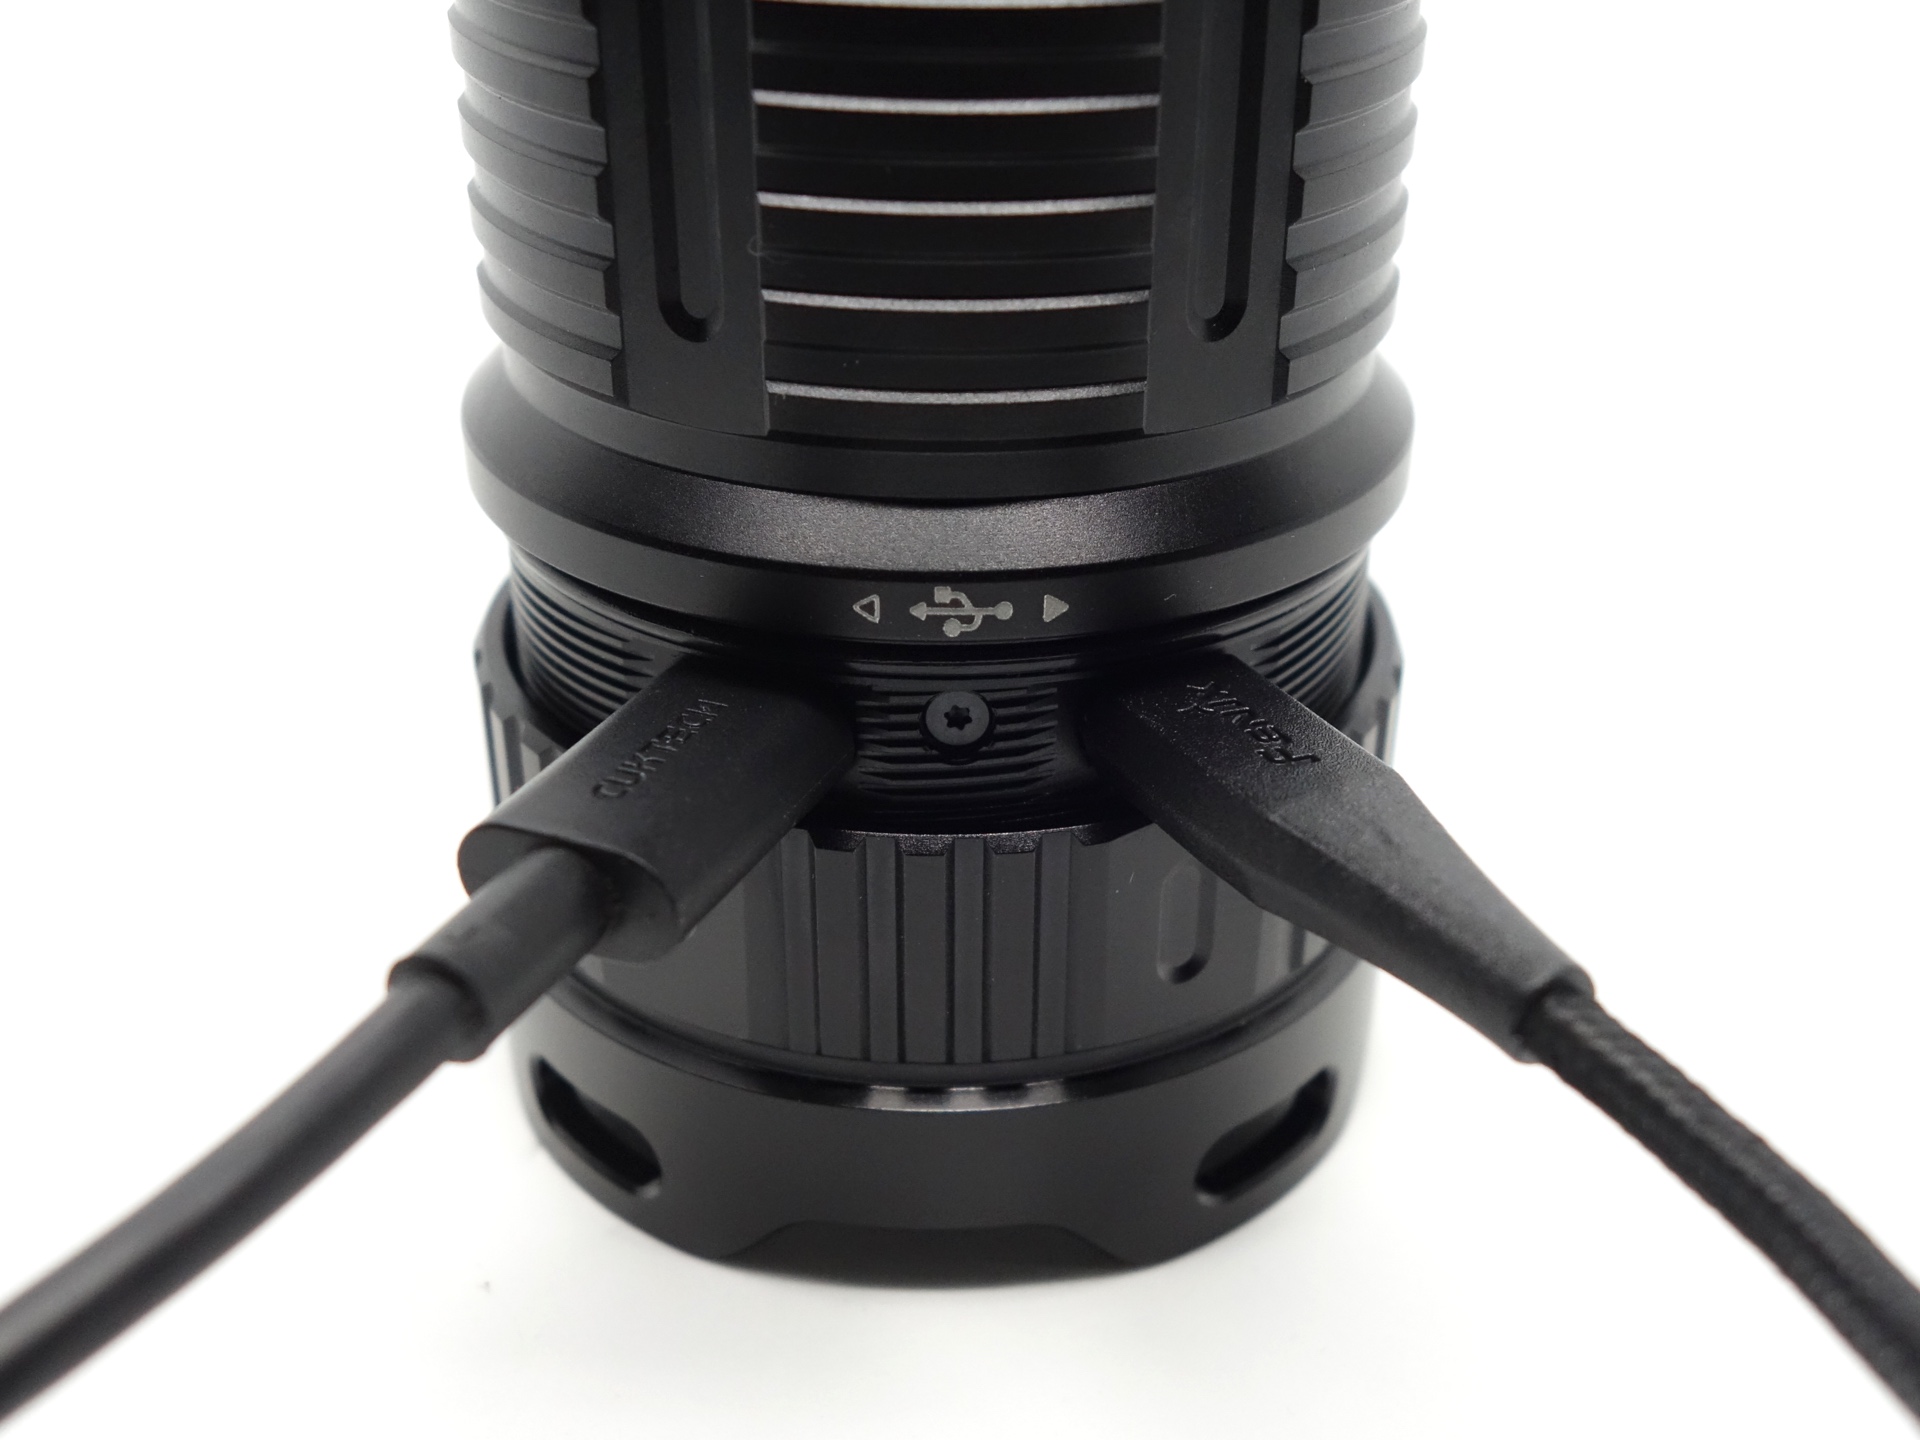
It has dual USB-C ports for: dual input charging, single input charging, pass-through charging and the battery pack can simply be used as a powerbank.
fenixstore.com.au kindly provided this torch for review. I have not been paid for this review nor have I held back my opinions of this torch.
Packaging#
The Fenix LR50R V2 comes in an orange and black Fenix branded box with an image of the torch on the front and specifications on the back.

The following is included in the box:
- Fenix LR50R V2.
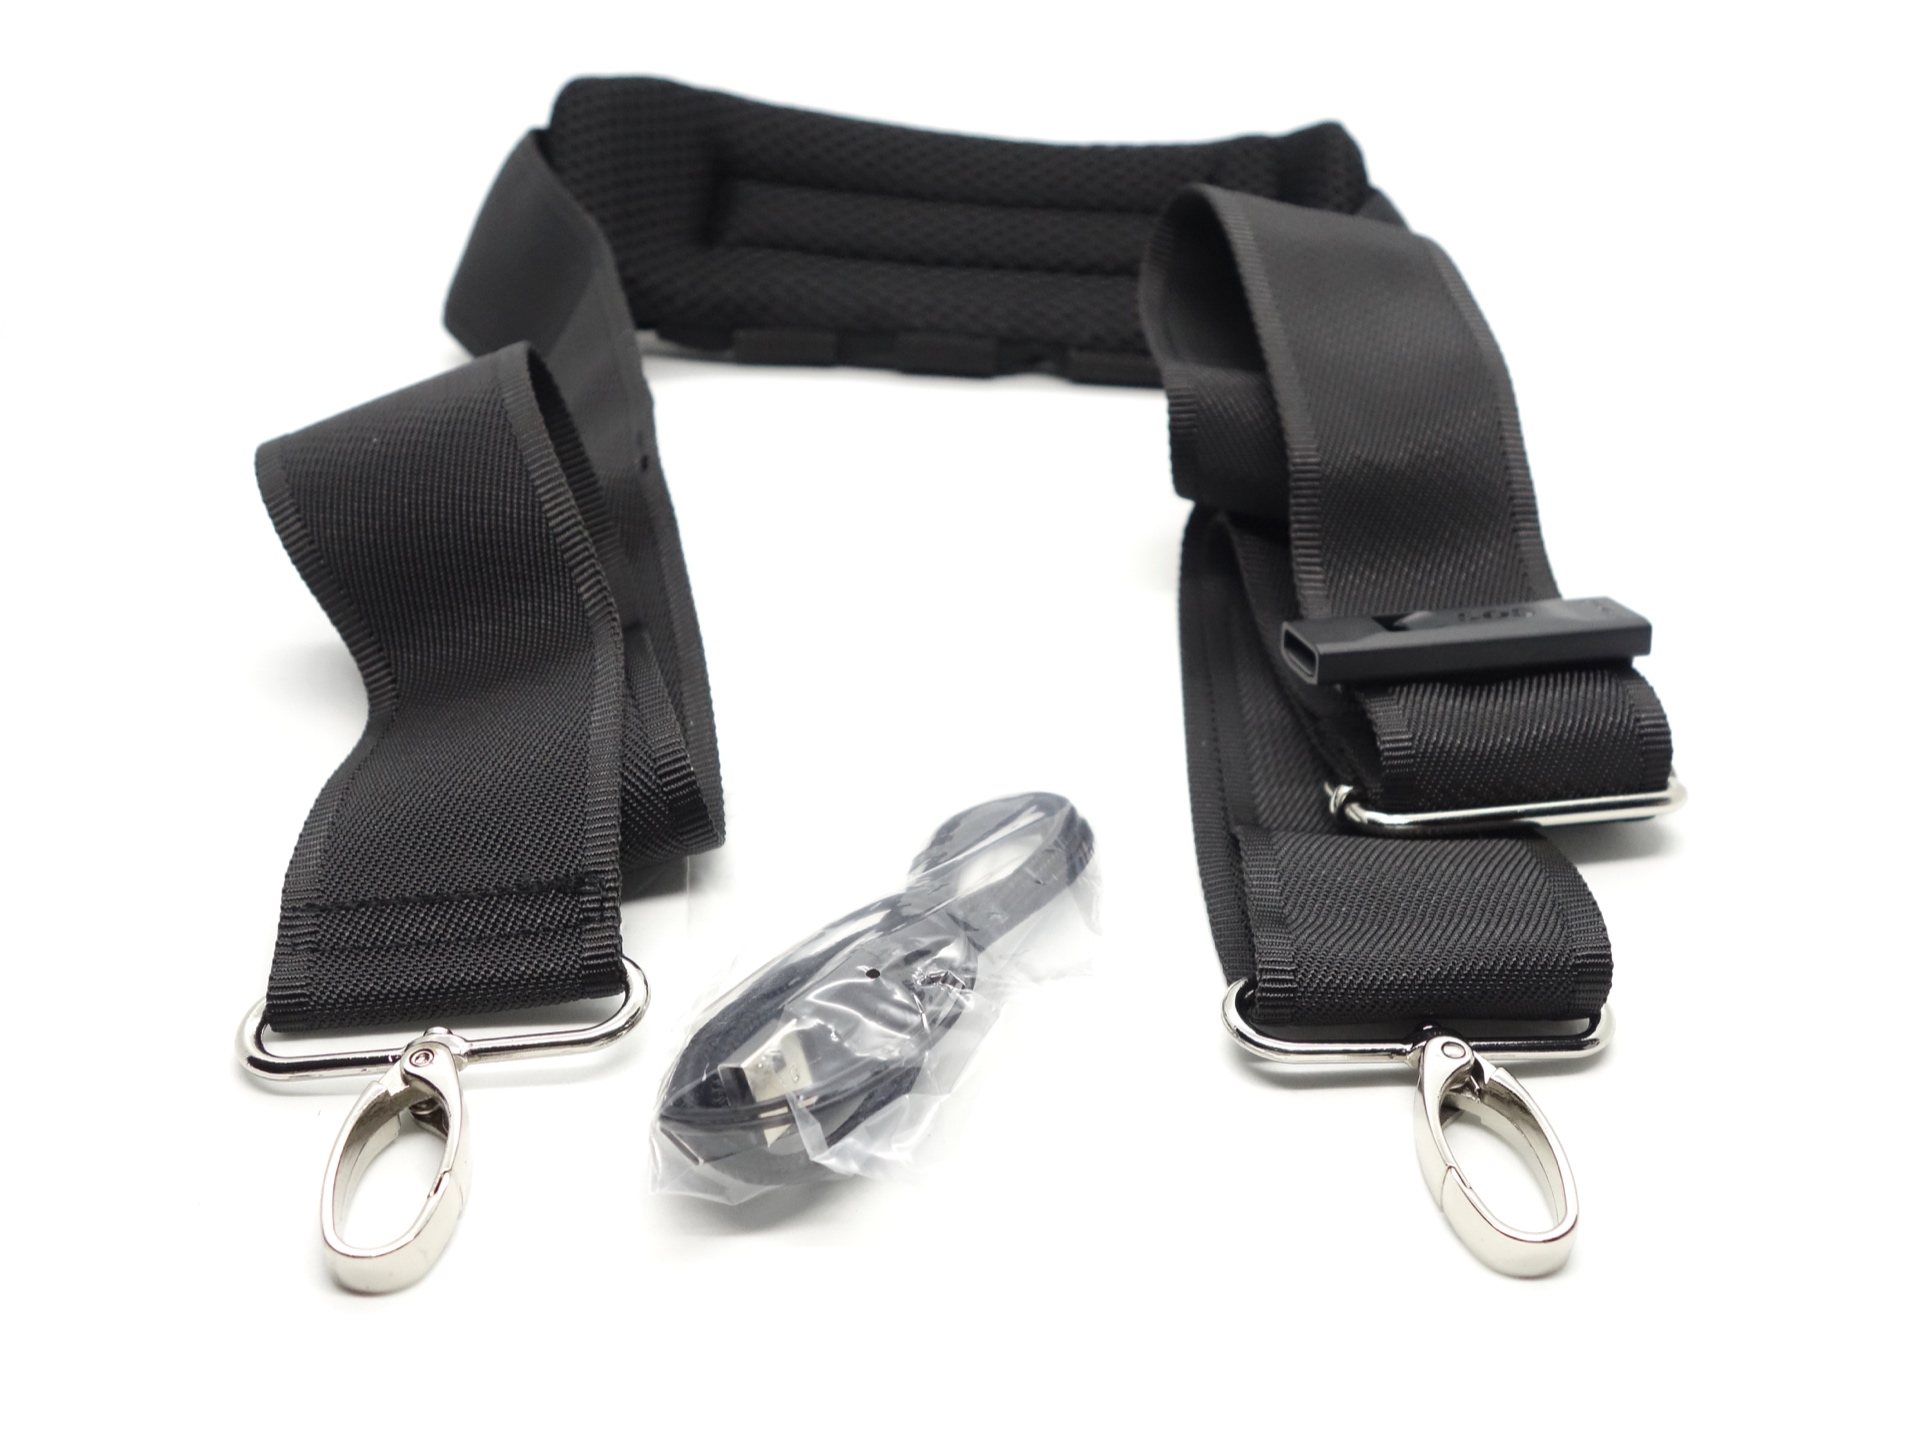
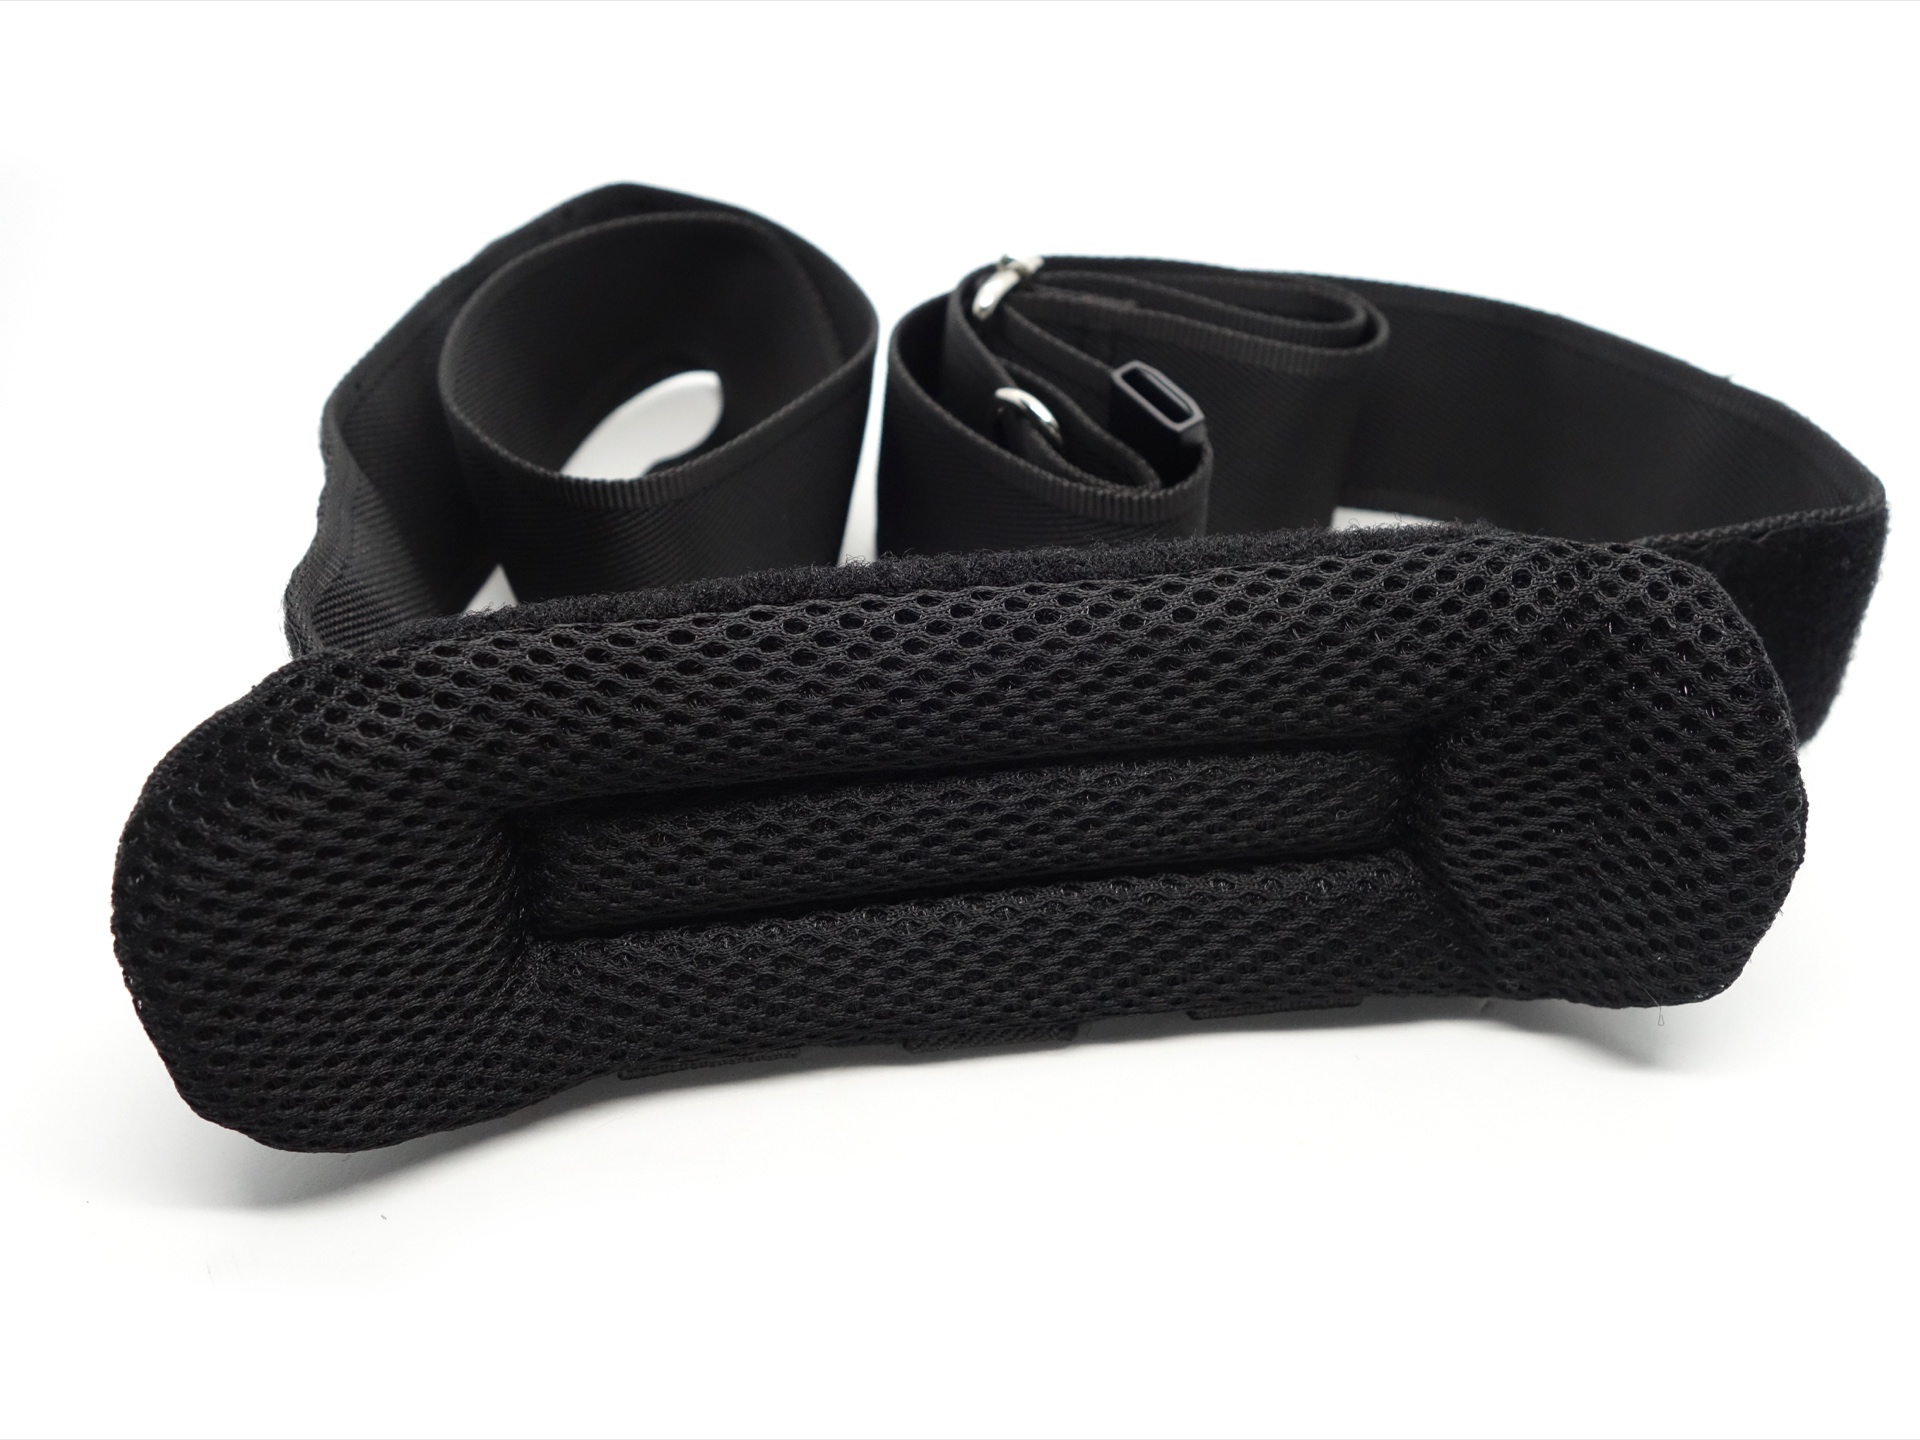
- Shoulder strap.
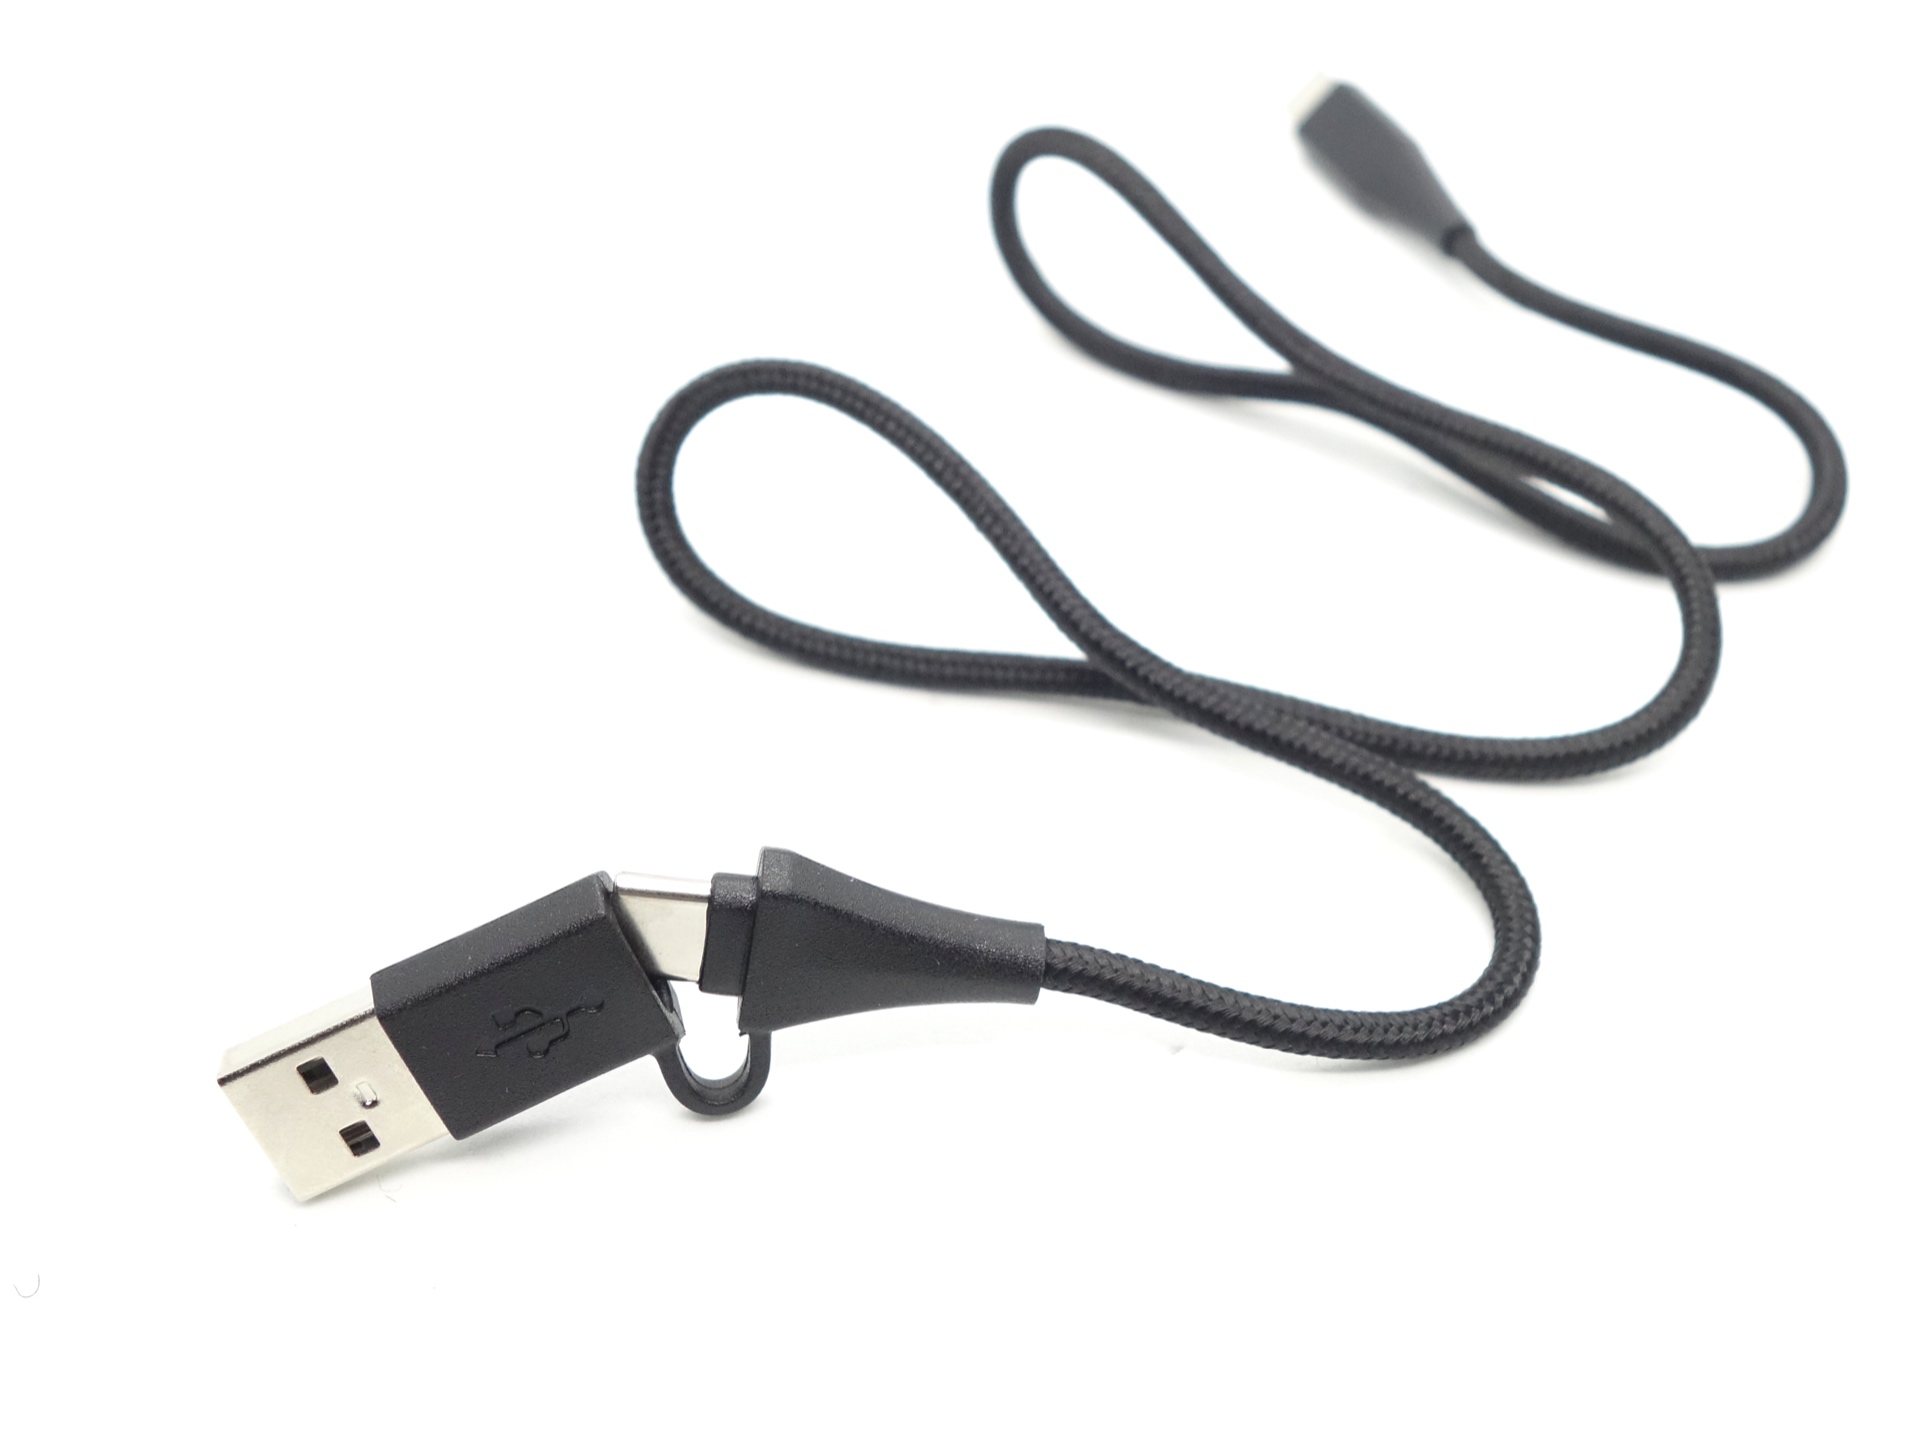
- USB-C to USB-C cable with USB-C to USB-A adapter.
- Two spare o-rings.
- User manual.
User manual#

Torch in use#
This thing is massive!


Most of the weight is in the battery tube.

The torch can be mounted to a tripod using a 1/4 inch threaded hole.
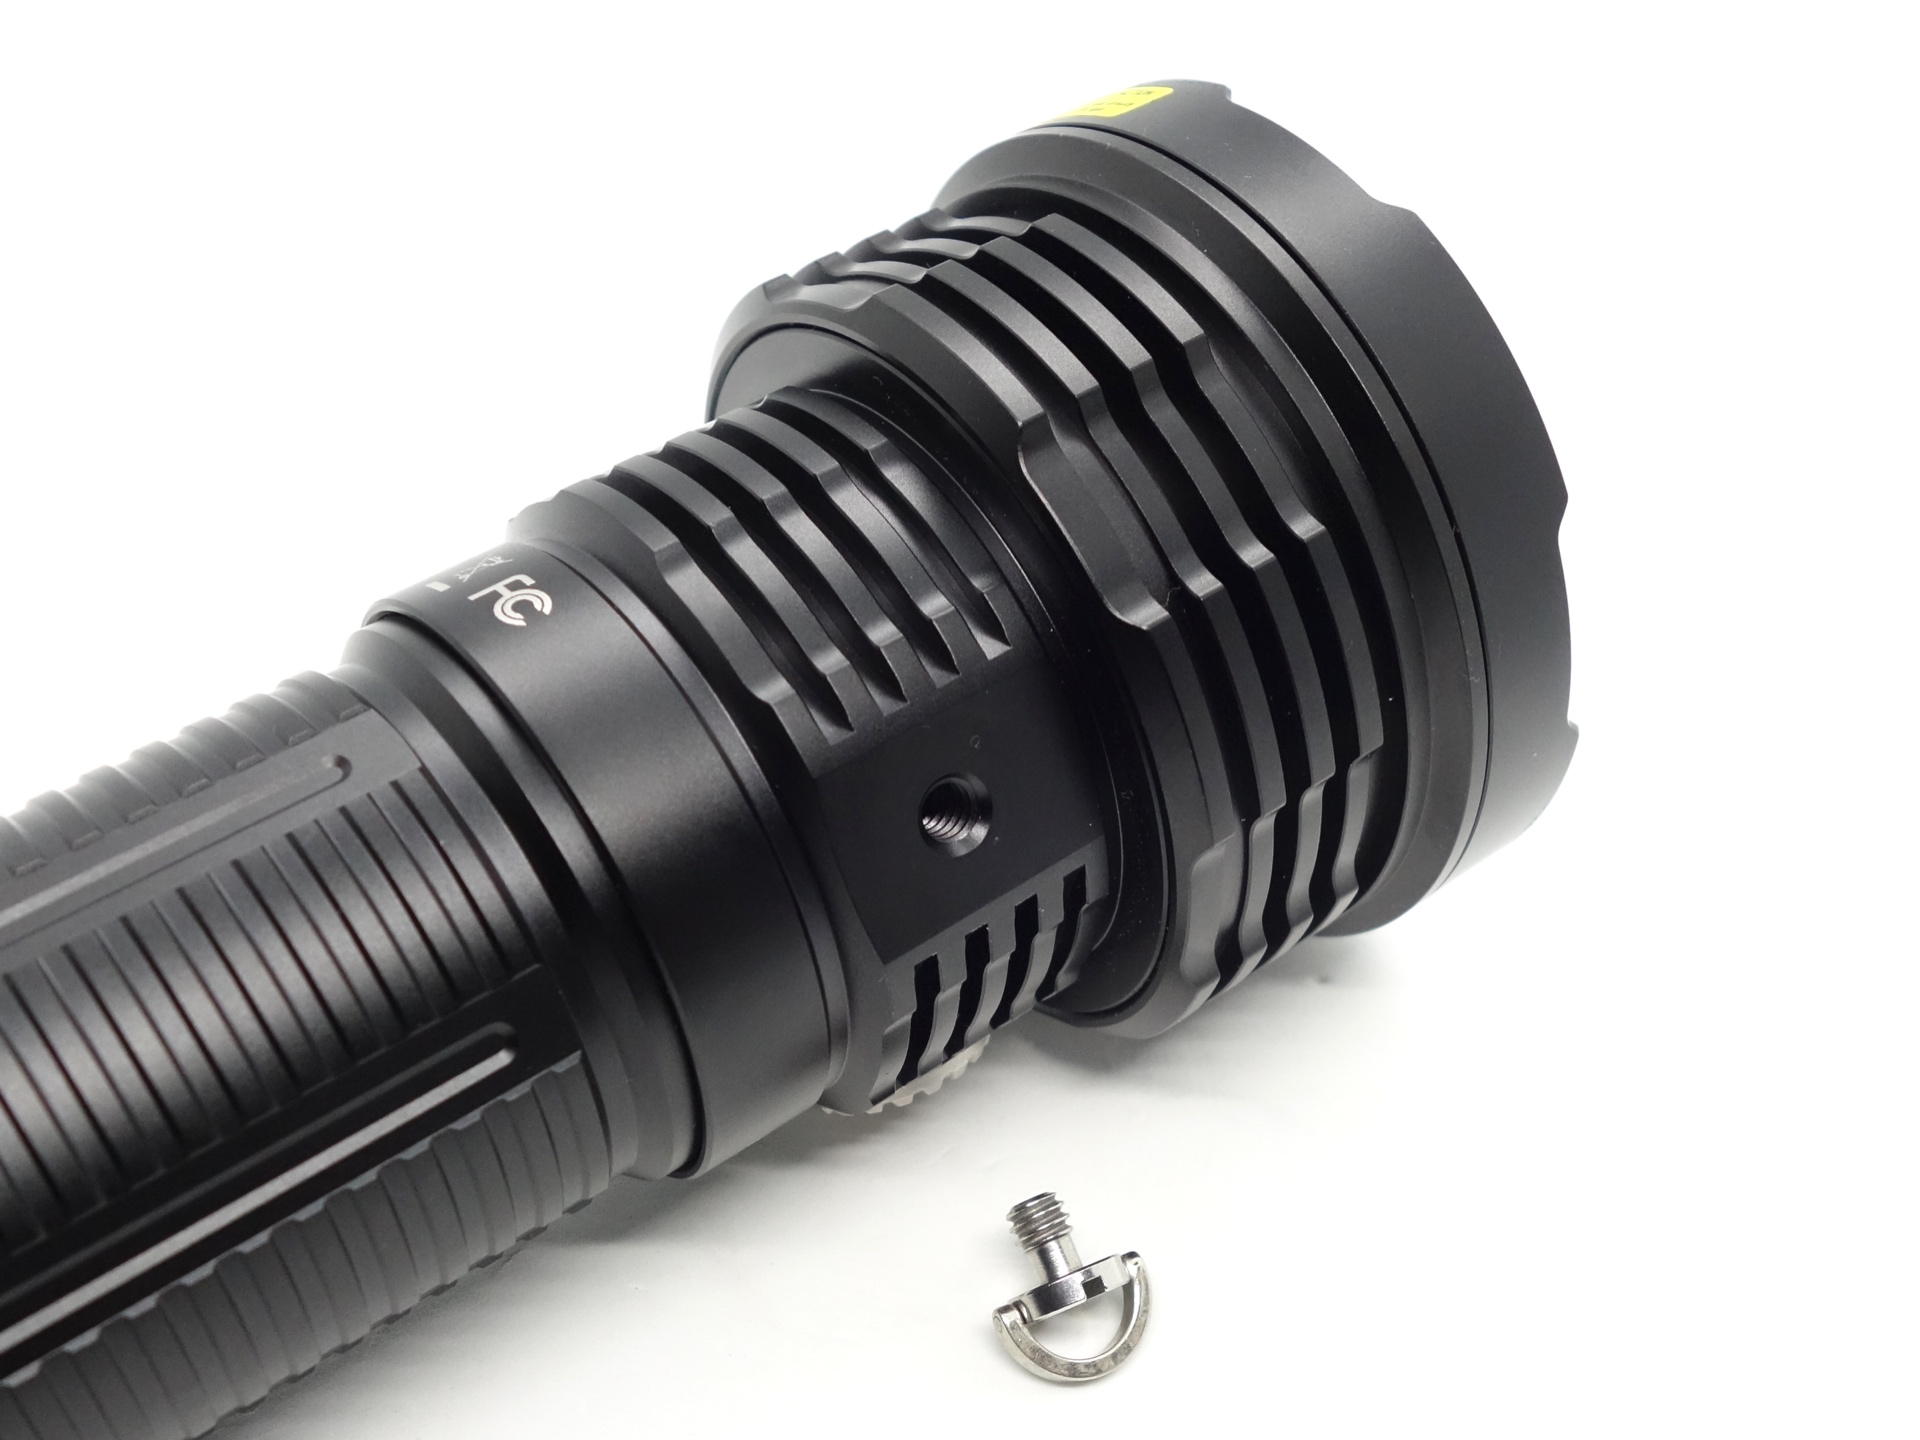
The shoulder strap can be clipped to the D-ring in the 1/4 inch hole and to one of the holes in the tailcap.
Build quality#
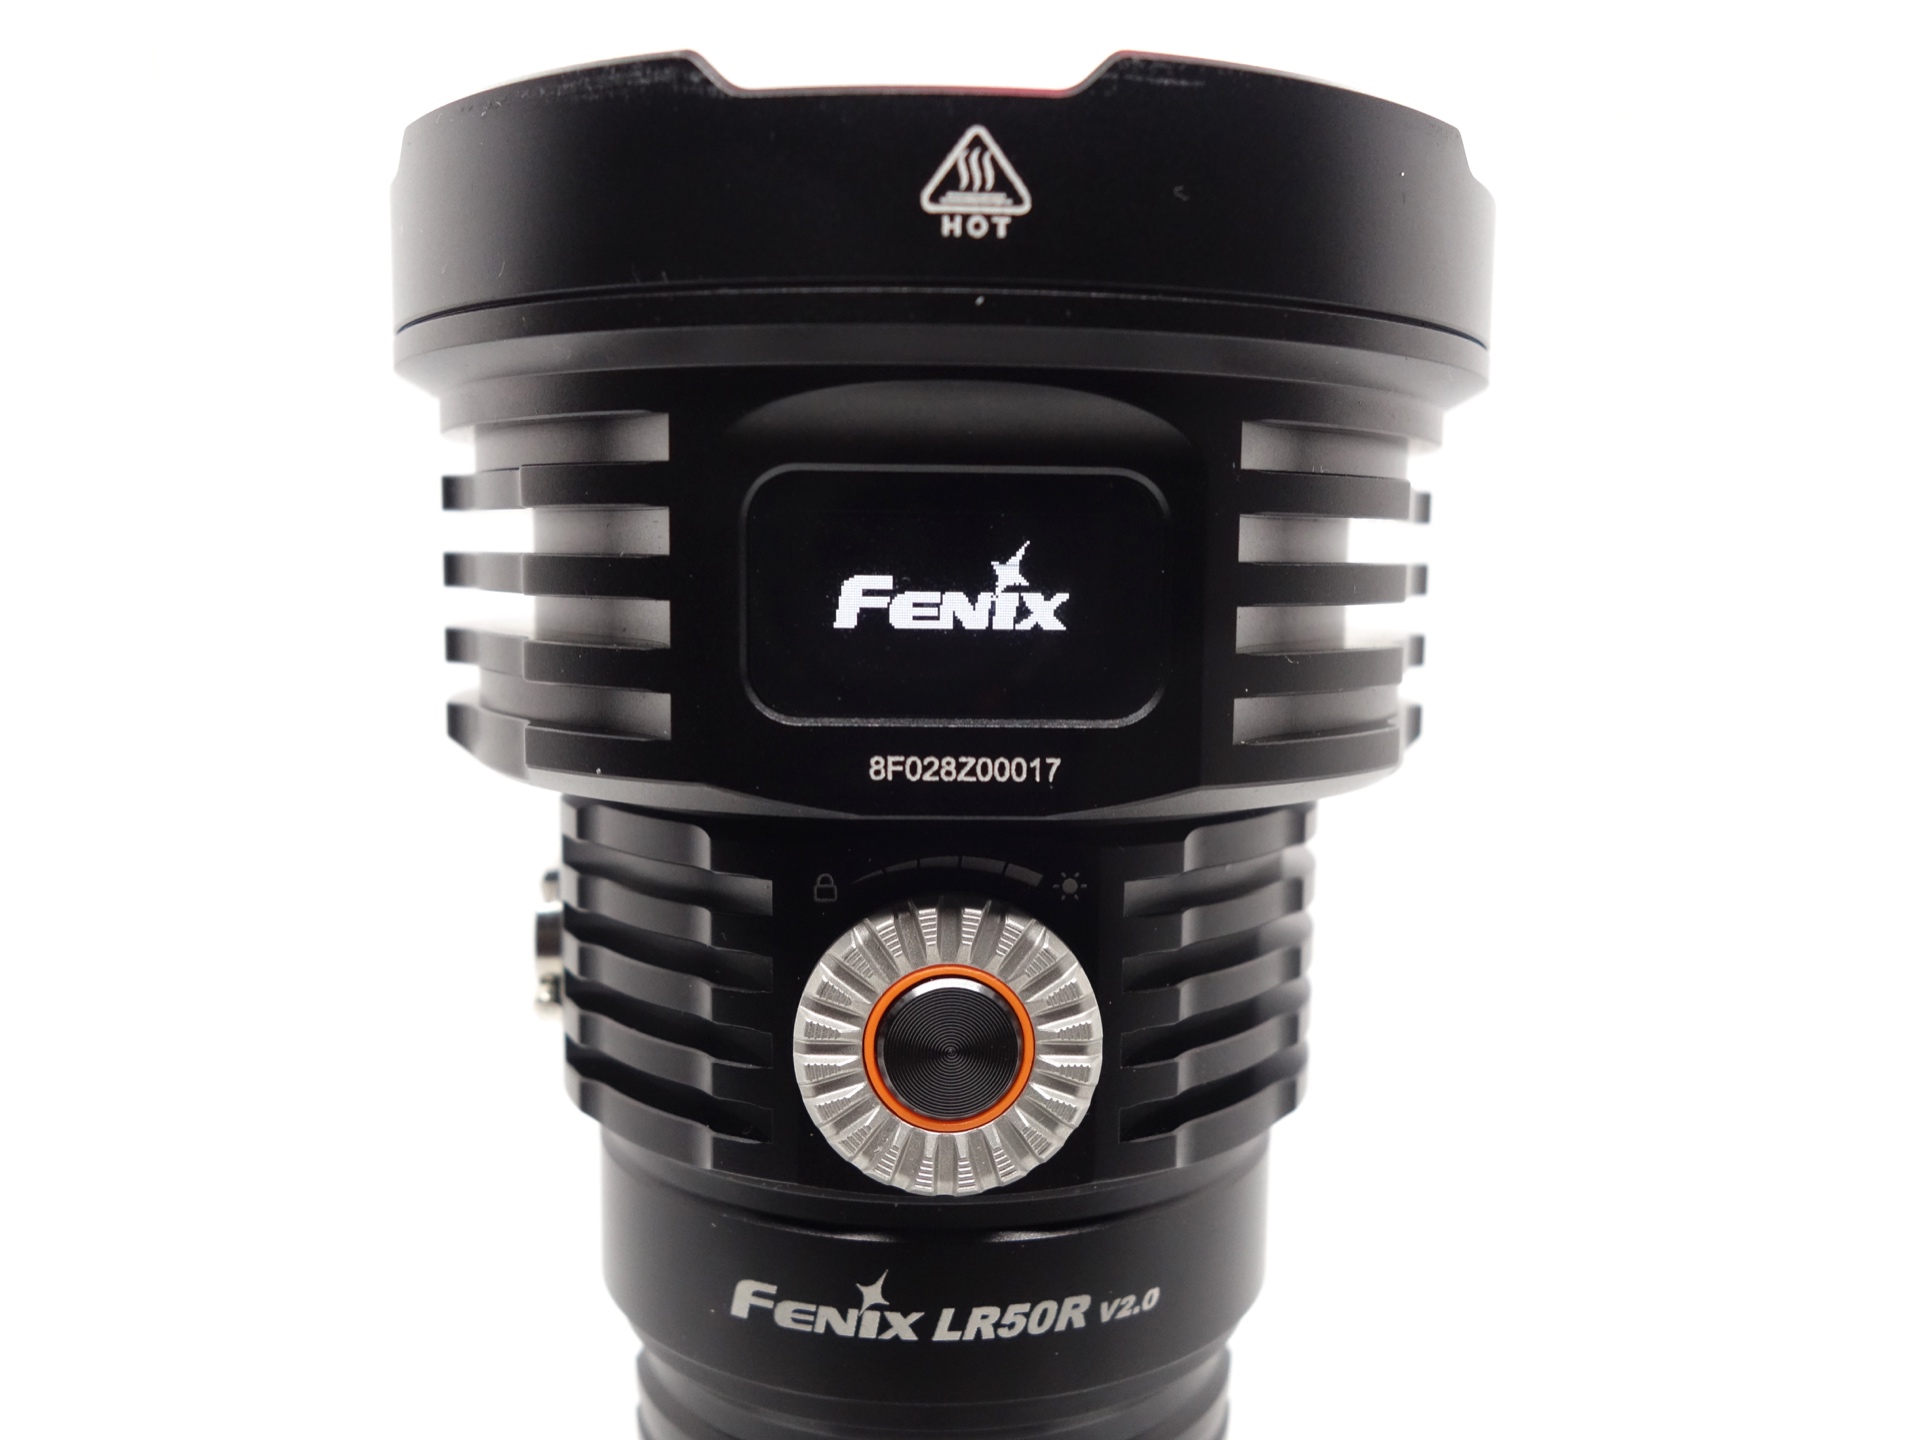
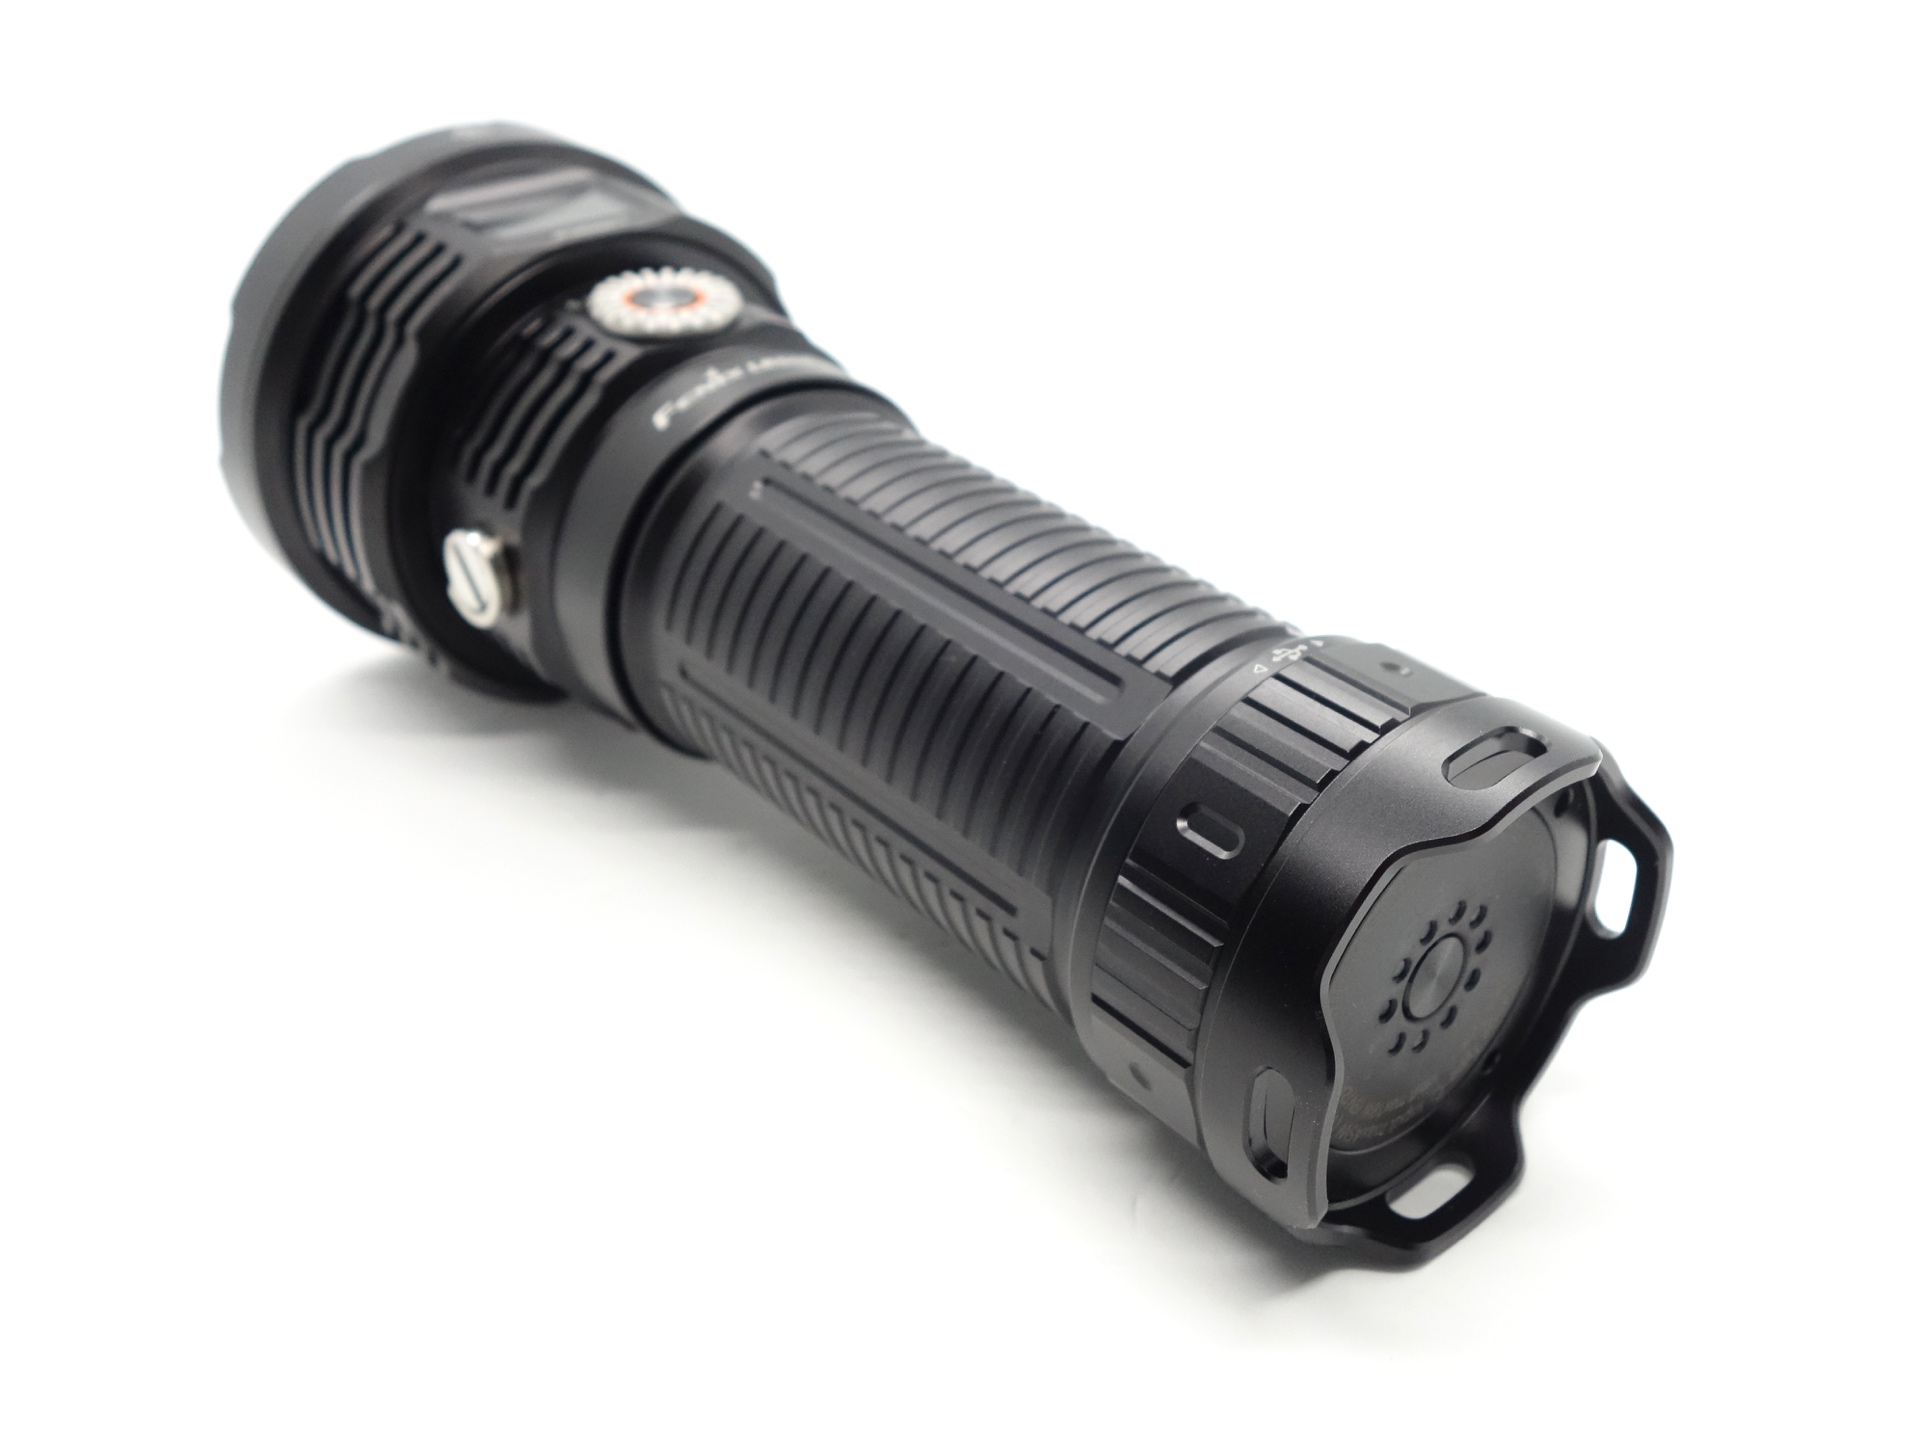
The Fenix LR50R V2 is made of aluminium and it has a matte black anodised finish.
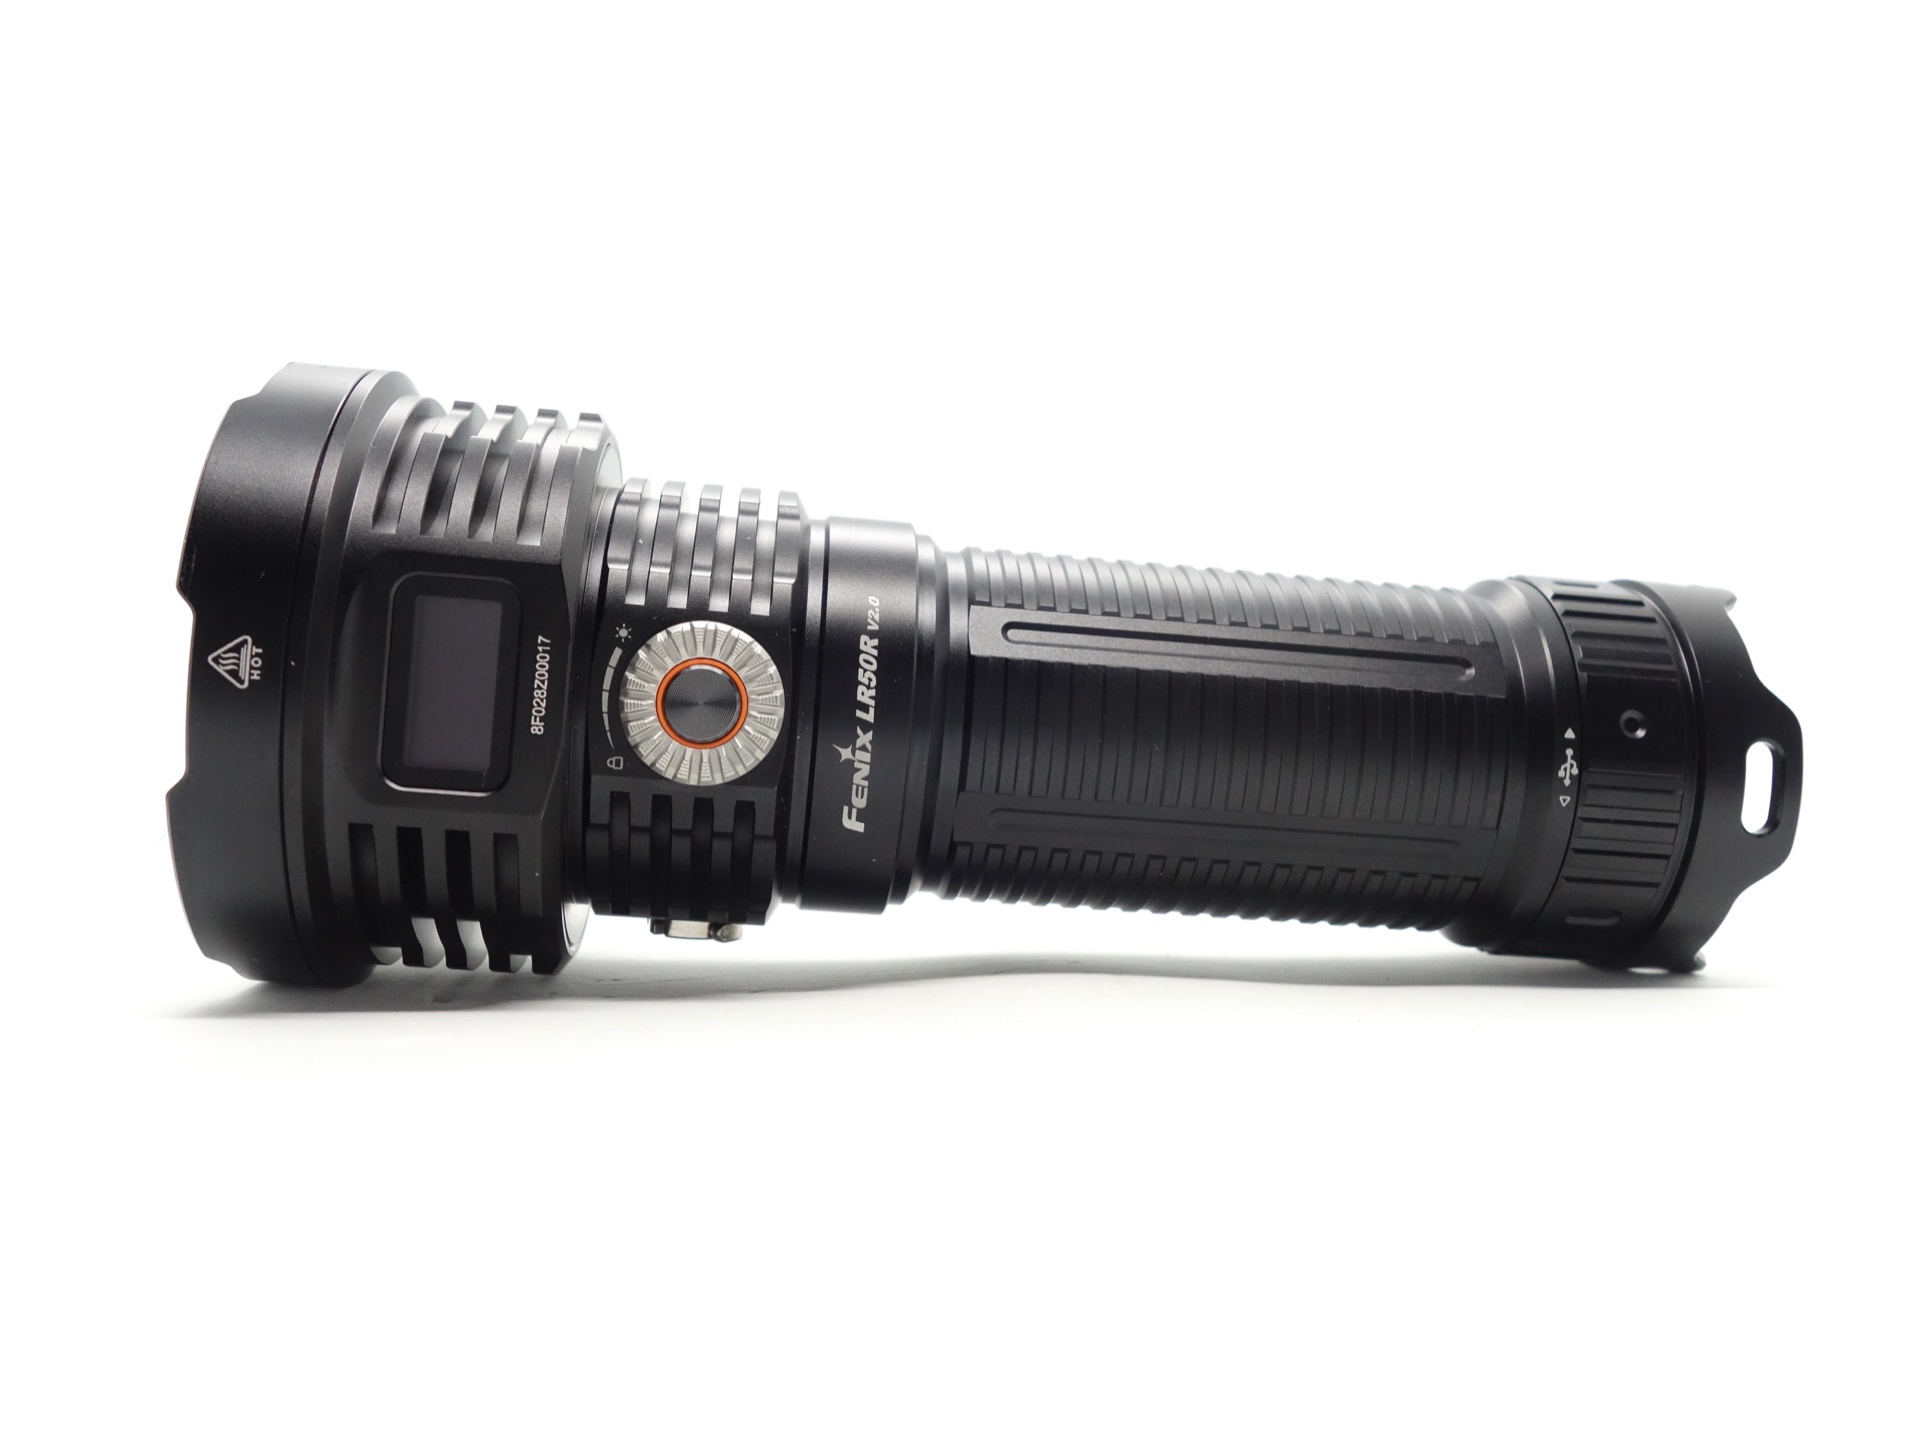
There is plenty of grip on the battery tube.
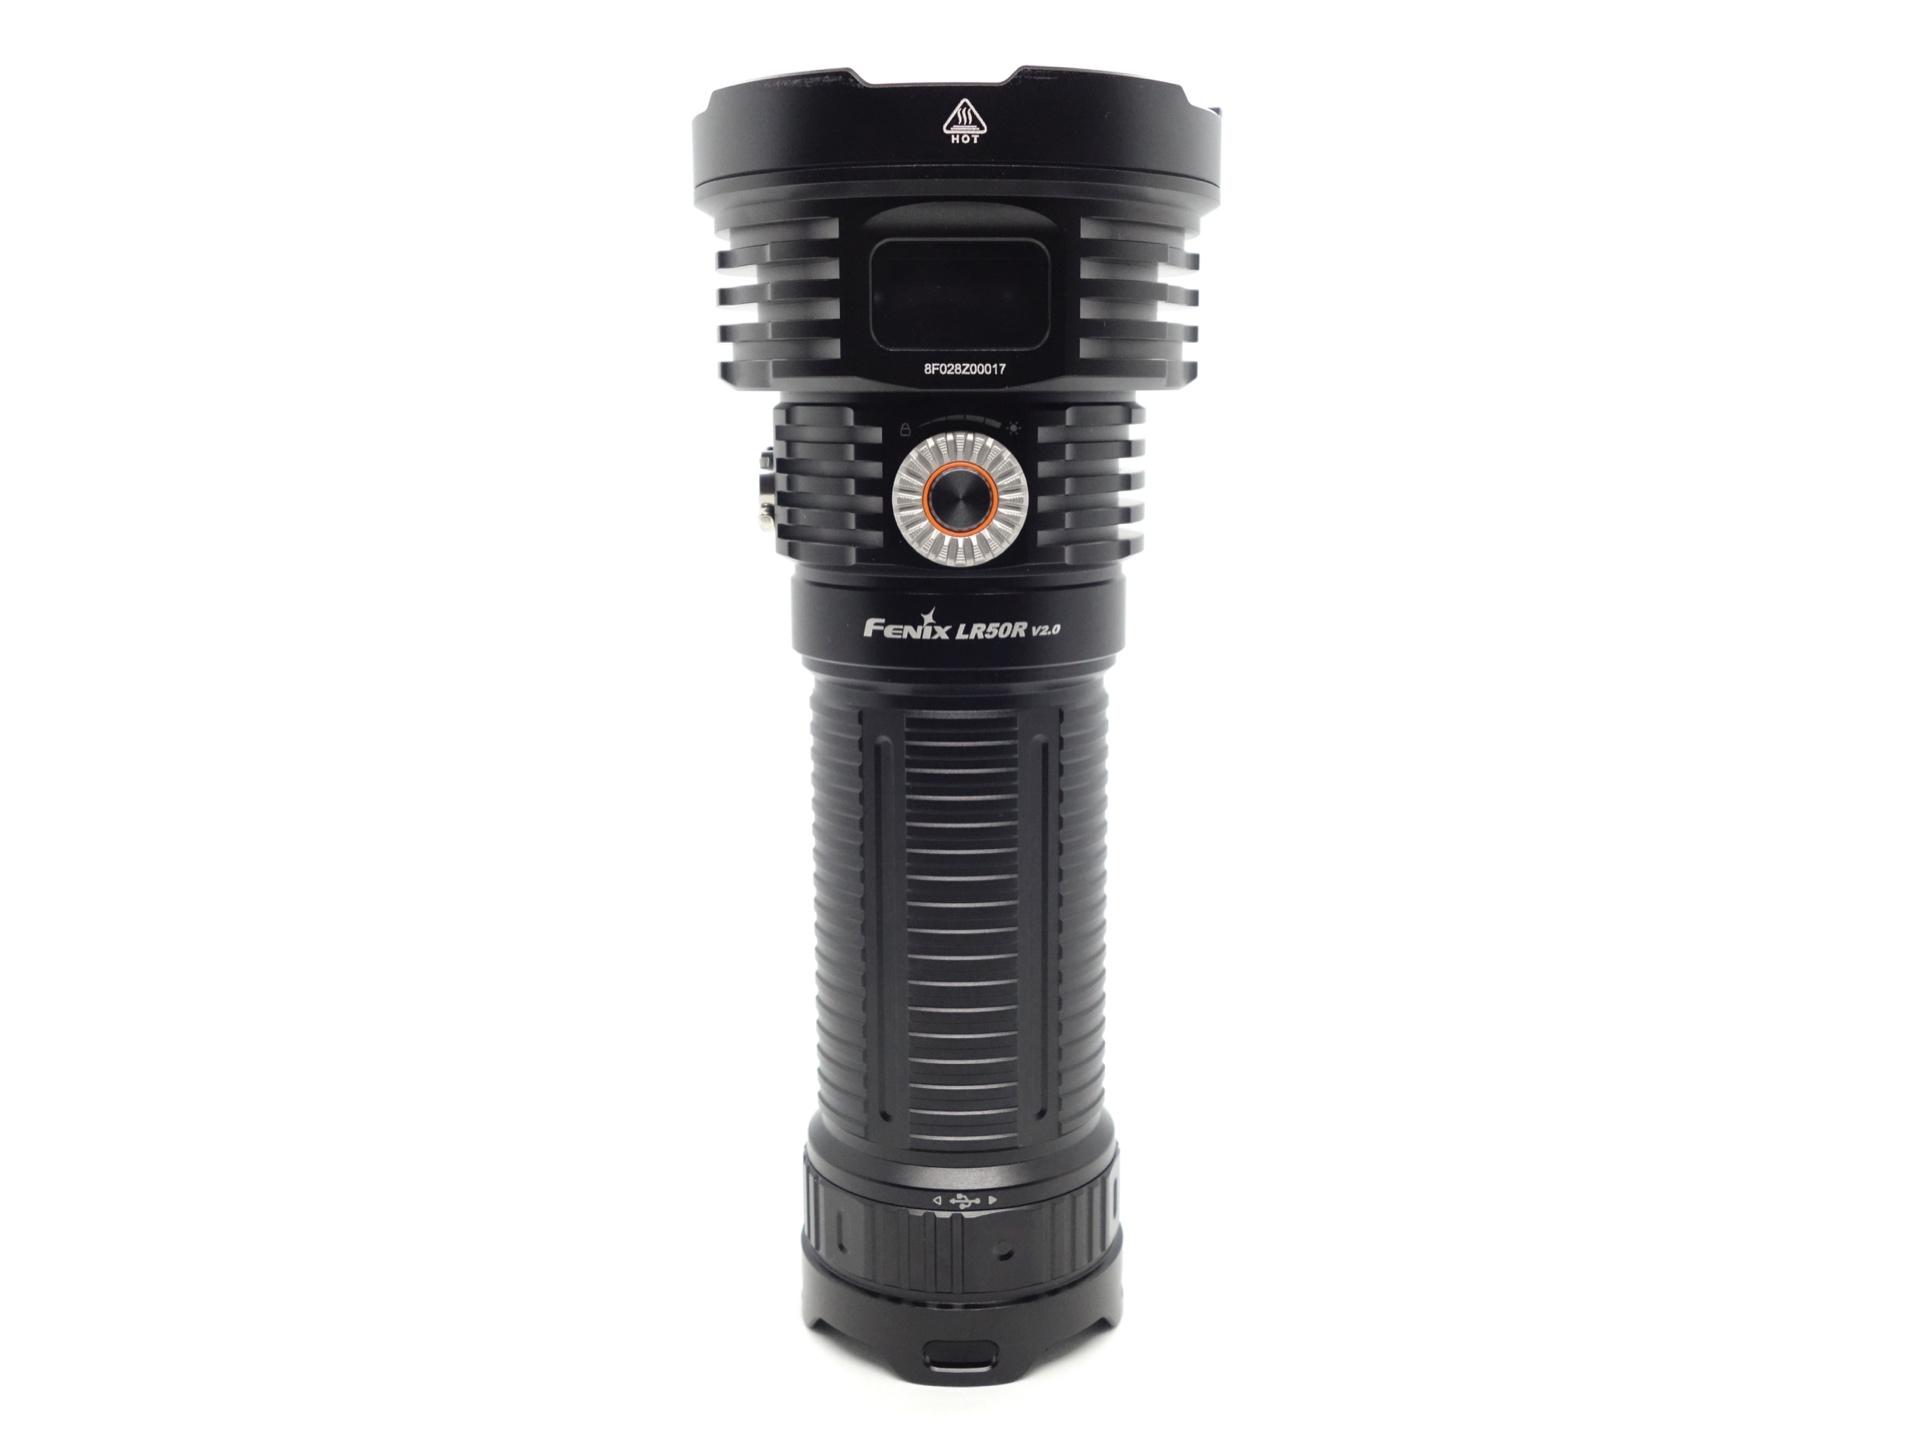
The rotary dial turns smoothly and it gives a satisfying click when it is pushed to the locked position.
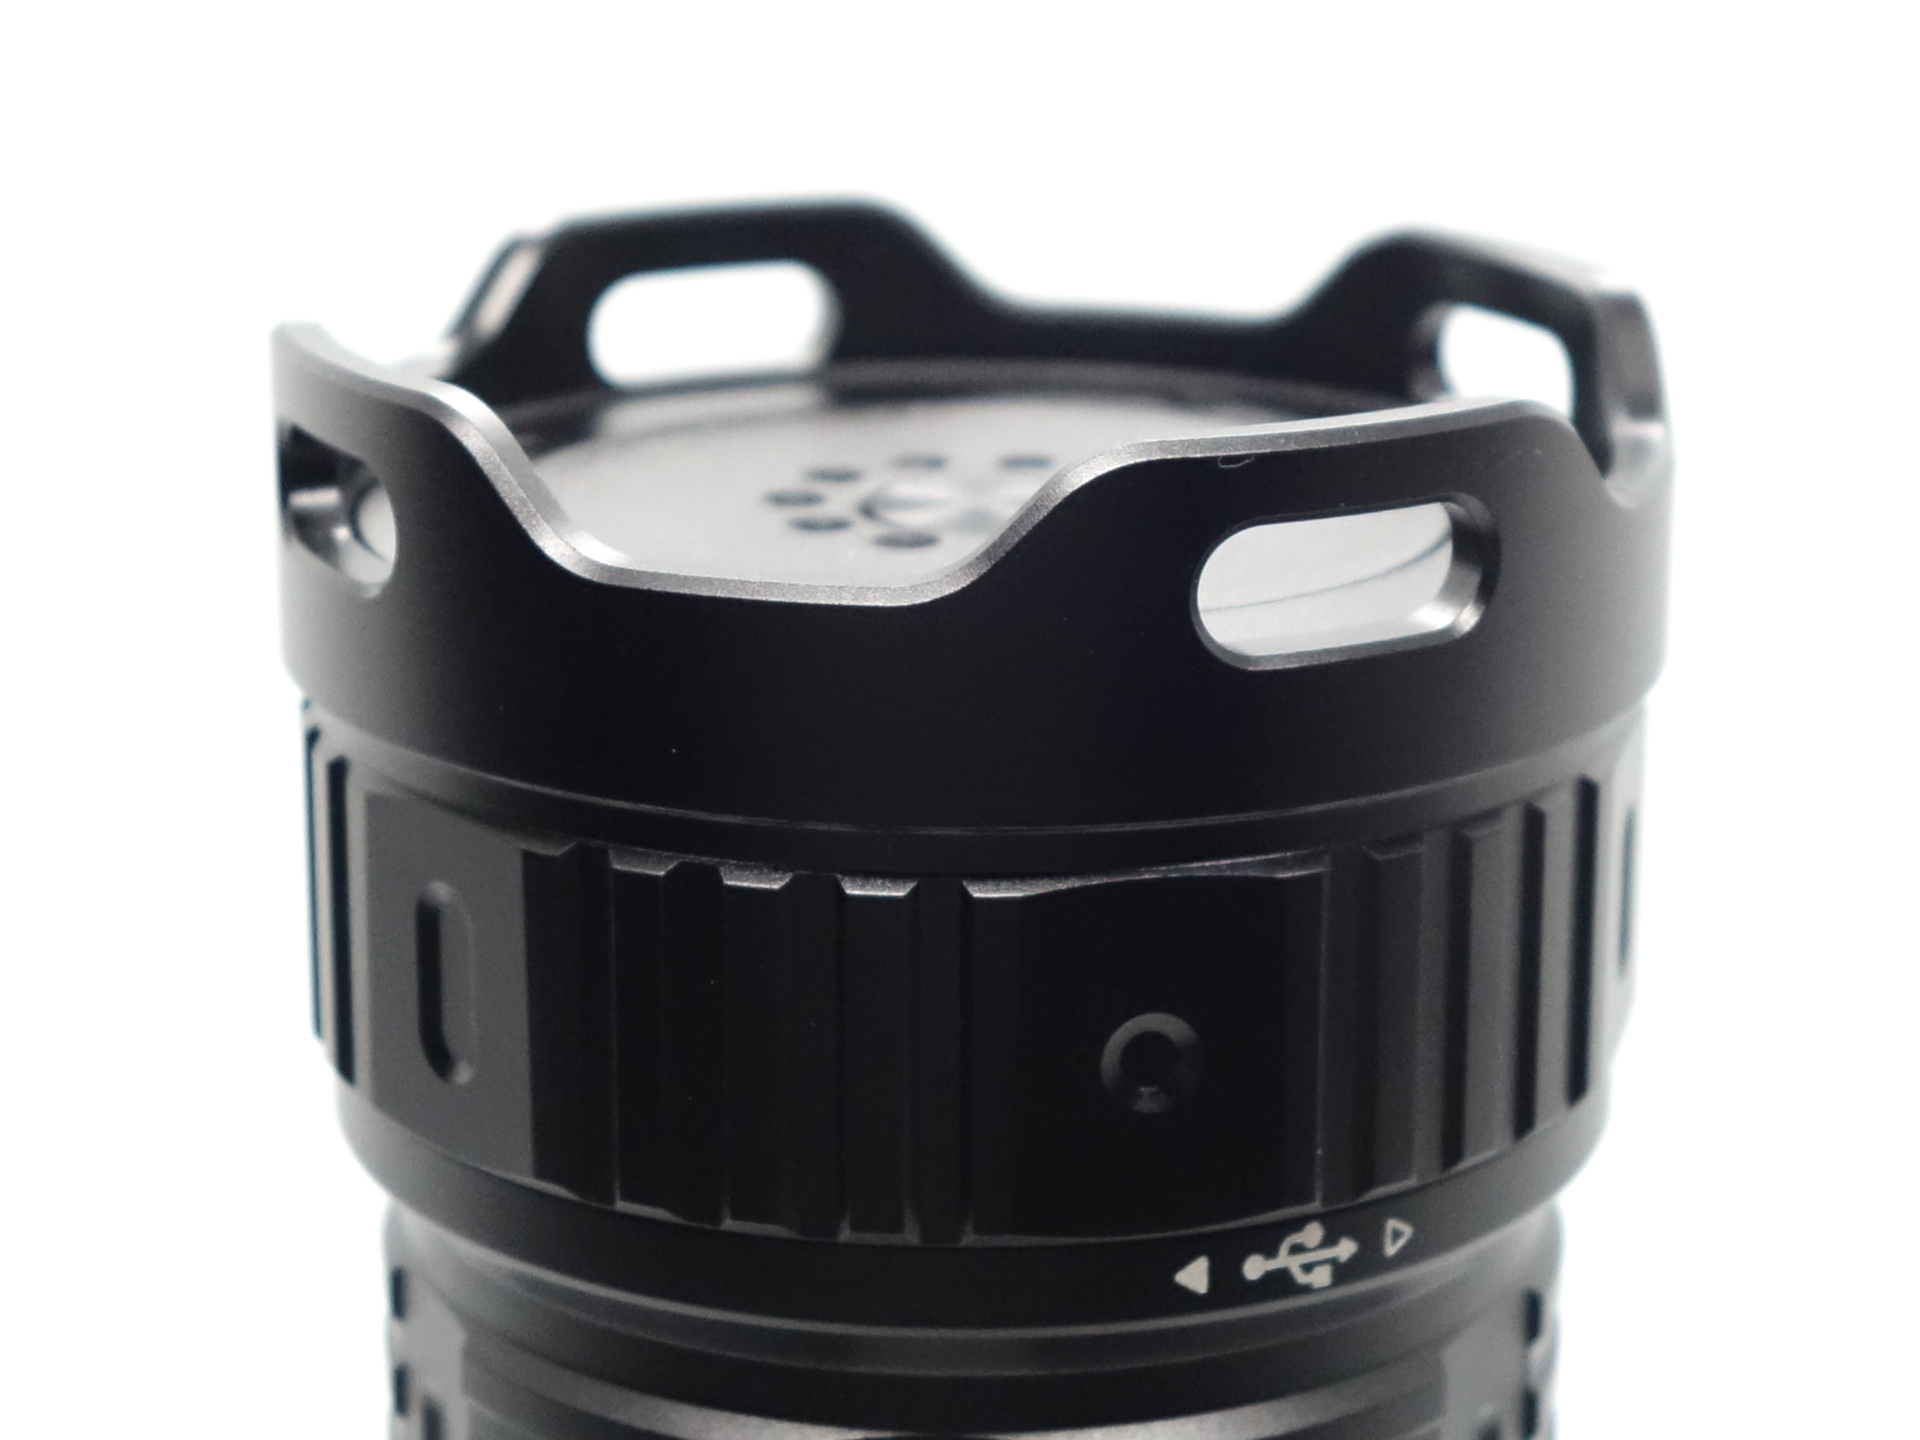
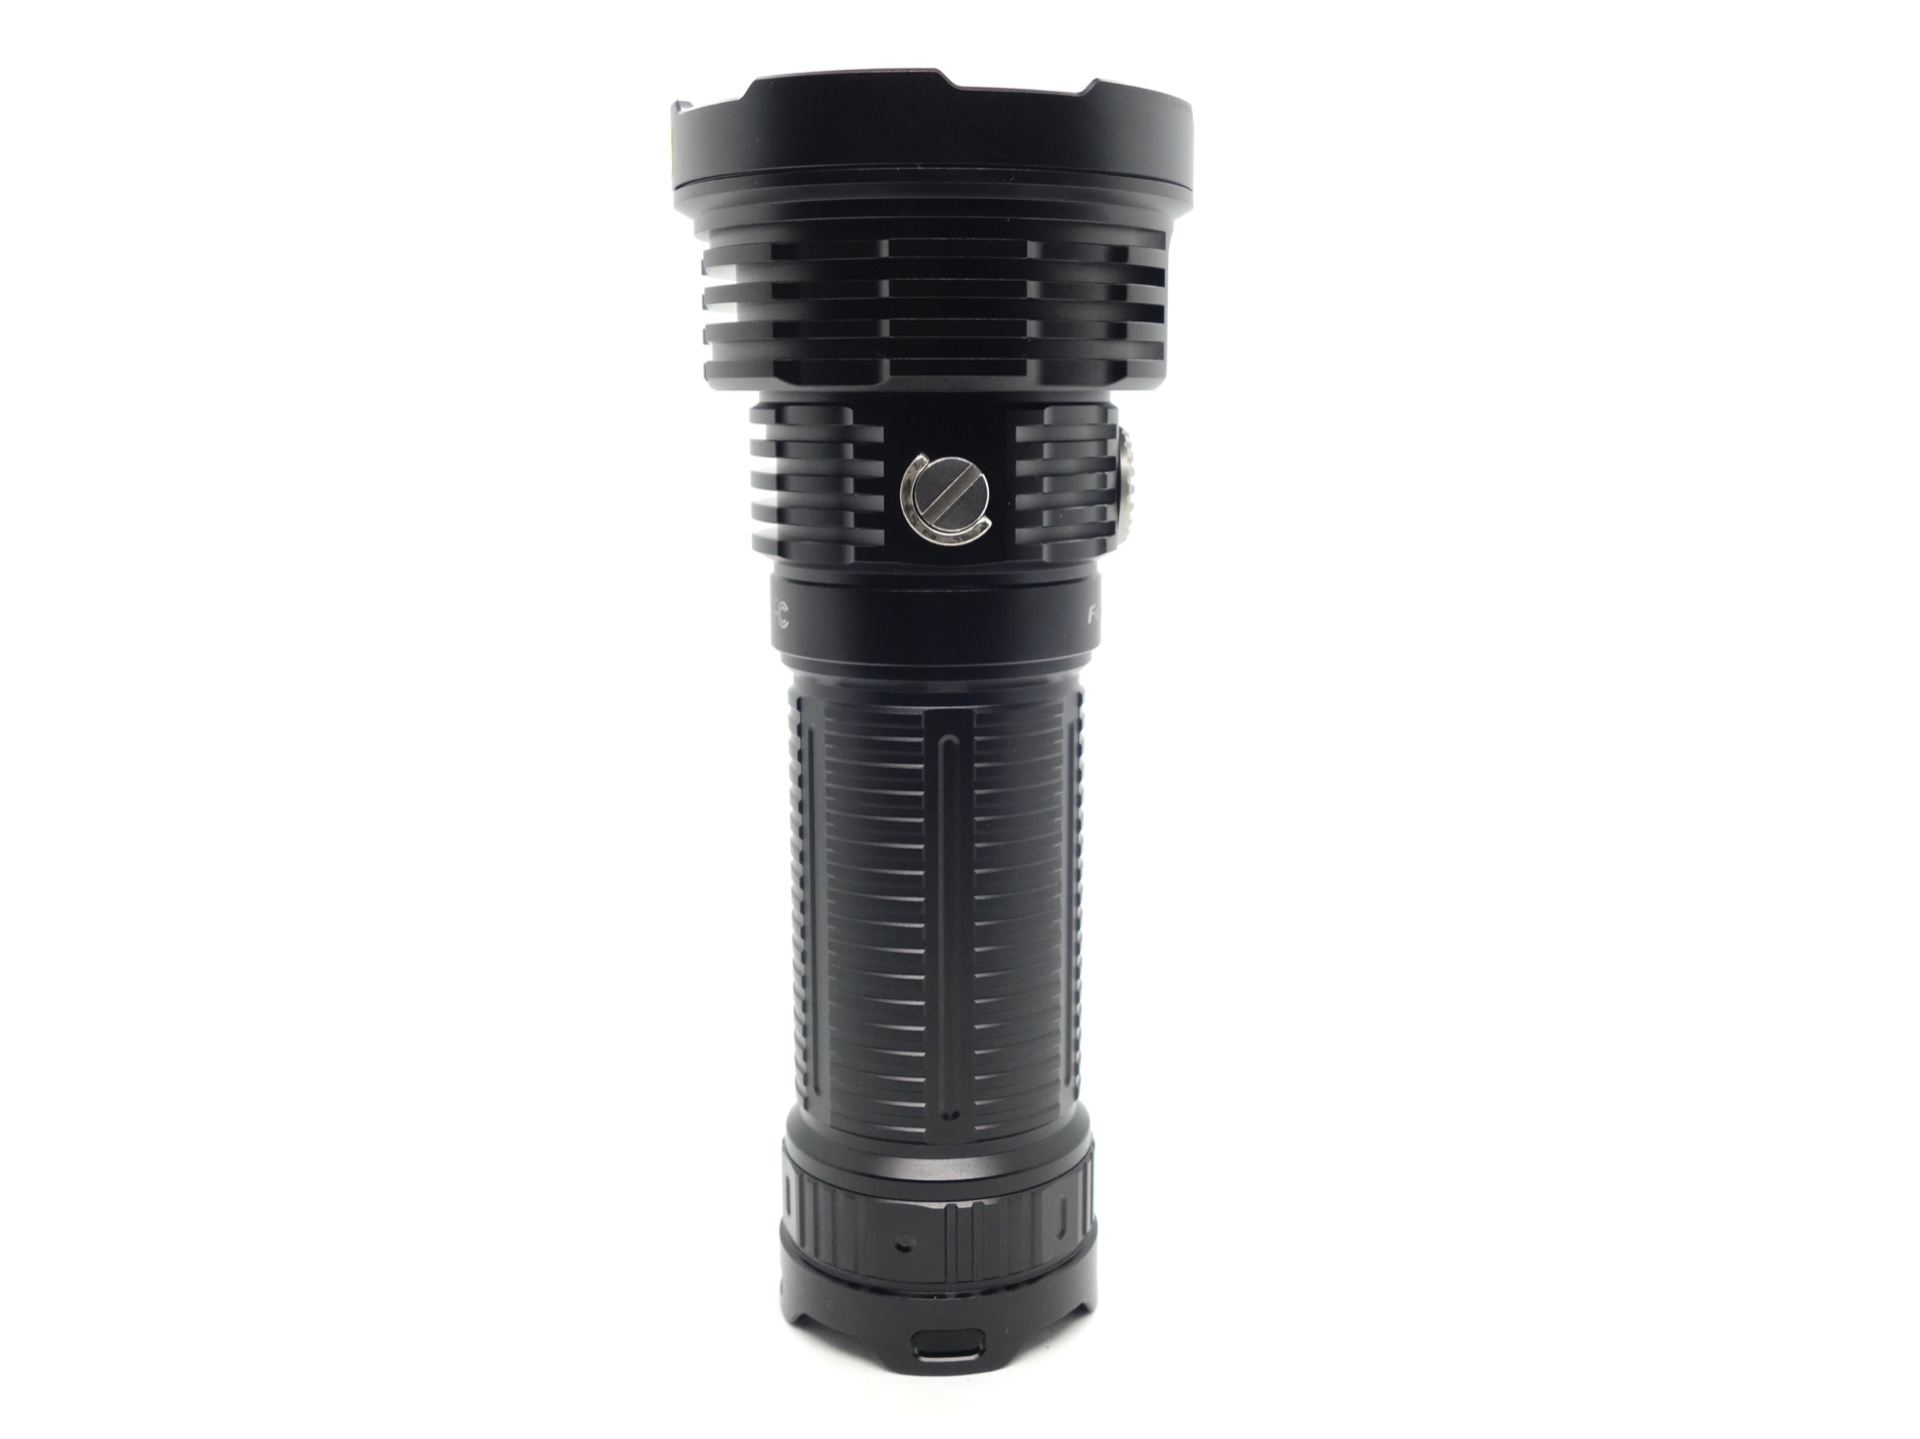
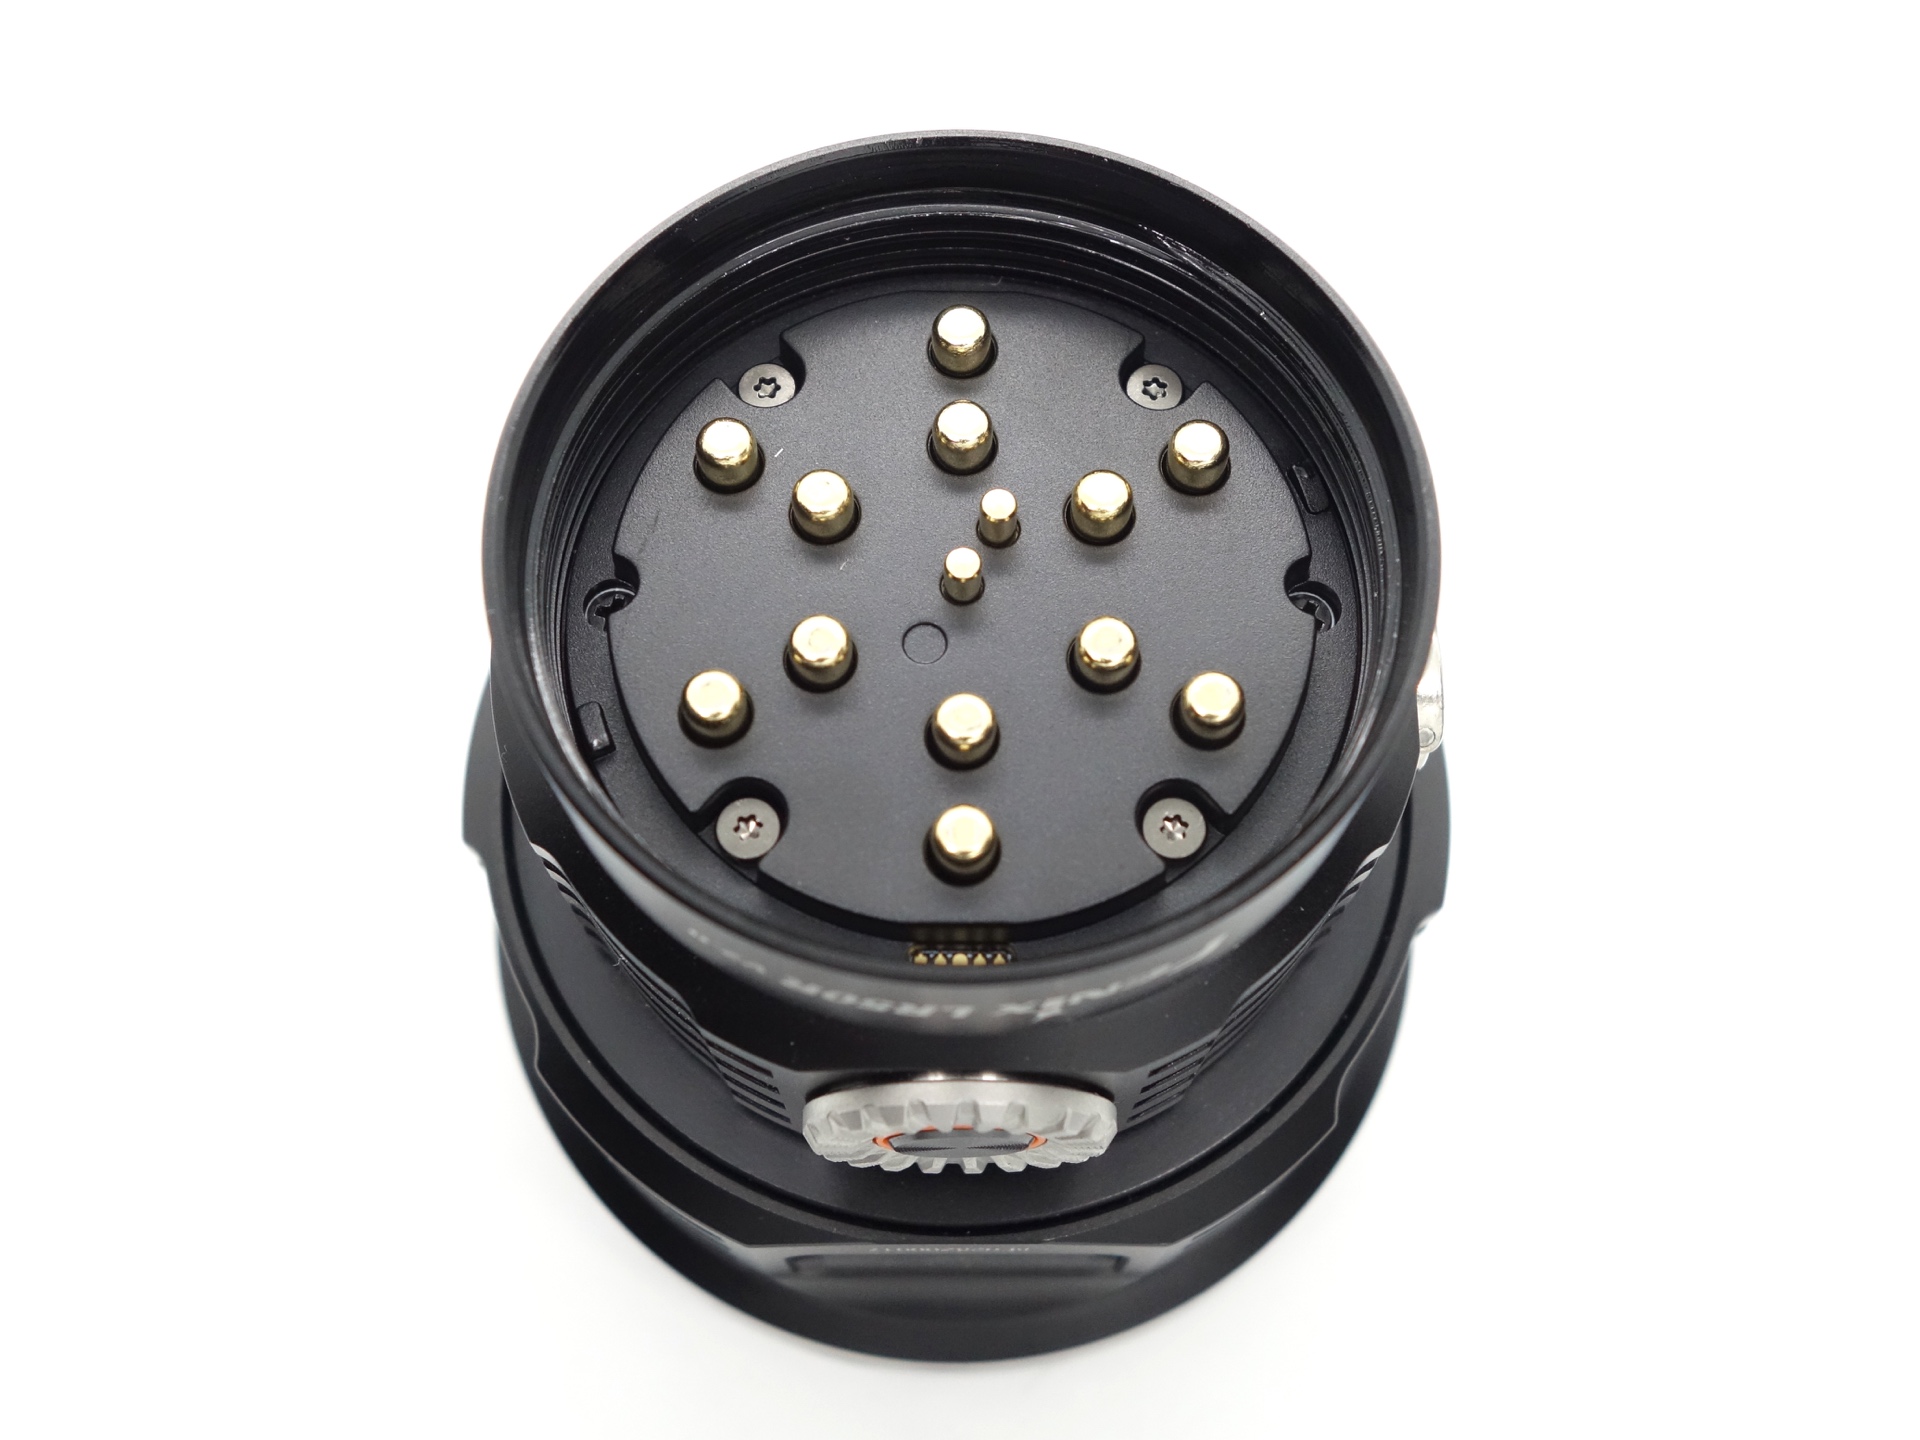
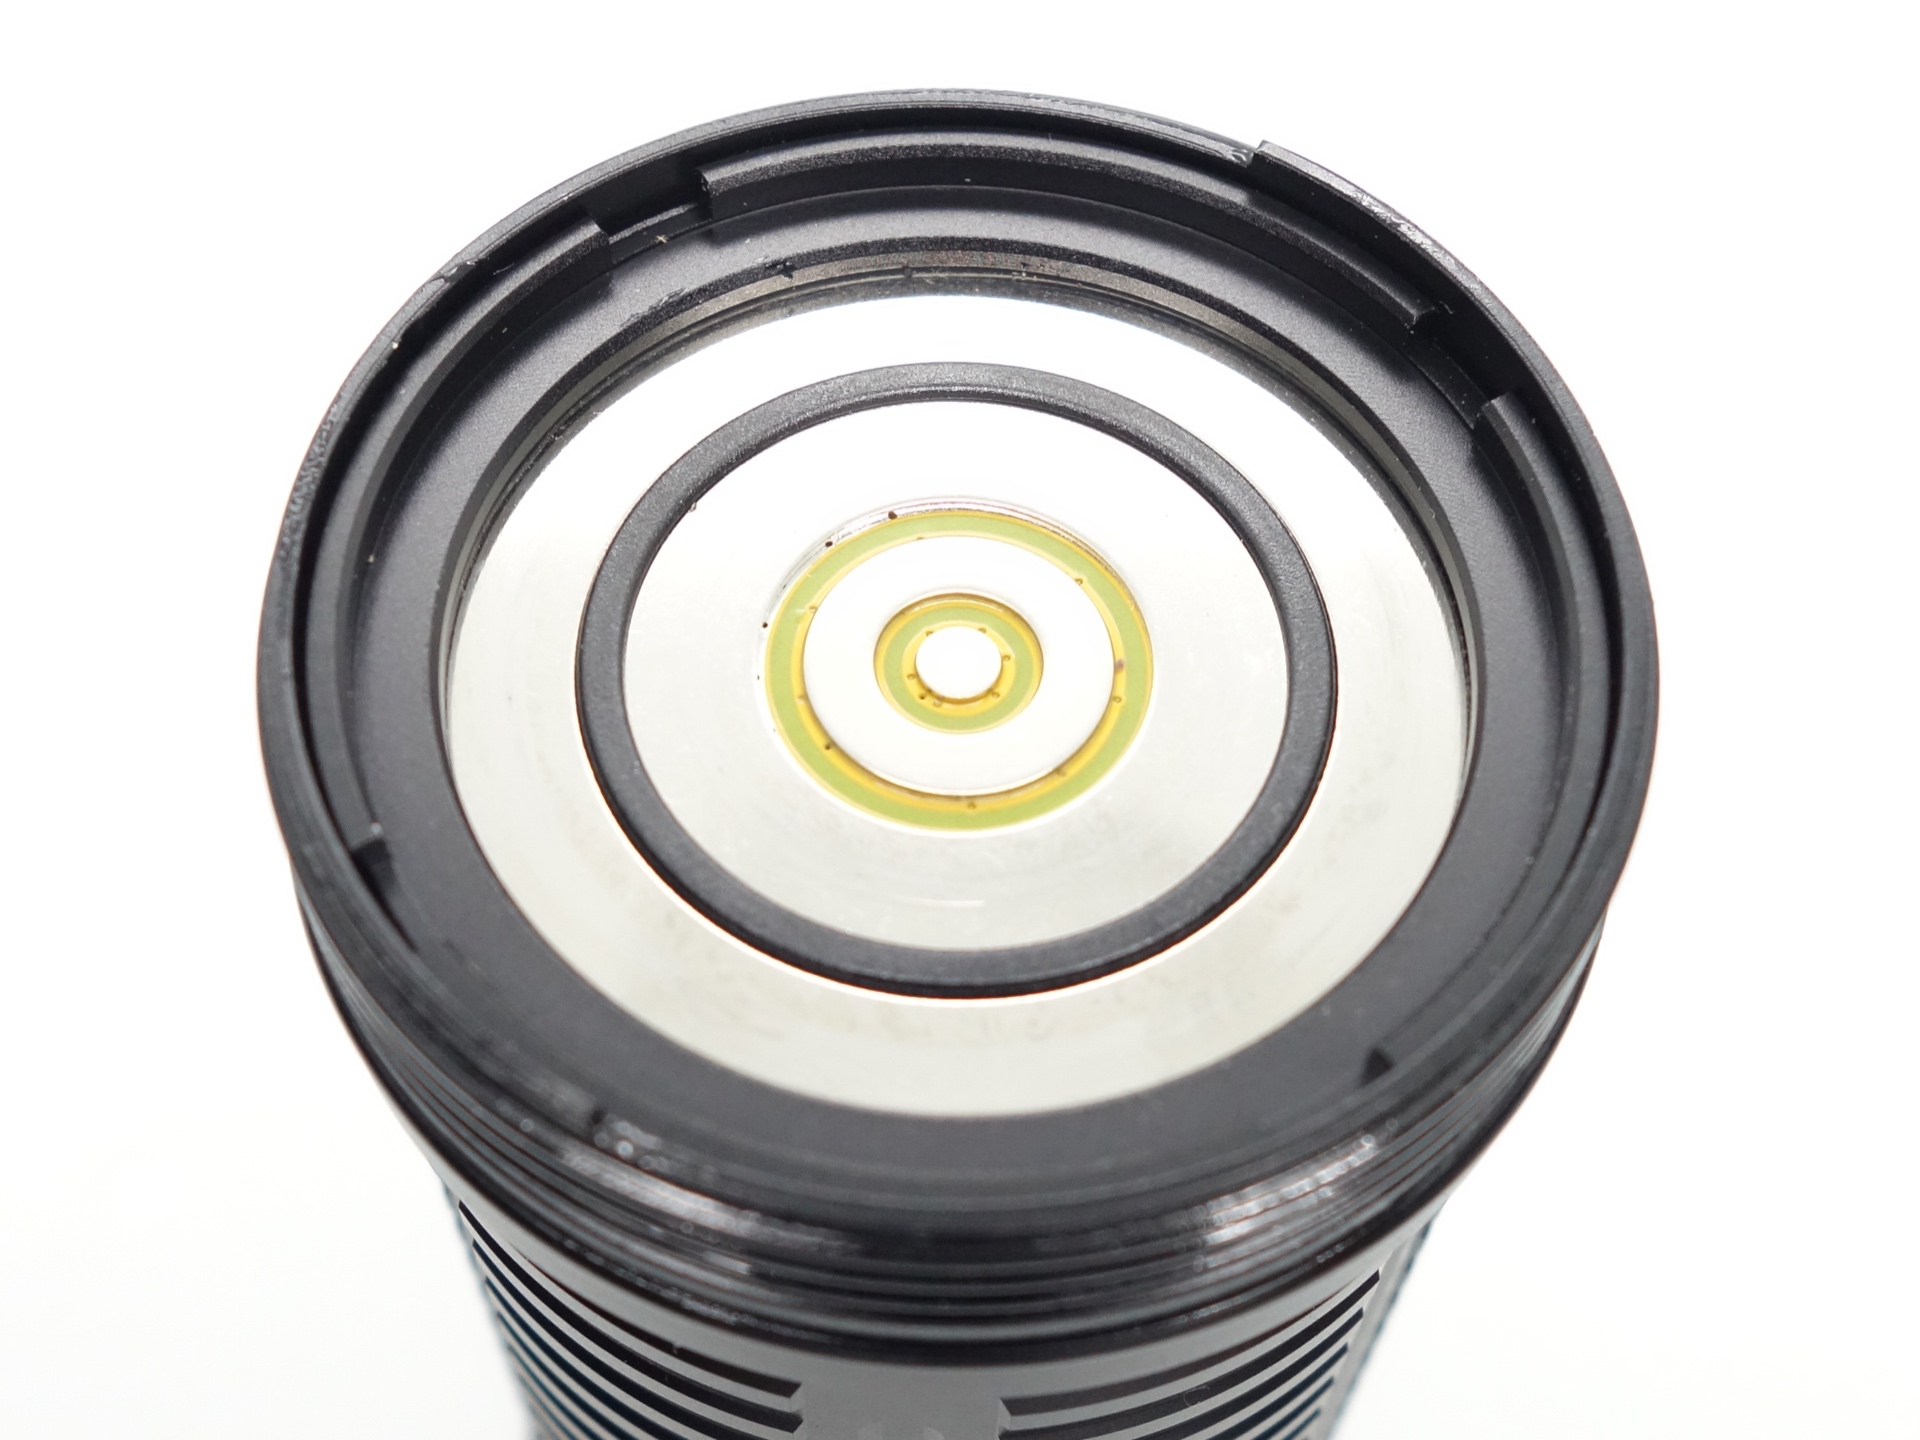
The anodised square-cut threads at the head came lubricated and they turn smoothly.
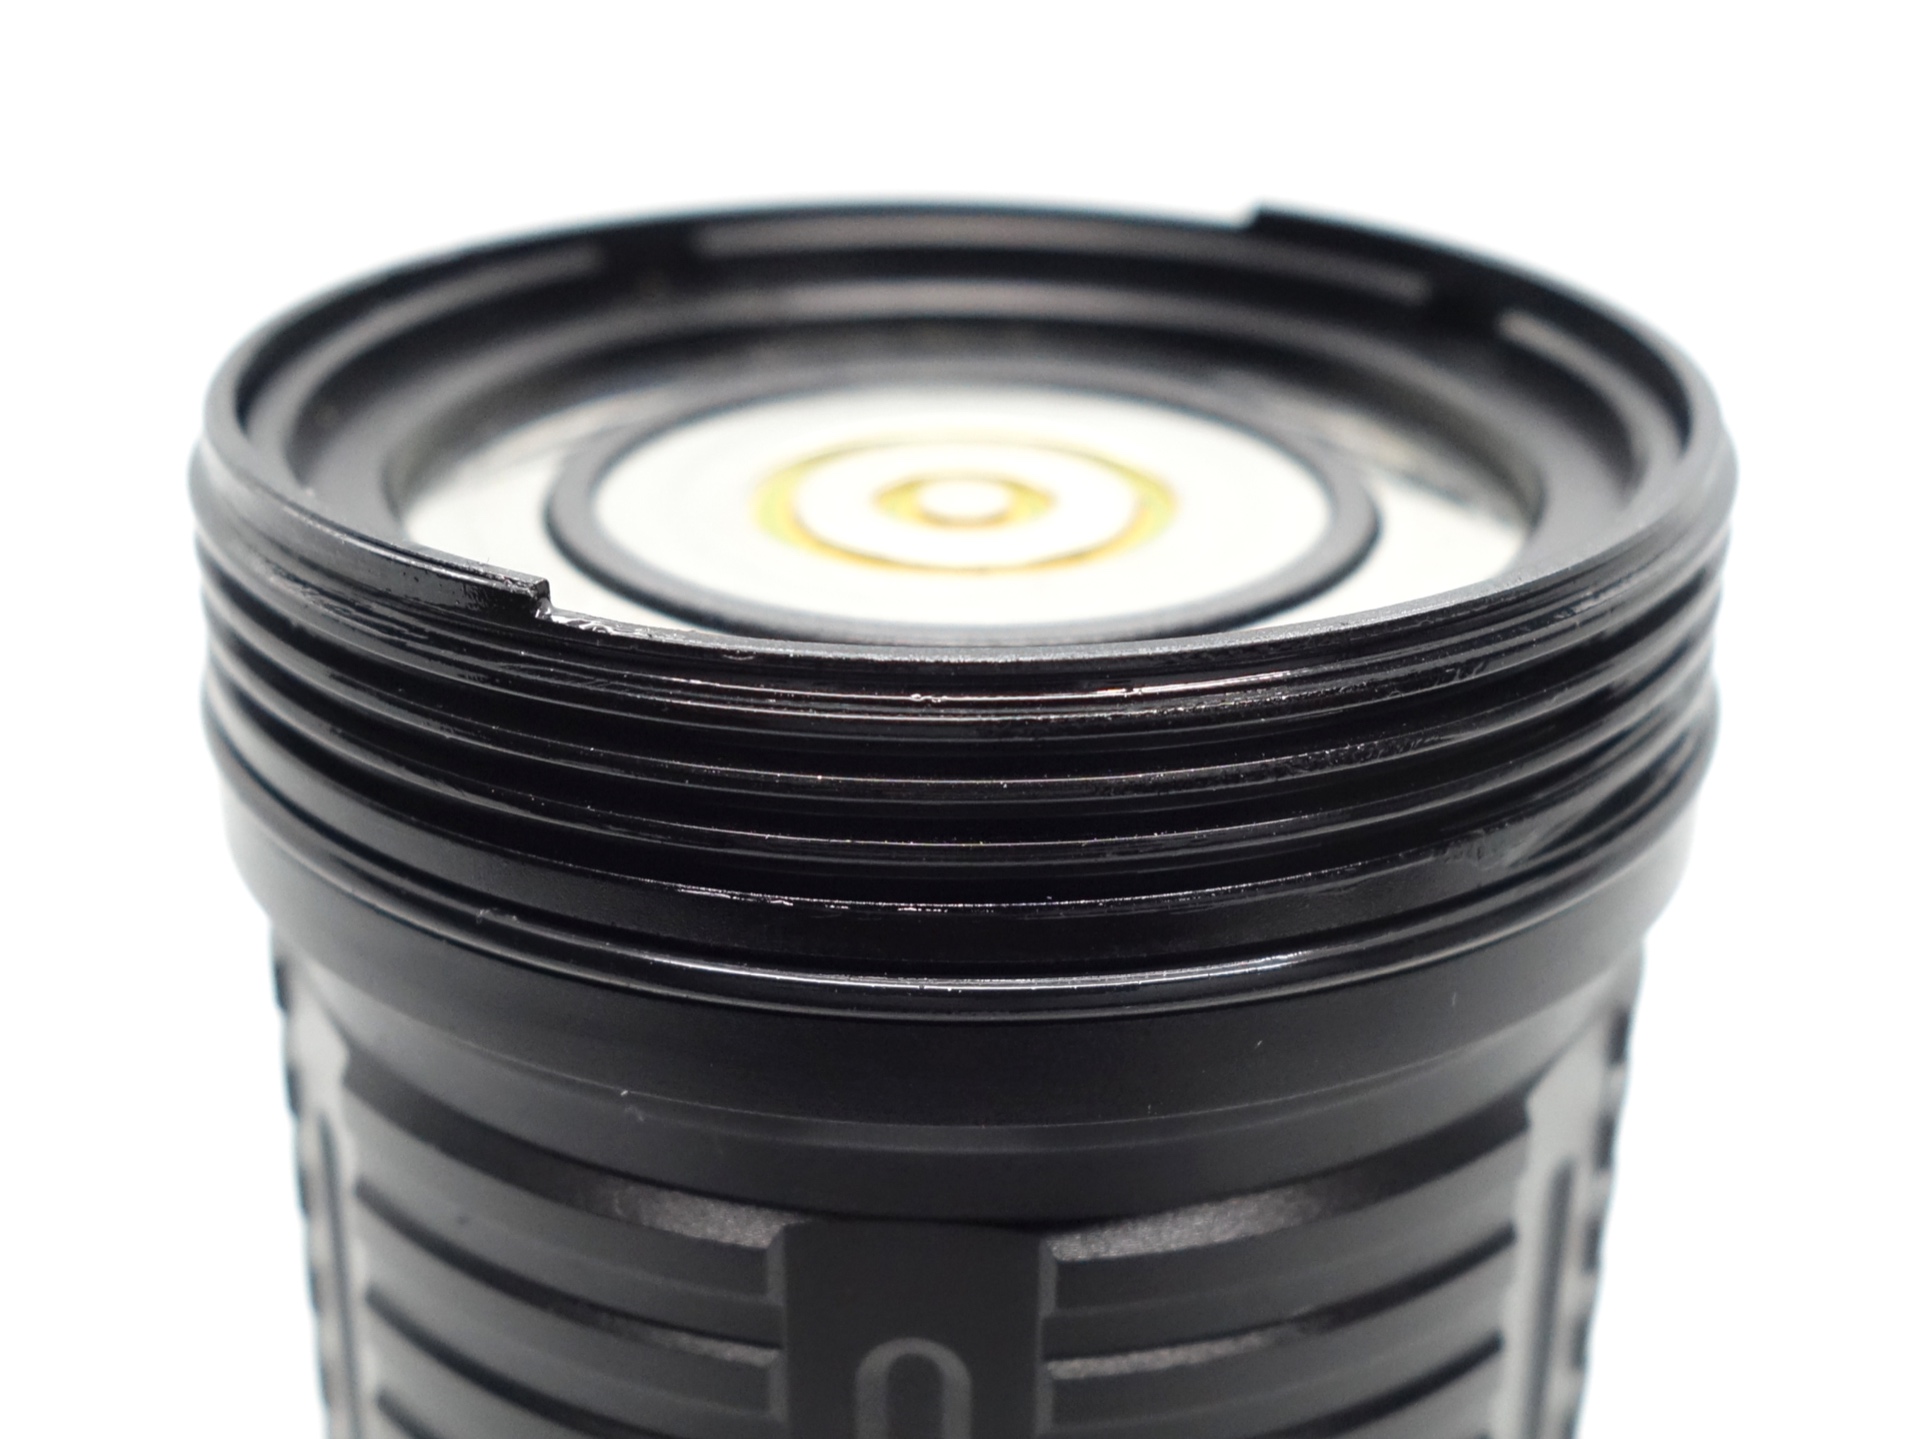
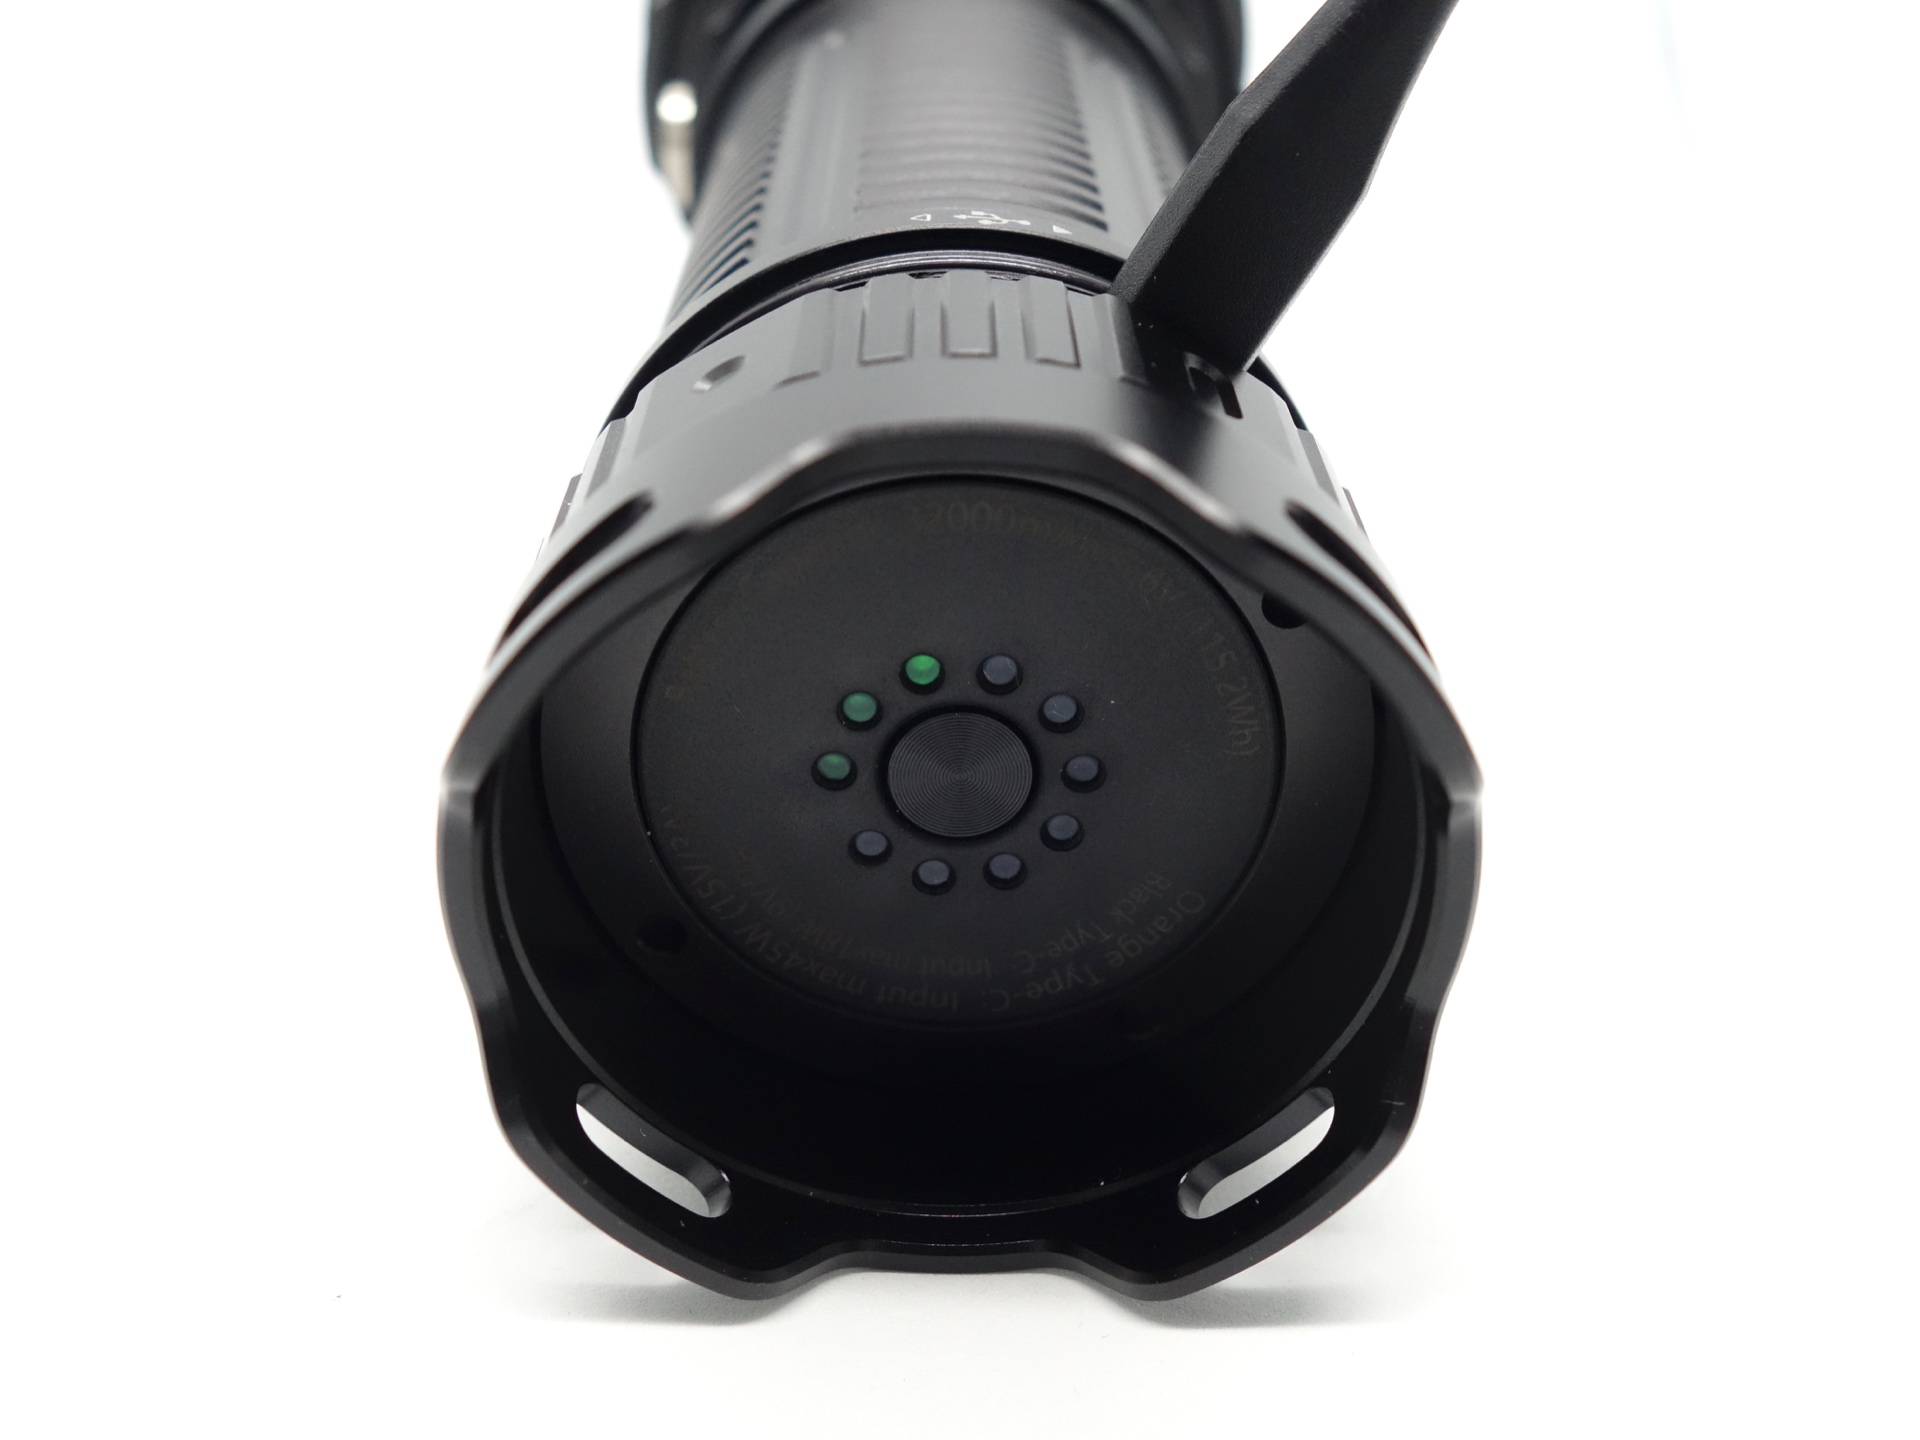
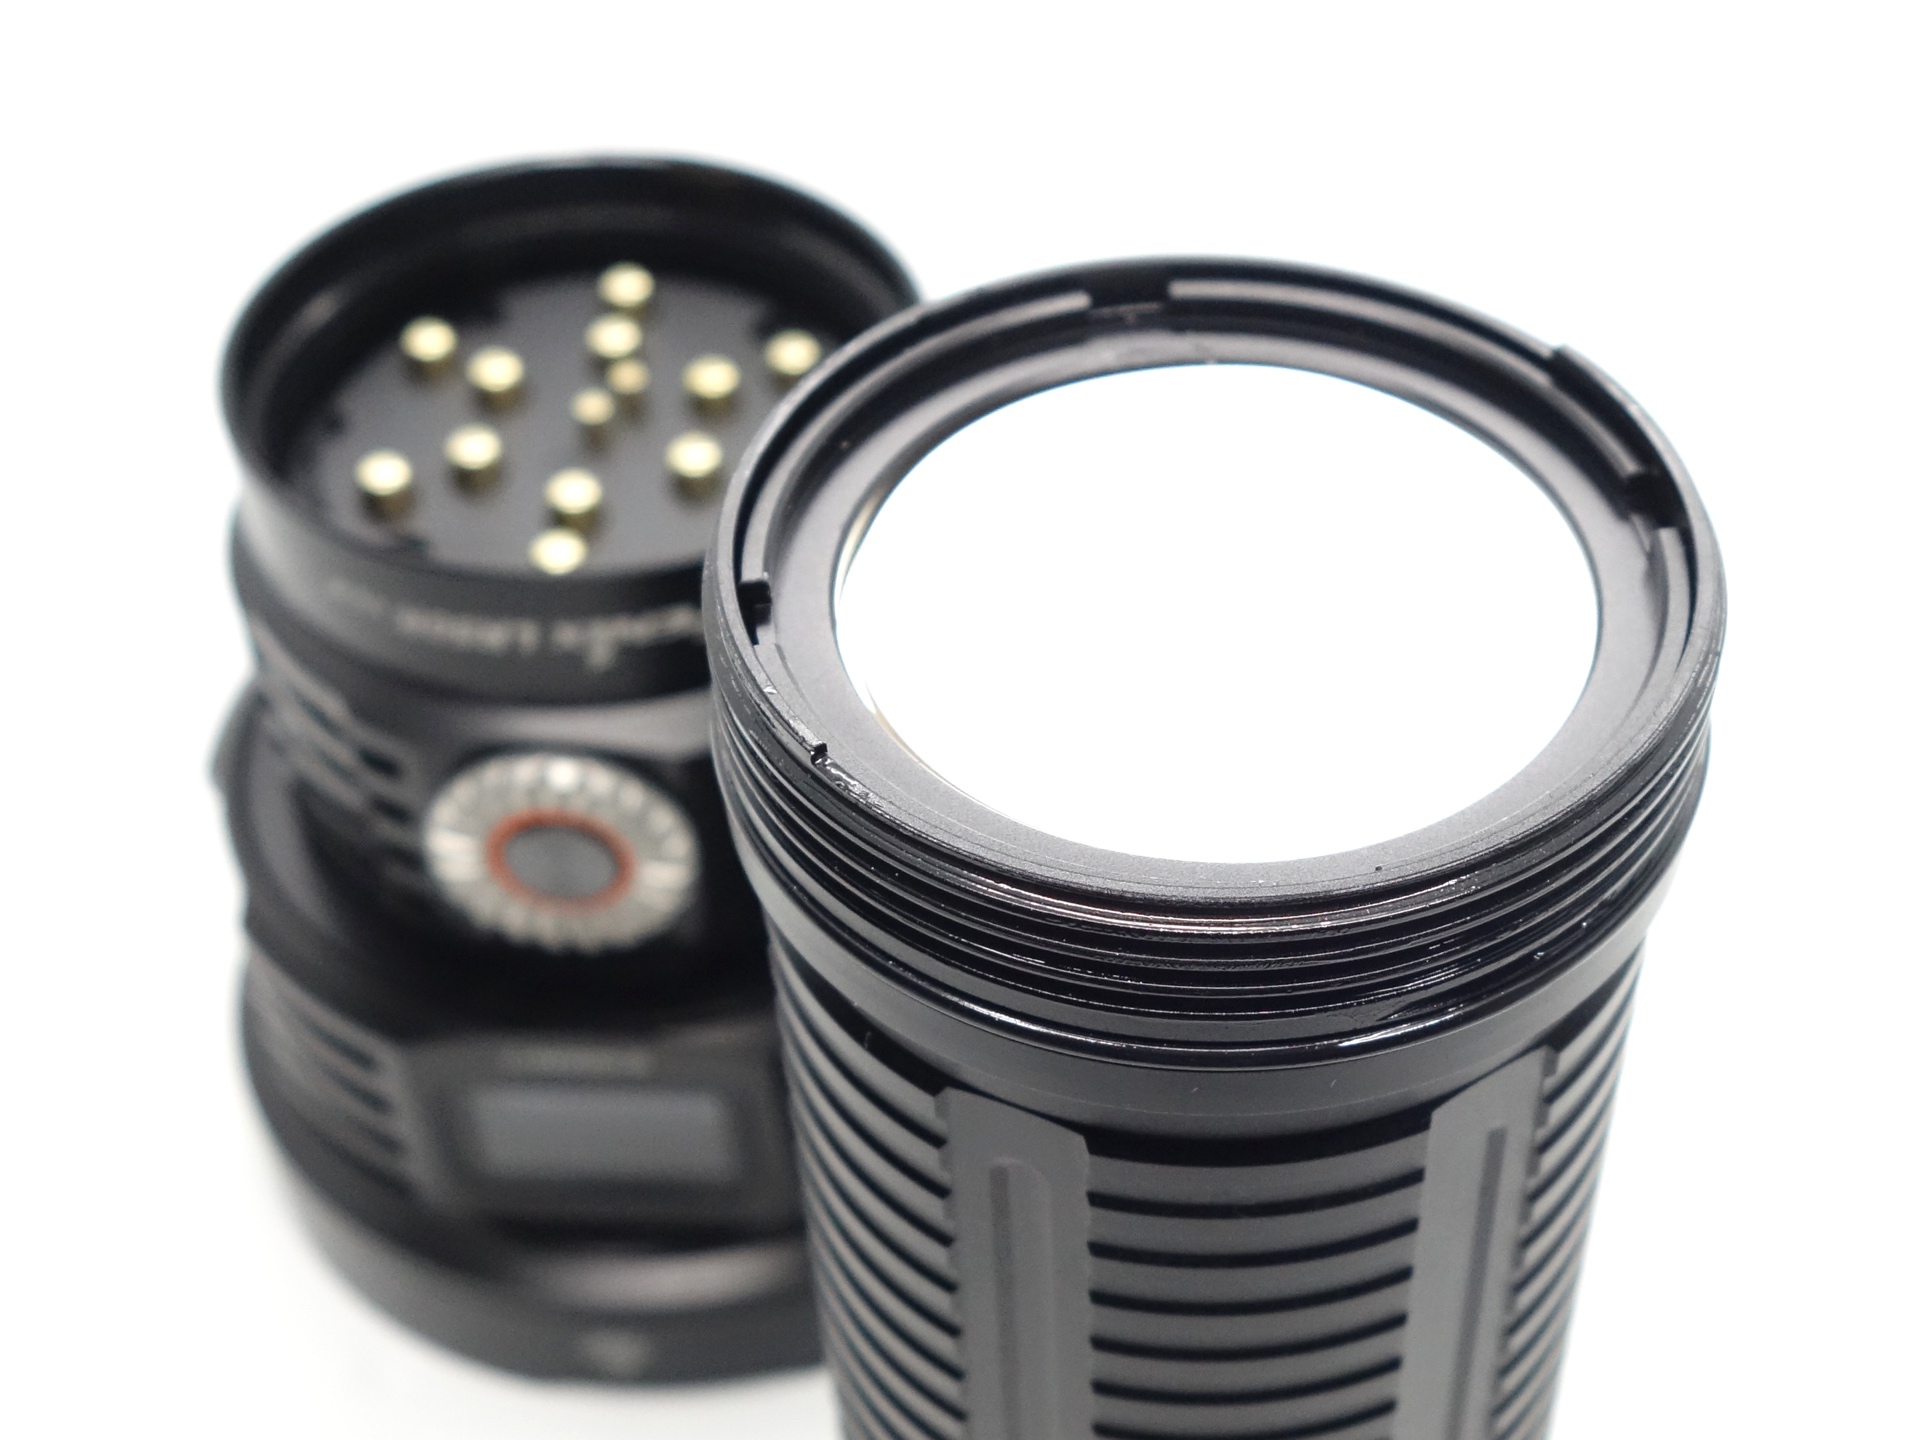
There are so many thick pogo pins that connect to the wide pads in the head. The outer two pads help carry the current.
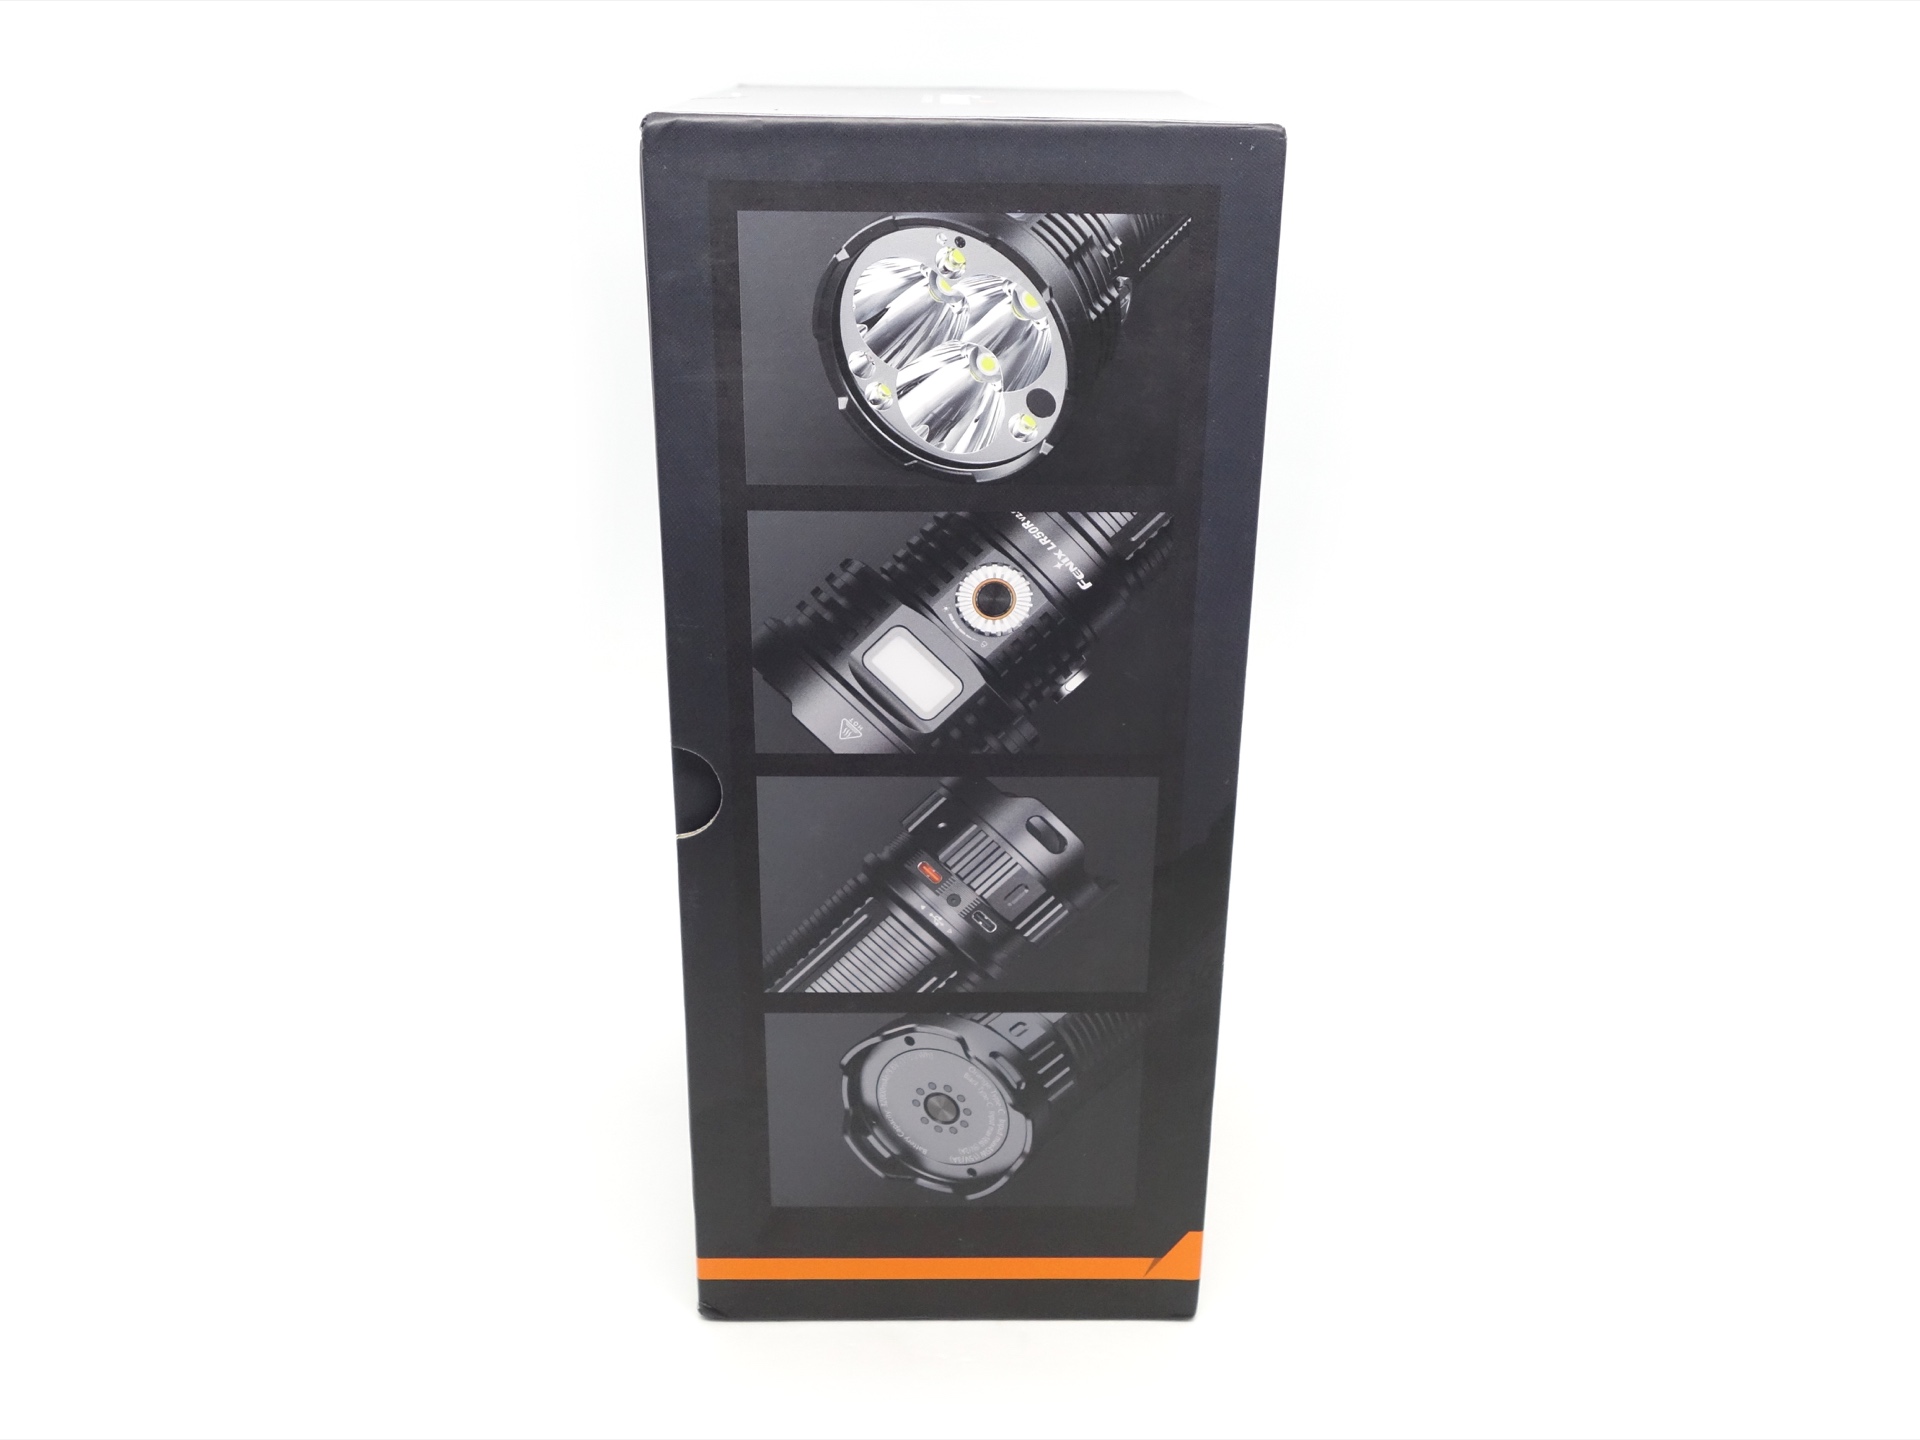
LED, bezel, lens and reflector#
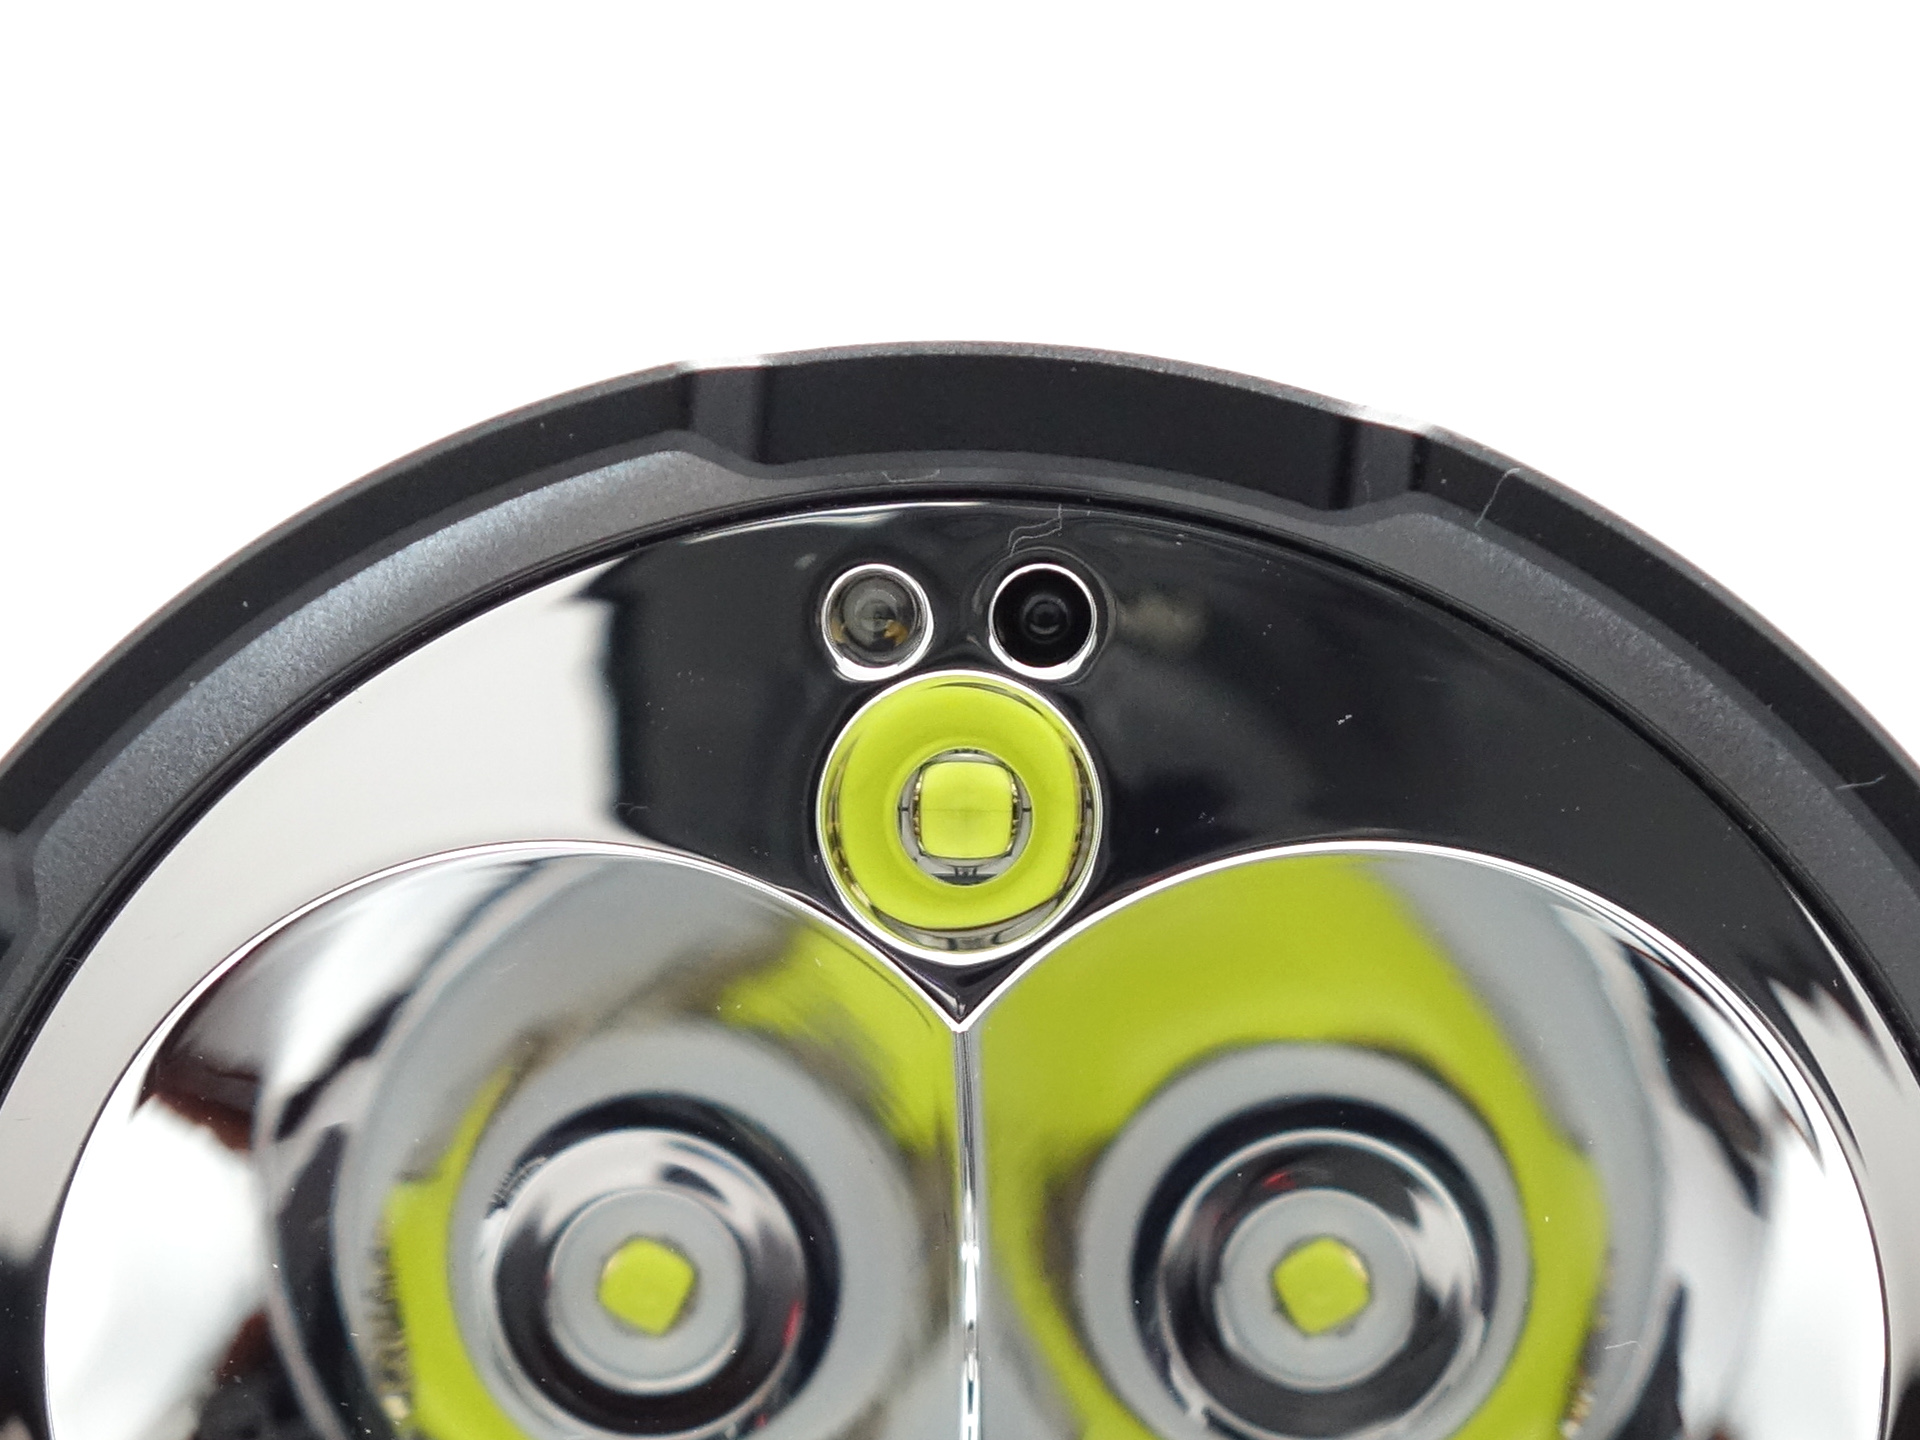
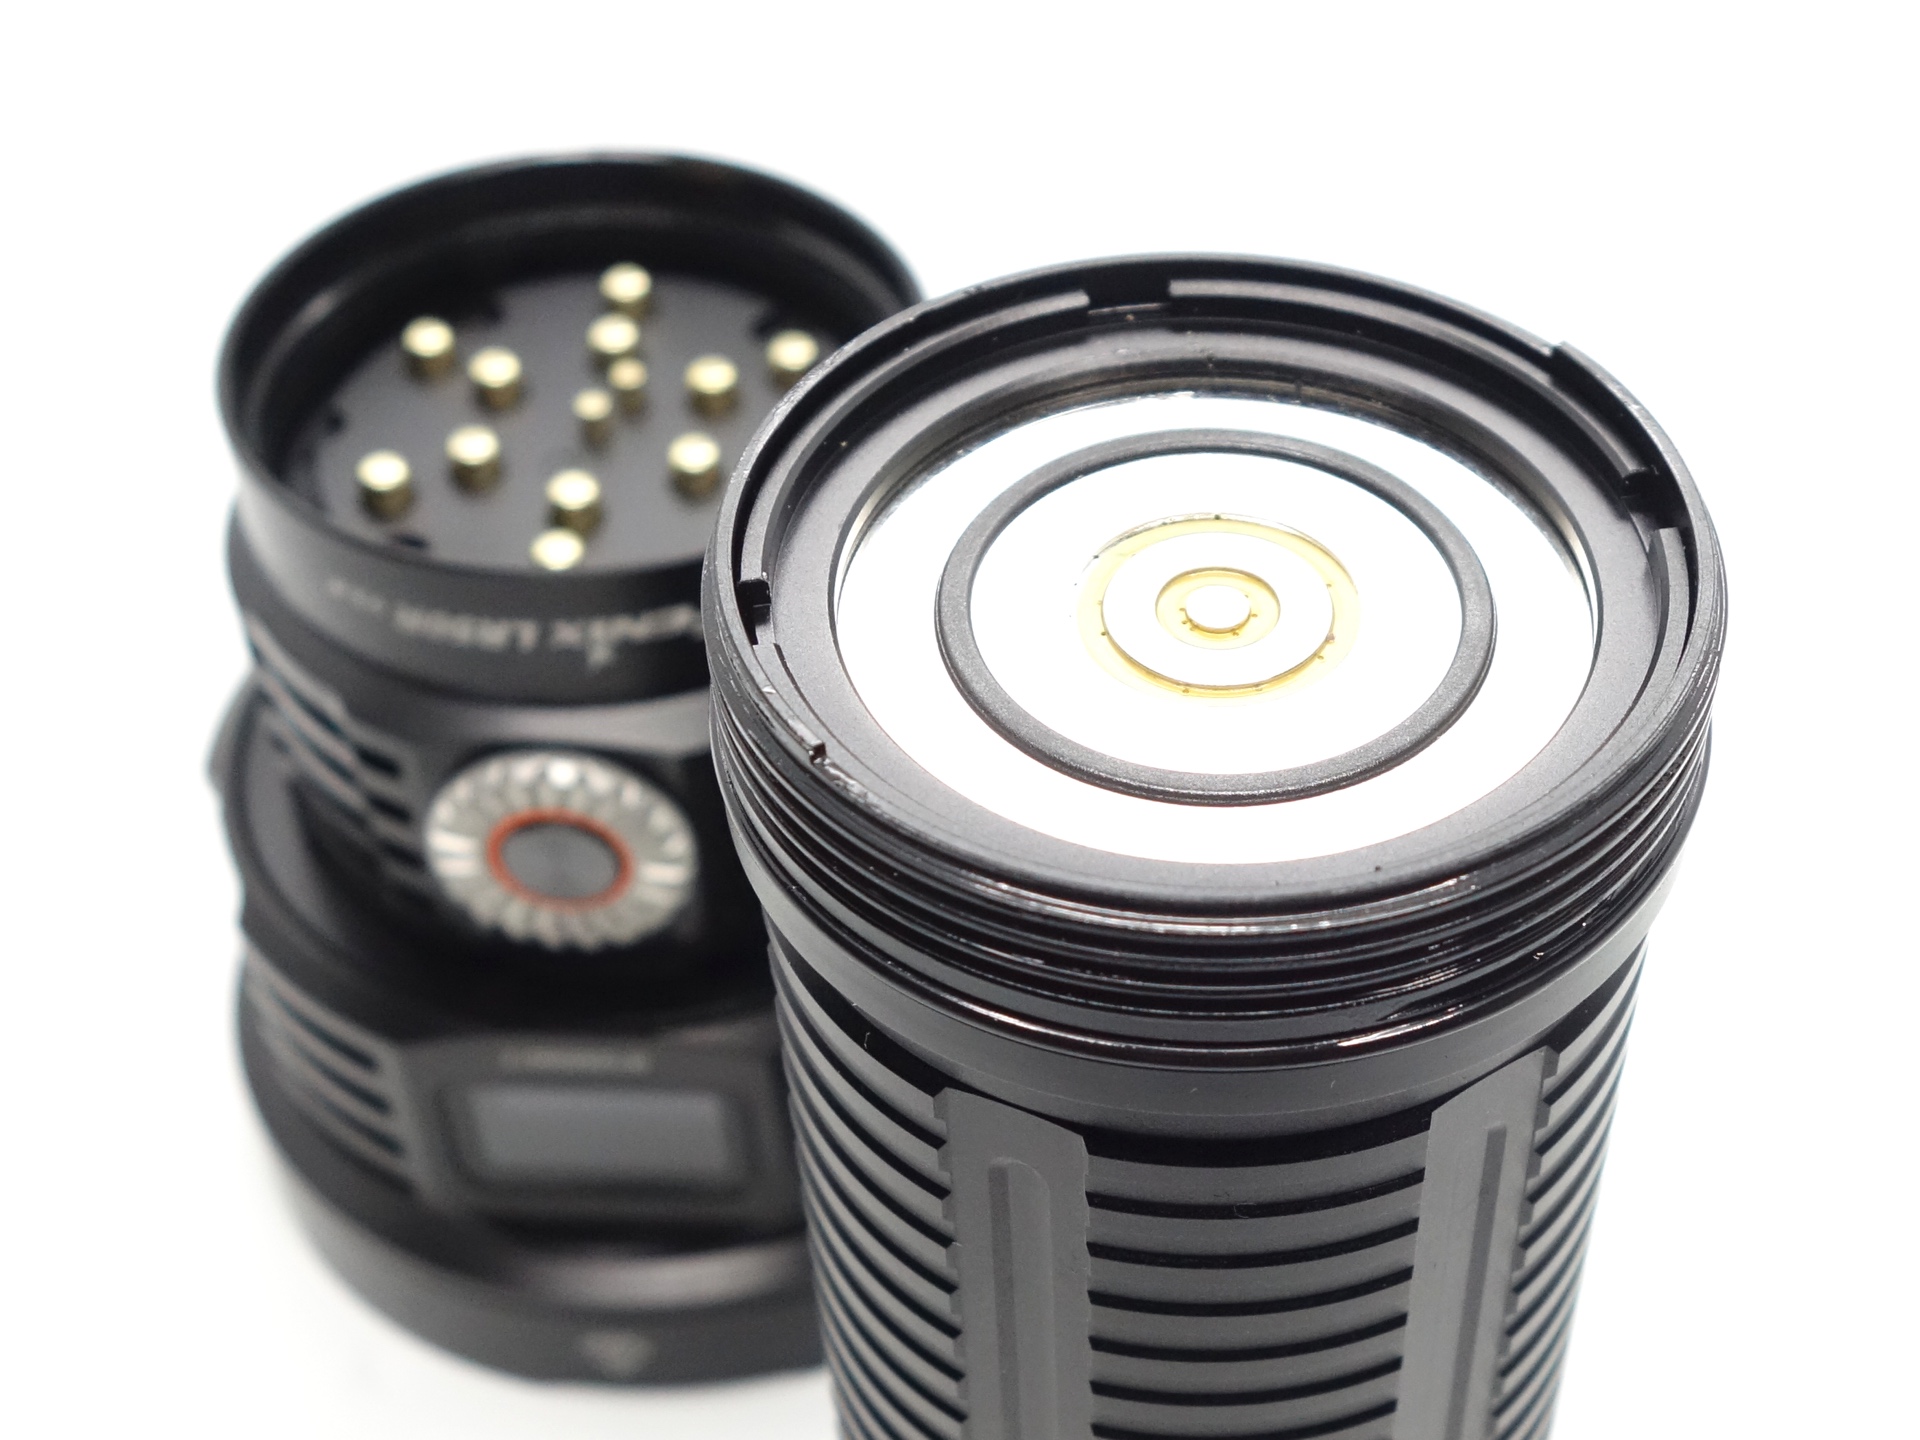
The Fenix LR50R V2 has six Luminus SST70 emitters (three for the Spotlight and three for the Floodlight).
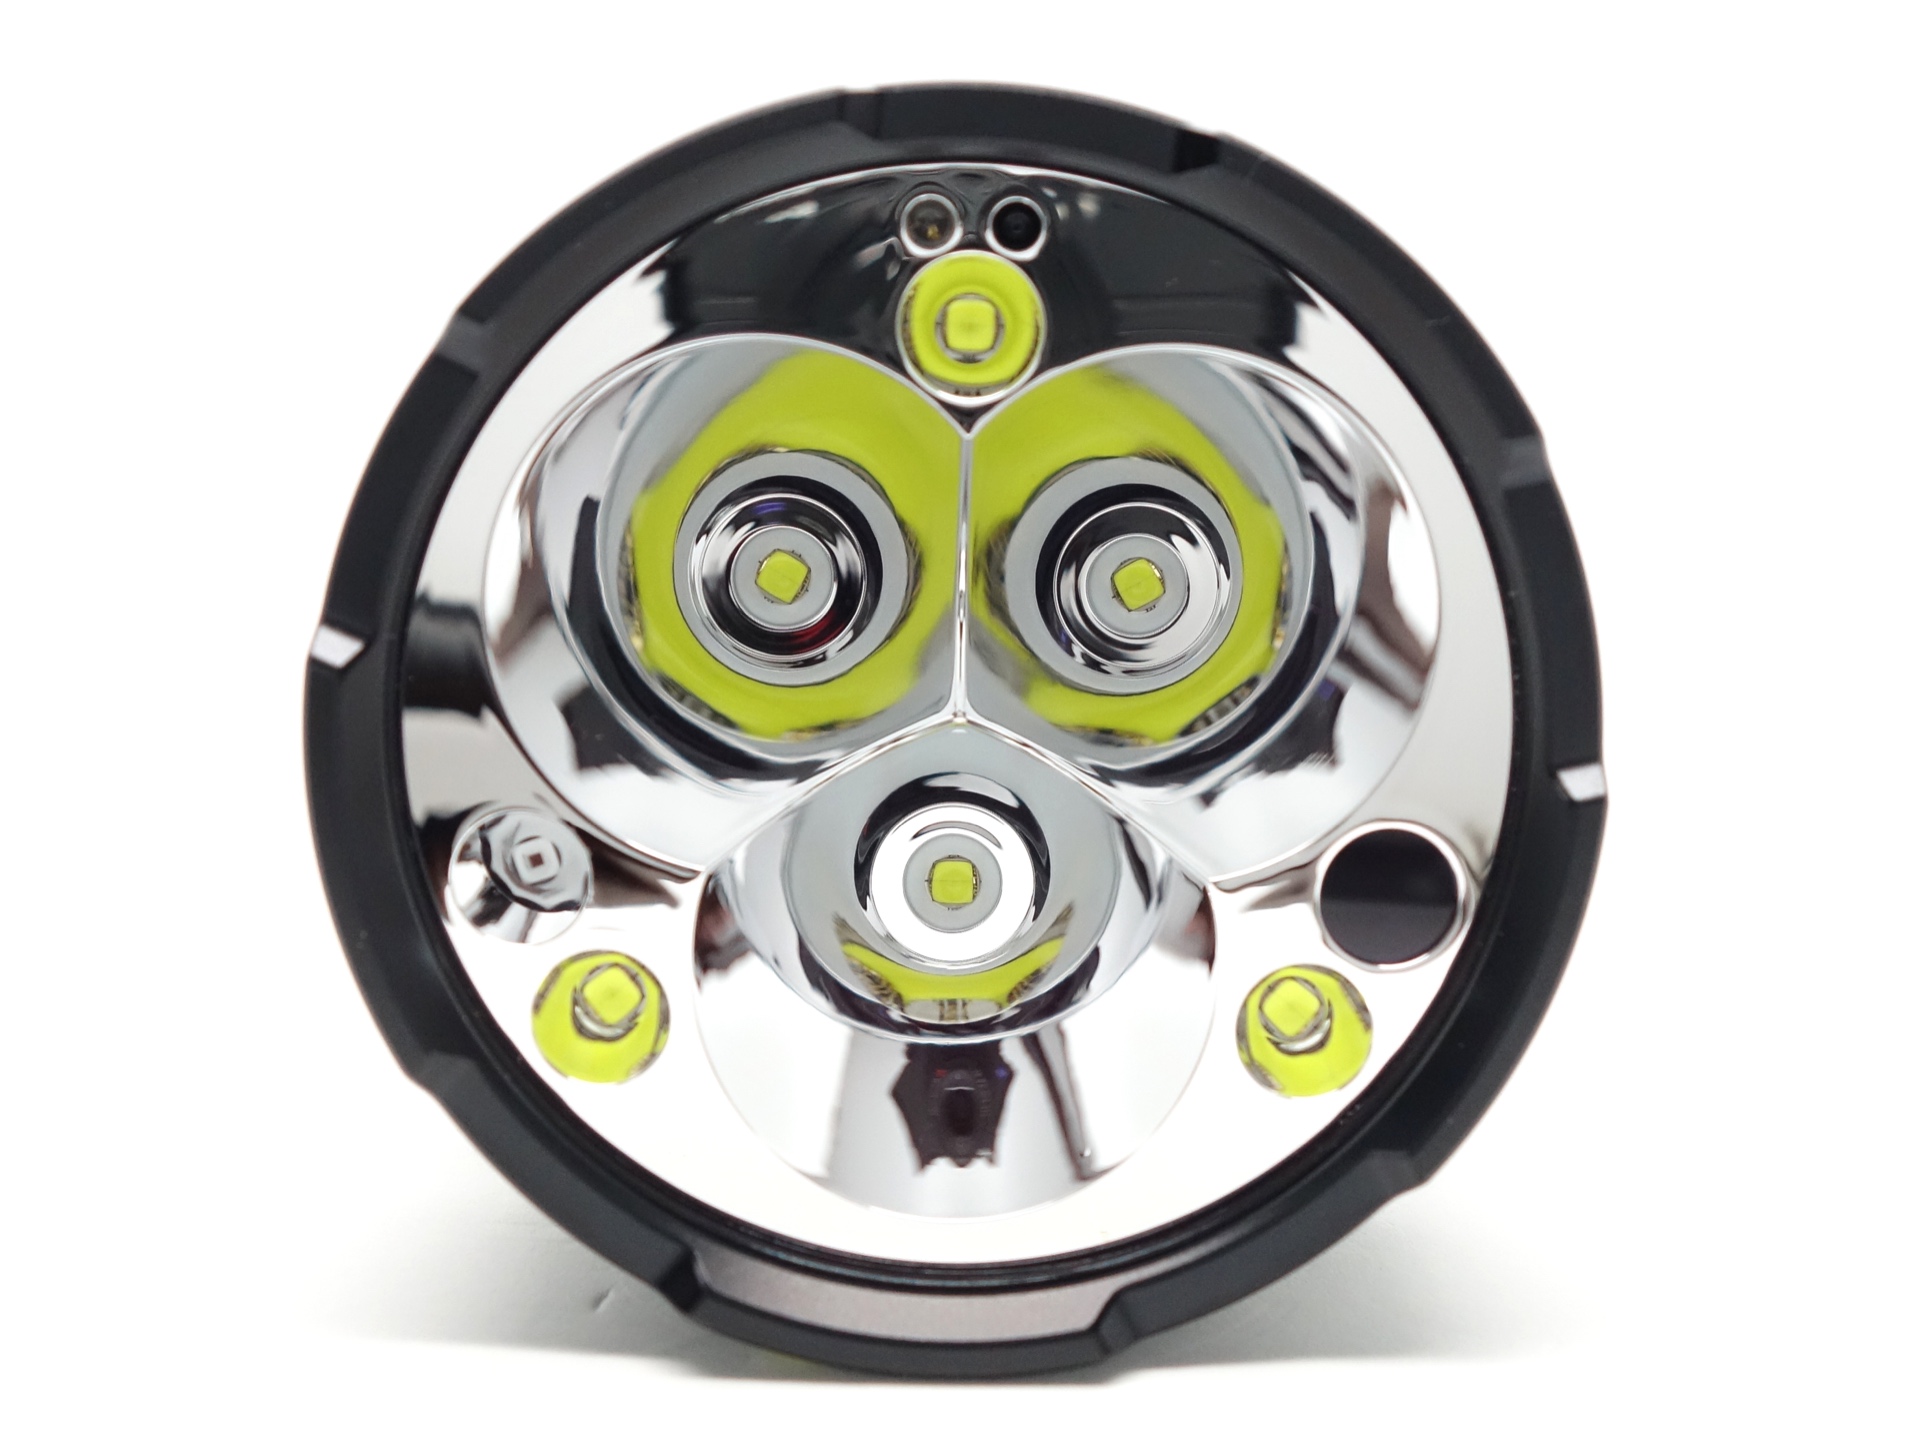
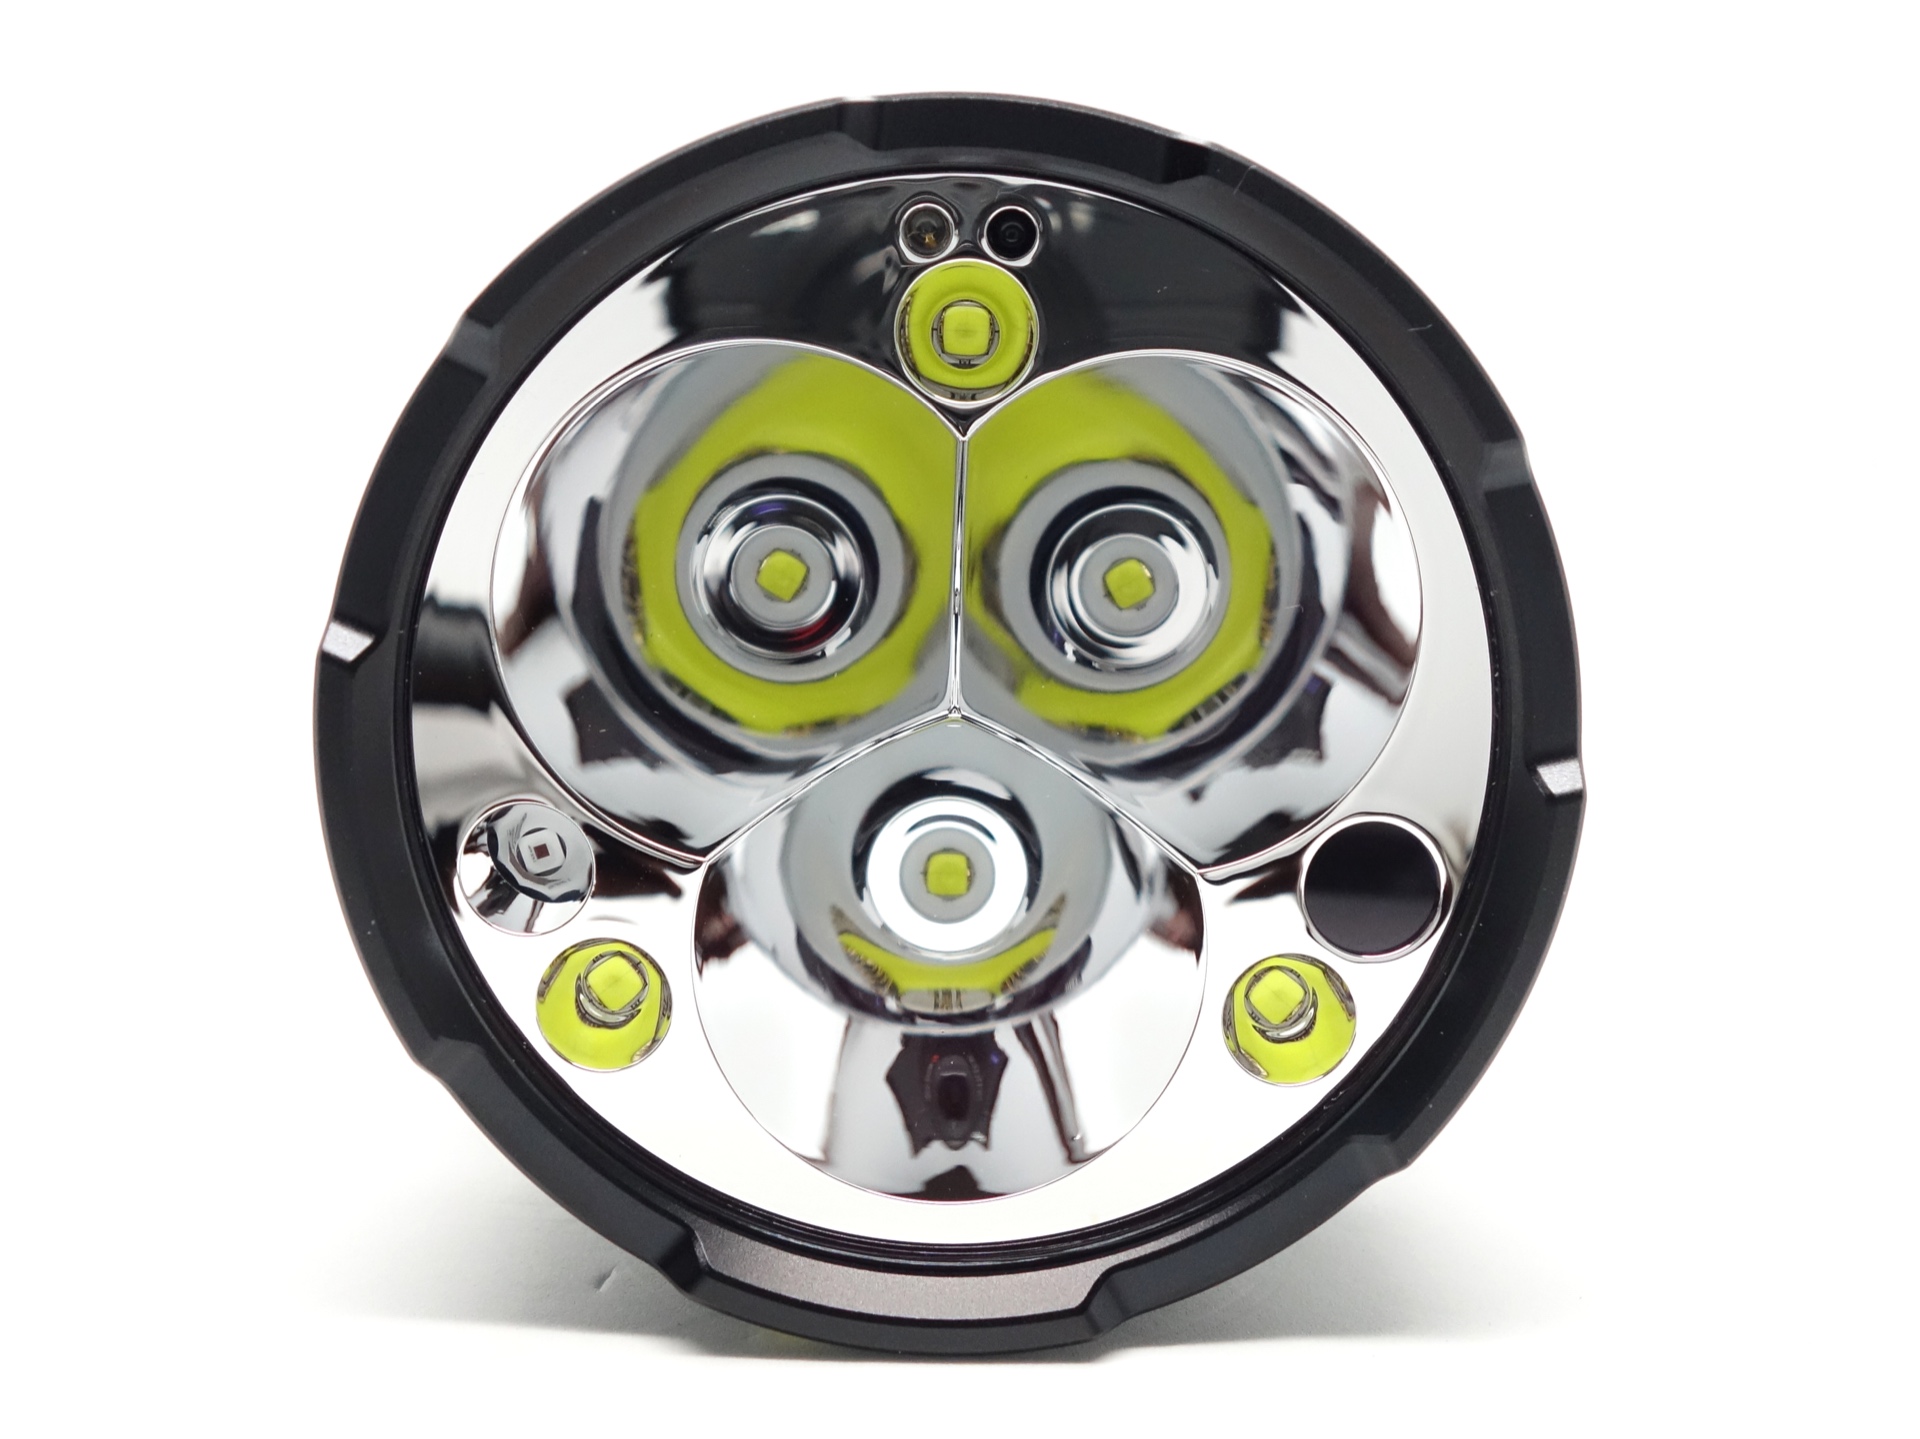
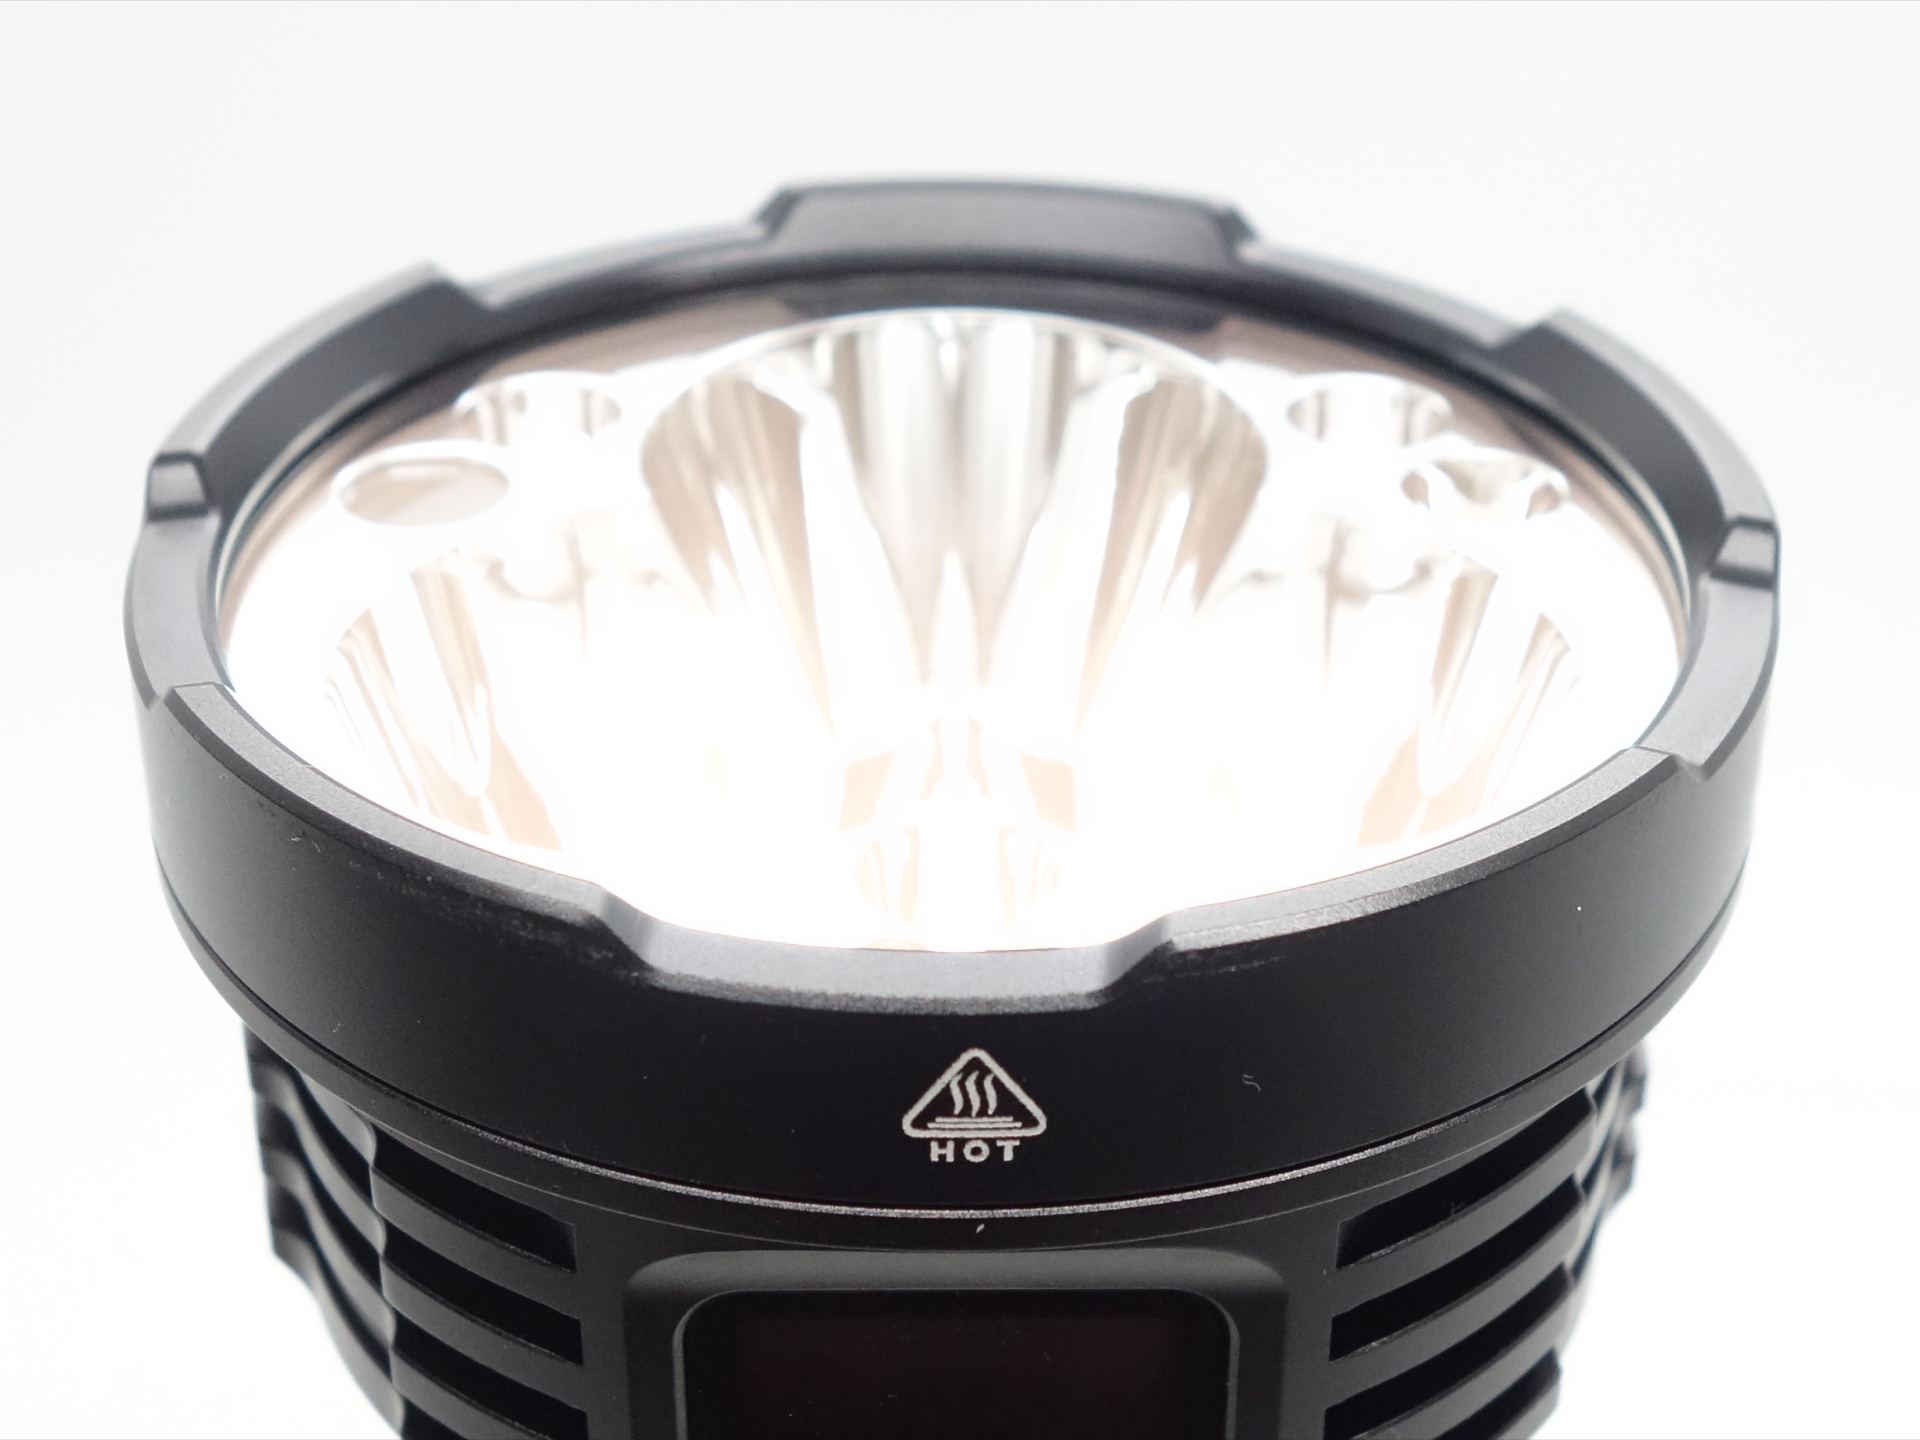
There is a smooth reflector.
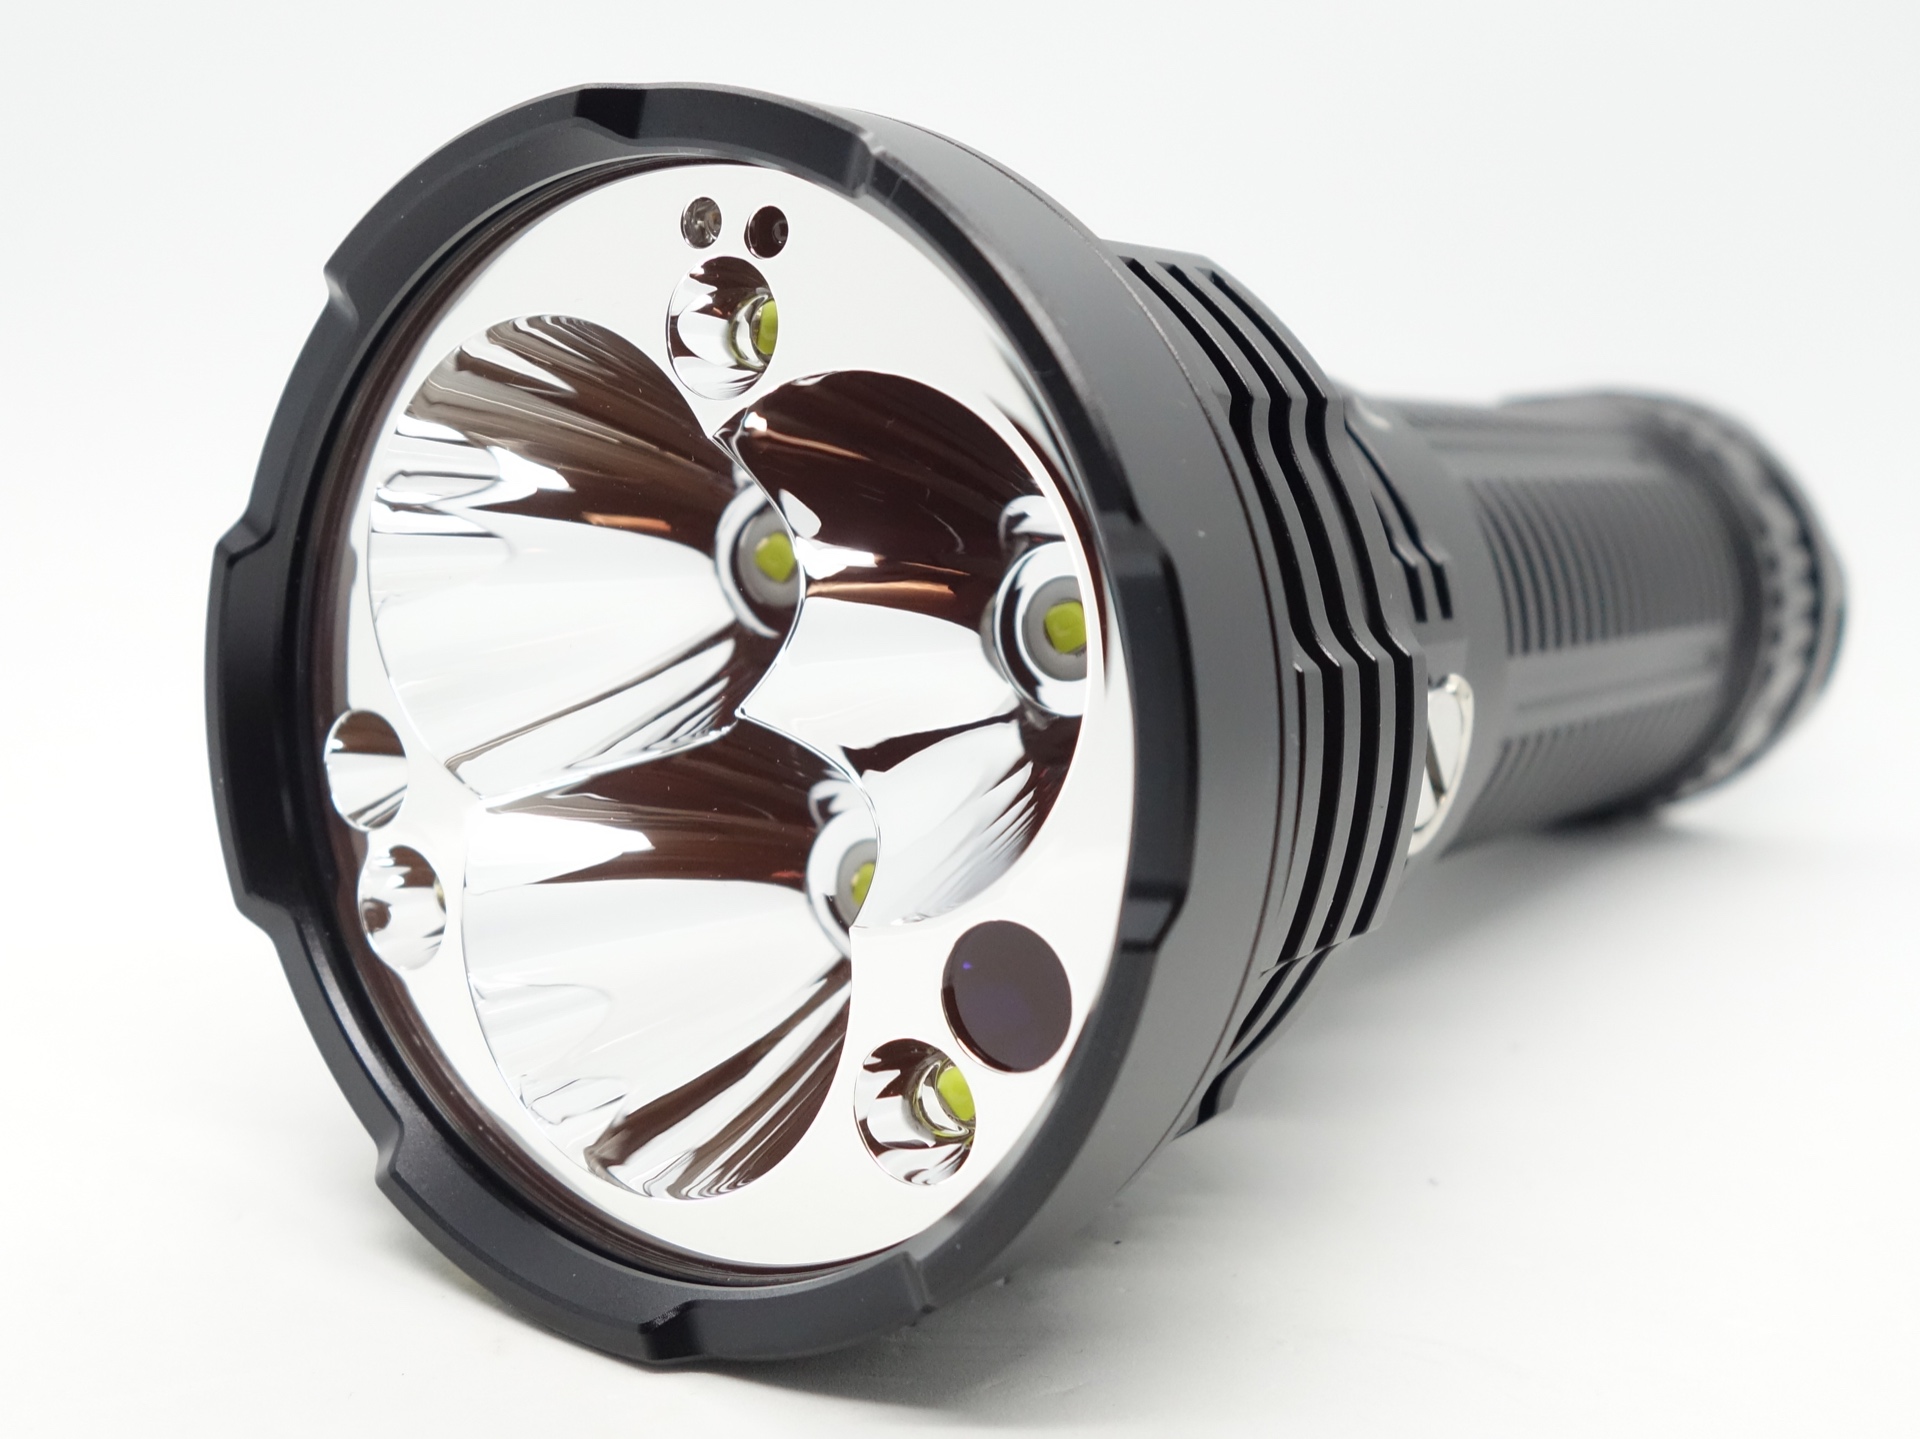
The glass lens appears to have an anti-reflective coating.
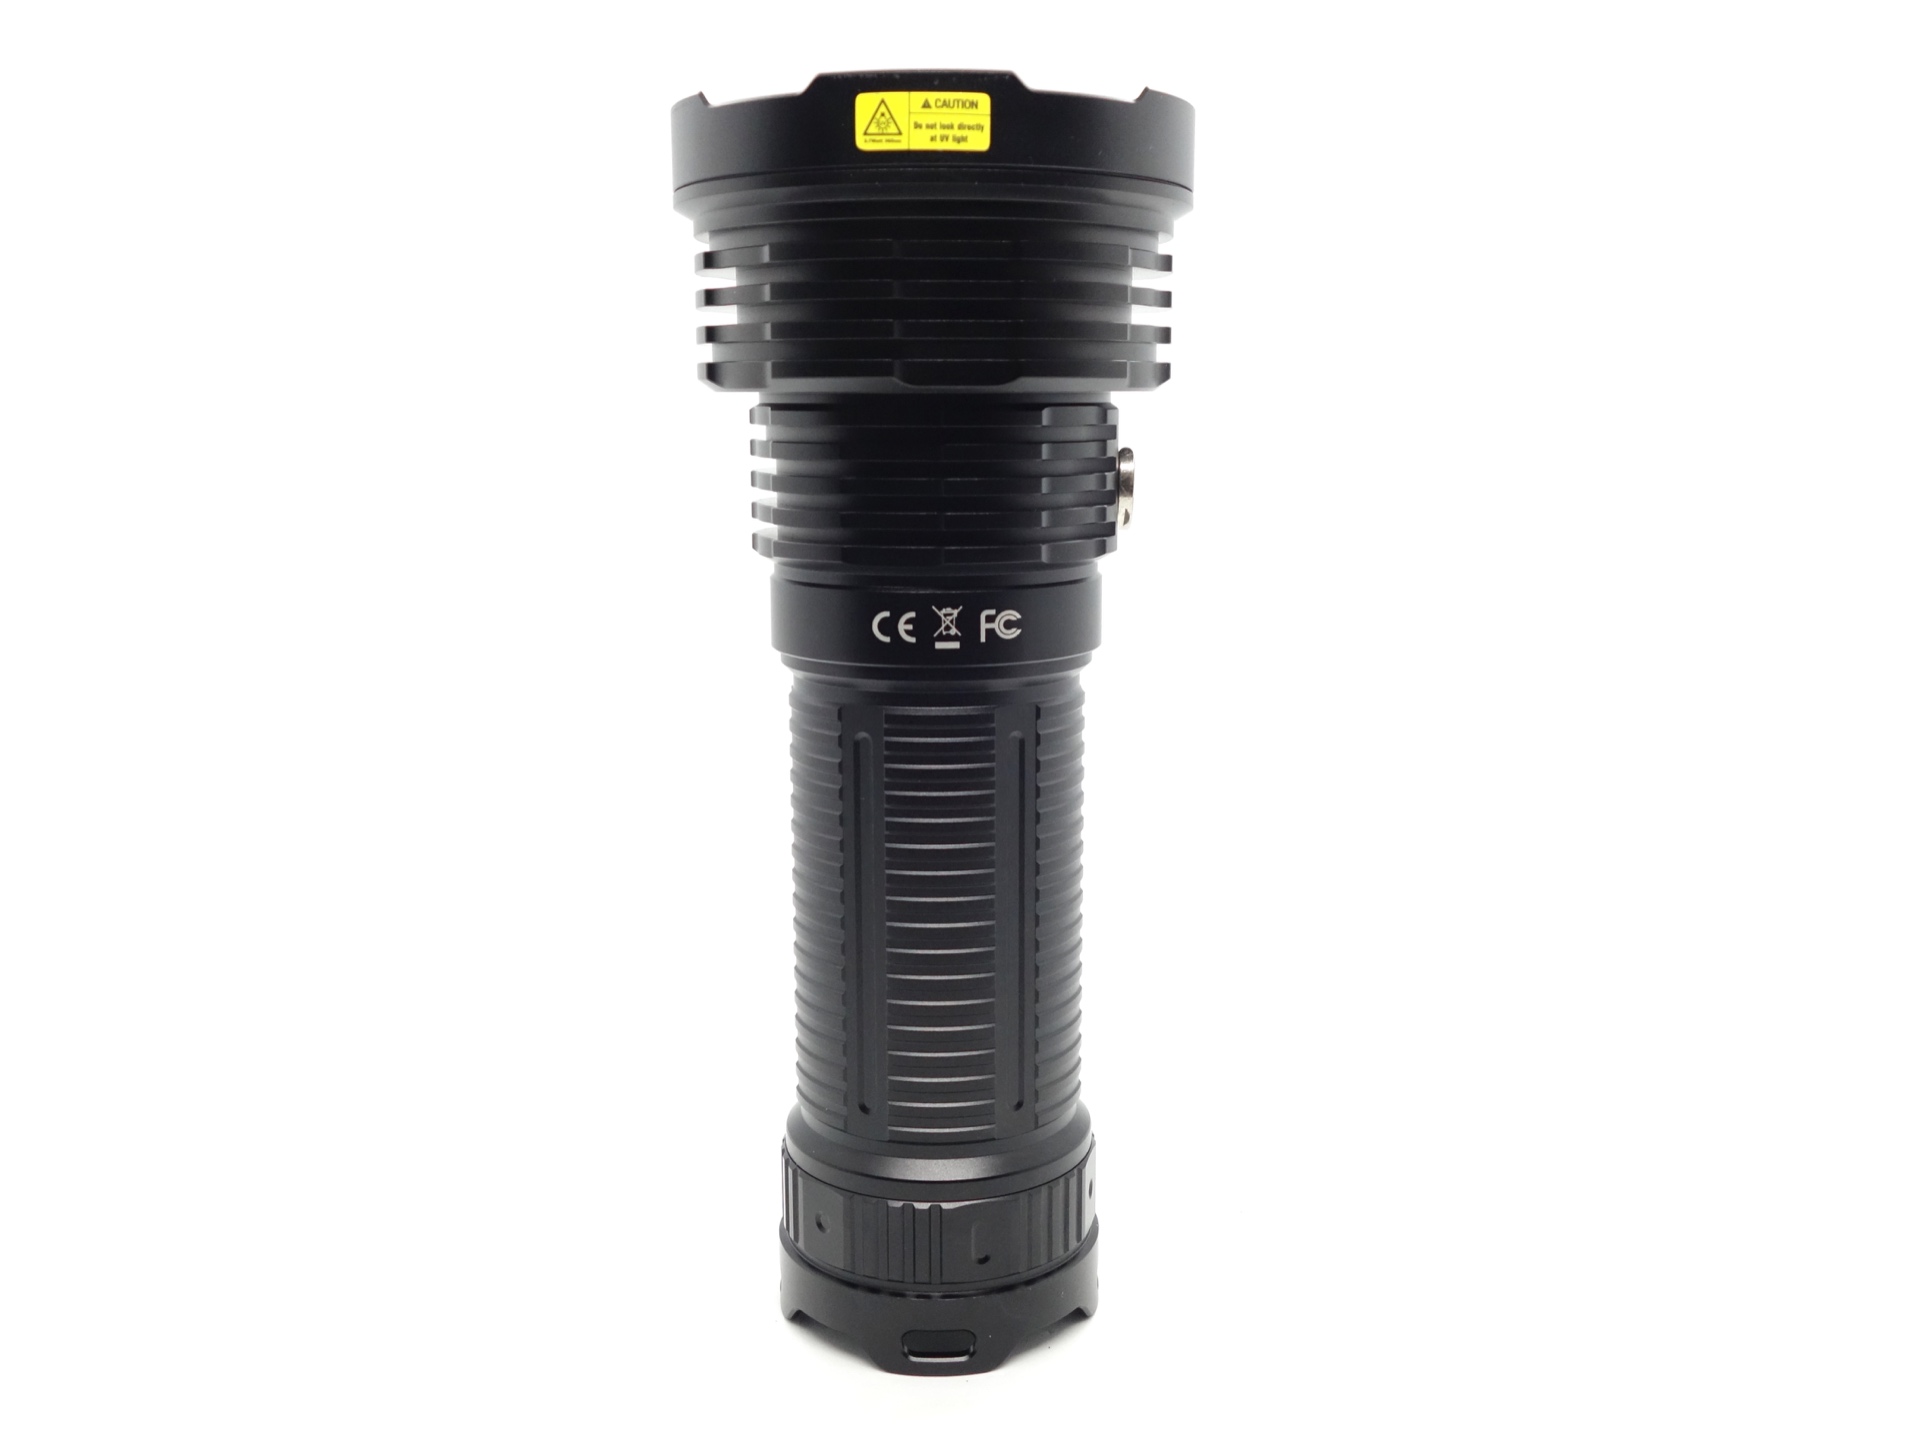
There is an SB10X UV emitter with a ZWB2 filter to pass only UV light around 365nm.
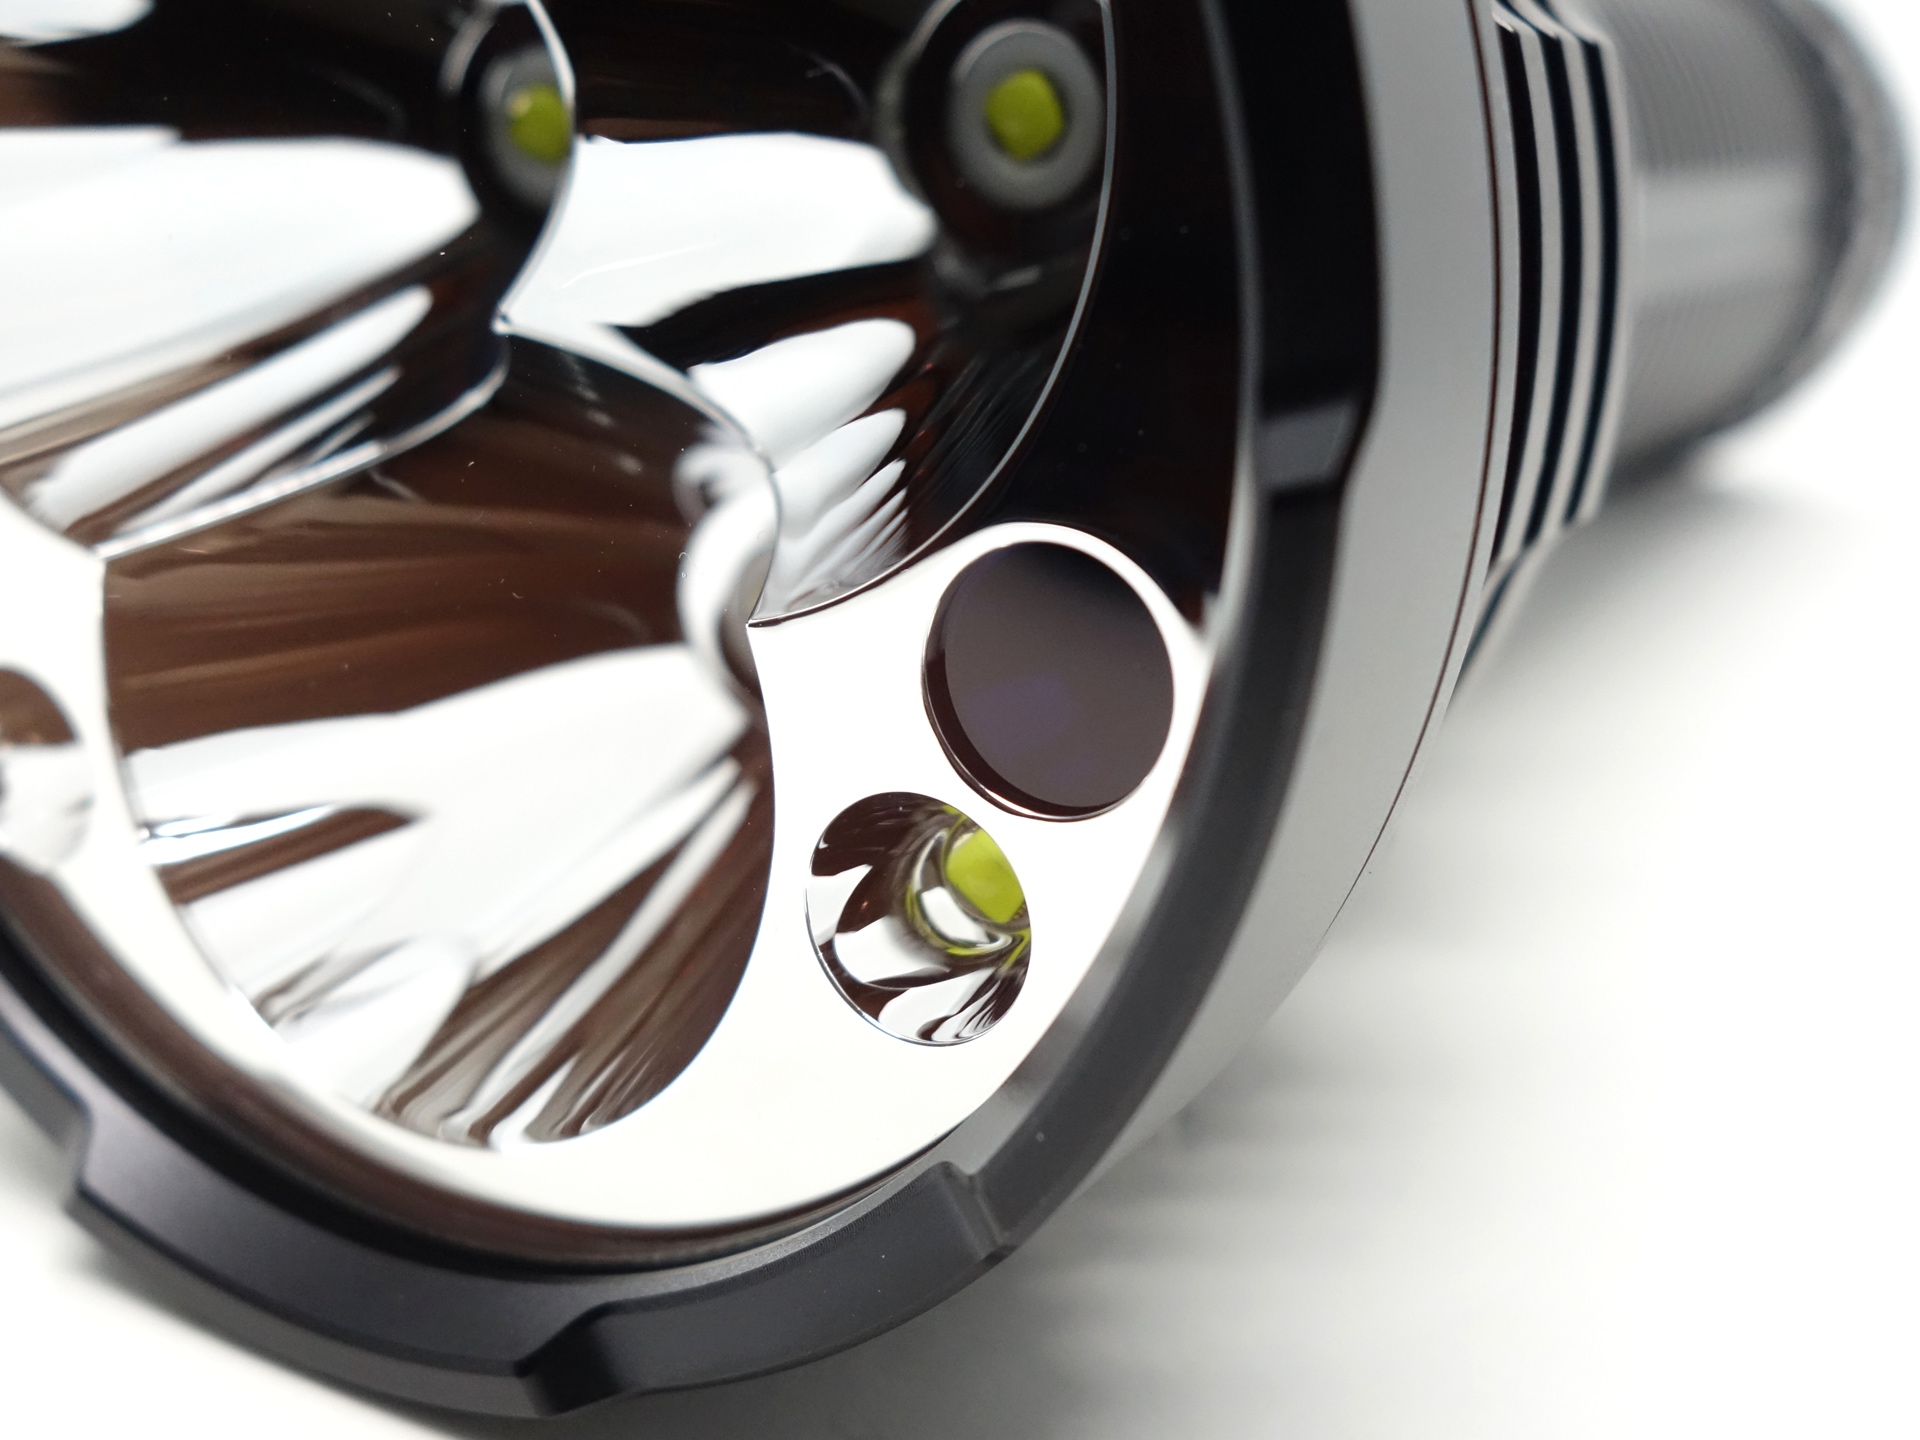
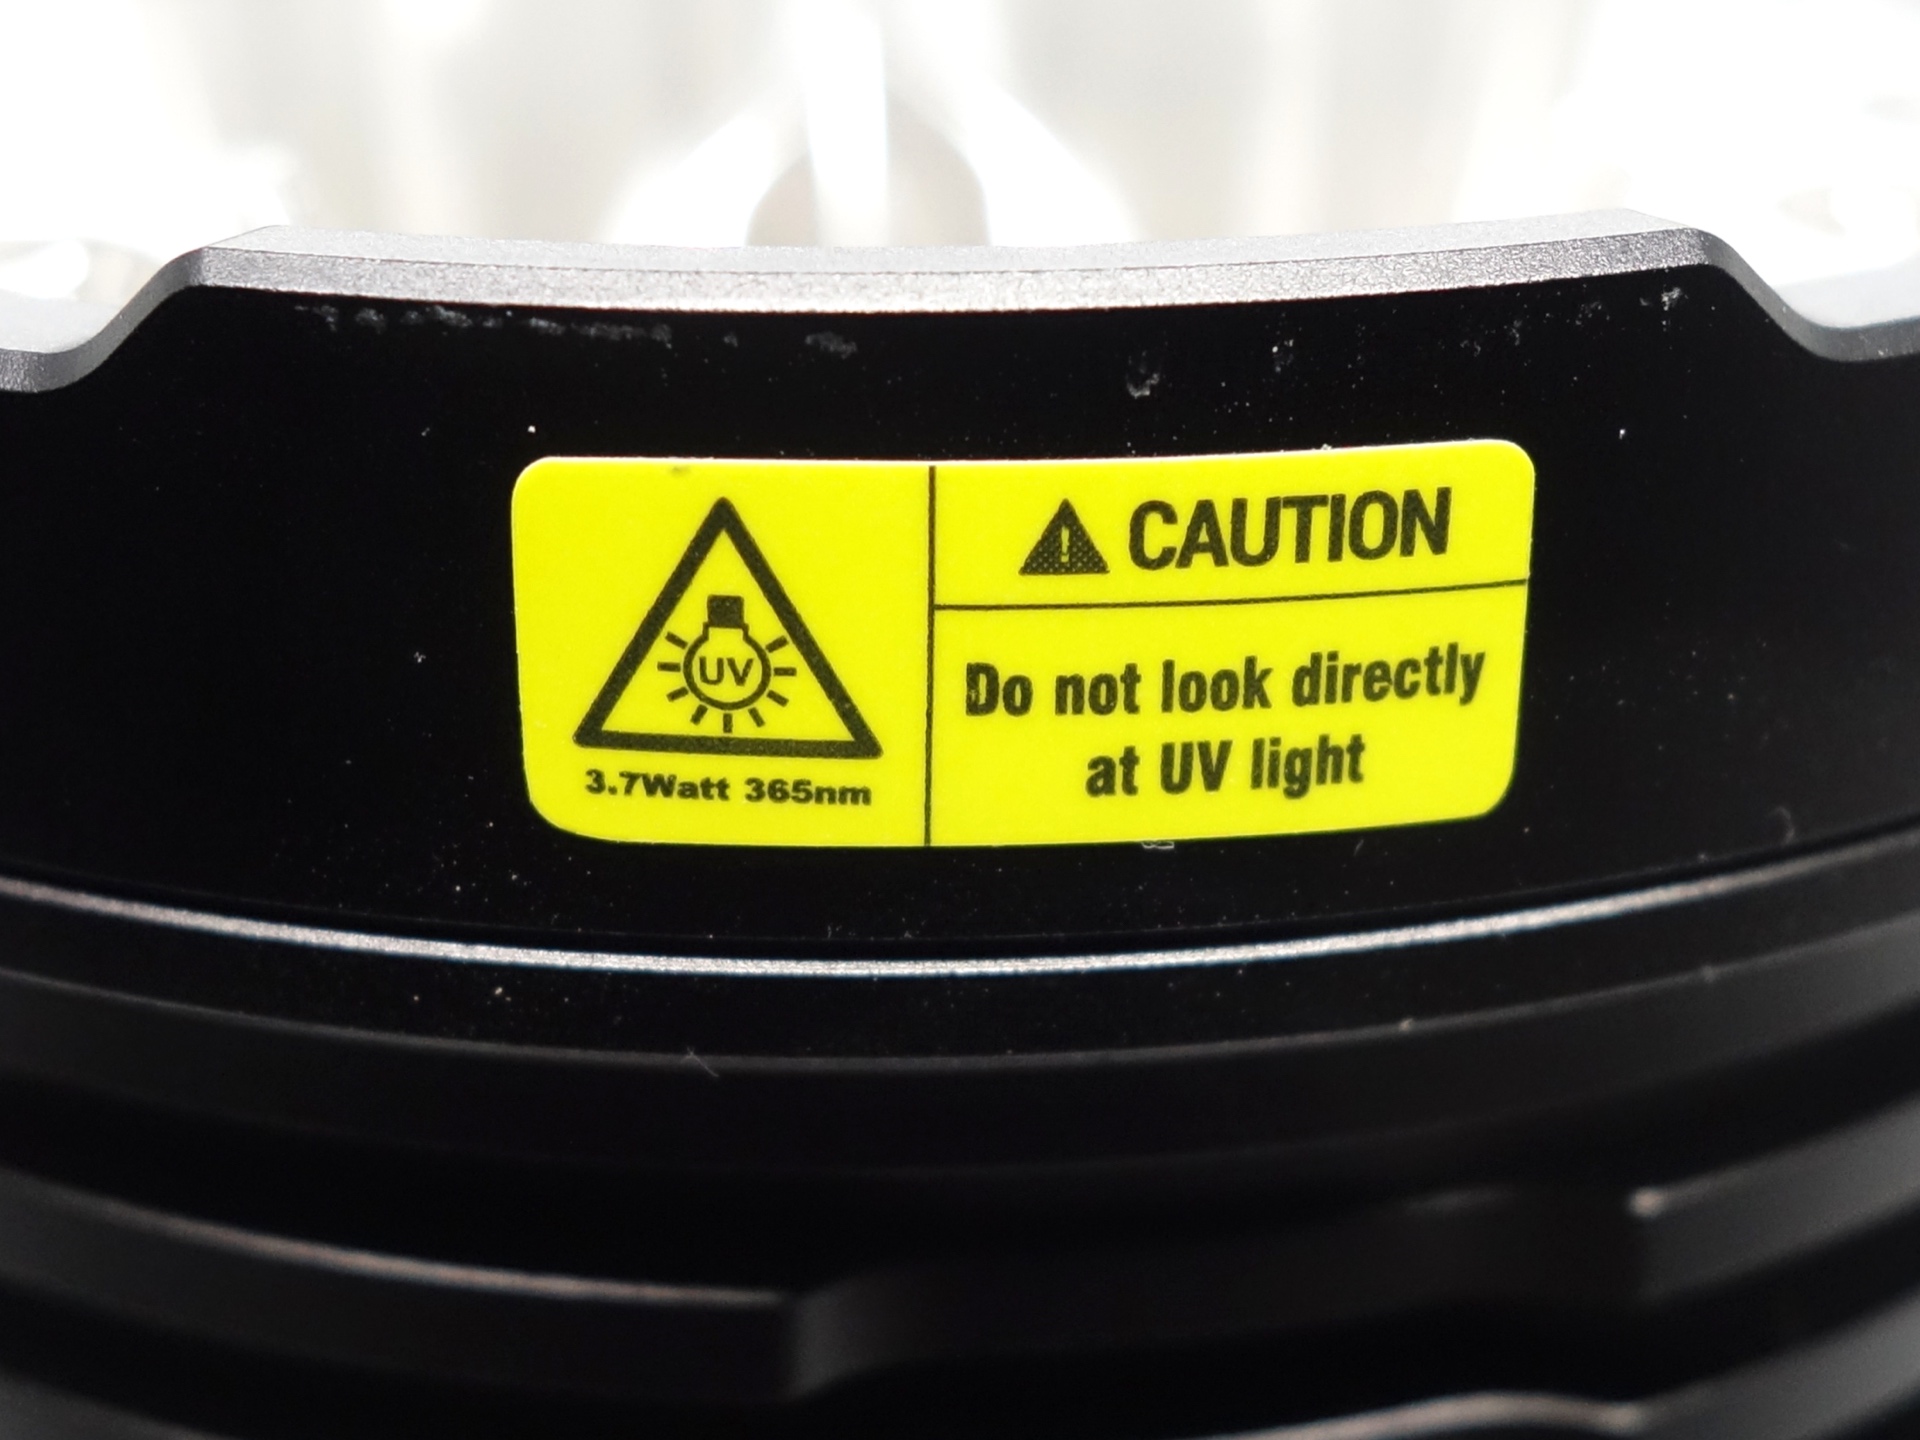
There is a red OSRAM KR CSLNM1.23 emitter.
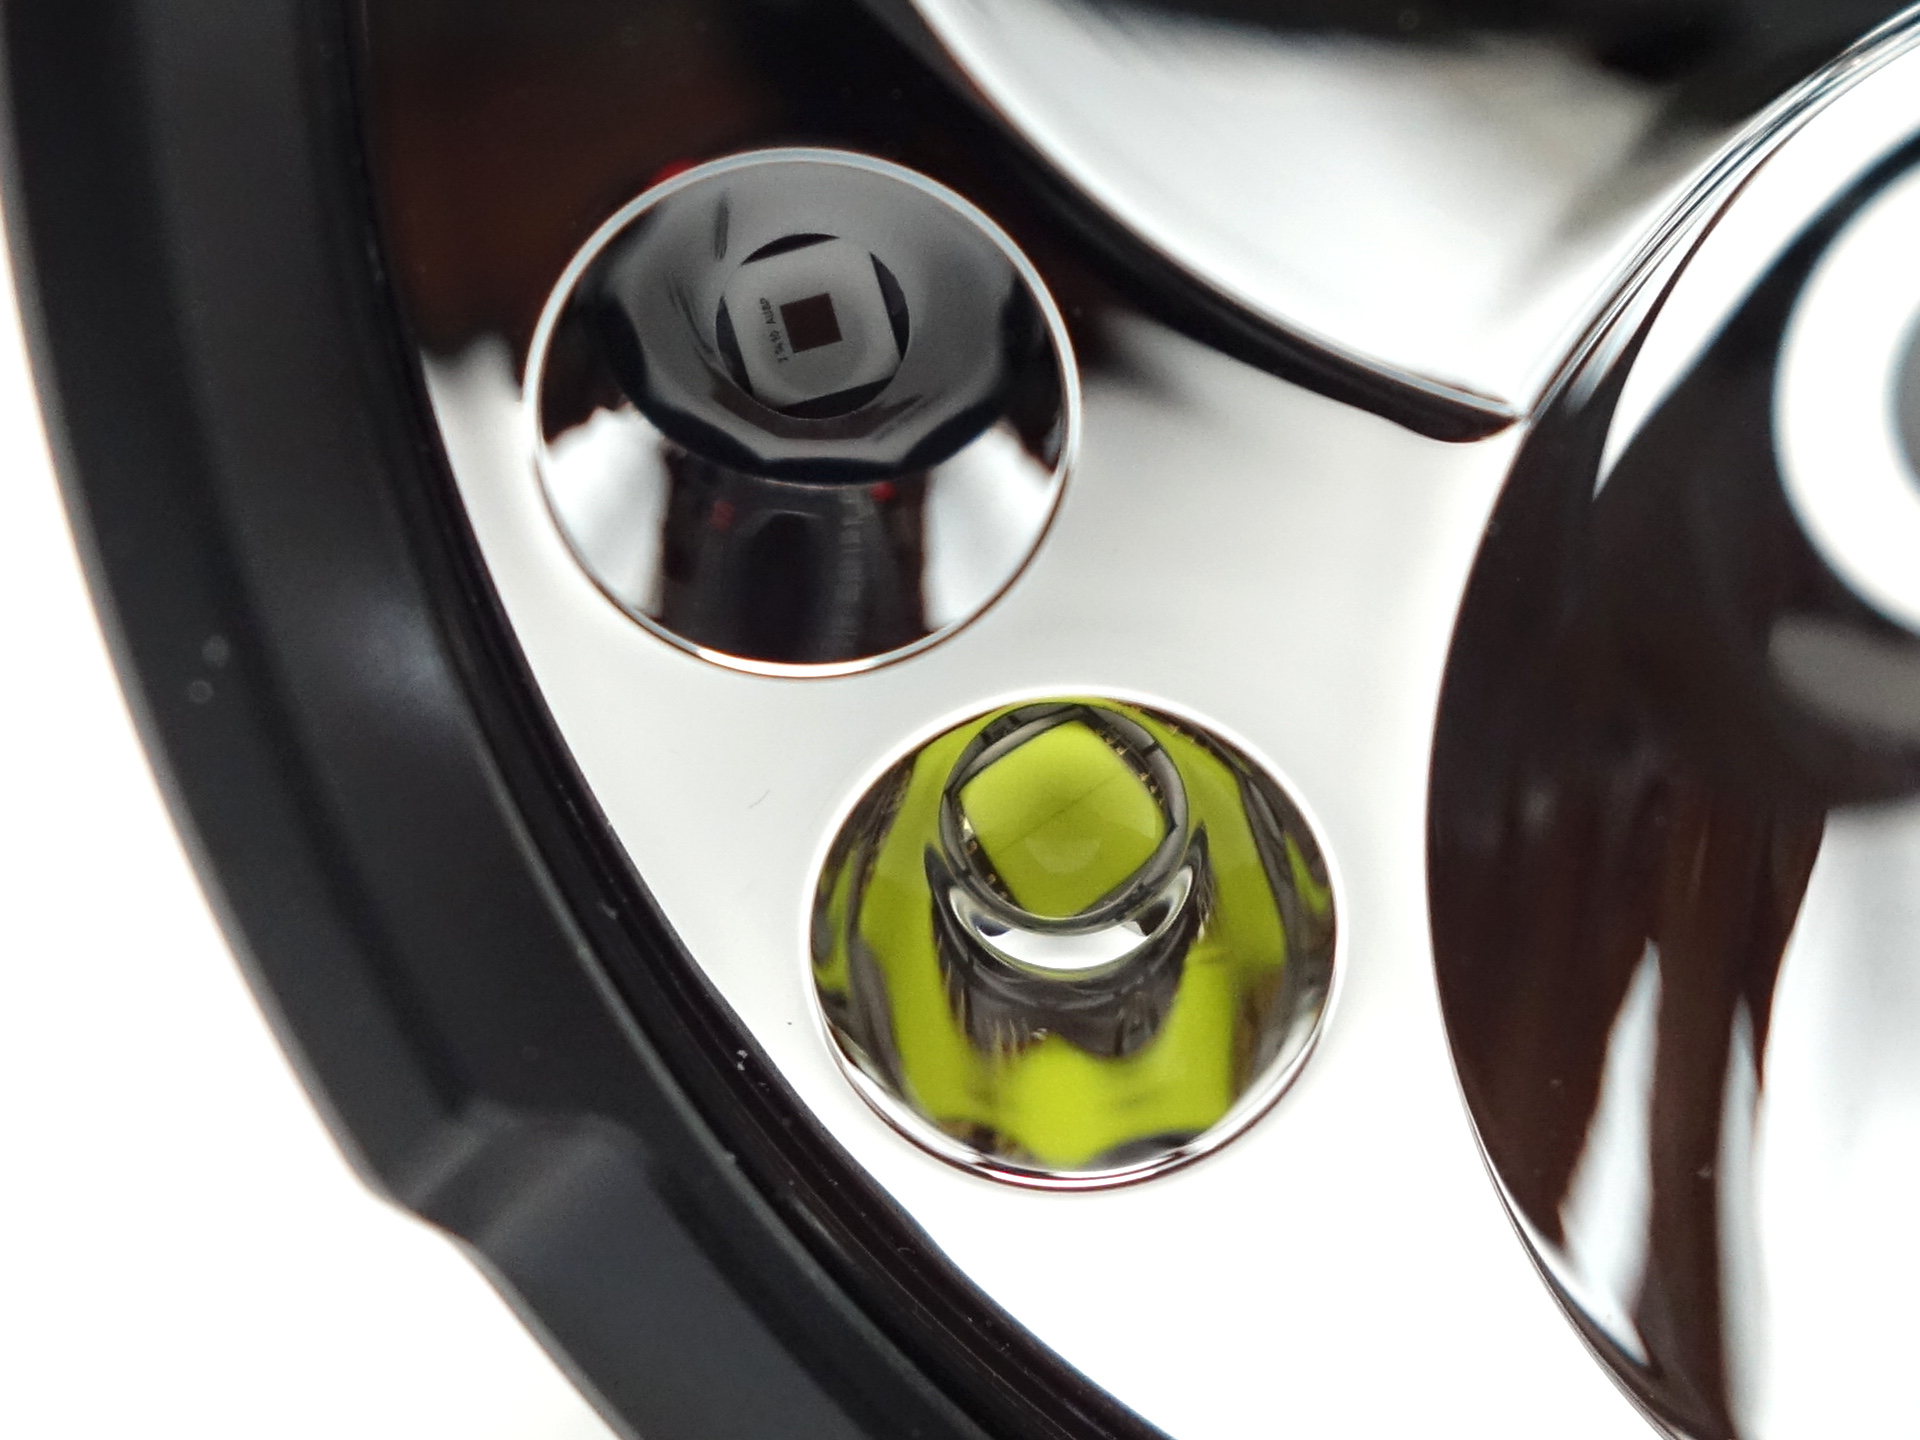
The proximity sensor helps prevent the light from burning things that may be too close while using a High mode. This can be disabled.
CCT, CRI, and duv#
I have taken Correlated Colour Temperature (CCT) and Colour Rendering Index (CRI, RA of R1-R8) measurements with the torch positioned 2.5 metres away from an Opple Light Master Pro III (G3).
The CCT is around 6500K, the CRI is around 68 and the Delta u, v is slightly positive (green) for the Spotlight.
The CCT is around 5800K, the CRI is around 66 and the Delta u, v is slightly positive (green) for the Floodlight.
The beam produced is a massive wall of light! There are some minor artefacts around the edge of the spill when using Spotlight mode.
Spotlight#
| Mode | CCT (K) | CRI (Ra) | x | y | Duv |
|---|---|---|---|---|---|
| Low | 5981 | 66.9 | 0.3215 | 0.3458 | 0.0074 |
| Medium | 6554 | 69.4 | 0.3120 | 0.3272 | 0.0026 |
| High | 6877 | 69.2 | 0.3073 | 0.3220 | 0.0024 |
Floodlight#
| Mode | CCT (K) | CRI (Ra) | x | y | Duv |
|---|---|---|---|---|---|
| Low | 5548 | 64.9 | 0.3313 | 0.3636 | 0.0116 |
| Medium | 5848 | 66.2 | 0.3243 | 0.3493 | 0.0078 |
| High | 6033 | 67.5 | 0.3207 | 0.3422 | 0.0060 |
S + F#
| Mode | CCT (K) | CRI (Ra) | x | y | Duv |
|---|---|---|---|---|---|
| Low | 5989 | 67.1 | 0.3214 | 0.3458 | 0.0074 |
| Medium | 6509 | 69.3 | 0.3127 | 0.3284 | 0.0029 |
| High | 6738 | 70.2 | 0.3096 | 0.3221 | 0.0012 |
Calculate Duv from CIE 1931 xy coordinates
Dimensions and size comparison#
Dimensions#
I took the following measurements using a digital caliper.
These measurements are of the headlamp and the bracket.
| Measurement | Unit (mm) |
|---|---|
| Length | 218 |
| Head diameter | 89.7 |
| Tube diameter | 53.9 |
| Tail diamter | 60.9 |
Weight#
I took the following measurements using a digital scale.
| Weight | Unit (g) |
|---|---|
| Torch | 1142 |
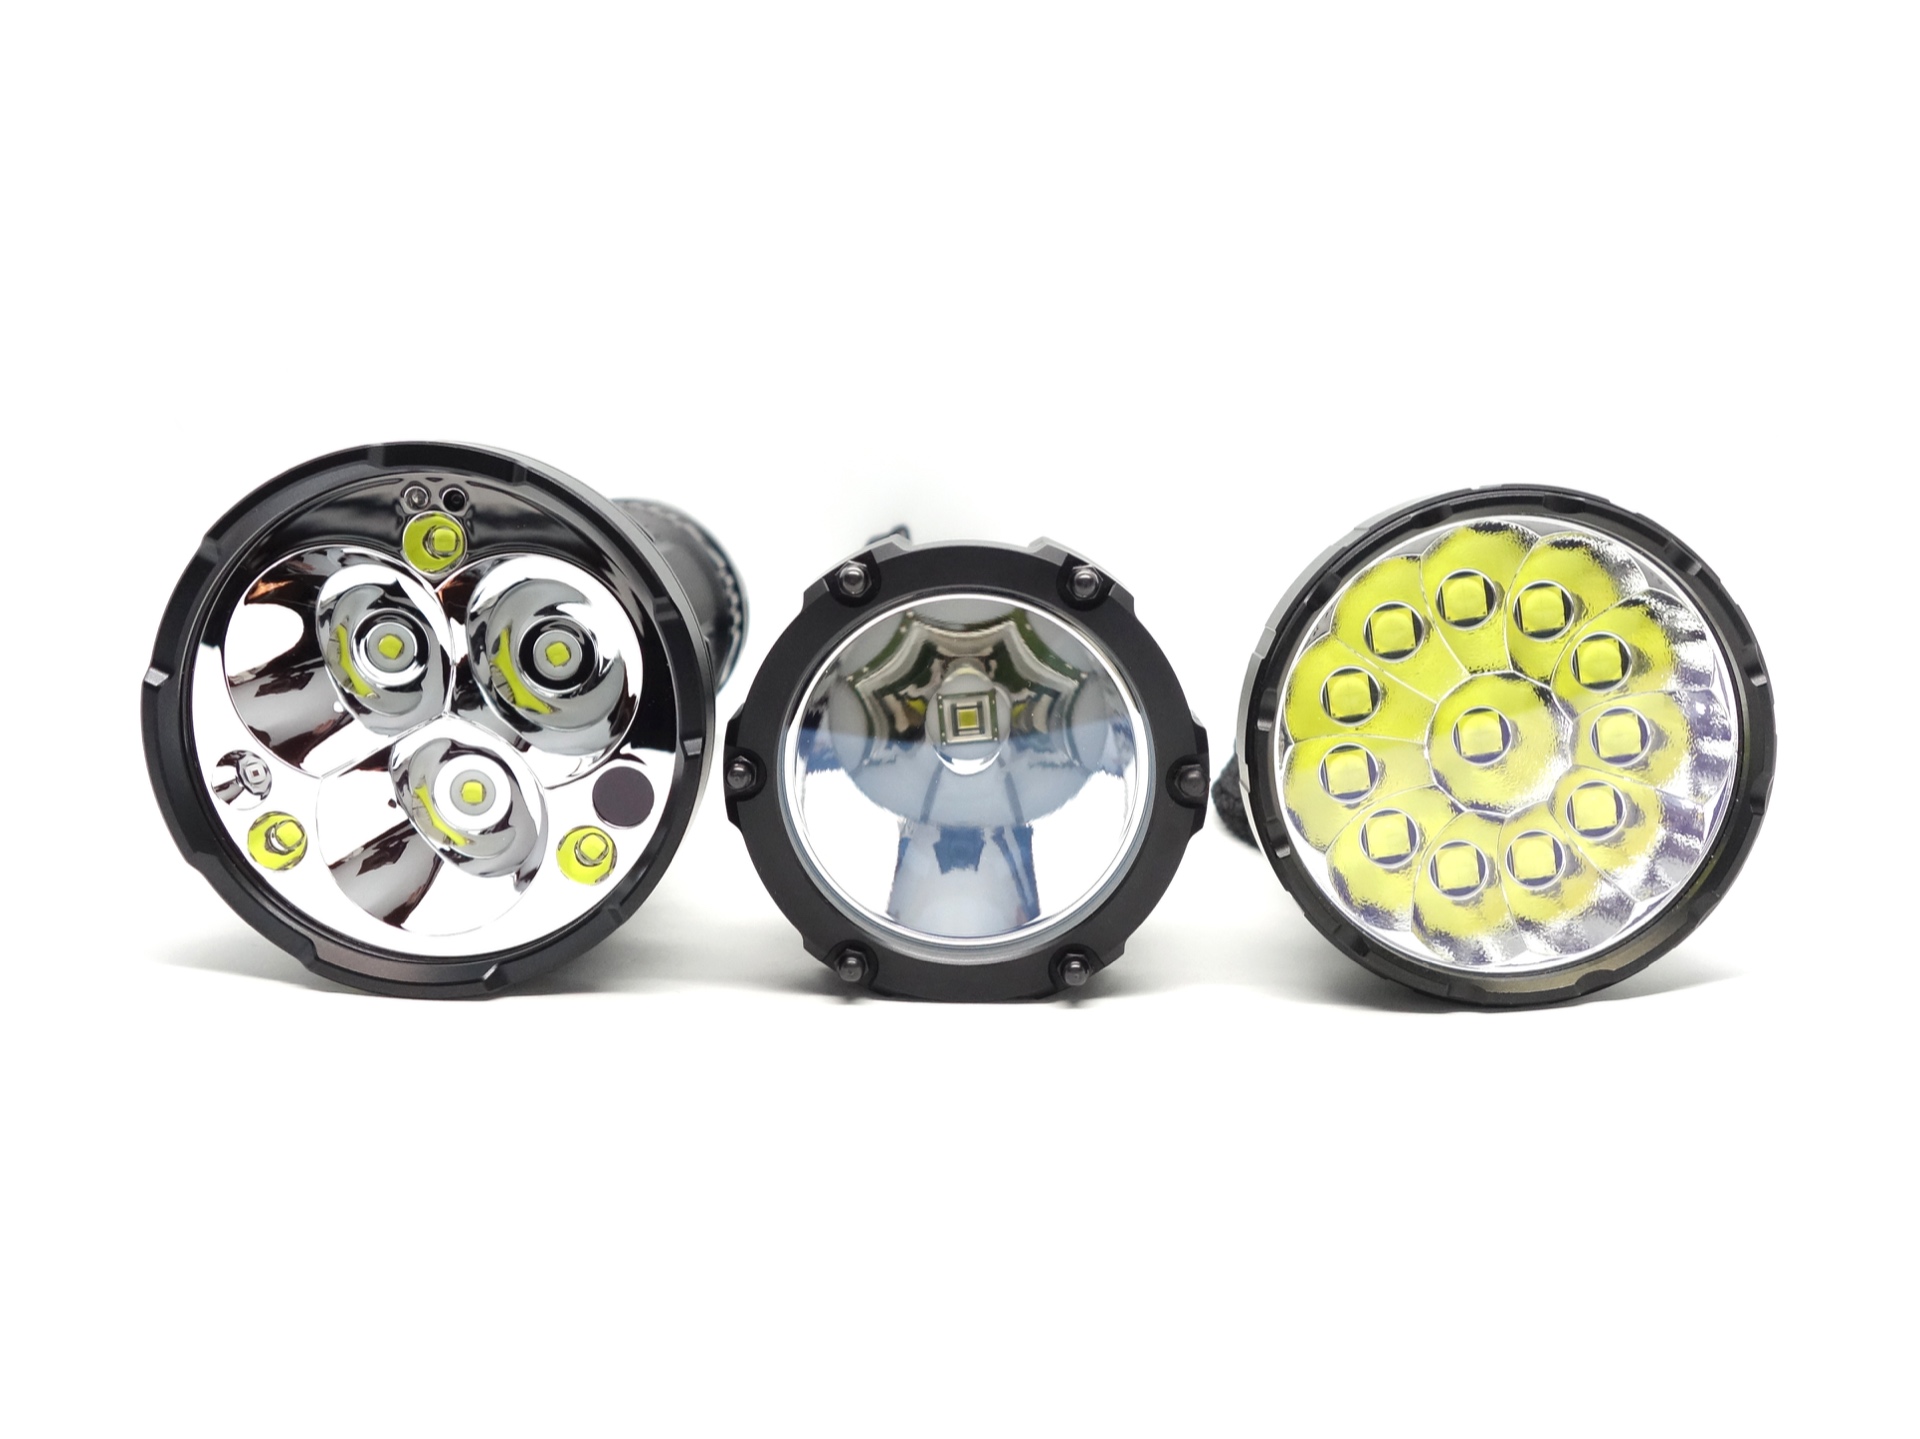
Size comparison with its competition#
From left to right: Fenix LR50R V2, Acebeam P20, IMALENT MS12 MINI
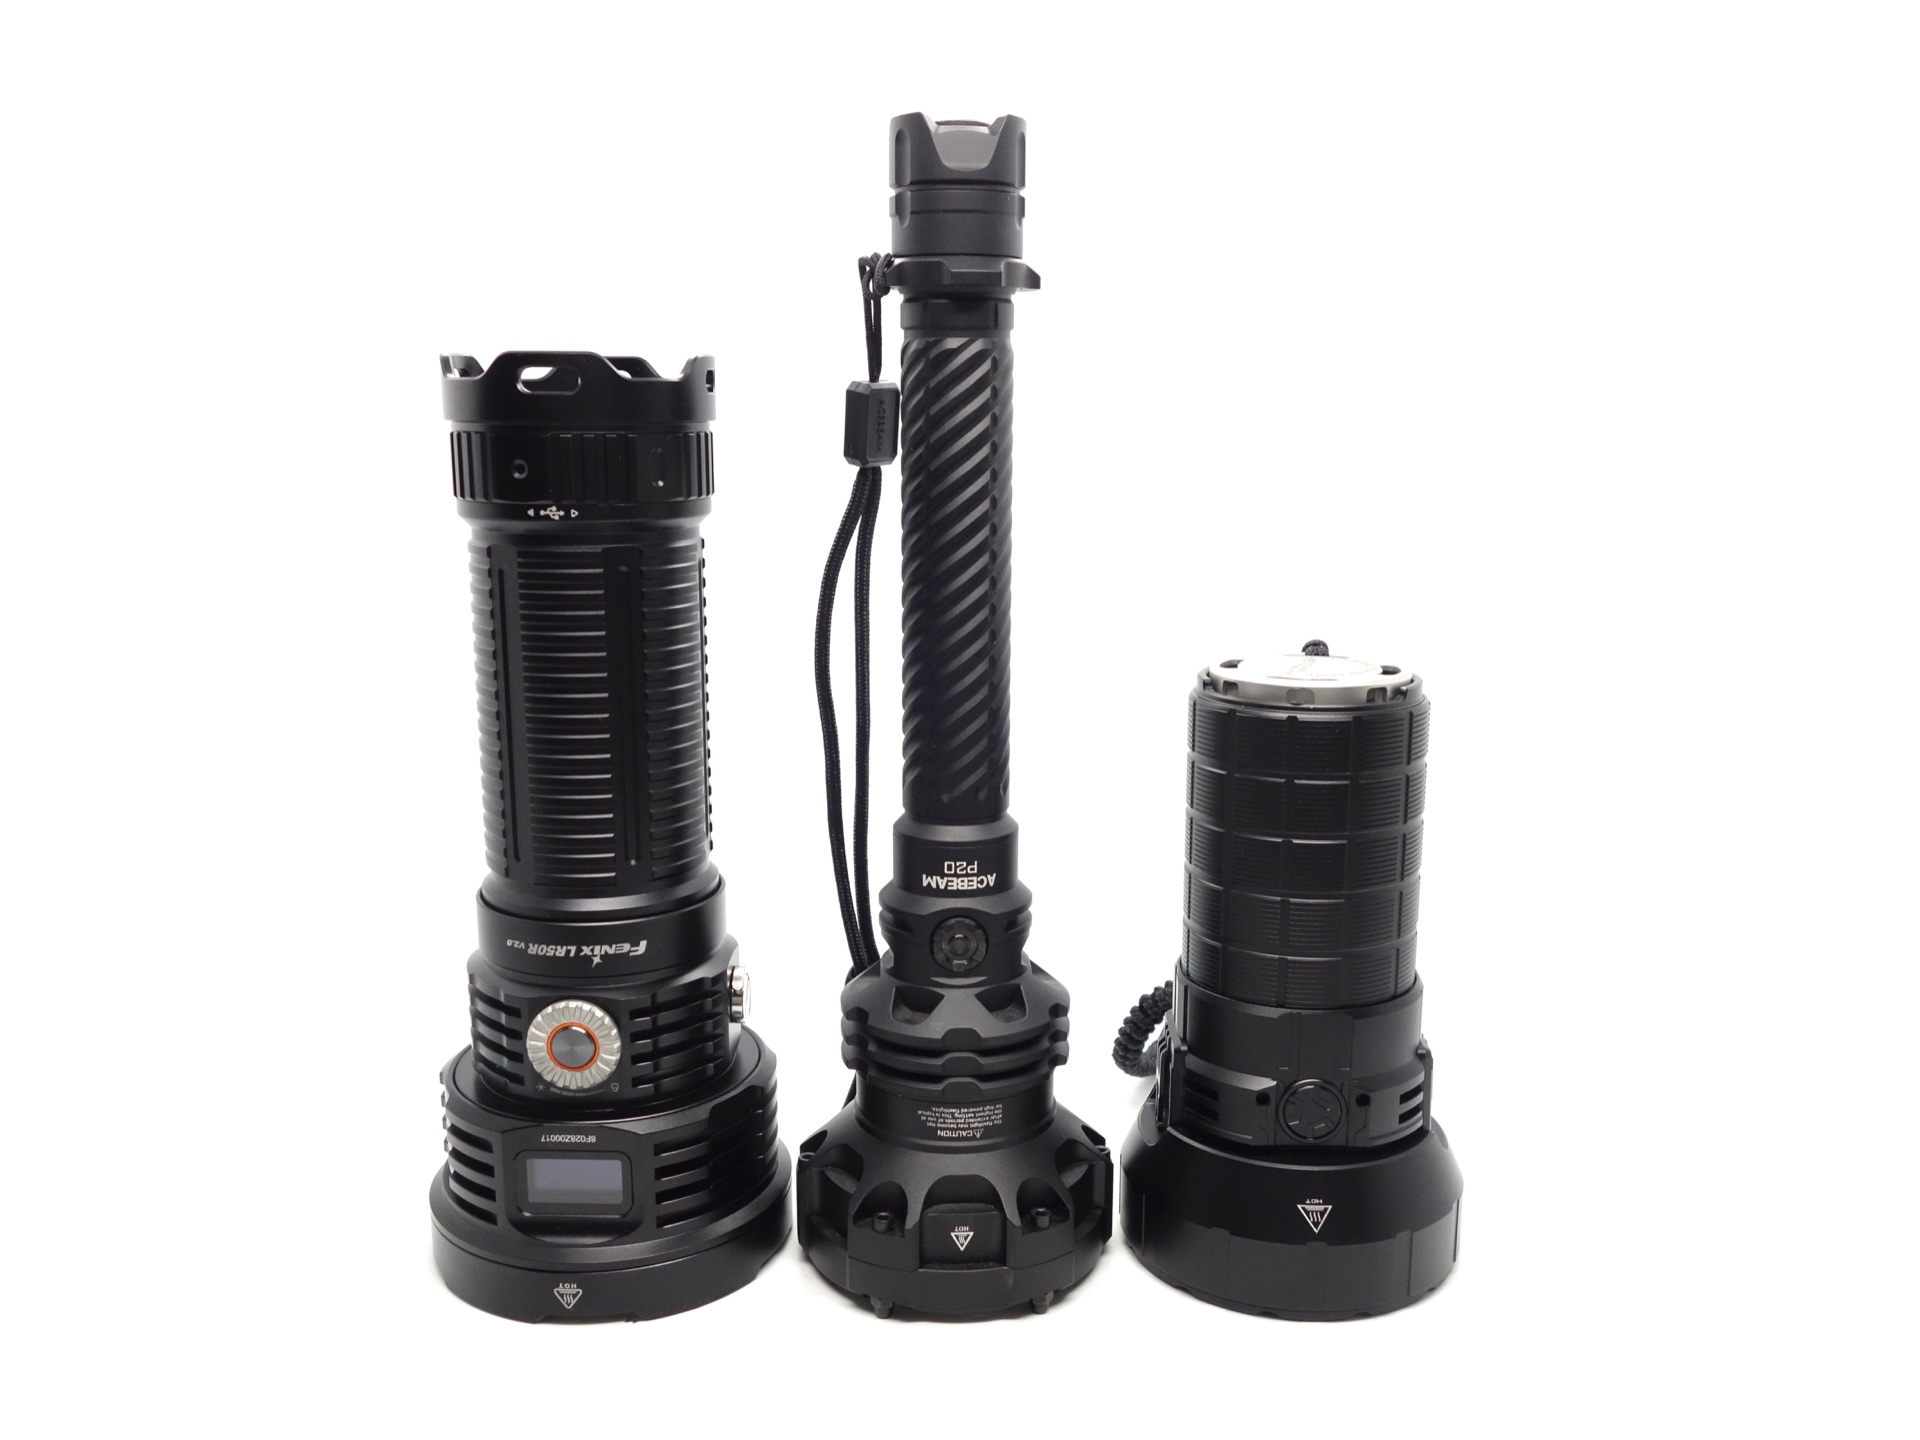
From left to right: Fenix LR50R V2, Acebeam P20, IMALENT MS12 MINI
User interface#
The torch is controlled by a side switch and a rotary dial.
Three modes are available via the rotary dial:
- Spotlight
- Floodlight
- Spotlight + Floodlight
There are also two more blinky modes for the white light: Strobe and SOS.
Three modes are available via the side switch:
- Red
- Red Flash
- UV
Once the torch has been unlocked and turned on by rotating the dial, you can press the side switch for 0.5 seconds to turn the light off and on again.
Please see the user manual for a great diagram.

Proximity sensor#
The proximity sensor can be turned on or off permanently (memorised).
When the torch is locked and off, press the side switch for 6 seconds until the Floodlight flashes.
Two flashes indicates that the proximity sensor is on.
Eight flashes indicates that the proximity sensor is off.
Mode memory#
There is mode memory.
S+F, Spotlight and Floodlight are memorised.
The brightness is memorised when turning the torch off by pressing the side switch for 0.5 seconds.
Red, Red Flash and UV are memorised.
Strobe and SOS are not memorised.
Strobe#
The white light has Strobe and SOS modes.
Strobe has an alternating frequency.
The red light has a blinking mode.
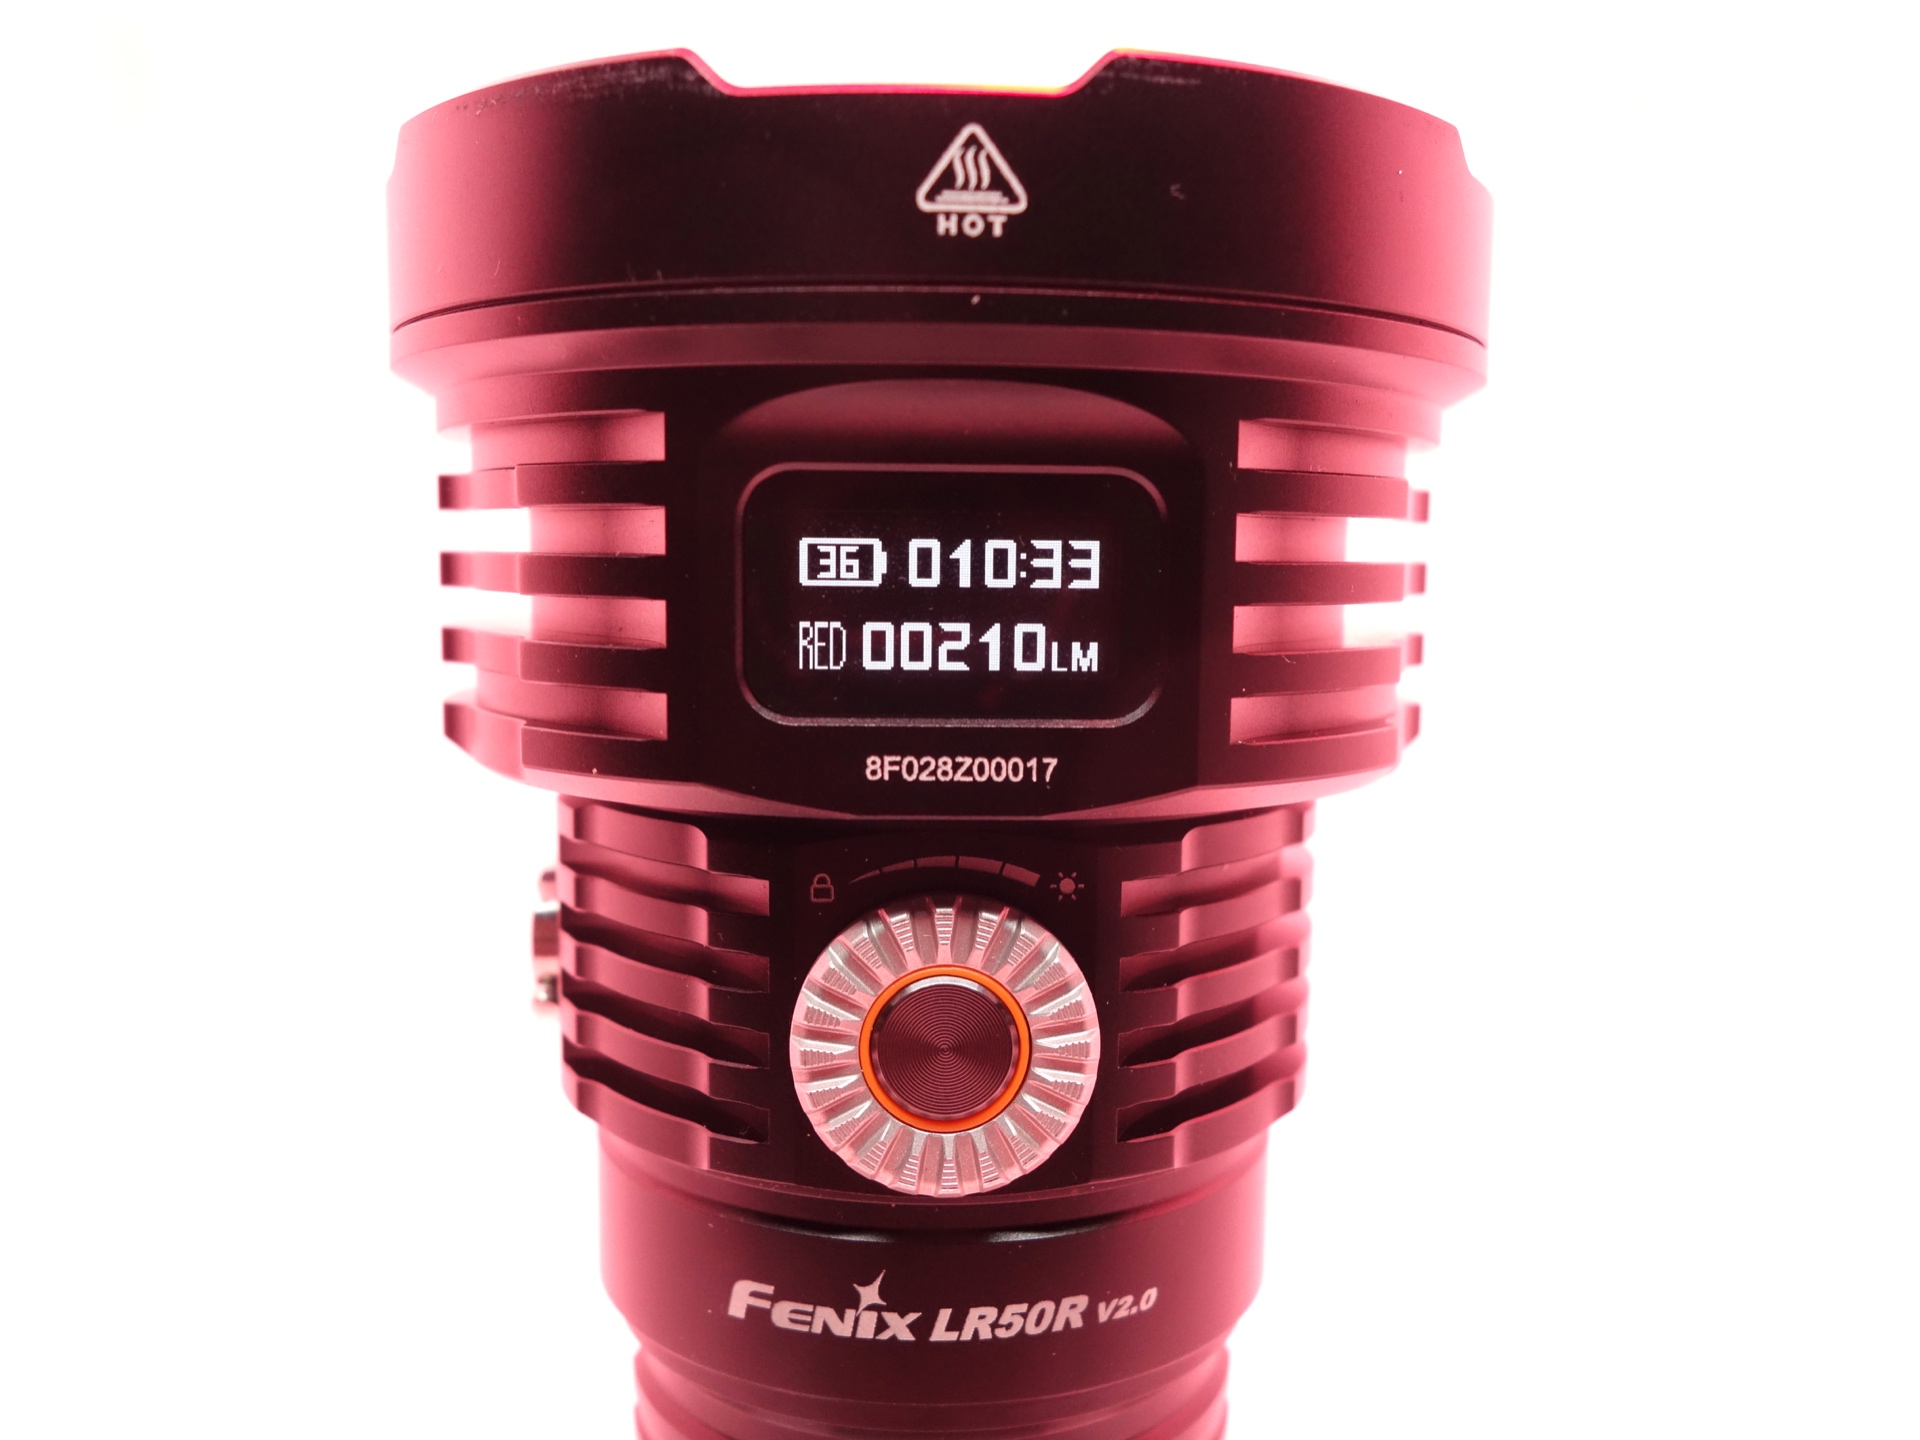
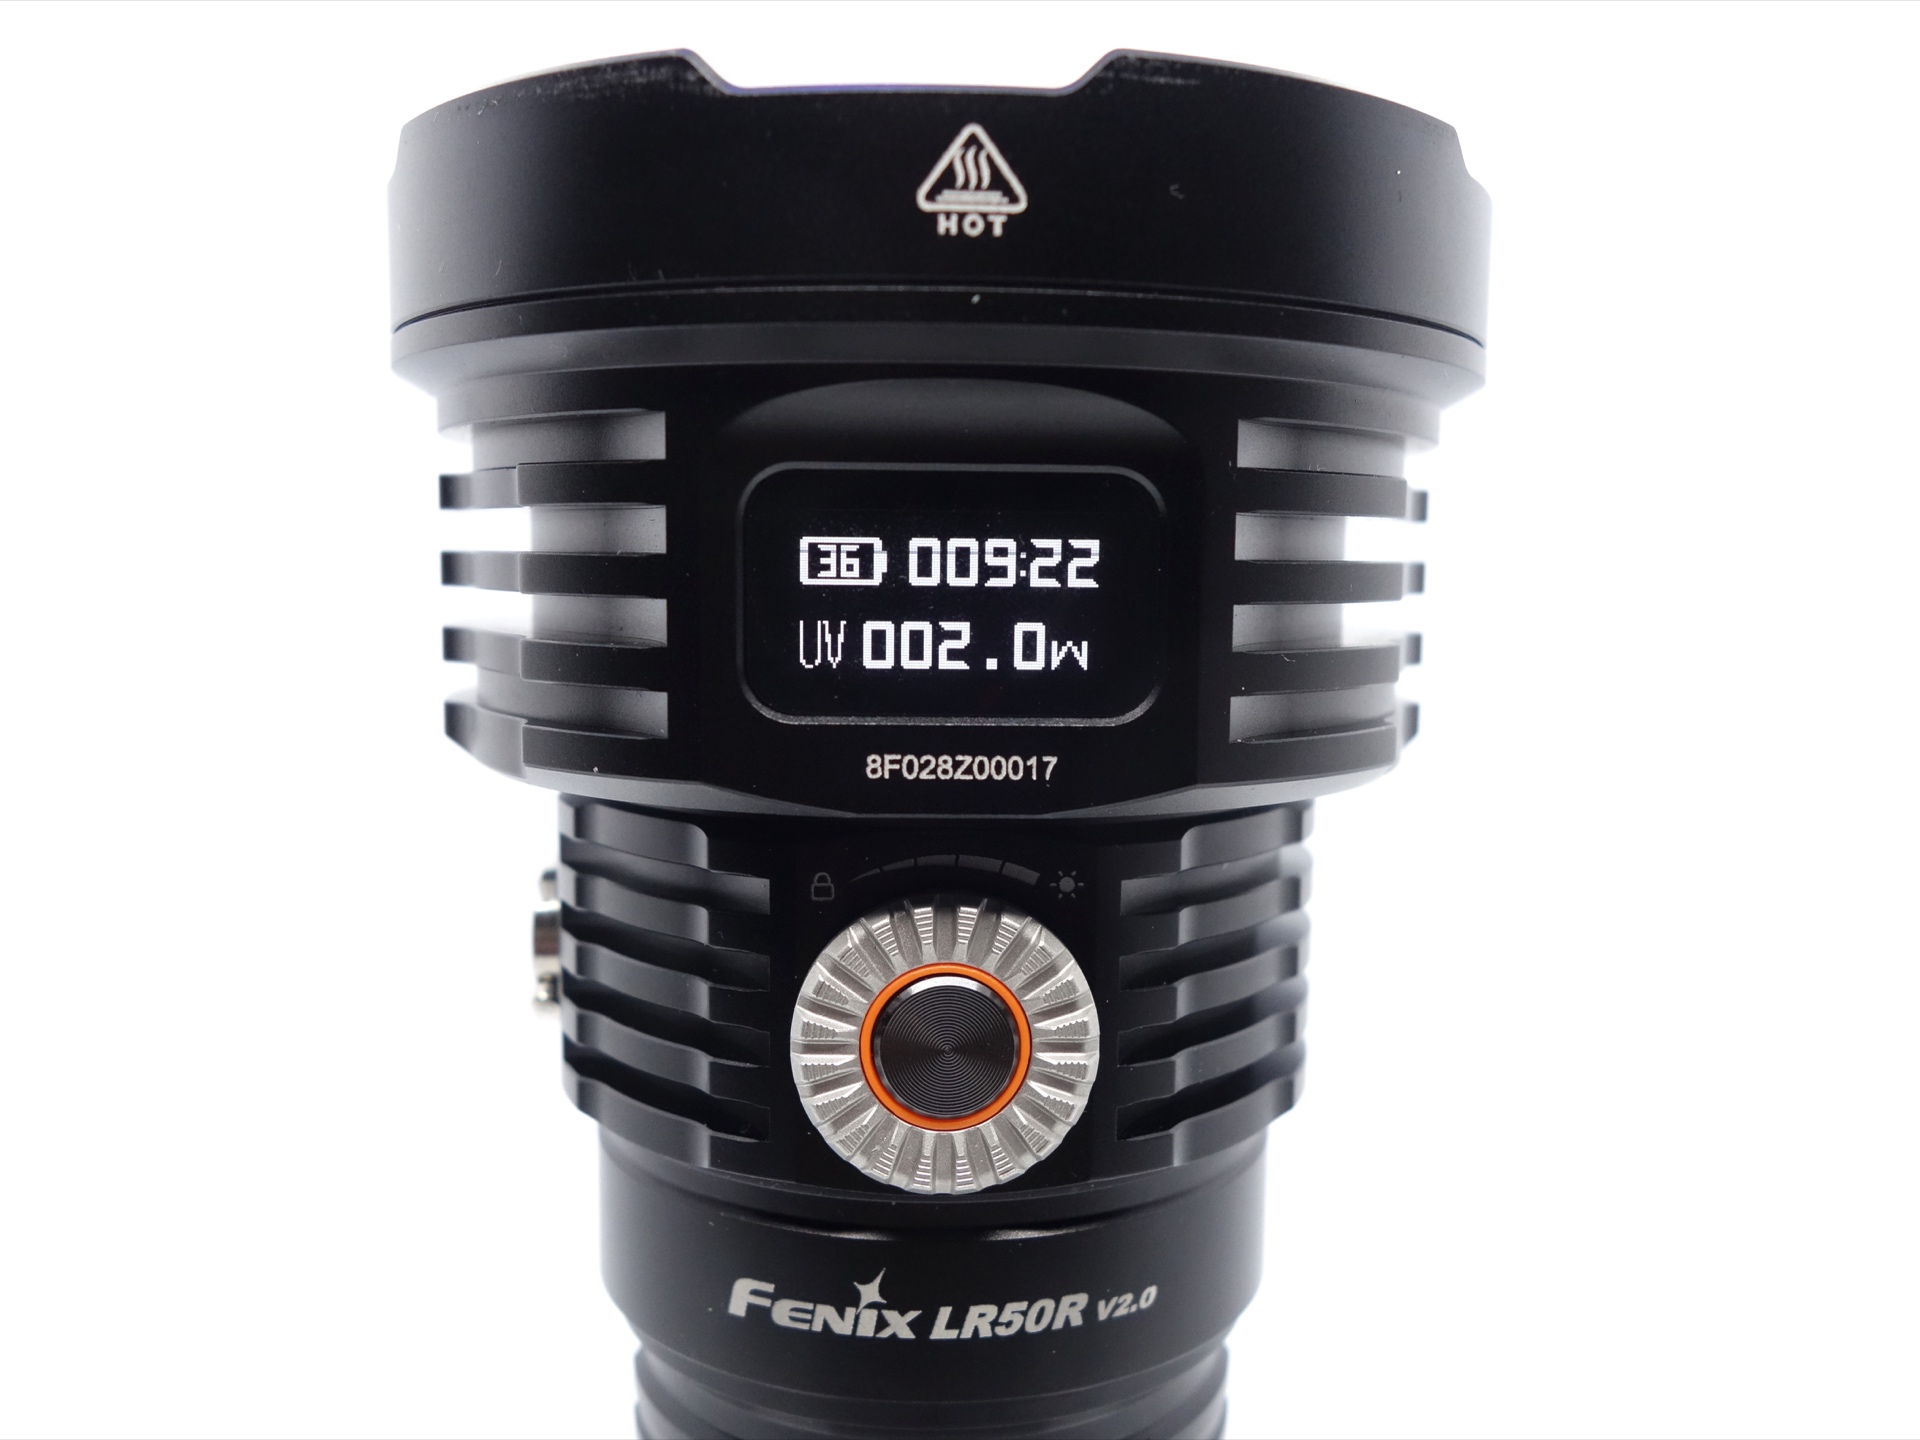
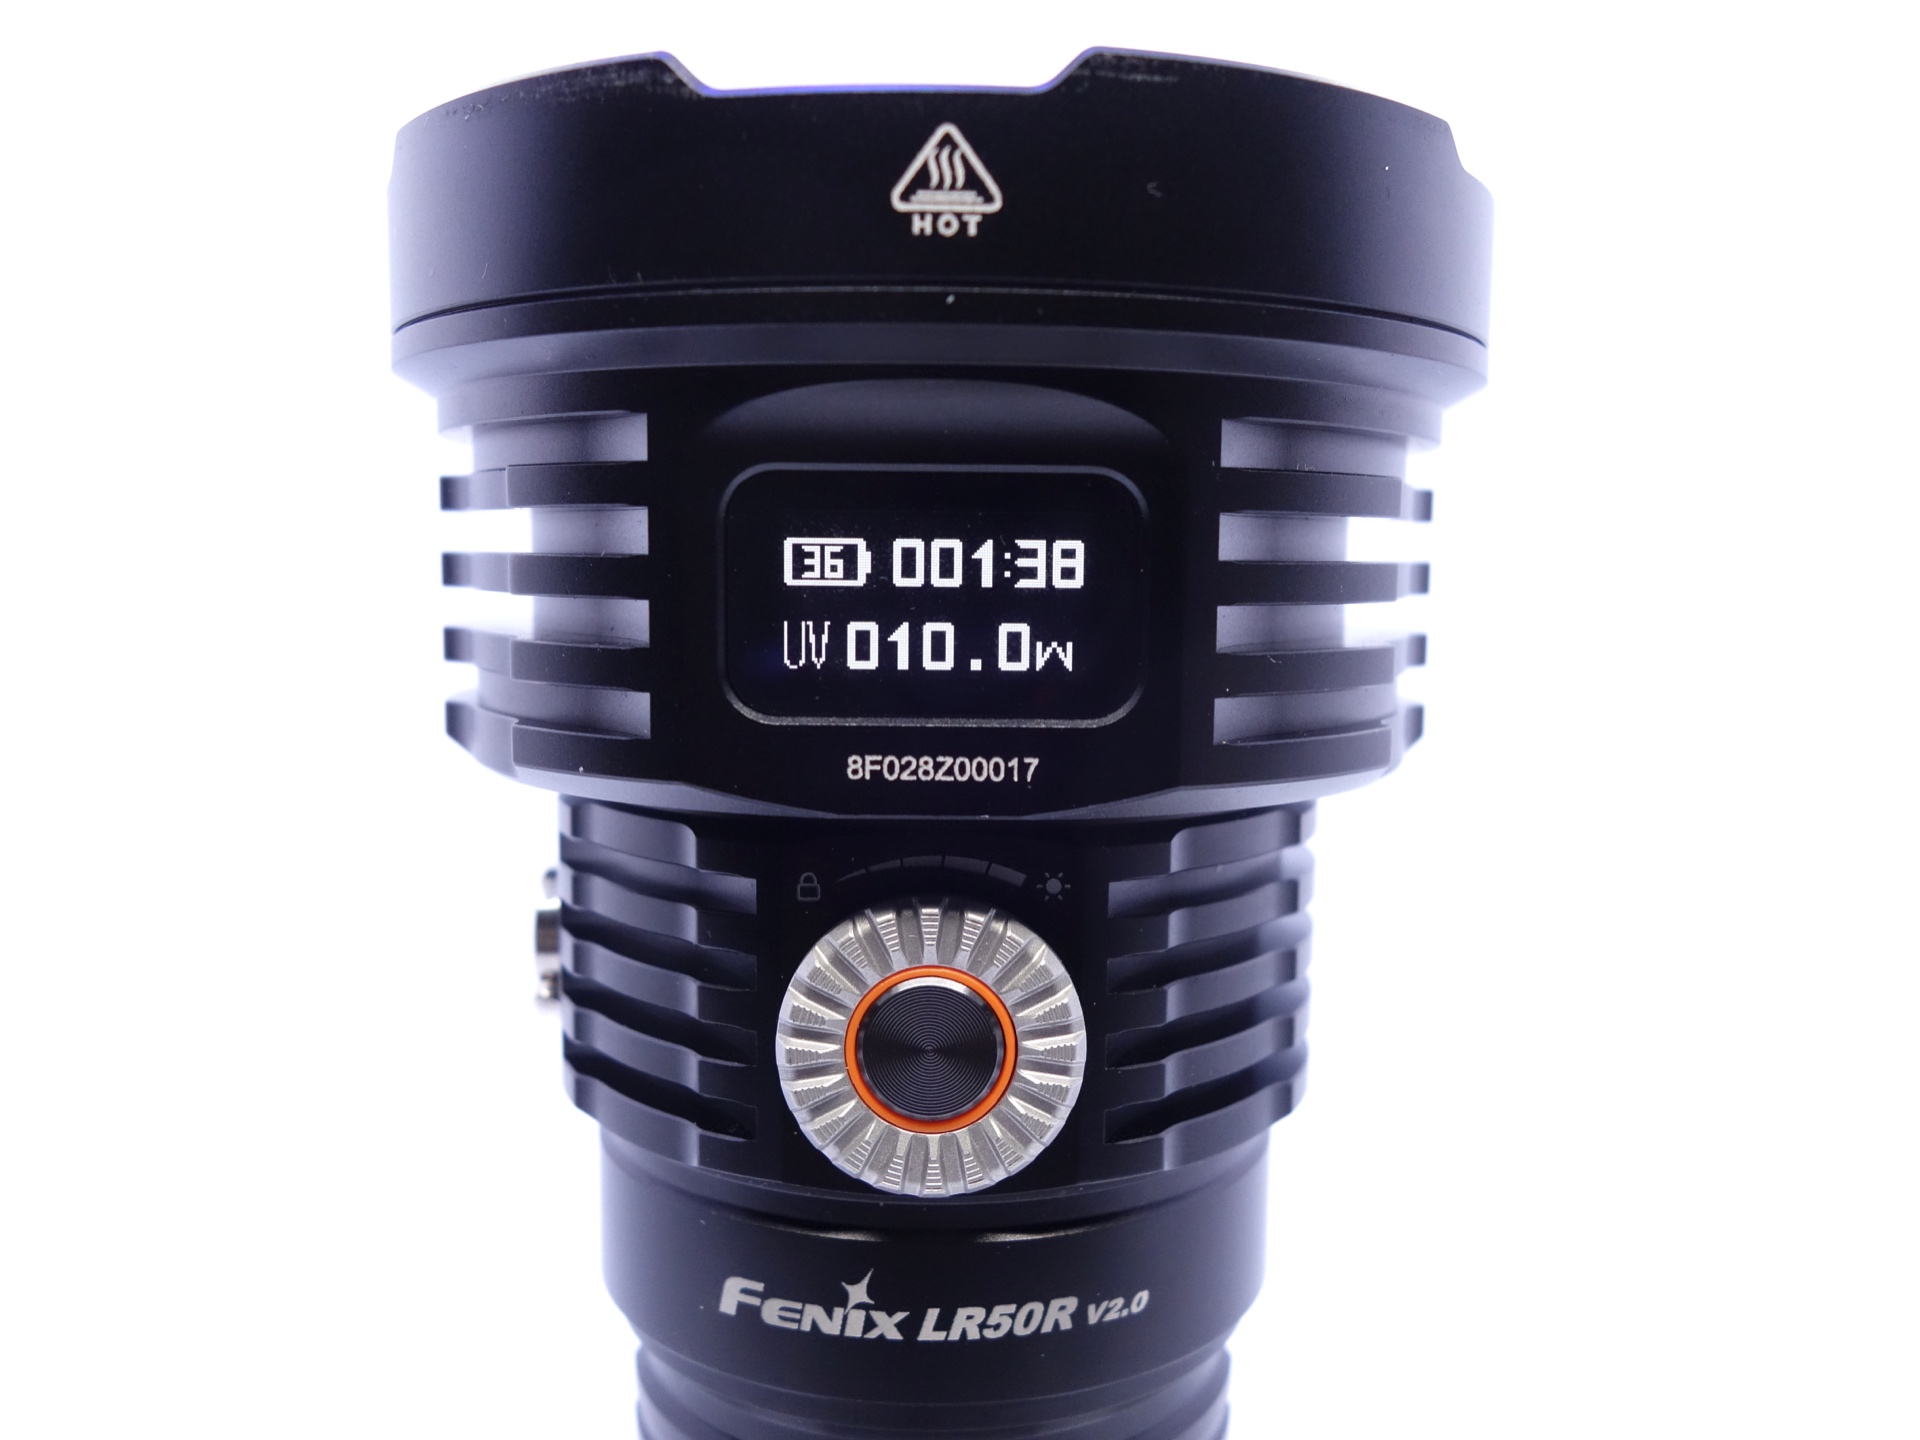
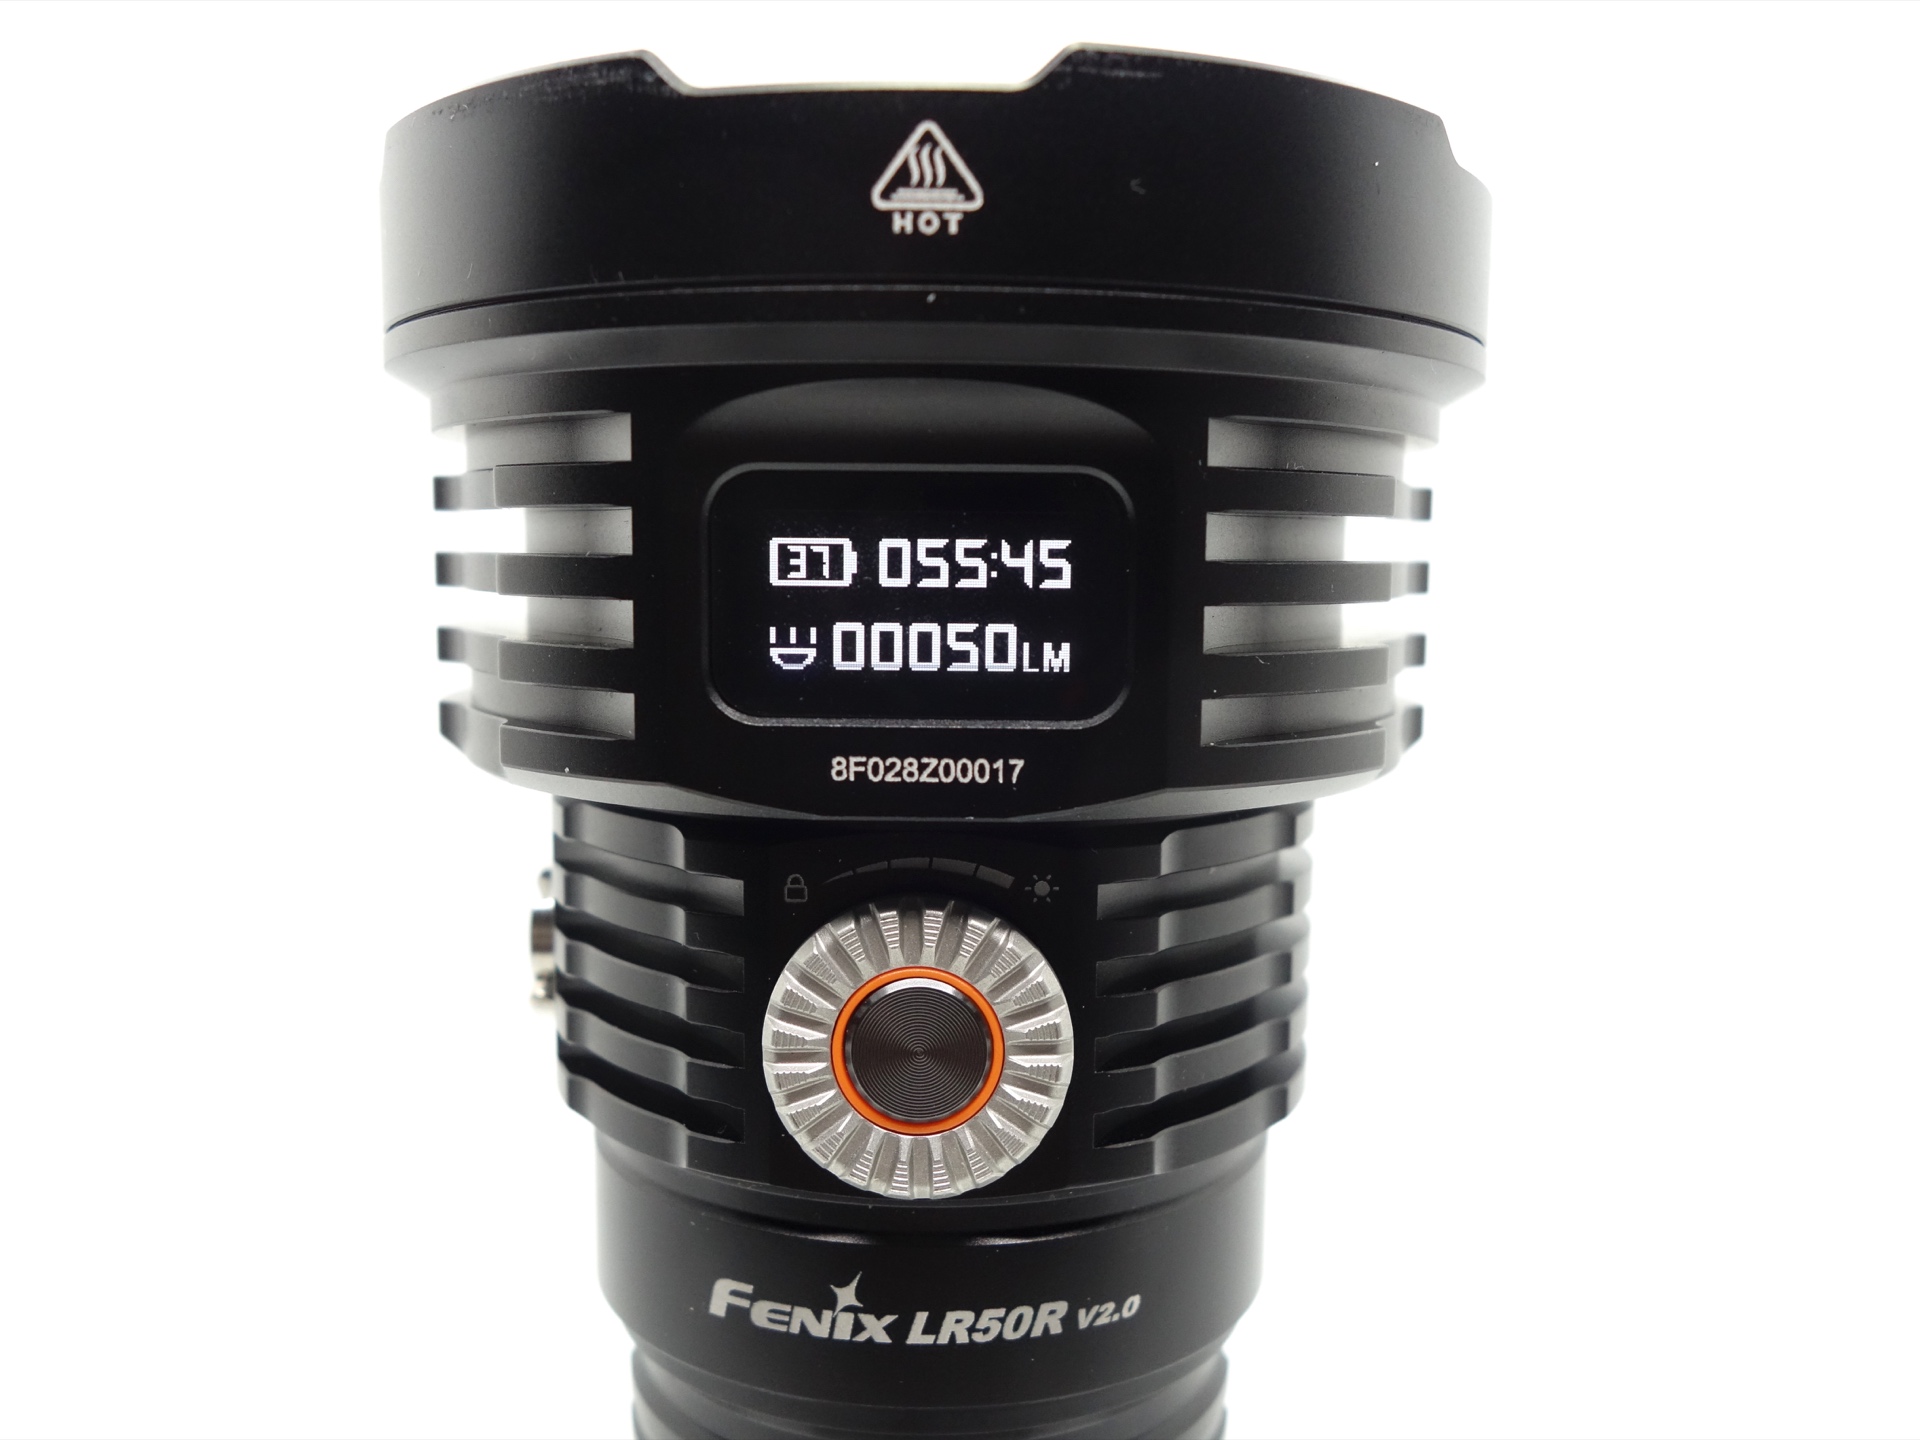
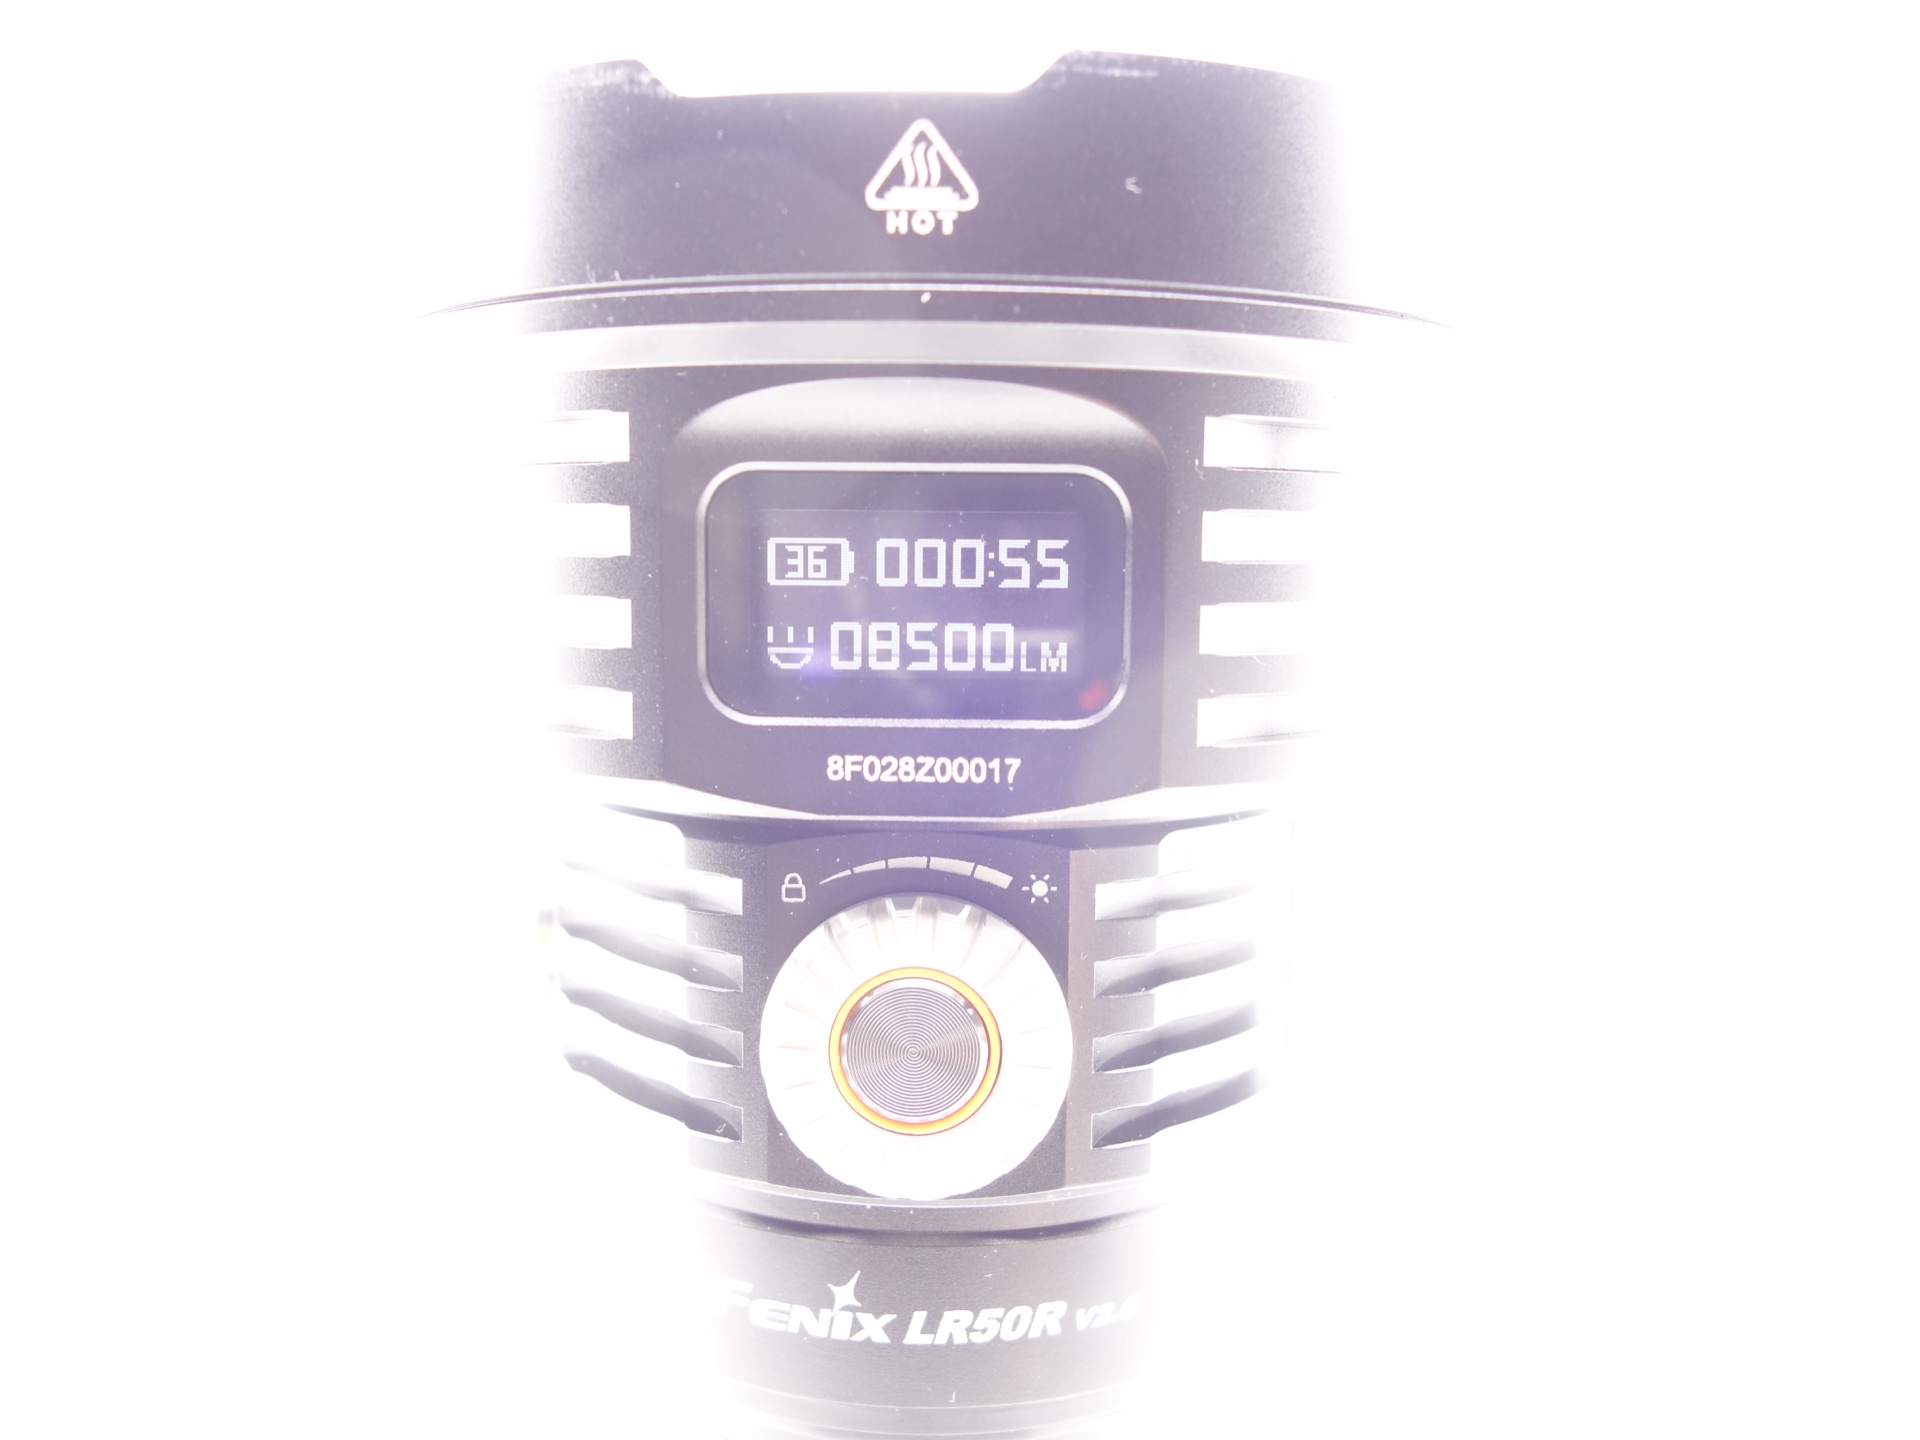
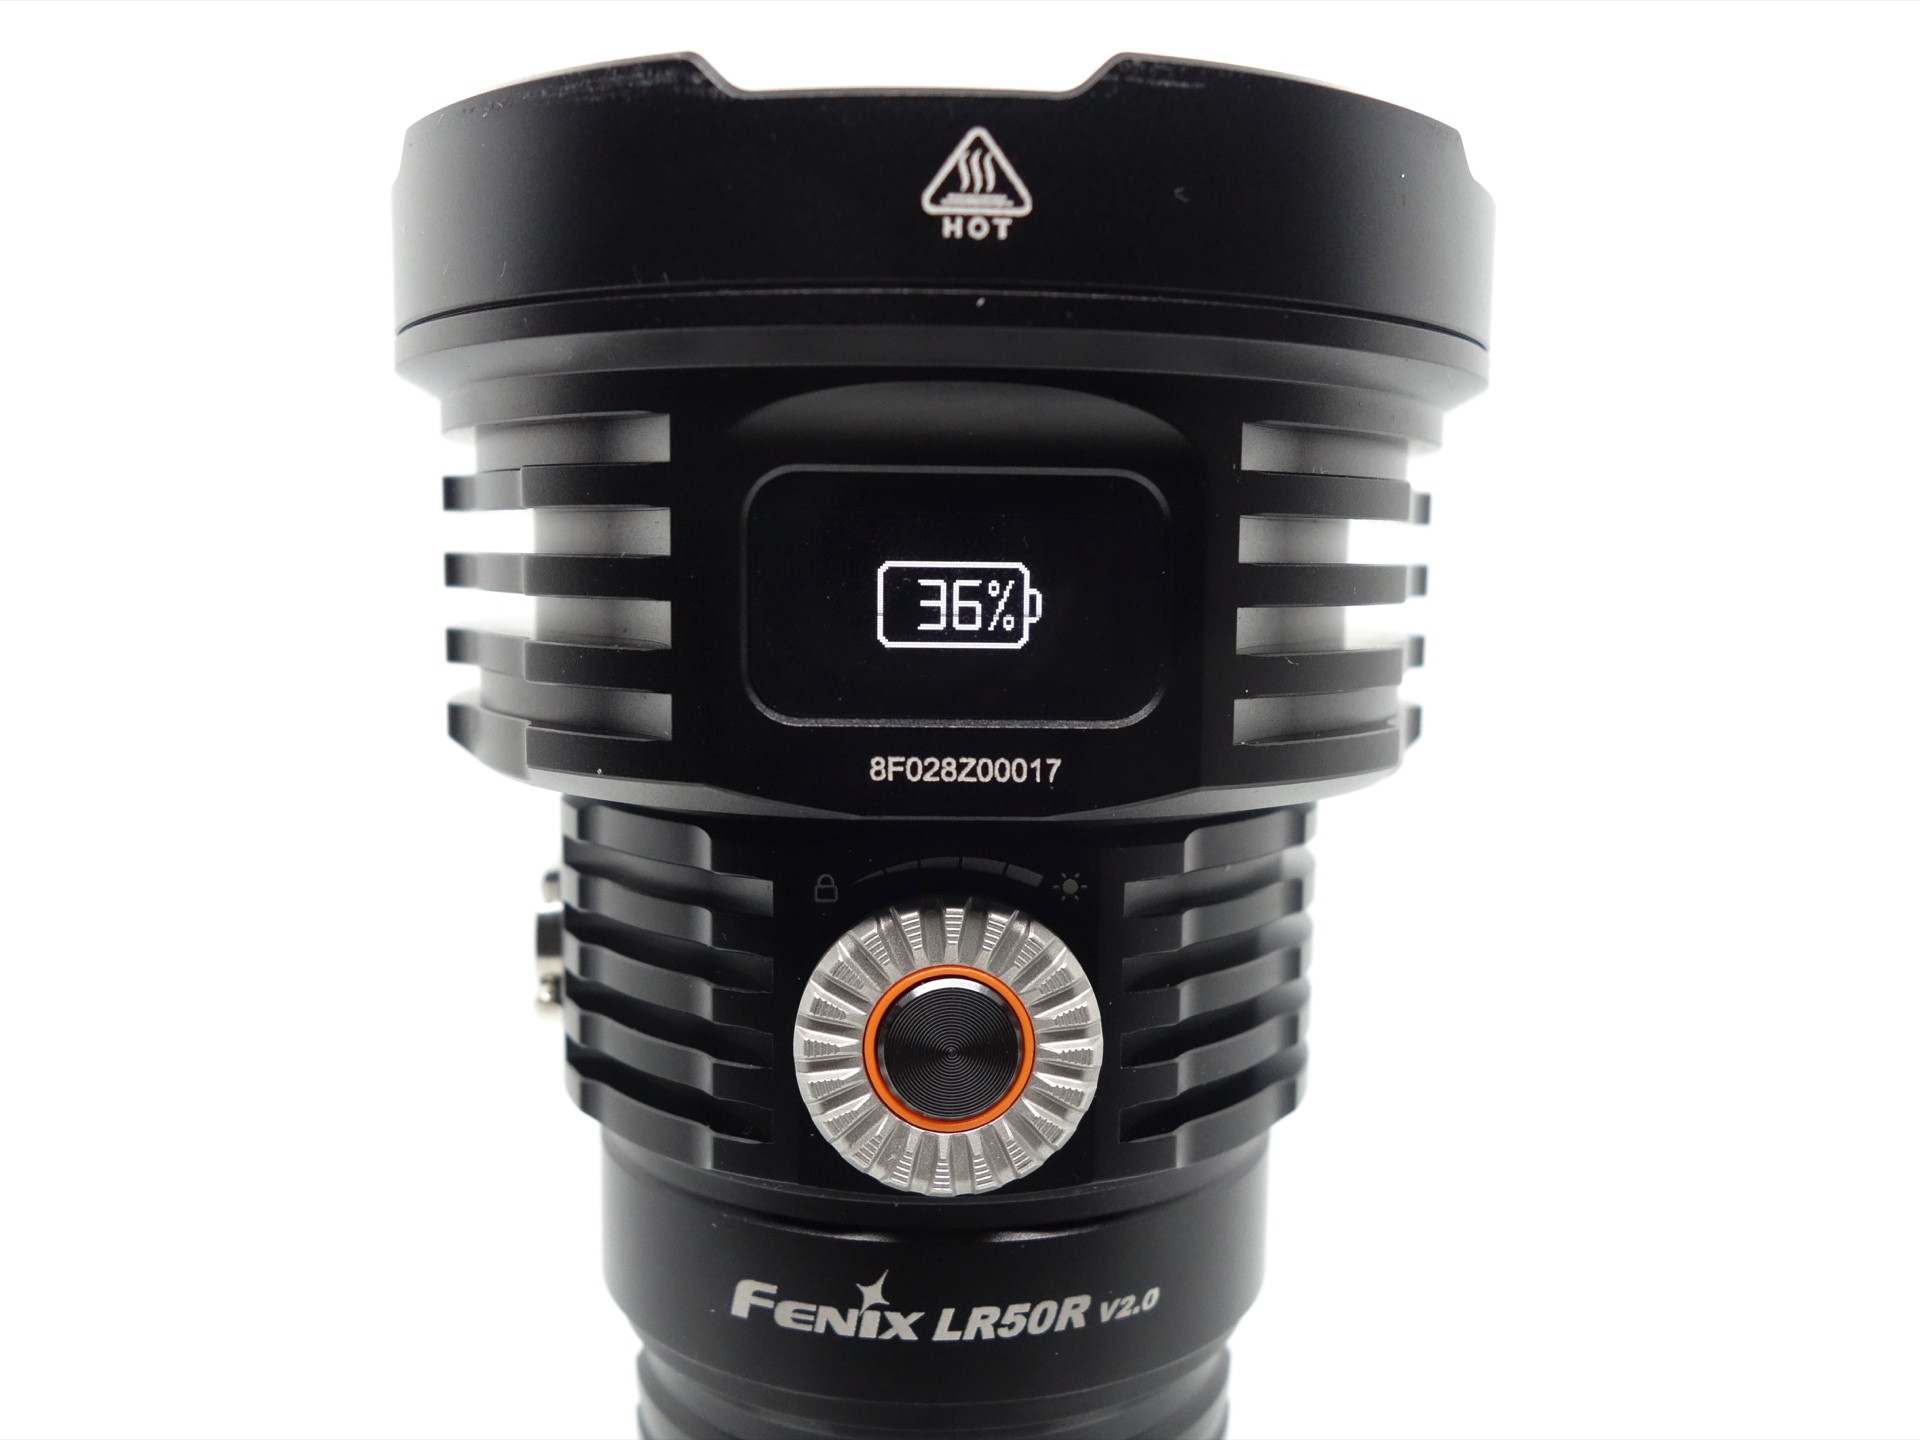
Battery status indicator#
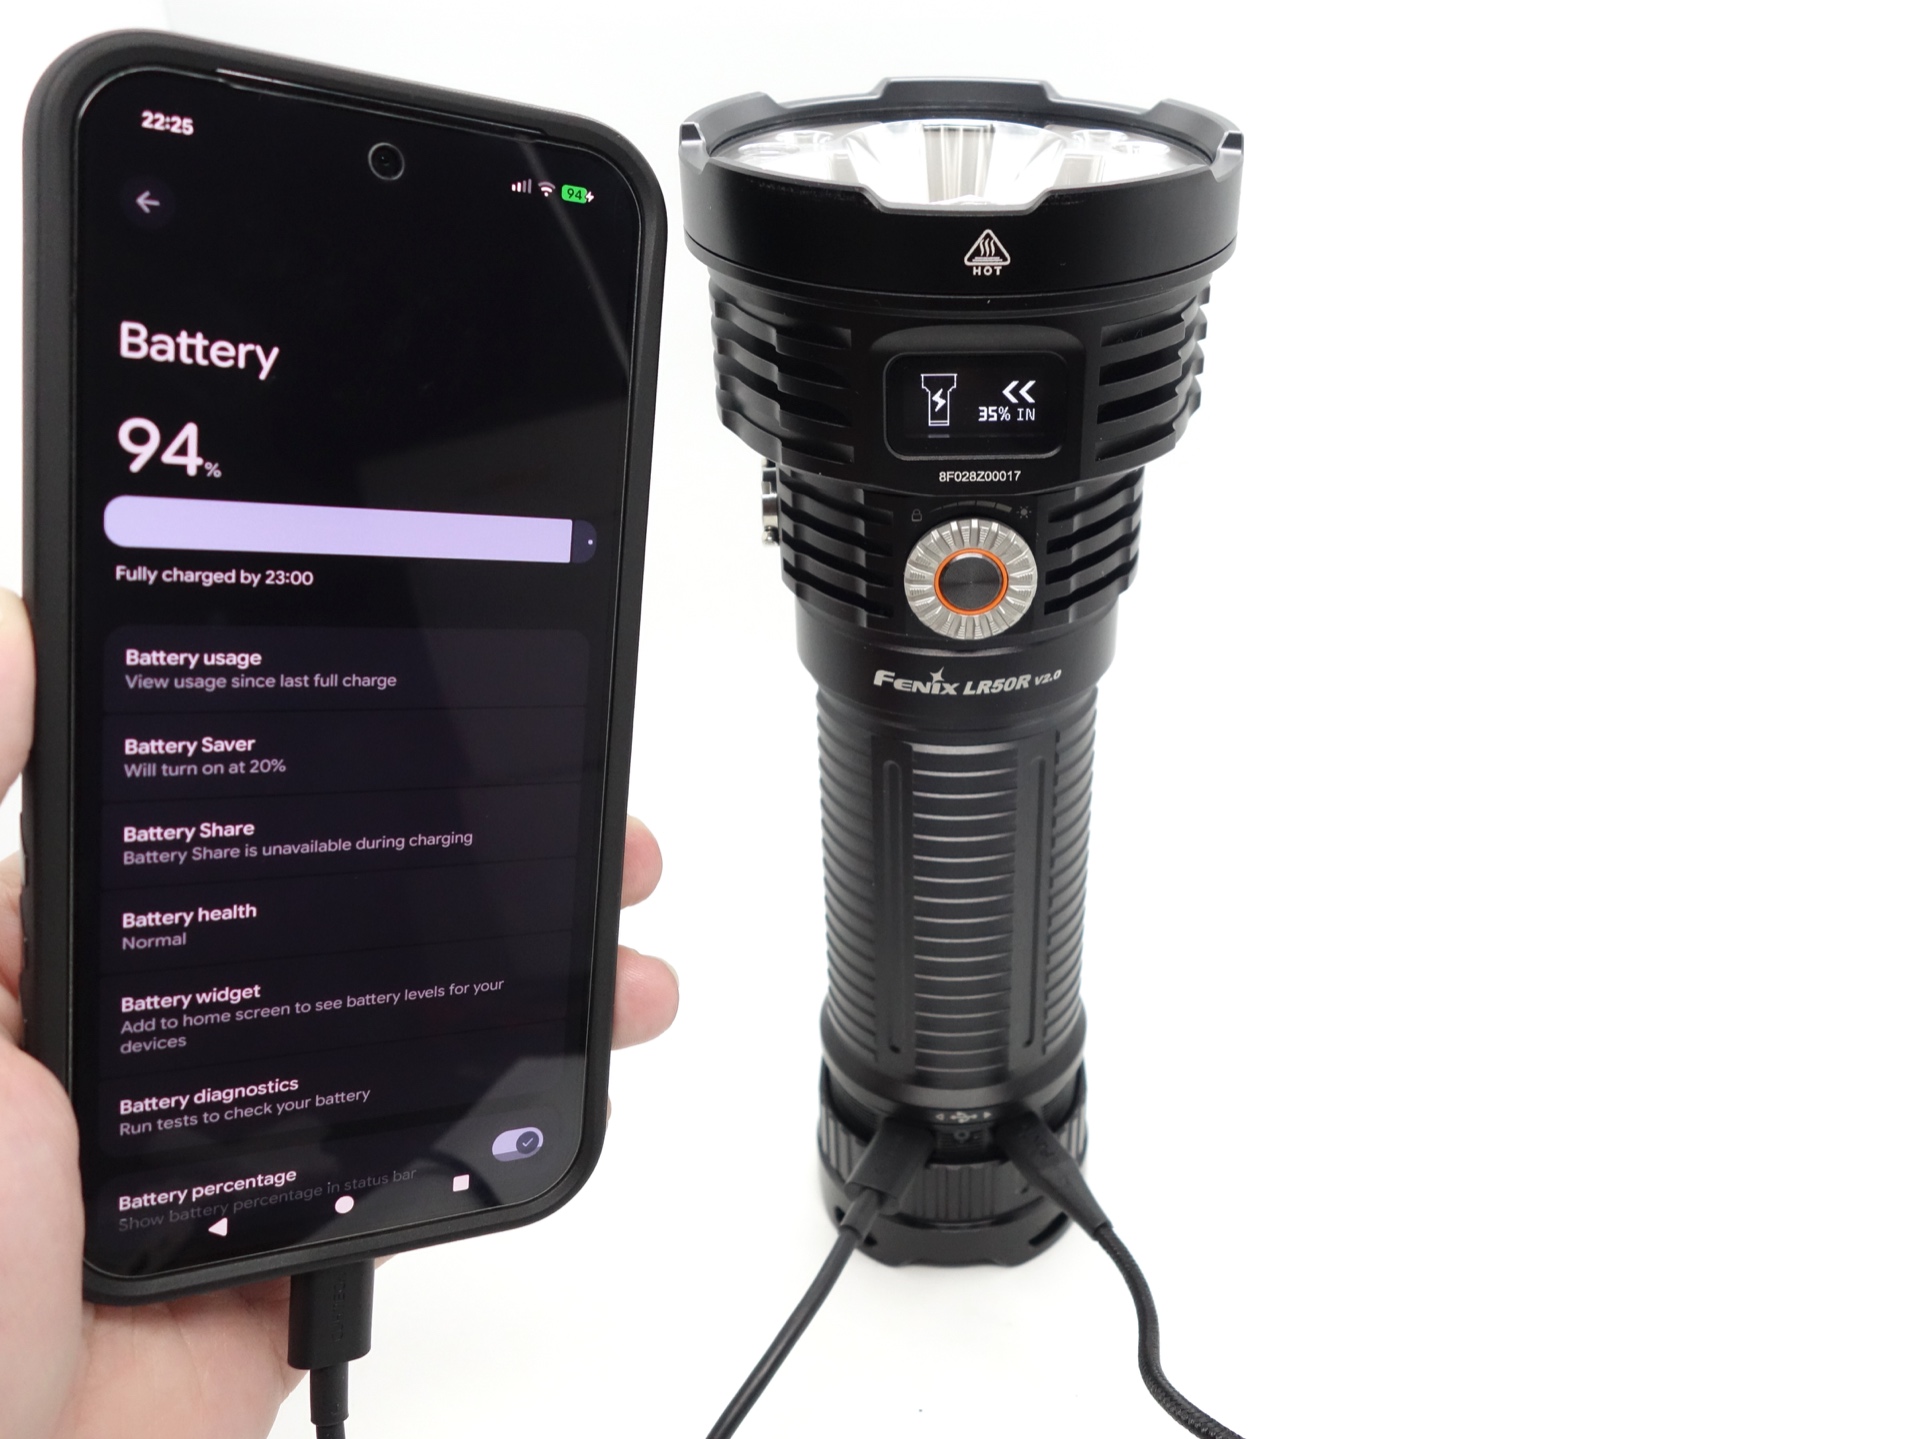
The battery status is displayed on the OLED display.
I noticed that the 100% battery level is not always 100%. The battery can sometimes still be charged for a few minutes despite displaying 100%. It might be 99%?
It is also displayed via 10 green indicators on the tailcap.
Each indicator represents 10%. These lights appear while charging/discharging the battery or when the button at the tailcap is pressed.
Low voltage protection#
The brightness is reduced when the voltage gets low and a low voltage warning is displayed on the OLED display.
Pulse Width Modulation#
I did not notice any visible PWM (flickering).
What I like about the UI#
- Simple to use.
- I like the rotary dial.
What could be improved#
- It would be nice if display was dimmer or if it automatically turns off so that it is not bright while using the torch.
- A shortcut to High from off would be nice.
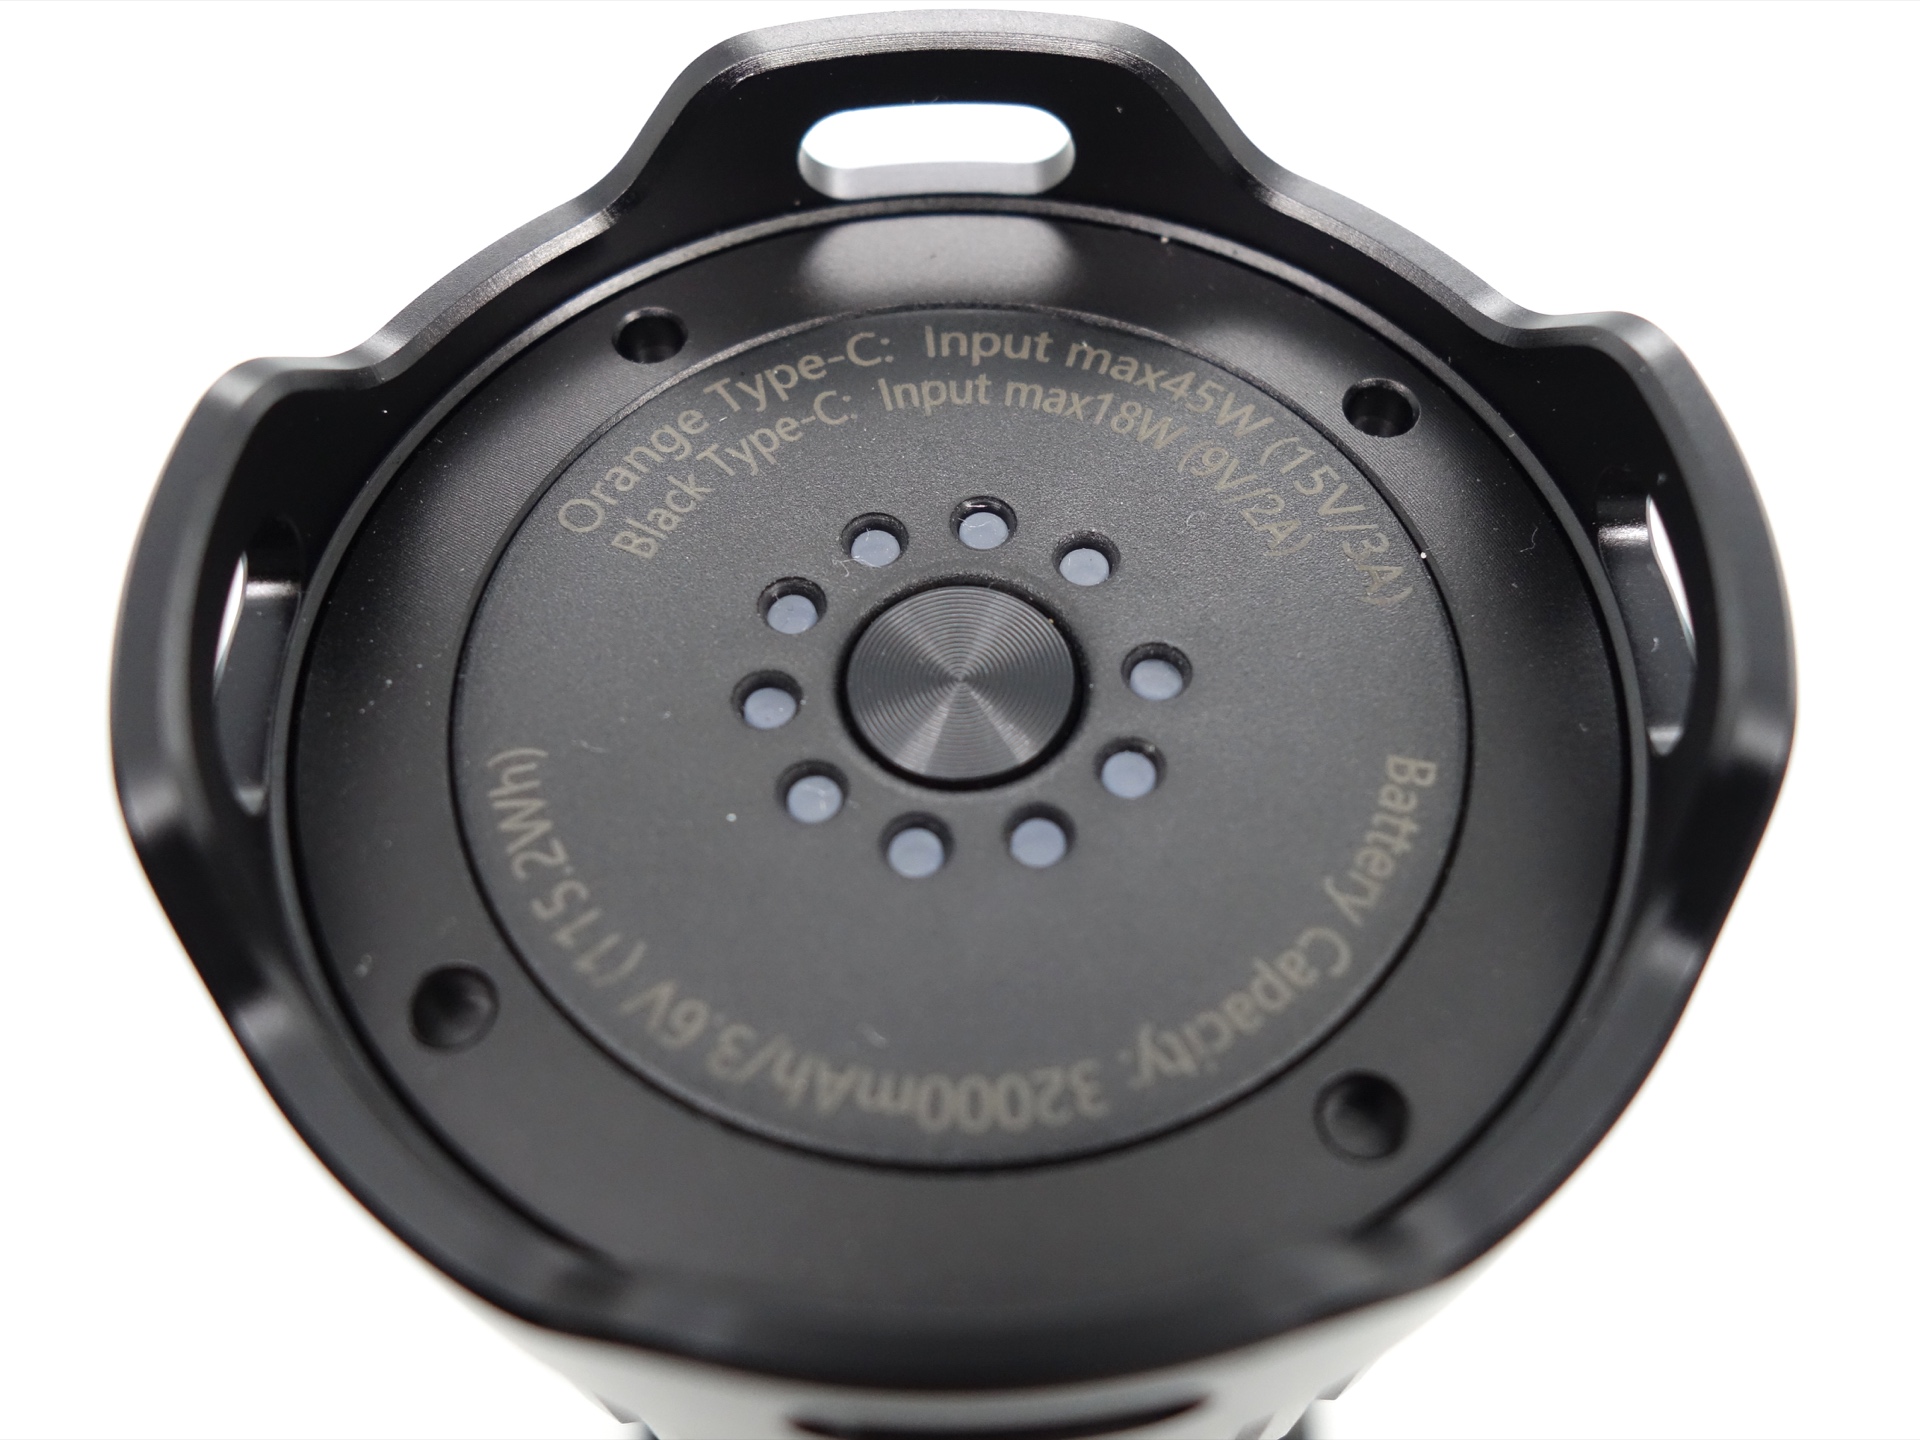
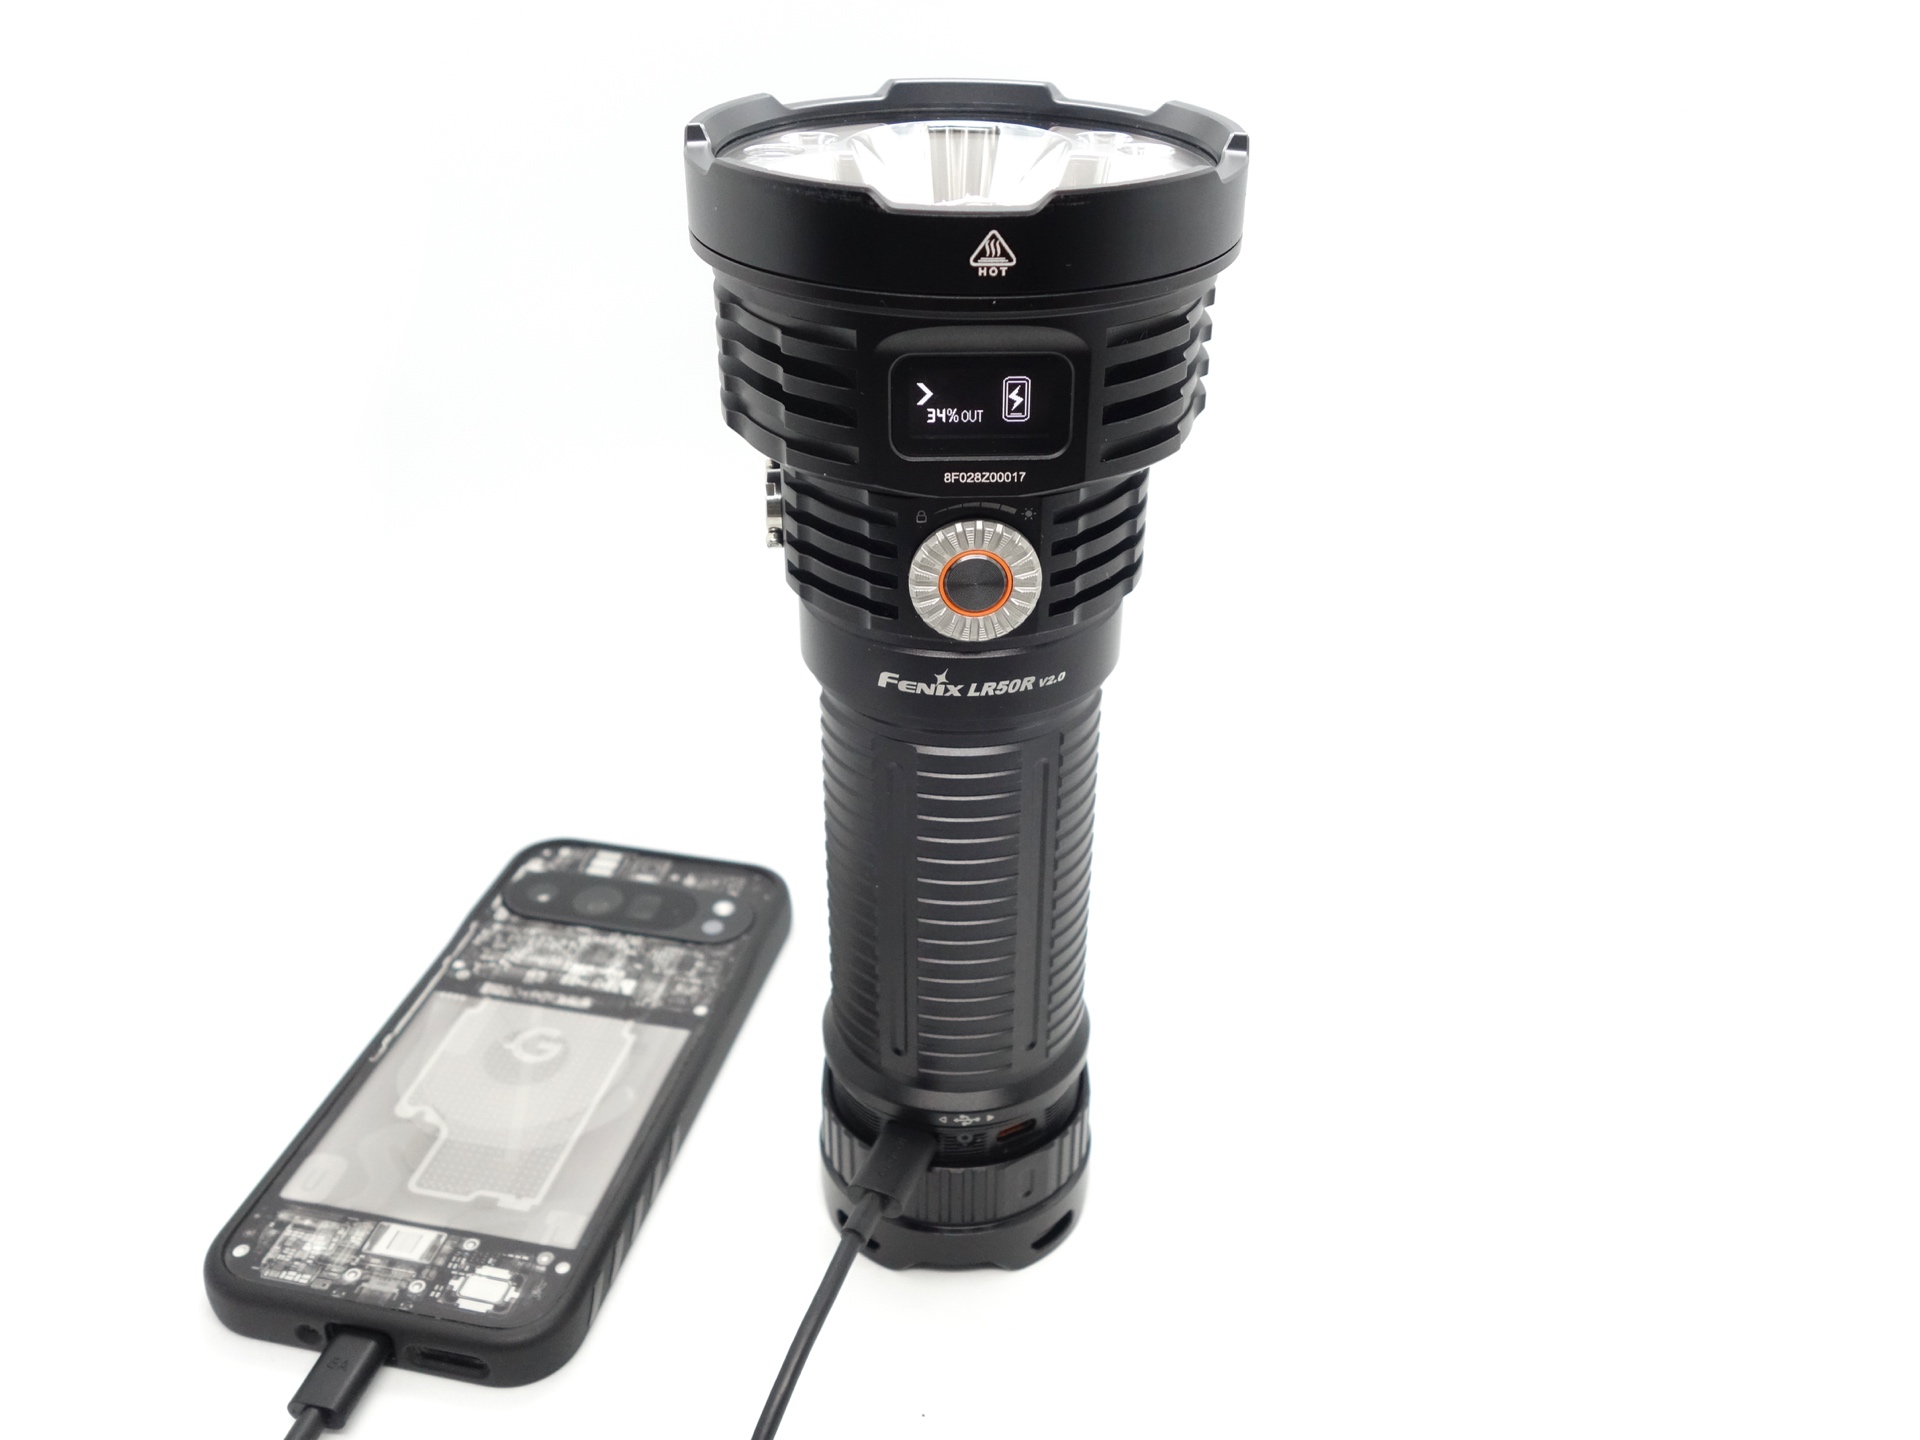
Batteries and charging#
Battery#
The torch comes with a battery pack containing a single 46950 3.6V Li-ion 32,000mAh cell.

The battery pack was isolated with a piece of plastic to prevent the torch from accidentally turning on while being stored.
Charging#
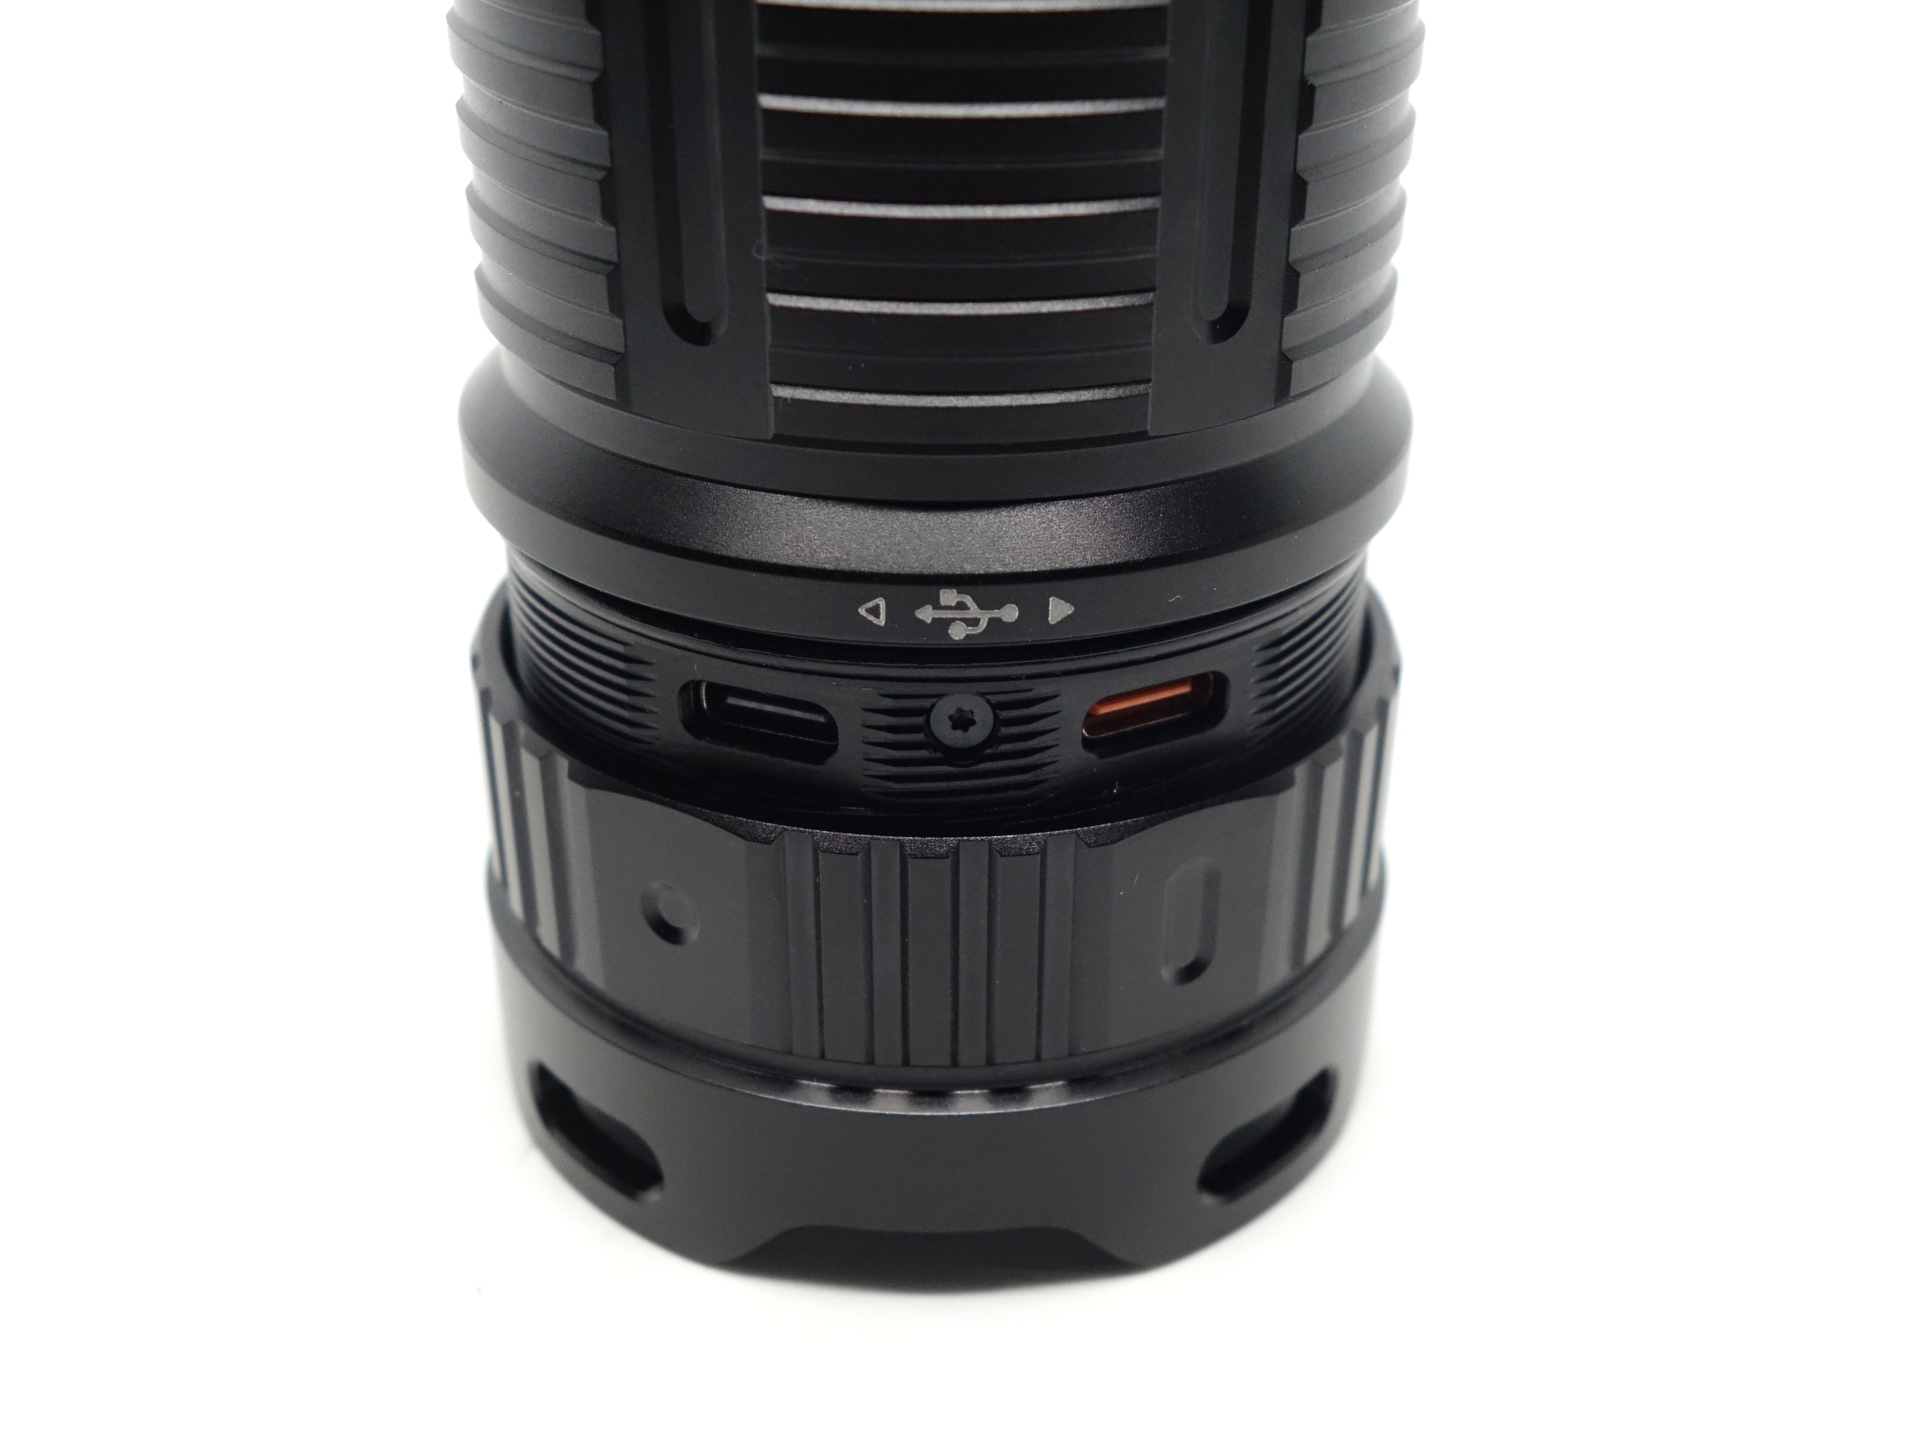
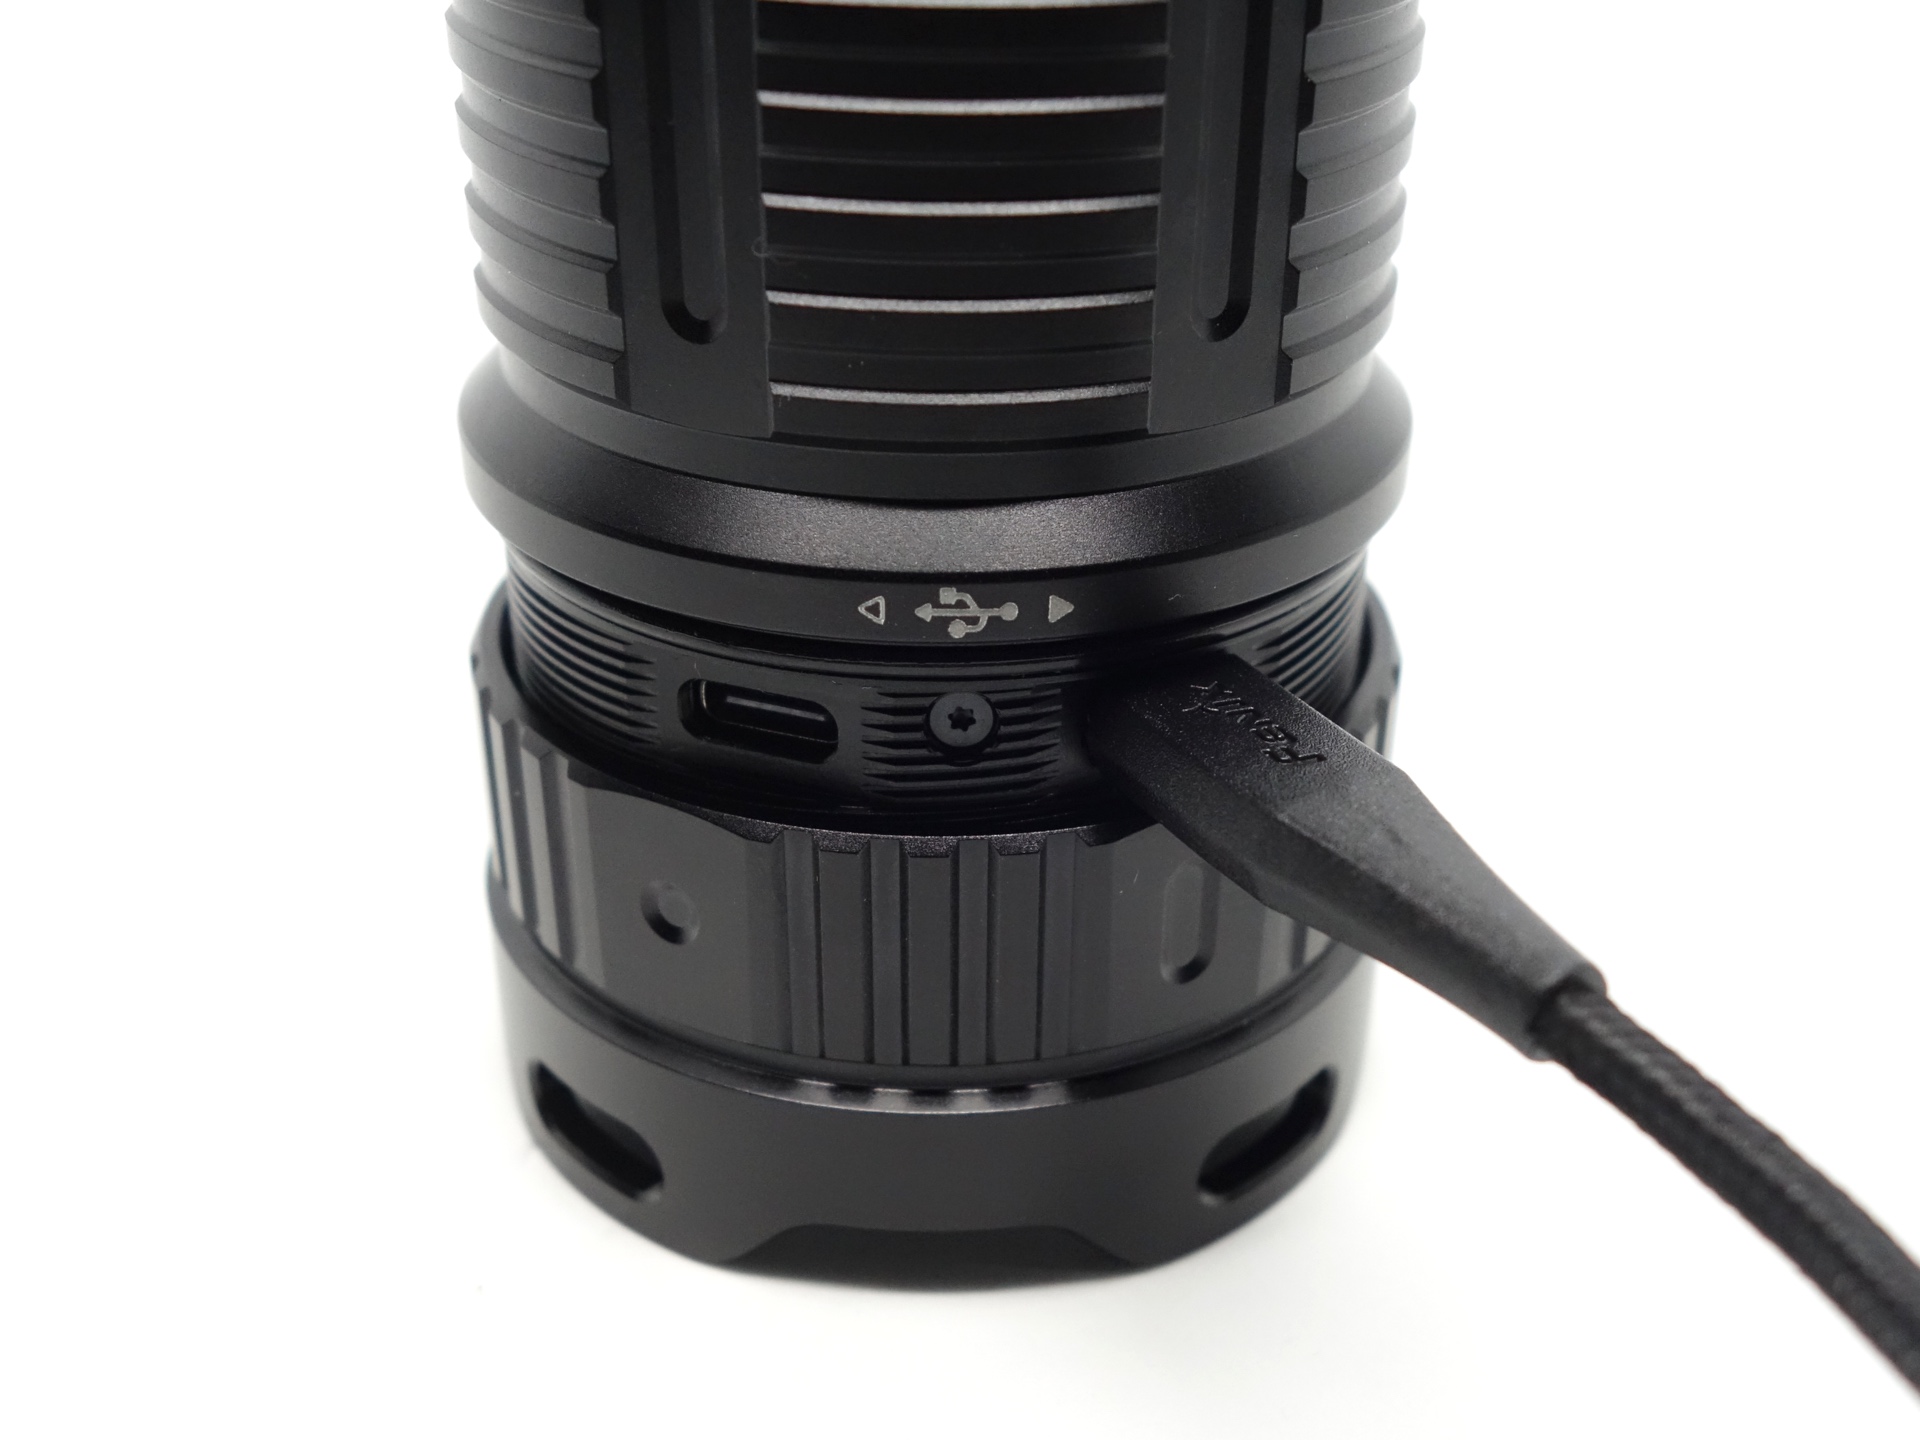
The torch has two USB-C ports for charging the torch.
The orange USB-C port accepts 45W (15V/3A) maximum input.
The black USB-C port accepts 18W (9V/2A) maximum input.
Power supply: XTAR USB-C Power Adapter
USB Meter: ChargerLAB Power-Z KM003C
Room temperature: 18 C
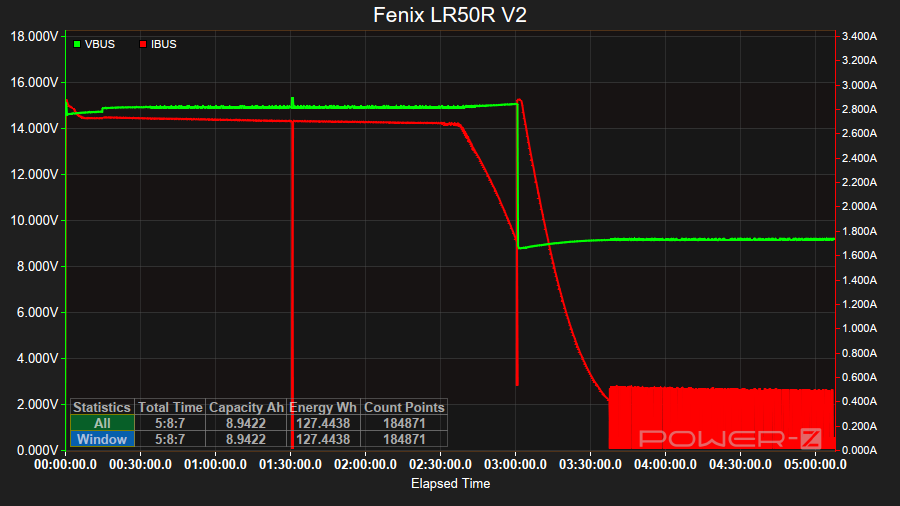
It took 5 hours 8 minutes to charge the battery from 2.94V to 4.197V at a rate of 15V/2.7A.
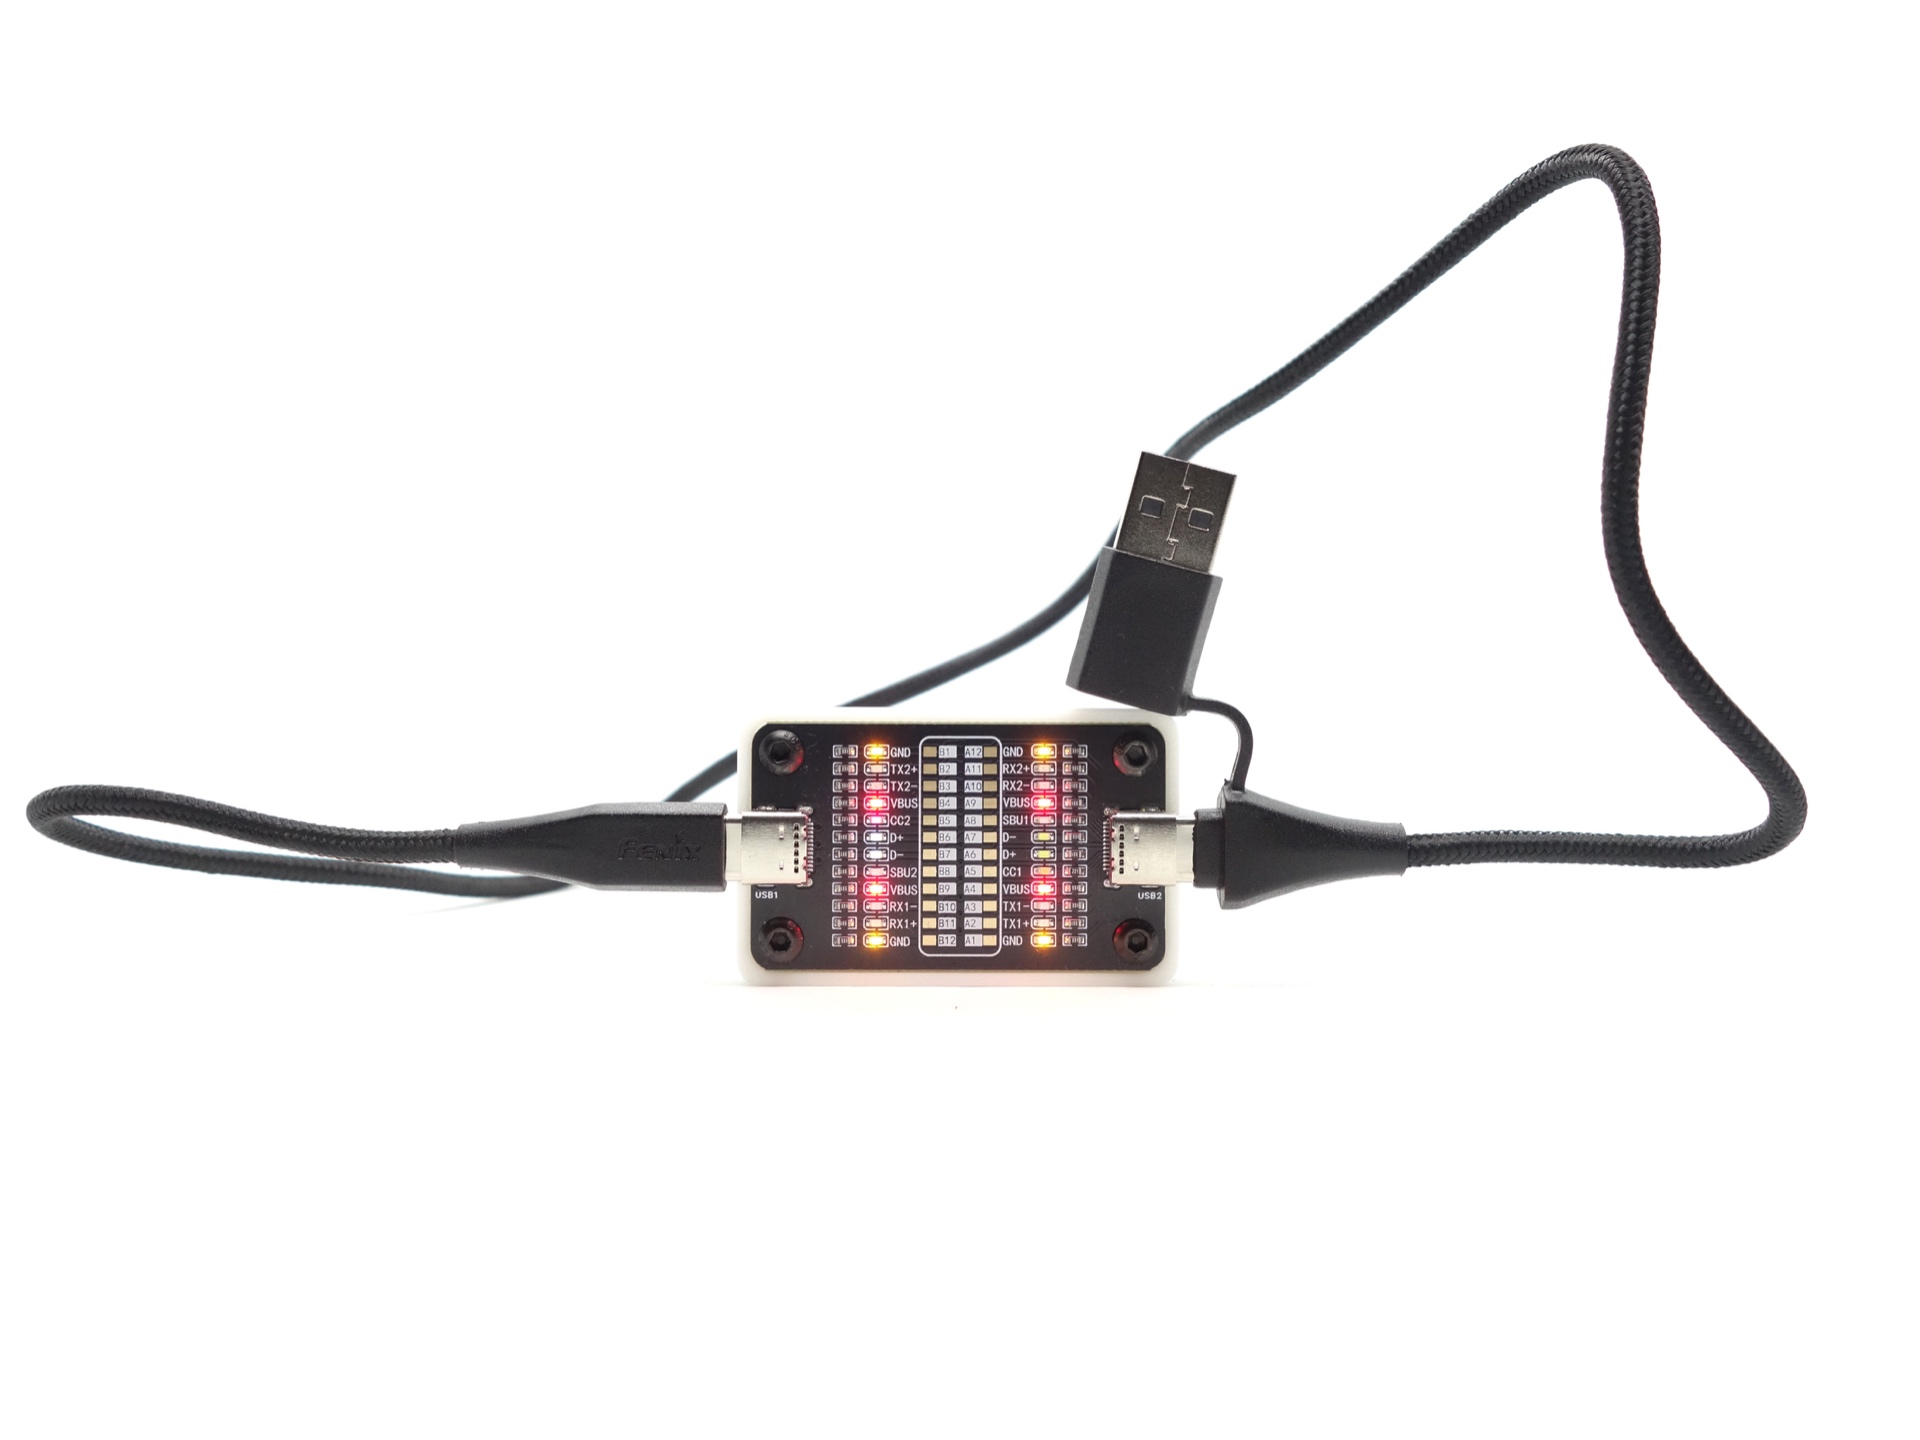
The included USB-C to USB-C cable has the following pins:
Powerbank#
The USB-C ports can also be used to charge a device such as a phone.
It supports QC3, PD, and pass-through charging.

Power supply compatibility#
I tried the following power supplies with the USB-A magnetic charging cable:
| Power supply | USB Type | Protocol | Does it charge? |
|---|---|---|---|
| Apple 61W Power Adapter | USB-C | PD | Yes |
| PinePower Desktop | USB-C | PD | Yes |
| PinePower Desktop | USB-A | QC | Yes |
| PinePower Desktop | USB-A | Yes |
USB-C to USB-C charging works.
Performance#
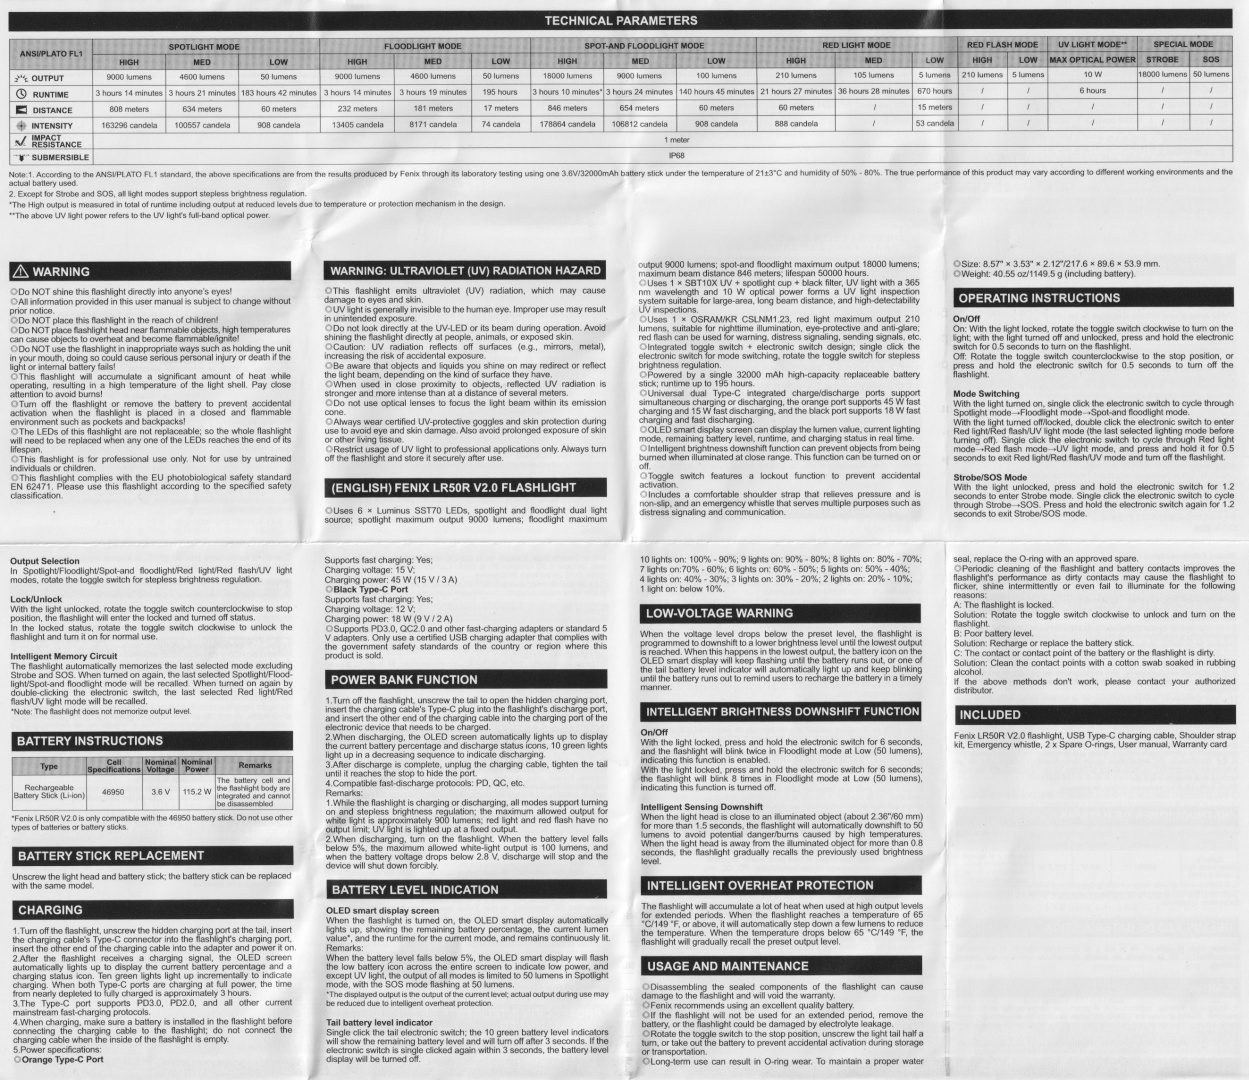
Specifications from the manual:
Spotlight Mode
| ANSI / PLATO FL1 | High | Med | Low |
|---|---|---|---|
| Output (lumens) | 9,000 | 4,600 | 50 |
| Runtime | 3h 14min | 3h 21min | 183h 42min |
| Beam Distance (metres) | 808 | 634 | 60 |
| Beam Intensity (cd) | 163,296 | 100,557 | 908 |
Floodlight Mode
| ANSI / PLATO FL1 | High | Med | Low |
|---|---|---|---|
| Output (lumens) | 9,000 | 4,600 | 50 |
| Runtime | 3h 14min | 3h 19min | 195h |
| Beam Distance (metres) | 232 | 181 | 17 |
| Beam Intensity (cd) | 13,405 | 8,171 | 74 |
Spotlight + Floodlight Mode
| ANSI / PLATO FL1 | High | Med | Low | Strobe | SOS |
|---|---|---|---|---|---|
| Output (lumens) | 18,000 | 9,000 | 100 | 18,000 | 50 |
| Runtime | 3h 10min | 3h 24min | 140h 45min | ||
| Beam Distance (metres) | 846 | 654 | 60 | ||
| Beam Intensity (cd) | 178,864 | 106,812 | 908 |
Red Light Mode
| ANSI / PLATO FL1 | High | Med | Low | Red Flash High | Red Flash Low |
|---|---|---|---|---|---|
| Output (lumens) | 210 | 105 | 5 | 210 | 5 |
| Runtime | 21h 27min | 36h 28min | 670h | ||
| Beam Distance (metres) | 60 | 15 | |||
| Beam Intensity (cd) | 888 | 53 |
UV Light Mode
Max Optical Power: 10 W
Runtime: 6 hours
I used the included battery for the following tests.
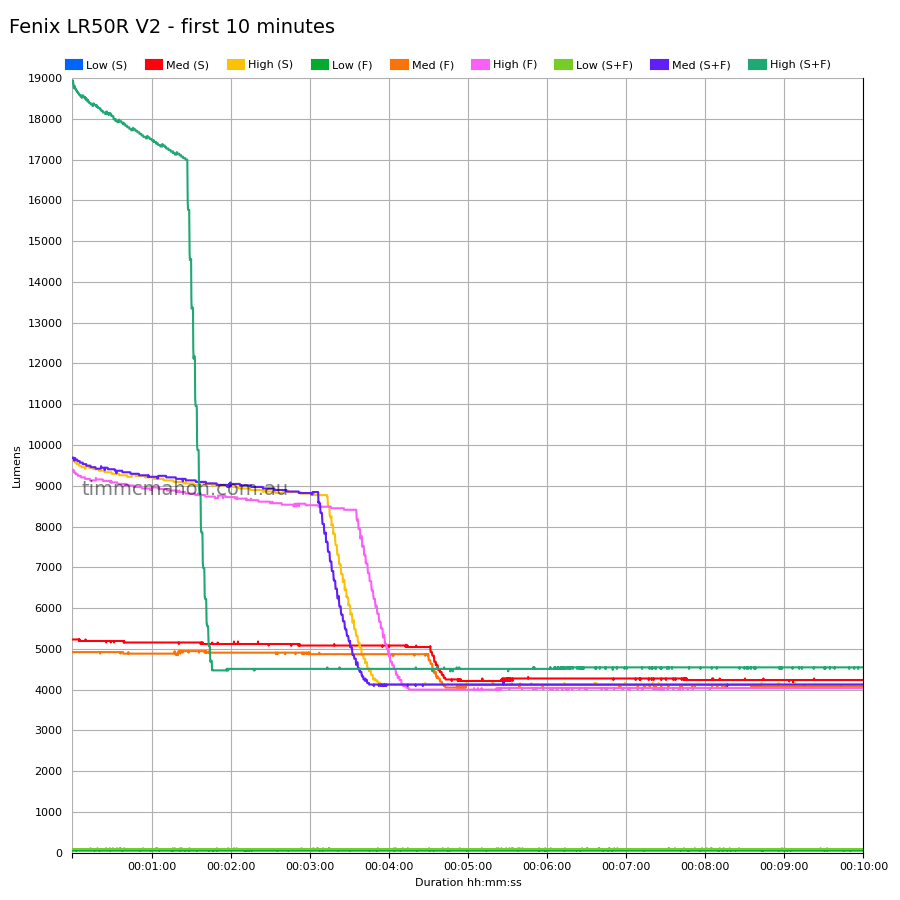
Lumen measurements#
| LED | Mode | Specs | Lumens @turn on | Lumens @30 sec | Lumens @10 min |
|---|---|---|---|---|---|
| Red | Low | 5 | 5 | 5 | 5 |
| Red | Med | 105 | 119 | 116 | 113 |
| Red | High | 210 | 222 | 220 | 213 |
| Flood | Low | 50 | 53 | 53 | 53 |
| Flood | Med | 4,600 | 4,919 | 4,919 | 4,074 |
| Flood | High | 9,000 | 9,367 | 9,081 | 4,036 |
| Spot | Low | 50 | 66 | 66 | 66 |
| Spot | Med | 4,600 | 5,229 | 5,192 | 4,235 |
| Spot | High | 9,000 | 9,677 | 9,293 | 4,124 |
| S + F | Low | 100 | 90 | 90 | 90 |
| S + F | Med | 9,000 | 9,691 | 9,404 | 4,124 |
| S + F | High | 18,000 | 18,934 | 18,064 | 4,545 |
Note: Lumen measurements may be off by 10% with my DIY lumen tube.
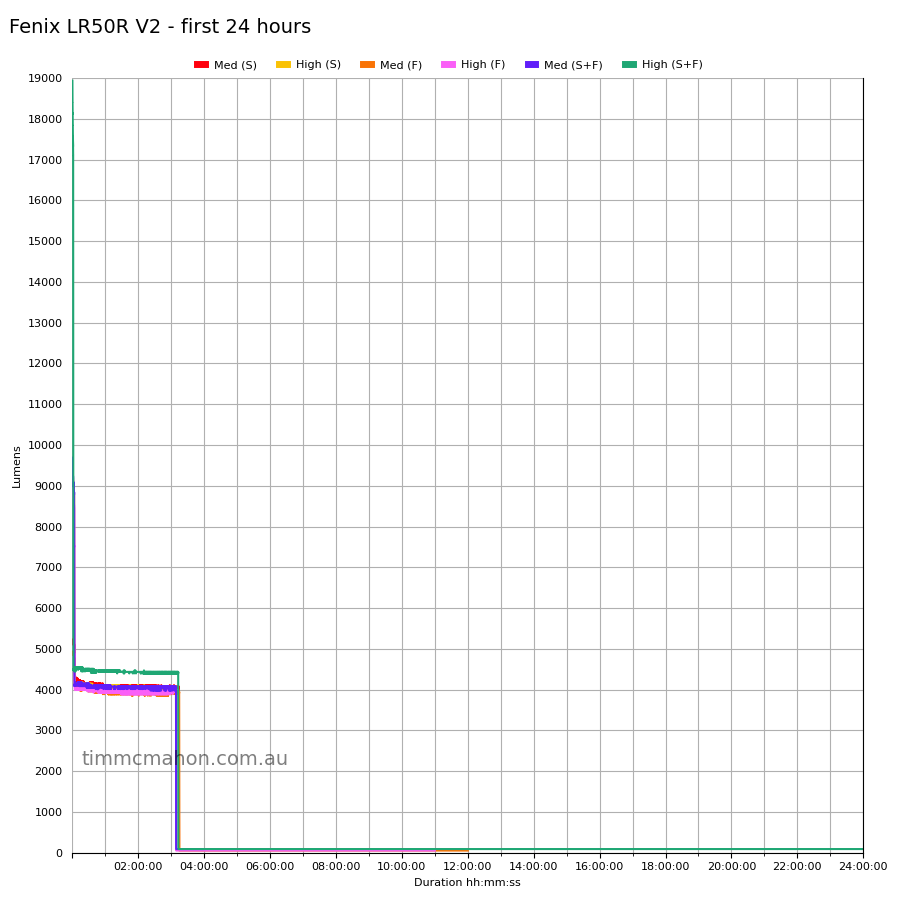
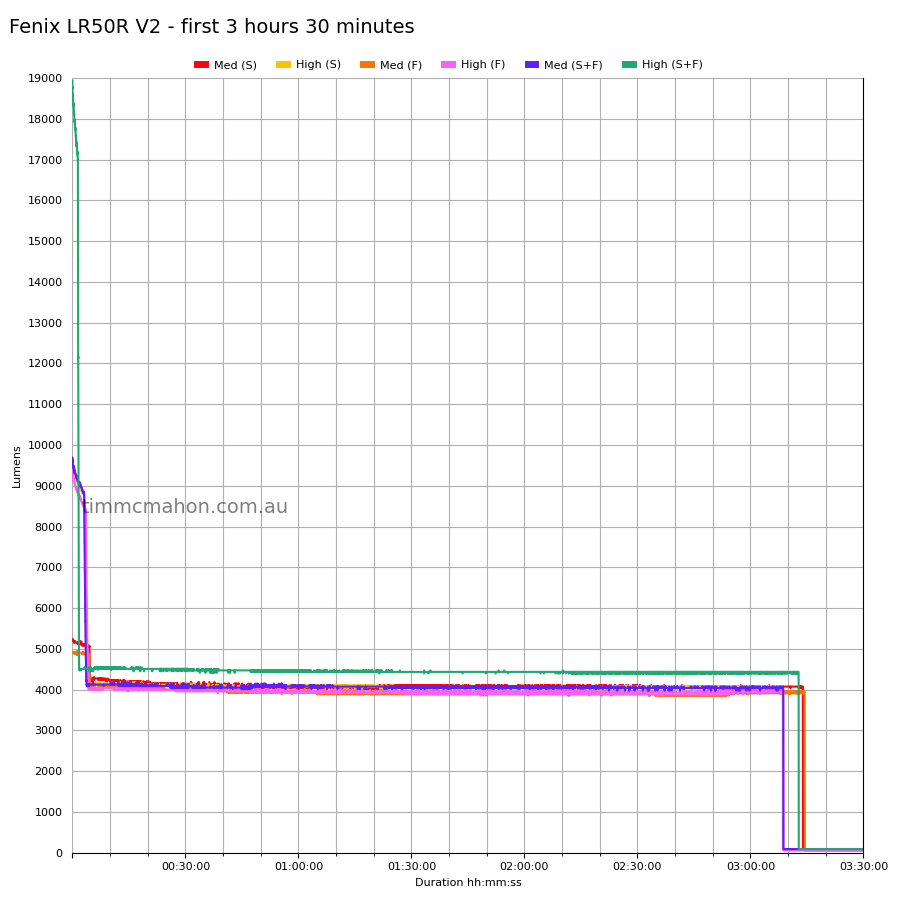
Runtime graphs#
I used my own DIY lumen tube with a TSL2591 sensor and forked bmengineer’s project RuTiTe to record runtimes.
The room temperature was approximately 18 C.
White Light#
Red Light#
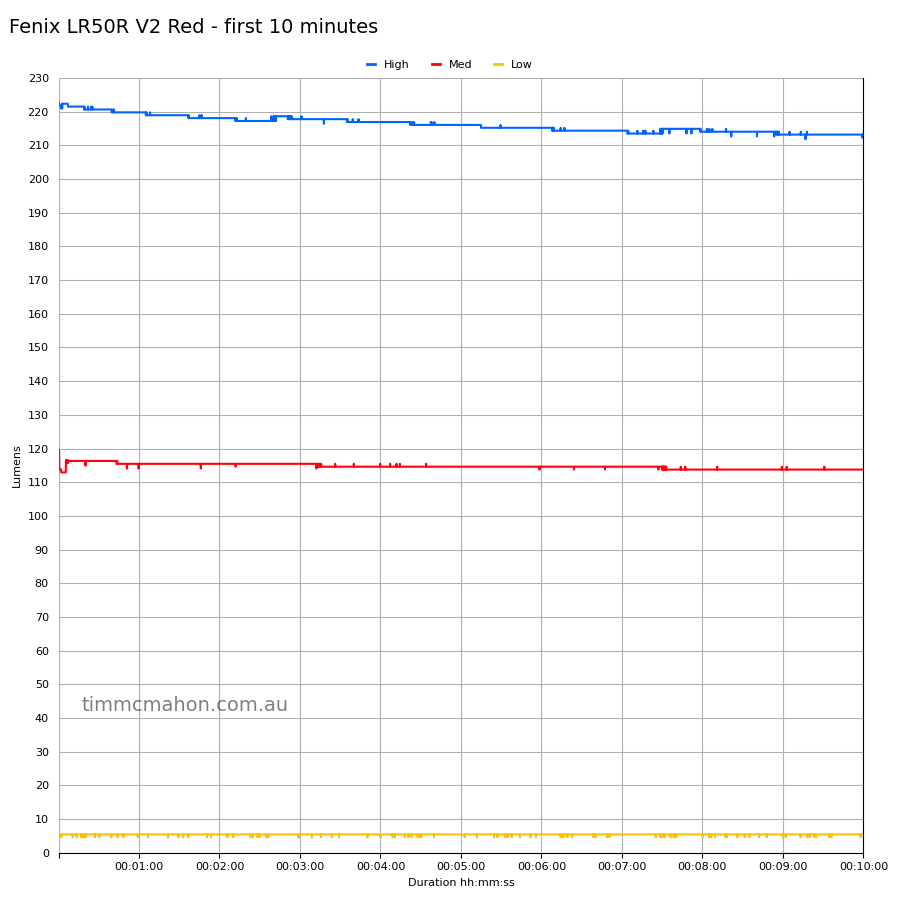
Runtime#
Here is a summary of the runtime results:
| LED | Mode | User manual | Runtime | Turn off | Final voltage |
|---|---|---|---|---|---|
| S + F | High | 3h 10min | 3h 12min 48s | 24h+ | 2.94 |
| S + F | Med | 3h 24min | 3h 8min 44s | 4h+ | |
| S + F | Low | 140h 45min | 10min+ | 10min+ | |
| Spot | High | 3h 14min | 3h 8min 36s | 6h+ | 3.42 |
| Spot | Med | 3h 21min | 3h 13min 56s | 6h+ | |
| Spot | Low | 183h 42min | 10min+ | 10min+ | |
| Flood | High | 3h 14min | 3h 8min 43s | 11h+ | 3.34 |
| Flood | Med | 3h 19min | 3h 14min 26s | 12h+ | |
| Flood | Low | 195h | 10min+ | 10min+ | |
| Red | High | 21h 27min | 19h 14min 27s | 24h+ | 3.45 |
| Red | Med | 36h 28min | 24h+ | 24h+ | 3.72 |
| Red | Low | 670h | 10min+ | 10min+ |
“Runtime” is the time until the output reduces to 10% of the output at 30 seconds (as per the ANSI/PLATO FL1 2019 Standard).
“Turn off” is the time until my DIY lumen tube no longer detects more than 1 lumen.
“+” indicates that the light remained on after recording had stopped.
The runtimes are pretty close to what Fenix claimed.
The output is well regulated.
The nonlinear time scale used for the runtime graph in the user manual and online looks a bit strange. Half of the first hour is actually the first 4 minutes of the runtime.
Throw#
I took lux measurements with a UNI-T UT383BT at 30 seconds from a distance of five metres for most modes. Low for Floodlight and Spotlight were measured at one metre.
| LED | Mode | Specs (cd) | Specs (m) | Candela measured (cd) | Distance (m) |
|---|---|---|---|---|---|
| Flood | Low | 74 | 17 | 103 | 20 |
| Flood | Med | 8,171 | 181 | 9,925 | 199 |
| Flood | High | 13,405 | 232 | 18,625 | 272 |
| Spot | Low | 908 | 60 | 986 | 62 |
| Spot | Med | 100,557 | 634 | 94,975 | 616 |
| Spot | High | 163,296 | 808 | 183,875 | 857 |
| S + F | Low | 908 | 60 | 750 | 54 |
| S + F | Med | 106,812 | 654 | 105,800 | 650 |
| S + F | High | 178,864 | 846 | 195,000 | 883 |
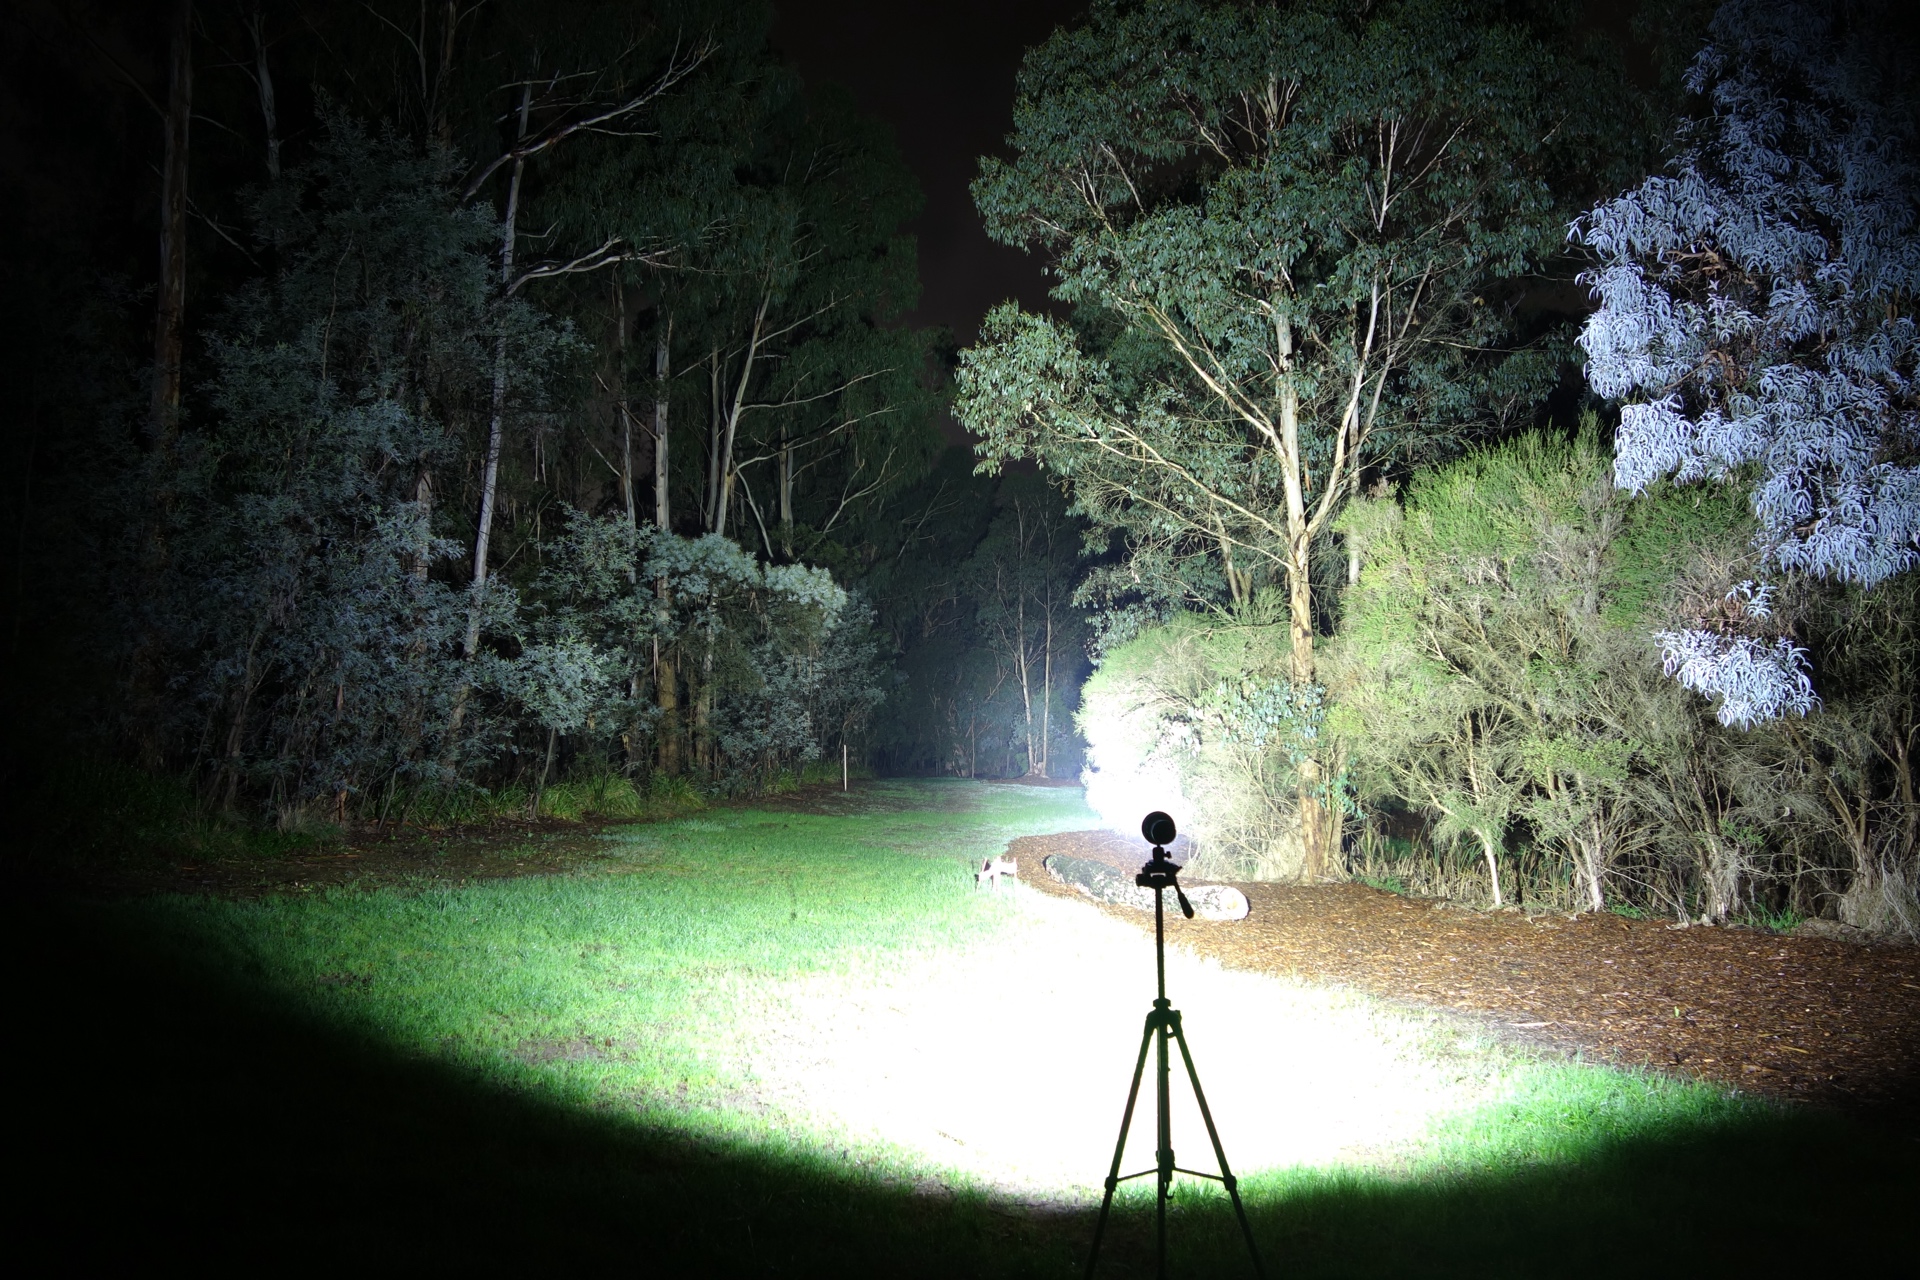
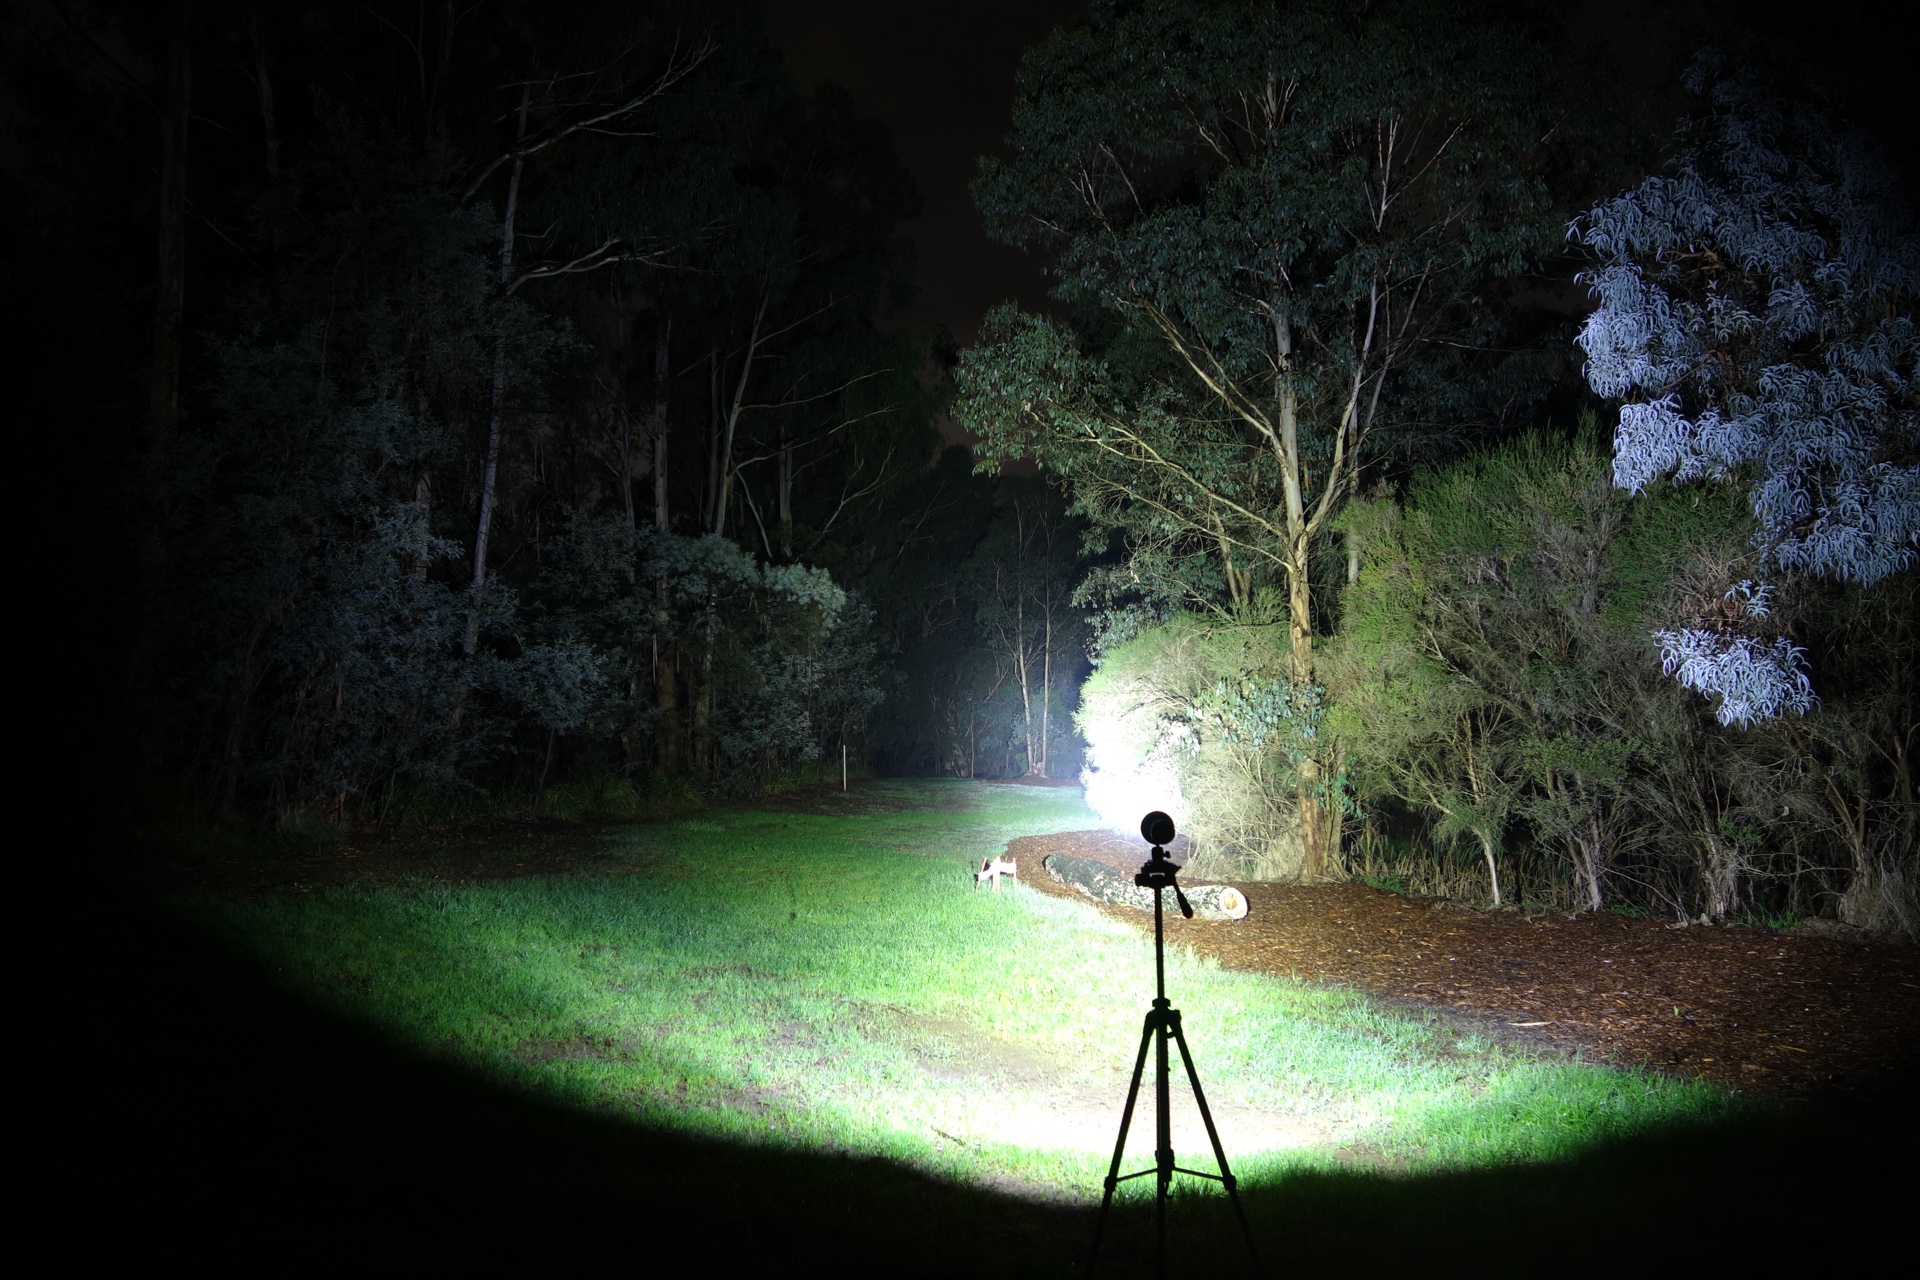
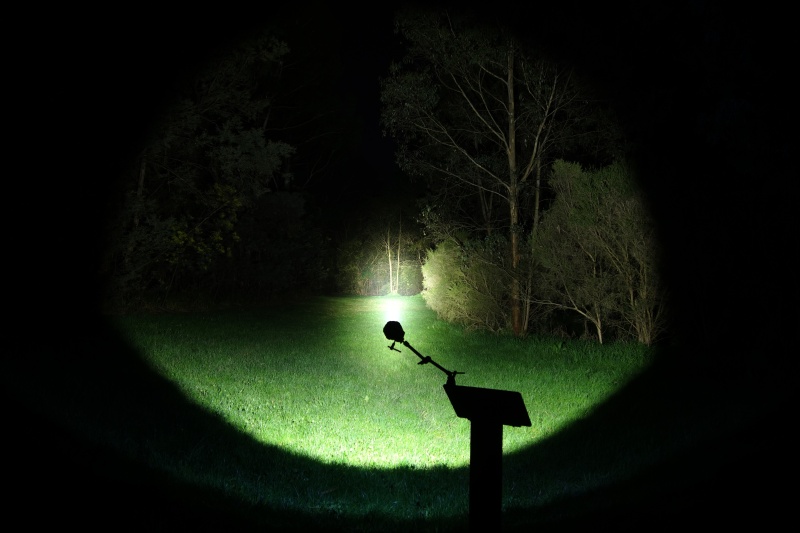
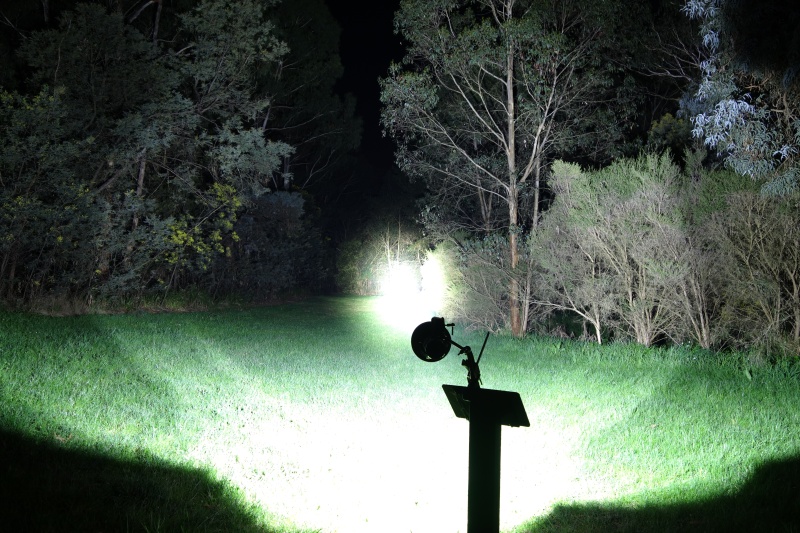
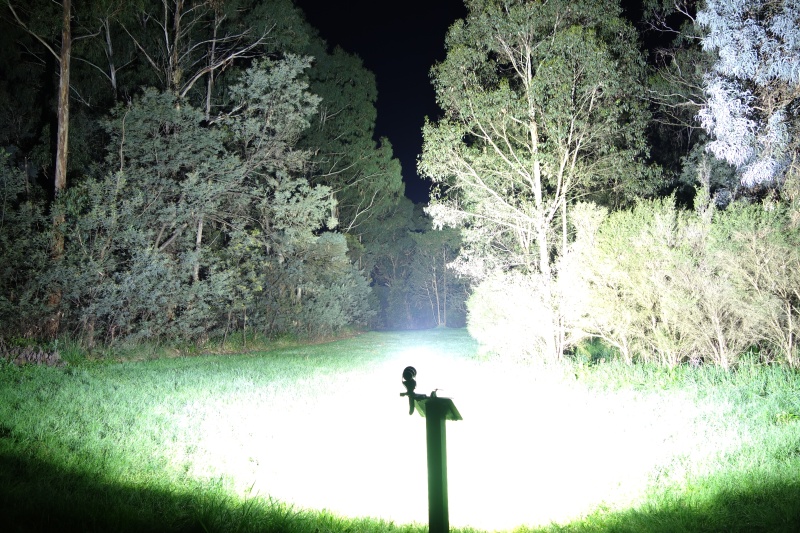
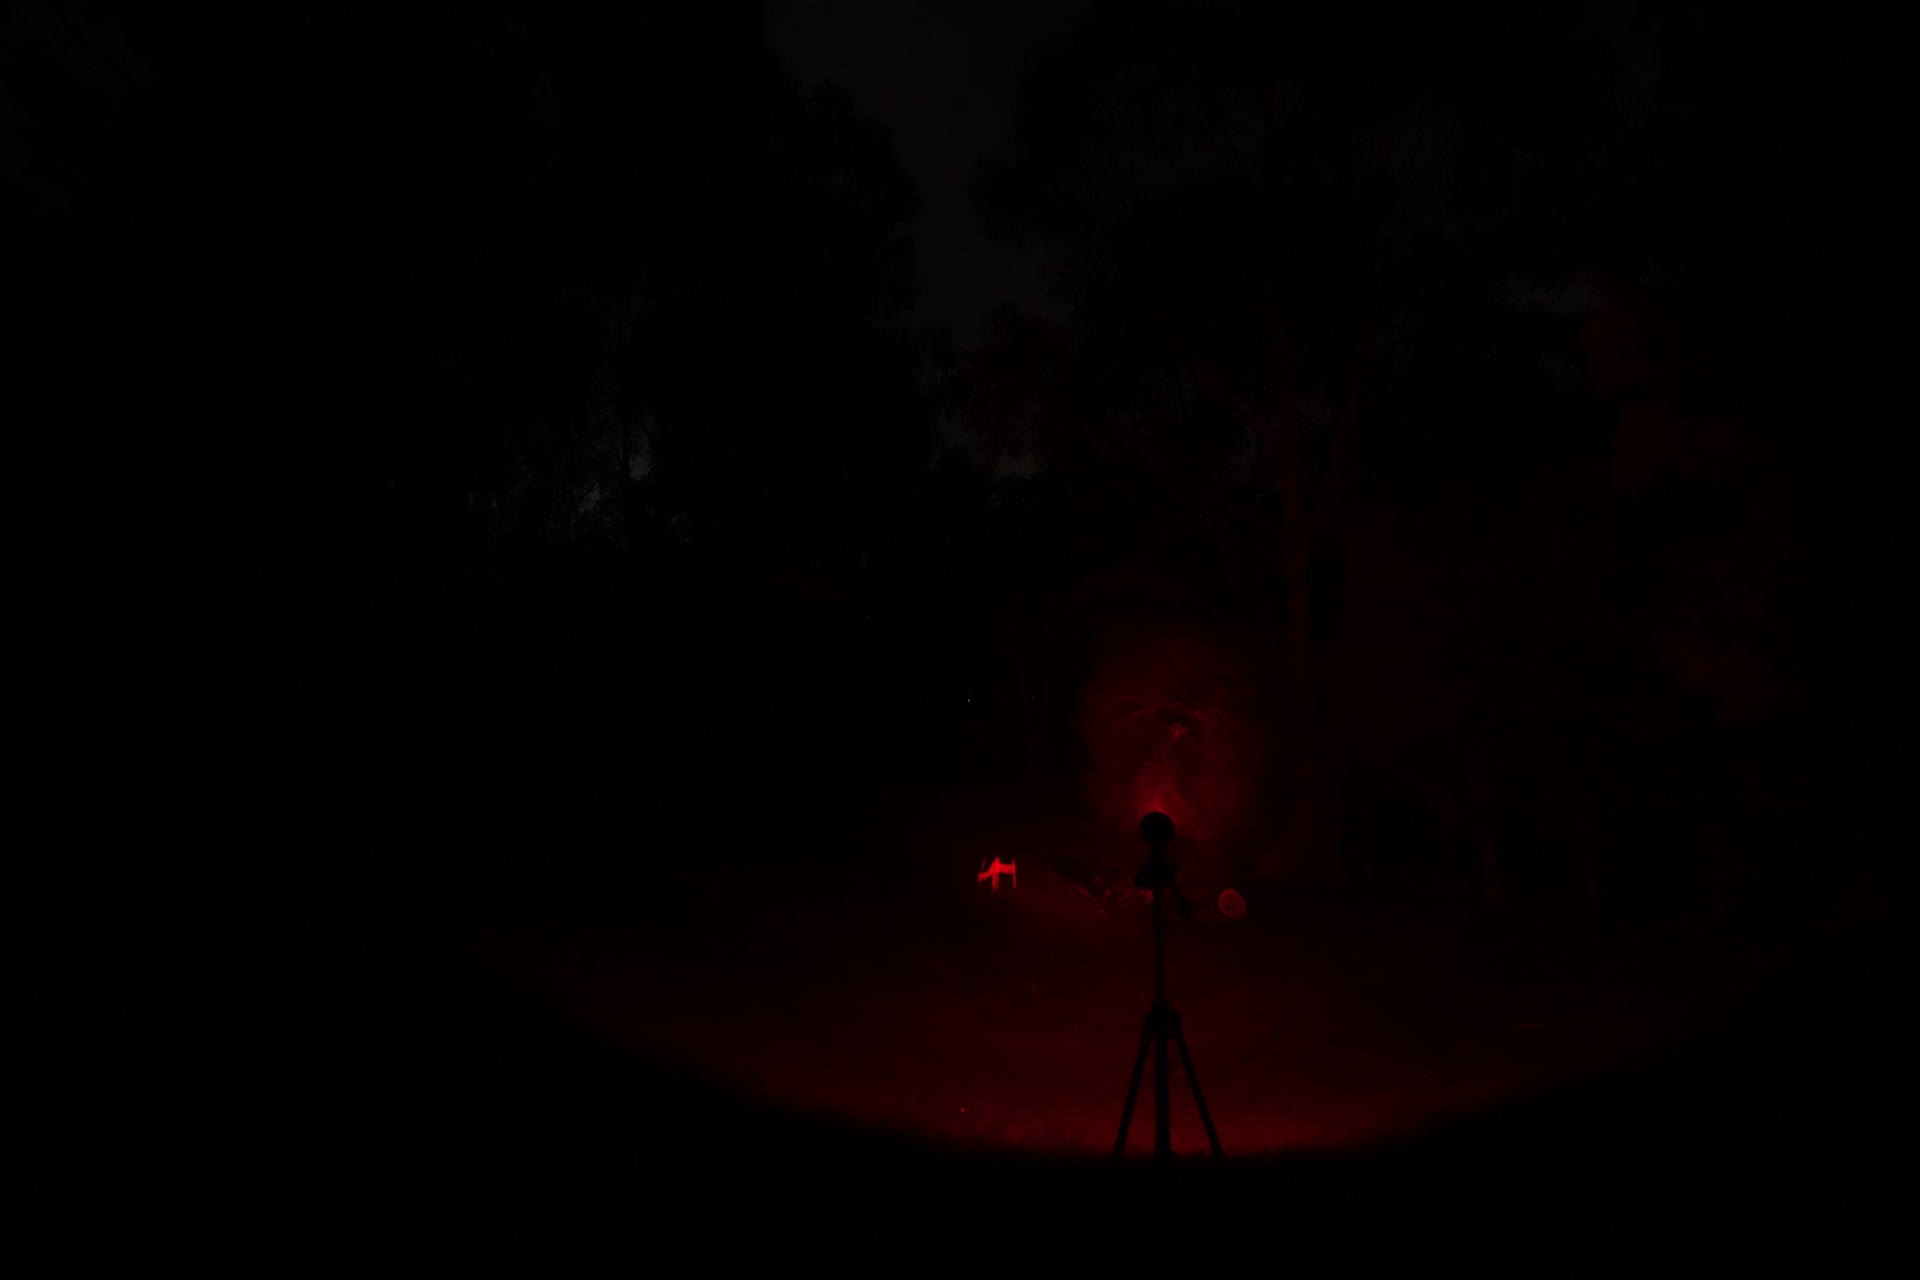
Beamshots#
I went to a local park and aimed the Fenix LR50R V2 at a tree 70 metres away while using High.
Beamshots were taken using a Sony RX100M2 using 3.2", f3.2, ISO 100, 5000K WB.
Fenix LR50R V2 S+F (High)#
Fenix LR50R V2 Spotlight (High)#
Fenix LR50R V2 Floodlight (High)#

Acebeam P20 (Turbo)#
Wuben A1 (Turbo)#
IMALENT MS12 MINI (Turbo)#
A red beamshot was taken using a Sony RX100M2 using 0.25 second shutter, f3.2, ISO 800, 5000K WB.
Fenix LR50R V2 Red (High)#
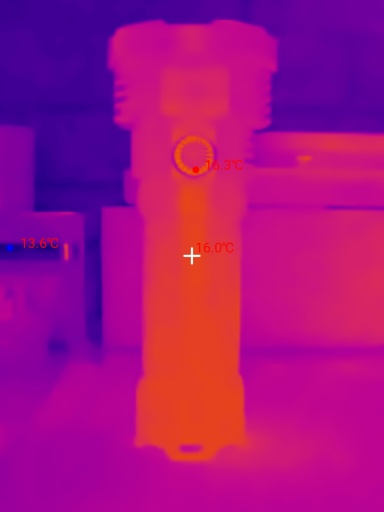
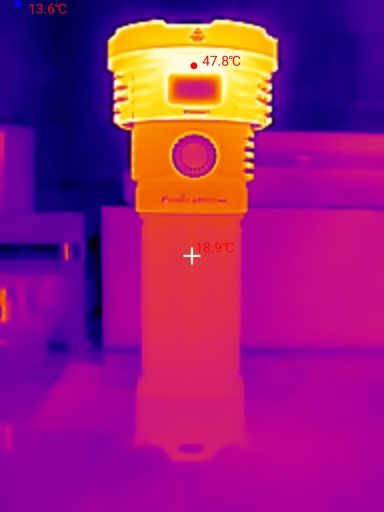
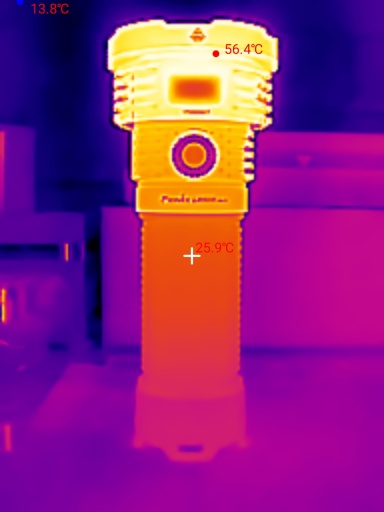
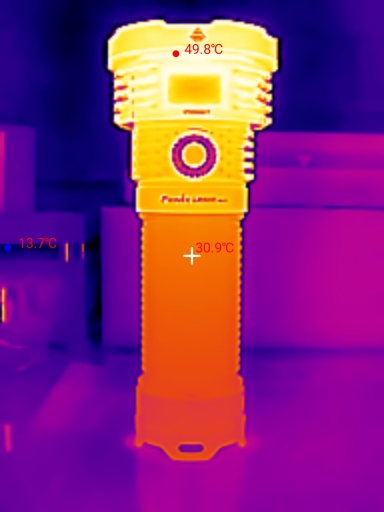
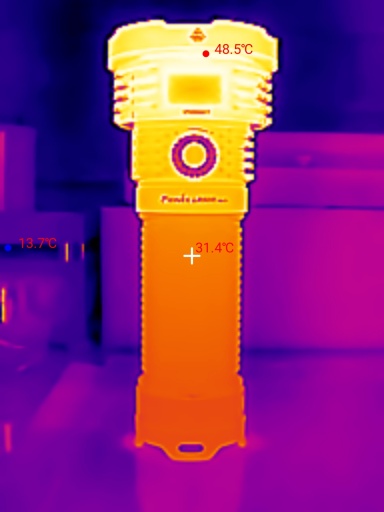
Thermal Images#
I used a Thermal Master P3 to take thermal images of the torch while using the Both at High. Get 10% off the Thermal Master P3 with code Mcmahon10
Room temperature: 13 C
| Time (mm:ss) | Max Temperature |
|---|---|
| 00:00 | 16.0 C |
| 01:00 | 47.8 C |
| 02:00 | 56.4 C |
| 03:00 | 51.8 C |
| 04:00 | 49.8 C |
| 05:00 | 48.5 C |
The temperature peaked at around 60 C within the first two minutes.

Here is a video of the torch filmed with a HIKMICRO B20S Thermal Camera:
Conclusion#
The Fenix LR50R V2 is an awesome handheld Search Light!
The Spotlight and Floodlight modes are impressive.
The output is well regulated. The runtimes are good.
It is small compared to a Wuben A1 but it is so much fun to use and carry in one hand.
I like how the proximity sensor can be turned off so that you can burn stuff with the light.
It would be better if the OLED display could be dimmed or turned off while using the light. This is something that brands like Nitecore do well but I digress.
The battery pack could be seen a negative. Not everyone wants a proprietary battery pack when searching for a light.
If you are looking for a search light, the Fenix LR50R V2 is definitely worth considering.
Pros:#
- Excellent build quality.
- Good lumen output.
- Output is well regulated.
- Good beam distance.
- Dual USB-C fast charging and discharging.
- Powerful UV light with ZWB2 filter.
- Powerful red light.
- Fun user interface.
- 1/4 inch tripod hole.
- Carry strap.
Cons:#
- OLED display is a bit bright.
- Battery pack.
Price#
The Fenix LR50R V2 is AU$629.95 at fenixstore.com.au (affiliate link)
Product page#
Promo code: TorchHacker
Fenix LR50R V2 at fenixstore.com.au (affiliate link)
I may earn a commission if you use an affiliate link or a promo code. This will help fund future torch reviews and tutorials.